

Page 1
LED FLUSH MOUNT
SAFETY PRECAUTIONS:
1. TURN OFF ELECTRICAL POWER BEFORE STARTING INSTALLATION OF LIGHT FIXTURE.
2. THIS PRODUCT MUST BE INSTALLED IN ACCORDANCE WITH THE APPLICABLE INSTALLATION CODE
BY A CERTIFIED ELECTRICIAN FAMILIAR WITH LOCAL MUNICIPAL CODES AND REQUIREMENTS.
3. CAUTION-RISK OF ELECTRIC SHOCK. CONSULT A QUALIFIED ELECTRICIAN TO ENSURE CORRECT
BRANCH CIRCUITCONDUCTOR.
4. WARNING, THIS IS A LINE VOLTAGE MODEL AND DOES NOT AND CANNOT USE A DRIVER.
5. LINE VOLTAGE MODELS ALREADY HAVE A POWER SUPPLY CHIP BUILT INTO THE LED ARRAY.
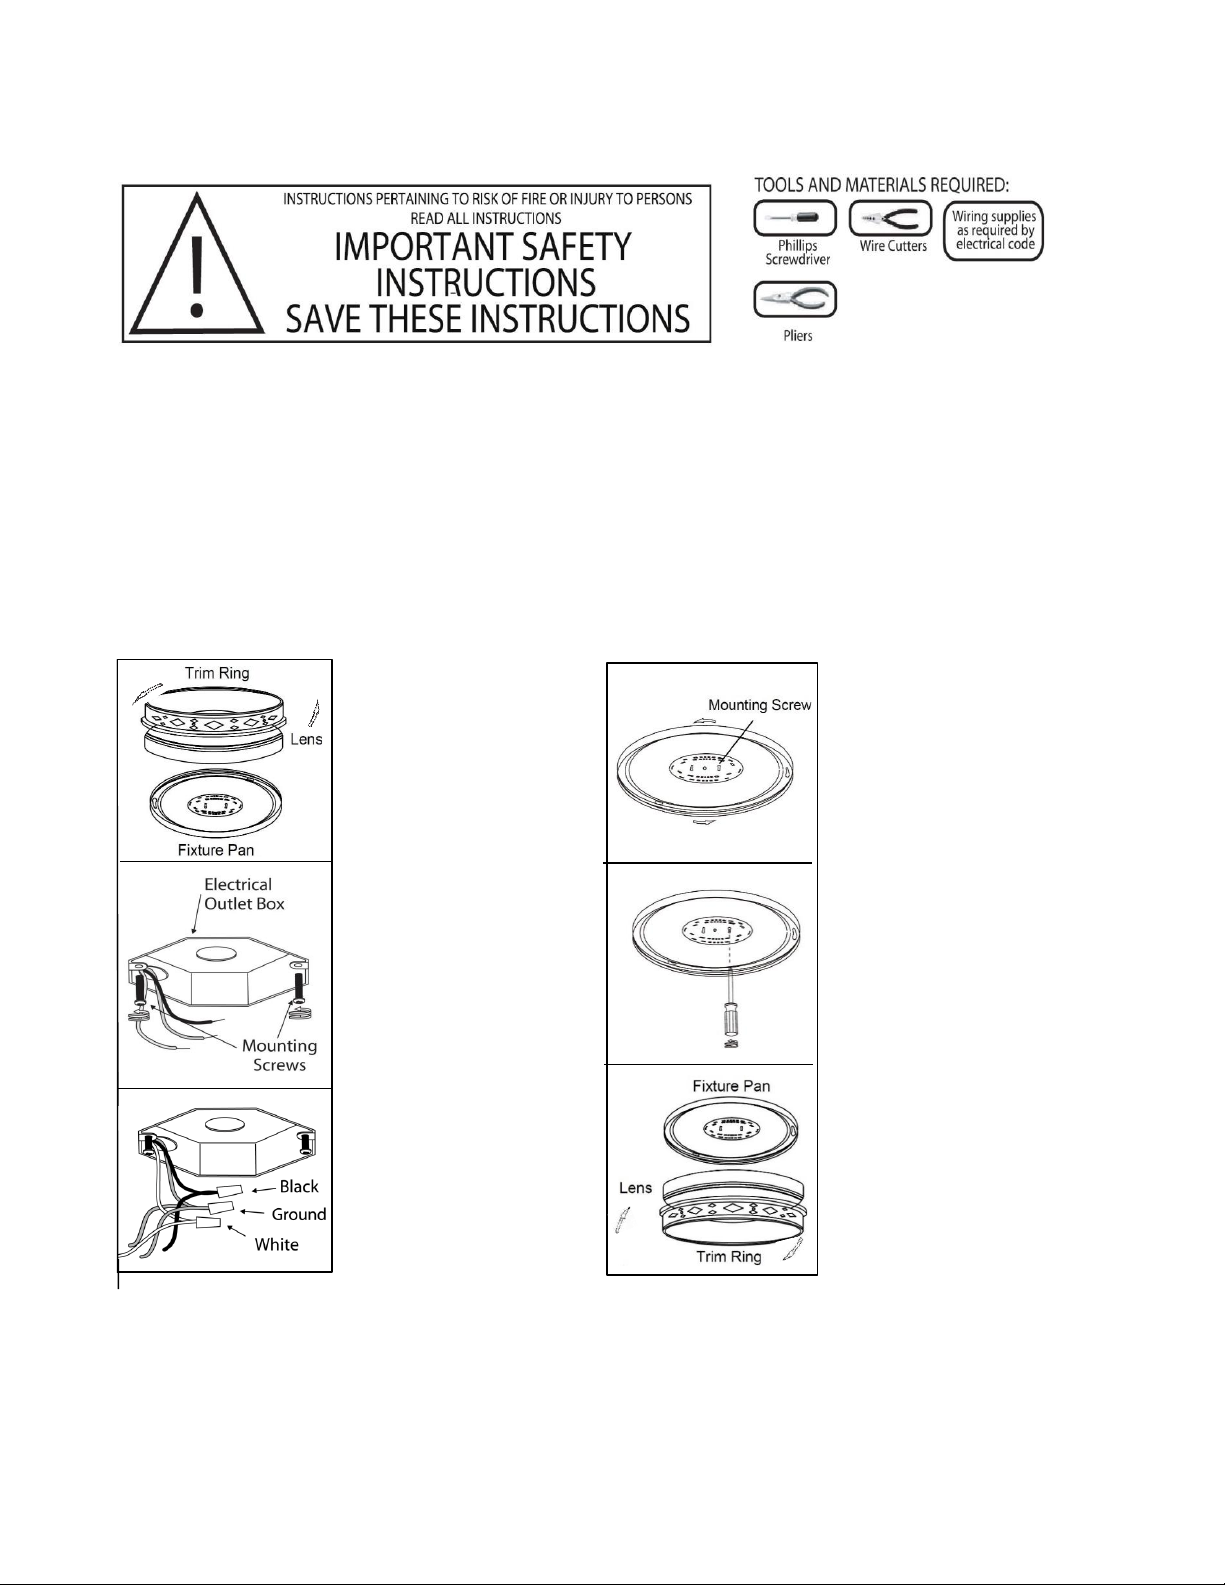
INSTALLATION
1. Remove plastic lens by 4. Attach fixture to mounting
gently rotating the lattice screws, turn fixture
trim ring counter-clockwise counter-clockwise to lock.
and remove it, then lift
the lens.
2. Place mounting screws 5. Secure fixture by
(included) in electrical box tightening mounting
screwing in halfway. screws.
6. Place acrylic lens in the
3. Using wire nuts to connect
lattice trim ring and keep
ground wire (green) from together. Match the 3 key
fixture and LED board to slots on the metal pan with
ground wire from electrical box. the 3 pins on the metal lattice
Connect black wire from fixture ring. After making sure that
to black wire from electrical box. the pins are inserted in the
Connect white wire from fixture key slots, twist and lock the
to white wire from electrical box.
lattice ring with lens together.
 Loading...