

WRIGHT BROTHERS Curtiss Pusher 1911 Vintage Instruction Manual
W8
W8
L12
L10
L10
L12
W9
W10
W9
W10
W5(middle)
W5(middle)
W6(down)
W7(up)
W3
W3
W7
W7
W6(down)
W7(UP)
L11
L13
L8
L4
L7
Pay attention to
the orientation
of this two holes.
L1X2
Foam wheels
L6
L6
L6
17mm
L6
L5
L5
L6
L3
L3
Wheels
Nut
screw 6mm+Nut
L23
L22
L23
carbon tube
2X135mm
L18
L18
L27
carbon tube
2X24mm
Fasten it with glue
on both ends.
L15
L16
L14
L17
L15
L28
L26
L29
L26
L27
Spray black paint after finishing.
Spray black paint
after finishing.
L21
L24
L24
Pay attention to the arrow direction of each parts
when you stick here.
T4
Curtiss Pusher
The 1911 Vintage
1
2
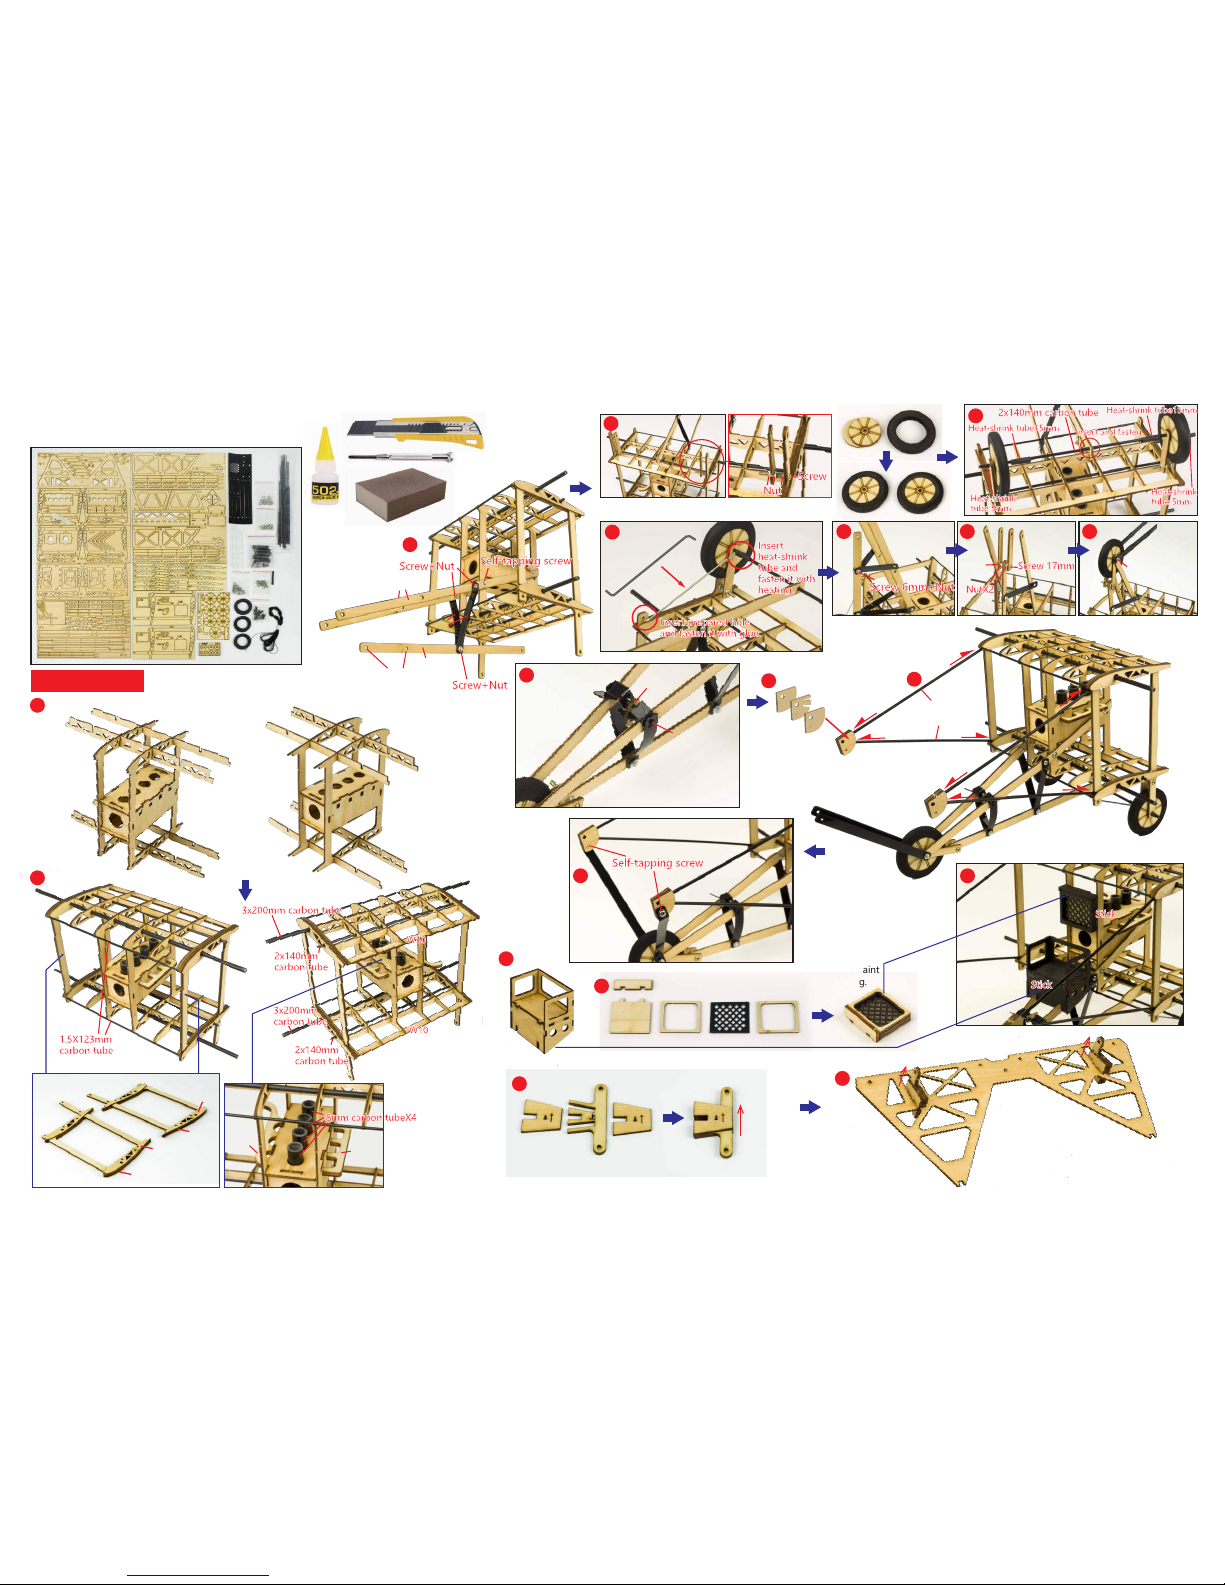
Installation Steps
3
4
5
6
7 8 9
10
11
12
13
14
15
16
17
18
Steel wire
Note:Please use 502 glue to stick
the joints in below building steps.
Tools
Instruction Manual

W4
W13
W12
W13
W12
W4
W3
W3
W3
W3
W3
W3
W2
W2
W1
W1
W14
W14
1.5x186mm
carbon tube
line1 start
line2 start
line1 end
line2 end
19
20
21
23
22
25
24
26 27
28
29
30
31
carbon tube
2X210mm
Screw 6mm+Nut
Screw 6mm+Nut
+ Fastener
(Same installation way
in the symmetry plane.)
T5
T5
L20
L19
W18
L9-1x2
W18
Stick w18 at the ends of 6mm
carbon rod and polishing.
Stick L9-1 at the
end of 12mm
carbon rod
and polishing.
3mm carbon tube
W17
The same installation way in left wing and right wing,
plug the fuselage after finishing.Then hook the pulling wire's spring on the buckle.
Starting point of pulling wire,tie
a knot here for ending point.
Plug the ends of assembled w15 into the
prepared hole of the wing, and fix it.
Connect spring at the finish line
after pulling wire finishing.
2x30mm carbon tube
T1
T2
Connect L26 and L27, use U-shaped steel wire to connect L26 and T2.
Plug the ends of assembled T1 into the prepared hole of L23.
2x30mm
carbon tube
L26x2
W15
W16
32
33
34
Assemble bracket.
B1
B2
B3
B1
B3
B2
T3
Screw 6mm+Nut
+ Fastener
Finished
2pcs stay wires in the rear, according to the numerical order as shown in
below picture to thread wire.The same installation way for the left and right sides.
1 start
2
4
9
10 end
6
2
3
4
5
6
7
spring
spring
 Loading...