

WPPO WPPO3, KU-17W Operation And Owner's Manual
Operations and Owner’s Manual
WPPO3/KU-17W Wood Fired Pizza
Ovens
Countertop and Stand
ASSEMBLY INSTRUCTIONS and
IMPORTANT SAFEGUARDS
Models
WPPO Operator’s Manual for the WPPO3/KU-17W, November 2018
WPPO Operator’s Manual for the WPPO3/KU-17W, November 2018
2
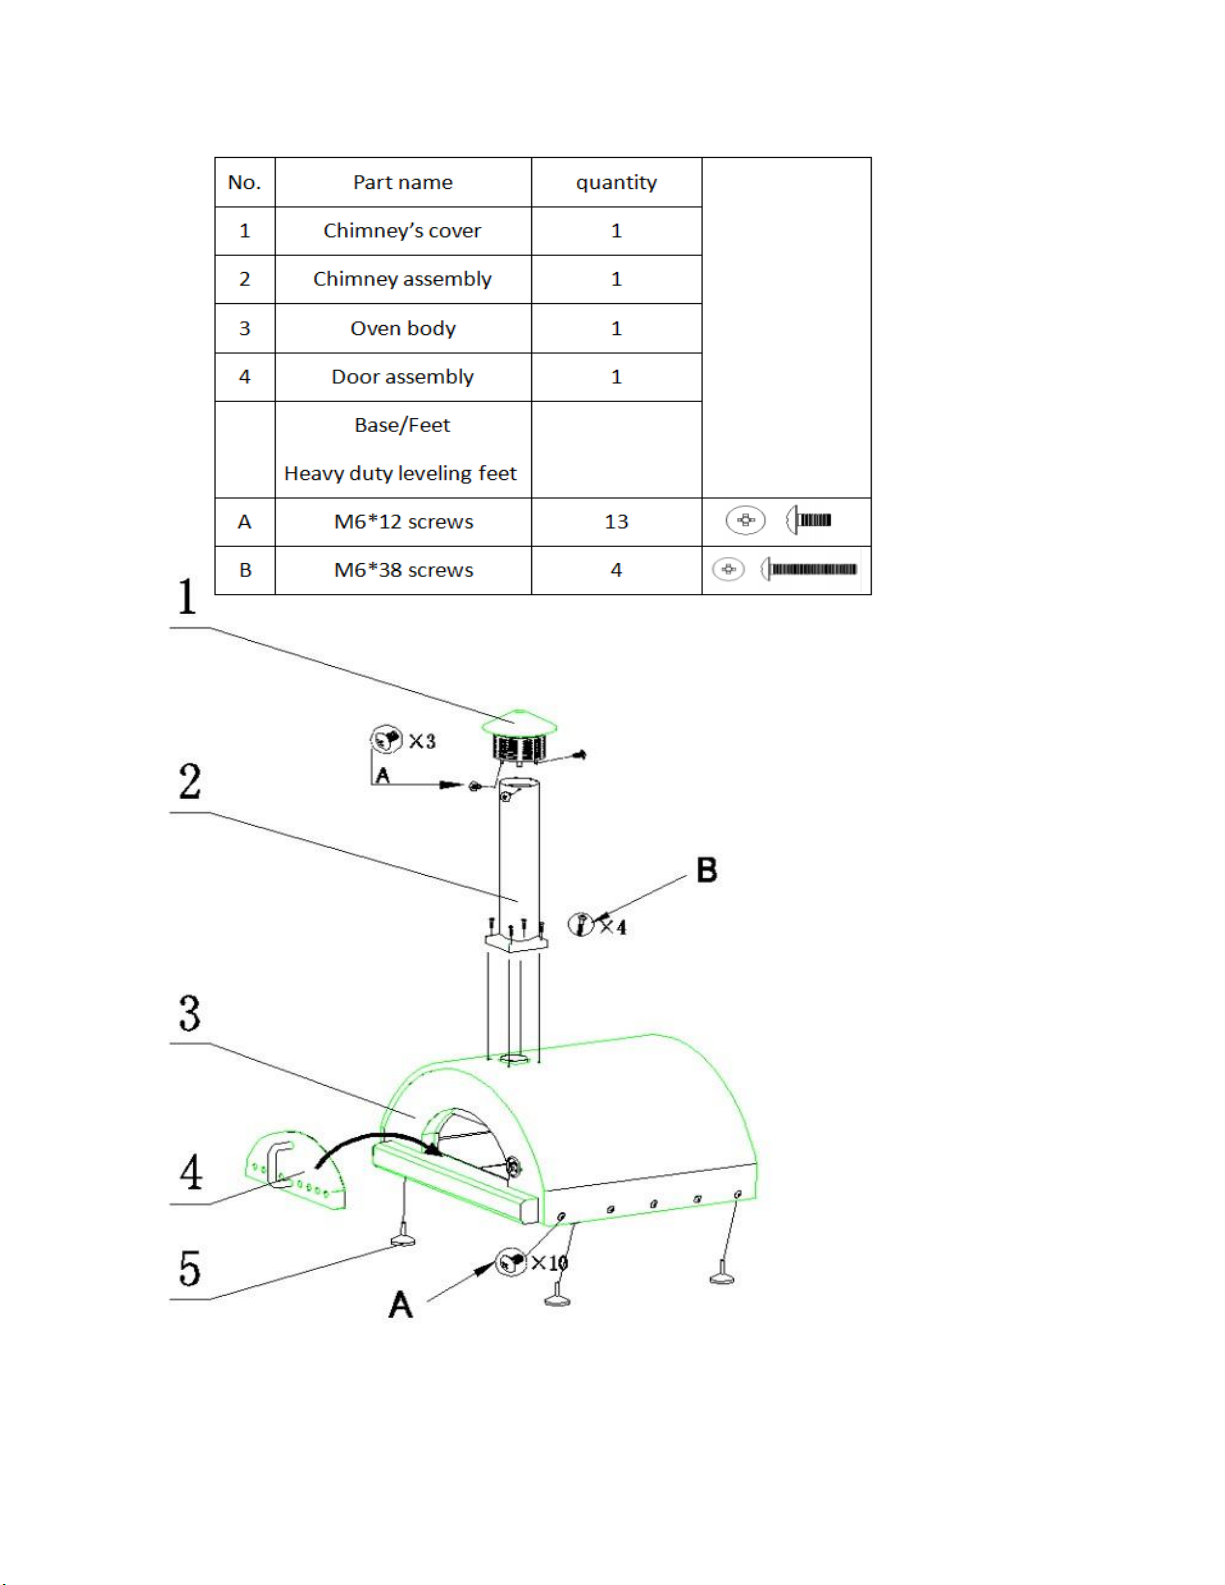
WPPO3 ASSEMBLY INSTRUCTIONS
WPPO Operator’s Manual for the WPPO3/KU-17W, November 2018
3
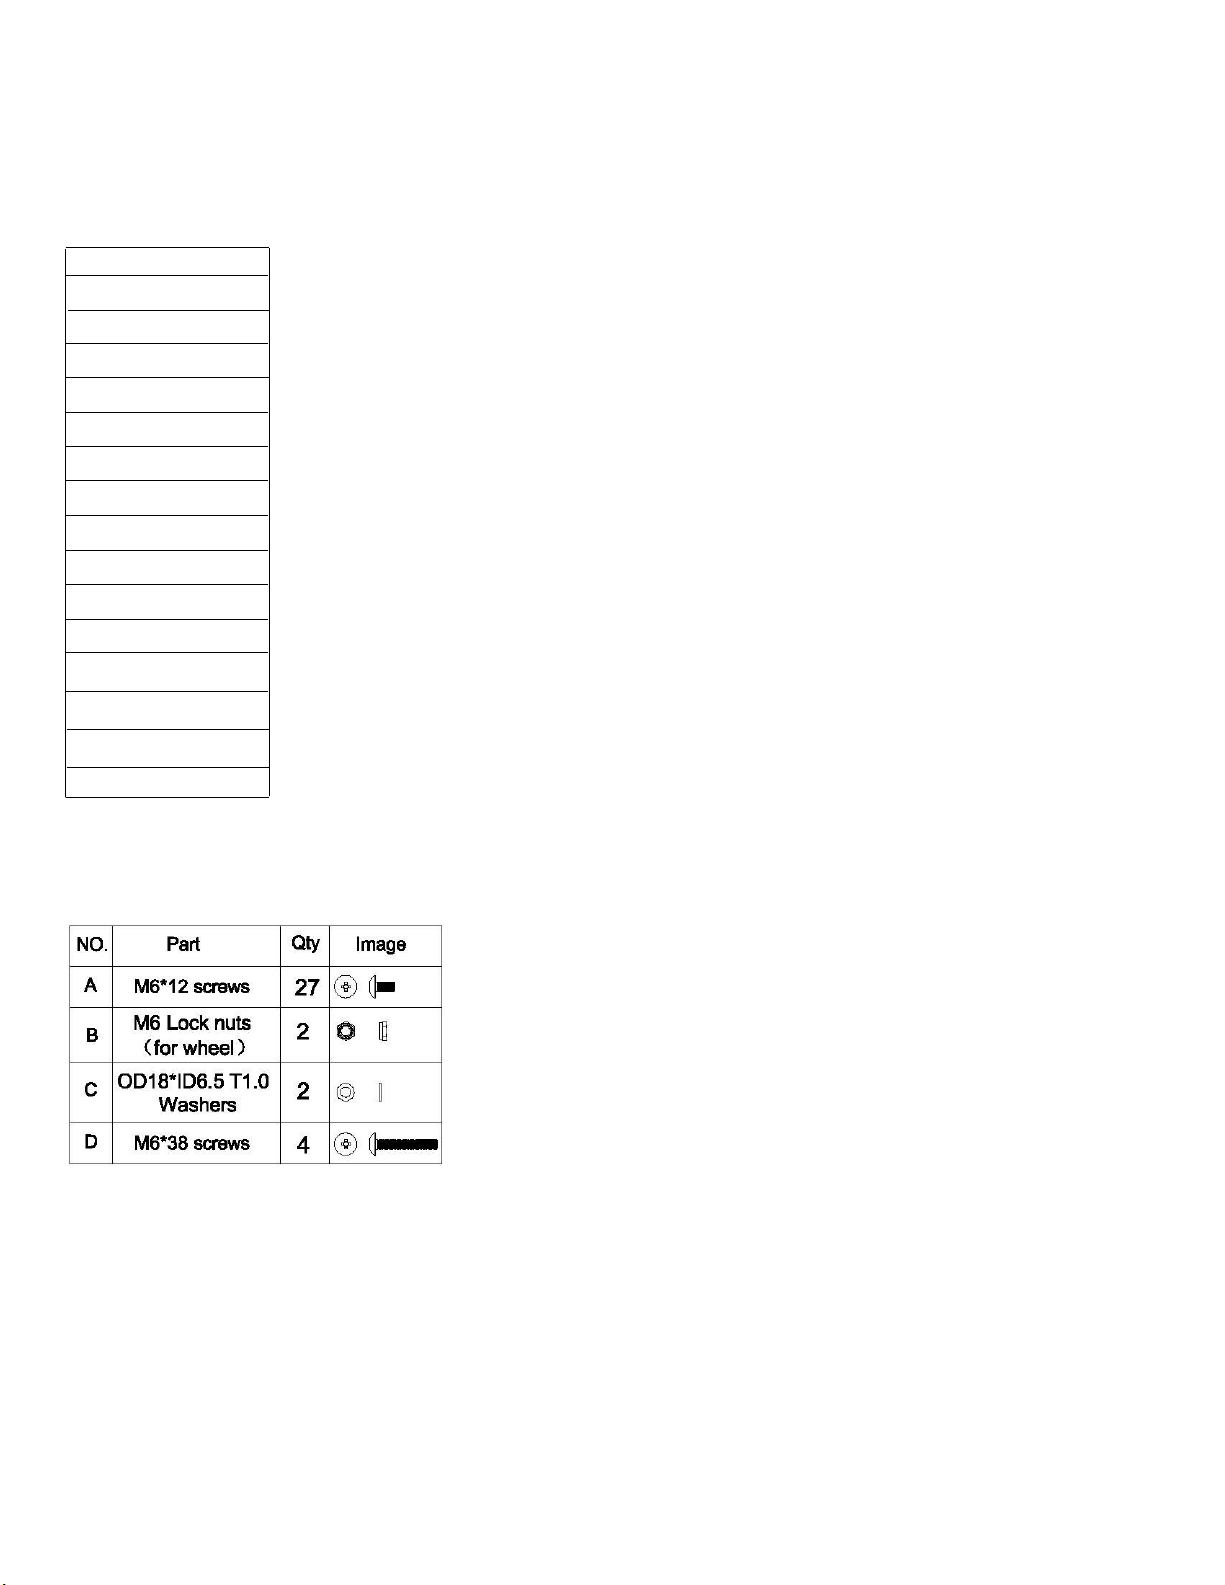
KU-17W ASSEMBLY INSTRUCTIONS
Parts list
1. Top shelf
2.
Left front leg
3.
Left back leg
4.
Right front leg
5.
Right back leg
6. Fixed plate
7. Bottom shelf
8.
Wheel * 2
9.
Axle
10.
Sleeve * 2
11. Side handle
12. Firebox assembly
13. Chimney assembly
14. Chimney cover
15. Door assembly
WPPO Operator’s Manual for the WPPO3/KU-17W, November 2018
4
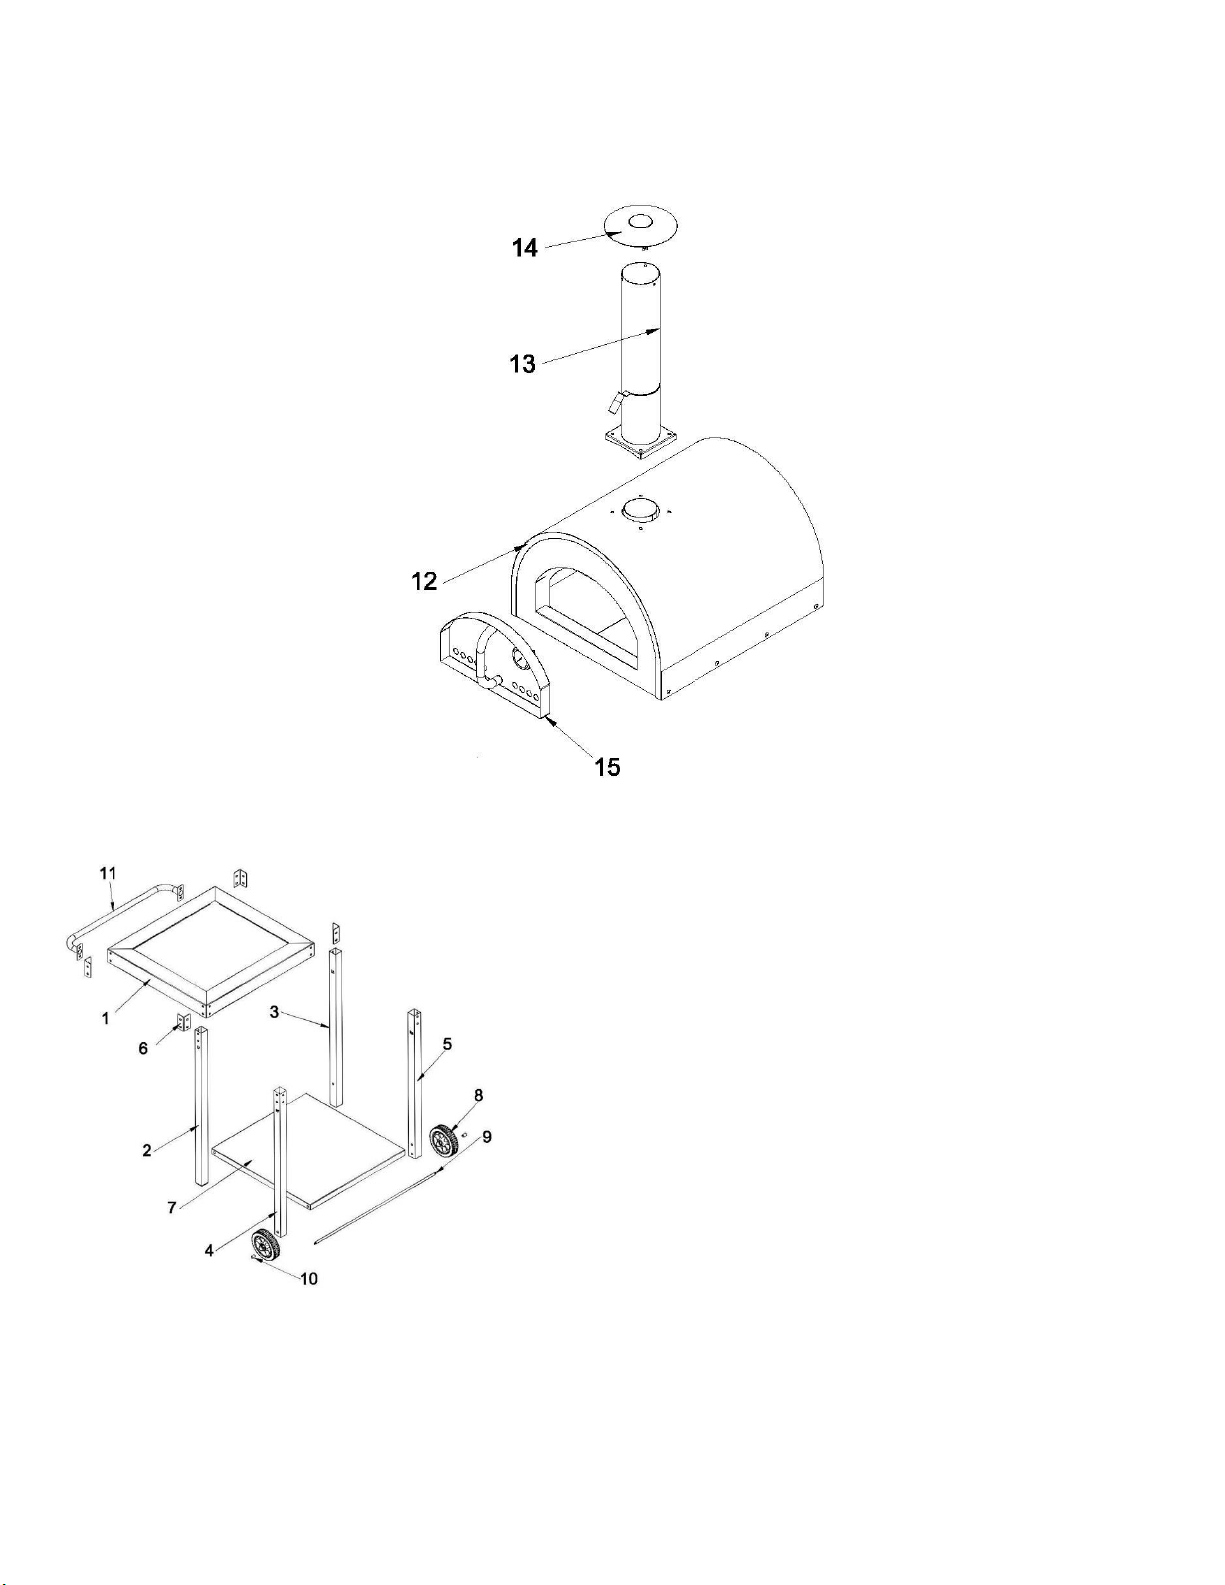
Exploded View

WPPO Operator’s Manual for the WPPO3/KU-17W, November 2018
5
Step 1
1-1: Attach the left front leg (2) and fixed plate (6) to the Top shelf (1) with four M6*12 screws (A);
1-2: Attach the left back leg (3) and fixed plate (6) to the Top shelf (1) with four M6*12 screws (A);
1-3: Attach the right front leg (4) and fixed plate (6) to the Top shelf (1) with four M6*12 screws (A);
1-4: Attach the right back leg (5) and fixed plate (6) to the Top shelf (1) with four M6*12 screws (A);
partially tighten each screw with a screwdriver. (as shown)
Step 2
Slide the bottom shelf (7) into the corresponding position of each leg, with four M6*12 screws (A)
tighten by hand. (as shown)

WPPO Operator’s Manual for the WPPO3/KU-17W, November 2018
6
Step 3
Slide the Axle (9) through the wheel legs (4 and 5), slide a Wheel (8) and Sleeve (10) and Flat washer
(C) onto axle end, Thread two M6 lock nuts (B) onto each long end and tighten with a wrench. The
wheel should spin, but not wobble.
Step 4
Slide the Side handle (11) onto Left front leg (2) and left back leg (3,) with four M6*12 screws (A)
tighten by hand.
 Loading...