

Page 1

PZMIII/PZMTIII
Precision Zoom Stereo Microscope
World Precision Instruments
INSTRUCTION MANUAL
Serial No._____________________
101212
www.wpiinc.com
Page 2

Page 3

PZMIII/PZMTIII
World Precision Instruments iii
Copyright © 2012 by World Precision Instruments, Inc. All rights reserved. No part of this publication
may be reproduced or translated into any language, in any form, without prior written permission of
World Precision Instruments, Inc.
CONTENTS
ABOUT THIS MANUAL ..................................................................................................................... 1
INTRODUCTION .................................................................................................................................. 2
Parts List ........................................................................................................................................... 2
Unpacking ....................................................................................................................................... 2
INSTRUMENT DESCRIPTION .......................................................................................................... 3
Setup .................................................................................................................................................. 4
Adusting a Microscope ................................................................................................................ 4
System Diagram ............................................................................................................................ 5
OPERATING INSTRUCTIONS ........................................................................................................... 6
MAINTENANCE .................................................................................................................................... 7
ACCESSORIES ....................................................................................................................................... 8
SPECIFICATIONS .................................................................................................................................. 9
PZMIII Eyepieces and Objectives ............................................................................................ 9
APPENDIX: BOOM STAND ASSEMBLY ......................................................................................10
Focus Mount .................................................................................................................................10
WARRANTY ........................................................................................................................................11
Claims and Returns ....................................................................................................................11
Repairs ............................................................................................................................................11
Page 4

iv World Precision Instruments
Page 5
PZMIII/PZMTIII
World Precision Instruments 1
ABOUT THIS MANUAL
The following symbols are used in this guide:
This symbol indicates a CAUTION. Cautions warn against actions that can
cause damage to equipment. Please read these carefully.
This symbol indicates a WARNING. Warnings alert you to actions that can
cause personal injury or pose a physical threat. Please read these carefully.
NOTES and TIPS contain helpful information.
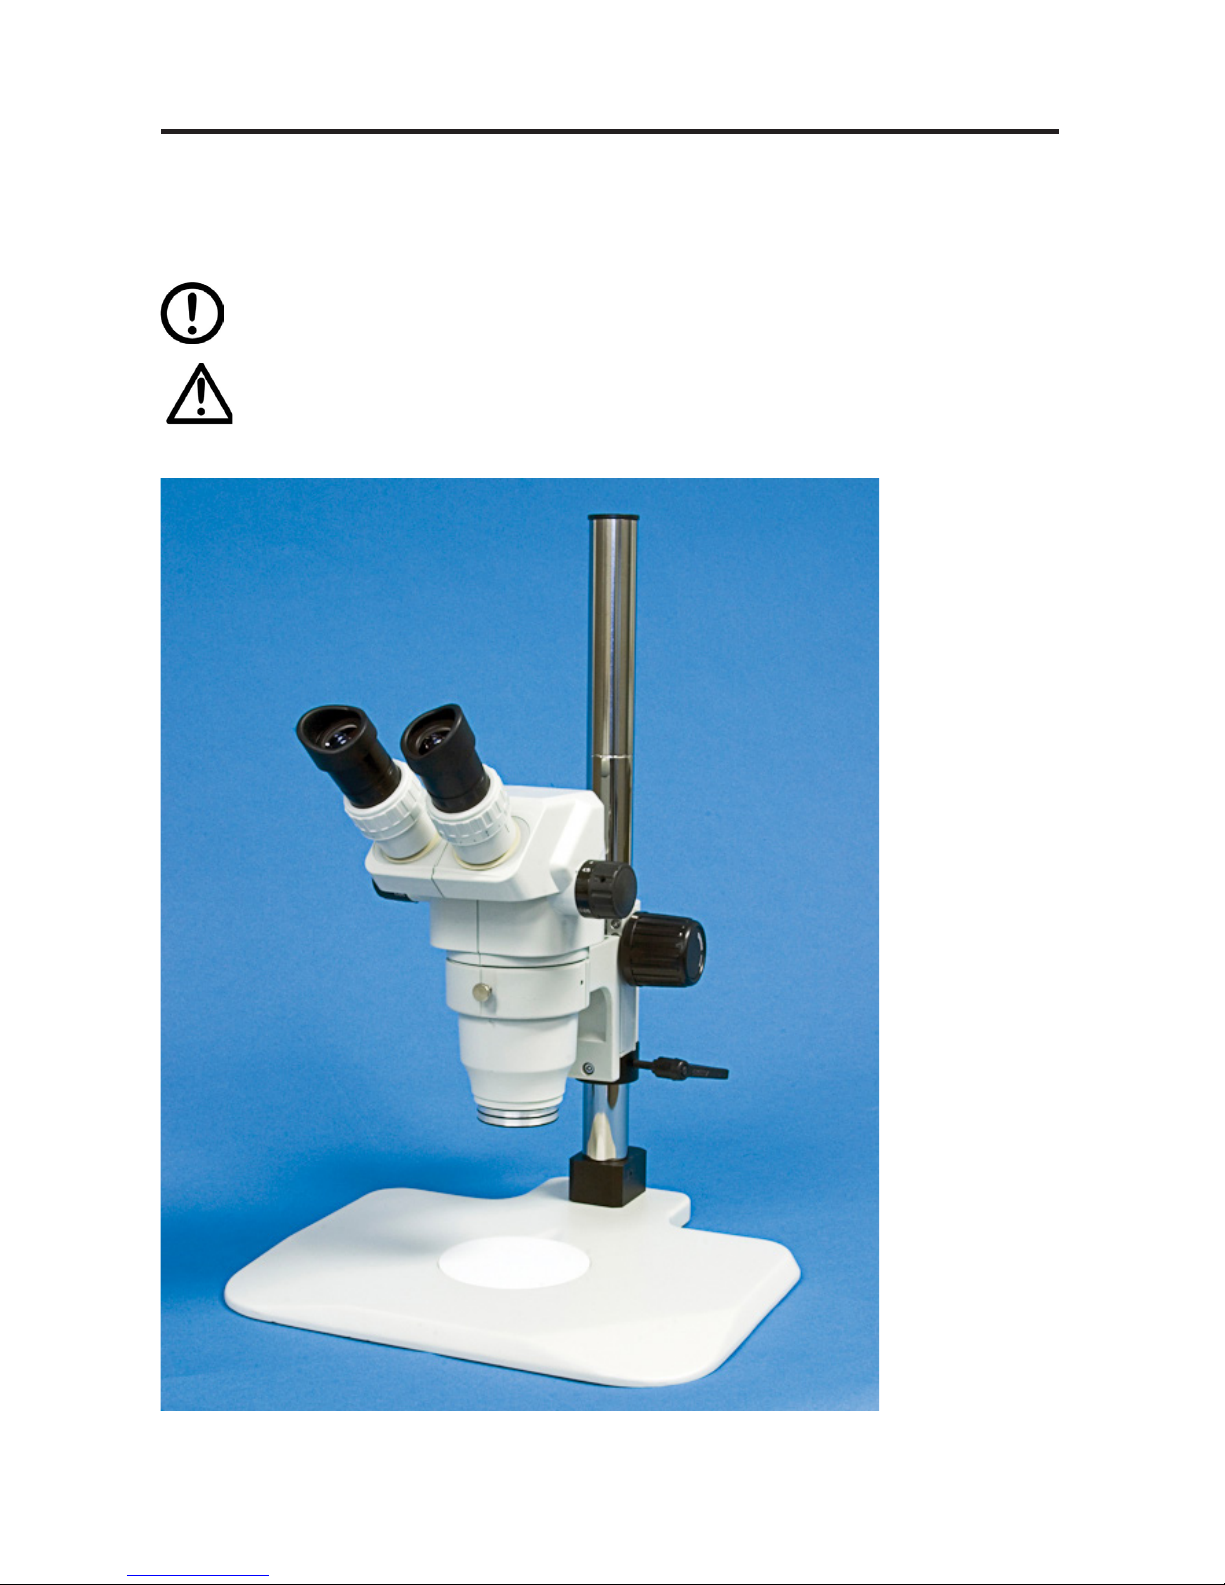
Fig. 1—The PZMIII binocular microscope is shown on its standard post stand.
Page 6

2 World Precision Instruments
INTRODUCTION
WPI’s PZMIII stereomicroscope is an ideal tool for tissue dissection, cell injection,
specimen manipulation, electrode inspection and many other applications
requiring a magnified stereo view and ample working distance. It offers quality and
performance at an affordable price. Advanced optics provide image sharpness found
only among the best of this class.
Zooming is smooth and effortless, controlled by a spring-loaded knob. The PZMIII’s
compact size and light weight make it more stable and easily manipulated on a
boom stand. The binocular PZMIII can be eaily upgraded to a trinocular microscope
at any time by attaching the optional Photo/Video Module.
With an extensive array of optional accessories, PZMIII is suitable for almost any
bio-research application requiring a stereo microscope.
Parts List
After unpacking, verify that there is no visible damage to the sensor. Verify that all
items are included:
(1) PZMIII or PZMTIII Stereo microscope head
(1) Post stand
(1) Light ring adapter
(2) 10X eyepieces
(2) Paired Eye Guards
(1) Instruction Manual
Unpacking
Upon receipt of this instrument, make a thorough inspection of the contents and
check for possible damage. Missing cartons or obvious damage to cartons should be
noted on the delivery receipt before signing. Concealed damage should be reported
at once to the carrier and an inspection requested. Please read the section entitled
“Claims and Returns” on page 11 of this manual. Please contact WPI Customer
Service if any parts are missing at 941.371.1003 or customerservice@wpiinc.com.
Returns: Do not return any goods to WPI without obtaining prior approval (RMA
# required) and instructions from WPI’s Returns Department. Goods returned
(unauthorized) by collect freight may be refused. If a return shipment is necessary,
use the original container, if possible. If the original container is not available, use a
suitable substitute that is rigid and of adequate size. Wrap the instrument in paper
or plastic surrounded with at least 100mm (four inches) of shock absorbing material.
For further details, please read the section entitled “Claims and Returns” on page
11 of this manual.
Page 7

PZMIII/PZMTIII
World Precision Instruments 3
INSTRUMENT DESCRIPTION
Diopter Adjustment Ring
Magnification Indicating Ring
Post
Base
Focusing Knob
Magnification Knob
Stage Plate
Eyepiece
Body Rotation Clamp
Locking Screw
Securing Knob
Vertical Stop Knob
PZMTIII
CCD Color Video
Camera (optional)
C-Mount CCD Camera
Coupler (optional)
Video/Photo Port
Light Path
Selector Bar*
Fig. 2—This image identifies the parts of the binocular PZMIII. The trinocular version
(PZMTIII) has the video/photo port and the light path selector bar, and it can accept the
camera with a C-Mount coupler.
*NOTE: “True trinocular” microscopes do not have the Light Path Selector Bar.
Instead of blocking the right eye path, this port transfers 50% of the light intensity to
the camera port.
Page 8

4 World Precision Instruments
Setup
1. Remove the microscope from the case and check that the following parts are all
present and undamaged:
• Microscope and Base
• WFH 10x Wide-Field Eyepieces (two)
• Paired Eyeguards (two)
• Stage Plate
• Instruction Manual
2. Unscrew the protective cap on the bottom of the microscope head.
3. Refer to the “Instrument Description” on page 3 and follow the set-up
instructions below.
4. Loosen the securing knob to place the microscope at approximately the
working distance.
5. The exact working distance is found by adjusting the focusing knob.
6. Install the WFH 10x eyepiece pair, included. Then, attach the paired eyeguards
to the eyepieces.
7. When the optional stands are used instead of the standard base, see the
“System Diagram” on page 5 for mounting instructions.
8. The Precision Zoom Stereo Microscope is now ready for normal operation.
Adusting a Microscope
These instructions describe how to properly focus a binocular microscope.
1. Turn on the lamp and adjust its intensity.
2. Set theoth eye piece diopters to zero.
3. Adjust the interpupilary distance so that the two circles of light merge into one.
4. Place a sample on the stage.
5. Select the 1.0 dial setting and look through the right eyepiece only.
6. Use the focus control knobs to adjust the focus of the sample.
7. When the sample is clearly visible, use only your left eye. Do NOT adjust the
focus knobs. Instead, adjust the diopter on the left eyepiece until the sample
comes clearly into view. The image should be clear with both eyes open.
8. Choose the desired zoom range. You may need to adjust the fine focus a little.
TIP: For information on microscope basics, understanding objectives, choosing a
microscope camera, a camera comparison chart and a camera/microscope
configuration chart, see www.wpiinc.com/microscope.
Page 9

PZMIII/PZMTIII
World Precision Instruments 5
System Diagram
Post Stand
503102
Fan Stand
501353
Articulated Arm
with Table Clamp: 502007
Optional Wall Mount: 502163
Boom/Clamp Stand
502006
Extension Rod
504123
Universal
Focus
Mount
502009
Ring Light Adapter
13338*
*Included with the body
Objectives:
0.3X–501373
0.5X–501375
1.5X–501377
2.0X–501378
Eyepieces:
10X–501369*
15X–501370
20X–501371
25X–501372
C-mount to Eyepiece Adapter:
1/3” or 1/2” Video–503097
1/4” Video–503098
2X for DSLR–503099
CCD Coupler:
0.5X–501381
1.0X–503300
(special order only)
1/2” Color CCD Camera
USBCAM50
Color CCD Video Camera
COLCAM-HD
Color CCD Video Camera
COLCAM
Ring Light
504134
Fiber Optic Light
NOVA
BoomStand
502004
Ball-Bearing Stand
502005
Binocular Body
501352
Trinocular Body
501379
Fig. 3—This diagram shows many of the options available for the PZMIII.
Page 10

6 World Precision Instruments
OPERATING INSTRUCTIONS
Refer to Fig. 2 on page 3 and Fig. 3 on page 5 along with the following
instructions on normal operation.
1. Working Distance Adjustment–Loosen the Securing knob and the Vertical Stop
knob which secures the microscope to the post. Move the microscope to the
desired height (working distance) according to lens (auxiliary objective lens)
attached (see “PZMIII Eyepieces and Objectives” on page 9 for working
distance). Then, re-tighten the knobs.
2. Interpupilary Distance Adjustment–Looking through the eyepieces with both
eyes, adjust the interpupillary distance by sliding the two eyepiece tubes with
both hands until a single image is observed.
3. Focus Adjustment–Place a sample under the microscope, turn the Magnification
knob to its greatest setting (4.5). Focus the image by turning the Focusing knob.
Once the image is in clear focus at its highest magnification you may zoom out
to lower magnification by adjusting the Magnification knob while remaining in
focus.
4. Diopter Adjustment–If the image does go out of focus when zooming out, zoom
to the lowest setting and focus each eyepiece individually by adjusting the
Diopter Adjustment Ring.
5. Video/Photo Applications (for the Trinocular PZMTIII only)–Slide the Light Path
Selector bar* to the Photo In position in order to direct the light to the Video/
Photo port. Remove the black protective cap on top of the Video/Photo port.
Slip and secure the body of C-mount CCD camera Coupler over the Video/Photo
port, with its focus ring facing back. Attach a C-mount video or digital camera
(when using cameras with an integrated lens filter thread of 28, 37 or 43 mm,
Digital Camera Adapter Kit #501384 is required). Refer to your camera’s manual
for instructions on connecting the camera to the monitor. Focus the image on
the screen by adjusting the Fine Focus Ring located at the back of the C-mount
CCD camera coupler.
*NOTE: The newer trinocular body is a true trinocular. It may not have the Light
Path Selector switch. This microsocpe port transfers 50% of the light intensity to the
camera port without blocking the right eye piece path.
Page 11

PZMIII/PZMTIII
World Precision Instruments 7
MAINTENANCE
This instrument should be kept in a cool, dry place free from direct sun, dust, alkali
and acid fumes, as well as moisture.
Do not disassemble any of the lenses since they have all been properly aligned at
the factory. The glass surfaces of the lenses should be cleaned with lens tissue or
brushed with a soft camel-hair brush. Any dust which has fallen on lens exterior
surfaces may be blown away with a commercial grade clean dust spray.
If stains deposit on exterior surfaces of the lenses, clean them gently using a mild
soap solution with a lint free cloth. Industrial solvents should not be used since they
may penetrate to the inside of the lens components and dissolve the lens cement.
When cleaning and lubricating the mechanical parts, special attention must be taken
not to stain the optical surfaces with grease. The moveable mechanical parts should
be lubricated occasionally with a non-corrosive grease.
When not in use, remove the eyepieces and put them back into the lens box.
Replace them with the eyepiece tube dust covers. The microscope should then be
secured in its box or covered with a dust cover.
A variety of bundles
are available.
Page 12

8 World Precision Instruments
ACCESSORIES
13338 Ring Light Adapter for the PZMIII (For R-8-8-WPI01 Ring Light Guide)
501352 PZMIII Binocular Body
501379 PZMTIII Trinocular Body
502004
Boom Stand (Heavy) W/O Focus Mount (requires 502009 Focus Mount for
PZMIII)
502005 Ball Bearing Boom Stand (Heavy) W/O Focus Mount (requires 502009
Focus Mount for PZMIII
502006 Boom Clamp Stand (Heavy) (requires 502009 Focus Mount for PZMIII)
504123 Extension for Heavy Clamp Stand
502007 Articulated Arm and Table Clamp w/o Focus Mount (requires 502009
Focus Mount for PZMIII)
501355 Universal Focus Mount for 76 mm PZMIII (Required for BS, AAC, BBS,
and BCS) (5/8” pin)
502160 Lighted Fan Base, Fluorescent base, Tungsten Halogen beam
501369 10× Eyepiece for PZMIII (pair)
501370 15× Eyepiece for PZMIII (pair)
501371 20× Eyepiece for PZMIII (pair)
501372 25× Eyepiece for PZMIII (pair)
501373 0.3× Objective
501375 0.50× Objective
501376 0.75× Objective
501377 1.5× Objective
501378 2.0x Objective
501381 0.5x C-Mount CCD Camera Coupler
502163 Wall Mount Plate for Articulated Arm System
NOVA NOVAFLEX Fiber Optic Illuminator
500186 Bifurcated Light Guide with Lenses
R-8-8-WPI01 Ring Light Guide
NOVA-186 NOVAFLEX Fiber Optic Illuminator with Bifurcated Light Guide and
Lenses
EJA Replacement Lamp for NOVAFLEX
502167 Replacement Fluorescent lamp for Lighted Fan Base (502160)
502168 Replacement Tungsten Halogen lamp for Lighted Fan Base (502160)
504134 LED Ring Light
Page 13

PZMIII/PZMTIII
World Precision Instruments 9
SPECIFICATIONS
This unit conforms to the following specifications:
Eyepieces ..................................................................................................WFH 10X (two), standard
................................................................................................................ WF 15X, 20X, 25X, optional
Objectives (optional) ..................................................................... 0.3X, 0.5X, 0.75X, 1.5X, 2.0X
Zoom Range ....................................................................................................................0.67X – 4.5X
Total Magnification ........................................................................................................6.77X – 45X
Field of View .................................................................................................................... ∅34–∅5mm
Working Distance ............................................................................................................ 26–287mm
Binocular Tube .................................................................................................................. Inclined 45°
Interpupilary Distance ....................................................................................................... 47–70mm
Diopter Adjustment .......................................................................... ±5 Diopter (both eye tubes)
Microscope Body........................................................................................................Rotatable 360°
Auxiliary Lenses
Total Magnification ...........................................................................................................2X–225X
Biggest Field Of View .......................................................................................................∅110mm
Working Distance ........................................................................................................ 26–287mm
PZMIII Eyepieces and Objectives
10x Eyepiece 15x Eyepiece 20x Eyepiece 25x Eyepiece
Objective Mag
Field (mm)
(Video Field)
Mag
Field (mm)
(Video Field)
Mag
Field (mm)
(Video Field)
Mag
Field (mm)
(Video Field)
Working
Distance
0.3x
2x-
13.5x
109.5 -16.3
(53.6–8)
3–
20.3x
79.6–11.9
(53.6–8)
4–
27x
59.7–8.9
(53.6–8)
5–
33.8X
57.2–8.5
(53.6–8)
287mm
0.5x
3.4–
22.5x
65.7–9.8
(32.4–4.7)
5–
33.8x
47.8–7.1
(32.4–4.7)
6.7–
45x
35.8–5.3
(32.4–4.7)
8.4–
56.3x
34.3–5.1
(32.4–4.7)
177mm
0.75x
5–
33.8x
43.8–6.5
(21.1–3.3)
7.5–
50.6x
31.8–4.7
(21.1–3.3)
10.1–
67.5x
23.9–3.6
(21.1–3.3)
12.6–
84.4x
22.9–3.4
(21.1–3.3)
117mm
1.0x
6.7–
45x
32.8–4.9
(16–4.7)
10.1–
67.5x
23.9–3.6
(16–4.7)
13.4–
90x
17.9–2.7
(16–4.7)
16.8–
112.5x
17.2–2.6
(16–4.7)
100mm
1.5x
10.1–
67.5x
21.9–3.3
(10.8–1.6)
15.1–
101.3
15.9–2.4
(10.8–1.6)
20.1–
135x
11.9–1.8
(10.8–1.6)
25.1–
168.8x
11.4–1.7
(10.8–1.6)
47mm
2.0x
13.4–
90x
16.4–2.4
(5.6–1.17)
20.1
–135
11.9–1.8
(5.6–1.17)
26.8–
180x
9–1.3
(5.6–1.17)
33.5–
225x
8.6–1.3
(5.6–1.17)
26mm
The Video Field is based on a 1/2-inch CCD (8 mm diagonal) and a 0.5x camera adapter.
Page 14

10 World Precision Instruments
APPENDIX: BOOM STAND ASSEMBLY
1. Remove all the parts from the box.
2. Unscrew the hex screw from
Vertical Post. The Vertical Post
should have a cross block
attached to it.
3. Screw Vertical Post and Base
together using the hex screw.
(Insert the screw from bottom of
the base into the threaded section
of Vertical Post.)
4. Insert the Horizontal Bar into the
opening in the cross block with the
slot side facing up.
Two different types of focusing assemblies are available:
Focus Mount
1. Remove the focus mount from the protective packaging
2. Insert the focus mount into the end
of the Horizontal Bar and secure it by
tightening set screw.
3. Tighten one or both hex screws (2.5
mm and 4 mm) so the microscope head
is tiltable but not free to swing.
TIP: The focus mount can be inserted from
the TOP, BOTTOM or END of the Horizontal
Bar. For oblique viewing, set the focus
mount up at various angles and then tighten the handle.
Page 15

PZMIII/PZMTIII
World Precision Instruments 11
* Electrodes, batteries and other consumable parts are warranted for 30 days only from the date on which the
customer receives these items.
WARRANTY
WPI (World Precision Instruments, Inc.) warrants to the original purchaser that this equipment,
including its components and parts, shall be free from defects in material and workmanship for a
period of one year* from the date of receipt. WPI’s obligation under this warranty shall be limited
to repair or replacement, at WPI’s option, of the equipment or defective components or parts upon
receipt thereof f.o.b. WPI, Sarasota, Florida U.S.A. Return of a repaired instrument shall be f.o.b.
Sarasota.
The above warranty is contingent upon normal usage and does not cover products which have been
modified without WPI’s approval or which have been subjected to unusual physical or electrical stress
or on which the original identification marks have been removed or altered. The above warranty will
not apply if adjustment, repair or parts replacement is required because of accident, neglect, misuse,
failure of electric power, air conditioning, humidity control, or causes other than normal and ordinary
usage.
To the extent that any of its equipment is furnished by a manufacturer other than WPI, the foregoing
warranty shall be applicable only to the extent of the warranty furnished by such other manufacturer.
This warranty will not apply to appearance terms, such as knobs, handles, dials or the like.
WPI makes no warranty of any kind, express or implied or statutory, including without limitation any
warranties of merchantability and/or fitness for a particular purpose. WPI shall not be liable for any
damages, whether direct, indirect, special or consequential arising from a failure of this product to
operate in the manner desired by the user. WPI shall not be liable for any damage to data or property
that may be caused directly or indirectly by use of this product.
Claims and Returns
Inspect all shipments upon receipt. Missing cartons or obvious damage to cartons should be noted
on the delivery receipt before signing. Concealed loss or damage should be reported at once to the
carrier and an inspection requested. All claims for shortage or damage must be made within ten
(10) days after receipt of shipment. Claims for lost shipments must be made within thirty (30) days
of receipt of invoice or other notification of shipment. Please save damaged or pilfered cartons until
claim is settled. In some instances, photographic documentation may be required. Some items are
time-sensitive; WPI assumes no extended warranty or any liability for use beyond the date specified
on the container
Do not return any goods to us without obtaining prior approval and instructions from our Returns
Department. Goods returned (unauthorized) by collect freight may be refused. Goods accepted for
restocking will be exchanged or credited to your WPI account. Goods returned which were ordered
by customers in error are subject to a 25% restocking charge. Equipment which was built as a special
order cannot be returned.
Repairs
Contact our Customer Service Department for assistance in the repair of apparatus. Do not return
goods until instructions have been received. Returned items must be securely packed to prevent
further damage in transit. The Customer is responsible for paying shipping expenses, including
adequate insurance on all items returned for repairs. Identification of the item(s) by model number,
name, as well as complete description of the difficulties experienced should be written on the repair
purchase order and on a tag attached to the item.
Page 16

World Precision Instruments, Inc.
USA
International Trade Center, 175 Sarasota Center Blvd., Sarasota FL 34240-9258
Tel: 941-371-1003 • Fax: 941-377-5428 • E-mail: sales@wpiinc.com
UK
1 Hunting Gate, Hitchin, Hertfordshire SG4 0TJ
Tel: 44 (0)1462 424700 • Fax: 44 (0)1462 424701 • E-mail: wpiuk@wpi-europe.com
Germany
Zossener Str. 55, 10961 Berlin
Tel: 030-6188845 • Fax: 030-6188670 • E-mail: wpide@wpi-europe.com
China & Hong Kong
WPI Shanghai Trading Co., Ltd.
Rm 20a, No8 Dong Fang Rd., Lu Jia Zui Financial District, Shanghai PRC
Tel: +86 688 85517 • E-mail:chinasales@china.wpiinc.com
Internet
www.wpiinc.com • store.wpiinc.com • www.wpichemistry.com
www.wpi-europe.com • www.wpiinc.cn
 Loading...