

Page 1

Instrumenting scientific ideas
WORLD
PRECISION
INSTRUMENTS
NANOLITER2010
Nanoliter Injector with SMARTouch™ Controller
Serial No._____________________
www.wpiinc.com
QUICK START GUIDE
061217
Page 2

Copyright © 2017 by World Precision Instruments. All rights reserved. No part of this publication may
be reproduced or translated into any language, in any form, without prior written permission of World
Precision Instruments, Inc.
Page 3
Nanoliter 2010 with SMARTouch™ Controller
World Precision Instruments 1
Get started with your Nanoliter 2010 and SMARTouch™ Controller as quickly as
possible using these step by step instructions.
NOTE: This Quick Start Guide assumes that the operator back lled a micropipette
with mineral oil. For instructions on how to prepare the micropipette, see the
Nanoliter2010 Instruction Manual page 7.
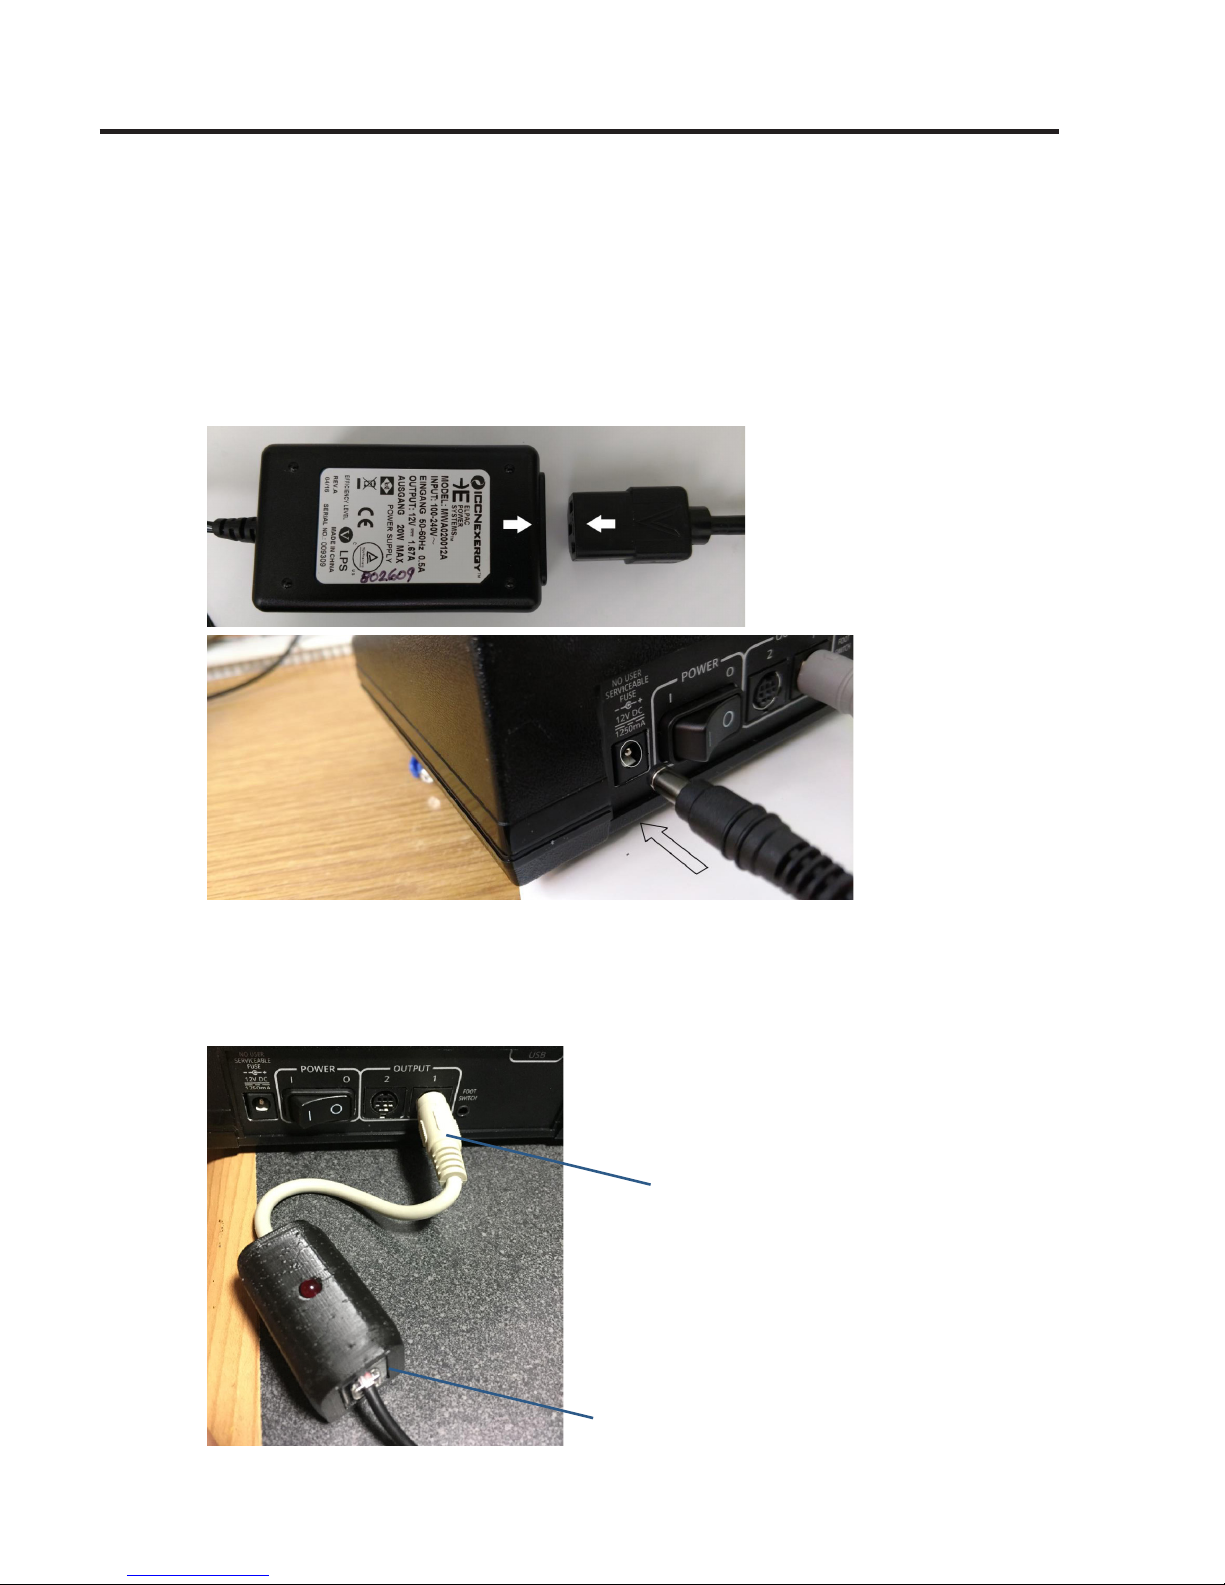
1. Connect the AC power cord to the power supply unit and connect the power
supply unit to the MICRO2T controller. Plug the AC power cord into a wall outlet.
2 Connect the Nanoliter adapter cable to the output of channel 1 of the
SMARTouch™ controller and the RJ-11 connector of the Nanoliter2010 to the
RJ-11 female connector on the adapter. Make sure the embossed arrow on the
connector is facing upwards for proper pin alignment.
Adapter Cable connects to the
SMARTouch™ controller
Nanoliter 2010 Injector connection to
the adaper.
Page 4
2 World Precision Instruments
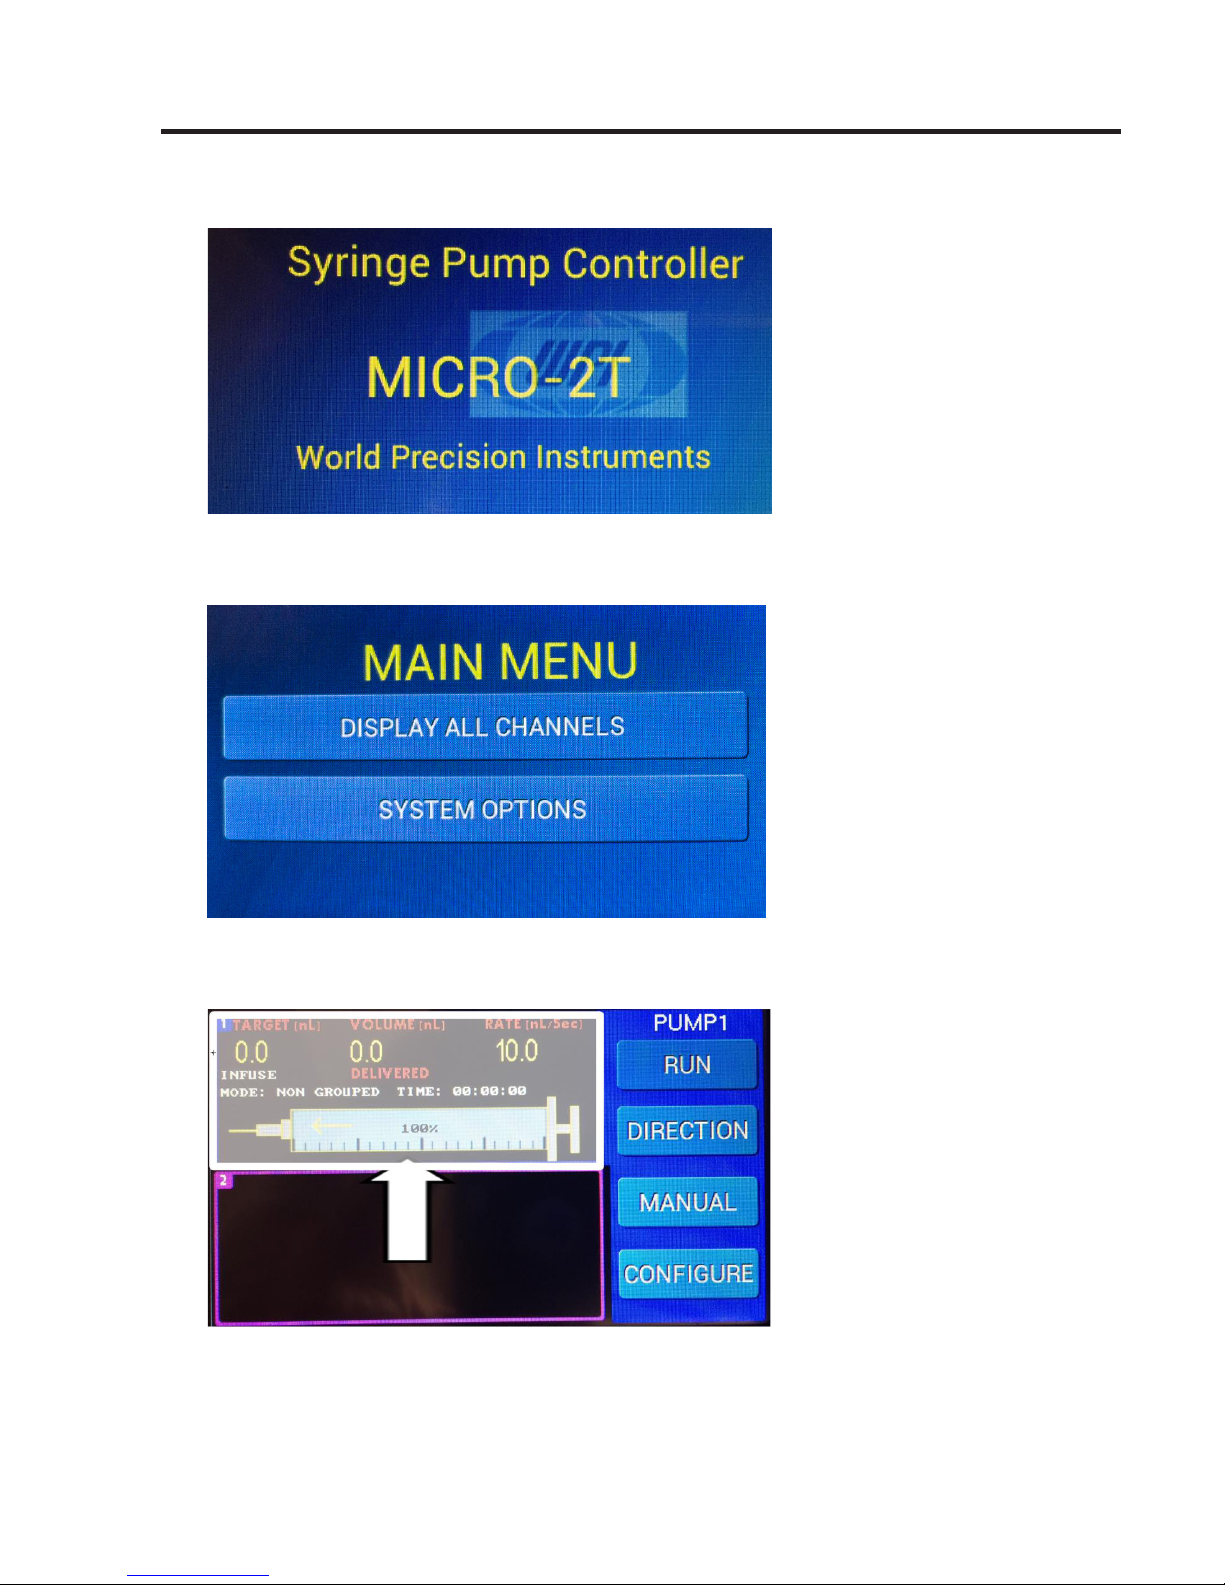
3. Power on the unit. The following screen appears.
4. Touch the Initial Splash Screen anywhere. The MAIN MENU appears. Touch
DISPLAY ALL CHANNELS.
5. The syringe status screen appears. Press anywhere in the PUMP1 Display Area to
make Pump1 the active pump.
Page 5

Nanoliter 2010 with SMARTouch™ Controller
World Precision Instruments 3
6. Touch the Congure button.
7. Press the Type box to bring up the Syringe Selection Screen.
8. In the Syringe Selection Screen, press the DWN key until you see the NL (Nanoliter
2010) type and press it. It will become highlighted. Then press Back to return to
the Pump Conguration Screen
Page 6

4 World Precision Instruments
9. The CONFIGURATION screen appears. Touch the Volume Target display.
10. The Volume Target screen appears. Use the numerical keypad to enter 2500 nL.
Touch ENTER to set the volume and return to the CONFIGURATION screen.
11. Touch the DELIVERY RATE display.
Page 7

Nanoliter 2010 with SMARTouch™ Controller
World Precision Instruments 5
12. The Volume Rate screen appears. Use the numerical keypad to enter a desired
injection rate in nL /sec. In this example, 500 nl/sec was entered. Touch ENTER to
set the delivery rate and return to the CONFIGURATION screen.
13. The Conguration screen shows that a target volume of 2500 nL was entered
and a delivery rate of 500 nL/s was entered. Touch BACK to return to the syringe
status {Home} screen.
14. Verify that the arrow inside the syringe is yellow and pointing in the injection
direction. If the arrow is not red and pointing to the left, touch DIRECTION to
change it. Touch the RUN button to start the injection.
Page 8

6 World Precision Instruments
15. The injection will run until 2500 nL is injected and will then halt automatically.
Even though no injection actually happened, this will place the metal needle
plunger about 13.6 mm from the home (fully retracted) position. At this point
install the back lled micropipette on to the Nanoliter2010 injector as shown
below.
16. Press the DIRECTION button to change the direction to Withdraw. The arrow
turns green and points towards the back of the syringe depiction.
17. Press the CONFIGURE button.
Page 9

Nanoliter 2010 with SMARTouch™ Controller
World Precision Instruments 7
18. Press the Volume Target area to bring up the Volume Target screen.
19. Use the keypad to enter the desired aliquot volume to be pulled into the
micropipette. We will enter 200 nL and press Enter.
20. Press the Delivery Rate area.
Page 10

8 World Precision Instruments
21. Use the keypad to set the rate to 50 nL/sec and press Enter.
22. Press Back to go to the main Syringe information display.
23. Next place the micropipette tip into the aliquot to be loaded and press RUN. This
will pull 200 nL into the micropipette.
Page 11

Nanoliter 2010 with SMARTouch™ Controller
World Precision Instruments 9
24. When the injector nishes, press the direction button to set it to Infuse. The arrow
will turn Red.
25. Now the micropipette can be placed at the desired injection location and after
setting the desired injection volume, the injection can be done by pressing the
Run button.
Page 12

USA
International Trade Center, 175 Sarasota Center Blvd., Sarasota FL 34240-9258
Tel: (941) 371-1003 • Fax: (941) 377-5428 • E-mail: sales@wpiinc.com
UK
1 Hunting Gate, Hitchin, Hertfordshire SG4 0TJ
Tel: 44 (0)1462 424700 • Fax: 44 (0)1462 424701 • E-mail: wpiuk@wpi-europe.com
Germany
Zossener Str. 55, 10961 Berlin
Tel: 030-6188845 • Fax: 030-6188670 • E-mail: wpide@wpi-europe.com
China & Hong Kong
WPI Shanghai Trading Co., Ltd.
Rm 25e, No8 Dongfang Rd., Pudong District, Shanghai, 200120 PR China
Tel: +86 21 6888 5517 • E-mail:chinasales@china.wpiinc.com
Brazil
Av. Conselheiro Nébias, 756 sala 2611, Santos-CEP: 11045-002, São Paulo Brazil •
Tel: (013) 406-29703 • E-mail: info@brazil.wpiinc.com
Internet
www.wpiinc.com • www.wpi-europe.com • www.wpiinc.cn
 Loading...