

Wow Wee 8032 User Manual

ROBOBOA
A Fusion of Technology and Personality
User Manual
Item No. 8032 | Ages 8+
1
1
Welcome
ongratulations on purchasing your new
Roboboa™ from Wowwee, a cool sci-
C
tech toy with mood and mobility. Combining
advanced A.I. animations with lights, vision, and
sound, Roboboa is a smart desk light, wake-up
alarm, scanning room guard, disco marquee,
roving tank, safety light, playful cannon, and
friendly and attentive “alien” robot. Fun and
useful for the whole family!
Please read these instructions carefully for
details on how to get the most out of your
Roboboa.
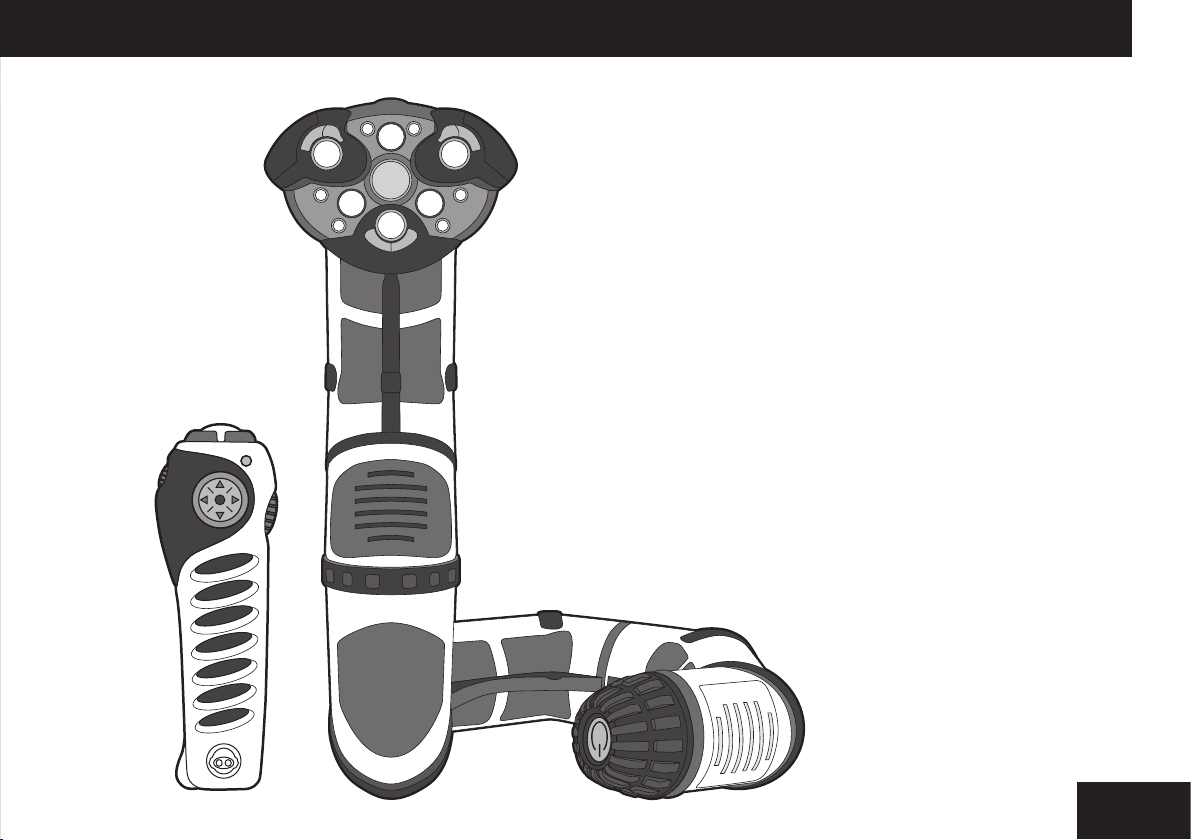
Package contents
m
o
Hold
d
e
d
a
e
h
/
l
i
e
f
ta
a
r
t
S
t
R
e
e
s
k
c
a
r
t
r
e
z
a
L
S
n
a
c
e
r
o
l
p
n
x
e
o
n
n
a
C
p
S
e
l
e
m
r
a
l
a
t
s
e
T
D
y
l
i
a
rd
a
l
o
gu
r
t
a
P
y
r
S
t
e
n
o
m
e
d
e
m
u
l
o
V
y
P
t
a
r
e
t
u
c
e
k
x
c
e
a
B
m
a
r
P
g
r
o
1 x Roboboa
1 x Remote controller
This user manual
2
3
Contents
Welcome p.1
Contents p.2-3
Getting started p.4
Battery details p.4
Roboboa
Remotecontroller
LowPower
Roboboa overview p.5
Controller overview p.6
Power on / off p.7
Stop and reset p.7
StoppingRoboboa
ResettingRoboboa
Aware mode p.7
Mode Light button p.8
Remote controller functions overview p.8
Remote controller quick reference p.9
Remote controller directional pad p.10
Miscellaneous directional pad functions p.11
Stopfunction
Holdfunction
Shutdownfunction
Modelightfunction
Safety light mode p.13
Remote ashlight mode p.13
Mode functions p.13
Tail / Head function p.14
Reset function p.14
Strang p.14
Track mode p.15
Scan mode p.15
Explore mode p.15
p.12

3
Alarm modes p.15
Sleep mode p.16
Guard modes p.16
Demo mode p.17
Party mode p.17
Volume control p.17
Program function p.17
Programming Roboboa p.17
ProgramMode
Back function p.18
Program play function p.18
Troubleshooting guide p.19
Support p.19
Notes p.20
Contents
4
5
Getting started
To use your Roboboa, insert batteries (see below), place him on a large level
surface with his battery compartments facing downwards, turn him on, and
explore some of his functions from the Button overview table (see page 6).
Read on for full details about your grooving, roving, attentive robot friend.
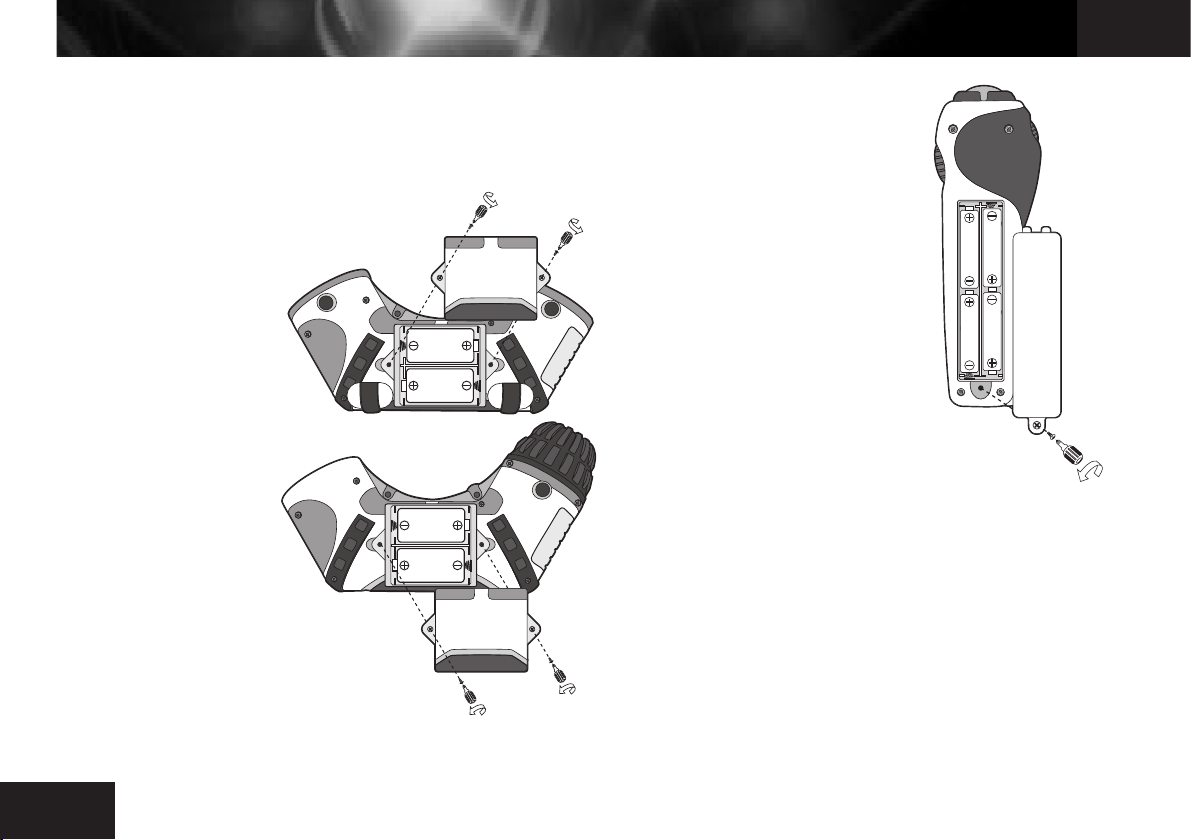
Battery details
This sections deals with battery
information for your Roboboa
and his remote controller.
Roboboa battery requirements
Your Roboboa is powered by
4 x “D” size batteries (not included).
Battery installation
Before installing or changing
batteries, be sure the power
button located on the robot’s
tail is in the OFF position (see
page 7).
1. Remove the battery compartment covers using a Phillips
screwdriver (not included).
2. Insert batteries into Roboboa
as illustrated in the diagram.
3. Replace the battery covers and
all screws.
Low power
When Roboboa’s batteries are low, the LEDs on Roboboa’s
face will continuously pulse with a hiss sound. When this
happens, you need to replace all robot batteries.
1.5V “D”
LR20/UM1
1.5V “D”
LR20/UM1
Bottom view of
Roboboa’s™ body
1.5V “D”
LR20/UM1
1.5V “D”
LR20/UM1
Remote controller battery requirements
Roboboa’s remote controller is powered
by 4 x “AAA” size batteries (not included).
Battery installation
To install the batteries in Roboboa’s remote
controller:
1. Remove the battery compartment
cover using a Phillips screwdriver (not
included).
“AAA”
UM4
1.5V
1.5V
1.5V
LR03
LR03
LR03
LR03
1.5V
UM4
UM4
UM4
“AAA”
“AAA”
“AAA”
2. Insert batteries into the controller as
illustrated in the diagram.
3. Replace the battery cover and lightly
tighten the holding screw.
“AAA”
UM4
1.5V
1.5V
1.5V
LR03
LR03
LR03
LR03
1.5V
UM4
UM4
UM4
“AAA”
“AAA”
“AAA”
Low power
If Roboboa is not responding well to
controller commands, you might need to
replace the controller batteries.
Bottom view of
remote controller
ATTENTION: Important battery information
• Replace all batteries at the same time with new batteries of the same type, size,
and brand.
• Use only fresh batteries of required size and recommended type.
• Do not mix old and new batteries, different brands of batteries
(standard Carbon-Zinc, Alkaline or rechargeable), or rechargeable
batteries of different capacities.
• Respect the correct contact and battery polarities, (+) and (-).
• Rechargeable batteries must be charged under adult supervision.
• Do not attempt to recharge non-rechargeable batteries.
• Do not burn or incinerate used batteries.
• Do not short-circuit battery terminals.
• Remove exhausted batteries from Roboboa to avoid leakage damage.
• Batteries should be replaced under adult supervision.
• Remove batteries if the toy is not going to be played with for some time.
• Rechargeable batteries must be removed from the toy before being charged.

5
IR receiver
On/Off button
Motorized tail wheel
Roboboa OverviewBattery details
Animation face lights
IR transmitters
Mode light button
Casters
Light sensor
6
7
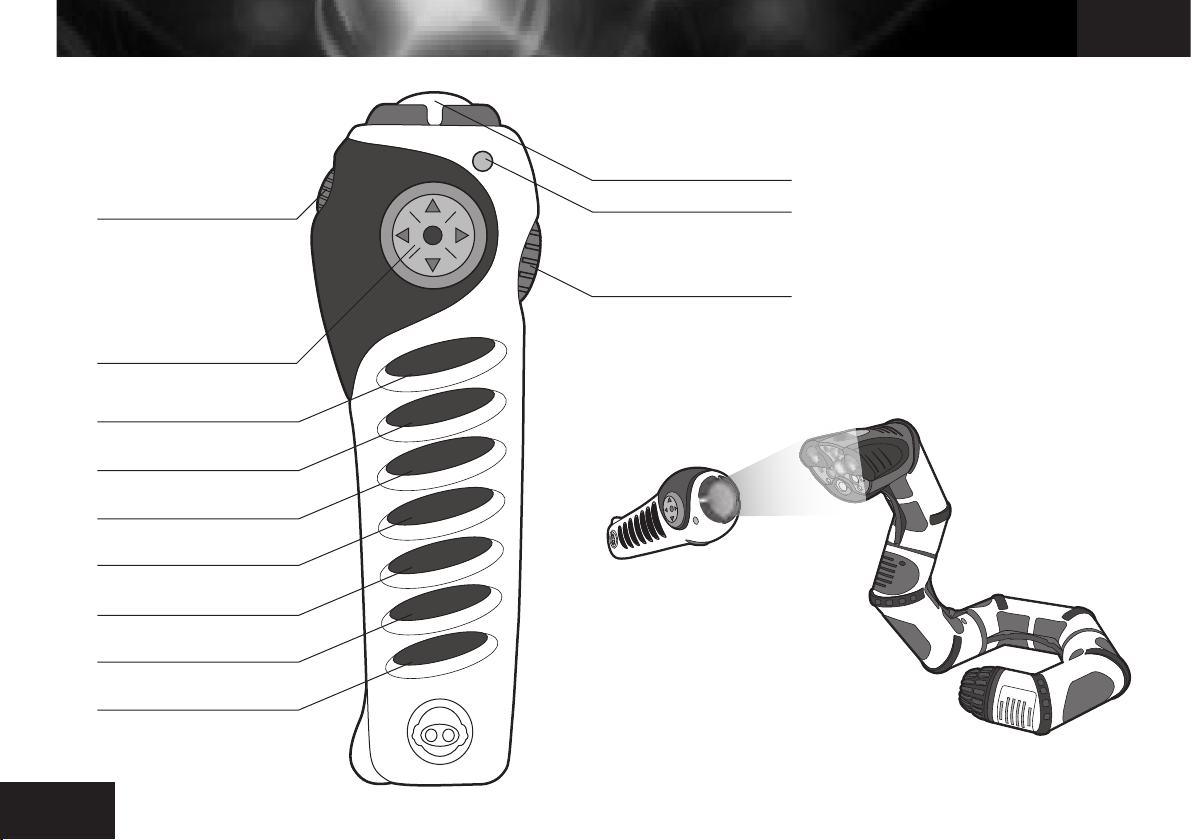
Controller Overview Power on / off / Stop and reset / Aware mode
Flashlight LED
Mode button (small)
Hold
m
o
d
e
Signal indicator LED
Mode button (large)
Directional pad
Tail / Head button
Track button
Explore button
Alarm button
Guard button
Demo button
Execute button
il/hea
ta
t
R
e
e
s
tr
S
n
a
c
explore
p
S
e
l
e
l
a
D
y
l
i
a
ua
g
r
S
t
e
n
d
y
P
t
a
r
e
x
e
r
P
g
r
o
ack
a
y
m
e
u
c
m
a
d
e
f
a
r
t
S
r
e
z
a
L
n
o
n
n
a
C
m
r
t
s
e
T
d
r
l
o
r
t
a
P
o
e
m
u
l
o
V
e
t
k
c
a
B
NOTE: Always point the controller at the Roboboa’s face when controlling him.
 Loading...