

wowvision proVEOS User Manual

User Manual

Contents
Welcome ............................................................................... 4
How proVEOS Works ........................................................................................... 6
Installing the proVEOS Software for Windows ...................... 8
Configuring Firewall Software ............................................................................... 9
Installing the Windows proVEOS Software ......................................................... 13
Starting the Installer ............................................................................................ 13
Signing in to ConnectME .................................................................................... 23
Installing the proVEOS Software for Mac............................ 27
Configuring the Firewall ...................................................................................... 28
Installing the Mac proVEOS Software ................................................................. 28
Presenting with ConnectME ................................................ 30
Starting a Presentation ....................................................................................... 32
Quad Presentation .............................................................................................. 32
Managing Participants ........................................................................................ 33
Chatting with Participants ................................................................................... 37
Share My Screen ................................................................................................ 37
Playing Music and Movies .................................................. 43
Managing Media in Your Computer .................................................................... 45
Managing Media in WOW Gateway .................................................................... 45
Playing Media Files ............................................................................................. 46
Stream media from Streaming Player ................................................................. 55
Collaborating with the White Board ..................................... 59
Drawing and Annotating Tools ............................................................................ 61
Displaying a Participant’s Annotations ................................................................ 62
Capturing and Saving ......................................................................................... 62
Recording Presentations ..................................................... 63
Audience Response System ............................................... 68
Topic Manager .................................................................................................... 69
Question Bank .................................................................................................... 70
Prepare Exam ..................................................................................................... 72
Detail Report ....................................................................................................... 74
Bar Chart ............................................................................................................ 75

Instant Polling ...................................................................... 76
View Result ......................................................................................................... 78
Polling Result ...................................................................................................... 78
Multimedia Notice Board ....................................................... 2
Uploading Content ................................................................................................ 5
Creating Playlists .................................................................................................. 5
Scheduling Playlists .............................................................................................. 7
Layout Manager .................................................................................................... 8
User Manager ....................................................................................................... 9
Options and Settings ........................................................... 10
Client Preferences .............................................................................................. 11
Controlling the Projector ..................................................................................... 15
Diagnostic Tools .................................................................. 20
Network Diagnostics ........................................................................................... 21
Bandwidth Utility ................................................................................................. 22
Using the Web Admin .......................................................... 23
User Management .............................................................................................. 25
Device Management ........................................................................................... 29
Alerts ................................................................................................................... 34
Device Control .................................................................................................... 35
Message Scheduler ............................................................................................ 36
Reports ................................................................ ............................................... 37
Session Record................................................................................................... 38
Logout ................................................................................................................. 39

Welcome
Thank you for choosing the proVEOS Wireless Presentation Gateway. proVEOS
is an advanced network-based and wireless presentation solution that makes it
easy to make presentations and interact with others from the comfort of your
wireless laptop.
Send any laptop’s display to the projector wirelessly without the hassle of
passing around VGA cables and configuring display settings
Interact and collaborate with participants with the chat and white board
features
Play video and audio files on the big screen in HD quality
Staff can easily control access to the projector to ensure a smooth
presentation flow
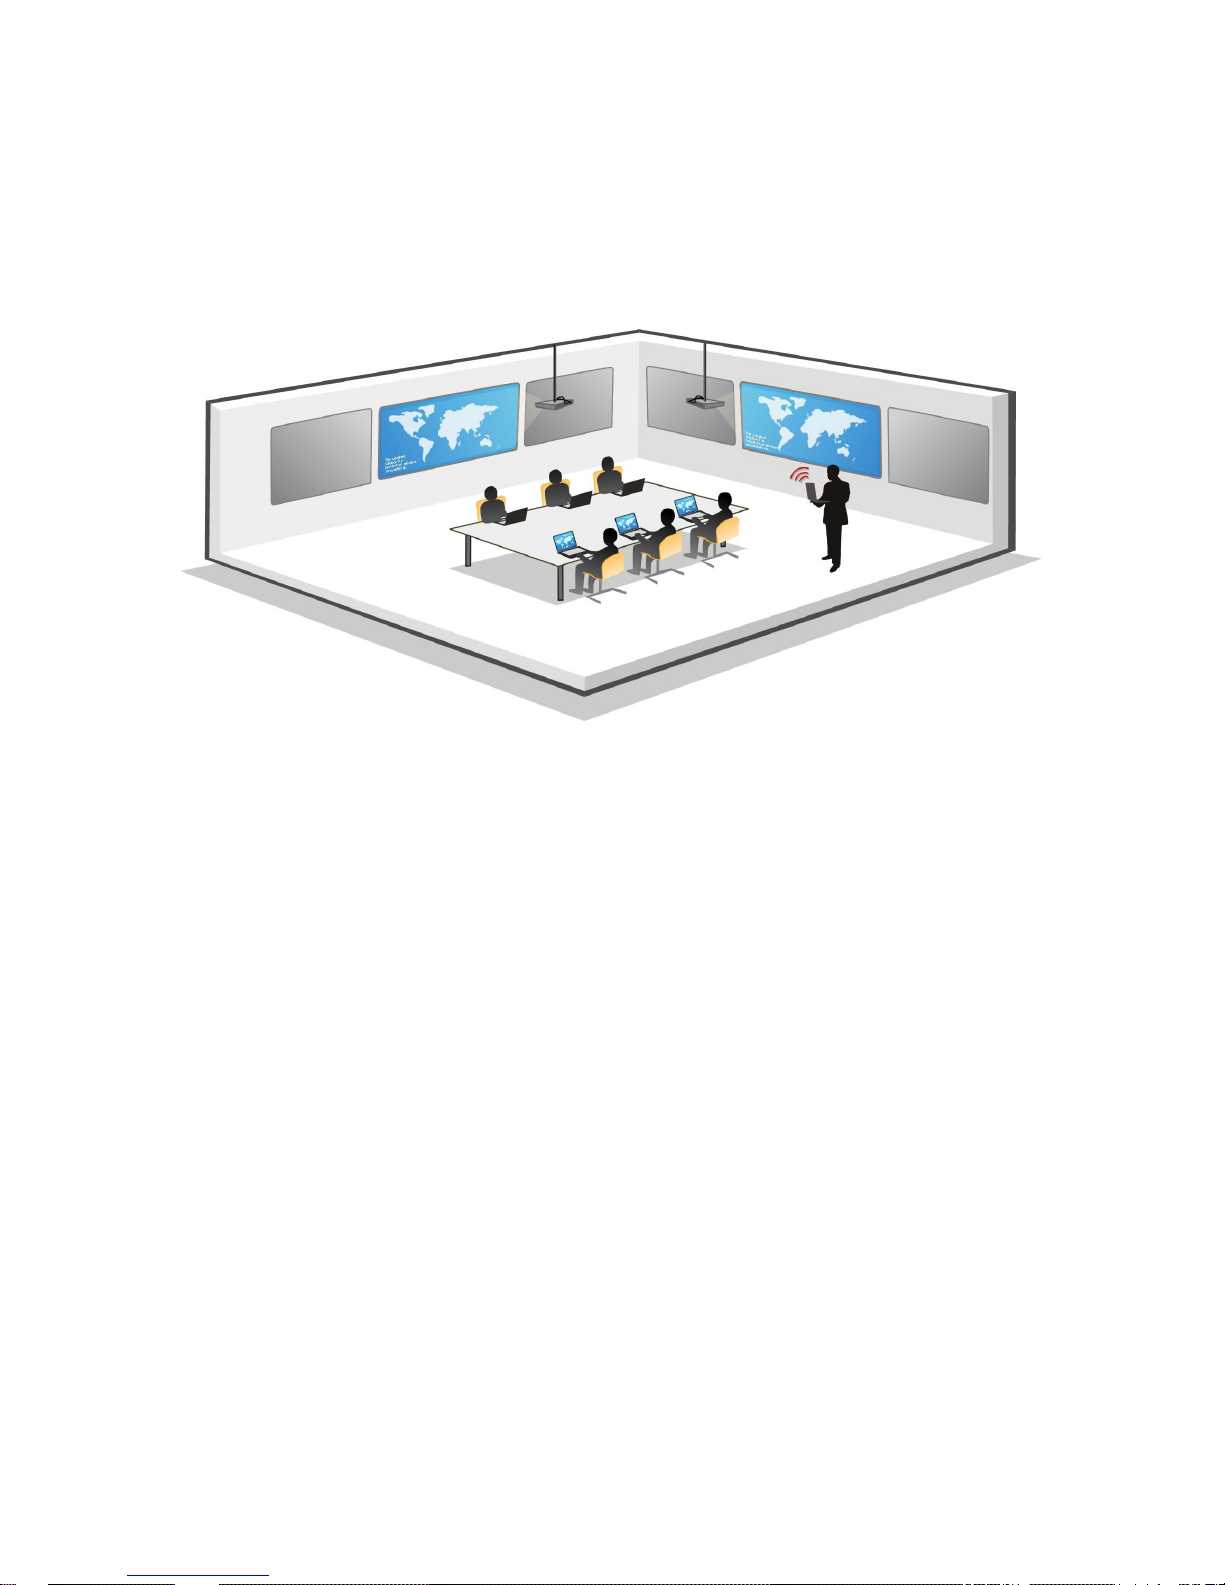
How proVEOS Works
A proVEOS setup is made up of three major components:
1. A Windows or Macintosh computer with the proVEOS software installed
2. proVEOS Wireless Presentation Gateway connected to a projector and
speakers
3. Local area network (LAN)
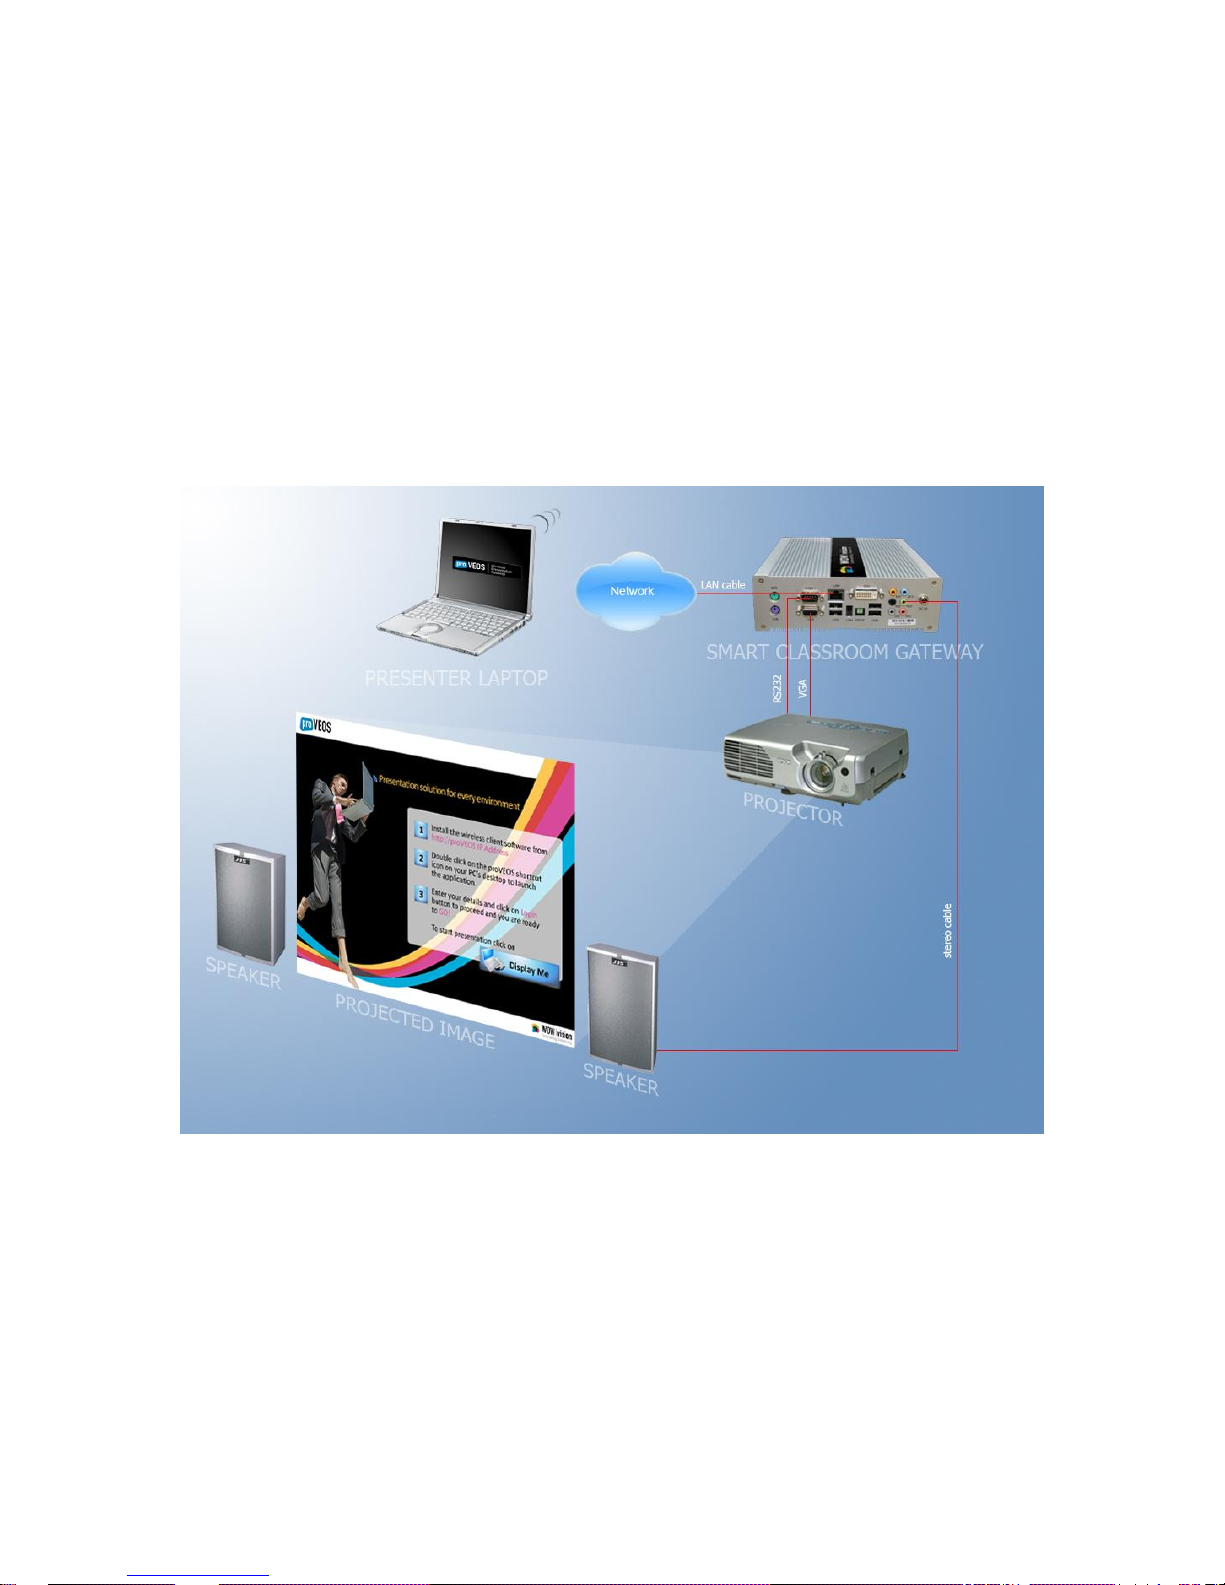
The computer and proVEOS gateway are connected to the LAN to allow
them to send and receive information
The proVEOS Client on the computer signs in to the gateway, announcing
its presence to the other participants

The proVEOS Client is switched to presentation mode to start capturing
the laptop’s display continuously and send it to the proVEOS gateway
over the LAN
Multimedia files can also be sent to the proVEOS gateway for playback
The proVEOS gateway receives the display information and multimedia
files from the laptop and sends them to the connected projector and
speakers
The presenter can also show a white board on the projector, and allow
other participants to join in and contribute

Installing the
proVEOS
Software for
Windows

The ConnectME is installed on PCs and laptops, and provides access to a full
range of features available on a proVEOS gateway.
Minimum system requirements:
Windows 2000, XP or Vista
256MB RAM or more
Connect the computer to the network and start Internet Explorer (IE).
Note: ActiveX support is recommended for installation. ActiveX is only available
in Internet Explorer.
Configuring Firewall Software
Before installing the ConnectME, configure your computer’s firewall software to
prevent problems when the ConnectME attempts to connect and communicate
with the proVEOS gateway.
The most common connection problems are caused when firewall software are
configured to prevent the ConnectME from making outgoing connections to other
devices on the network, like the proVEOS gateway.
Note: Check the firewall settings on your computer before you install or run the
software to make presentations.
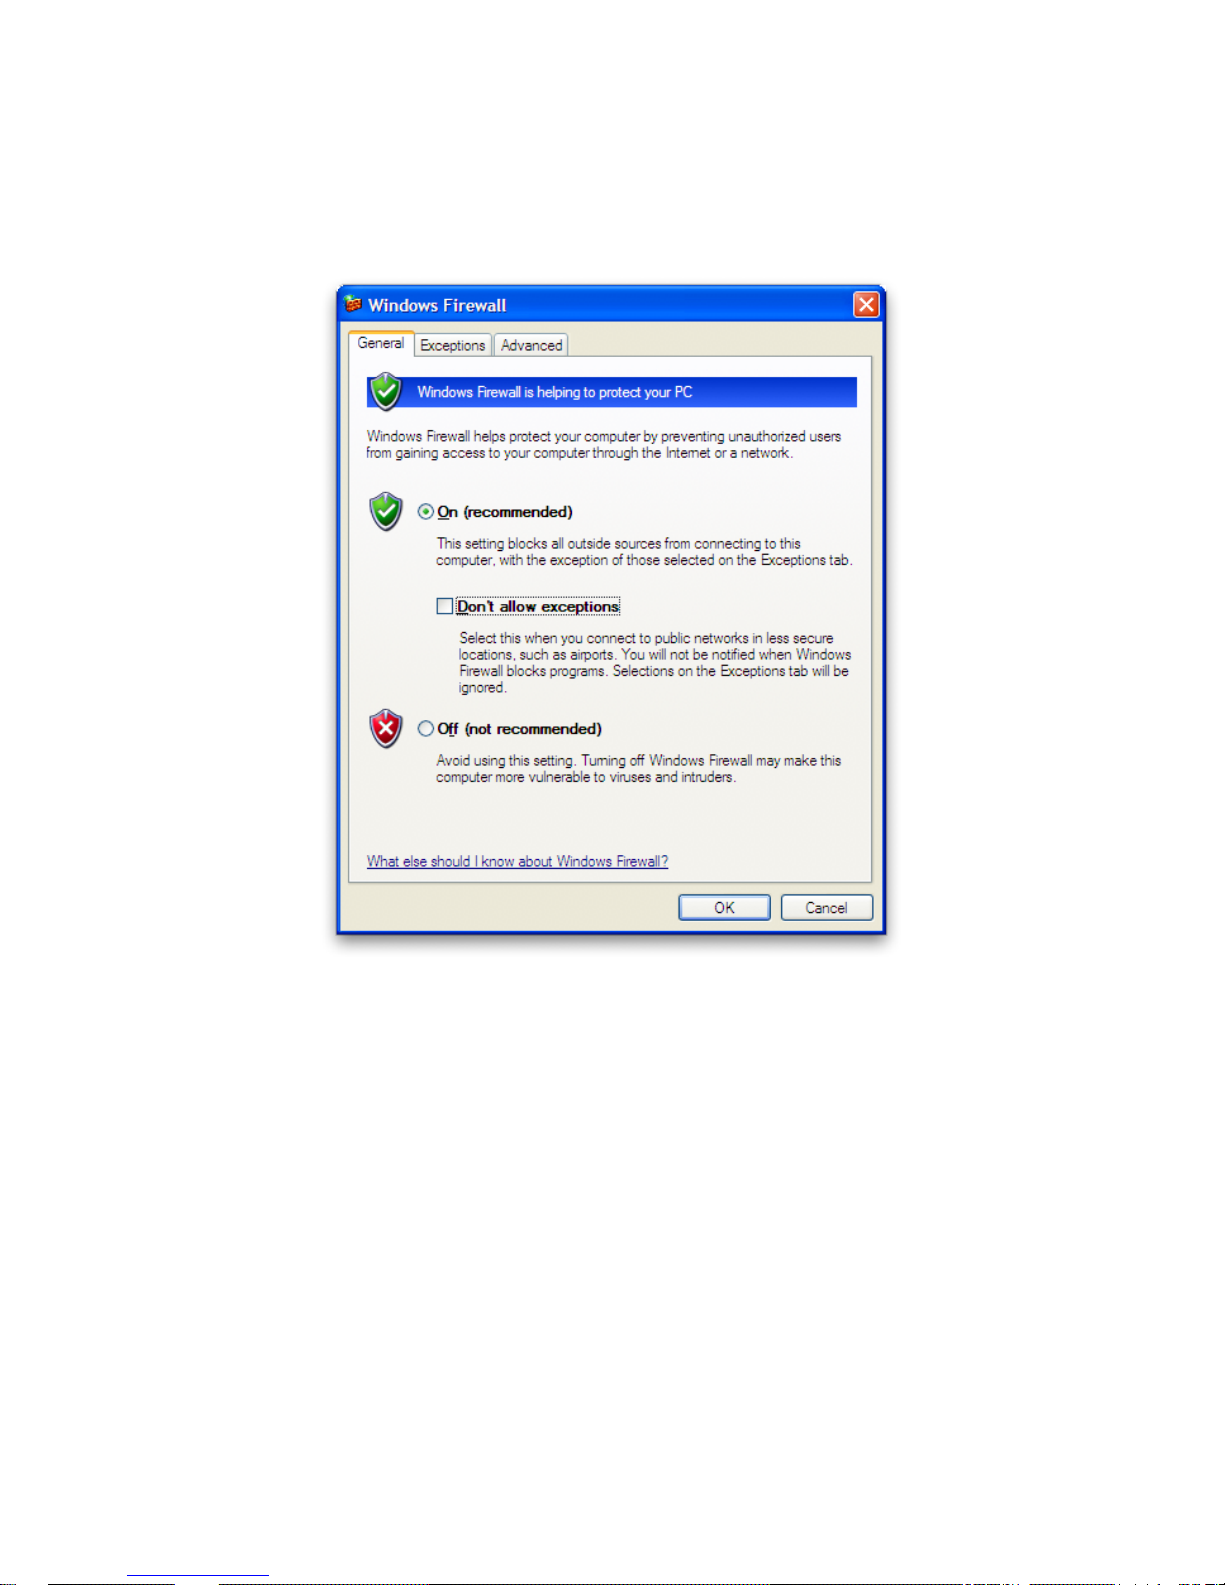
Windows Firewall
If you are using Windows Firewall, available in the Control Panel of Windows XP
Service Pack 2 and above, configure it to allow exceptions.
Click on the Windows Firewall item in Control Panel
Ensure that Don’t allow exceptions checkbox is unchecked
Click the OK button to save the setting
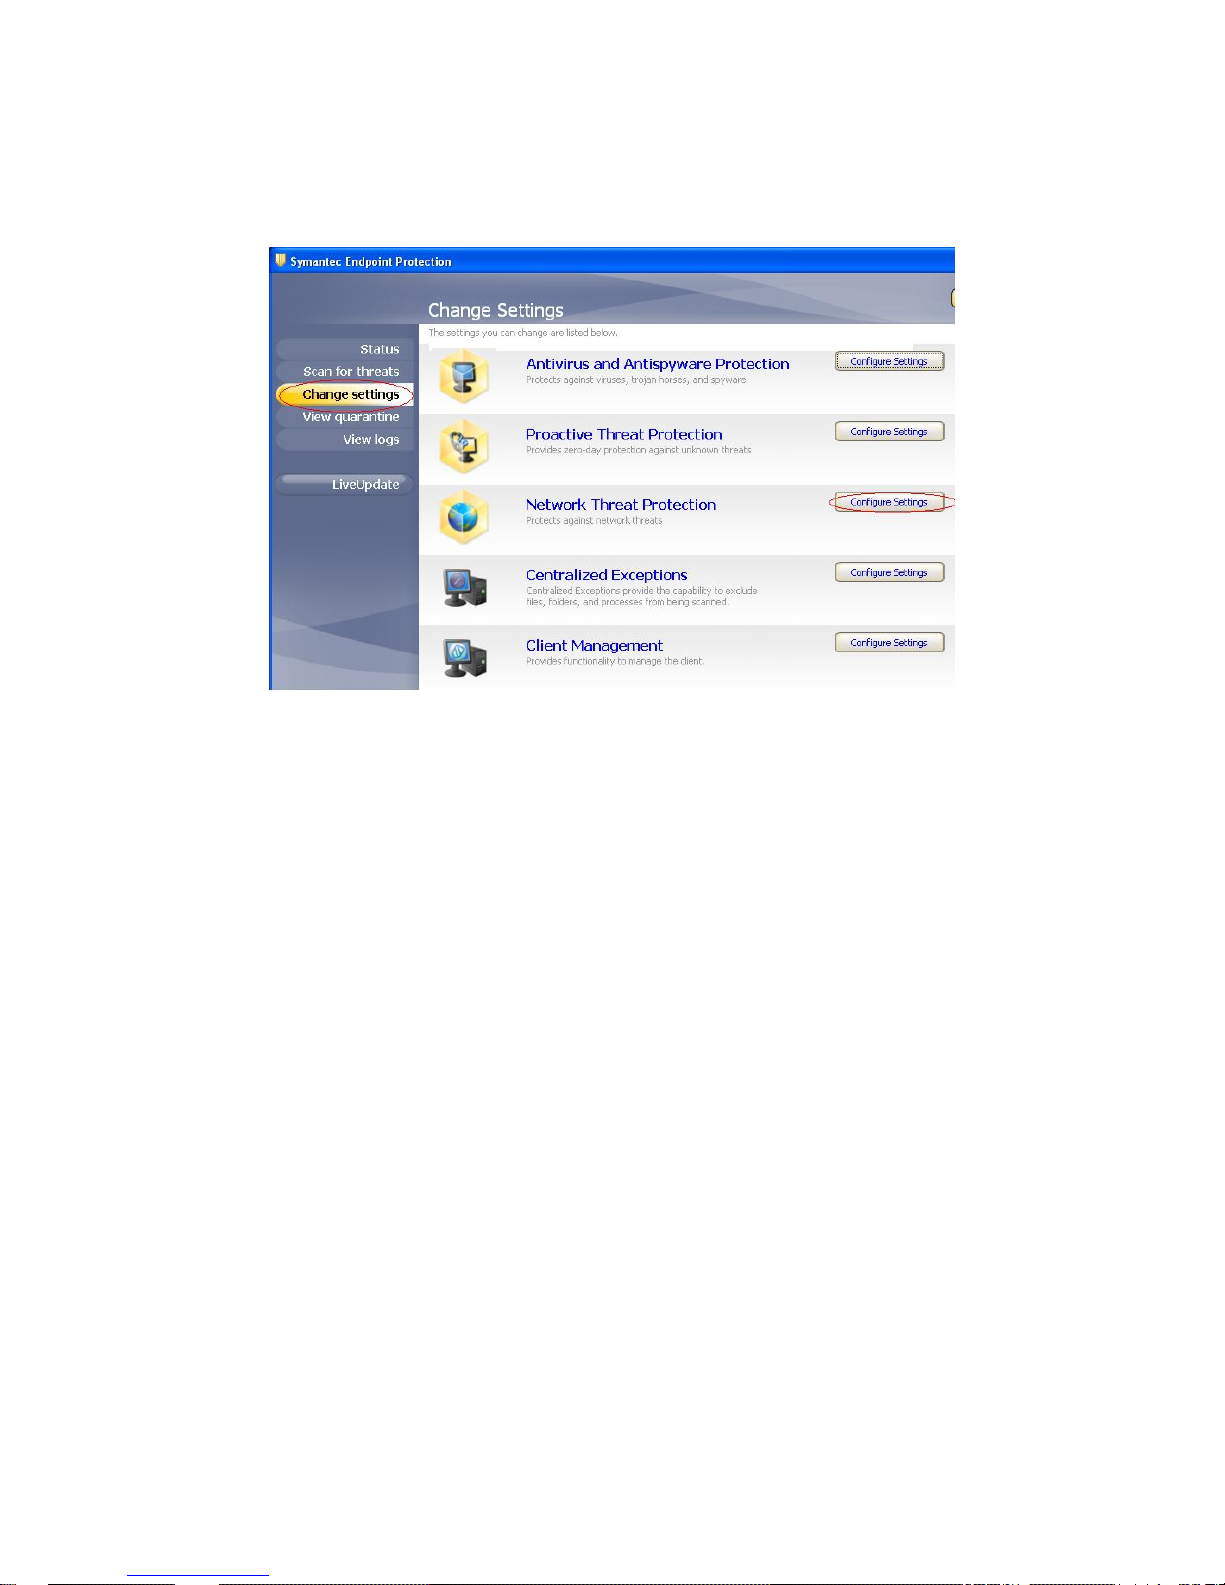
Symantec Endpoint Protection
To configure Symantec Endpoint Protection to allow connections to proVEOS:
Run the Symantec Endpoint Protection program in the Start Menu
Click Change settings in the left menu
Click the Configure Settings button in the Network Threat
Protection section

A configuration window will be shown:
Under the Unmatched IP Traffic Settings section, select the Allow IP
traffic radio button
Click the OK button to save the settings
For other firewall software, please consult the user manual, online technical
support forums or contact the vendor for further assistance.
Ensure that these ports are not blocked: 9954, 9955, 9956, 9957, 9958, 9959

Installing the Windows proVEOS Software
Starting the Installer
Enter the address of the proVEOS gateway in IE’s address bar and press
Enter.
Note: The IP address is usually an internal domain name allocated by the
system administrator (e.g. projector.company.com) or an internal IP
address (e.g. 10.x.x.x or 192.168.x.x). New proVEOS units are
configured with a default IP address of 192.168.1.1. The subnet mask is
255.255.255.0.
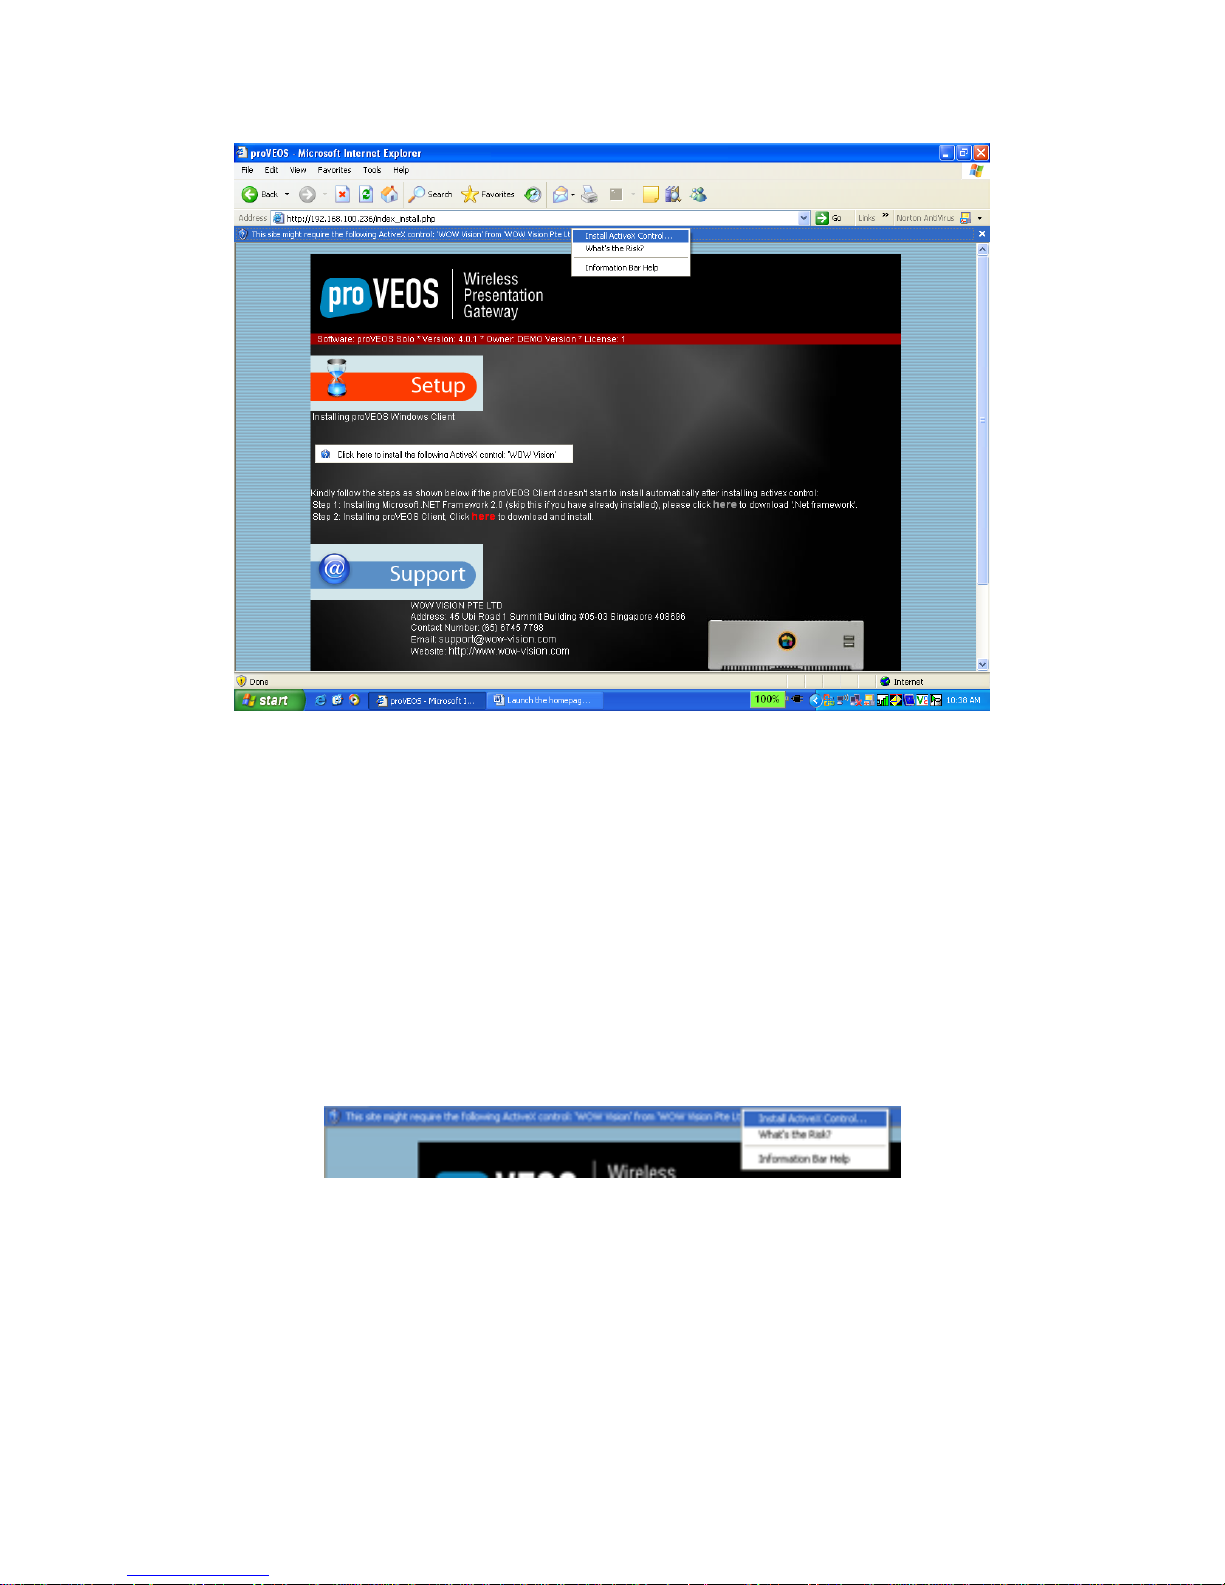
The proVEOS web page is loaded:
Locate the Windows Client link and click it.
Note: If the ActiveX automatic installation described in the next section fails,
follow the steps displayed in the web page pictured above to perform a manual
installation. Step 1 installs the .NET Framework, as described from page 20
onwards. Step 2 installs the proVEOS client software, described from page 15
onwards.
Bypassing the ActiveX Security Warning
In most default IE configurations, the security level is set such that it will display a
security warning whenever a web site attempts to install and run an unknown
ActiveX control.
A bar at the top of the web page will appear, prompting you to click it:
Click the bar and a context menu will pop up. Click Install ActiveX
Control to allow the installation to proceed.

An Internet Explorer - Security Warning window will pop up:
Click the Install button to continue installing the ActiveX control.
Installing the Client
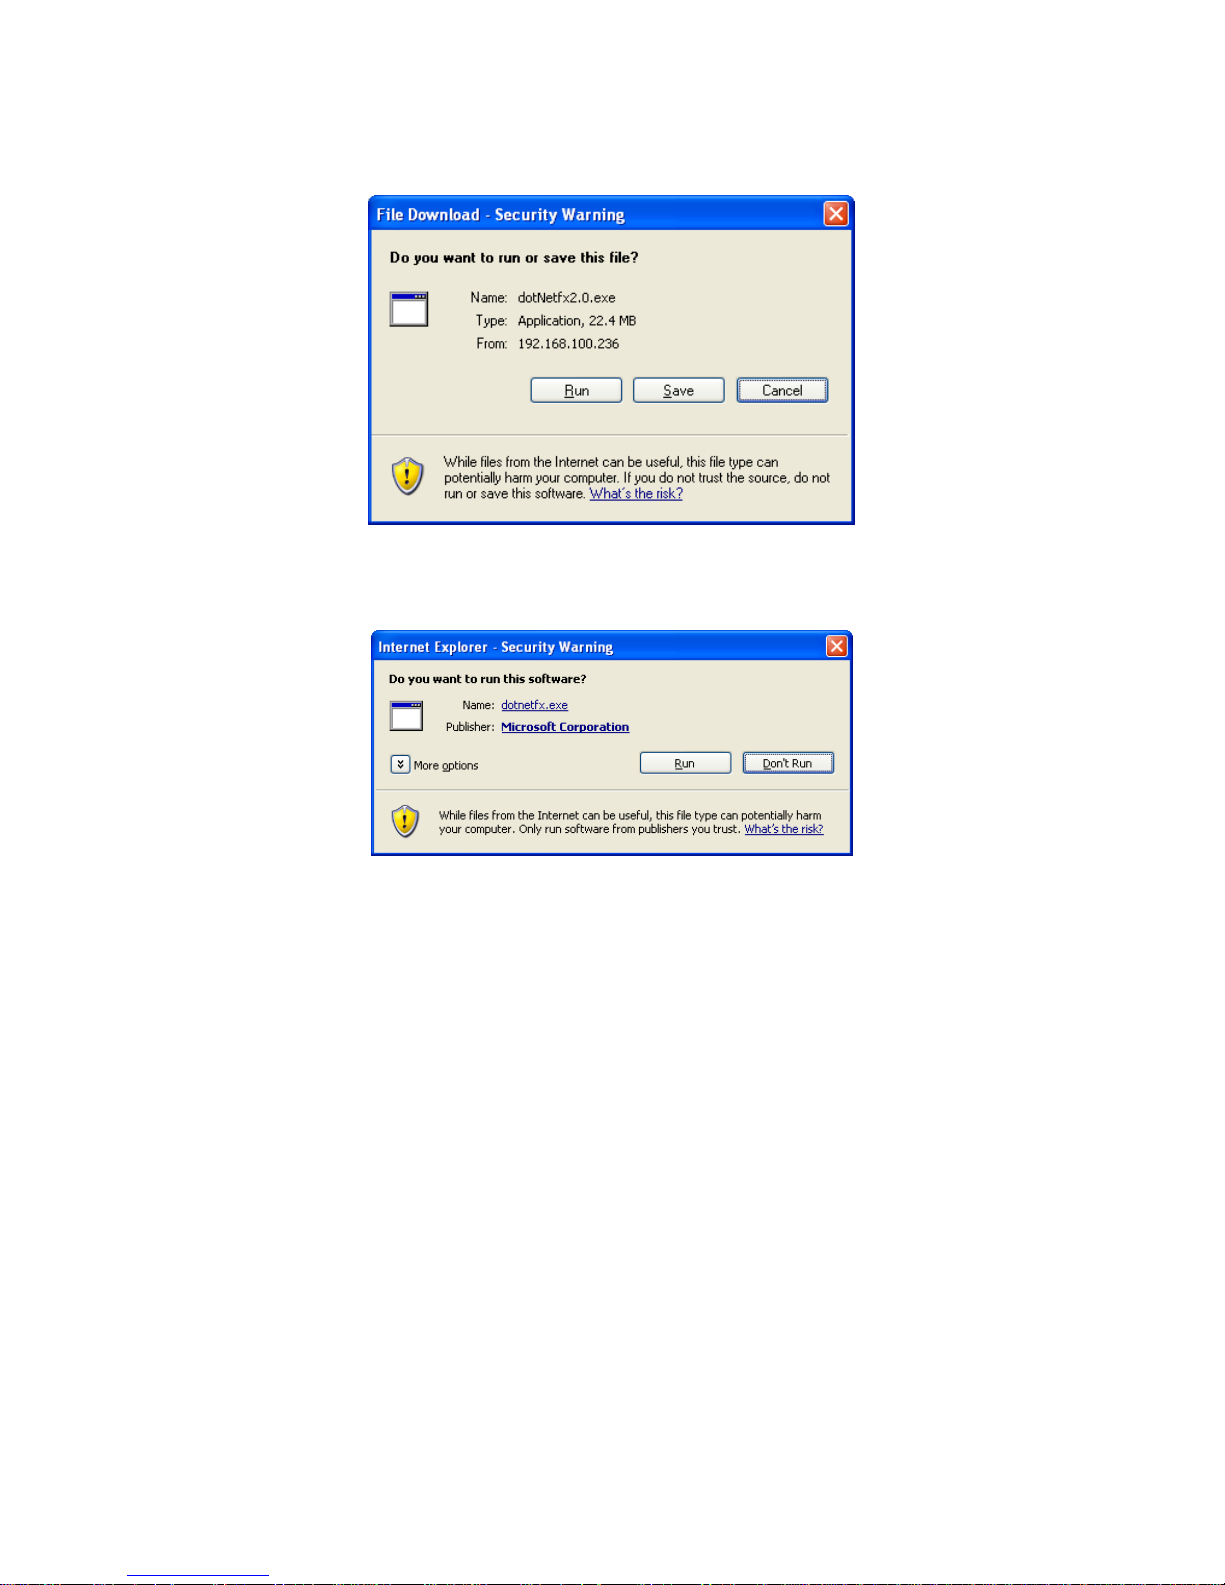
IE will attempt to download an installer file to your computer:
Click the Run button.
IE will download the installer to a temporary area on your computer and
automatically run it to begin the installation process.
Before the installation can proceed, IE will display another security warning for
your confirmation:
Click the Run button to start the setup wizard.
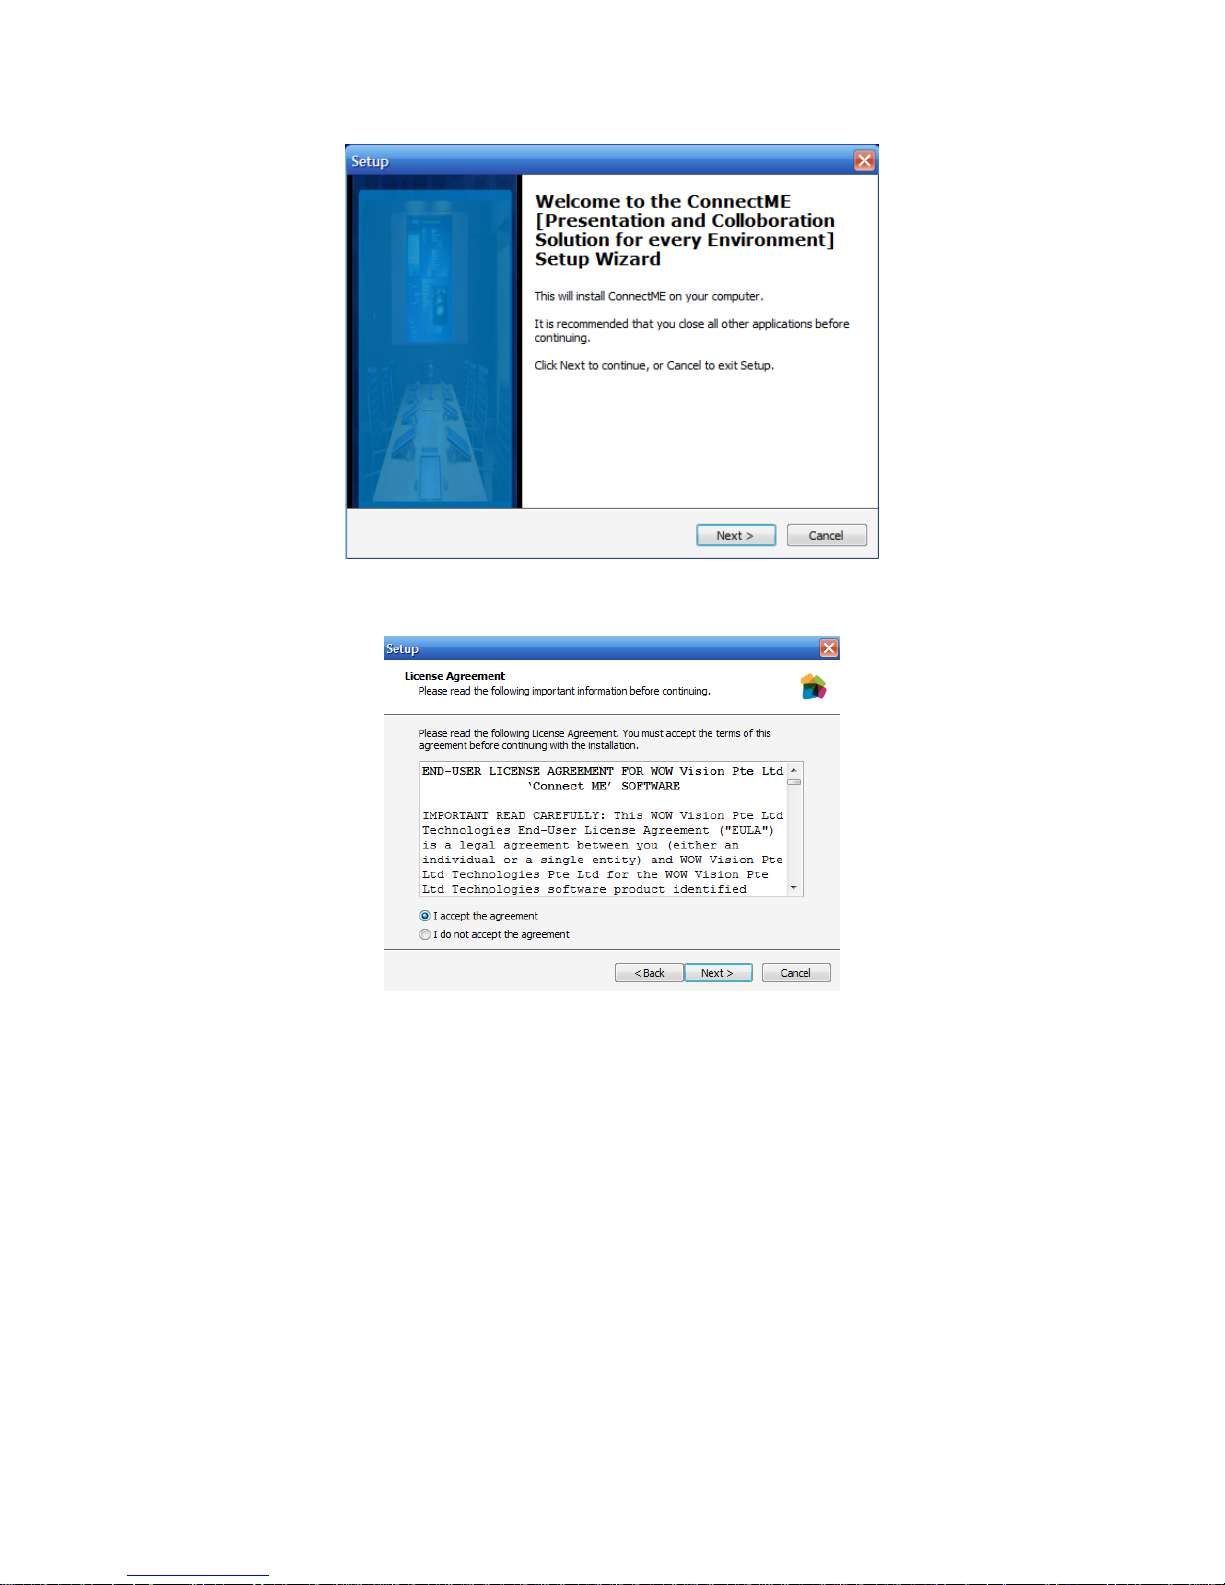
Click Next > to start the installation process.
Read and accept the license agreement by selecting the first radio button. Click
Next > to continue.

Select the checkboxes if you wish to install additional shortcut icons to start the
ConnectME from the desktop or Quick Launch bar. Click Next > to continue.
A summary of the actions to be performed during installation is shown:
Click Install to begin the installation.
A hardware driver will be installed in Windows to allow it to make presentations to
proVEOS.
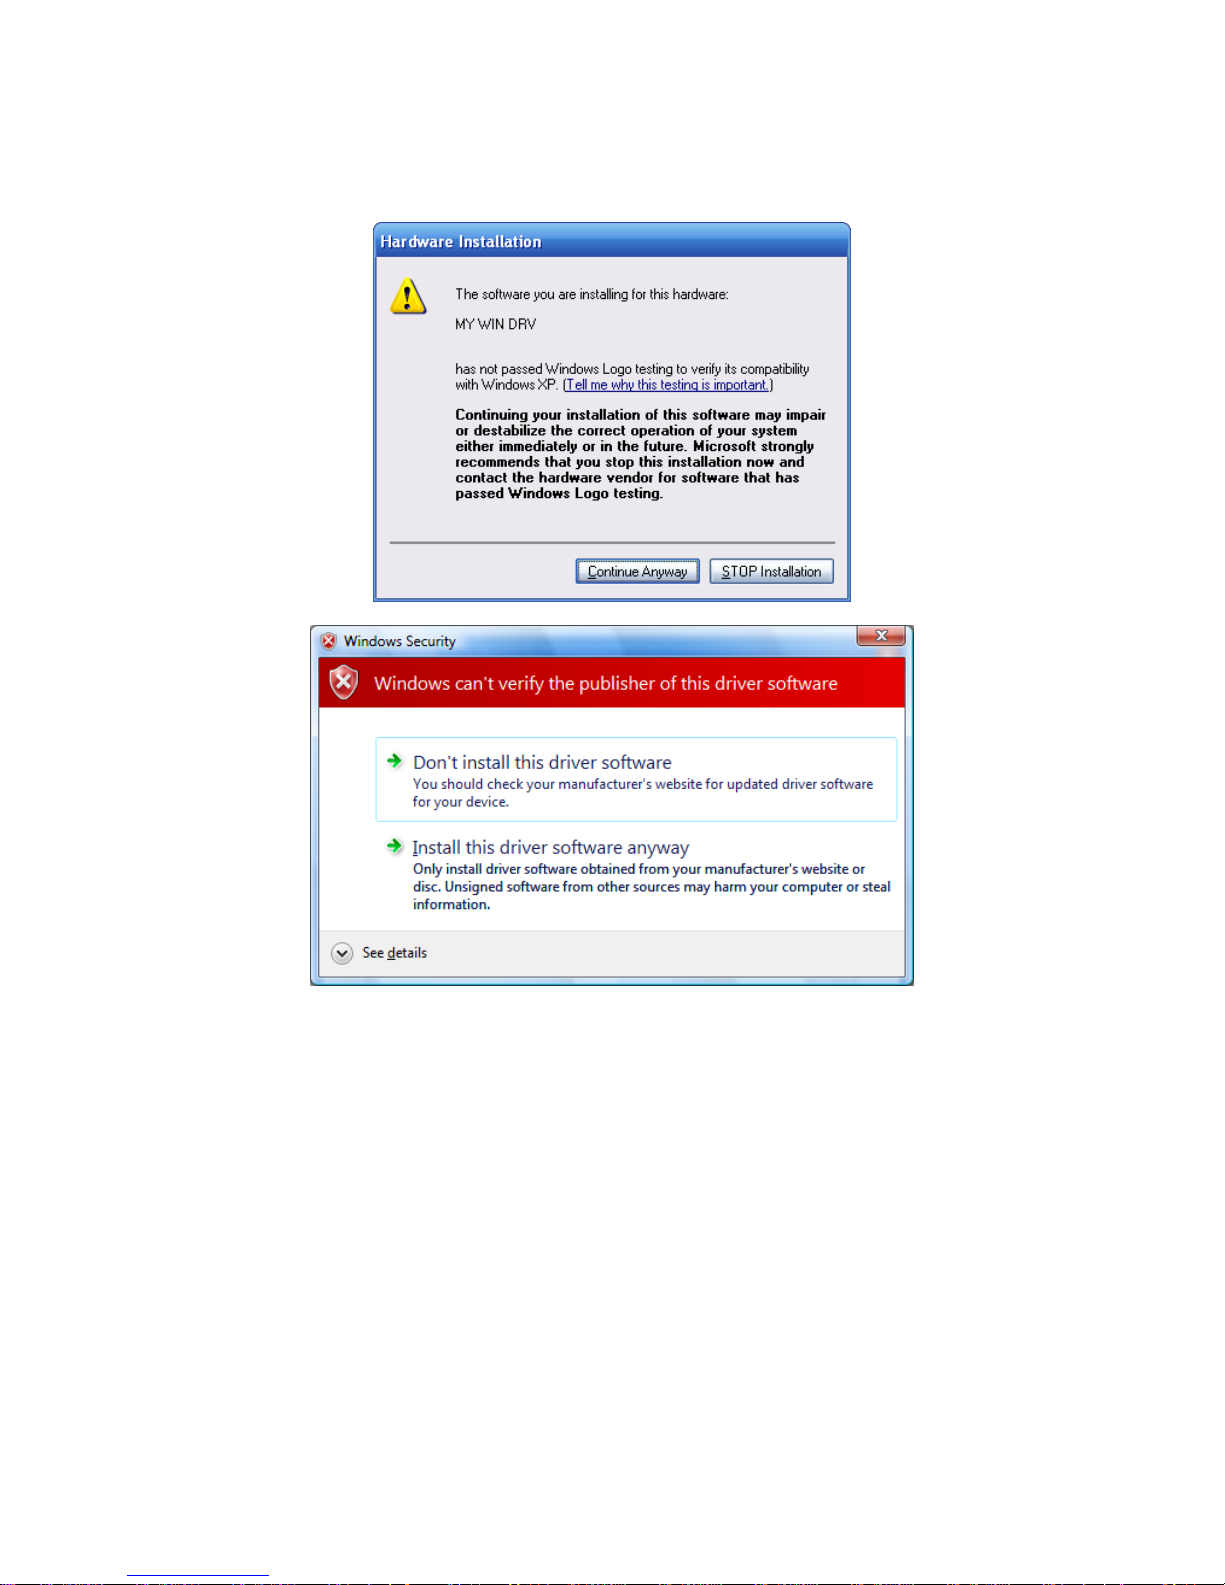
Windows XP (top) and Windows Vista (bottom) will ask if you wish to continue
installing the driver:
Click the Continue Anyway button (Windows XP) or Install this
driver software anyway (Windows Vista) to proceed.
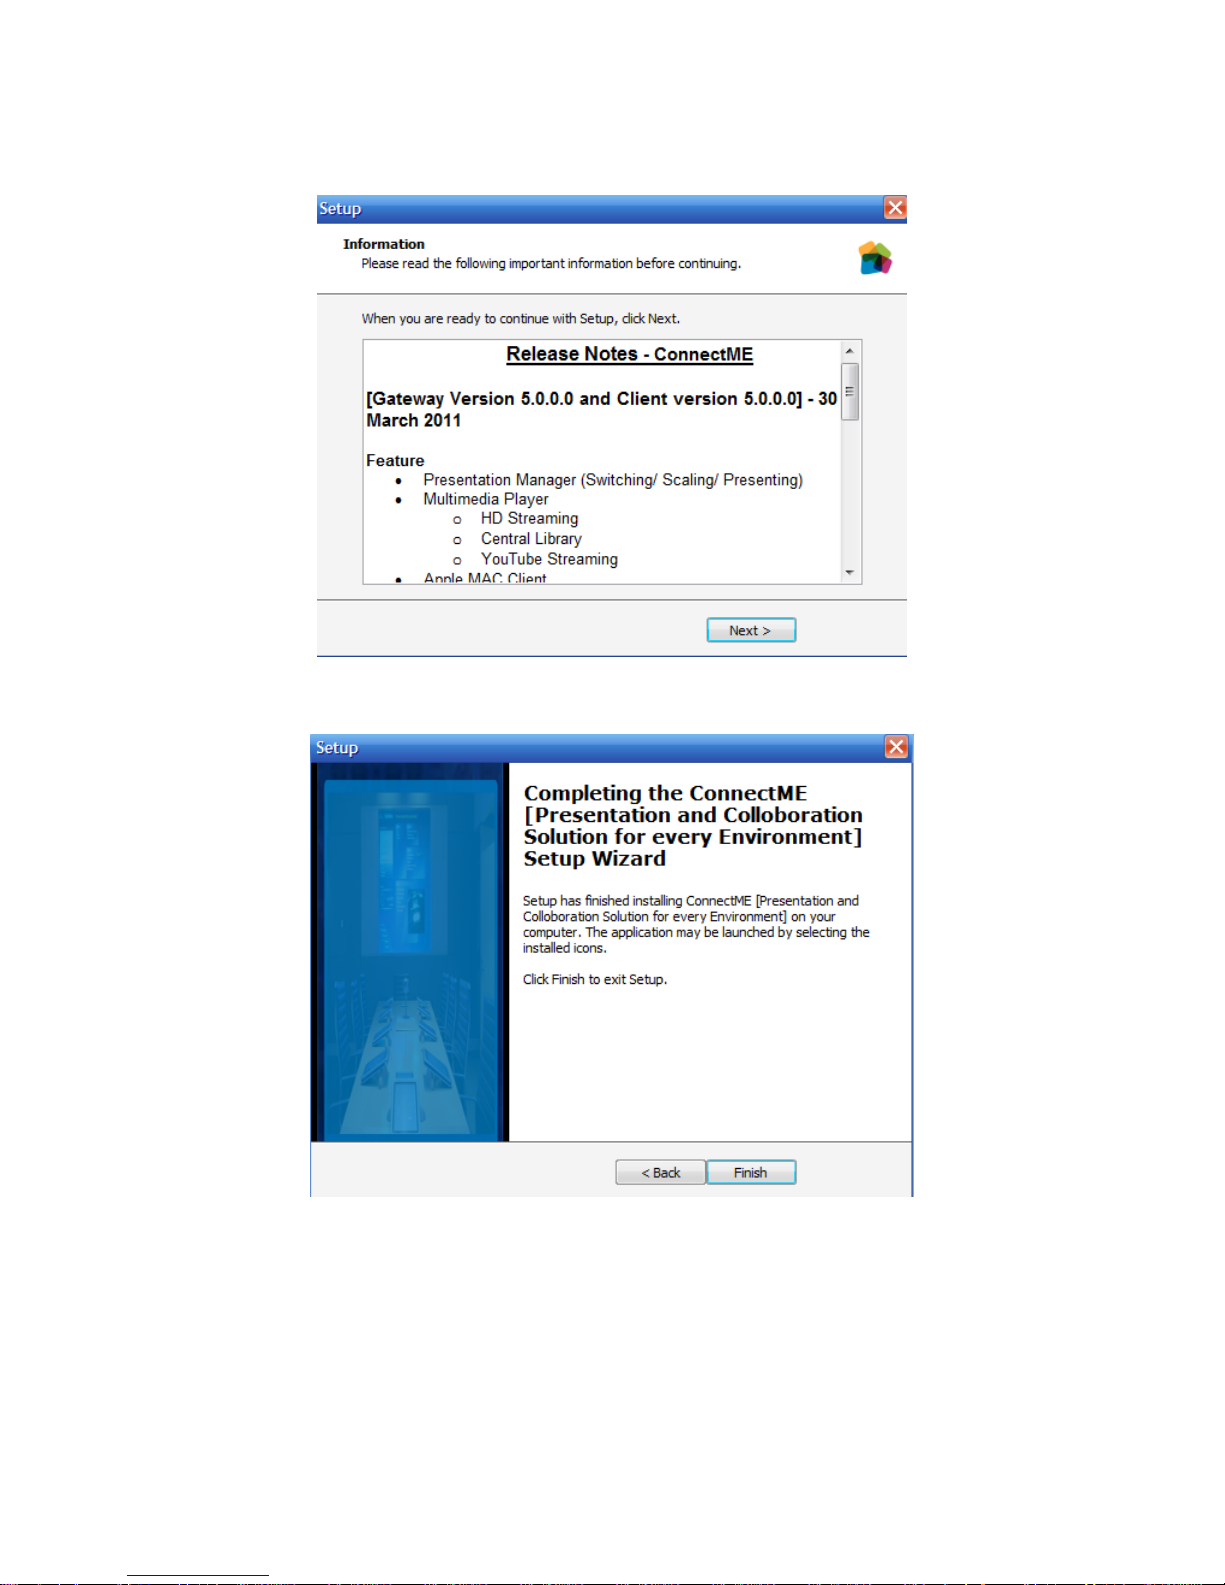
Once the installation is complete, the release notes are displayed:
Click Next > to continue.
The installation is complete. Click Finish to close the installer.
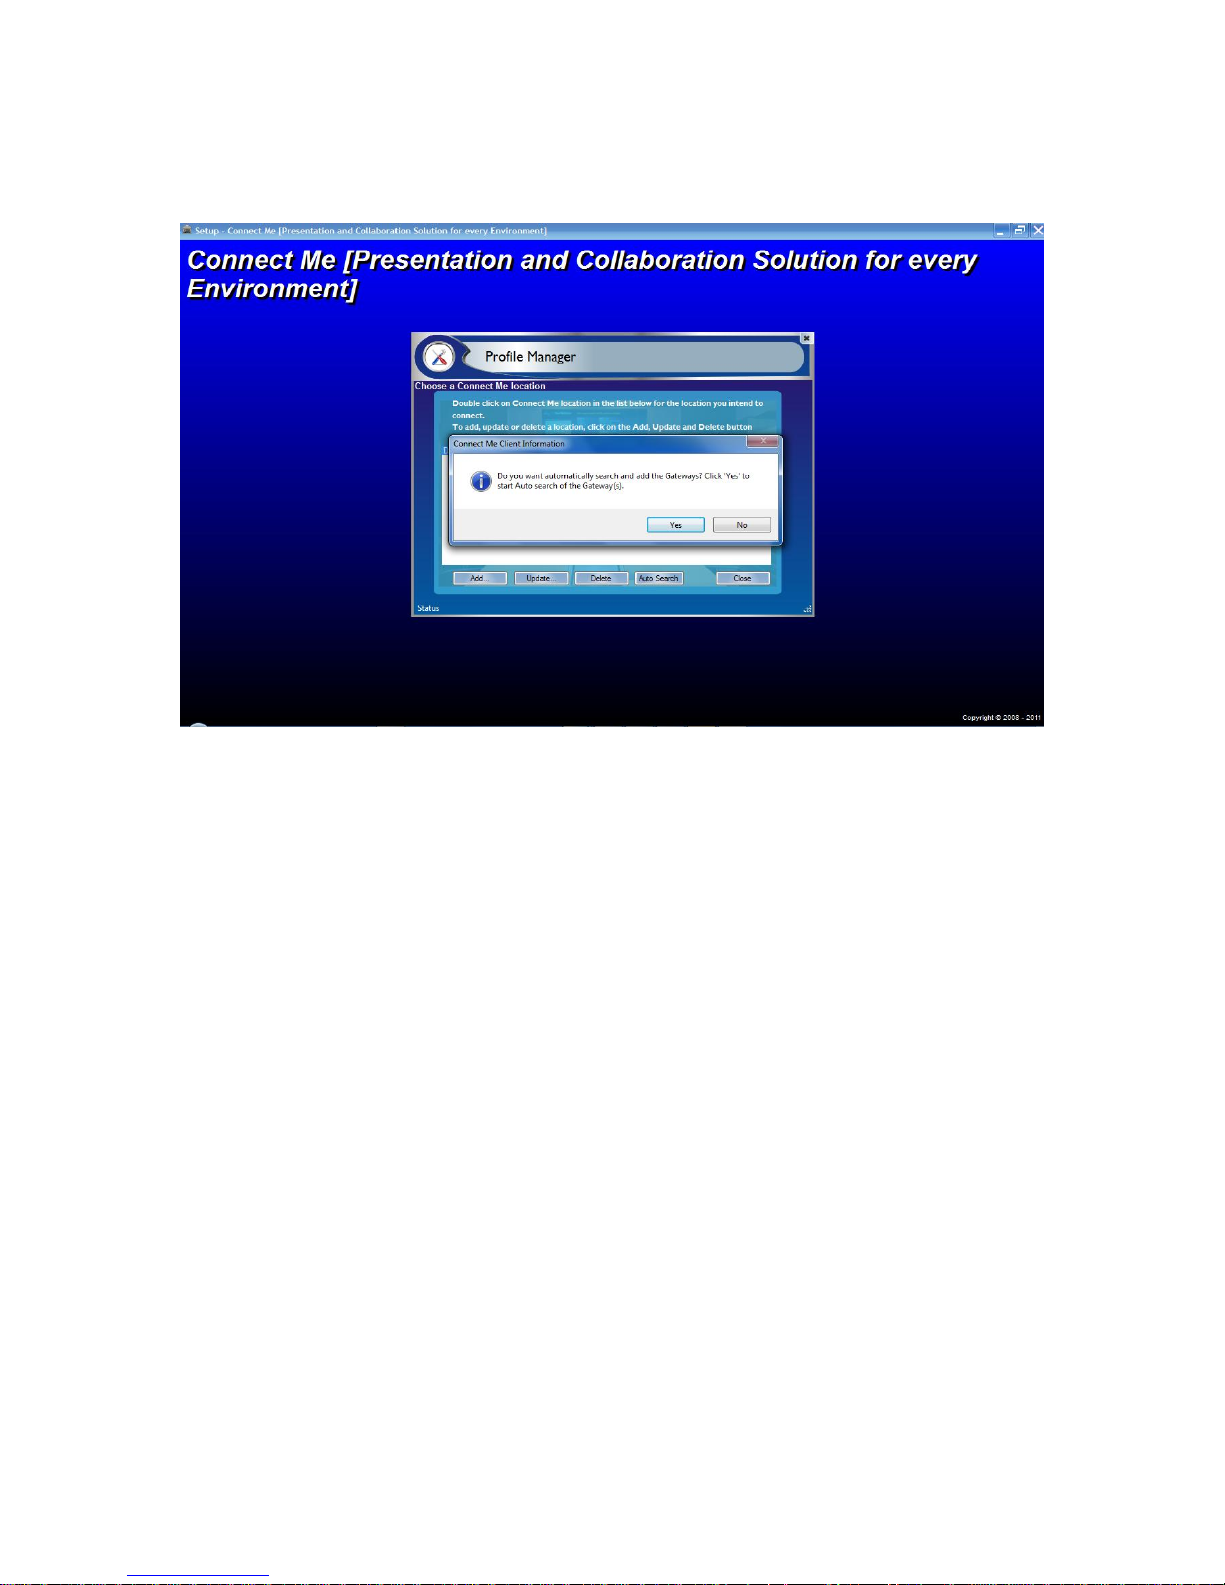
If you have manually started the installer, instead of using Internet Explorer to
install the ConnectME, a window will be shown:
Click on Yes to auto search the Gateways in case it is not found on Add
button to add manually.
o Change the IP Address to the address assigned to the
miniVEOS gateway
o Location can also be changed to another name for easy
reference in future
o Click OK to save the settings
Installing the Microsoft .NET Framework
This section covers the steps to install the .NET Framework manually, if the
ActiveX installation method described in the previous section fails.
Note: This section can be skipped if you already have .NET Framework 2.0
installed.
Click the link under Step 1 of the manual installation instructions to launch the
.NET Framework installer.
The browser will display a security warning before downloading the installer:
Click Run to download the installer to a temporary location on your computer
and run it.
Click Run to accept the security warning.
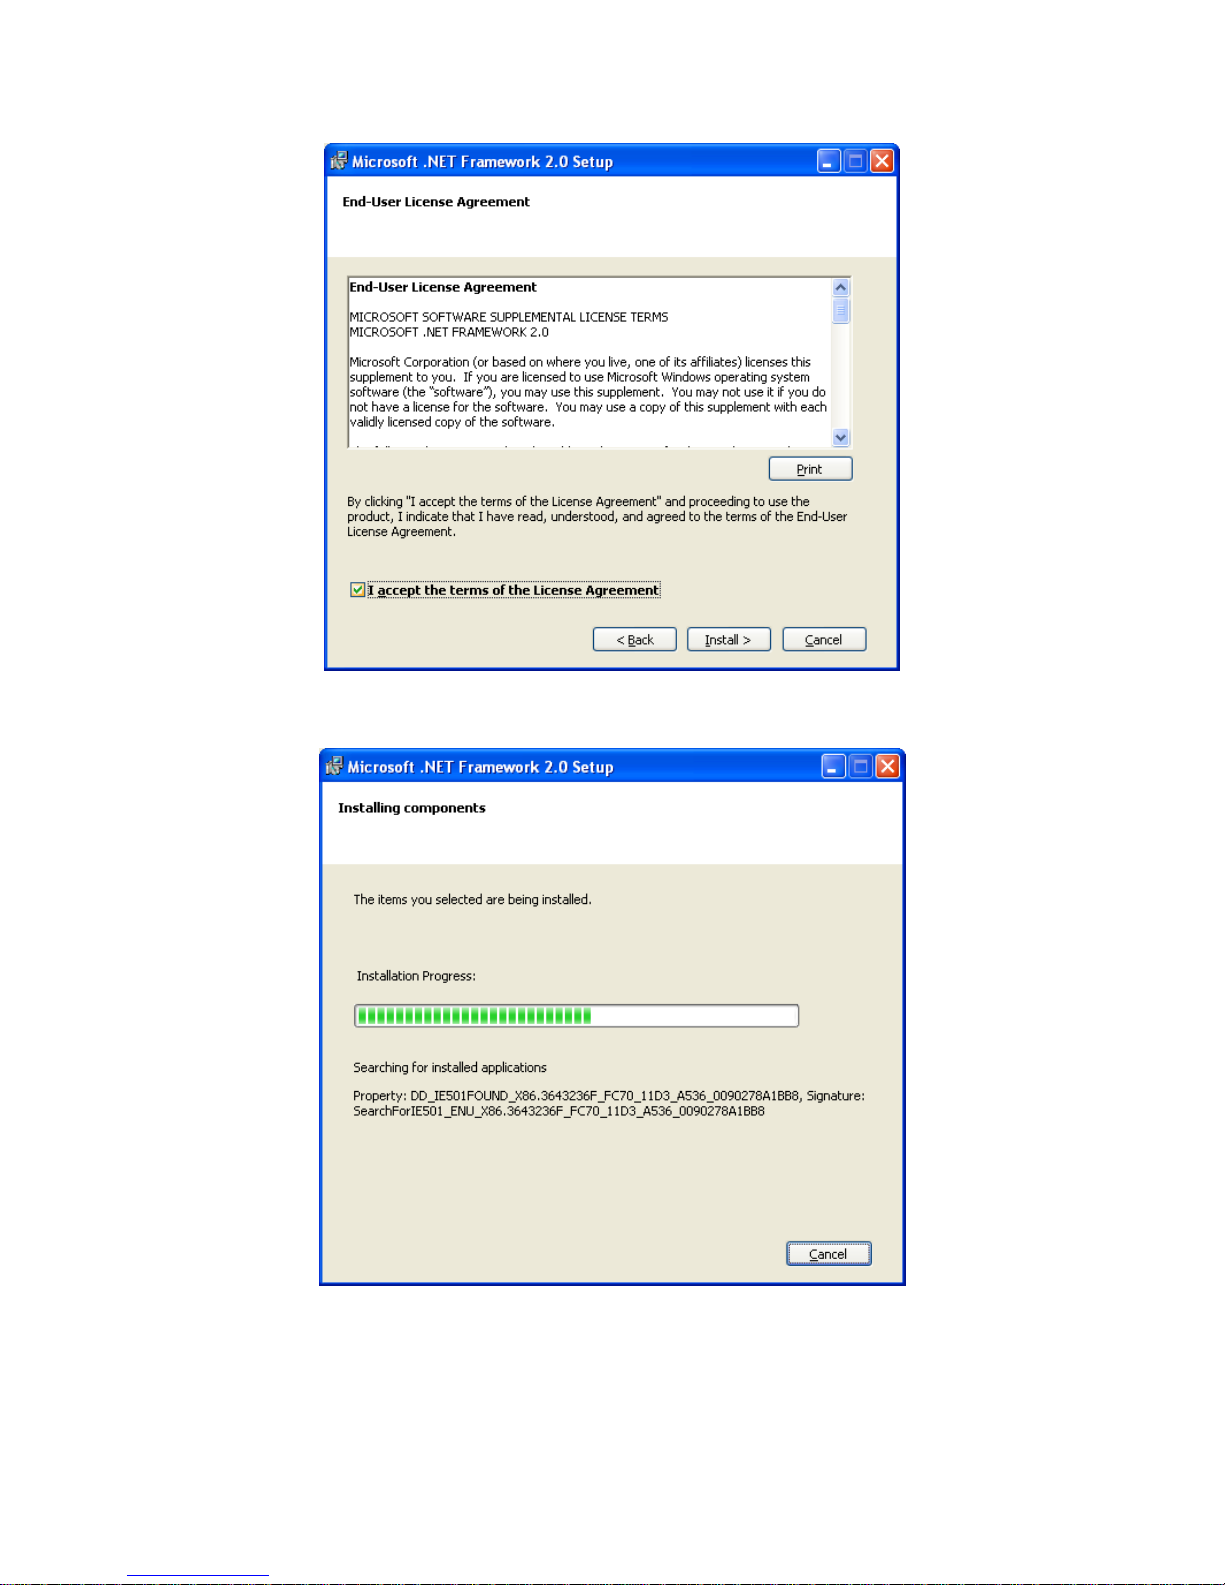
Accept the license agreement and click Install > to begin.
The installation is in progress.

Once the installation is complete, click Finish to close the installer.
Signing in to ConnectME
After installation, a shortcut is added to the Start Menu under WOW Vision >
ConnectME > Launch ConnectME Client.
Click the shortcut to launch the ConnectME.
If you have opted to install an icon to the Windows desktop, you may also use it
to launch the ConnectME:

Next, provide participant credentials to gain access to the proVEOS gateway:
If there are multiple proVEOS gateways in your network, choose a
Location
Enter your User Name and Password
On new installations, default participant accounts are available:
Staff – user name: su / password: supass
Participant – user name: user / password: userpass
Enter a Nick Name for yourself, if it is different from your user name
Check Remember Me if you are on a secured and personal machine,
and wish to save your user name and password locally so that it need not
be entered in future
Check Start on start-up if you want the ConnectME software to
start automatically once you log in to Windows
Check Sign me in automatically if you want the ConnectME
software to automatically sign you in once it is started
Click the Login button to sign in
Once the Login button is clicked, the software initiates an outgoing network
connection to proVEOS.
This may trigger firewall software to display a warning prompt. It is recommended
to choose the option that will allow the ConnectME to always make such
connections without any future warnings.
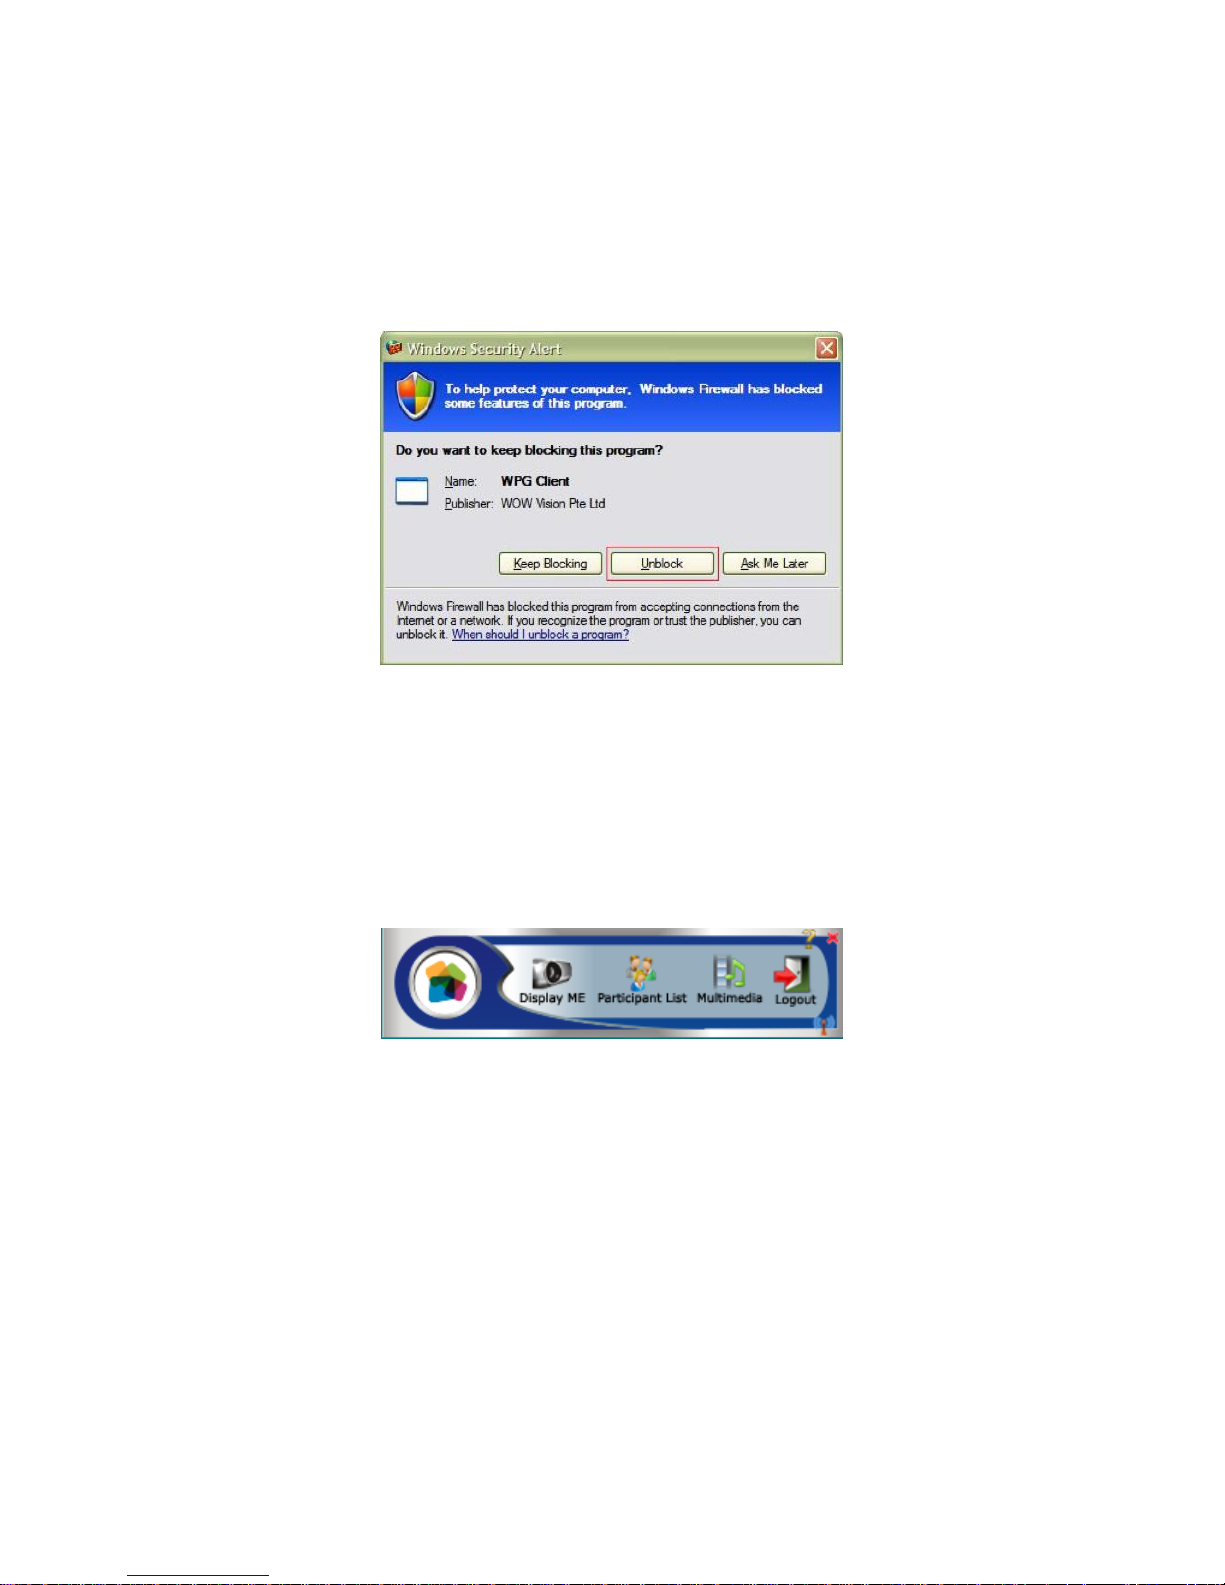
If the Windows Firewall in Windows XP Service Pack 2 and above is used, a
Windows Security Alert window will pop up:
Click Unblock to allow the ConnectME to make outgoing connections to the
proVEOS gateway in future.
Note: Other firewall software installed on your computer may also produce a
similar prompt.
Once the ConnectME connects to the proVEOS gateway successfully, the main
menu is available:
The resolution of your desktop will also be changed to 1024 x 768 pixels to
match the resolution projected by ConnectME to the connected projector. The
original desktop resolution will be restored once you logout from ConnectME.

proVEOS will also show the default display background:
Note: See Changing the Display Background on page 33 to upload your own
background image.

Installing the
proVEOS
Software for
Mac

The proVEOS Software is also available for Apple Macintosh computers running
the Mac OS X operating system.
Minimum system requirements:
Mac OS X 10.4 Tiger and above
256MB RAM or more
Configuring the Firewall
Before installing the proVEOS software, configure the Firewall in Mac OS X to
allow the proVEOS software to connect and communicate with the proVEOS
gateway.
Installing the Mac proVEOS Software
Downloading the Installer
Open a web browser like Safari and enter the address of the proVEOS gateway
and press Return.
Note: The IP address is usually an internal domain name allocated by the
system administrator (e.g. projector.company.com) or an internal IP
address (e.g. 10.x.x.x or 192.168.x.x). New proVEOS units are
configured with a default IP address of 192.168.1.1. The subnet mask is
255.255.255.0.

The proVEOS web page is loaded:
Locate the proVEOS MAC Client link and click it.
The browser will download an installation package file to the default download
location configured in the browser.

Presenting
with
ConnectME
 Loading...