

WOW! Air Swimmers Instruction Manual
Instructions for assembly and flying of Shark & Clownfish*
8+
*For the purposes of illustrations a Clownfish has been used
For easy to follow video instructions on assembling and flying your Air Swimmer go to
www.wowstuff.co.uk/airswimmers
1.
For easy to follow video instructions go to www.wowstuff.co.uk/airswimmers
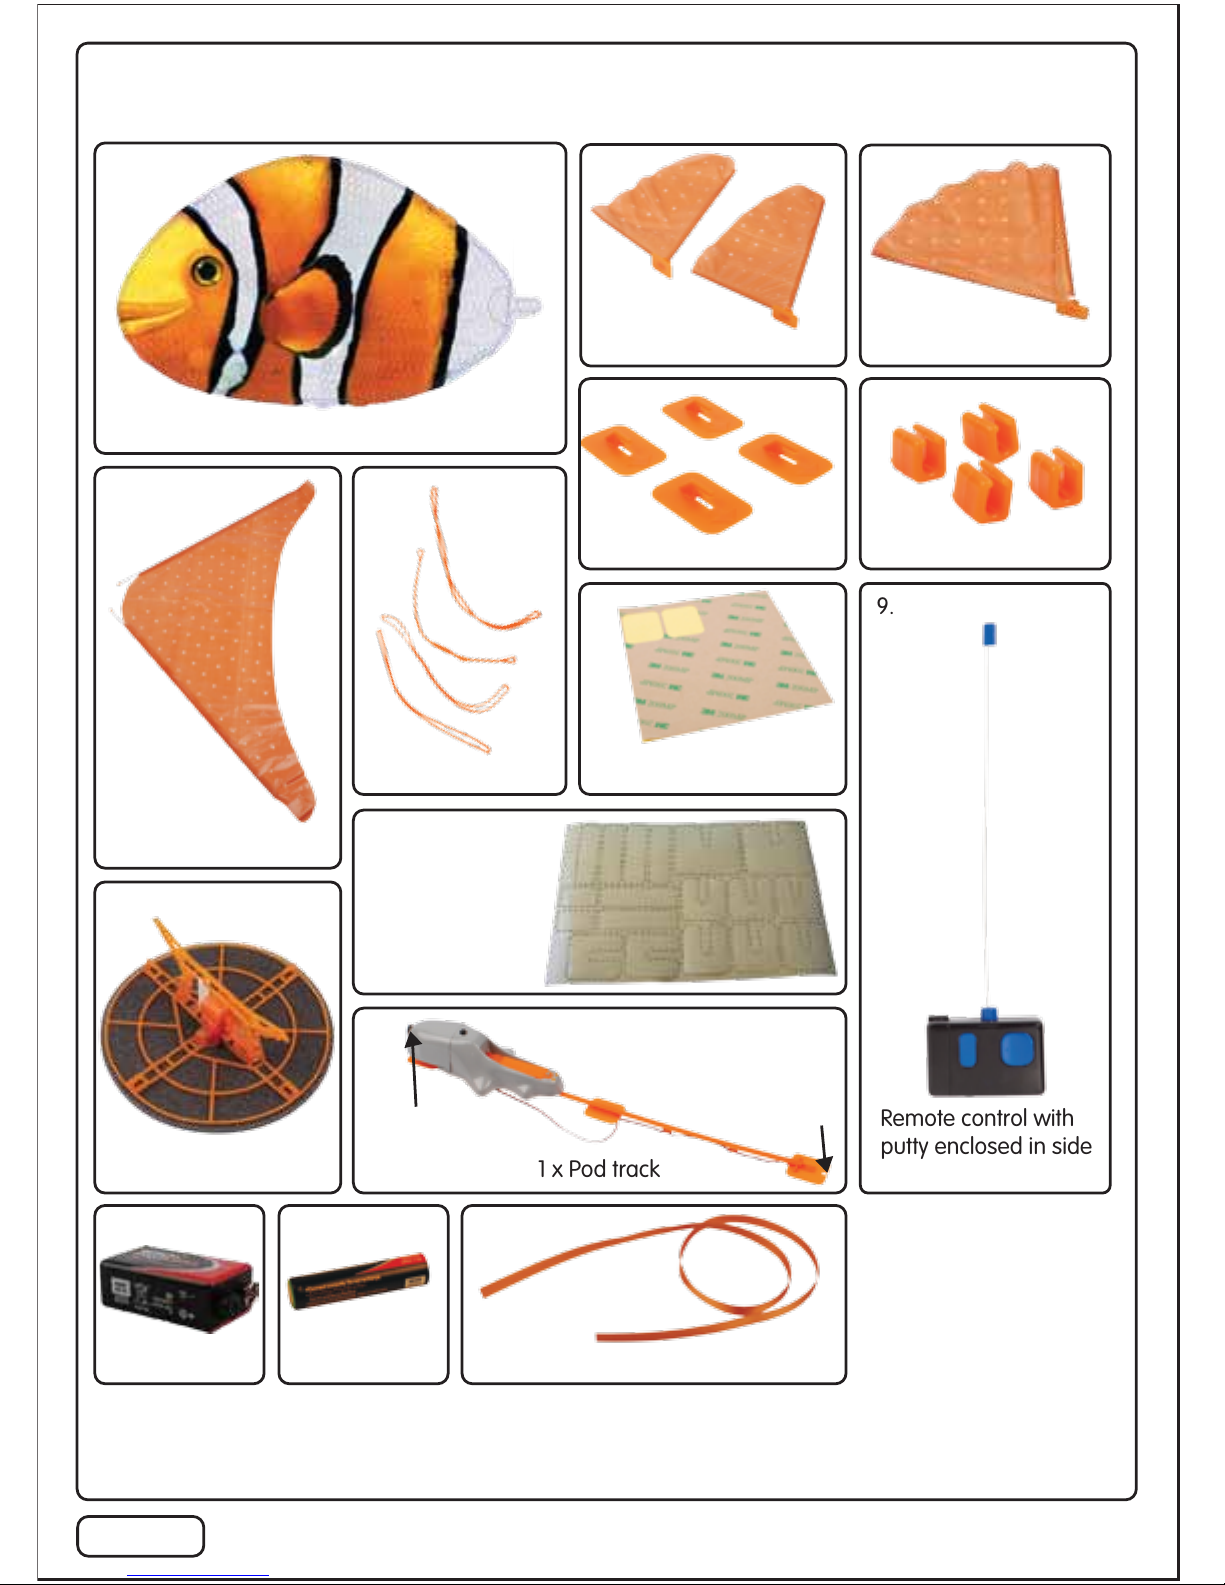
Contents of Air Swimmers Clownfish Box
1 x Air Swimmers Clownfish balloon
1.
2 x Underbelly fins
1 x Tail fin
4 x Hooks
1 x Tail motor unit
1 x Ribbon1 x AAA battery1 x 9V battery
4 x Fastening clips
1 x Back fin
4 x Elastic bands
1 x Pod track
12 x Double sided sticky pads
2.
6. 7.
9. 8.
5.
11.
12.
4.
10.
13. 14. 15.
3.
Remote control with
putty enclosed in side
compartment.
18 x Clear
tape tabs
A
B
C
Additional tool required: small cross head screwdriver
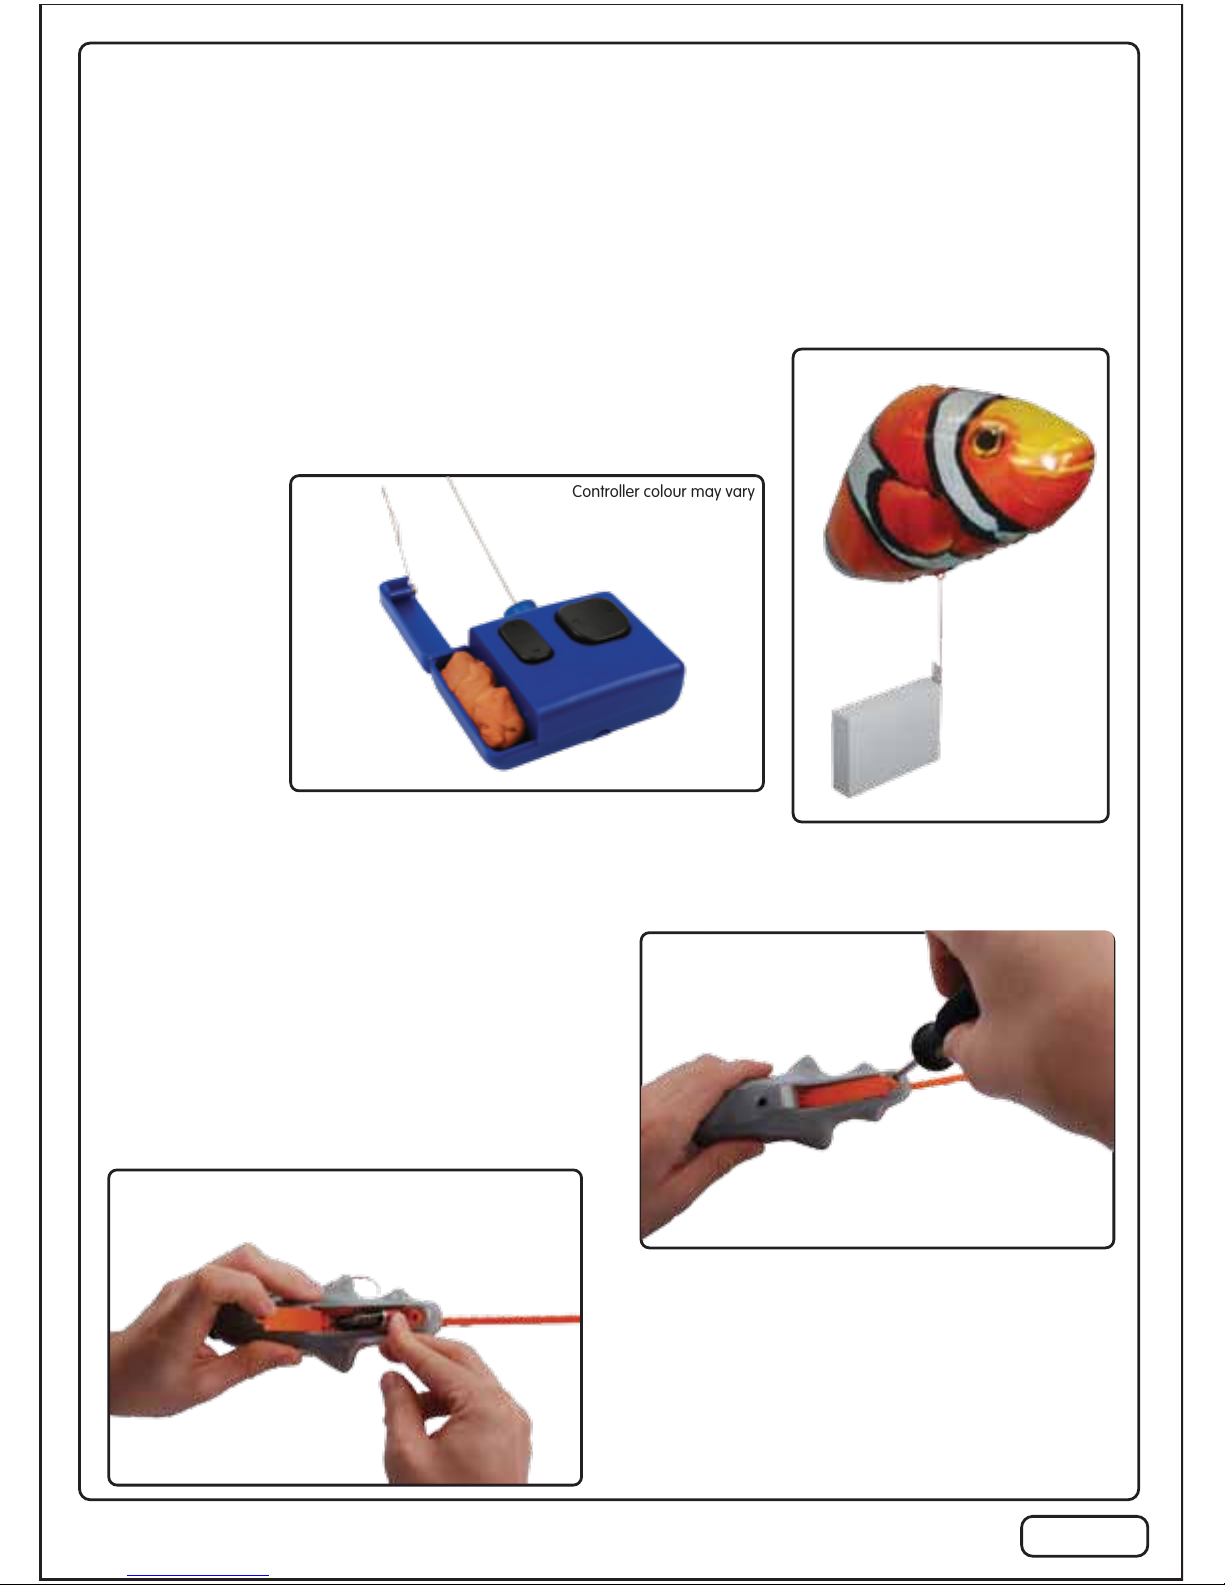
Controller colour may vary
Mouth for putty
End of pod
For spare parts please go to
www.wowstuff.co.uk/airswimmers
2.
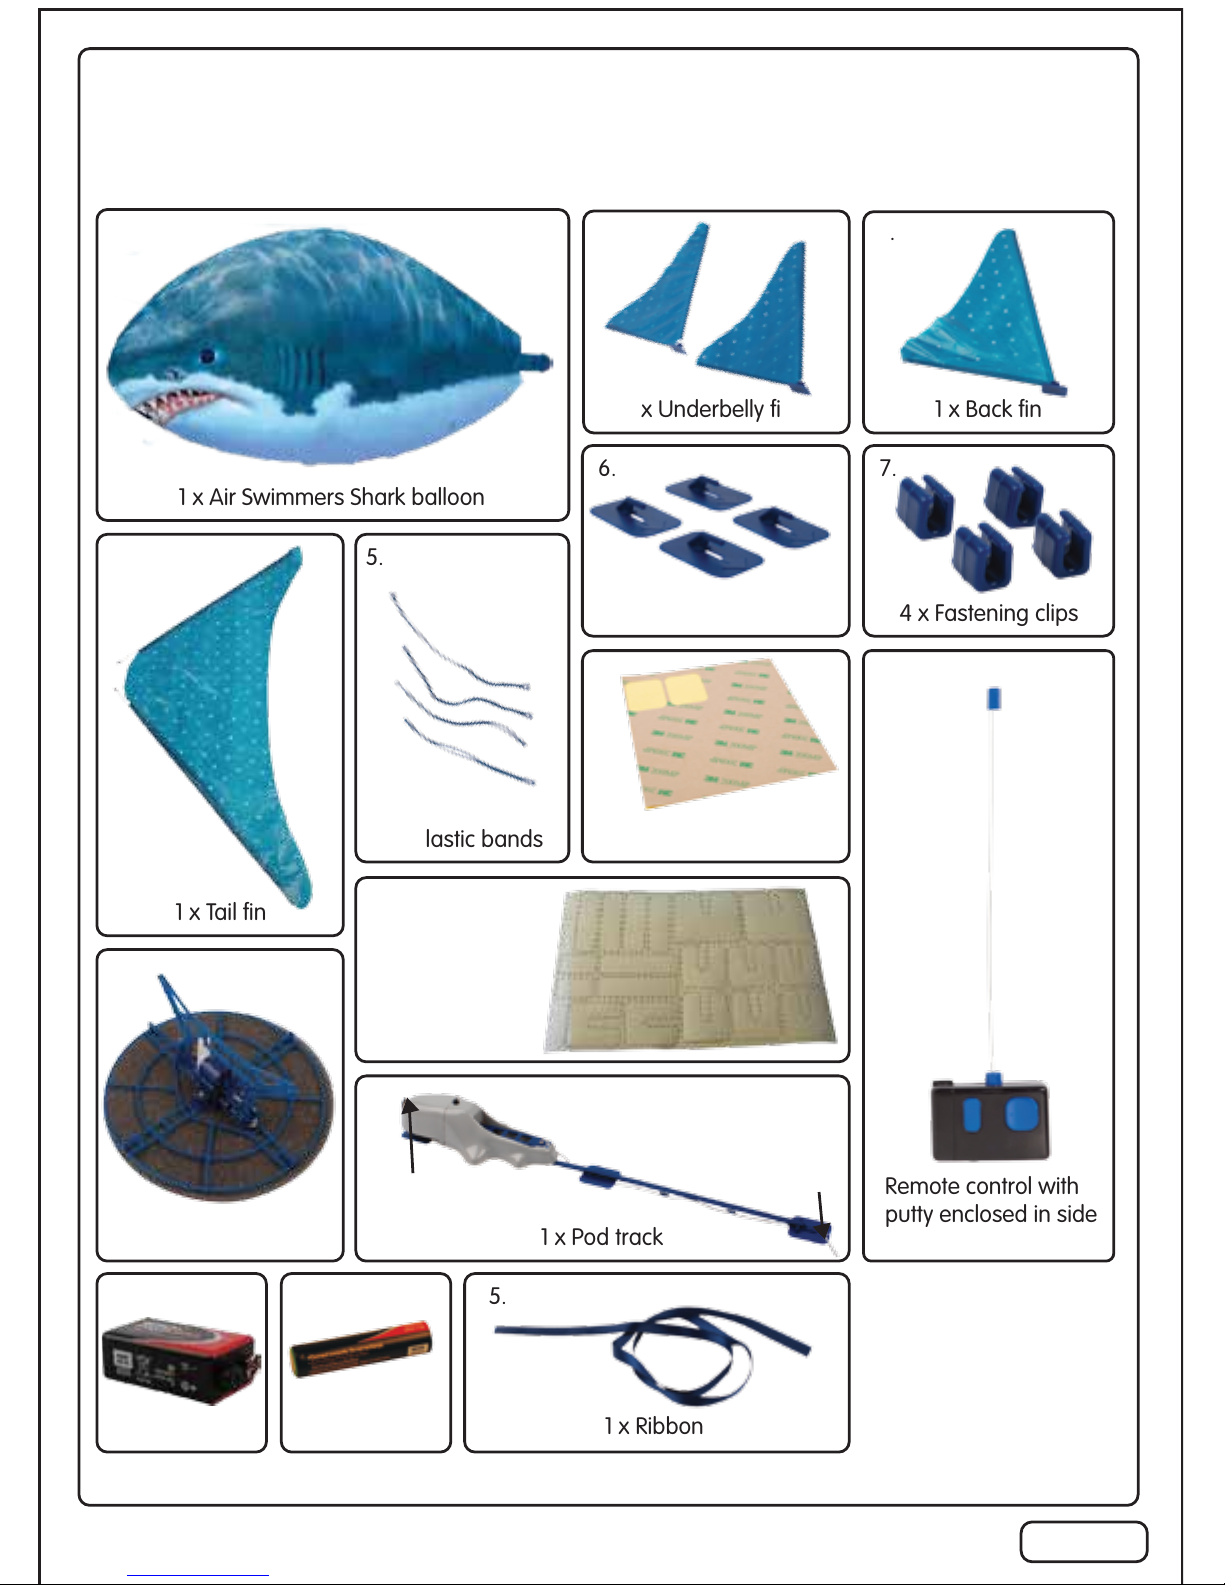
Contents of Air Swimmers Shark Box
1 x Air Swimmers Shark balloon
2 x Underbelly fins
1 x Tail fin
4 x Hooks
1 x Tail motor unit
18 x Clear
tape tabs
1 x Ribbon1 x AAA battery1 x 9V battery
Remote control with
putty enclosed in side
compartment.
4 x Fastening clips
1 x Back fin
4 x Elastic bands
1 x Pod track
12 x Double sided sticky pads
2.
6. 7.
9. 8.
5.
11.
12.
14. 15.
3.
A
B
C
Additional tool required: small cross head screwdriver
Controller colour may vary
Mouth for putty
End of pod
For spare parts please go to
www.wowstuff.co.uk/airswimmers
3.
For easy to follow video instructions go to www.wowstuff.co.uk/airswimmers
IMPORTANT: PLEASE READ FULLY BEFORE ASSEMBLY
THIS PRODUCT IS ONLY TO BE USED INDOORS
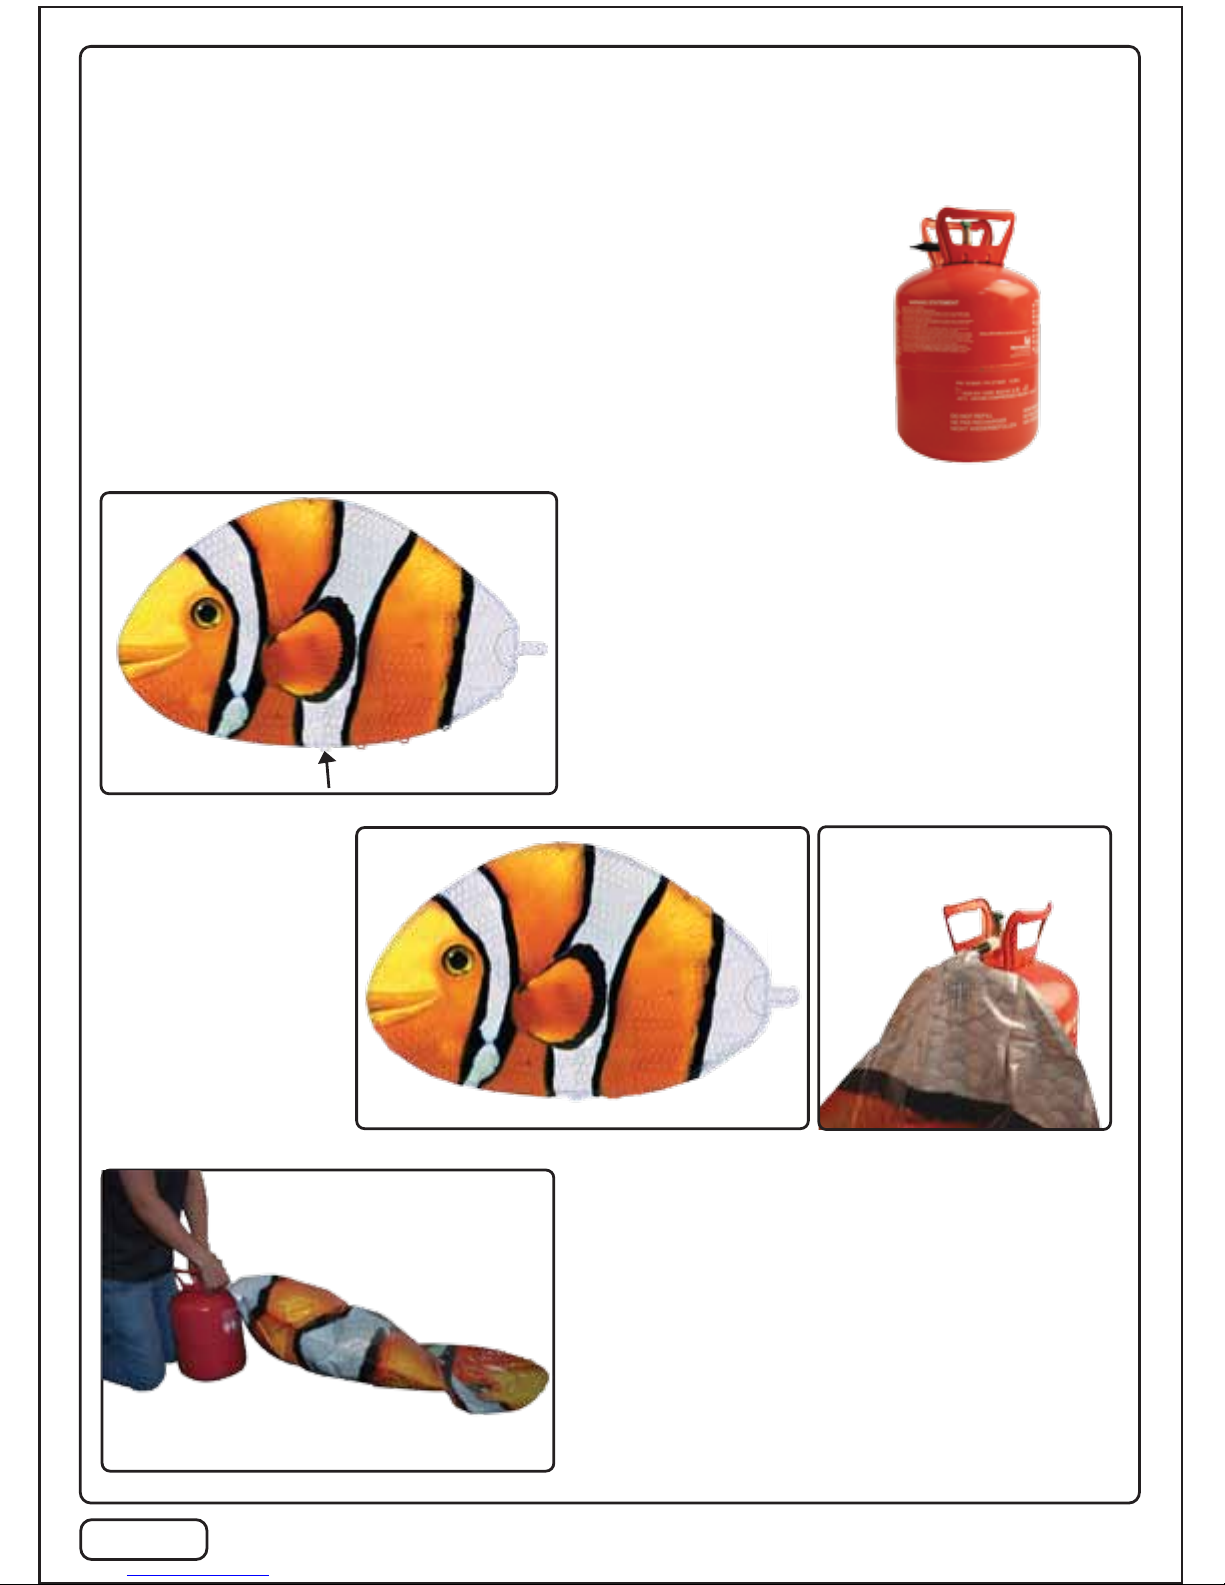
Filling with helium
Fill your Air Swimmer at most party shops, flower shops and good retail
stockists. You may also buy your own helium tank that will allow you to
fill your Air Swimmer at home.
Note. Helium tanks should be used by adults only. Before using helium
tanks please consult any instruction manuals provided. It is recommended
two people carry out this assembly.
1. Tie the enclosed ribbon (15) to the loop indicated
at the bottom of the Air Swimmer and attach the
other end to the tag on the packaging. This will
stop the Air Swimmer floating off when inflated.
3. Release the helium slowly so that the balloon
starts to inflate and increase gradually until the
balloon is full and firm.
Warning: Do not over inflate the balloon.
The value is one way so does not require sealing
after inflating.
2. To fill the Air Swimmer
with helium, lay the
Air Swimmer balloon
(1) out flat on the
ground and insert
the helium tank nozzle
into the valve at the
back of the balloon.
Tie ribbon here
4.
Note. After a few days you may find that the Air Swimmer may lose some of its buoyancy,
therefore you will need to top up the balloon on a regular basis. After several top ups the
helium inside the balloon may become mixed with air and need to be emptied fully and
then refilled.
Warning: Do not inhale helium. Use only in a well ventilated area. Never use in closed spaces.
Helium reduces and can eliminate oxygen available for breathing. Inhaling helium can result in
serious personal injury or death.
Warning: DO NOT OVER INFLATE THE BALLOON.
Only inflate with helium. Do not use other type of gas.
Do not use any other inflations device such as a foot pump.
Inserting the batteries
Please ensure that batteries are installed by
an adult.
Pod Track
The pod track (12) requires 1 x AAA battery (14).
1. Unscrew the battery cover using a cross
head screwdriver.
2. Insert the battery according to polarity
shown. Screw the battery cover back
into place.
- +
Assembling your Air Swimmer
After filling the Air Swimmer balloon, you are ready for assembly. It is recommended two
people carry out this assembly.
To empty your Air Swimmer, insert a narrow drinking straw (maximum 6mm / 0.24 ins) into the
valve by at least 7 inches. Inserting a thicker diameter straw may damage the one way valve.
Controller colour may vary
You can
store your
Air Swimmer
by attaching
the ribbon to
the box or
using the
hook on
the controller.
 Loading...