

Page 1
SAFETY AND OPERATING MANUAL
ORIGINAL INSTRUCTIONS
CORDLESS DRILL WU127 W U127.9
Page 2

2
General power tool safety
warnings
Warning! Read all safety warnings and all instructions. Failure
to follow the warnings and instructions may result in electric shock, fire
and/or serious injury.
Save all warnings and instructions for future reference.
The term “power tool” in the warnings refers to your mains-operated
(corded) power tool or battery-operated (cordless) power tool.
WORK AREA SAFETY
1
a) Keep work area clean and well lit. Cluttered or dark areas invite
accidents.
b) Do not operate power tools in explosive atmospheres, such as
in the presence of flammable liquids, gases or dust. Power tools
create sparks which may ignite the dust or fumes.
c) Keep children and bystanders away while operating a power
tool. Distractions can cause you to lose control.
ELECTRICAL SAFETY
2
a) Power tool plugs must match the outlet. Never modify the
plug in any way. Do not use any adapter plugs with earthed
(grounded) power tools. Unmodified plugs and matching outlets will
reduce risk of electric shock.
b) Avoid body contact with earthed or grounded surfaces, such
as pipes, radiators, ranges and refrigerators. There is an increased
risk of electric shock if your body is earthed or grounded.
c) Do not expose power tools to rain or wet conditions. Water
entering a power tool will increase the risk of electric shock.
d) Do not abuse the cord. Never use the cord for carrying, pulling
or unplugging the power tool. Keep cord away from heat, oil,
sharp edges or moving parts. Damaged or entangled cords increase
the risk of electric shock.
e) When operating a power tool outdoors, use an extension
cord suitable for outdoor use. Use of a cord suitable for outdoor use
reduces the risk of electric shock.
f) If operating a power tool in a damp location is unavoidable,
use a residual current device (RCD) protected supply. Use of an
RCD reduces the risk of electric shock.
PERSONAL SAFETY
3
a) Stay alert, watch what you are doing and use common sense
when operating a power tool. Do not use a power tool while you
are tired or under the influence of drugs, alcohol or medication.
A moment of inattention while operating power tools may result in
serious personal injury.
b) Use personal protective equipment. Always wear eye
protection. Protective equipment such as dust mask, non-skid safety
shoes, hard hat, or hearing protection used for appropriate conditions
will reduce personal injuries.
c) Prevent unintentional starting. Ensure the switch is in the
off-position before connecting to power source and/or battery
pack, picking up or carrying the tool. Carrying power tools with your
finger on the switch or energising power tools that have the switch on
invites accidents.
d) Remove any adjusting key or wrench before turning the
power tool on. A wrench or a key left attached to a rotating part of
the power tool may result in personal injury.
Page 3

3
e) Do not overreach. Keep proper footing and balance at all
times. This enables better control of the power tool in unexpected
situations.
f) Dress properly. Do not wear loose clothing or jewellery. Keep
your hair, clothing and gloves away from moving parts. Loose
clothes, jewellery or long hair can be caught in moving parts.
g) If devices are provided for the connection of dust extraction
and collection facilities, ensure these are connected and properly
used. Use of dust collection can reduce dust-related hazards.
4
POWER TOOL USE AND CARE
a) Do not force the power tool. Use the correct power tool for
your application. The correct power tool will do the job better and
safer at the rate for which it was designed.
b) Do not use the power tool if the switch does not turn it on
and off. Any power tool that cannot be controlled with the switch is
dangerous and must be repaired.
c) Disconnect the plug from the power source and/or the battery
pack from the power tool before making any adjustments,
changing accessories, or storing power tools. Such preventive
safety measures reduce the risk of starting the power tool accidentally.
d) Store idle power tools out of the reach of children and do
not allow persons unfamiliar with the power tool or these
instructions to operate the power tool. Power tools are dangerous
in the hands of untrained users.
e) Maintain power tools. Check for misalignment or binding of
moving parts, breakage of parts and any other condition that
may affect the power tool’s operation. If damaged, have the
power tool repaired before use. Many accidents are caused by
poorly maintained power tools.
f) Keep cutting tools sharp and clean. Properly maintained cutting
tools with sharp cutting edges are less likely to bind and are easier to
control.
g) Use the power tool, accessories and tool bits etc. in
accordance with these instructions, taking into account the
working conditions and the work to be performed. Use of the
power tool for operations different from those intended could result in
a hazardous situation.
5
BATTERY TOOL USE AND CARE
a) Recharge only with the charger specified by the manufacturer.
A charger that is suitable for one type of battery pack may create a risk
of fire when used with another battery pack.
b) Use power tools only with specifically designated battery
packs. Use of any other battery packs may create a risk of injury and
fire.
c) When battery pack is not in use, keep it away from other
metal objects, like paper clips, coins, keys, nails, screws or
other small metal objects, that can make a connection from one
terminal to another. Shorting the battery terminals together may
cause burns or a fire.
d) Under abusive conditions, liquid may be ejected from the
battery; avoid contact. If contact accidentally occurs, flush with
water. If liquid contacts eyes, additionally seek medical help.
Liquid ejected from the battery may cause irritation or burns.
6
SERVICE
a) Have your power tool serviced by a qualified repair person
using only identical replacement parts. This will ensure that the
safety of the power tool is maintained.
Page 4

4
Additional safety rules for your
Cordless drill
Remove the battery pack from the drill before carrying out
1
adjustments.
Do not expose to rain or water.
2
Do not store the battery pack in temperatures over 40oC.
3
Always charge the batter y pack between temperatures 0oC to
4
30oC. Ideal charging temperature is 18oC to 24oC.
Only use the charger and the battery pack provided no others.
5
Avoid short circuit of the battery pack connections (screws & nails).
6
Do not incinerate or burn the battery pack, it may explode.
7
Do not charge a damaged battery pack.
8
Replace any damaged supply cords on your charger.
9
Always disconnect the charger power supply before making or
10
breaking the connections to the battery pack.
Battery pack and charger will be warm during charging this is
11
normal.
When not in use, remove a charged battery pack from the charger.
12
Always remove the battery pack from the charger immediately
13
after re-charging is completed.
Your drill and battery pack will be warm when working, this is
14
normal.
Do not dispose of batteries in fire, or with household waste. Return
15
exhausted batteries to your local collection or recycling point.
Always check walls, floors and ceilings for hidden power cables
16
and pipes.
Use auxiliar y handle(s), if supplied with the tool. Loss of
17
control can cause personal injury.
Accessories and metal par ts can become very hot.
18
19
Hold power tool by insulated gripping surfaces, when
performing an operation where the cut ting accessory may
contact hidden wiring. Cutting accessory contacting a “live” wire
may make exposed metal parts of the power tool “live” and could
give the operator an electric shock.
Warning: If a small amount of electrolyte should leak
from the battery pack under extremes of temperature or after
heavy use, then wash off immediately from your skin and
hands using clean water. For eye contact, rinse thoroughly with
clean water and seek medical treatment immediately.
Page 5

5
Symbols
To reduce the risk of injury, user must read instruction
manual
Warning
Wear ear protection
Wear eye protection
Wear dust mask
Indoor use only
Do not expose to rain or water
Do not burn
Do not dispose of batteries. Return exhausted batteries to
your local collection or recycling point
Page 6

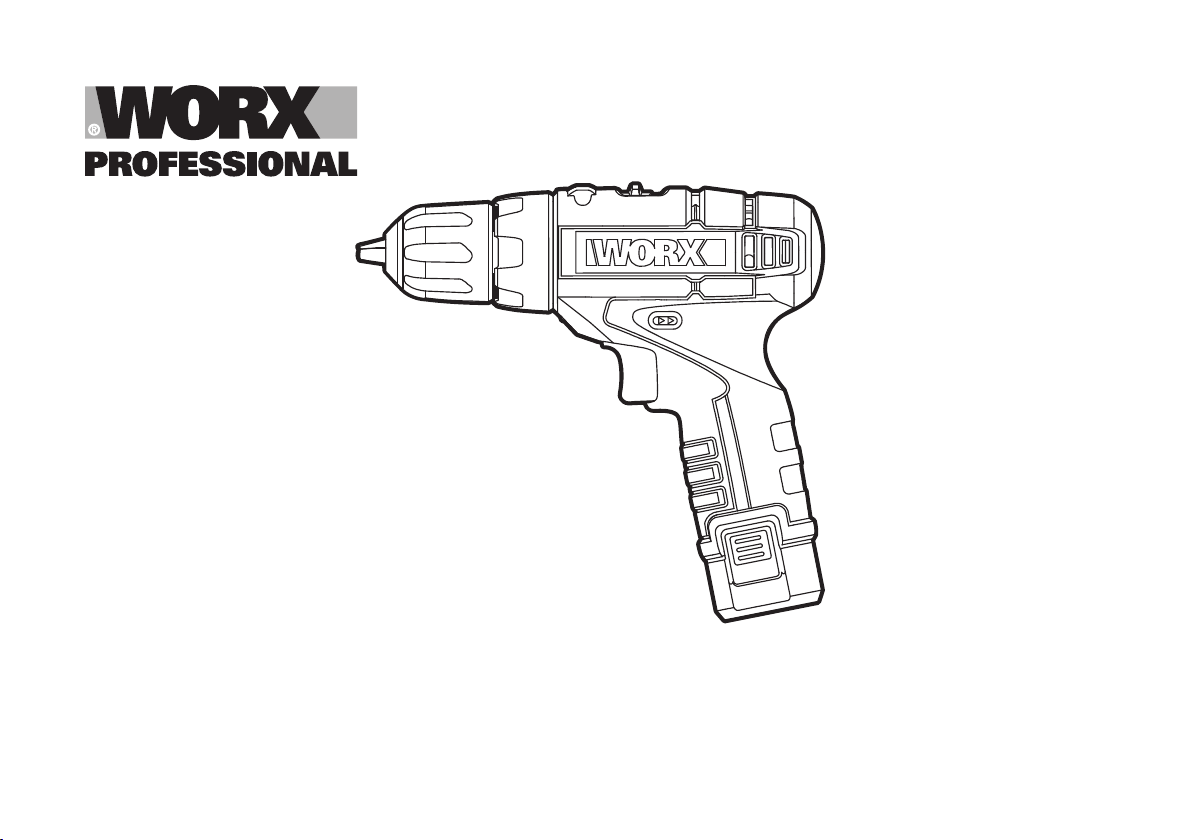
6
Component list
Keyless chuck
1
Torque adjustment ring
2
Two-speed gear control
3
Forward/ Reverse rotation control
4
Soft grip handle
5
Battery pack release button
6
Battery pack *
7
On/ off switch
8
LED light
9
1
2 3
* Not all the accessories illustrated or described are included in
standard delivery.
9
4
8
5
6
7
Page 7

7
Technical data
Vibration information
WU127 WU127.9
Voltage 12V
•
No load speed 0-350 / 0-1300/min
•
Number of clutch positions 15+1
•
Max torque(soft/hard) 14/24N.m
•
•
Chuck capacity 10mm
Max. drilling
•
capacity
Charging time 30min
•
Machine weight 1.0kg
•
Steel 10mm
Wood 20mm
Noise information
A weighted sound pressure LPA: 73dB (A)
•
A weighted sound power LWA: 84dB(A)
•
K
& KWA 3.0dB(A)
•
PA
Wear ear protection when sound pressure is over 80dB(A)
•
Vibration total values (triax vector sum) determined according to
•
EN 60745:
Vibration emission value
= 1.24m/s²
Drilling into metal
•
Warning: The vibration emission value during actual use of the
power tool can differ from the declared value depending on the ways
in which the tool is used dependant on the following examples and
other variations on how the tool is used:
How the tool is used and the materials being cut or drilled.
The tool being in good condition and well maintained
The use the correct accessory for the tool and ensuring it is sharp and
in good condition.
The tightness of the grip on the handles and if any anti vibration
accessories are used.
And the tool is being used as intended by its design and these
instructions.
This tool may cause hand-arm vibration syndrome if its use is not
adequately managed.
Warning: To be accurate, an estimation of exposure level in
the actual conditions of use should also take account of all parts of
the operating cycle such as the times when the tool is switched off
and when it is running idle but not actually doing the job. This may
a
h
Uncertainty K = 1.5m/s²
Page 8

8
significantly reduce the exposure level over the total working period.
Helping to minimize your vibration exposure risk.
ALWAYS use sharp chisels, drills and blades.
Maintain this tool in accordance with these instructions and keep well
lubricated (where appropriate).
If the tool is to be used regularly then invest in anti vibration
accessories.
Avoid using tools in temperatures of 100C or less.
Plan your work schedule to spread any high vibration tool use across a
number of days.
Accessories
WU127 W U12 7.9
1.3Ah lithium battery pack (WA3509) 2 /
•
Charger(WA3845) 1 /
•
Double ended bit 1 1
•
We recommend that you purchase your accessories from the same
store that sold you the tool. Use good quality accessories marked
with a well-known brand name. Choose the type according to the
work you intend to undertake. Refer to the accessory packaging for
further details. Store personnel can assist you and offer advice.
Page 9

9
Operating instructions
A B
Note: Before using the tool, read the instruction book carefully.
INTENDED USE
The machine is intended for driving in and loosening screws as well
as for drilling in wood, metal and plastic.
BEFORE PUTTING INTO OPERATION
• CHARGING THE BATTERY
The battery charger supplied is matched to the Li-ion battery
installed in the machine. Do not use another batter y charger.
The Li-ion battery is protected against deep discharging. When
the battery is empty, the machine is switched off by means of a
protective circuit: The tool holder no longer rotates.
In a warm environment or after heavy use, the battery pack may
become too hot to permit charging. Allow time for the battery to
cool down before recharging.
When the battery pack is charged for the first time and after
prolonged storage, the battery pack will accept a 100% charge
after several charge and discharge cycles.
• TO REMOVE OR INSTALL BATTERY PACK (See A)
Depress the battery pack release button to release and slide the
battery pack out from your tool. After recharge, slide it back into
your tool. A simple push and slight pressure will be sufficient.
OPERATION
1
ON / OFF SWITCH (See B)
Depress the On/Off switch to start and release it to stop your drill.
Page 10

10
The on/off switch is fitted with a brake function which stops your
A B
C D
chuck immediately when you quickly release the switch.
It is also a variable speed switch that delivers higher speed and
torque with increased trigger pressure. Speed is controlled by the
amount of switch trigger depression.
Warning: Do not operate for long periods at low speed
because excess heat will be produced internally.
2
SWITCH LOCK
The switch trigger can be locked in the OFF position. This helps
to reduce the possibility of accidental starting when not in use.
To lock the switch trigger, place the rotation control in the center
position.
3
REVERSIBLE ( See B)
For drilling and screw driving use forward rotation marked “ ”
(lever is moved to the left). Only use reverse rotation marked
“ ” (lever is moved to the right) to remove screws or release a
jammed drill bit.
Warning: Never change the direction of rotation when
the chuck is rotating, wait until it has stopped!
4
TWO-SPEED GEAR CONTROL (See C)
The drill has a two- speed gear control designed for drilling or
driving at LO (mark is 1) or HI (mark is 2) speeds. A slide switch is
located on top of the drill to select either LO or HI speed. When
using the drill in the LO speed range, the speed will decrease and
the drill will have greater power and torque. When using the drill in
the HI speed range, the speed will increase and the drill will have
less power and torque.
Page 11

11
Gear I
D
A B
C D
E F
Low speed range: for screwdriving or working with large drilling
diameter.
Gear II
High speed range: for working with small drilling diameter.
Warning: To prevent gear damage, always allow the
chuck to come to a complete stop before changing the
direction of rotation or the two-speed gear control.
5
CHUCK ADJUSTMENT (See D)
To open the chuck jaws rotate the front section of the chuck. Insert
the drill bit between the chuck jaws and rotate the front section in
the opposite direction. Ensure the drill bit is in the center of the chuck
jaws. Finally, firmly rotate the front chuck section in the opposite
directions. Your drill bit is now clamped in the chuck.
6
TORQUE ADJUSTMENT (See E)
(Screw driving force of your drill driver)
The torque is adjusted by rotating the torque adjustment ring. The
torque is greater when the torque adjustment ring is set on a higher
setting. The torque is less when the torque adjustment ring is set on
a lower setting.
Make the setting as follows:
1 - 4 for driving small screws
5 - 9 for driving screws into soft material
10 - 15 for driving screws into soft and hard material
for heavy drilling
Page 12

12
AUTOMATIC SPINDLE LOCK (See F)
F
7
The automatic spindle lock allows you to use it as a regular
screwdriver. You can give an extra twist to firmly tighten a screw,
loosen a very tight screw or continue working when the battery
energy has expired. For manual screwdriver purposes, the chuck is
automatically locked when the tool is off.
USING THE LED LIGHT
8
To turn on the light simply press the on/off switch. When you release
the on/off switch, the light will be off.
LED lighting increases visibility- great for dark or enclosed area. LED is
also a batter y capacity indicator. It will flash when power gets low.
DRILLING
9
When drilling into a hard smooth surface, use a center punch to mark
the desired hole location. This will prevent the drill bit from slipping
off center as the hole is started. Hold the tool firmly and place the tip
of the bit at the point to be drilled. Depress the switch trigger to start
the tool. Move the drill bit into the workpiece, applying only enough
pressure to keep the bit cutting. Do not force or apply side pressure
to elongate a hole.
Tungsten carbide drill bits should always be used for
concrete and masonry. When drilling in metal, only use HSS
drill bits in good condition. Always use a magnetic bit holder
(not included) when using short screwdriver bits. When screwdriving, apply a small quantity of liquid soap or similar to the
screw threads to ease insertion.
Page 13

13
10
DISPOSAL OF AN EXHAUSTED BATTERY PACK
To preserve natural resources, please recycle or dispose of
the battery pack properly. This battery pack contains Lithium
batteries. Consult your local waste authority for information
regarding available recycling and/or disposal options. Discharge
your battery pack by operating your drill, then remove the battery
pack from the drill housing and cover the battery pack connections
with heavy-duty adhesive tape to prevent short circuit and energy
discharge. Do not attempt to open or remove any of the components.
11
OVERLOAD PROTECTION
When overloaded, the motor comes to a stop. Relieve the load on the
machine immediately and allow cooling for approx. 30 seconds at the
highest no-load speed.
12
TEMPERATURE DEPENDENT OVERLOAD PROTECTION
When using as intended for the power tool cannot be subject
to overload. When the load is too high or the allowable battery
temperature of 75°C is exceeded, the electronic control switches off
the power tool until the temperature is in the optimum temperature
range again.
13
PROTECTION AGAINST DEEP DISCHARGING
The Li-ion battery is protected against deep discharging by the
“Discharging Protection System”. When the batter y is empty, the
machine is switched off by means of a protective circuit: The inserted
tool no longer rotates.
Problem solution
WHY DOES THE DRILL NOT TURN ON WHEN YOU PRESS THE
1
SWITCH?
The forward/reverse rotation control, which is on top of the trigger, is
positioned in the lock function. Unlock the for ward/reverse rotation
control by putting it into the required rotation position. Push the
trigger and the drill will start to rotate.
THE DRILL STOPS BEFORE THE SCREW IS COMPLETELY
2
TIGHTENED. WHY?
Verify the torque position of the torque adjusting ring, you can find the
torque- adjusting ring between the chuck and the drill body. Position
1 is the lowest torque (screw driving force) and position 15 is the
highest torque ( screw driving force). Position is for drill operation.
Regulate the torque adjusting ring to a higher position to reach the
best result.
REASONS FOR DIFFERENT BATTERY PACK WORKING TIMES
3
Charging time problems, as above, and having not used a battery
pack for a prolonged time will reduce the batter y pack working time.
This can be corrected after several charge and discharge operations
by charging & working with your drill. Heavy working conditions such
as large screws into hard wood will use up the battery pack energy
faster than lighter working conditions. Do not re-charge your battery
pack below 0oC and above 45oC as this will affect performance.
Page 14

14
Maintenance
Connect
Blue to N
(neutral)
Outer sleeve
firmly clamped
Cable grip
Brown L (live)
13 Amp fuse approved
to BS1362
Your tool requires no additional lubrication or maintenance.
There are no user serviceable parts in your power tool. Never use
water or chemical cleaners to clean your power tool. Wipe clean
with a dry cloth. Always store your power tool in a dry place. Keep
the motor ventilation slots clean. Keep all working controls free
of dust. Occasionally you may see sparks through the ventilation
slots. This is normal and will not damage your power tool.
Plug replacement
(UK & Ireland only)
If you need to replace the fitted plug then follow the instructions
below.
IMPORTANT
The wires in the mains lead are colored in accordance with the
following code:
BLUE =NEUTR AL BROWN = LIVE
Environmental protection
Waste electrical products must not be disposed of with
household waste. Please recycle where facilities exist.
Check with your local authorities or retailer for recycling
advice.
As the colors of the wires in the mains lead of this appliance may not
correspond with the colored markings identifying the terminals in
your plug, proceed as follows. The wire which is colored blue must
be connected to the terminal which is marked with N. The wire which
is colored brown must be connected to the terminal which is marked
with L.
Note: If a moulded plug is fitted and has to be removed take great
care in disposing of the plug and severed cable, it must be destroyed
to prevent engaging into a socket.
Warning!
Never connect live
or neutral wires to
the earth terminal
of the plug. Only
fit an approved
13A BS1363/A
plug and the
correct rated fuse.
Page 15

15
EC DECLARATION OF
CONFORMITY
We,
Positec Power Tools (Europe) Ltd, PO Box 152,
Leeds, LS10 9DS, UK
Declare that the product,
Description WORX Cordless drill
Type WU127 WU127.9
Function Drilling
Complies with the following Directives,
•
EC Machiner y Directive 2006/42/EC
•
EC Electromagnetic Compatibility Directive 2004/108/EC
Standards conform to
EN 55014-1 EN 55014-2
EN 60745-1 EN 60745-2-1 EN 60745-2-2
The person authorized to compile the technical file,
Name Russell Nicholson
Address Positec Power Tools (Europe) Ltd,
PO Box 152, Leeds, LS10 9DS, UK
2011/01/18
Jacky Zhou
POSITEC Qualit y Manager
Page 16

Copyright © 2011, Positec. All Rights Reserved.
 Loading...