

Wortmann 3030041 operation manual

LCD/LED 2747W

Safety Precautions and Maintenance 1
English
Basic setup 2
Screen image setups 2
Functions 3
BRIGHTNESS 3
IMAGE 3
COLOR TEMP. 4
OSD SETTING 5
RESET 6
MISC 7
Installing the LED Monitor 8
Supporting Timing Modes 9
Troubleshooting 10
SPECIFICATIONS 11

English
Safety Precautions and Maintenance
Read this manual carefully and retain for future reference
1. Unplug the monitor before cleaning it with a slightly damp cloth.
2. Wiping the screen with a dry cloth is recommendable, and only during the power has
been switched off.
3. Do not use alcohol or ammonia-based liquids.
4. This monitor is designed with ventilation holes on the cabinet back, please do not cover
them or block it.
5. Also avoid placing the monitor near the electric heater or heater, including in an enclosed
room with no ventilations.
6. Please do not insert any matter or spray any liquid on it.
7. Please do not position the moni tor on unsafe space, if it falls, it may be damaged and
may hurt the user.
8. Unplug the monitor if it is not going to be in use for an extended period of time.
9. Please do not put heavy items on the monitor, or electric cord.
10. P leas e do not open t h e monitor bac k panel because the monitor contained high voltage
current.
Contents
*
Monitor
*
HDMI cable
*
AC Power cord (C5)
*
Warranty card
*
Quick start guide
*
Audio cable
Features:
*
16.7M high quality image colors
*
Smart image screen setting-OSD with simple layout and easy selection
*
Smart control interfaces for easy settings
1
English
2
1
Basic setup
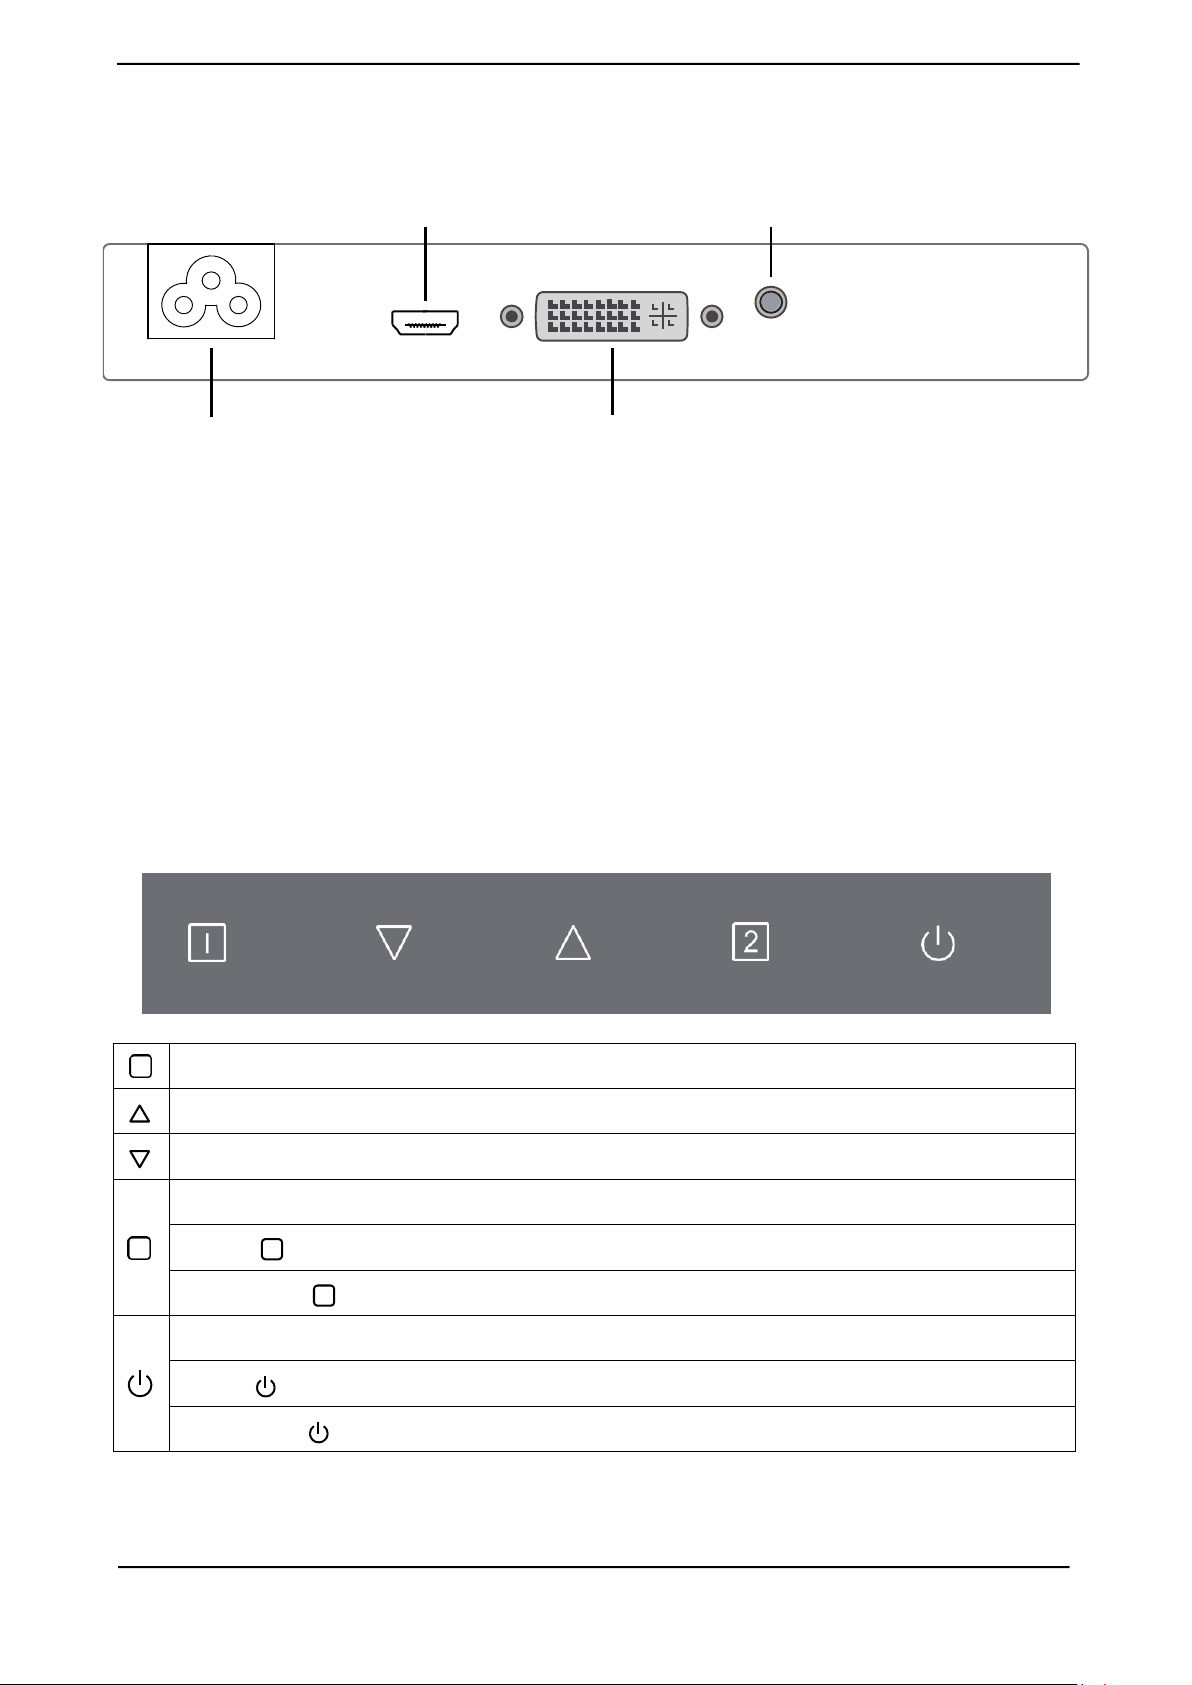
a) Connect a DVI cable or HDMI cable to the PC (signal output) and to the monitor.
HDMI connector
AC IN (C5) DVI connector
b) The monitor has a wide power voltage range; it can be used on AC100-240V~ 60/50Hz
power supply.
c) Connect the power cable to the Monitor power socket and to the power source in the
room.
d) Turn on the power source supply.
e) To switch on the monitor, press the power control key.
Audio connector
Screen image setups
The right backside of the monitor has five keys to adjust the monitor settings with aid of the
OnScreen Display.
Confirm selection OSD / When not in OSD-Menu: source selection
Adjust the options-move up / When not in OSD-Menu: call the volume menu
Adjust the options-move down or lower / When not in OSD-Menu: call the brightness menu
Shows main menu/ Exit from menu
Press [
1 ] key long-term: OSD LOCKED
Then press [
1 ] key long-term: OSD UNLOCKED
Power ON/OFF
Press [
Then press [
] key long-term: POWER LOCKED
] key long-term: POWER UNLOCKED
2
English
1
2
2
2 2 2 2 2 1 2
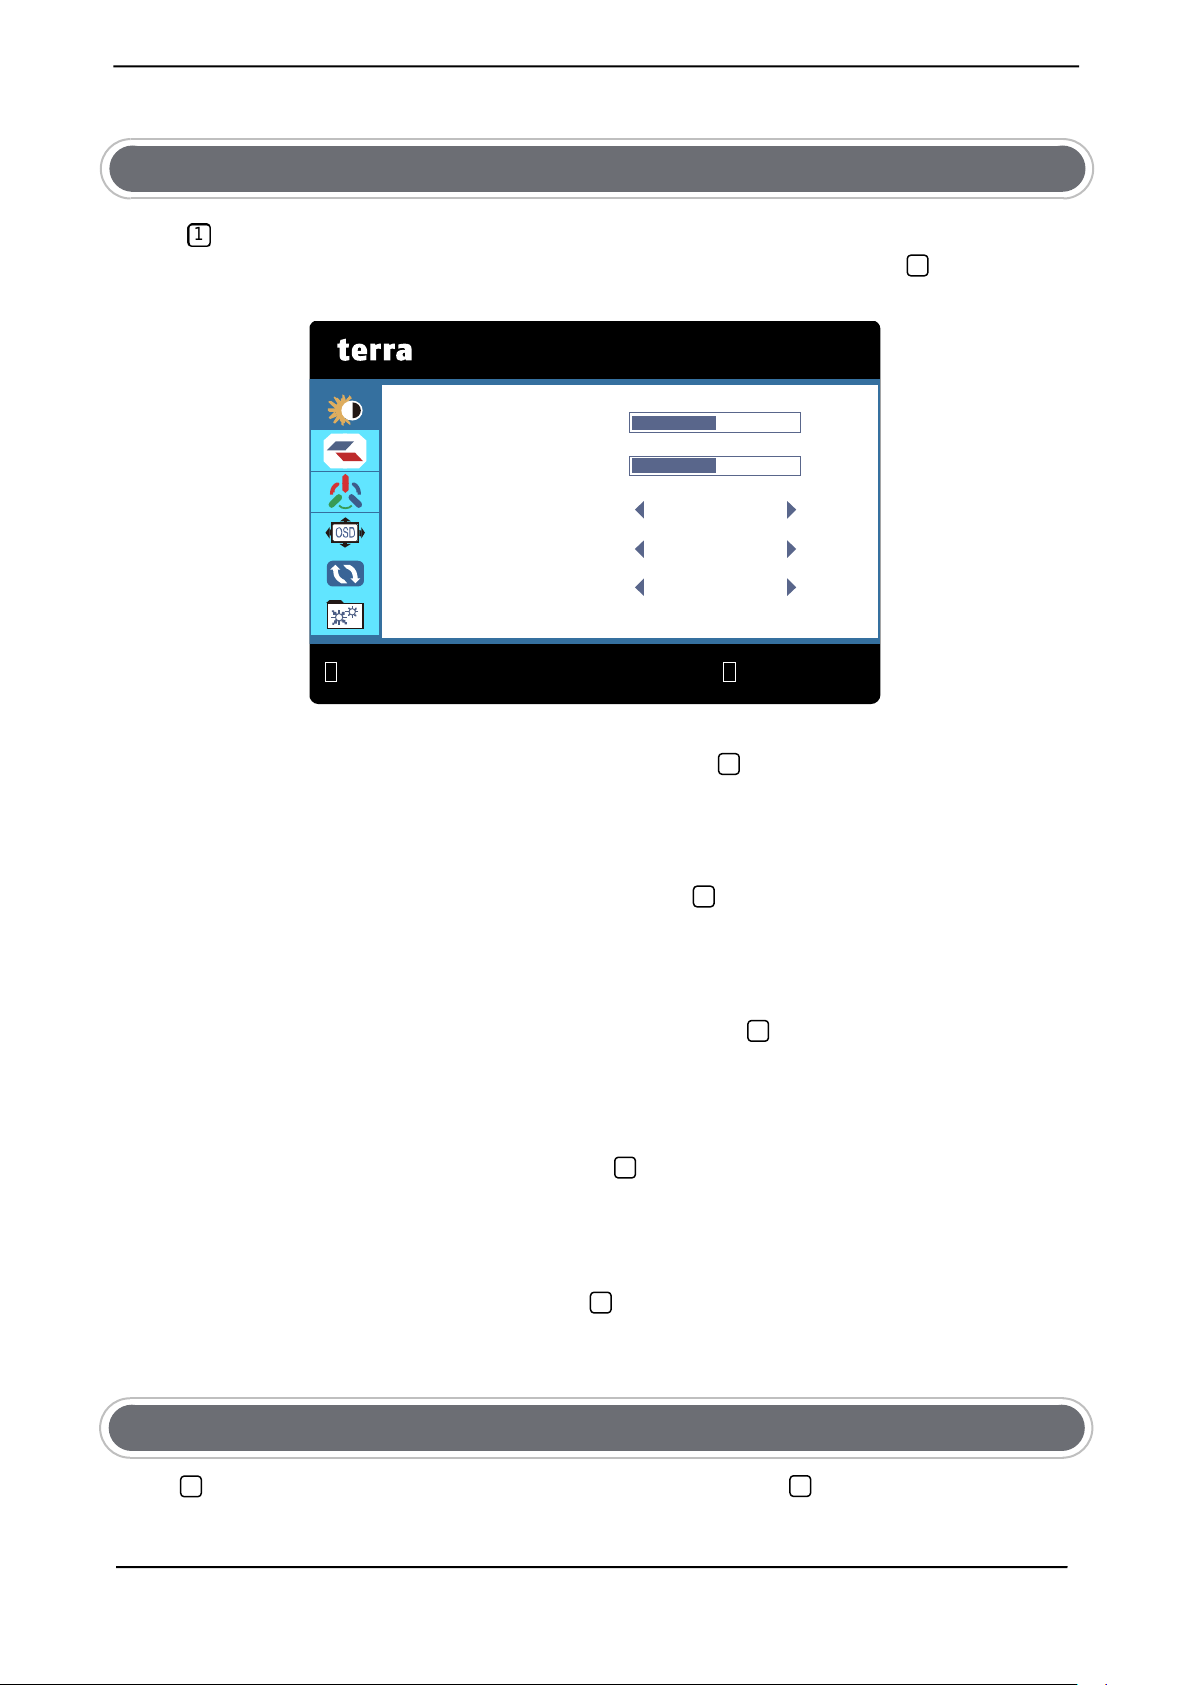
BRIGHTNESS
:EXIT
:SELECT
BRIGHTNESS
50
CONTRAST
PICTURE MODE
DCR
OD
50
STANDARD
OFF
Functions:
BRIGHTNESS
Press
Press △ / ▽ button to select BRIGHTNESS in the main menu, then press button to
enter.
BRIGHTNESS
Press △ / ▽ button to select BRIGHTNESS, then press button confirmati on choi c e and
1
button the main menu will appear as follows:
OFF
press △ / ▽ button to adjust.
CONTRAST
Press △ / ▽ button to select CONTRAST, then press button confirmation choice and
press △ / ▽ button to adjust.
PICTURE MODE
Press △ / ▽ button to select PICTURE MODE, then press button confirmation choice
and press △ / ▽ button to select STANDARD, MOVIE, GAME, TEXT.
DCR (Dynamic Contrast Ratio)
Press △ / ▽ button to select DCR, then press button confirmation choice and press
△ / ▽ button to select ON or OFF.
OD(Overdrive)
Press△ / ▽ button to select OD, then press button confirmation choi c e and press
△ / ▽ button to select STRONG, MIDDLE, WEAK, OFF.
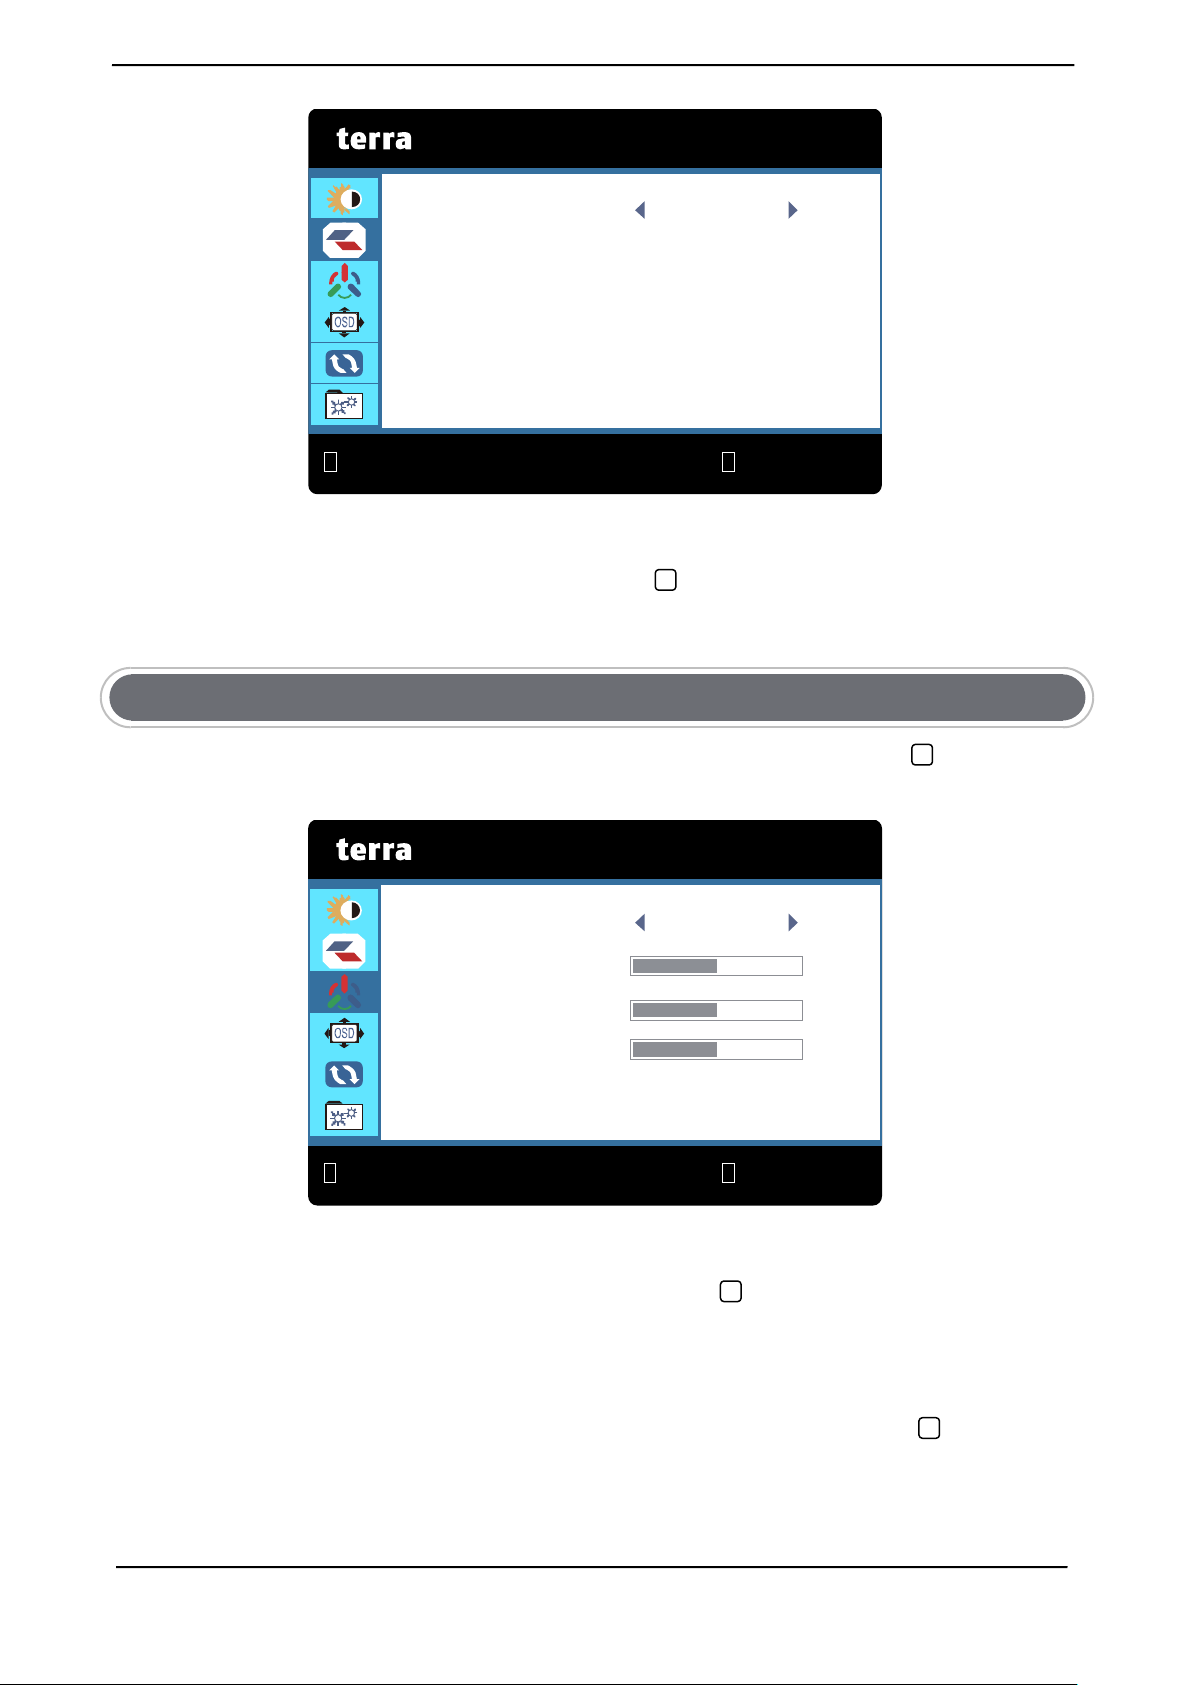
Press button to select IMAGE in the main menu, then press button to enter.
IMAGE
3
English
1
2
1
2
COLOR TEMP.
COLOR TEMP. NORMAL
RED 50
GREEN
50
BLUE 50
2
IMAGE
2
:EXIT
:SELECT
2
2
ASPECT WIDE
ASPECT
Press △ / ▽ button to select ASPECT, then press button confirmation choice and press
△ / ▽ button to select WIDE or 4:3.
COLOR TEMP.
Press △ / ▽ button to select COLOR TEMP. in the mai n me nu, the n pr es s button to
enter.
:EXIT :SELECT
COLOR TEMP.
Press △ / ▽ button to select COLOR TEMP., then press button confirmation choice and
Press △ / ▽ button to choose the color temperature (NORMAL, WARM, USER, COOL).
RED
When you choose the USER Press △ / ▽ button to select RED, then press button to
adjust the value of the three pri mar y color s of red.
4
 Loading...