

Page 1
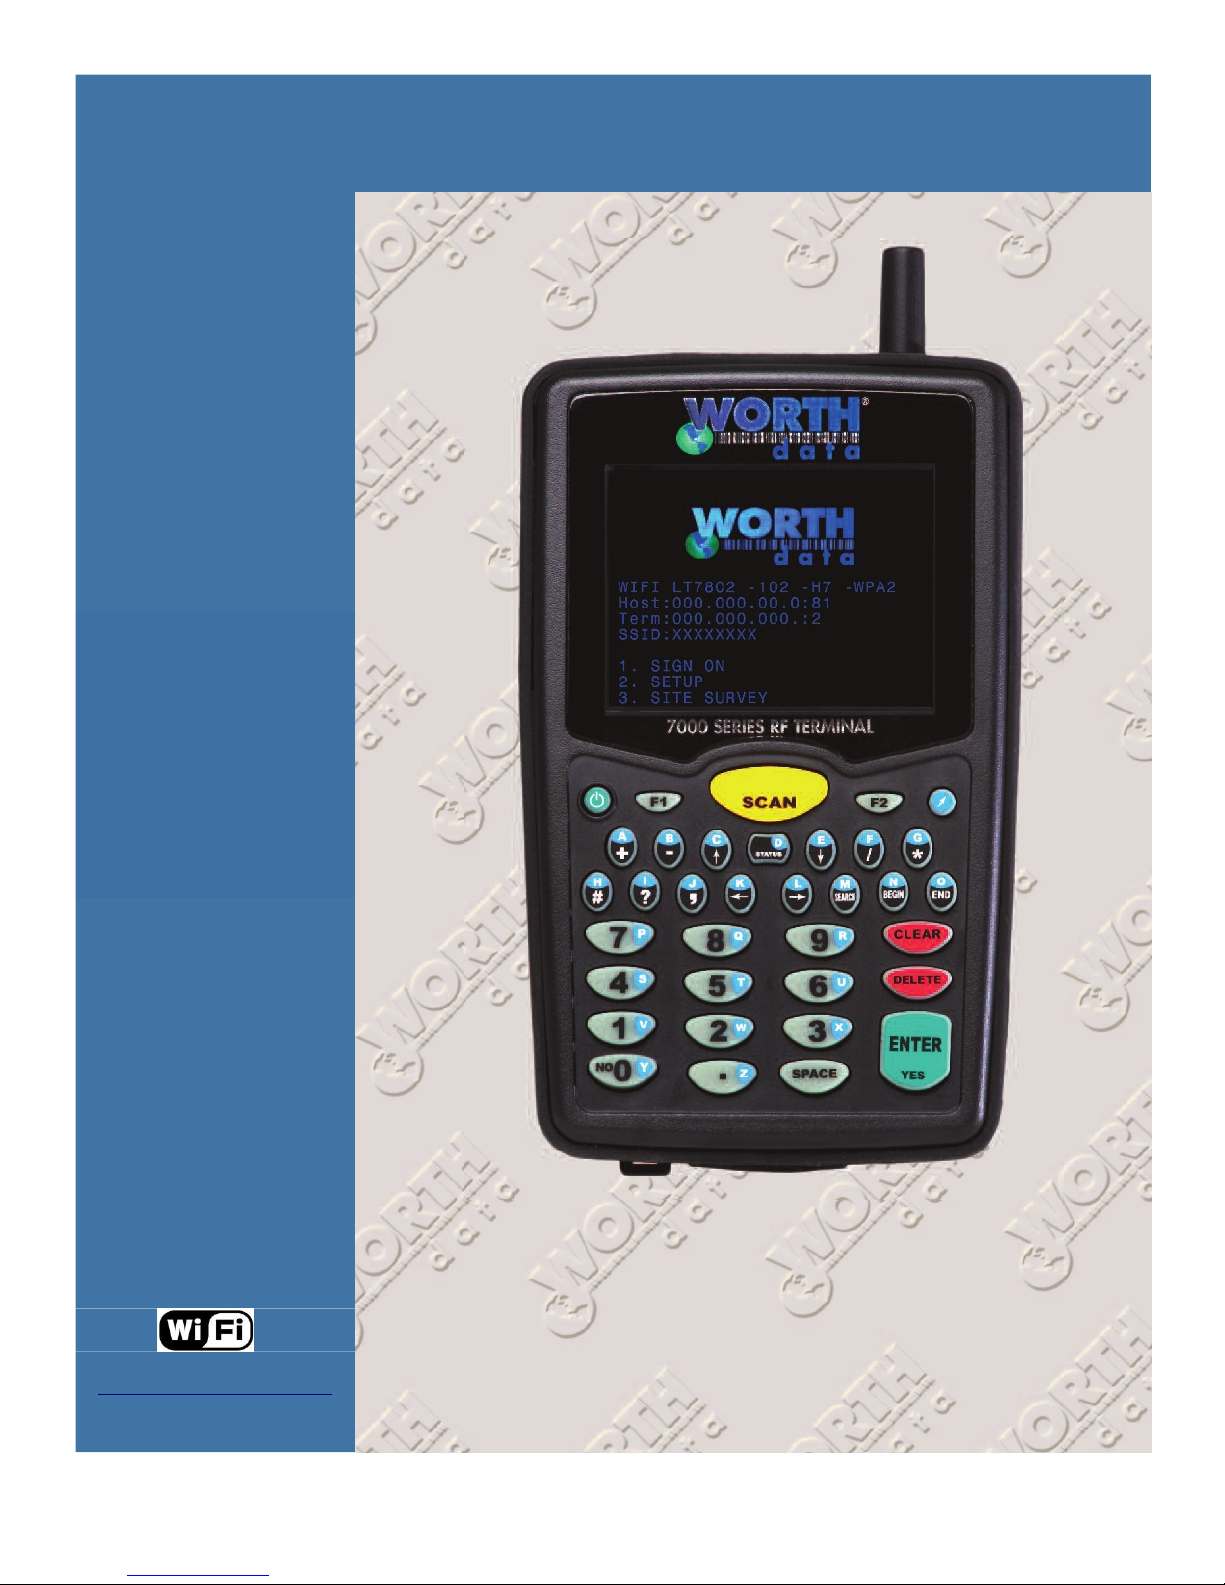
7802 WiFi Terminal
Portable WiFI Data Collection Terminal
Worth Data
7800 Series
Host Controlled
WiFi Terminal System
®
www.worthdata.com
Copyright © 2011 Worth Data, Inc.
Quick Start Guide
1
Page 2

Table of Contents
Chapter 1: Basic Terminal Setup.................................................................................3
Using the Setup Menu on the RF Terminal.........................................................................................................3
Wi-Fi Configuration.......................................................................................................................................3
Access Point Configuration.......................................................................................................................3
“Cloud” vs. “Local” Test Server Layouts...........................................................................................................4
Chapter 2: Using Web-Based “Cloud” Test Server....................................................5
Chapter 3: Using Local (ActiveX) Test Server............................................................7
Install Local Test Server......................................................................................................................................7
How To Use Local Test Server.......................................................................................................................9
2
Page 3

Chapter 1: Basic Terminal Setup
The Wi-Fi RF Terminal can be configured using the Wi-Fi RF Terminal Setup menu. Most users do not need
to change anything in the setup except for the Wi-Fi settings.
Using the Setup Menu on the RF Terminal
The Wi-Fi RF Terminal can be setup via the Terminals' keypad by entering Setup from the menu.
1. - SIGN ON
2. - SETUP
3. - SITE SURVEY
Press the 2 key. The next menu allows you to choose which item to configure:
Wi-Fi TERMINAL SETUP
Wi-Fi CONFIGURATION 1
BAR CODE OPTIONS 2
RS-232 I/O SETTINGS 3
DATE & TIME SETTINGS 4
SPEAKER SETTINGS 5
LASER SETTINGS 6
LCD SETTINGS 7
OTHER SETTINGS 8
SYSTEM TOOLS 9
DONE/EXIT 0
Press the 1 key. The next menu allows you to choose which item to configure:
Wi-Fi Configuration
Under Wi-Fi Configuration there are three options:
Wi-Fi CONFIGURATION
TERMINAL CONFIGURATION 1
ACCESS POINT CONFIG 2
CONNECTION HOST CONFIG 3
Press the 2 key. The next menu allows you to choose which item to configure:
Access Point Configuration
Host IP Address
• NOT USED.
Host Port Number
• NOT USED.
000.000.000.000
0
SSID
<blank>
3
Page 4
• Set the SSID to match the SSID of the network that the Wi-Fi RF Terminal will be connected to. You
can use the SITE SURVEY command at the opening screen to find the SSID of Wi-Fi networks that are in
range. When setting the SSID the cursor will change to a white box. Press the light blue shift key to enter
upper-case alpha characters. Press the F2 to toggle upper and lower-case entry. The red cursor is for uppercase, the yellow cursor is for lower-case and the white cursor is for non-shifted characters from the number
pad.
SECURITY
NONE
WEP-128
WPA1-PSK-TKIP
WPA-PSK (mixed WPA1 and WPA2)
WPA2-PSK-AES
• The Security type must match the security set in the APs that the Wi-Fi RF Terminal will be
communicating with. The default is no security. WEP-128 only supports Open System Authentication.
Pressing the 4 key will toggle through the available choices. WPA1 and WPA2 are the most common types.
KEY/PHRASE
<blank>
• The security key or pass phrase must match the Wi-Fi network that the Wi-Fi RF Terminal will be
operating on and the Security type selected above. For WEP-128 enter the hex key. For WPA enter the pass
phrase.
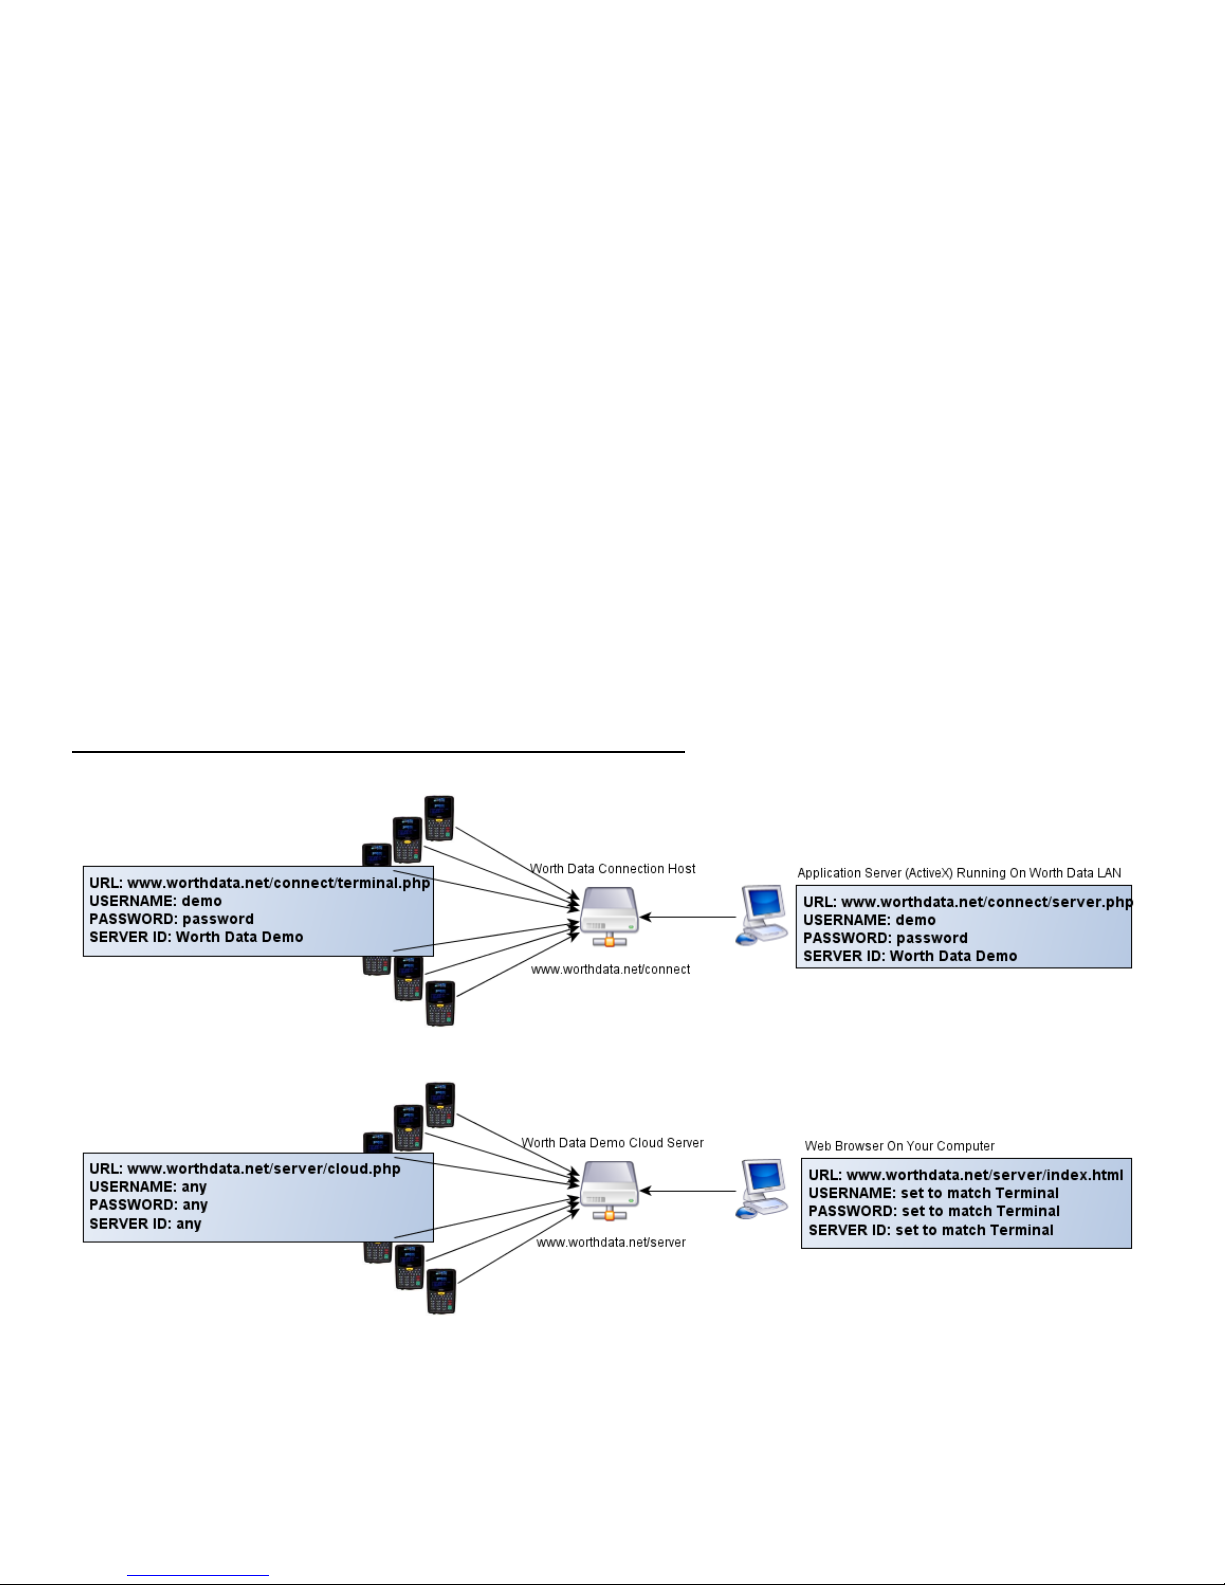
“Cloud” vs. “Local” Test Server Layouts
4
Page 5

Chapter 2: Using Web-Based “Cloud” Test Server
Your terminal comes configured by default to access Worth Data's Cloud Test Server. Of course, you must
first configure your Terminal to connect with an access point on your LAN.
See the chapter on RF System Setup to configure the Terminal to connect to your access point.
The settings that determine what server you use that are pre-configured are in
SETUP → WIFI CONFIGURATION → CONNECTION HOST CONFIG
Once you have an internet connection with your Terminal, all you have to so is SIGN ON. When you do,
assuming everything is working properly with your Terminal, you will see a prompt
Scan Item:
Key or scan some data. Press enter and you will see the next prompt
Enter Quantity:
These prompts repeat. Collect as much data as you desire.
Now go to your web browser and point it to
www.worthdata.net/server
Enter the same keys (username, password, serverID) that are set in your Terminal's CONNECTION HOST
CONFIG. If you have left these settings at default they are
USERNAME: demo
PASSWORD: password
SERVER ID: Worth Data Demo
5
Page 6
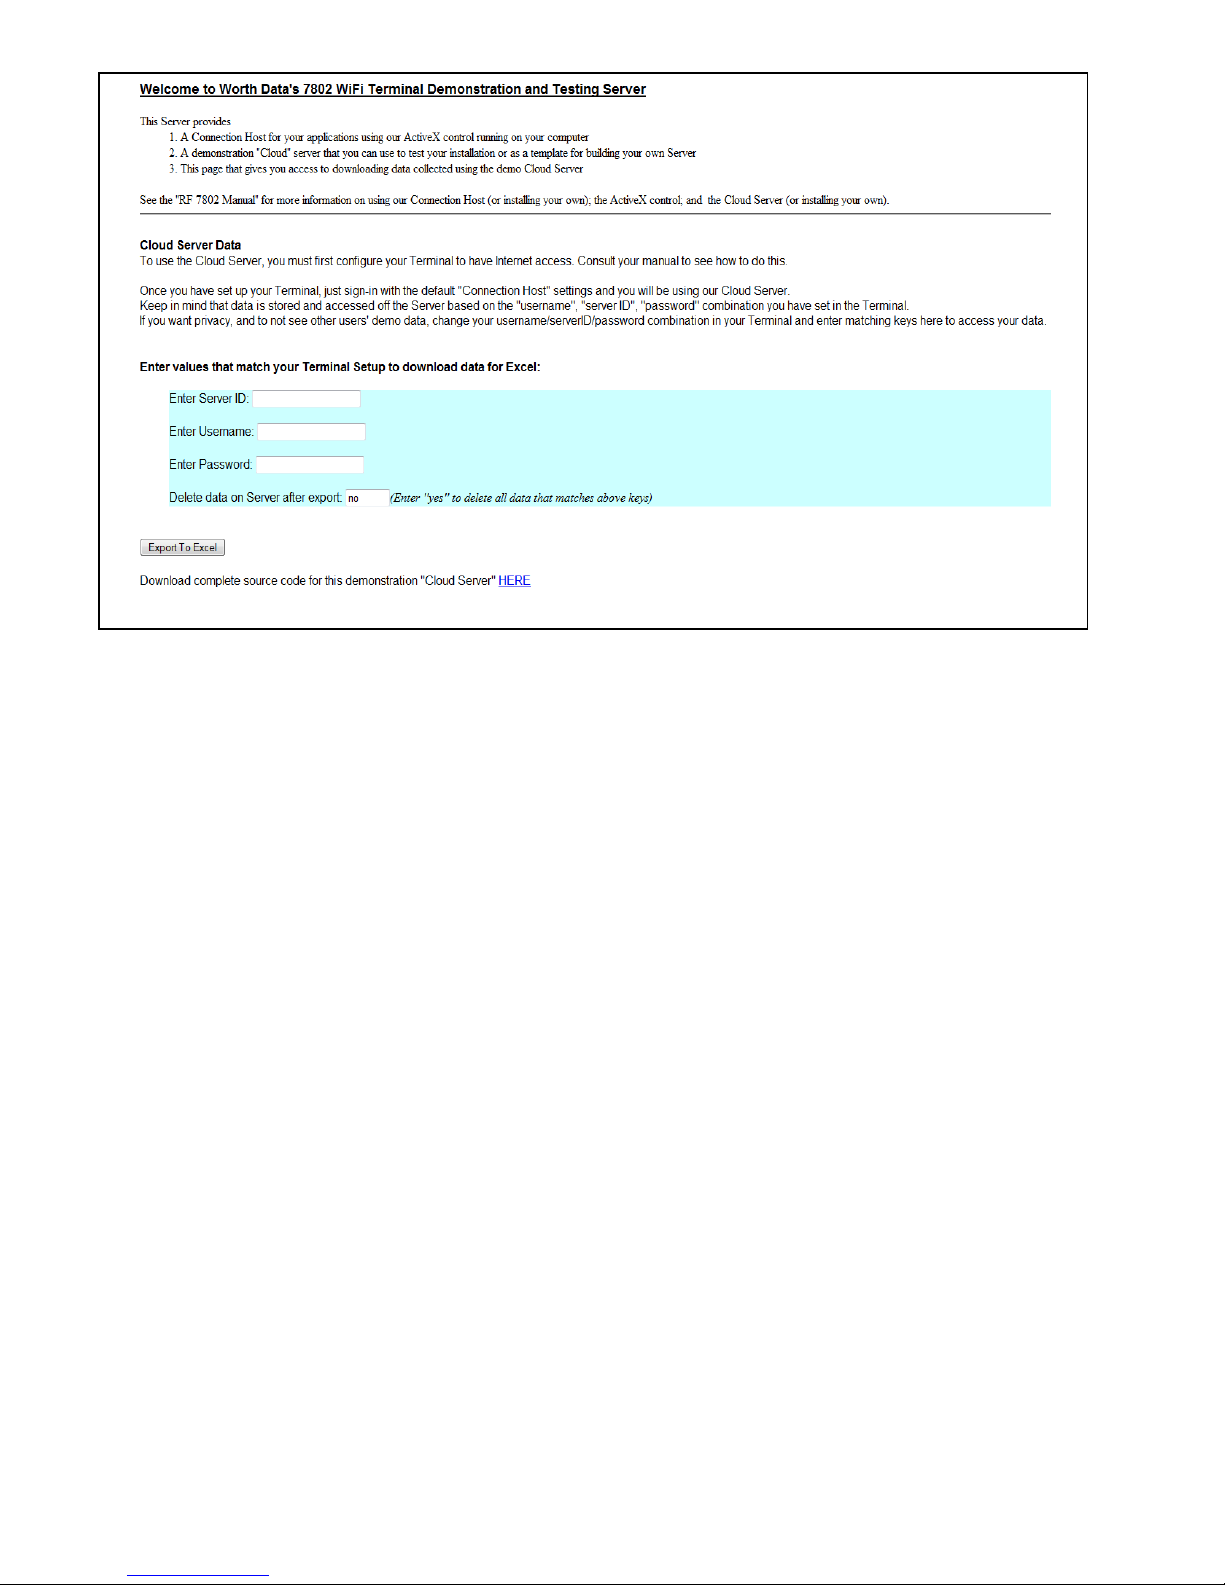
Click on the “Export To Excel” button to download the data you just collected directly into Excel running
on your computer.
6
Page 7
Chapter 3: Using Local (ActiveX) Test Server
Install Local Test Server
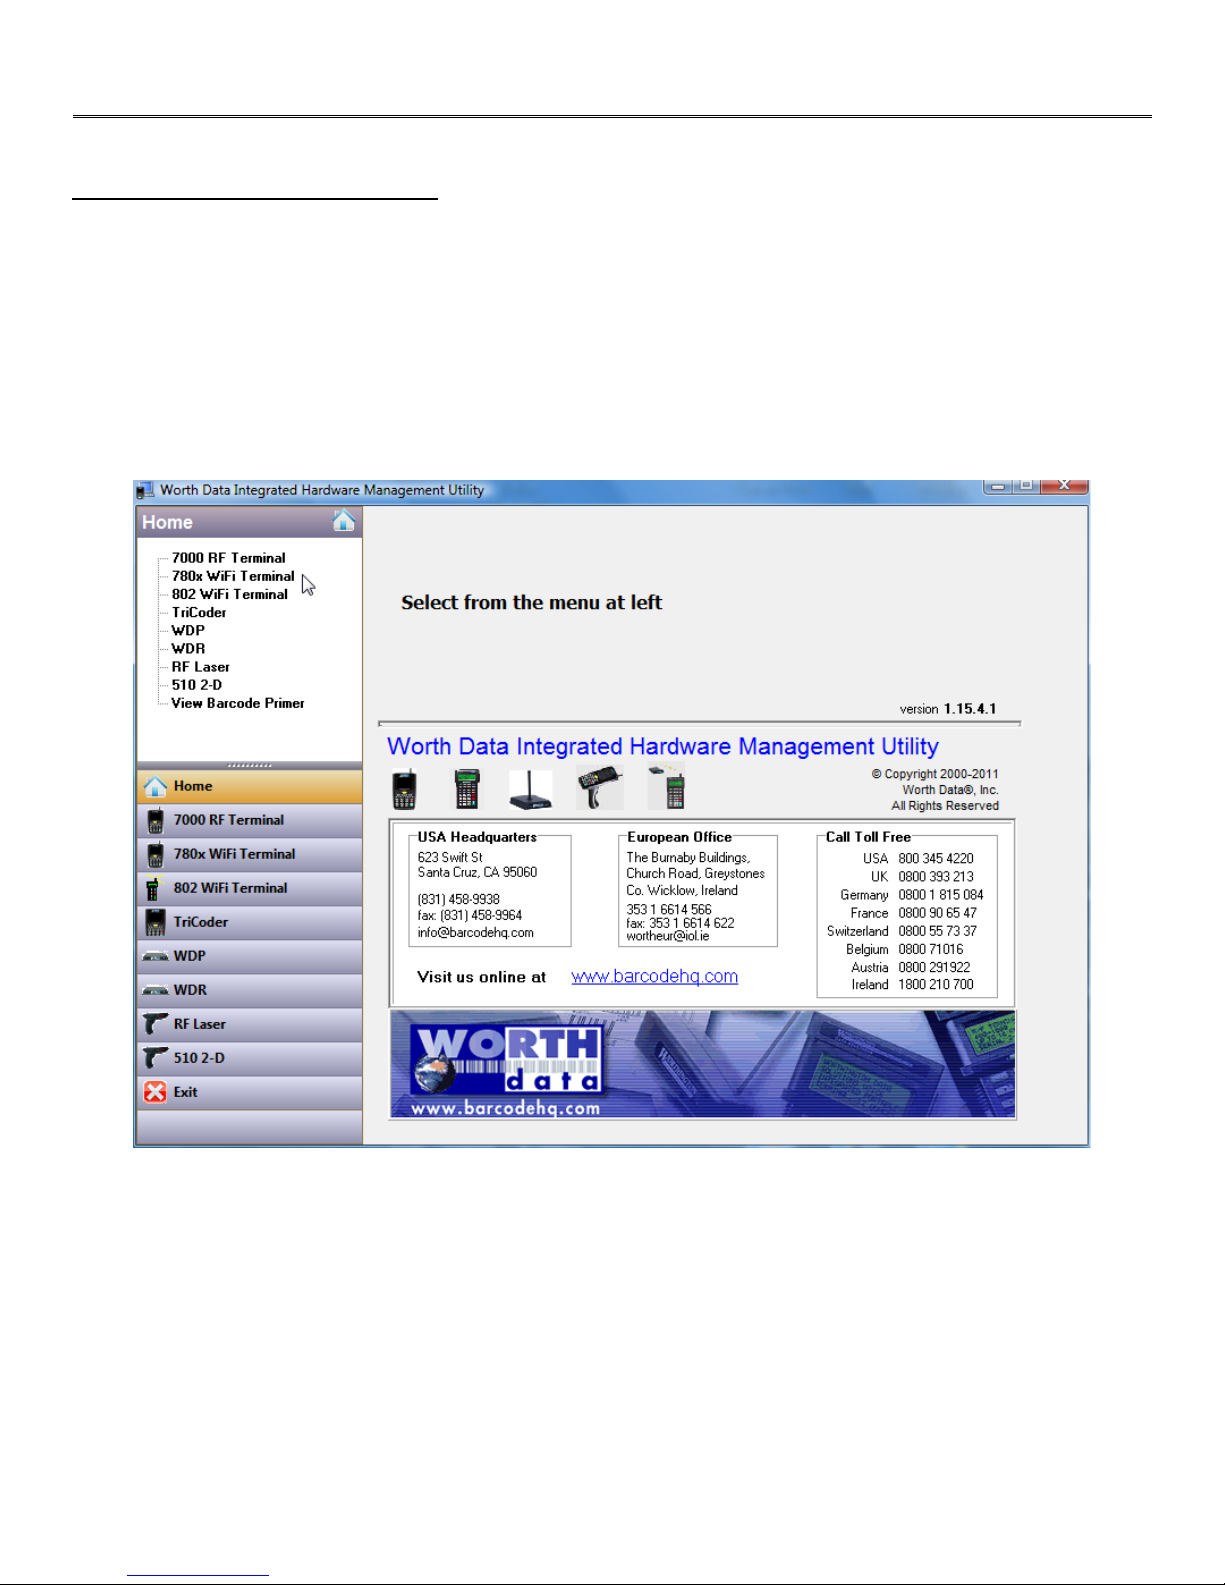
When you install the Integrated Utilities on your computer (on your CD or download from
www.barcodehq.com), the Test Application Server is installed on your computer along with the ActiveX
programming tool for creating your own Application Server.
Click on your Windows Start button and find the Hardware Utilities Program in
Programs/Worth Data Hardware/Hardware Utilities
Select the “780x WiFi Terminal” from the menu on the left.
7
Page 8
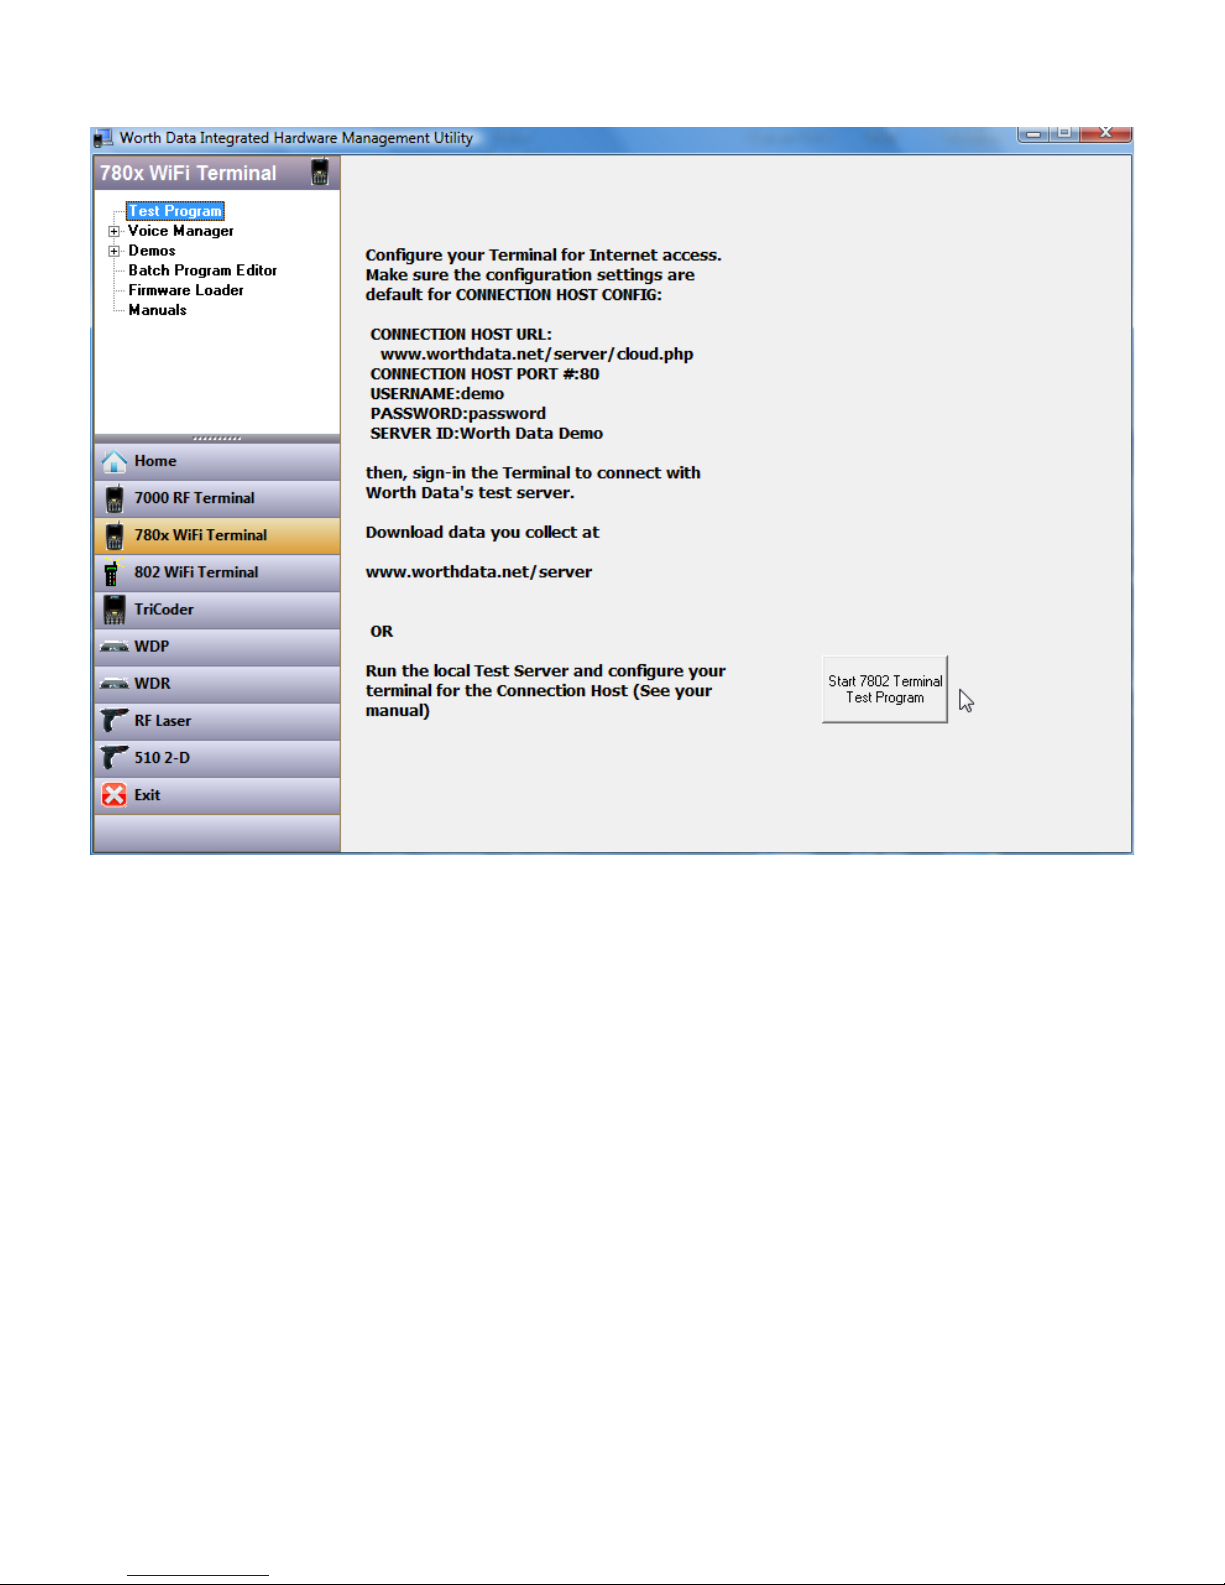
Select “Test Program” at the upper-left
Click on the button for “Start 7802 Terminal Test Program”
8
Page 9
How To Use Local Test Server
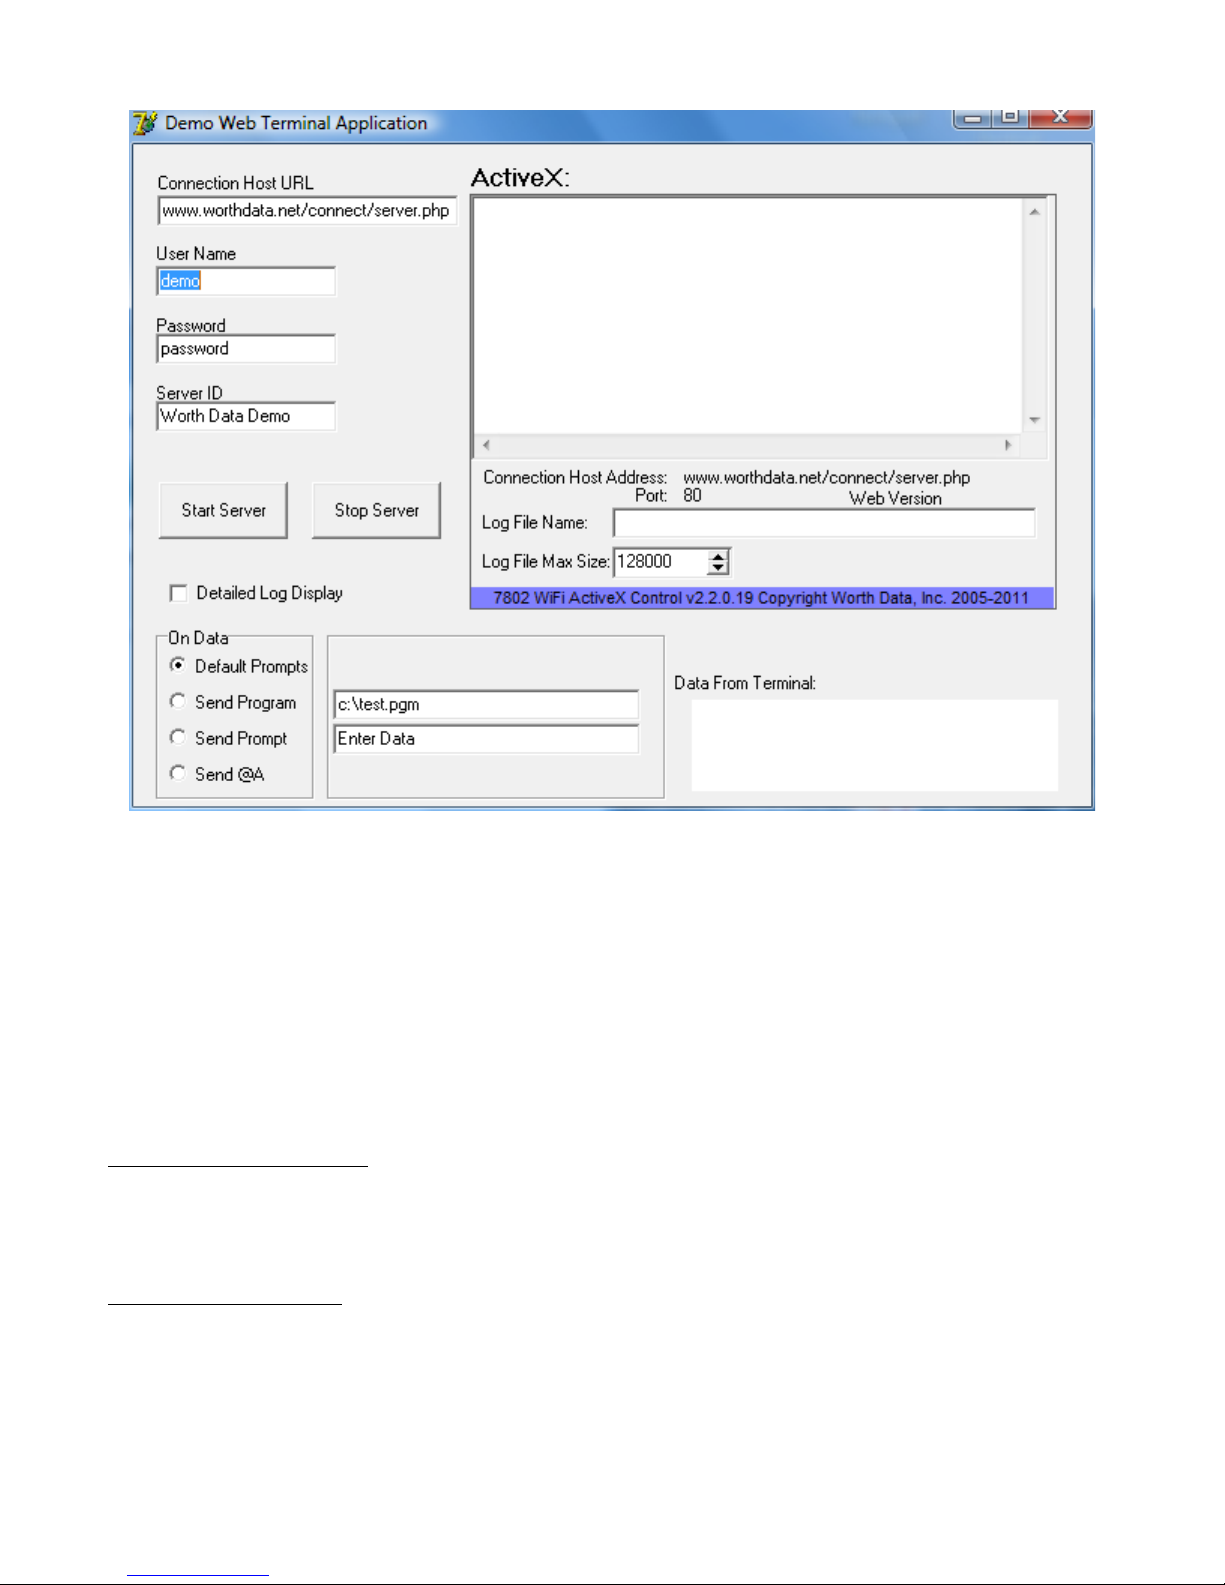
When you start the Test Server, you will see that it has a number of setup options
Connection Host URL
User Name
Password
Server ID
as well as some options for “On Data” and “Log Display”.
Refer to the Manual for details on these options.
Server Setup: User Name
For now, all you need to do is enter something unique and easy to remember here. Your name is good. Or try
your email address. You will exactly what you enter here in a moment to setup the Terminal.
Server Setup: On Data
This is a set of options that allow you see how some of the Terminal's features work. For example. If you
have used the Batch Program Editor to create a Batch Program File, you can instruct the Server to send the
Batch Program (enter the file name in the box to the right of “Send Program”) instead of a prompt when a
Terminal signs-in or sends data.
9
Page 10

There is also an option to send a custom prompt (enter it in the box to the right of “Send Prompt”) or to send
a “@A” which is how you respond to receiving Batch data to tell the Terminal to continue running its
existing Batch program.
Leave this setting at default for now.
Terminal Setup: Connection Host URL
Your Terminal is shipped to you with default settings that will allow it to connect to the Test Server running
on Worth Data's web site. This is actually a simple “Cloud Server”. If you want your Terminal to use a
Connection Host and the Local Test Server instead, you must change the Connection Host URL
Follow the menu on your Terminal screen:
SETUP
WIFI CONFIGURATION
CONNECTION HOST CONFIG
Enter the same URL as you did in Server Setup above except change server.php to terminal.php:
www.worthdata.net/connect/terminal.php
Terminal Setup: User Name, Password, Server ID
Follow the menu on your Terminal screen:
SETUP
WIFI CONFIGURATION
CONNECTION HOST CONFIG
Enter exactly the same settings here as your did above for the Server.
Start the System
Run your local Test Server. Make sure the settings are correct and click on the “Start” button.
The Test Server then attempts to evaluate its link with the Connection Host, and you will see a count-down
displayed on the log.
Initializing Server in 5 Seconds...
If there is a problem, you will see an error message. Once the Server connects with the Connection Host,
you will see.
Application Server started successfully
Once you have successfully started your Application Server, now it is time to sign-on a Terminal.
10
 Loading...