

World Tech Toys 35054 Instruction Manual
Troubleshooting
Introduction
Features
Notice
Thank you for purchasing this World Tech Toys remote control helicopter. Before flying the helicopter please
carefully read this instruction manual and keep it for future reference.
•
World’s first unbreakable helicopter.
•
Super strong polymer body.
•
Helicopter body can take up to 200 pounds of force
•
3.5 channel radio control
•
Built-in gyro
•
LED lights
•
Please keep this product away from small children for
their safety.
•
Never charge the helicopter’s battery unsupervised.
Overcharging the battery may cause it to overheat.
•
Make sure you turn off both the helicopter and
transmitter when not in use.
•
Never throw batteries into a fire. Batteries may
explode and cause injury.
•
Never touch the rotating rotors with any parts of your
body while operating.
•
Do not disassemble the helicopter or transmitter.
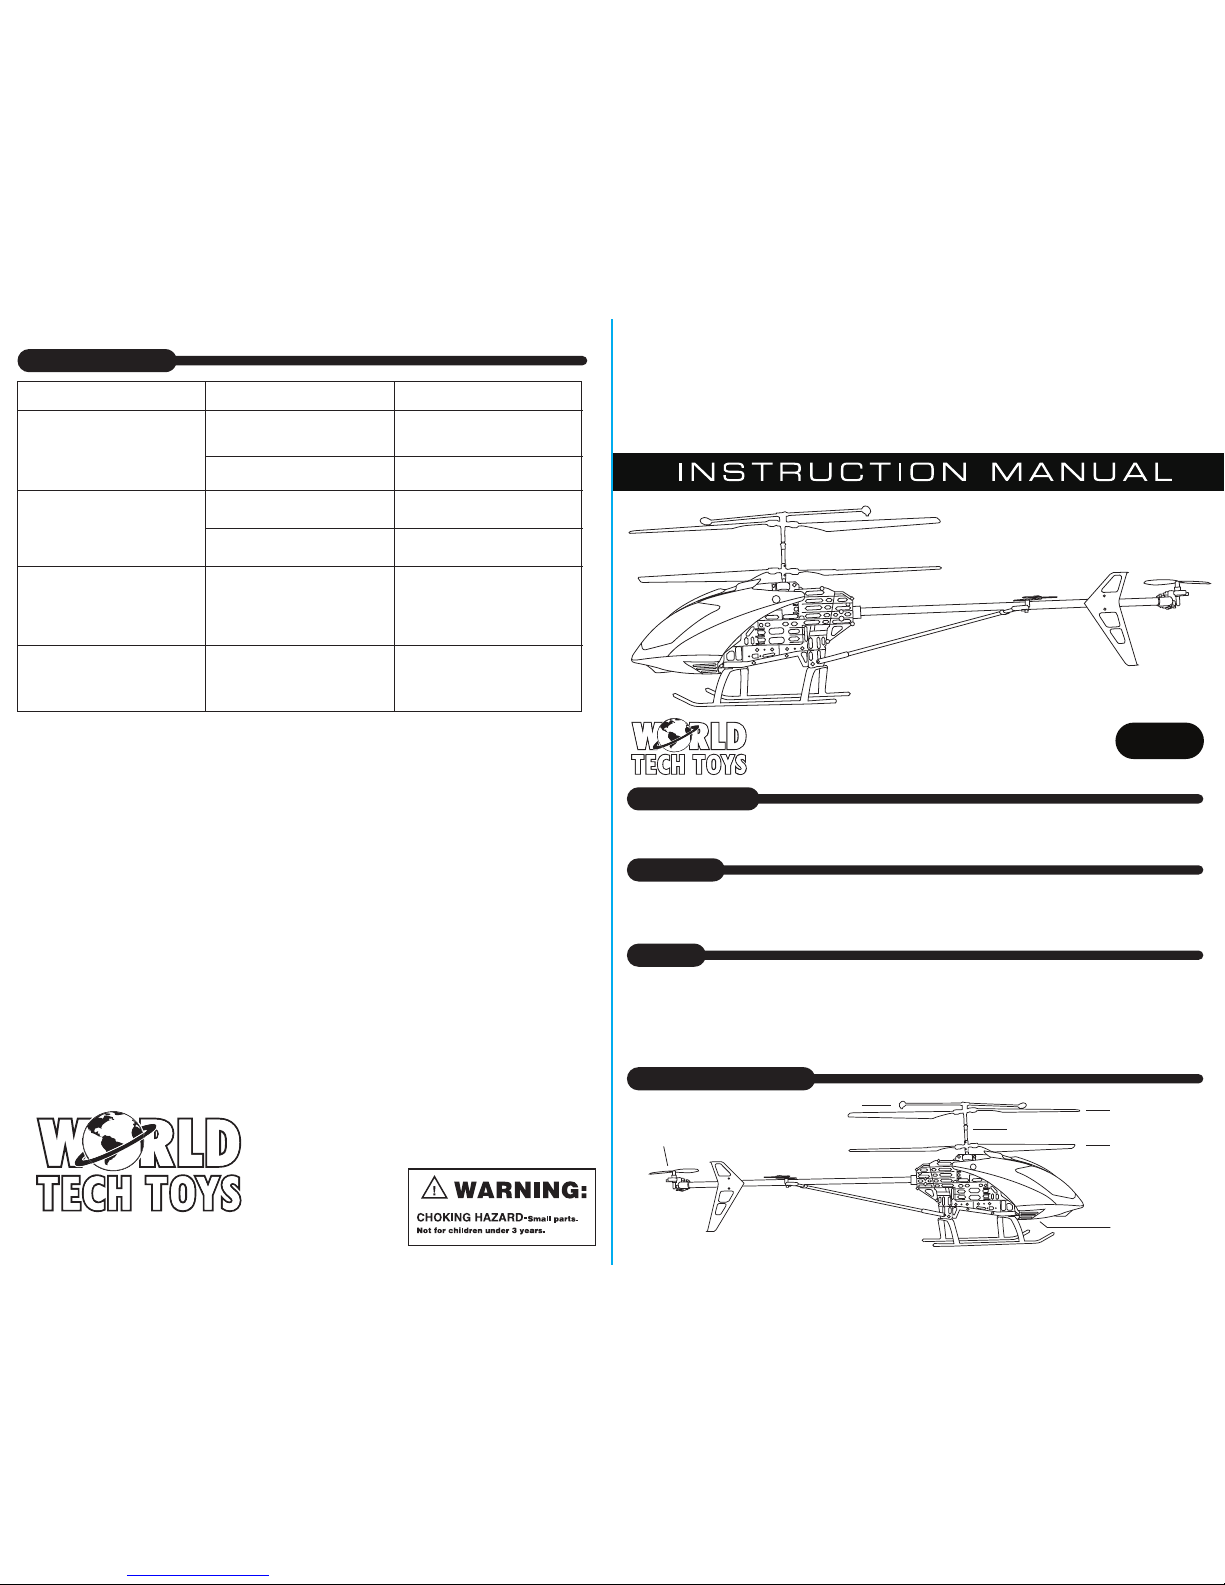
Stabilizer
Main Rotor Blade
(Top)
Main Rotor Blade
(Bottom)
Charging Port
Tail Rotor
Connecting Shaft
Parts Identification
MEGA HERCULES
3.5 CHANNEL GYRO RC HELICOPTER
14+
FOR AGES 14 AND UP
ITEM NO. 35054
Problem Cause Solution
Helicopter rotor
doesn’t spin.
Helicopter suddenly
loses power and drops
to the ground.
Helicopter doesn’t
ascend when throttle
stick is pushed all the
way up.
Helicopter spins to the
left or right in flight
without your input.
Transmitter power is off and
helicopter battery is not connected.
Transmitter infrared interference.
Helicopter flew out of range of
transmitter.
Helicopter battery charge is low.
The trim needs to be adjusted.
Charge the helicopter battery.
Twist the trim wheel slowly
upward or downward until the
helicopter stops spinning.
Battery is drained.
Make sure transmitter is on and
helicopter battery is connected.
Replace the transmitter batteries
and charge the helicopter.
Fly the helicopter in an area with
less sunlight.
Make sure the helicopter stays
within 35 feet of you when flying.
Website: www.worldtechtoys.com
Email: customerserv@worldtechtoys.com
Phone: (877) 498-8697
Monday - Friday / 9:00AM - 5:00PM / Pacific Time
WWW.WORLDTECHTOYS.COM
MADE IN CHINA
SPECIFICATIONS, COLORS AND CONTENT
MAY VARY FROM ILLUSTRATIONS
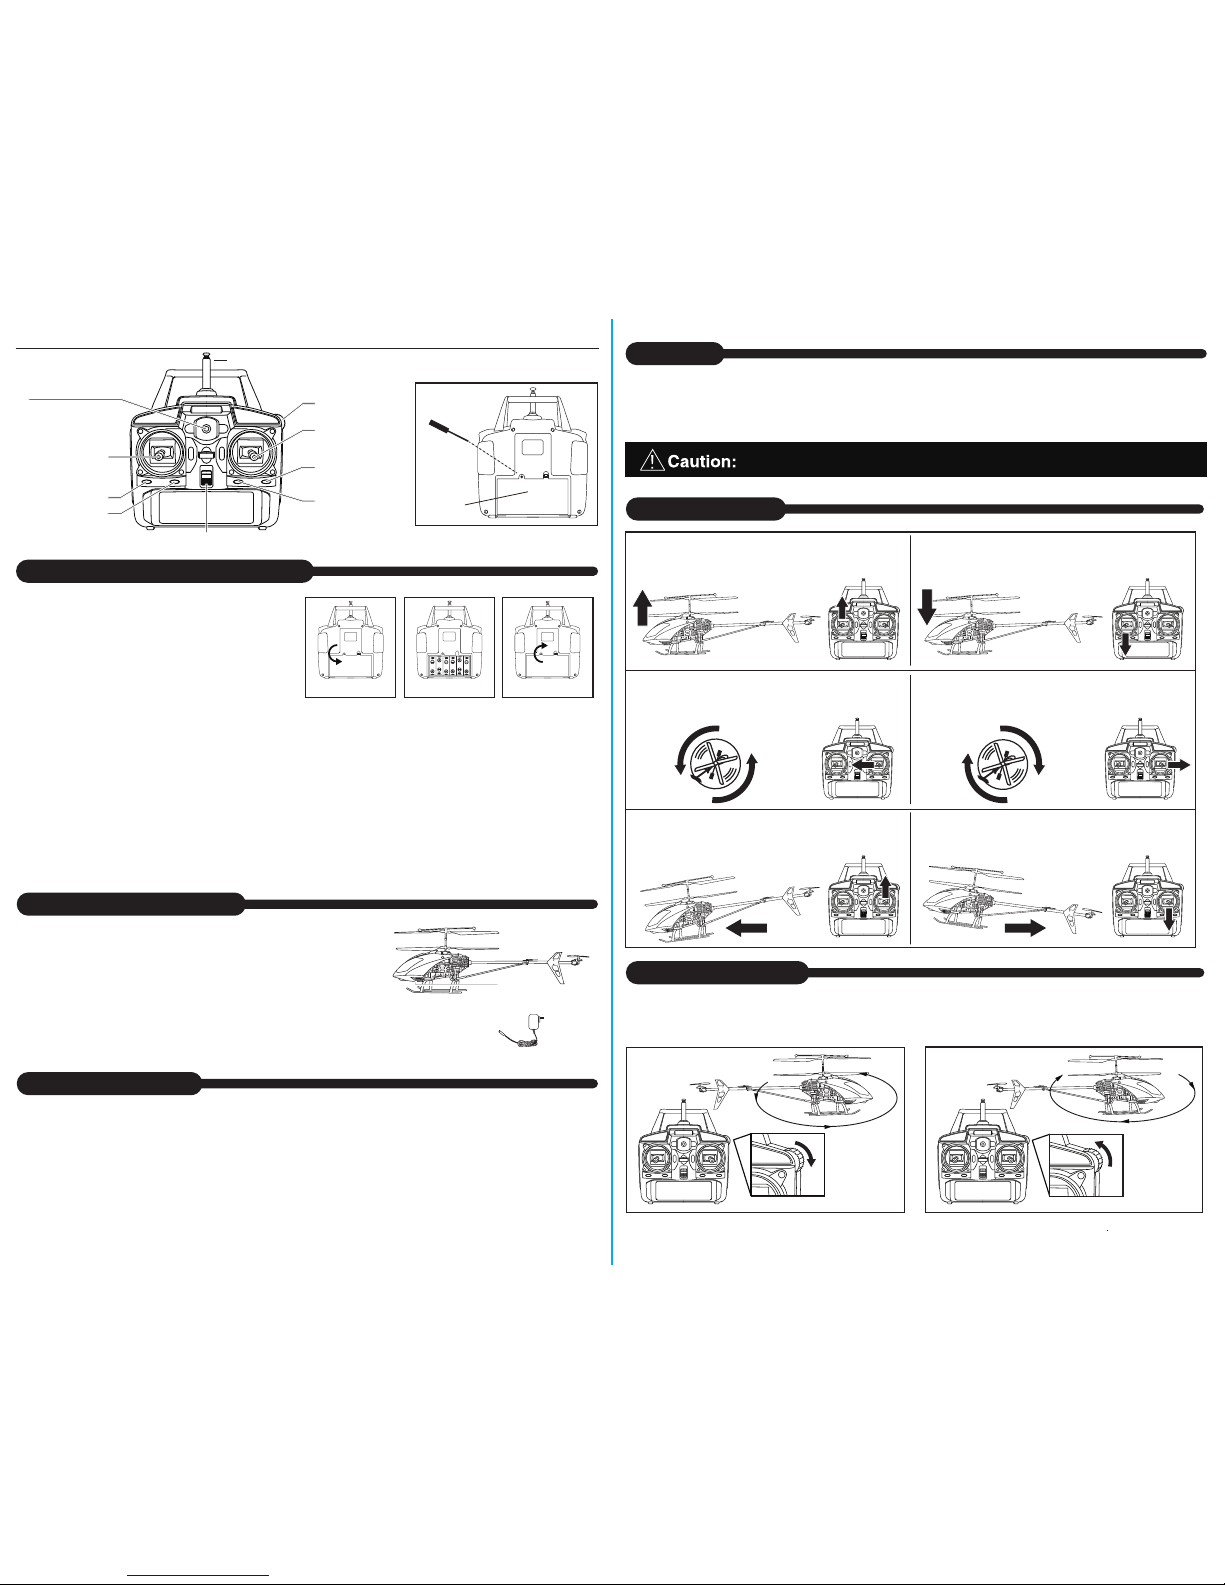
Adjusting the Trim
Control Methods
Battery
cover
pic. 2 pic. 3pic. 2pic. 1
AC Charger
Transmitter Battery Installation
Charging the Helicopter
Flight Environment
Take Off
BATTERY WARNING:
Power Indicator Light
Antenna
Trim Wheel
LED Light Mode
OFF
LED Light Mode
ON
Left Throttle Stick
(Up/Down)
Slow Speed
High Speed
ON/OFF Switch
Right Rudder Stick
(Forward/Backward,
Left/Right)
When Helicopter SPINS LEFT When Helicopter SPINS RIGHT
Turn the trim
wheel slowly
DOWNWARD.
Turn the trim
wheel slowly
UPWARD.
If the helicopter spins to the left or right in flight without your input, you will need to adjust the trim to
correct this issue.
ASCEND
Push up on the left joystick and the helicopter will fly
upwards.
DESCEND
Push down on the right joystick and the helicopter will fly
downwards.
TURN LEFT
Push the right joystick to the left and the helicopter will
turn to the left.
TURN RIGHT
Push the right joystick to the right and the helicopter will
turn to the right.
FORWARD
Push the right joystick upward and the helicopter will
fly forward.
BACKWARD
Push the right joystick downward and the helicopter
will fly backward.
Transmitter
1. Parental Guidance is suggested for children operating Helicopter.
2. Multiple Helicopters operating simultaneously must be on different Frequency Bands.
1. Unscrew the screw on the battery cover and
remove the battery cover. (pic. 1)
2. Install 6 AA size batteries in the battery compartment
as per the polarity shown inside. (pic. 2)
3. Close the battery cover and replace the screw. (pic. 3)
1. Connect the AC charging adapter to the charging port of the helicopter.
2. When charging is completed the first time, unplug the charger from the
helicopter.
3. The helicopter is ready for takeoff.
4. A f
ull charge will take approximately
3-4 hours. Flight time on max charge is approximately 10-15 minutes.
1. For best results, use type alkaline batteries.
2. Install only new batteries of the same type.
3. Failure to insert batteries in the correct polarity, as indicated in the battery compartment,
may shorten the life of the batteries or cause batteries to leak.
4. Do not mix old and new batteries.
5. Do not mix Alkaline, Standard (Carbon-Zinc) or Rechargeable (Nickel Cadmium) or (Nickel
Metal Hydride) batteries.
6. Do not dispose of batteries in fire.
7. Batteries should be recycled or disposed of as per state and local guidelines
1. Be sure that Helico pter Batte ry is full y charged and Remote Control Batteries are f resh.
2. Helicopter will f ly best in low wind conditions.
3. Fly Helicopter in a wide open are a with no people, pets, an d other obje cts in the way.
4. Do not fly in strong w inds. This w ill make oper ation dif ficult and crash th e Helicopter.
1. Place Helicopte r on a flat sur face. Plug in the heli copter bat tery pac k to the helic opter. Turn on the tran smitter.
2. Check surroundi ngs to be sure that it is clear of people, an imals and obstructi ons.
3. Slowly push the Throttle Sti ck UP to increase blade s peed for lif t.
4. Adjust throttle i nput to maintain a steady hover.
DO NOT OVER CHARGE THE HELICOPTER BATTERY PACK.
DO NOT CHARGE THE HELICOPTER BATTERY PACK OVERNIGHT.
DO NOT CHARGE THE HELICOPTER BATTERY PACK UNSUPERVISED.
 Loading...