

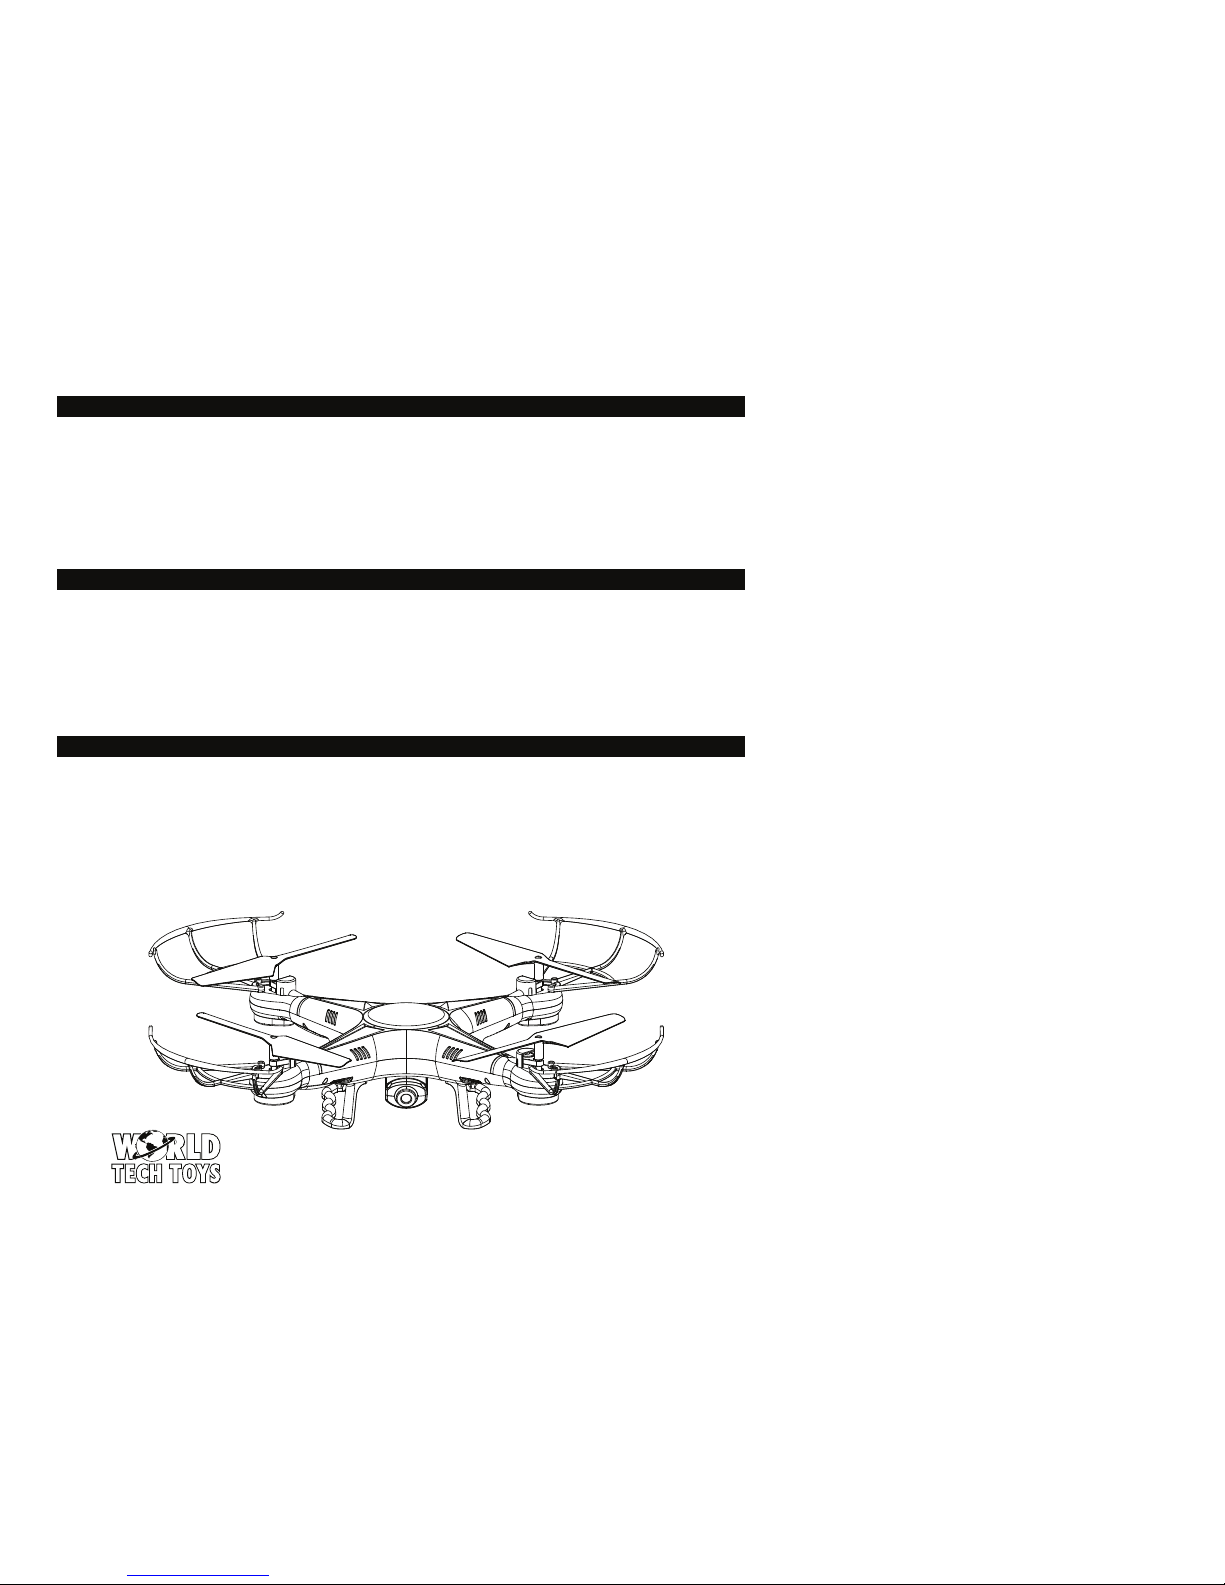
World Tech Toys 34937 Quick Start Manual
QUICK START GUIDE
What’s included:
• D rone • Rechargeab le B atter y • Charg ing Cable • M icro SD Ca rd
• Mi cro SD US B Ada pter • S pare Parts Kit • Remot e Con trol
BEFORE YOU S TAR T:
1. Find the Mi cro-SD card. I t is located in t he small zip-loc k pouch with your USB ad apter.
2. Slide the Mic ro-SD c ard into the b ack of the cam era on the unde rside of your d rone. Push unti l you hear a clic k.
The card sh ould slide in e asily. If you fin d it is not click ing into plac e, do not force t he card. Remov e it, and turn th e
card over an d try again. ( To remove t he card, push in until yo u hear a click , then the car d will be easily removab le)
3. Charge the dr one fully by connec ting the cable on the b attery with the i ncluded USB cabl e. Plug into the USB por t
of a compute r or a USB compatible c harging block and all ow to charge for at least 9 0 minutes. During ch arging, the
USB conn ector will il luminate. When the bat tery is fully charg ed, the light on the USB c onnector will tur n off.
4. Put 4 AA batt eries into the Remote C ontrol according t o the diagram inside th e battery compar tment.
TURNI NG ON DRONE A ND PAIRIN G WIT H REMOT E CONT ROL:
1. Unplug th e battery from the c harging cable.
2. Insert the b attery in to the compar tment on the undersi de of the drone w ith the batte ry cable s ticking ou t. (Note:
the camer a does not need to be remove d.)
3. Insert the white battery connector into the slot marked power. Then close the battery compartment.
4. Turn on the power swi tch on the back o f the drone, place the dr one on a flat level sur face.
5. Turn on the Remote Co ntrol using the switc h at the center of the remo te. The lights o n the drone will be flas hing.
6. Start wit h the left st ick on the rem ote control a ll the way down. T hen push the le ft stick on t he remote all th e way
up, then all th e way back down ag ain. The light s on the drone sh ould stop fl ashing and re main illumin ated. This
means the dr one is paired. (If this do es not occur, turn off t he remote con trol, and rep eat steps 3- 5.
7. Onc e paired, the dr one is ready to f ly. Keep t he left stic k all the way down t o prevent the rot ors from tur ning until
you are ready t o fly. It is STRONGLY recomme nded that you us e the drone outdoors d uring initi al flights.
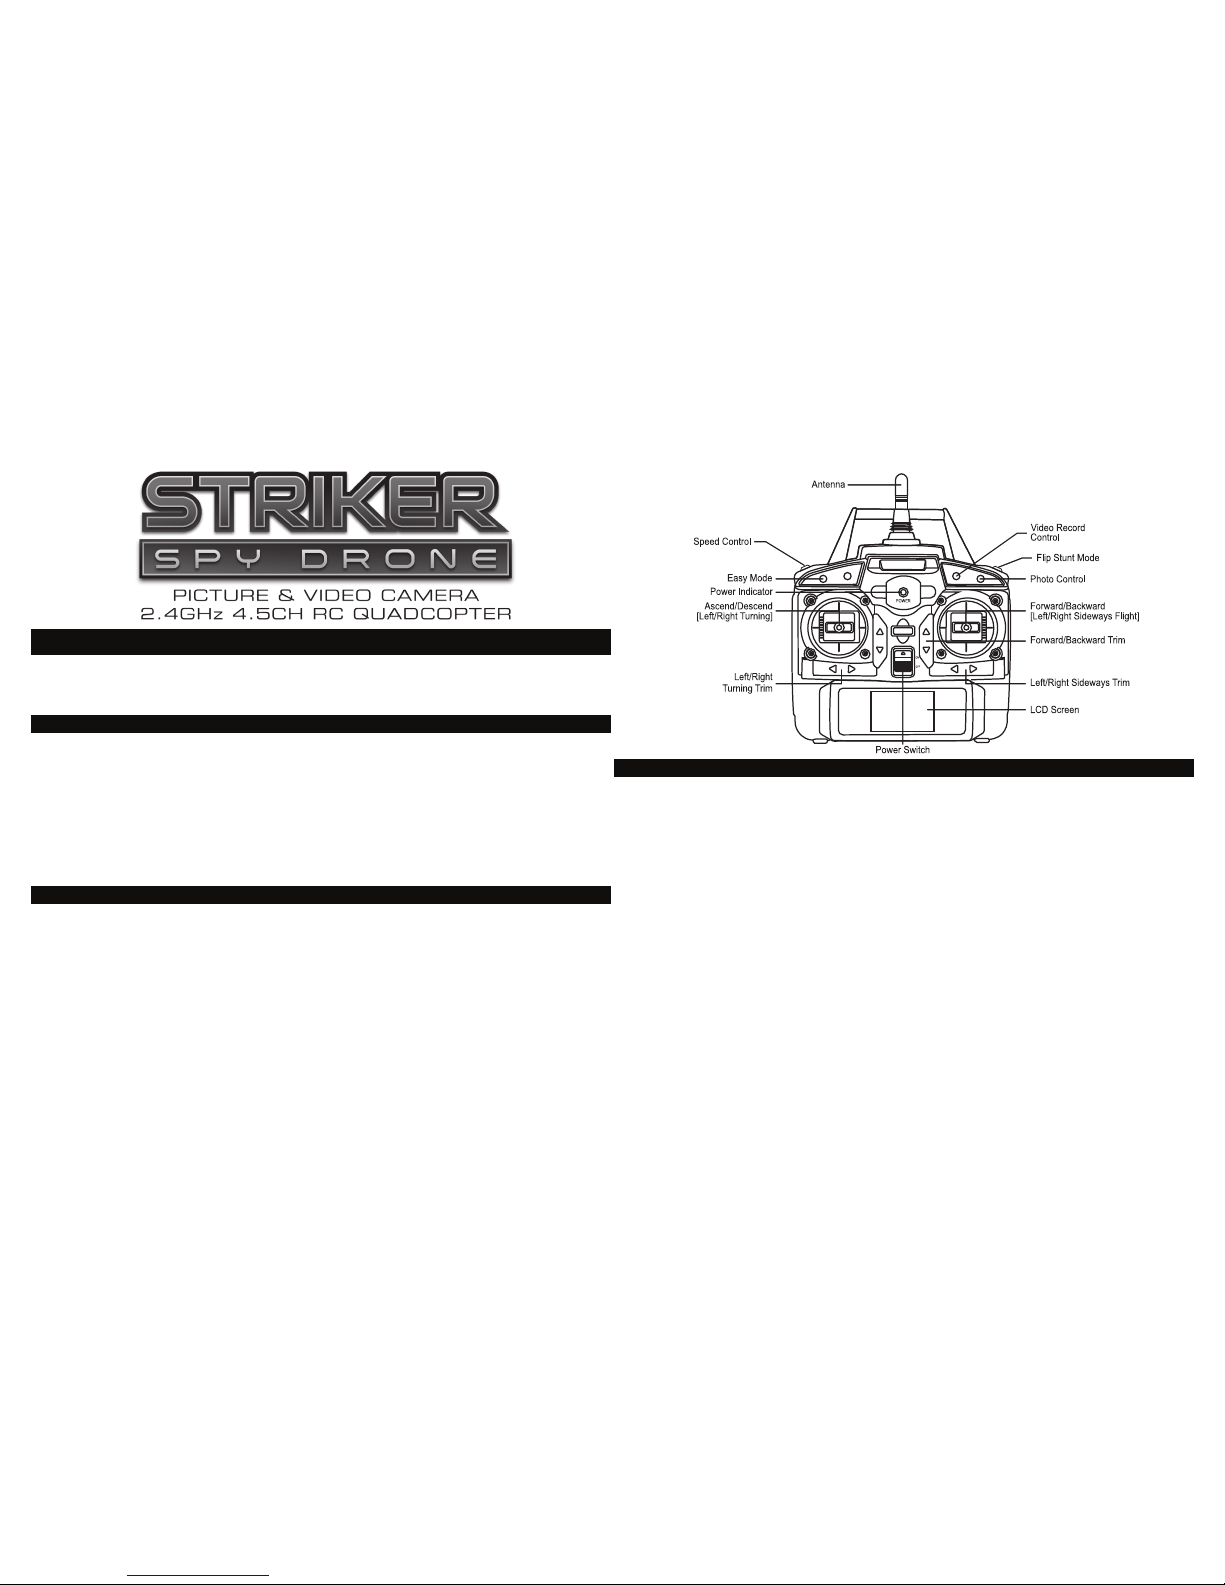
REMOT E CON TROL OV ERVIE W:
1. Your remote con trol has an LCD sc reen on it that w ill give you bas ic informat ion includ ing the thru st % you are
using when fl ying your dron e, batter y life, and con nection st rength bet ween the remo te control an d the drone. For
addition al information reg arding the LCD s creen, plea se consult the user ’s manu al.
2. The left sti ck control s ELEVATIO N and ROTATIO N. Pushing th e stick up will i ncrease ele vation and lowe ring the
stick wil l reduce eleva tion. Pushin g the stick right and le ft will rot ate the drone c lockwis e and countercloc kwise.
3. The right st ick controls dir ection of movement . Pushing the stick up w ill make the drone f ly forward. Pushi ng down
will make the d rone fly backward . Pushing left and rig ht will make the drone fl y left and right.
IM PORTAN T NOTE : Once rotated, re member that the dro ne will still oper ate according to th e direction it is po inting.
If the drone i s facing you, for exampl e, pushing for ward will actually c ause the drone to move towa rds you. Pushin g
right wil l cause the dro ne to move to your lef t. Always ke ep track of whi ch directi on your drone i s facing. The red
propel lers are at the front of the drone, whil e the bl ack propell ers are at the back of the drone. The LED light
colors a lso indicate fr ont and bac k.
4. Your remote contr ol has little trian gle-shaped but tons near the two sti cks. These buttons o n the remote “trim ” the
flight. T hese buttons allow y ou to correct drif ting. For example, if t he drone drifts to t he right a bit too much, yo u can
correc t that with the use of the c orrect trim butt on. Please co nsult the user’s manual i ncluded with the dro ne for full
explanati on of the trim button s.
5. There are 4 but tons on the top of the remo te. They are labe led accor ding to their pu rpose. From r ight to left t hey
will per form the fo llowing fun ctions: take a st ill photogr aph, star t and stop vide o recordin g, the next but ton is not
utilized o n this model, t he last button on this r ow toggles Ea sy Mode.
6. Above those 4 bu ttons are 2 sh oulder but tons. The sho ulder butto n on the right e ngages 36 0º stunt mod e. The
shoulder b utton on the lef t adjusts the speed o f flight. It has thr ee modes delineat ed by the number of beep s it makes
when pres sed. A single b eep indicat es the lowest s peed, two be eps indicat es medium spe ed, and three b eeps
indicate s the highest s peed. Low spe ed flying is b etter for tight spac es, while hig h speed fly ing is better f or flight at
higher ele vations and op en areas, or in stronge r breezes.
FLY ING THE DRON E:
1. Gently pus h up on the left st ick to gain altitude.
2. Use the right sti ck to move the drone f orward, bac kward, lef t and right.
3. If you want to rotate the drone so that you c an point the c amera in a speci fic direct ion, do so by pushin g the left
stick to the le ft or right. I f you do this, keep in mi nd where the fr ont of the drone is p ointing bec ause that will dete rmine
how your controls operate.
4. If the lights sta rt flashing slowly, that means t he battery is running low.
5. It is strongly re commended t hat you do not fly at high elevations i n strong winds, densely popul ated or wooded ar eas.
1. Before attempt ing to record v ideo, ensure tha t any plastic cover ing over the lens of t he camera has been removed
and discarded.
2. Once your drone is turned o n and paired, and t he micro- SD card is c orrectly inserted into t he slot behind th e
camera, you w ill see a blue light illuminate on th e bottom of the c amera. When yo u click the vid eo-rec ording button,
a purple lig ht will turn on nex t to the blue light . This indicates that the camera is recording. Pushing the bu tton again
will stop rec ording and the p urple light wi ll turn off. A ca mera icon wi ll also be displaye d on the LCD screen w hile
recordin g is taking plac e.
3. Still photo s can be taken by pre ssing the photo b utton on the to p right of the rem ote control. Th e purple light under
the camera will come on br iefly, then turn o ff again.
RECORDI NG VIDEO A ND TA KING ST ILL PHO TOS:
TRA NSFERRI NG PHOT OS AND VID EOS TO A COMP UTER:
1. Remove the micro -SD car d from the drone a s explained above.
2. Insert the micro- SD card into the USB adapter t hat is provided.
3. Insert the USB adapter, with mi cro-S D inside, into the U SB port of a Windows PC or App le computer.
4. The USB adapter should appea r as a folder that c an be opened. Open the folder and find the video files. Dr ag the
files to the desktop, or other folder of your ch oosing. Thes e files can n ow be viewed, edite d and shared. Enjoy!
ITEM NO. 34937
 Loading...