

WORLD TECH ELITE RECON, 35064 User Manual

USER MANUAL
ITEM NO.
35064

1. Fly in an open wide area without large obstacles like buildings, trees or electric wires within
100 feet as they may distort the GPS signals and you may crash the drone. Do not fly close to
metal structures with strong magnetic fields.
2. Place the drone on a flat stable surface before take off. After powering on, the drone will start
flight system checking and gimbal system checking by itself. Do not touch or move it during
this process as it may result in a failure and errors in calibration.
3. The drone cannot take off until it connects to enough GPS satellites and the Transmitter /
Smart Watch screen shows a “ ”. Do not start follow me flight mode until the watch gets a
GPS signal strength of 10 and shows a “ ”. If the drone has a weak GPS signal, move to
another area and try again.
4. Do not fly in strong winds, rains, lightning, snow or fog. Bad weather may weaken the
GPS signals or even damage Recon.
5. Keep the drone 15 feet away from people or animals when it takes off.
6. Max flying range is 3,250 feet but it is recommended to keep within 500 feet. Do not fly across
large obstacles. Always keep the drone within your line of sight.
7. If the drone suddenly deviates or keeps ascending (flying upward) due to surrounding
interference, immediately press the “hover” and “land” button to force Recon to land.
8. If the drone crashes by mistake, press the land button or pull down the left flight stick to
the lowest point to shut down the motors. Do not touch while the propellers are spinning.
9. Ensure all components are in good, working condition and fully charged before every flight.
10. Turn off the battery for the Recon, camera, and transmitter or smart watch after every use to
save battery life.
15 feet
500 feet
500 feet
Safety & Precautions
Box Contents
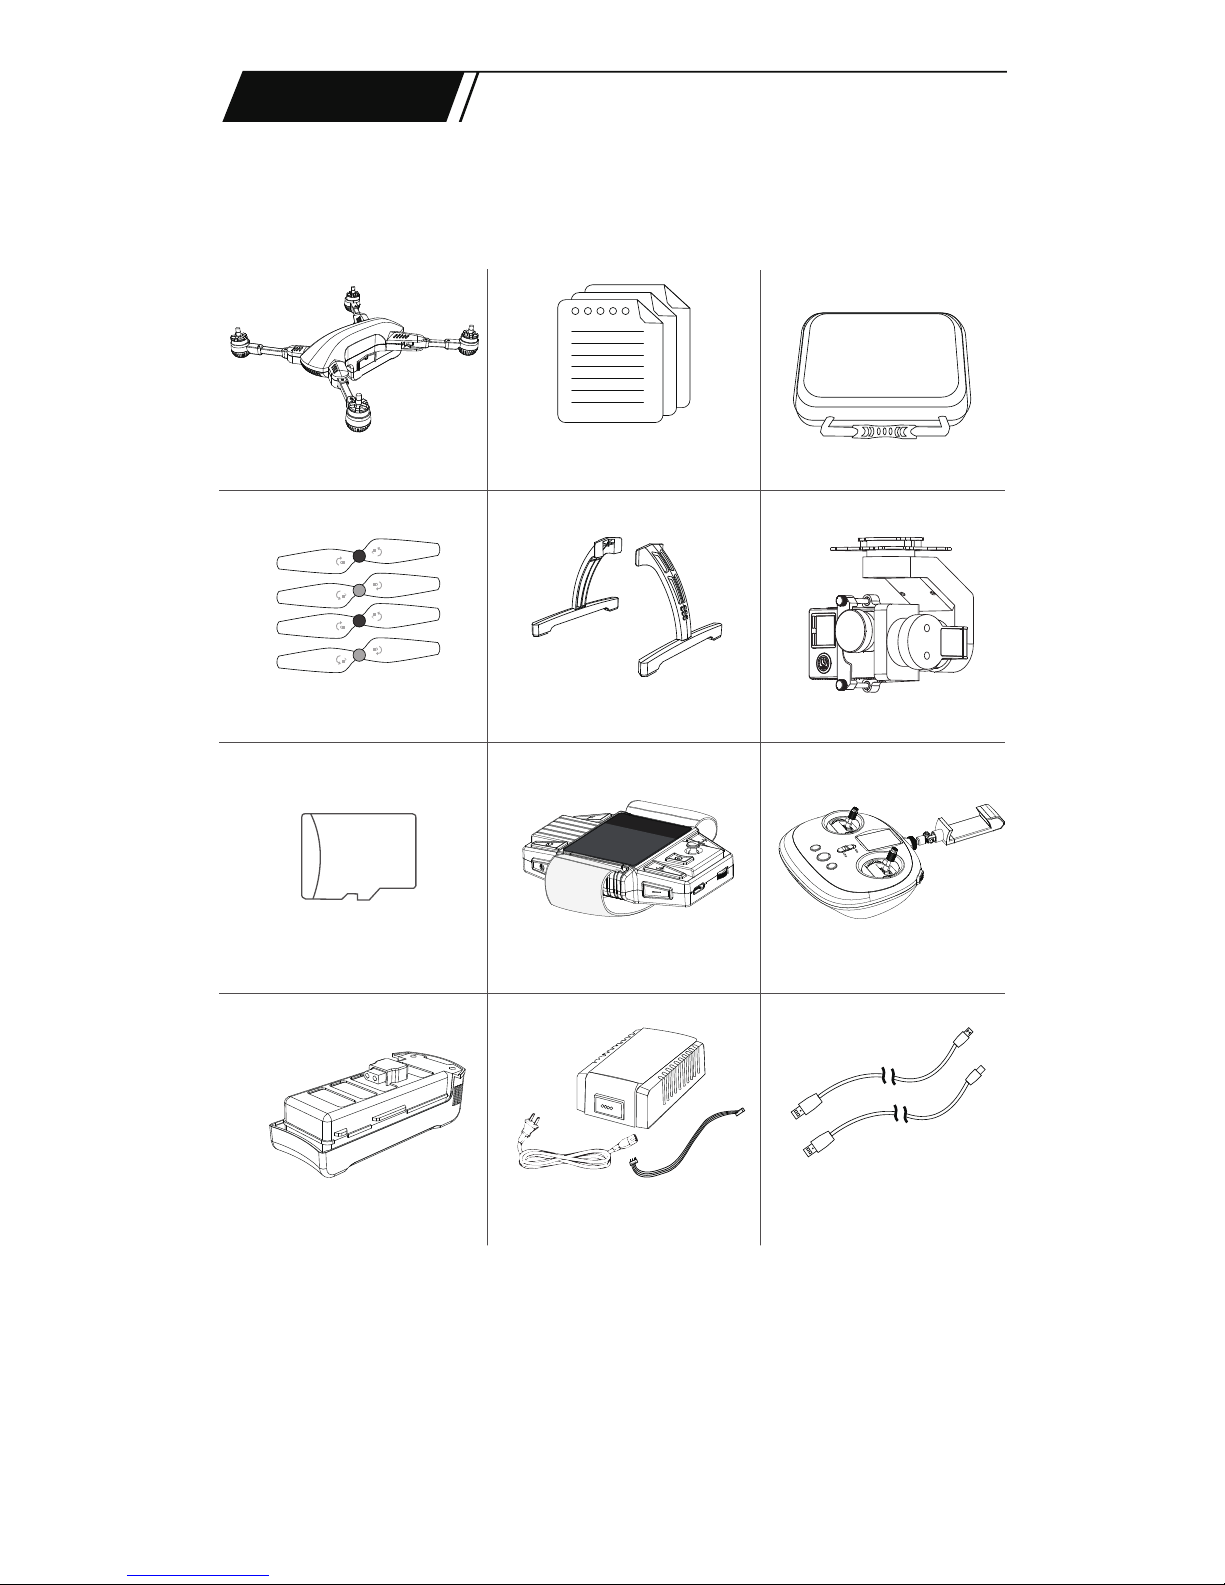
Please go through the checklist of items below after unboxing:
The box contents may vary occasionally due to different configurations. Subject to the description of the
retail store or ordering page.
Recon Drone x1
Memory Card x 1
Carrying Case x 1
Propeller x 4 Landing Skids x 2 Camera/Gimbal x 1
Smart Watch x 1 Transmitter x 1
Drone Battery x 1
Balance Charger & Cables Mini USB Cable x 1
Micro USB Cable x 1
User Manual x 1
Drone Battery Balance Charger
Smart Watch Transmitter
Camera
AC Power Cord
Battery Charging Times:
Drone Battery - 2 hours Transmitter - 6 hours Smart Watch - 1 hour Camera - 2 hours
Battery Running Times:
Drone Battery - 25 min. Transmitter - 24 hours Smart Watch - 1 hour Camera - 70-90 min.
Charging Cable
Micro USB Cable
Notes: Insert the charging cable into the correct position on battery. Otherwise, the battery will not charge
and all 4 LEDs will flash continuously. When the transmitter and smart watch are charging, the screen will
display a indicating the charging progress. The camera will start charging when a red light is on and
is fully charged when the red light turns off.
Mini USB Cable
Setup & Assembly
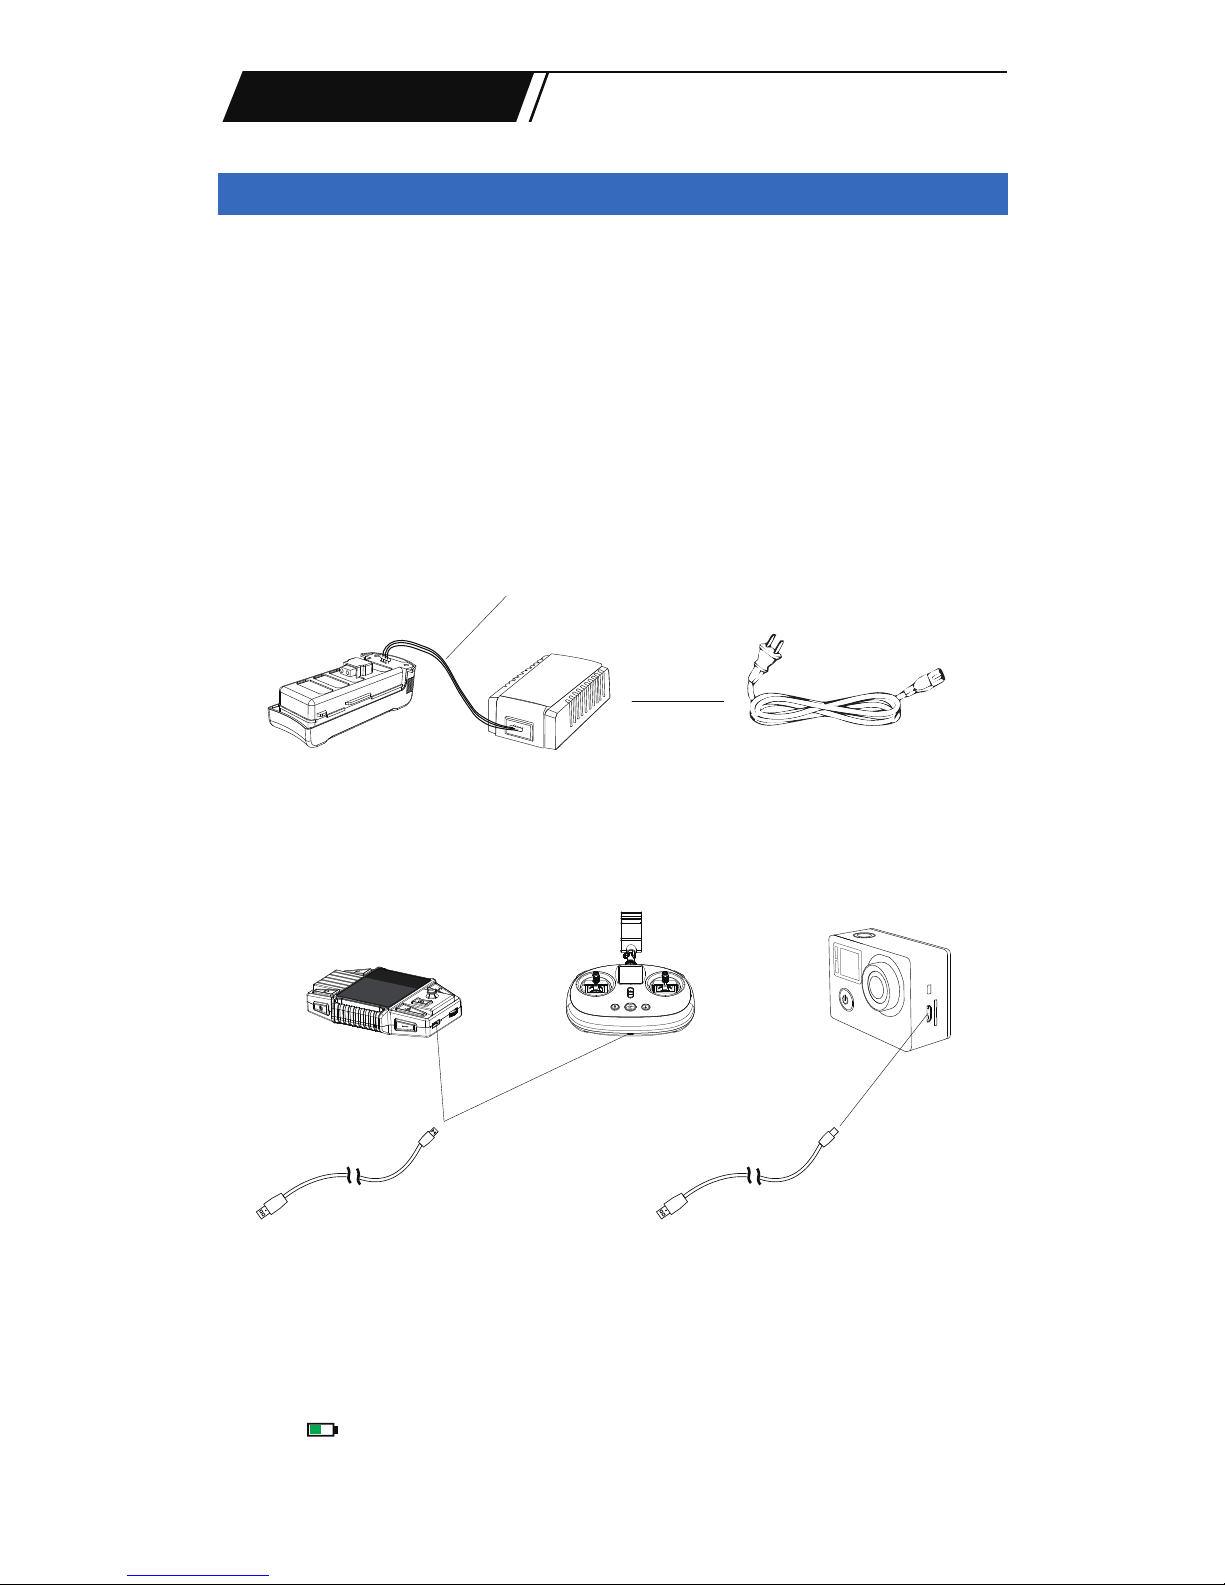
Charging Everything
Turn on the battery, transmitter and smart watch to check the battery levels.
Insert the AC power cord into the balance charger and plug into a standard U.S. wall
outlet. Connect the battery with the balance charger using the supplied charging
cable. When the battery is charging, the LEDs will light and indicate the battery level.
The LEDs on the charger will flash one by one and indicate charging progress.
When all 4 LEDs are on, the battery has been fully charged.
The transmitter and smart watch use the same type of USB cable to charge. The
camera uses the large Mini USB cable to charge when not connected to drone.
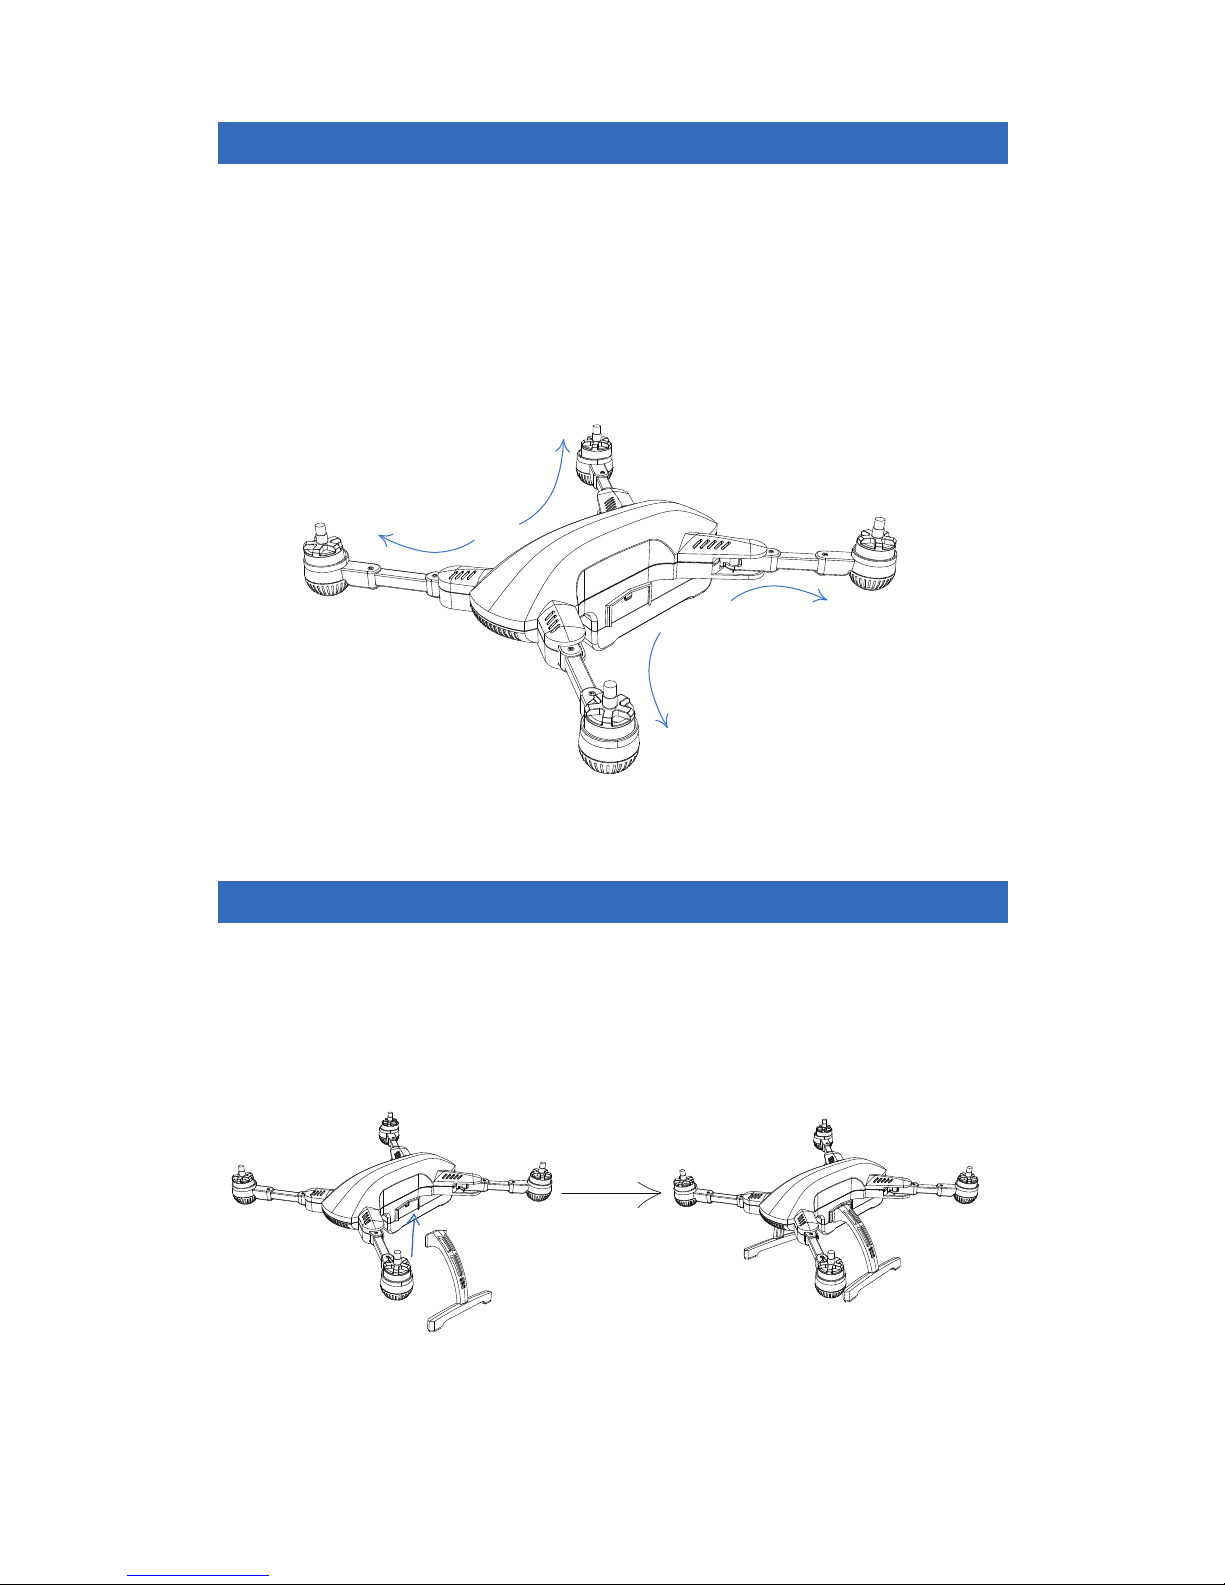
Unfolding the Recon
Landing Skid
Front Arm
Front Arm
Rear Arm
Attaching the Landing Skids
Rear Arm
Unfold the rear arms before unfolding the front arms. Each arm has a self locking
mechanism, slowly twist each arm outward till the arms are fully extended and click
into place.
To fold up Recon, firmly push the arms inward in the reverse order with the front
arms folding in first and the rear arms last. The self locking mechanism will release
each arm under pressure.
Match the landing skids with the skid mounts and push up into place.
To dismount the skids, pull them down smoothly till removed.
Setup & Assembly Continued
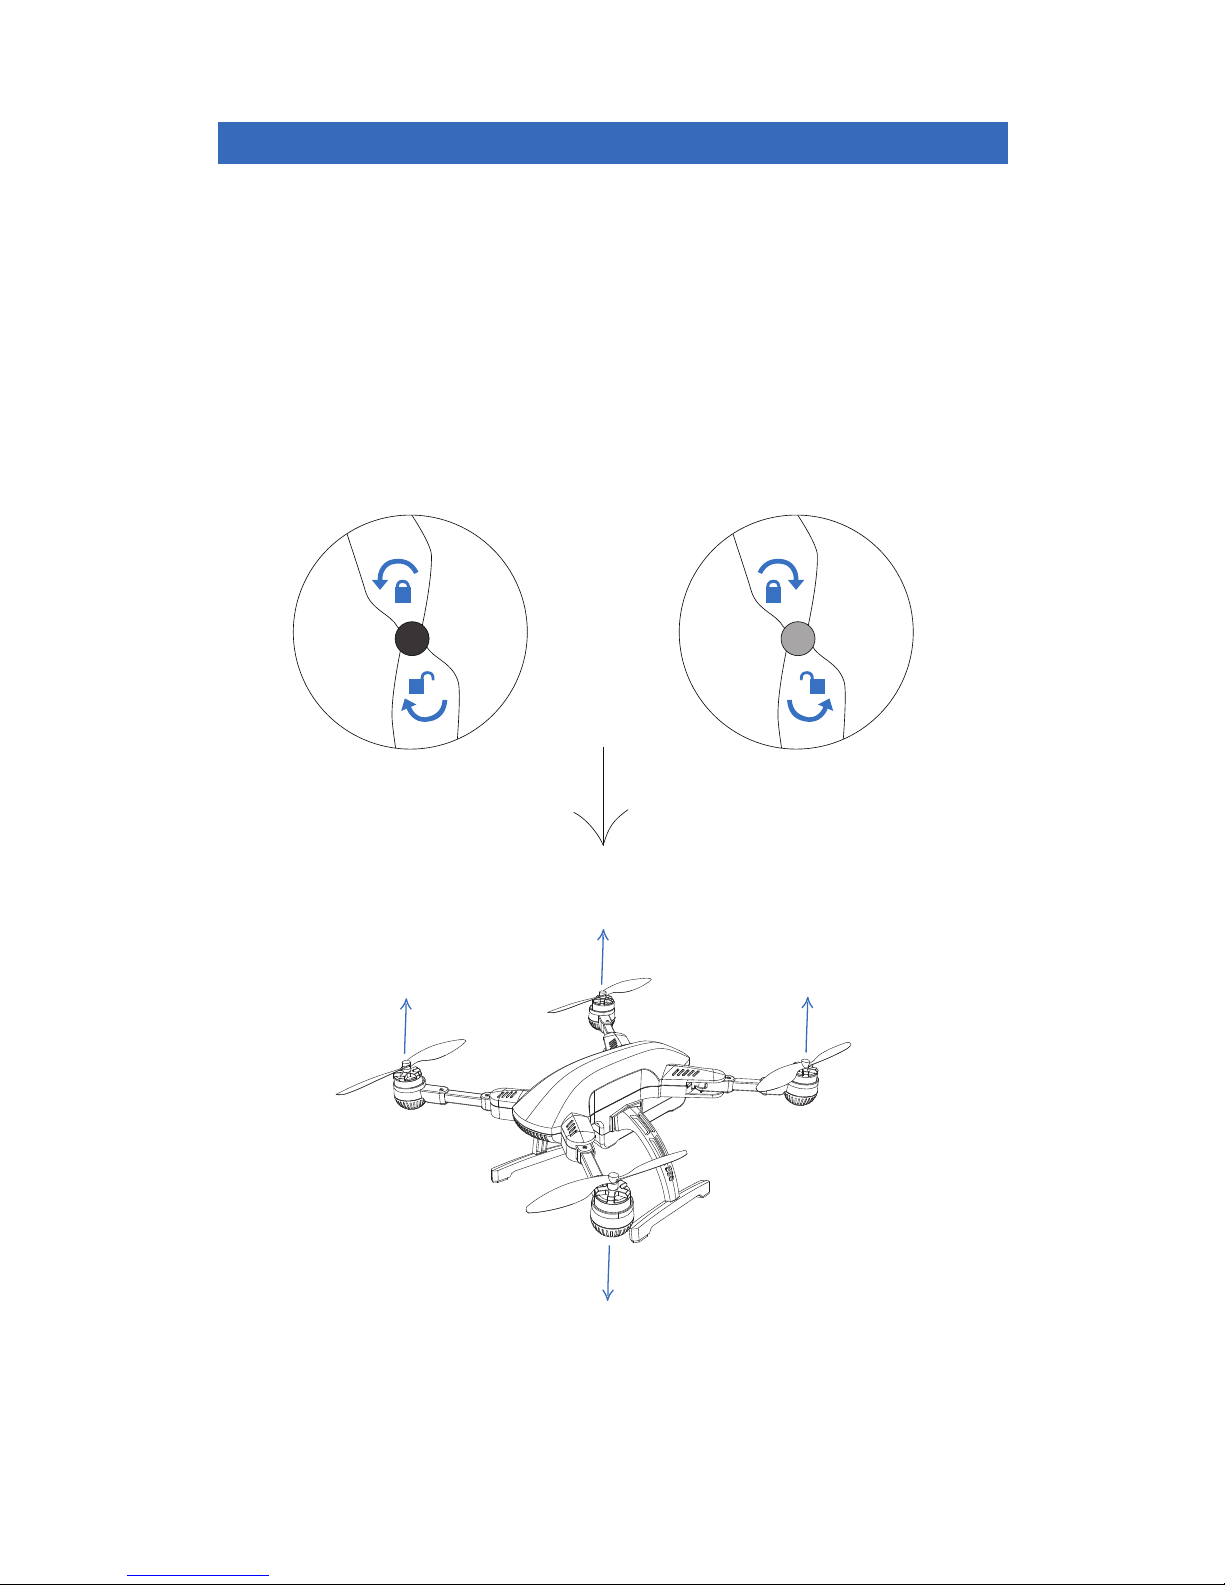
Installing the Rotors
Black Motor
Silver Motor
Black Motor
Silver Motor
Black cap rotors Silver cap rotors
lock
unlock
lock
unlock
Notes:
Make sure the rotors are tightened on the right motors before flying otherwise the drone may crash.
Attach the silver cap rotors onto the silver motors and secure them by twisting
clockwise.
Attach the black cap rotors onto the black motors and secure them by twisting
counter-clockwise.
Arrows around the rotor cap indicate the directions of tightening and loosening.
To release the rotors from the motors, just spin in the opposite direction.
Setup & Assembly Cont.

Installing the Gimbal & Camera
Camera strap
Gimbal Board
Camera Gimbal
Screw
Notes:
Do not install or remove the gimbal while the drone is powered on. You may damage the gimbal.
Unscrew the camera strap from the gimbal.
Attach the camera into the gimbal frame (the camera lens is on the right). The USB
port must line up and plug in to the camera from the side as shown. Fasten the
camera strap with the two thumb screws.
Fit the gimbal board under the bottom front mount of the drone and push the upper
part of the gimbal into place. To remove gimbal push out the tabs on each side of
gimbal mount to release, gimbal will push out, remove carefully.
Setup & Assembly Cont.
Gimbal Mount
(Under Front of Drone)

Installing & Removing the Recon Battery
Notes:
Do not remove battery while powered on or the battery may be damaged.
Do not force the battery into frame if it gets stuck. Wiggle the battery a few times until the battery plug
goes into the drones power plug.
Recon
Power Plug
Battery Plug
Push
Spring Button
Battery
Hand position to install
or remove battery
Battery Plug
To install the battery pull up the spring button on the back of the drone. Align the
battery with the drone, matching the battery plug with the power plug, slide the
battery into the drone until it is locked in securely.
To remove the battery, pull up the spring button first and pull out the battery.
Setup & Assembly Cont.
 Loading...