

Page 1
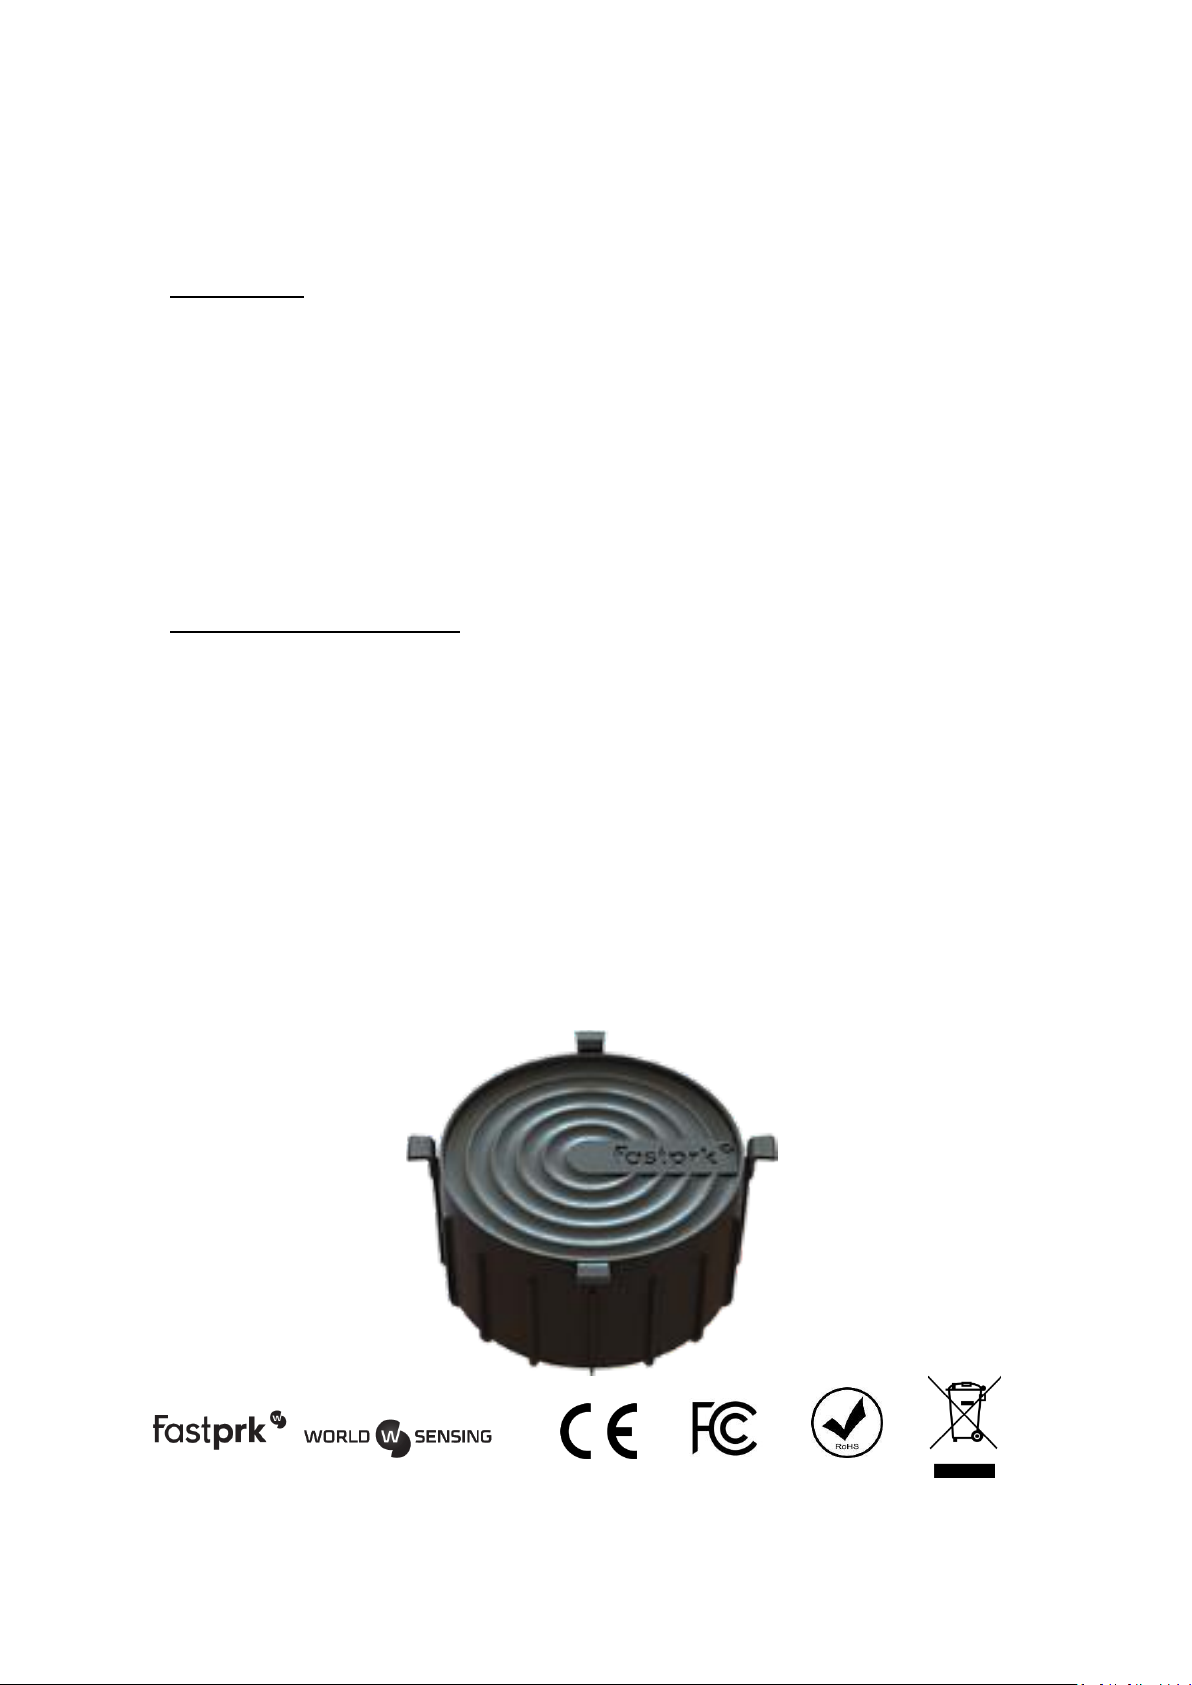
FLUSH, Fastprk Magnetic Sensor
Model: FP-GFLL
Description
The Fastprk sensor uses magnetic sensors to precisely detect the presence of vehicles.
It houses advanced signal processing, meaning that it can differentiate between the
various magnetic fields in its surroundings to achieve highly reliable detection.
The Fastprk sensor uses radio communication protocols based on standard certified
technology. The sensors are capable of direct communication with the Gateway within
a radius of up to 500 metres. As it does not use repeaters, this solution enables
significant savings in the installation of the network.
Installation of the sensor
The Fastprk sensor must be positioned in the centre of the parking space. It is important
to make sure the ground is dry before performing the installation. The step-by-step
procedure is as follows:
- Mark the spot where the sensor will go;
- Drill a 70 mm-deep hole with a diameter of 112 mm;
- Prepare the Mapegrout SV grout;
- Put approximately 250 ml of the grout in the hole;
- Insert the sensor and clean off any excess grout;
- Leave the grout to dry for approximately 15 minutes.
Page 2
Calibration of the sensor
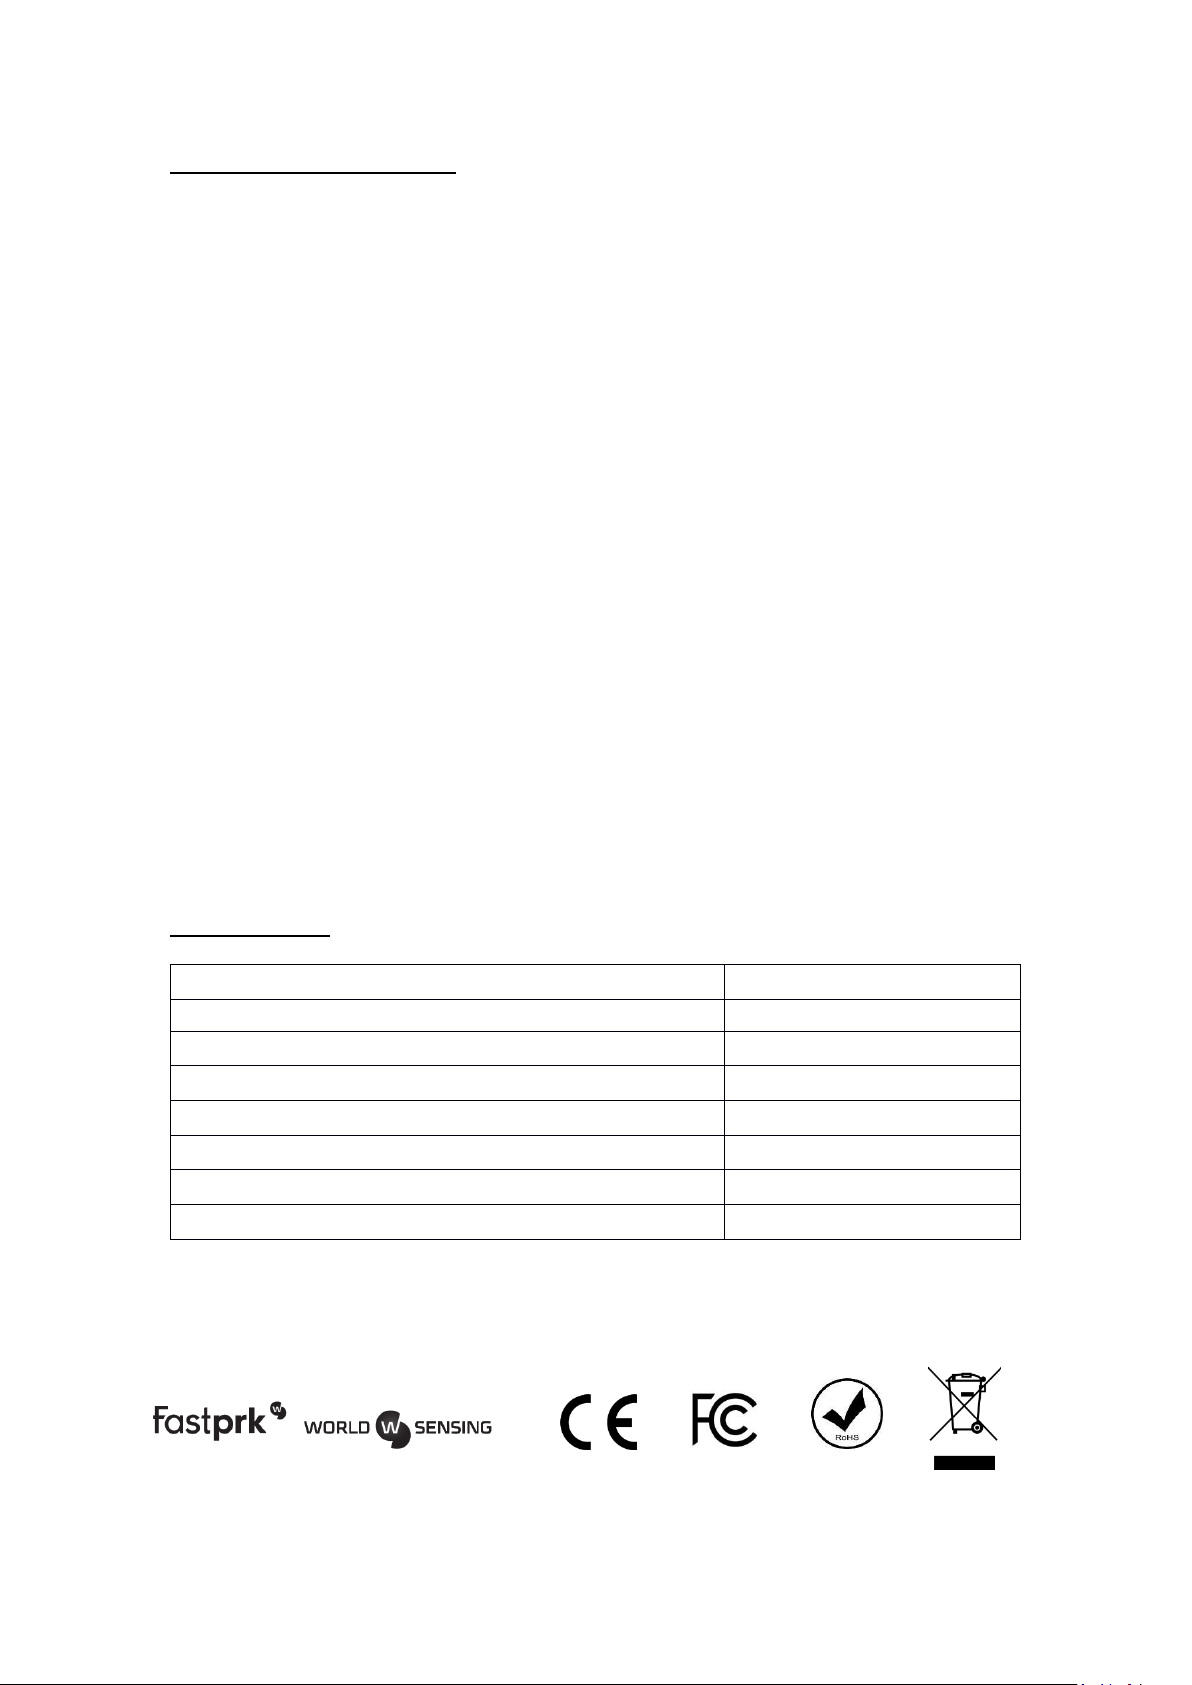
Dimensions
Ø 104 x 64 mm
Weight
435 g
Working temperature range
-30°C to +70°C
Protection
IP67
Power supply
3.6 VDC
Communications frequency
902 – 928 MHz
Distance to Gateway
200 metres
Battery type
Li-SOCl2
Once the sensor is in its final position, it must be calibrated. To do so, you need the
following tools:
- A smartphone with the Worldsensing calibration app installed;
- A Worldsensing RFID reader;
- The username and password provided by Worldsensing.
Calibration process
1. Turn on Bluetooth on the smartphone.
2. Log into the app on the smartphone.
3. Press the power button on the RFID reader.
4. Go to “Scan for device” in order to find nearby devices.
5. Make sure there are no metallic objects within 3 metres of the sensor, for
example cars, tools or fences.
6. In the app, press “Discovery” while holding the RFID reader close to the sensor.
7. The ID of the sensor will appear on the screen together with information about
the calibration.
8. In the app, press “Calibration”. The sensor’s calibration process begins.
9. A minute later, press “Report” while holding the reader close to the sensor.
Specifications
FCC/IC Regulatory notices
Page 3

Modification statement
Worldsensing, S.L. has not approved any changes or modifications to this device by the user.
Any changes or modifications could void the user’s authority to operate the equipment.
Interference statement
This device complies with Part 15 of the FCC Rules and Industry Canada’s licence-exempt RSS
standards. Operation is subject to the following two conditions: (1) this device may not cause
interference, and (2) this device must accept any interference, including interference that may
cause undesired operation of the device.
Wireless notice
This equipment complies with FCC and IC radiation exposure limits set forth for an
uncontrolled environment. The antenna should be installed and operated with
minimum distance of 20 cm between the radiator and your body.
This transmitter must not be co-located or operating in conjunction with any other
antenna or transmitter.
FCC Class B digital device notice
This equipment has been tested and found to comply with the limits for a Class B digital
device, pursuant to part 15 of the FCC Rules. These limits are designed to provide
reasonable protection against harmful interference in a residential installation. This
equipment generates, uses and can radiate radio frequency energy and, if not installed
and used in accordance with the instructions, may cause harmful interference to radio
communications. However, there is no guarantee that interference will not occur in a
particular installation. If this equipment does cause harmful interference to radio or
television reception, which can be determined by turning the equipment off and on, the
user is encouraged to try to correct the interference by one or more of the following
measures:
- Reorient or relocate the receiving antenna.
- Increase the separation between the equipment and receiver.
- Connect the equipment into an outlet on a circuit different from that to which the
receiver is connected.
- Consult the dealer or an experienced radio/TV technician for help.
Page 4

CAN ICES-3 (B) / NMB-3 (B)
This Class B digital apparatus complies with Canadian ICES-003.
 Loading...