

Page 1
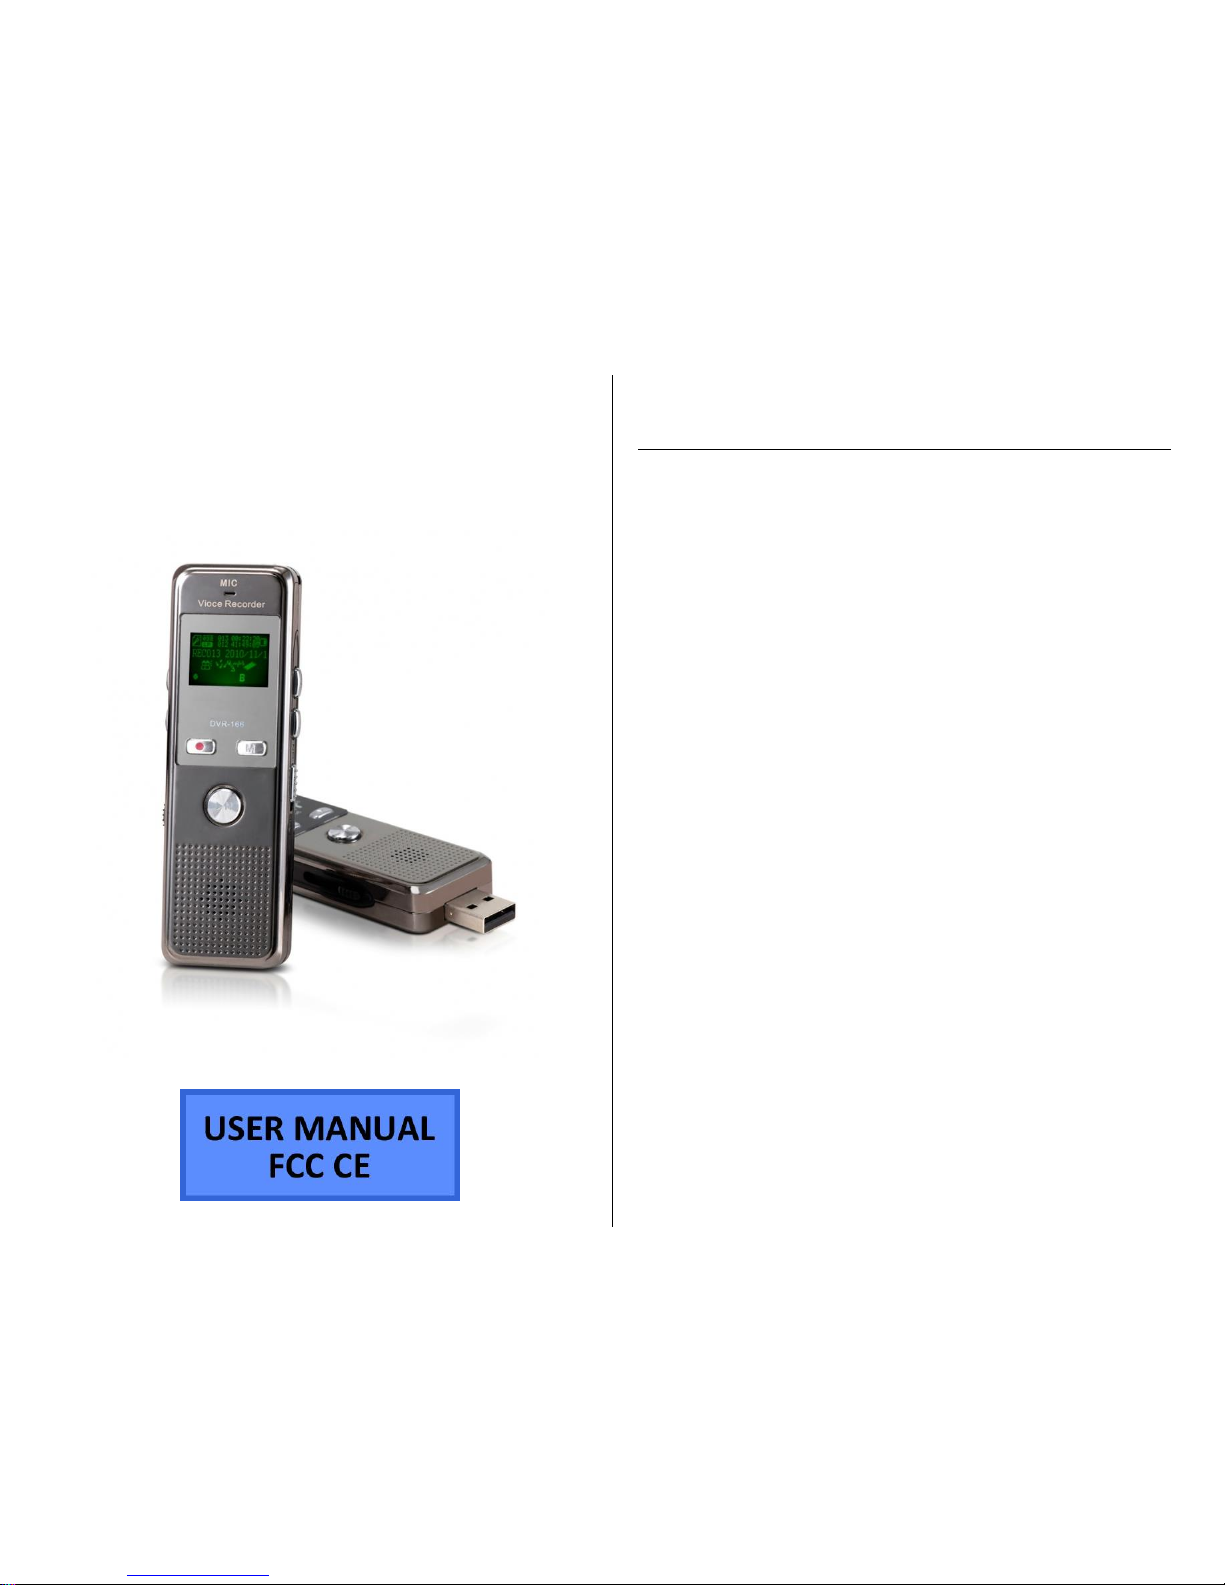
VR166 TELEPHONE VOICE
RECORDER
SKU: VR166
THANK YOU FOR PURCHASING THE VR166
Please read this manual before operating the VR166 and keep it
handy.
The VR166 is a professional grade telephone voice recording device.
Simple set up. Plug into a wall jack and pick the recording quality
mode that suits the situation. Set it to VOR (voice operated recording
mode) and you can go about your day or listen in with the included
earbuds or listen in with the included earbobs.
Adjustable quality settings. Manage the trade-off between quality
and recording time when choosing between extra high quality (XQ),
high quality (HQ), standard quality (SP), and long play (LP). The long
play mode can record for up to 283 hours (a bit longer than 11 days).
Built-in FM radio. Listen to your favorite radio station while you wait
for calls.
Your purchase should include:
1 x Telephone Voice Recorder
1 x Wall Adapter
1 x Set of Ear buds
1 x Telephone Recording Kit
1 x External Microphone Set
1 x Instruction Booklet
Page 2
GET FAMILIAR WITH YOUR VR166
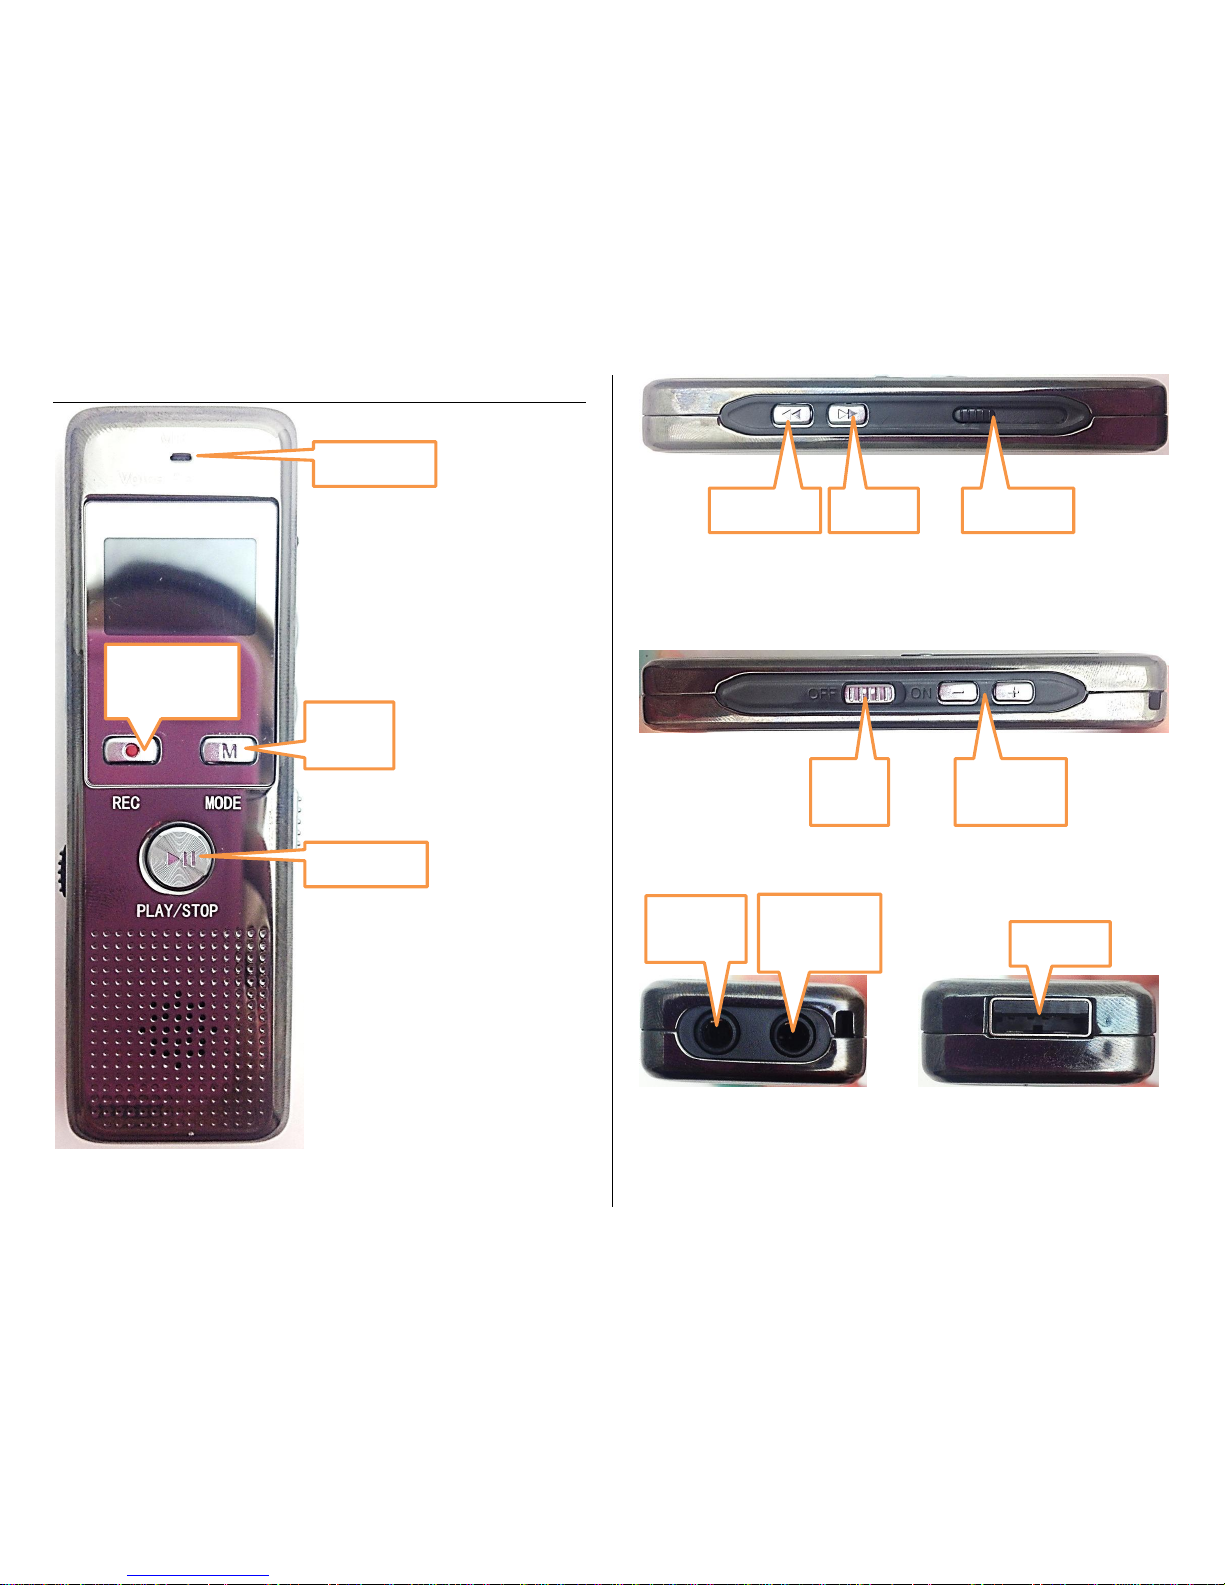
Figure 1: Front
Figure 2: Side A
Figure 3: Side B
Figure 4: Top Figure 5: Bottom
Microphone
Record / Stop
Mode
Button
Play / Pause
Backward
Forward
USB Slider
Power
Switch
Volume Up
and Down
Earphone
Jack
External
Microphone
Jack
USB Stick
Page 3
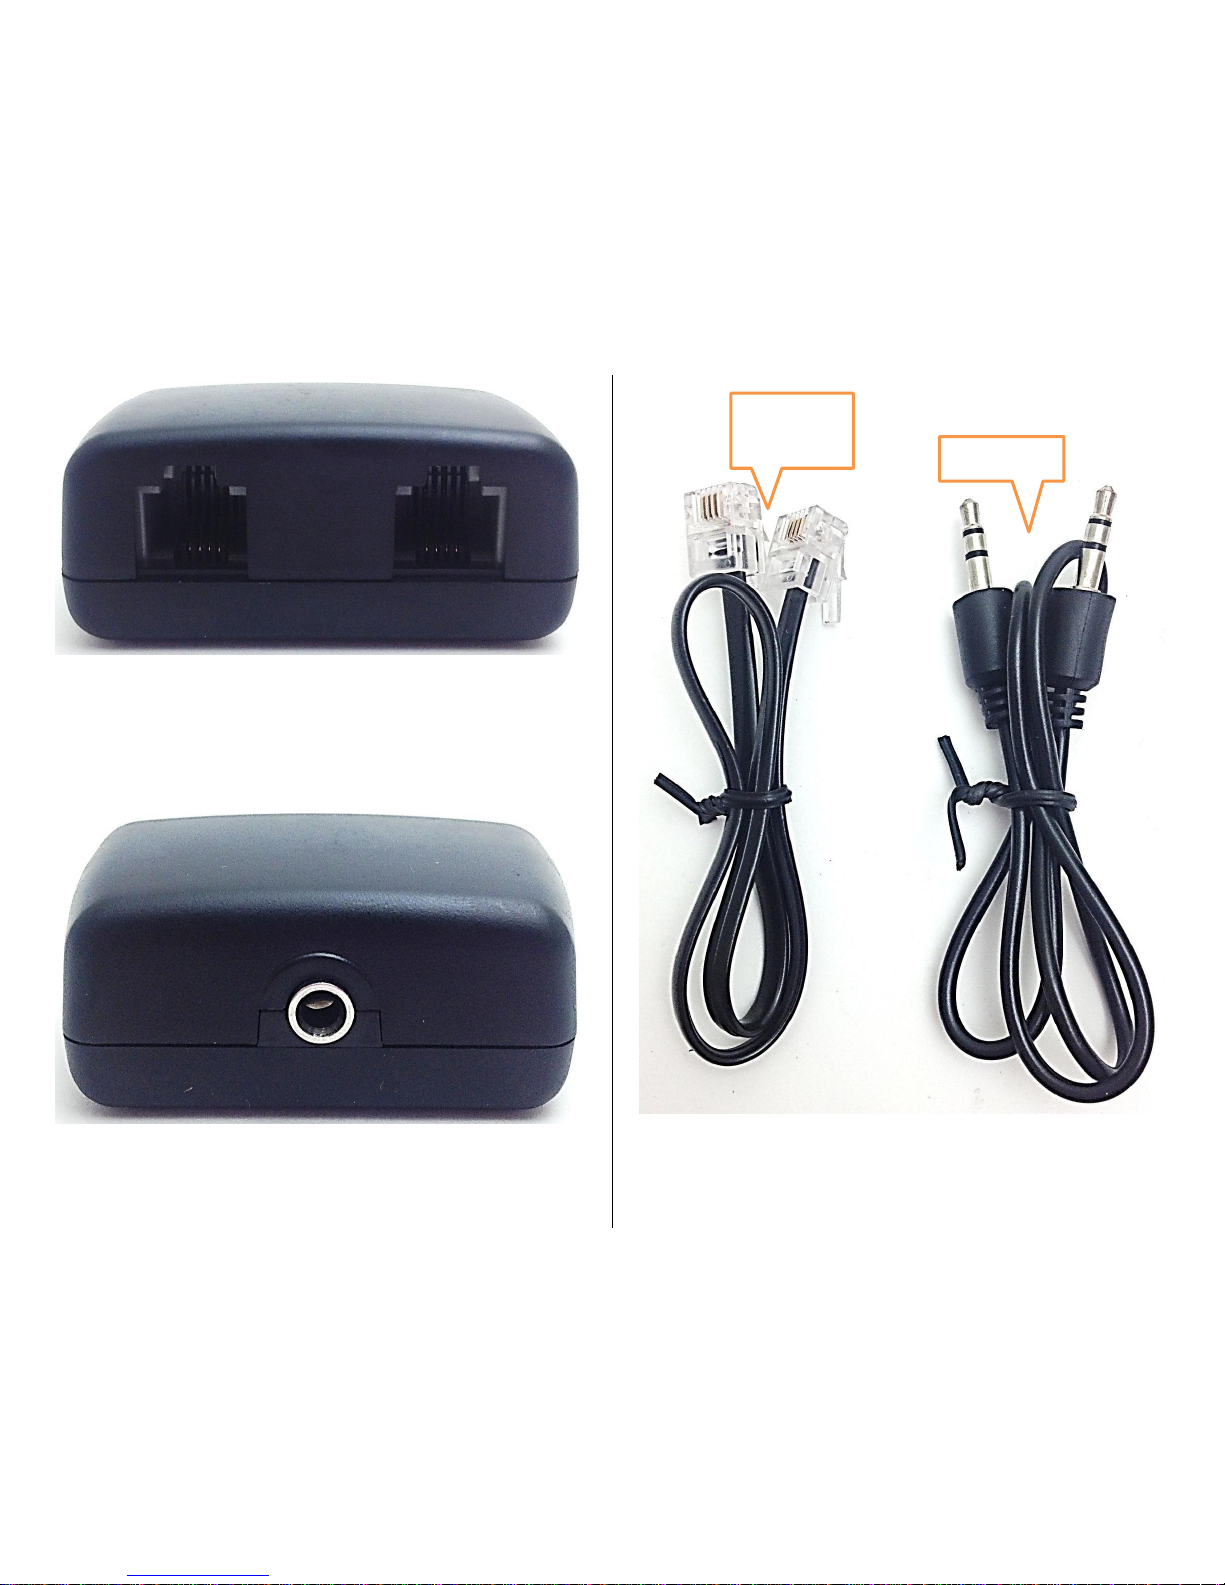
Figure 6: Jack Adapter Front View
Figure 7: Jack Adapter Back View
Figure 8: Cords
Modular
Connector
Stereo Plug
Page 4

OPERATING THE VR166
IMPORTANT NOTICE: Allow the device to charge 4 – 6 hours before
using.
HOW TO CHARGE THE DEVICE USING YOUR COMPUTER
1. Ensure the Power Switch is in the OFF position
2. Use the USB slider to extend the USB
3. Plug the USB directly into the USB port of your computer
The screen will be lit while charging
HOW TO CHARGE THE DEVICE USING THE CHARGING
ADAPTER
1. Ensure the Power Switch is in the OFF position
2. Use the USB slider to extend the USB
3. Plug the USB directly into the Charging Adapter
4. Plug the Charging Adapter into a power outlet
The screen will be lit while charging
HOW TO TURN THE DEVICE ON/OFF
1. Move the Power Switch into the ON position
The welcome screen will appear
o The device is now ON and in standby mode
2. To turn the device OFF move the Power Switch into the OFF
position
OR
3. Press and hold the Play/Stop button until the device shuts
down
HOW TO RECORD AUDIO MANUALLY
1. Turn the device ON
2. Press and hold the Record Button until the recording screen
comes on
OR
3. Press and hold the Mode Button to get to the Main Screen
4. Use the Rewind/Fast-Forward Buttons to find the Record
Mode
5. Press the Mode Button to select the Record Mode
6. When in Record Mode press the Record Button to start
recording
7. Press the Record Button again to stop recording
8. To listen to your recording press the Play/Stop Button
9. To return to the Main Menu press and hold the Menu Button
TIP: You can press the Play/Stop button to pause while recording
and press it again to resume recording
HOW TO RECORD AUDIO USING VOICE ACTIVATION
1. Press and hold the Mode Button to get to the Main Screen
2. Use the Rewind/Fast-Forward Buttons to find Record Mode
3. Press the Mode Button to make your selection
4. When in Record Mode press the Mode Button again
The menu will appear
5. Press the Mode Button to select “Record Mode”
6. Use the Rewind/Fast-Forward Buttons to select “AVR mode”
7. Press the Mode Button to finalize your selection
“AVR Level” will appear on the screen
8. Use the Rewind/Fast-Forward Buttons to adjust the activation
sensitivity
9. Press the Mode Button to finalize your selection
HOW TO RECORD AUDIO THROUGH YOUR TELEPHONE
1. Plug the Stereo plug into the External Microphone Jack on the
recorder
2. Plug the Stereo plug into the port on the back of the Jack
3. Adapter
4. Plug the Modular Connector into the Jack Adapter
5. Plug the Modular Connector into the phone line
6. Select the necessary recording type on the recorder
7. Push the Record button
TIP: You can plug in the ear buds to listen to the telephone
conversation while recording
Page 5
HOW TO MANAGE/LISTEN TO YOUR SAVED AUDIO FILES
1. When there are audio recordings saved to the device they will
automatically appear on the screen when the device is turned
on
2. Press the Play/Stop Button to listen to your files
3. To select a different file or to delete a file press the Mode
Button
“Local Folder” and Delete Options will appear
4. Your files are located in the “Local Folder”
5. Use the Rewind/Fast-Forward Buttons to make your selection
6. Press the Mode Button to finalize your selection
MUSIC MODE
10. Press and hold the Mode Button to get to the Main Screen
11. Use the Rewind/Fast-Forward Buttons to find Music Mode
12. Press the Mode Button to make your selection
FM RADIO MODE
1. Press and hold the Mode Button to get to the Main Screen
2. Use the Rewind/Fast-Forward Buttons to find the Radio Mode
3. Press the Mode Button to make your selection
4. Use the Rewind/Fast-Forward Buttons to select the radio
station you want
RETRIEVE THE FILES TO YOUR PC
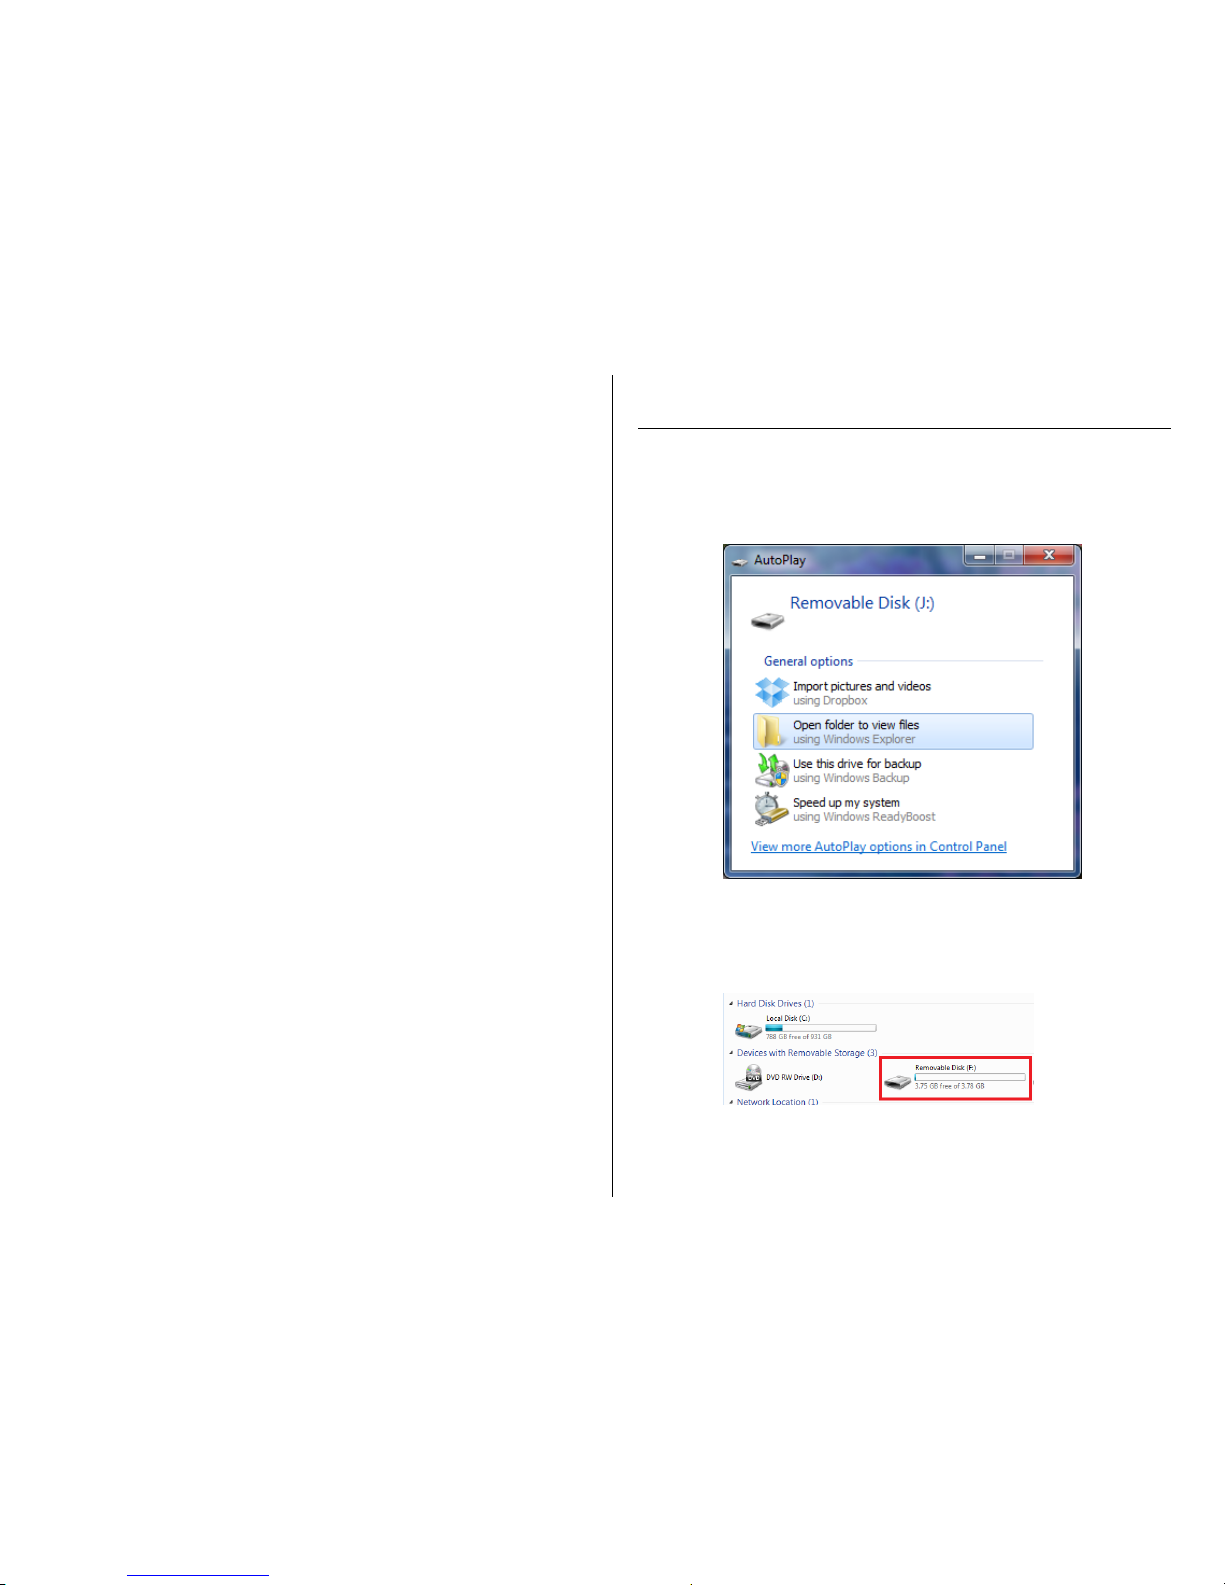
1. Plug the device into your PC using the USB cable
2. Locate “Removable Disk” inside the (My) Computer folder
AutoPlay Removable Disk > Open folder to view files
Or…
Go to Start > Computer > Removable Disk
3. Open the Removable Disk drive
4. Open the Record folder
5. Double click the file you want to view
Page 6

TROUBLESHOOTING
THE DEVICE WON’T TURN ON
Charge the device for at least 4 hours before the first use
Make sure the charging cable is securely inserted into the
device and into the power source
THE DEVICE ISN’T CHARGING
Replace the battery or charging cable
If you are charging via a wall power source, you may need to
charge via your PC. The AC adapter might be bad
THE DEVICE HAS CRASHED
You need to reset the device
MY COMPUTER DOESN’T RECOGNIZE THE DEVICE
Unplug the device from your PC and reboot the device
Unplug the device from your PC and reboot your PC
Try using a different USB slot on your PC
Replace the USB cable
THE SOUND IS UNCLEAR
The device needs charging
SPECIFICATIONS
Audio Format
WMA, MP3, ACT
Water Resistant
No
Battery Life
3 hours
Type of Memory
Internal
Memory Capacity
2GB
USB Interface
2.0 USB
Player Software
VLC recommended
Operating Systems
Windows 2000 – Windows 8
Mac OSX
Linux
 Loading...