

Page 1
CONTENTS
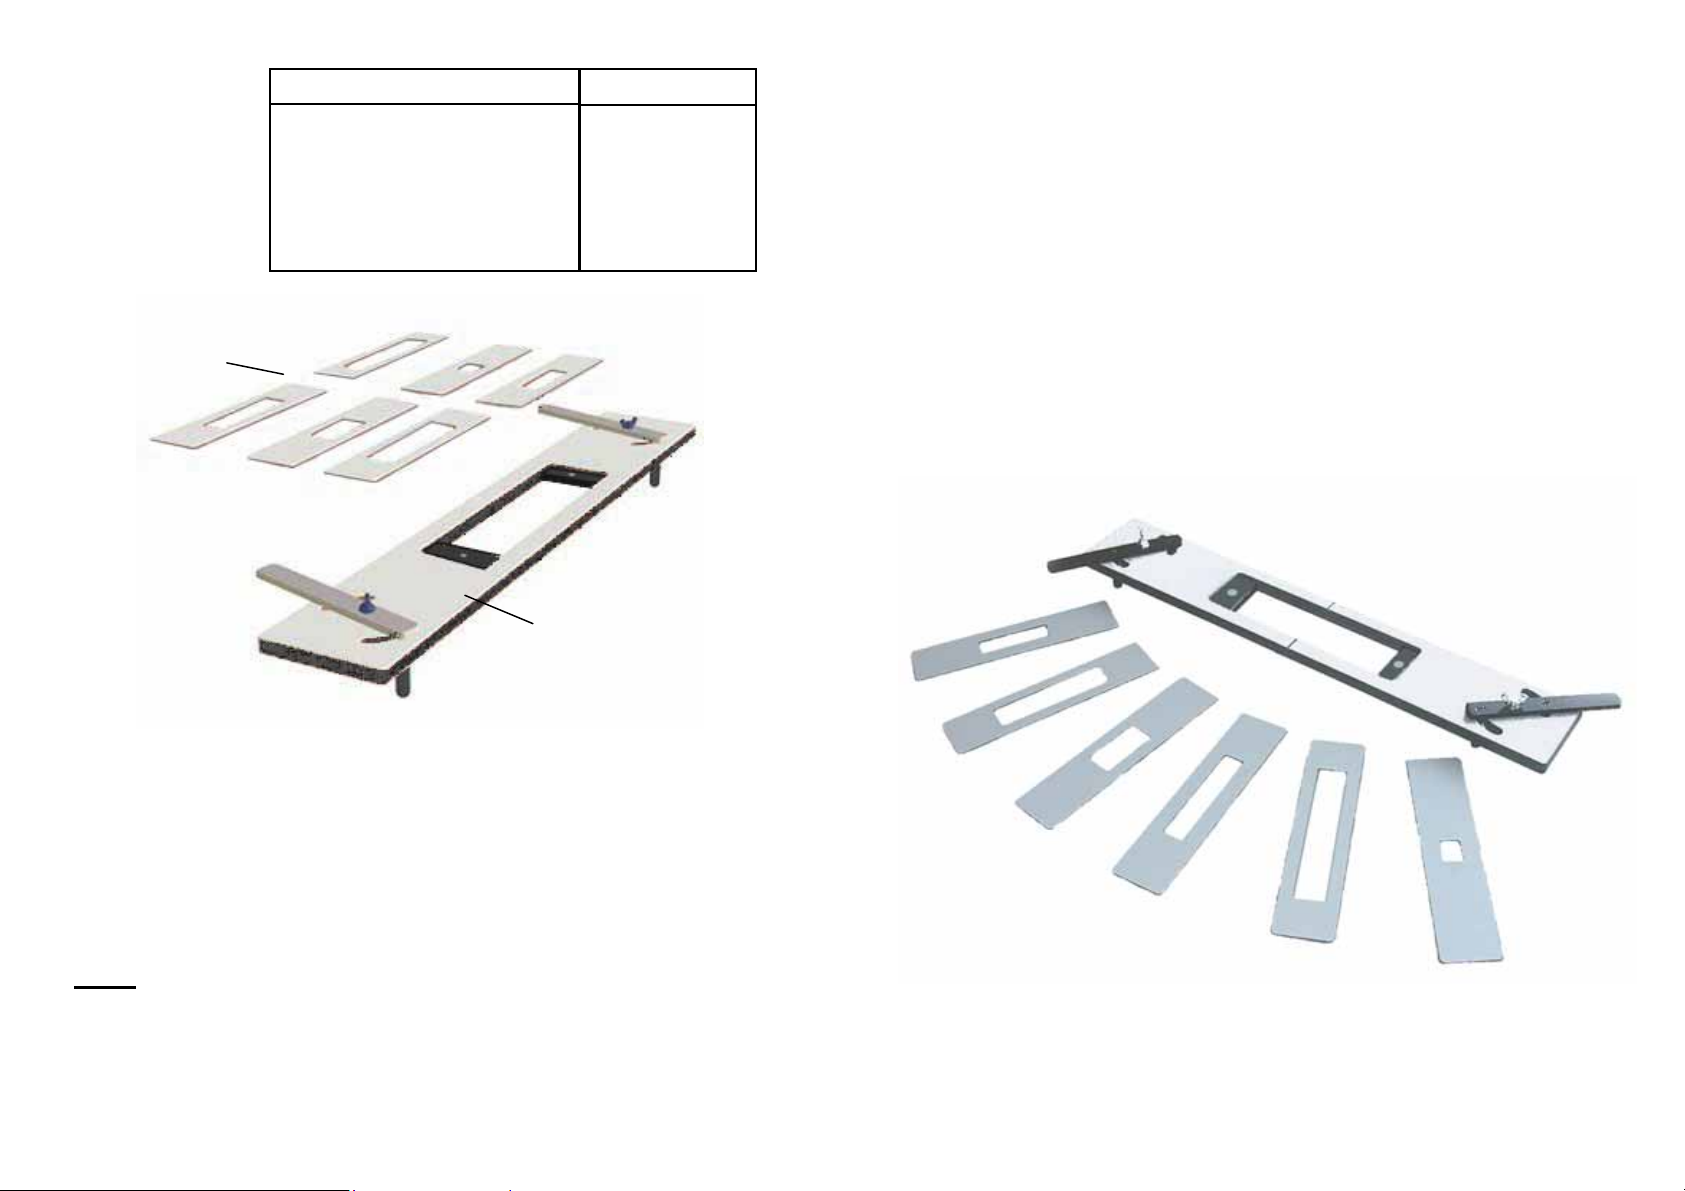
3 pairs of metal inserts
1 nesting plate
Inserts
Insert Plate Size
3/4" x 4 1/4" (19mm x 108mm) lock with
1" x 6" plate (25mm x 152mm)
5/8" x 7/8" (16mm x 22mm) lock with 1"
x 2 1/4" plate (25mm x 57mm)
3" x 3/4" (76mm x 19mm) lock with 1" x
4 3/4" plate (25mm x 120mm)
Nesting Plate
Lock
5 Lever Sash Lock
Mortise Latch
5 Lever Dead Lock
LOCK JIG
INSTRUCTION LEAFLET
Other equipment required not supplied:
• Light Weight Electric Router capable of plunging the depth of the
required lock.
• 16mm Special Guide Bush
• 12.7mm Router Bit
NOTE:
Before commencing with any operation, check that the cutter you
are using will fit centrally inside your 16mm guide bush and that there is
sufficient clearance for the cutter to rotate freely.
Page 4
Page 2
INTRODUCTION
The lock jig is a self-centring template used for routing out the edges of doors to accommodate popular lock bodies and lock face plates. The nesting plate or mother plate is
complete with a clamping lever system which positions the lock centrally in the door and
clamps the jig ready to start.
Once the nesting plate is in position, a range of metal inserts can be added
depending on the size of the lock. The inserts are used as pairs - on e fo r the lock
body and one for the lock face plate on the outside of the door.
HEALTH AND SAFETY
1. Always ensure that the router guide bush is mounted on the router correctly,
centrally and securely.
2. Always ensure the door is supported properly.
3. Always ensure that the path of the router is clear of any obstacles.
4. Always ensure that the cable of the router is clear of the jig and is of sufficient
length.
5. Always wear protective goggles when cutting.
6. If routing for a long period of time, ear protection is advisable.
7. Do not switch router on with the cutter touching the work piece.
8. Read the router instruction manual if there are any doubts on the correct operation.
The magnets embedded within the nesting plate will keep the inserts in place
securely.
DURING CUTTING
1. Never try to cut more than 10mm depth on one cut.
2. Always work in a clockwise direction when cutting.
3. Do not force the router too fast. This can damage expensive router bits.
4. Never, never remove the router from the jig whilst it is in motion. Always allow router
to stop and switch off before removing.
SETTING UP JIG
1) The nesting plate has a centre line scribed on it, which
relates to the centre line of the final position of the lock.
Decide where the centre of the lock will go on the door,
and mark a pencil line – position the centre line of the
jig in line with this. As a guideline, the lock centre is
positioned roughly 1 metre from the base of the door.
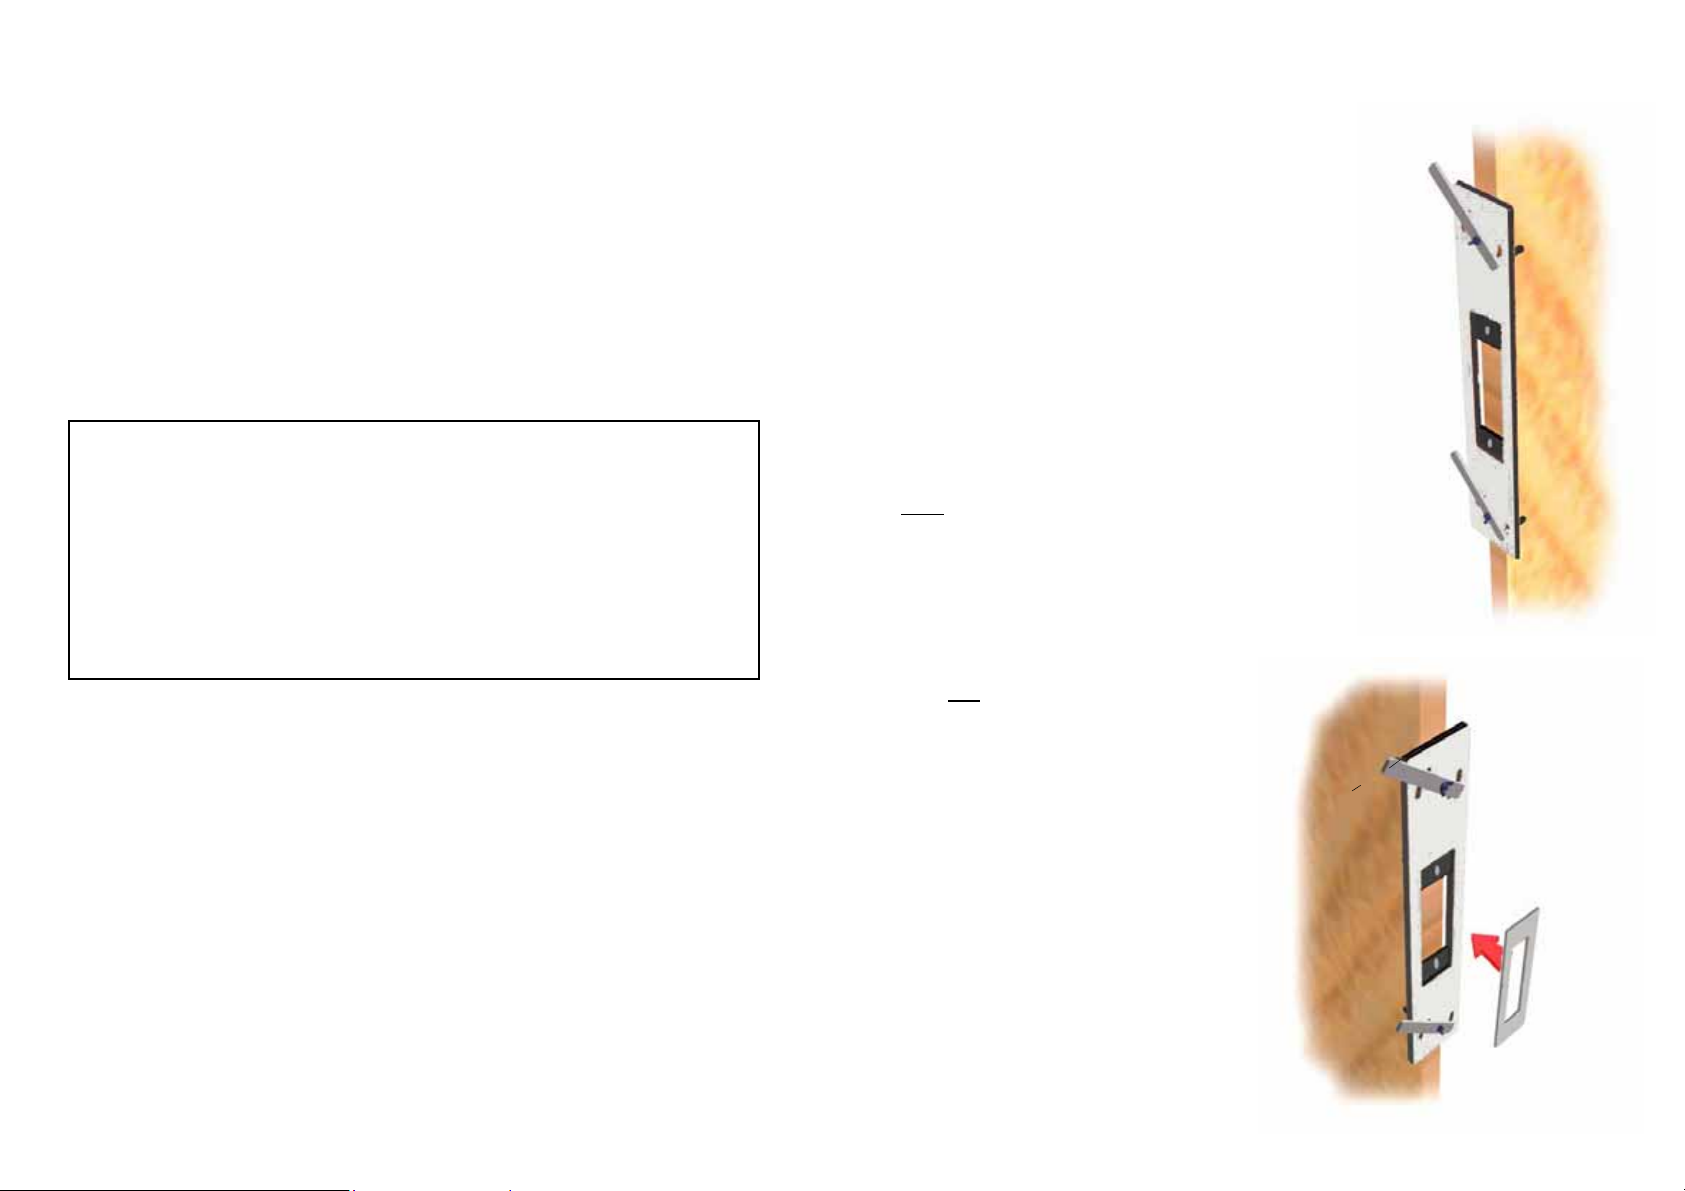
2) Position nesting plate on the edge of the door.
Turn the top lever so that the pins are pressed
firmly against the sides of the door, and tighten
wing nut.
3) Follow same procedures with the bottom lever,
making sure the nesting plate is firmly clamped
to the door. (See diagram 1)
4) The recess of the lock plate located on the outside
edge of the door can be routed out first.
Note
: When deciding upon an insert, please take into
account that the size of the aperture will cut 2.15mm
smaller all the way round due to the offset distance.
4) Attach the insert (See diagram 2), to the nesting plate,
the magnets embedded in the nesting plate will keep
the insert in place very securely.
5) Set the router to cut to the depth of the lock
plate and
the lock body plate.
6) Rout in a clockwise direction until the recess is completely cut out. Square out the
rounded corners with a sharp chisel.
7) Do not release nesting plate. Remove the
insert and replace with the one for cutting
out the lock body.
8) Set the router to plunge to a depth of
10mm, taking note of the total depth of cut
needed in order to house the lock body in
the door.
9) Continue to cut in a clockwise direction.,
plunging 10mm at a time until achieving
correct depth. Do not exceed 10mm depth
per cut.
Turn and clamp
top and bottom
lever to door. This
will position the
plate centrally on
the edge of the
door.
Insert the plate
Page 2
Page 3
 Loading...