

Page 1
- 1 -
Worksman WTX: Wide Track Tricycle
Assembly Instructions, Parts List, and Owners Manual
Assembly Video: http://worksmancycles.com/shopsite_sc/store/html/owners-manuals.html
The Worksman WTX WideTracker is a wonderfully simple, yet extremely
effective vehicle. Unlike an ordinary bicycle or tricycle, which includes a system
of gears and chains to turn the wheels, the WideTracker operates on a much more
basic idea. The pedals are DIRECTLY connected to the center of the front
wheel. Not only does this mean that there are no loose, dangling components on
this vehicle, but it also means COMPLETE CONTROL! Simply turn the pedals
forward in order to move forward. Turn the pedals backward in order to move
backward. If the rider stops pedaling, he or she stops. It’s as intuitive as
walking!
Who is it for?
The WTX WideTracker is fun for everyone. It’s an adult sized trike that works the same as a child’s trike. Whether you
just want to ride for fun or for therapeutic use, the WideTracker is a great choice. It is incredibly stable due to the wide
stance and wide tracking tires. It’s especially great for use in schools, hospitals and other institutions with special needs
populations. The WideTracker is also very durable, with a 250-pound weight capacity. (NOTE: The WTX is designed
for smooth, level, controlled environments. It does not have a braking system. DO NOT RIDE UP OR DOWN HILLS!)
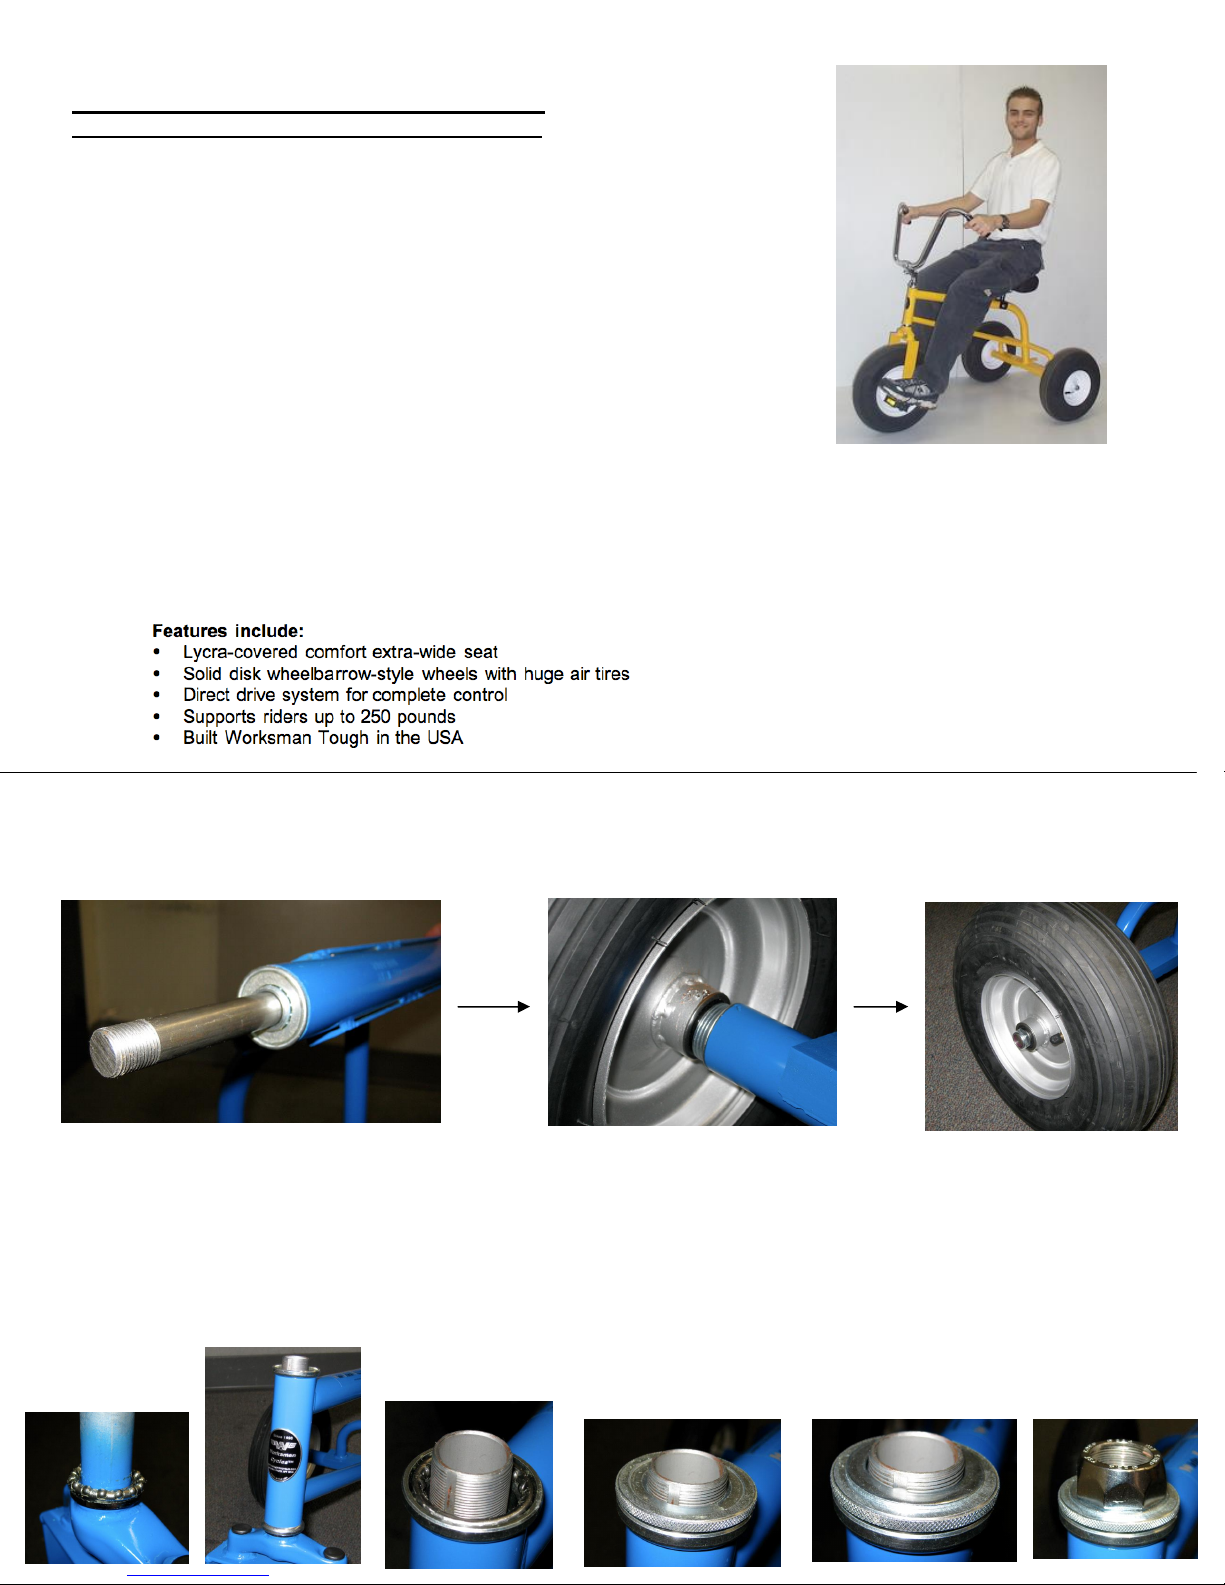
(1) Rear Wheel Assembly:
· Remove blue caps from axle and slide through the frame.
· Add 4 washers to each side, and then slide rear wheels onto axle.
· Thread lock nut on clockwise on each end of the axle.
(2) Attaching Front Wheel Assembly to Frame:
a) Remove locknut, keyed washer, adjustment cone, and one of the bearings from the front wheel assembly.
b) Make sure that the remaining bearing is sitting on the fork steerer tube cone with bearing balls UPWARD.
c) Slide the steerer tube up through the head tube on the frame.
d) Place remaining bearing (balls facing DOWNWARD) over the head tube.
e) Thread on adjustment cone, and thread all the way to the bottom, so it fits over the bearing. Make sure bearing is sitting
correctly. HAND-TIGHTEN.
f) Place keyed washer above adjustment cone, with key in slot.
g) Place locknut above washer, and tighten securely.
C
D
E G B
F
Page 2
- 2 -
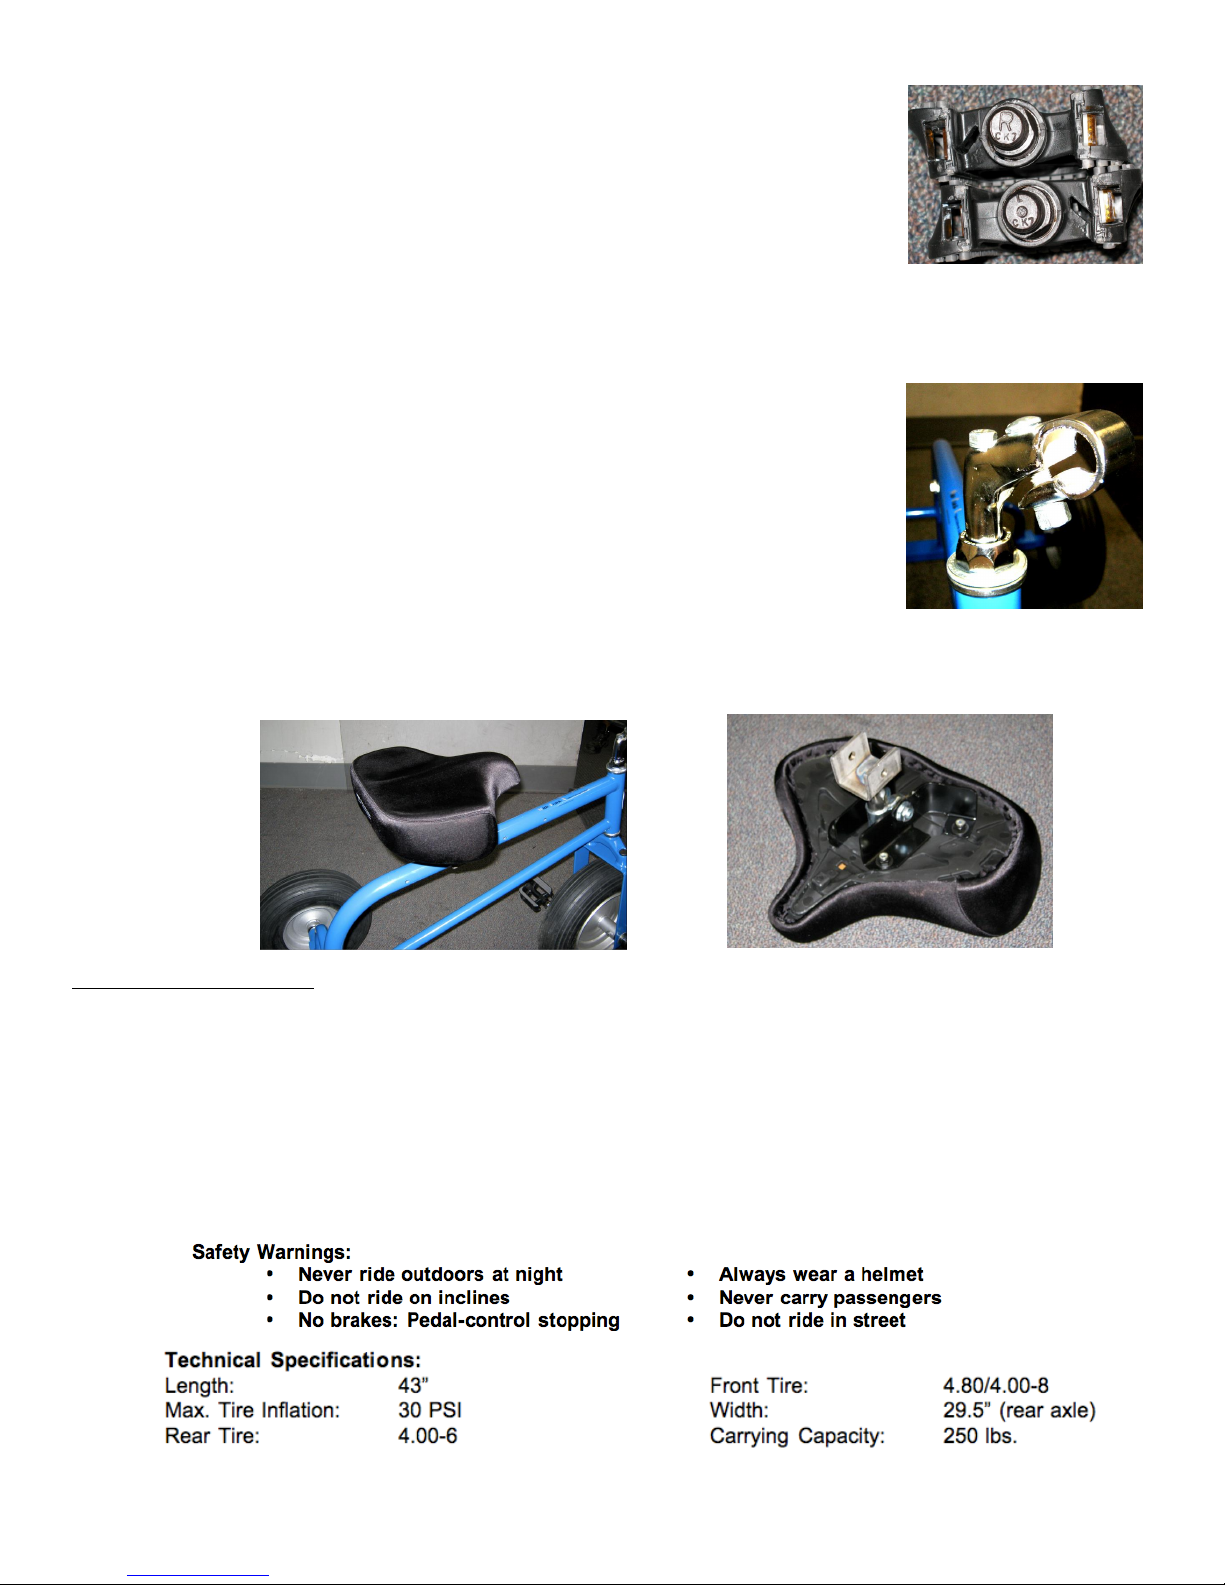
(3) Pedal Installation:
· The left pedal tightens counter-clockwise so that it does not loosen as you ride.
Pedals and cranks are marked L and R to make sure that you installing the
correct pedal on the correct side. If any left or right part is installed incorrectly,
the crankarm (and possibly the pedal) will strip and eventually loosen-up and
fall off. This installation error is not covered under warranty.
When installing pedals, make sure the left and right crankarms are on the
correct sides, and that you are installing the correct pedals on the correct crankarm. The left pedal is
"reverse-threaded", and is tightened counter-clockwise (to the left). The right pedal is tightened clockwise.
(4) Handlebar Installation:
· Turn screw on top of handlebar stem so that the wedge is at a low
height. Then, insert handlebar stem into front fork tube at desired
height (make sure that it is past the minimum height or damage to the
tube may occur). Now turn screw on top of handlebar stem so that the
wedge rises, locking it in position.
· Slide the handlebars through the opening in the stem, place at desired
angle, and tighten the nut on the bottom of the stem clamp.
· Slide the grips onto the ends of the handlebar.
(5) Seat Installation:
· Install seat post into the clamp under the seat. Tighten clamp nut to
secure seat clamp to seat post.
· Remove the seat bolt from the frame, and place seat post bracket over
the frame. Replace the seat bolt through both the frame and the bracket
holes, and tighten with accompanying nut.
WTX Replacement Parts
155 Handlebar 174HD 5/8” Bearings (for wheels/axles)
174W Axle washer 50A Headset
55A Handlebar Stem 55B Grips (pair)
57 Rear Axle Nut (each) 7219 Pedal (pair)
8250V Seat w/ Clamp Assembly 60010 Frame (Specify color)
60011 Rear Wheel w/ Tire 60012 Fork (Specify color)
60013 Seat Bracket w/ Seatpost 60014 Rear Axle
60015 Front Wheel w/ Tire 60016 Crank Arms (pair)
60017 Crank Arm Pins (pair) 60018 Spindle for Front Wheel
60019 Bolt / Nut for Front Wheel 60020 Bolt / Nut for Seatpost Clamp
Worksman Cycles 94-15 100th Street Ozone Park, NY 11416 www.worksman.com 718-322-2000
 Loading...