

Page 1
Parts by Carton
#1500123 - Rev B
Assembly Instructions
for two-piece Worksurfaces
Right Top Half
(size and shape differ
for each model)
Qty: 1
Verify that you have all the hardware and tools needed for the assembly
You will also need:
#3 tip Phillips screwdriver or drill bit
7
/
" Open-end wrench
16
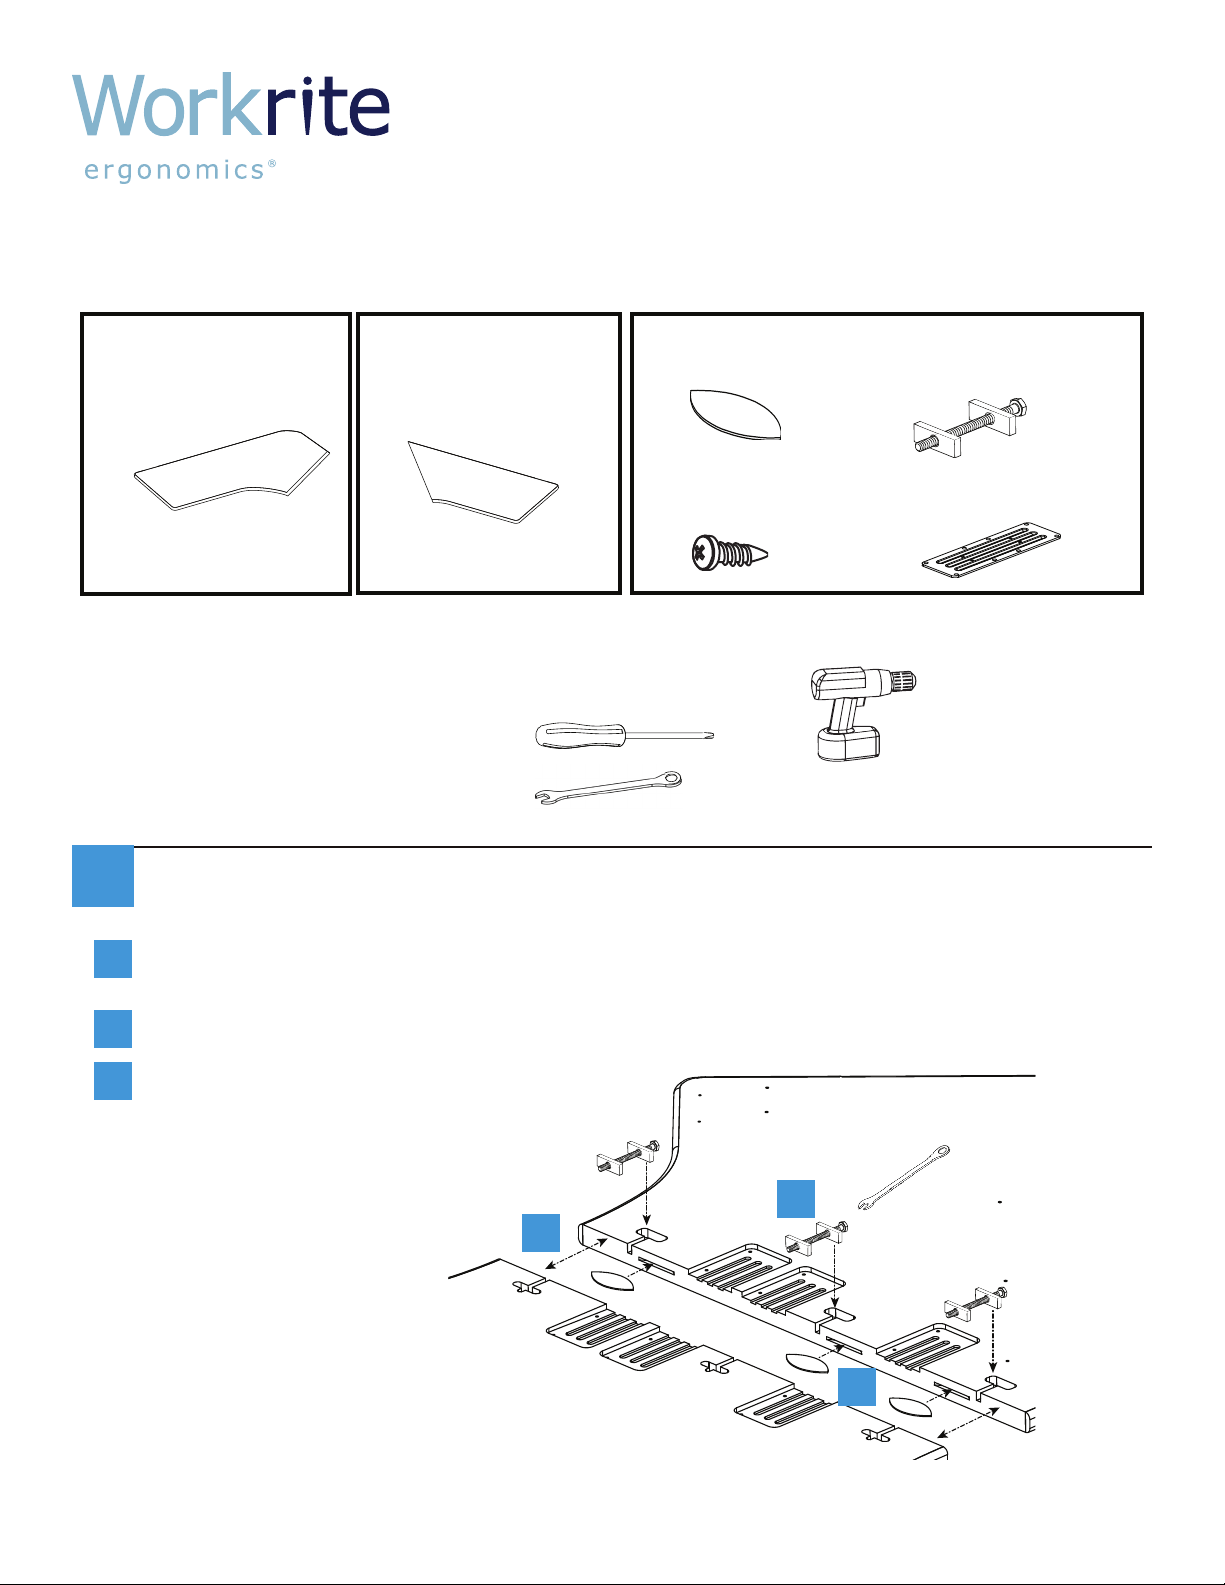
Join Halves using Biscuits and Draw Bolts
1
Left Top Half
B
(size and shape differ
for each model)
Qty: 1
Biscuits
C
Qty: 1 - 3A
#12 x ¾” Screws
F
Qty: 8 - 24
or
Draw Bolt with nut
D
and washer
Qty: 1 - 3
Brackets
G
Qty: 1 - 3
Insert Biscuits in slots.
a
Push Worksurface halves together.
b
Place Draw Bolts into slots, and tighten with
c
wrench, while squeezing Table Halves together.
B
b
A
c
D
C
a
Workrite Ergonomics | 800.959.9675 www.workriteergo.com
Page 2

Assembly Instructions for two-piece worksurfaces
Attach Brackets
2
Insert Brackets into recessed cuts. Secure with Phillips-head screws.
#1500123 - Rev B
F
G
Ensure Fit
3
It might be necessary to level the seam after the worksurface is assembled. If this is required,
loosen the Draw Bolts about ¾ turn. Tap the raised side with a soft face hammer, or protect the
surface with a pad and use a regular hammer, until the surface is level. Then retighten the bolts.
2 Workrite Ergonomics | 800.959.9675 www.workriteergo.com
 Loading...