

Page 1
Non-VESA Monitor Mount
Parts
Base Plate
A
Qty: 1 B
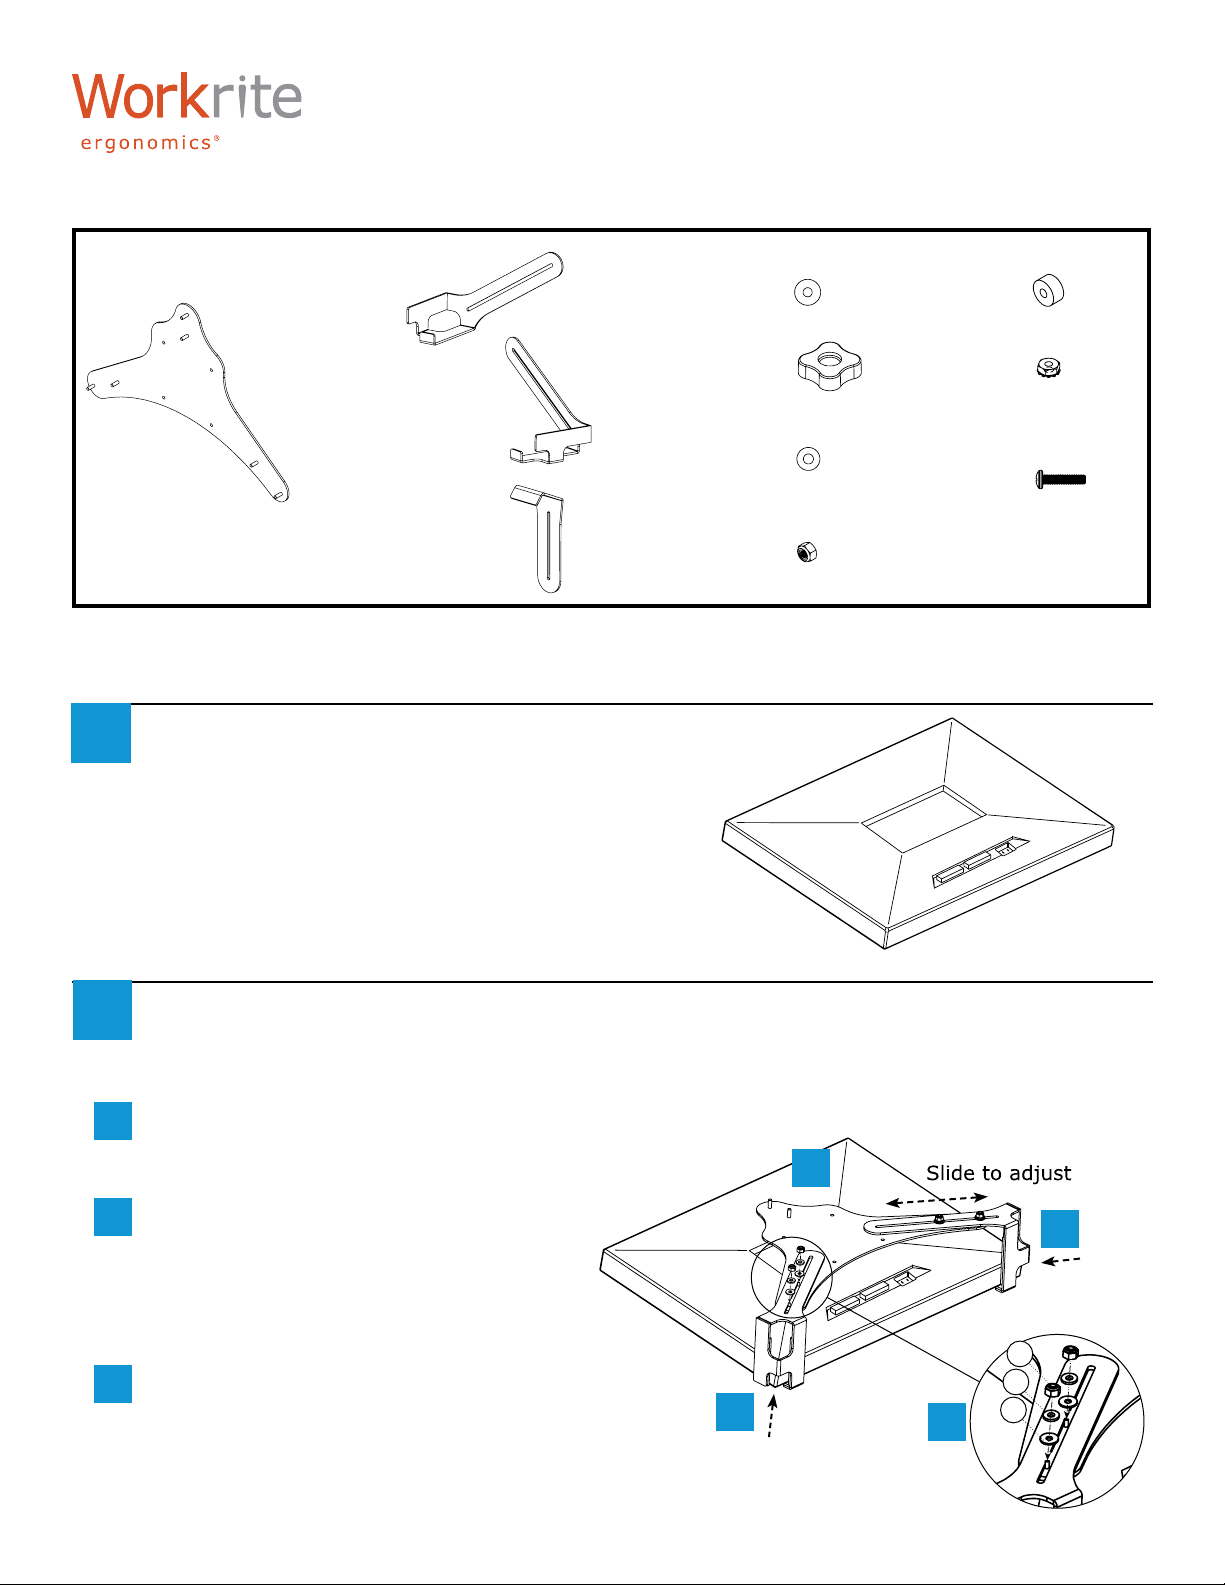
1
Lay your monitor face down on a clean, soft worksurface.
Make sure your worksurface is clean and will not
damage your monitor. Having a soft surface will aid in
protecting your monitor while the hardware is being
attached.
Left Clamp Arm
Qty: 1
Right Clamp Arm
C
Qty: 1
Top Clamp Arm
D
Qty: 1
#10 Nylon Washer
E
(white)
Qty: 5
#10/32 Knob
F
Qty: 1
#10 Flat Washer
G
(black)
Qty: 6
#10–32 Nyloc Hex
H
Nut
Qty: 5
Instructions
#8×.25 Nylon Spacer
I
Qty: 4
#8 Keps Nut (black)
J
Qty: 4
#8–32×.75 Pan Head
K
Philips Screw
Qty: 4
Place Base Plate in the center and Clamp Arms around the bottom corners of your
2
monitor. Remember, with your monitor upside down, the right side is on the left
and vice versa.
Place the Base Plate in the center of the
a
back of the monitor to align the Base Plate
with the Clamp Arms.
a
Place the Left Clamp Arm around the
b
bottom left monitor corner and the Right
Clamp Arm around the bottom right
corner of your monitor. You’ll need to lift
the bottom corners to “wrap” the clamps
around the bottom corners.
Slide the Clamp Arms to make sure you
c
have a snug t. Securely attach the Base
Plate to the two Clamp Arms using #10
Nylon Washer (white) (E), #10 Flat Washer
(black) (G) and #10 Nyloc Hex Nut (H).
b
c
G
E
#1500194 - Rev A
b
H
Page 2
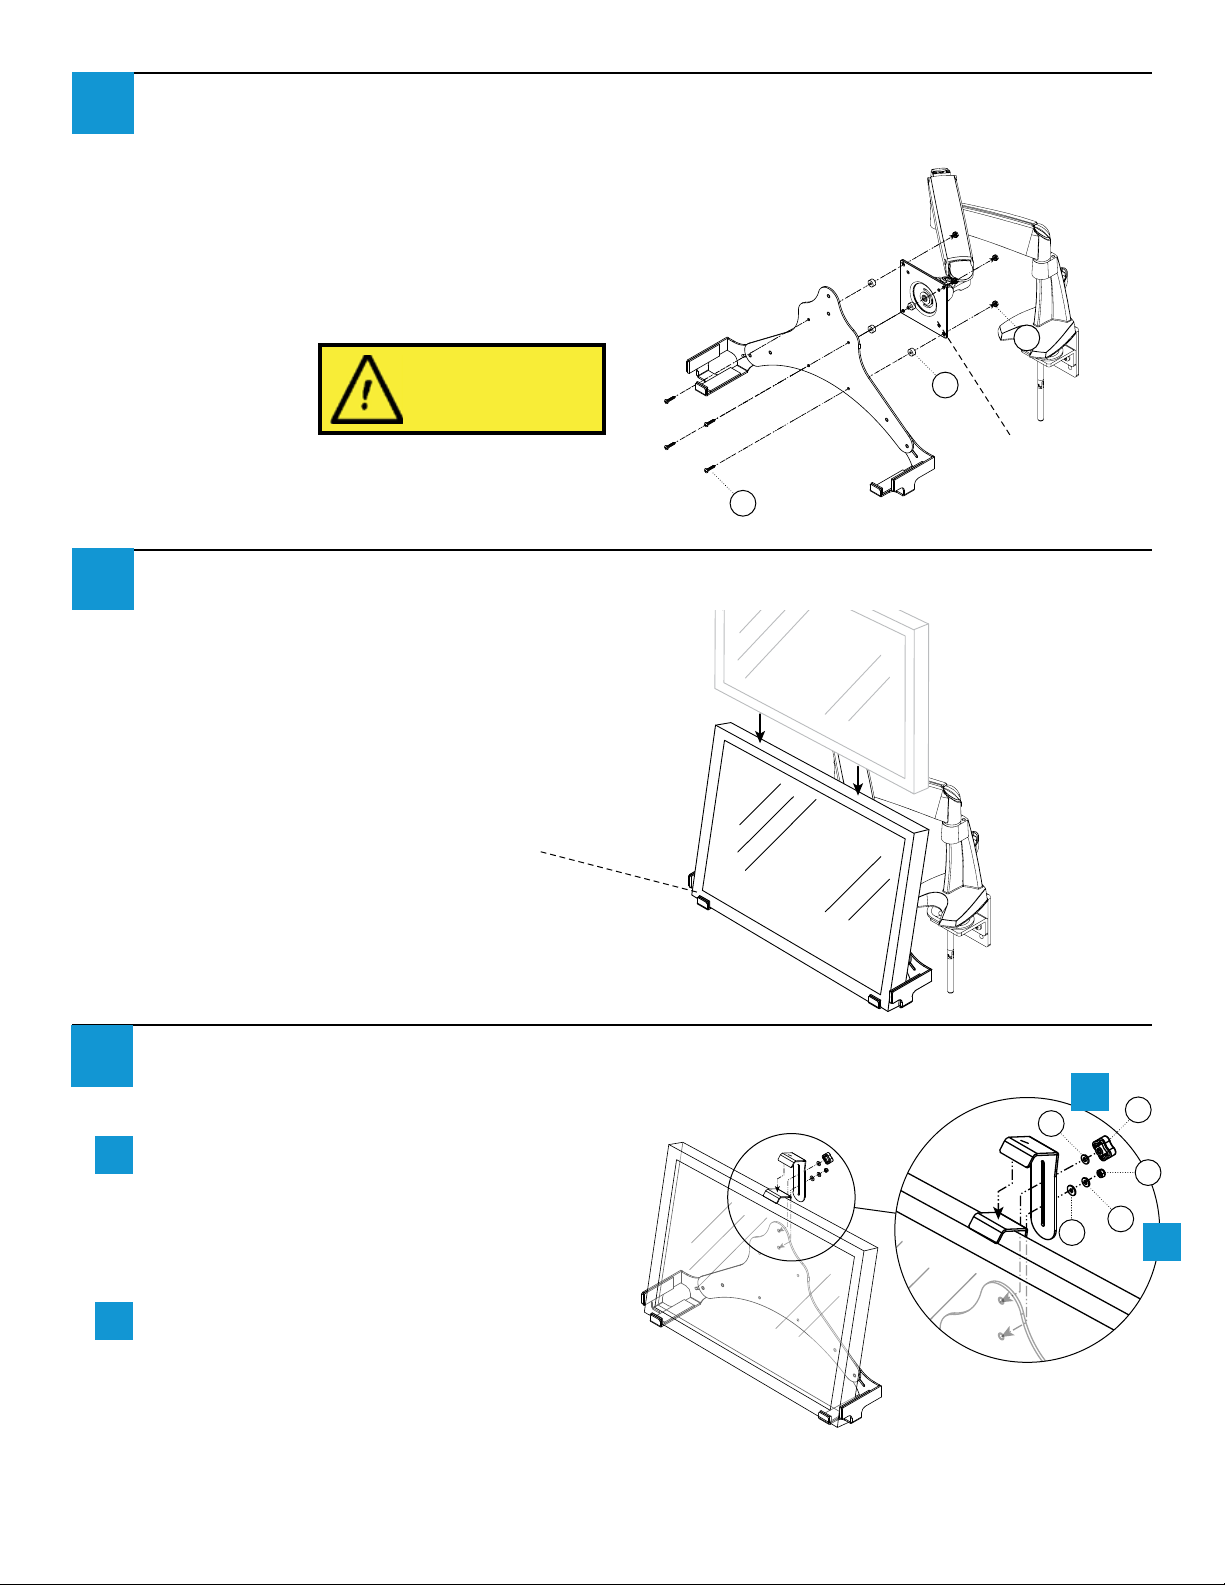
Remove the Monitor Mount from the monitor and attach it to your VESA compliant
3
Monitor Arm.
With the base plate attached to the two Clamp Arms, remove
the Monitor Mount from your monitor and attach to your VESA
compliant Monitor Mount, such as a Workrite Poise or SwingArm
Monitor Arm using #8×¾ Pan Head Philips Screws (K), #8
Nylon Spacers (I) and #8 Keps Nuts (J).
WARNING!
Spacers MUST be installed
between Monitor Mount
and Monitor Arm Mounting
Surface!
Rest monitor in Monitor Mount attached to Monitor Arm.
4
Carefully place your monitor in the Monitor Mount
attached to your Monitor Arm. Your monitor arm may
move and the weight will probably make your arm
drop.
K
I
VESA Compatible
Monitor Arm or
QuickMount
(not included)
J
The monitor will rest
against the FRONT of
the Clamp Arm
Attach Top Clamp Arm.
5
Install Top Clamp Arm, using #10 Nylon Washer
a
(white) (E), #10 Flat Washer (black) (G) and
#10 Nyloc Hex Nut (H). Leave loose enough to
adjust top clamp. Clamp is locked in place with
Quick Tighten Knob.
Insatall the Quick Tighten Knob (F) with #10
b
Flat Washer (black) (G). The monitor will clamp
down with a quick 1/4 turn.
b
G
E
F
H
G
a
 Loading...