

Page 1
Lincoln
™
Under-cabinet Light
Installation Instructions
#1500178 Rev A
Page 2
Lincoln Under-cabinet Light Installation Instructions
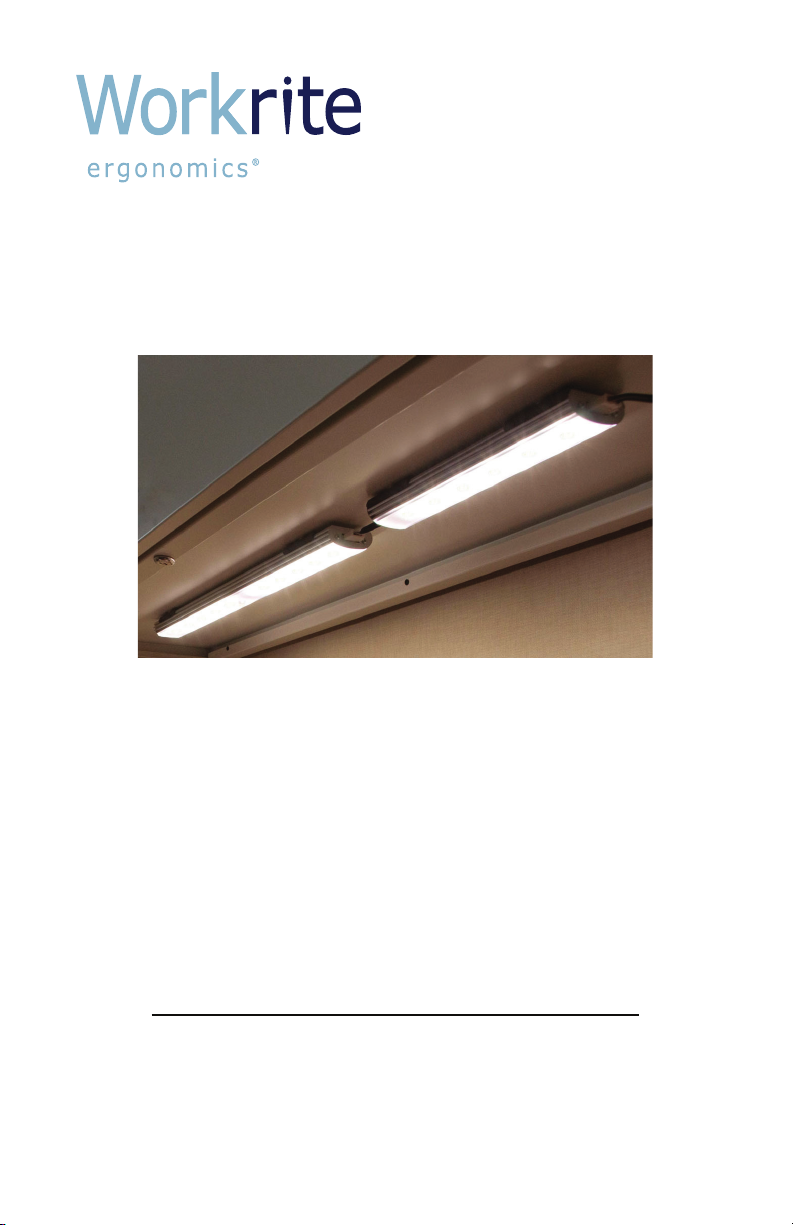
Congratulations on your new Lincoln Under-cabinet Light!
Whether purchased for its signicant energy savings and efciency,
lower lifetime costs, environmental considerations, or just to nd a
better way to light your work area, your Lincoln Under-cabinet Light
will provide consistent and reliable light from the highest quality LEDs
and components available.
Please read this guide carefully and follow the installation instructions.
An electronic version of this guide is also available on our website at
www.workriteergo.com.
Should you have any questions about your Lincoln Under-cabinet
Light, refer to the troubleshooting section at the end of this guide. If
you still have questions, please contact your sales representative, call
Customer Service at 800.959.9675 option “1” or send an e-mail to
customerservice@workriteergo.com.
From all of us here at Workrite Ergonomics: Thank you.
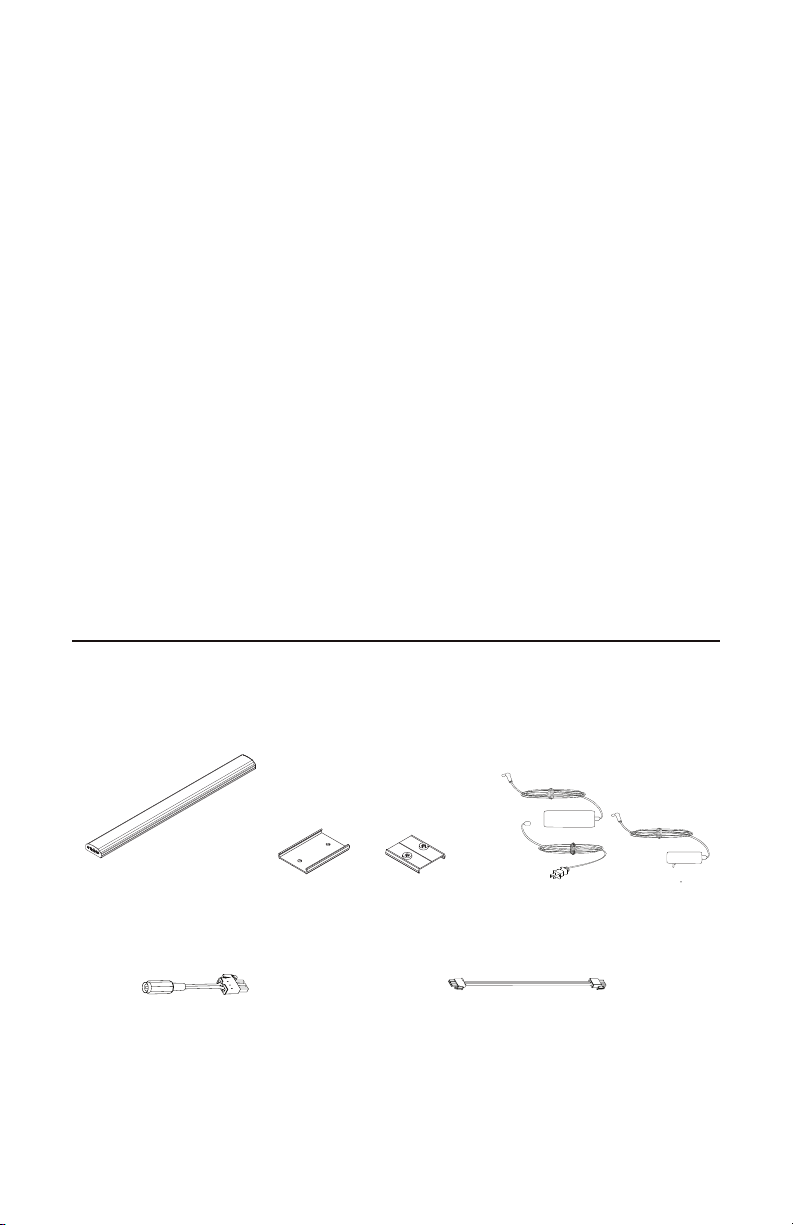
Parts
Light Fixture
A
Qty: 1 C
3-Pin Power
D
Adapter1
Qty: 1
1 Not included with Jumper models (SKUs beginning with LIN-J).
2 Amperage determined by length of light xture
3 Type A standard. Other plug types available
4 Only included with Jumper models (SKUs beginning with LIN-J)
2 Workrite Ergonomics | 800.959.9675 www.workriteergo.com
Mounting Kit
B
Qty: 2 Wood
Mount Brackets
with screws
2 Magnetic Mounts
Jumper Cable
E
3", 6", 10" or 20"4
Qty: 1
Transformer
1A, 2A OR 4A
1,2,3
Qty: 1
Max 4.0A output
Max 2.0A output
Page 3

Lincoln Under-cabinet Light Installation Instructions
!
Typical Congurations
Stand-Alone Daisy-Chain
Mount Fixture: Determine if the light will be
1
afxed to a metal or wood cabinet and follow the
appropriate directions below.
Note: If installing the parent unit of a daisy
chain, be sure to position the parent unit so that
it can be connected to the additional unit with
its supplied jumper cable.
Metal cabinet mounting:
Snap Magnetic Mounts (B) onto back of Light Fixture
a
(A).
Attach Light Fixture to metal under-cabinet. Magnets will
b
hold the xture in place.
B
“SNAP”
Under-Cabinet
Workrite Ergonomics | 800.959.9675 www.workriteergo.com 3
a
Align on back
of Light. Press
down to snap
into rail
Place lamp on
under-cabinet
b
A
Page 4

Lincoln Under-cabinet Light Installation Instructions
Wood cabinet mounting:
Note: You will need a #2 Phillips-head screwdriver
to complete this step.
Determine where you want to mount your Light and draw
a
a straight line on the underside of the cabinet to indicate
the center along the length of the Light. Be sure it is far
enough away from the front of the cabinet to prevent the
Light from protruding out from the edge.
Attach Wood Mounts (B) along your line with Screws
b
provided.
Snap Light Fixture (A) onto mounts to hold in place.
c
Under-Cabinet
b
Attach
Mounts along
B
drawn line
“SNAP”
1" - 6"
v a r.
a
Draw line parallel
to edges of
cabinet
A
4 Workrite Ergonomics | 800.959.9675 www.workriteergo.com
Snap Light
onto mounts.
c
Page 5

Lincoln Under-cabinet Light Installation Instructions
!
Connect Jumper Units to Parent Unit
2
(if applicable)
Secure Jumper Cable (E) between the plug side of the
a
Parent Unit and the Jumper Unit. The cable should snap
into place.
E
Note: To remove Jumper Cable, depress the clip on
the side of the plug and pull gently from the xture.
CAUTION
The number of lights that can be
daisy-chained together depends
on the size of the lights and the
exceed the total number of lights for each
of the transformer sizes listed:
Maximum Daisy-chained units: Number of xtures within same chain
2A under 48" of lights or 3 lights max
4A under 120" of lights or 5 lights max
Workrite Ergonomics | 800.959.9675 www.workriteergo.com 5
size of the transformer. Do not
Page 6

Lincoln Under-cabinet Light Installation Instructions
Attach Power Adapter
3
Attach Power Adapter (D) to the Parent (or Stand-Alone)
a
unit and the Transformer (C).
C
D
Attach Transformer to Wall Outlet
4
6 Workrite Ergonomics | 800.959.9675 www.workriteergo.com
Page 7

Lincoln Under-cabinet Light Installation Instructions
Troubleshooting Tips
The Lincoln Under-cabinet Light will not turn on
• Check all wire and cable connections. Make sure they are
completely and fully engaged.
• Check that the jumper cables or power adapter cables have
not come loose from their connectors
• Make sure that the Transformer is plugged into the wall.
• If a daisy chain, ensure the correct transformer is used for
the number of LEDs in the chain. All transformers should
be Class 2, 12V transformers. Refer to the Table in Step 2
for required current ratings.
• Check that the outlet has power.
The Lincoln Under-cabinet Light ashes on and off
• Unplug the transformer and locate the label. Make sure
that the transformer is ONLY a Class 2, 12V transformer
at 1A (1000mA), 2A (2000mA), or 4A depending on how
many LEDs are connected.
The Lincoln Under-cabinet Light dims or goes out.
• Make sure there are not too many lights in the daisy chain
for the rating of the transformer. Refer to the Table in Step
2 for guidance.
• Check all wire and cable connections. Make sure they are
completely and fully engaged.
• Check that the outlet has power.
The Lincoln Under-cabinet Light will not turn on when I
come back into the work area
• The occupancy sensor has a listed range of 15’. However,
if a lip of the cabinet or other object blocks the full view
of the sensor, then it may have trouble detecting the
presence of a person in the work area. Reposition the light
to have a better view of the work space.
Workrite Ergonomics | 800.959.9675 www.workriteergo.com 7
Page 8

Lincoln Under-cabinet Light Installation Instructions
Troubleshooting Tips, continued
The Lincoln Under-cabinet Light with an occupancy sensor
will not turn off
• The time on the occupancy sensor automatic shutoff is set
at the factory for 15 minutes. Cover the occupancy sensor
and record how long it takes for the light to turn itself off.
• If the Lincoln Under-cabinet Light is place near a walkway,
aisle way or adjacent to another workstation, the light may
receive signals that the space it is monitoring is occupied
and the light won’t shut off. Try to reposition the light
away from aisle ways.
If problems persist, please contact your sales
representative or Workrite Customer Service.
Replacement parts
Mounting Kit ................................................LIN-MOUNT
Power Adapter .............................................LIN-3PIN-PWR
3" Jumper Cable ...........................................LIN-3PIN-J-03
6" Jumper Cable ...........................................LIN-3PIN-J-06
10" Jumper Cable .........................................LIN-3PIN-J-10
20" Jumper Cable .........................................LIN-3PIN-J-20
1A Transformer ............................................LIN-T15
2A Transformer ............................................LIN-T25
4A Transformer ............................................LIN-T45
8 Workrite Ergonomics | 800.959.9675 www.workriteergo.com
 Loading...