

Page 1
Workrite Ciglio LED Under-Cabinet Parent Lights - Assembly Instructions #1500189 Rev B
!
Assembly Instructions:
Ciglio Under-Cabinet Light
Daisy Chain Parent Models
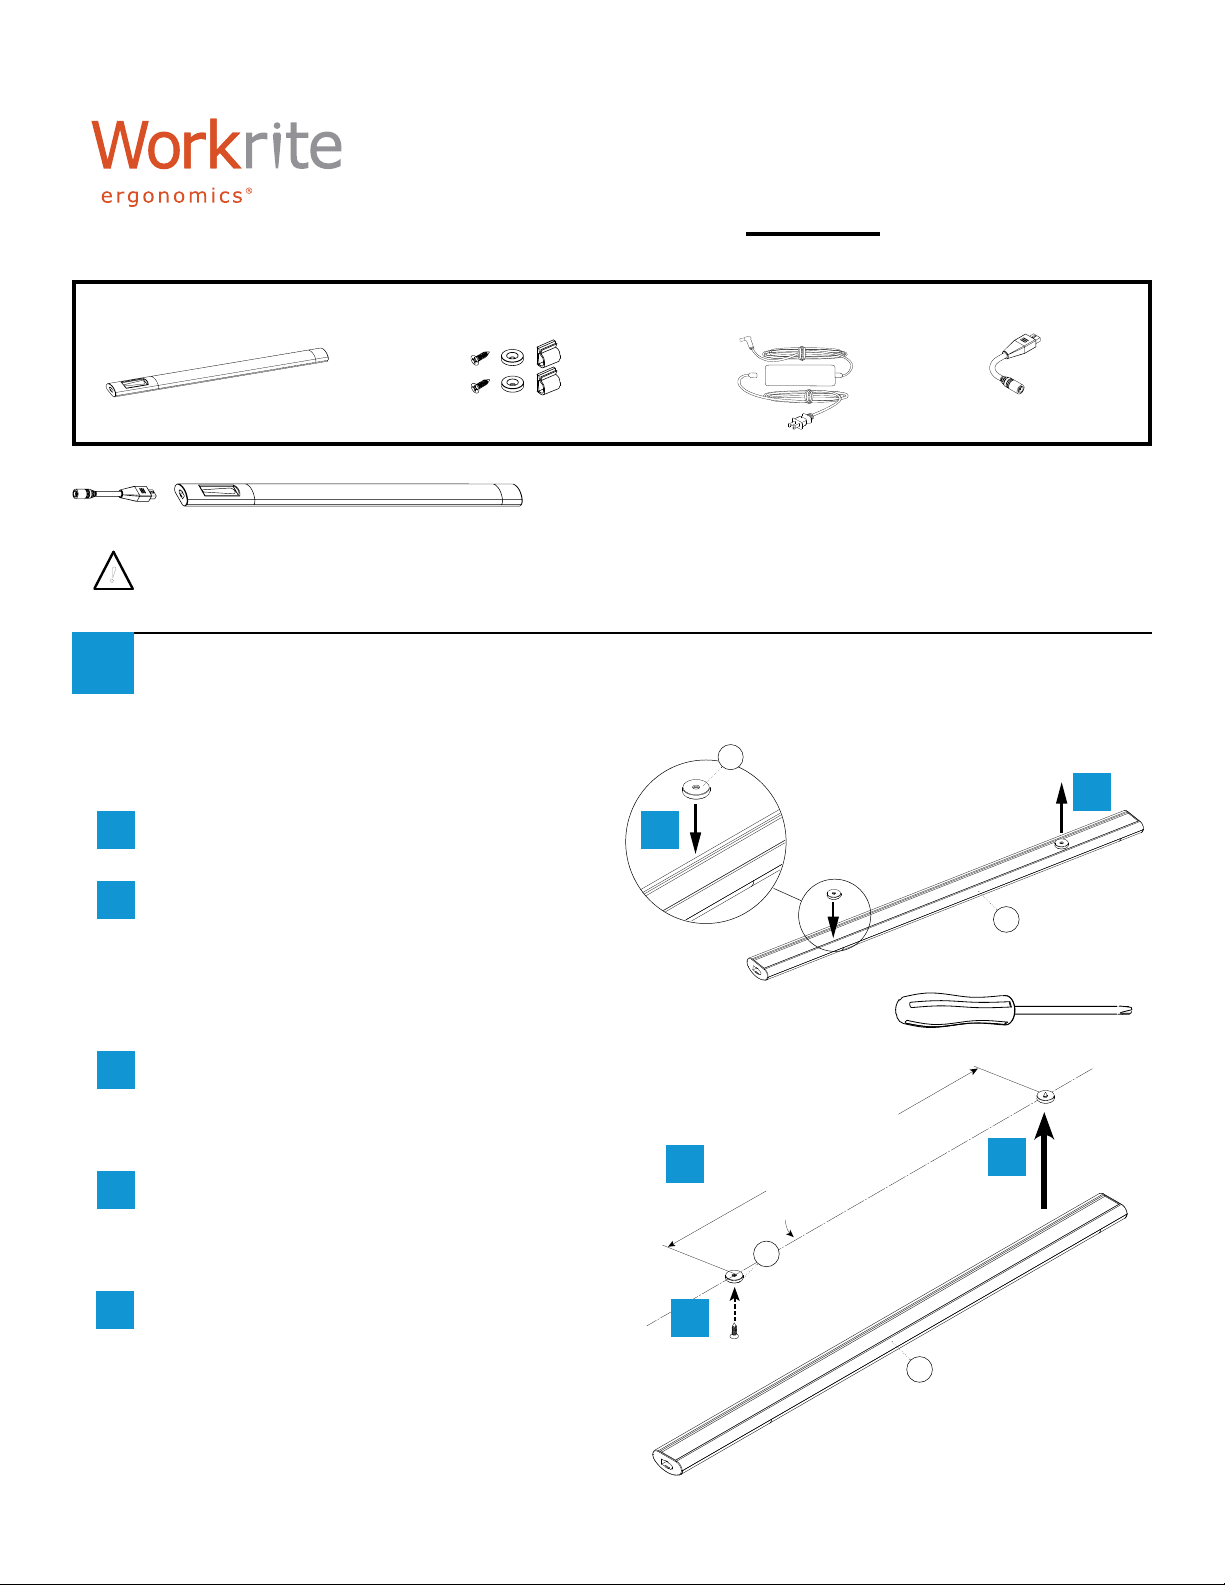
Parts
Light Fixture
A
Qty: 1 B
Parent Model
If installing parent unit of daisy chain, be sure to position parent unit so that it can be connected to
the additional unit with its supplied jumper cable.
Mount to Cabinet
1
Determine if light will be afxed to a metal or wood cabinet and follow the appropriate step below.
Mount to METAL Cabinets:
Place Magnetic Mounts (B) onto back of
a
Light Fixture (A).
Attach Light Fixture to metal under-cabinet.
b
Magnets will hold the xture in place.
Universal Mounting Kit
Qty: 2
Transformer, 48 W
C
Qty: 1
B
a
Power Adaptor Cable
D
Qty: 1
Place lamp
under cabinet
A
b
OR
Mount to Wood Cabinets:
Note: You will need a #2 Phillips-head screwdriver to complete this step.
Determine where you want to mount
a
your light and draw a straight line on the
underside of the cabinet to indicate the
center along the length of the light.
Attach the Universal Mounts (B) along
b
your line with Screws provided by
inserting screw through magnet and then
screwing into marked location.
Attach Light Fixture (A) onto mounts.
c
Magnets will hold the xture in place.
1 of 2 Workrite Ergonomics | 800.959.9675 www.workriteergo.com
a
b
Attach Mounts
along drawn
line
8"–15" depending on size
Draw line parallel to
edge of cabinet
Draw line
Under-cabinet
B
c
Lift light
onto mounts
A
Page 2

Workrite Ciglio LED Under-Cabinet Parent Lights - Assembly Instructions #1500189 Rev B
!
Attach Parent to Transformer
2
Insert Power Adaptor Cable (D) into either
a
end of the xture or at either end of the
daisy chain system.
Connect Power Adaptor Cable (D) to
b
Transformer (C).
A
a
D
b
C
D
A
Plug Transformer into Wall Outlet
3
Test the Touch Strip Control
4
Use the Touch Strip to turn light on
or off and to adjust brightness. To
turn the light on or adjust brightness
simply touch the strip and slide your
nger to the desired brightness. To
turn off, touch the smallest dot.
Occupancy Sensor Models
5
C
Off Dimming On
slide full brightness
Occupancy
Sensor
(select models)
Note: Install xture to ensure occupant
is within sensor range as illustrated.
Sensor turns light off after 15 minutes
of inactivity and instantly back on when
activity is detected.
Replacement parts
i
Universal Mounting Kit ..................................CIG-MOUNT
Power Adapter .............................................CIG-CABLE-PWR
48 W Transformer .........................................TR-48242000-A-RF5.5
2 of 2 Workrite Ergonomics | 800.959.9675 www.workriteergo.com
0˚
Occupancy sensor range
96"
60˚
40˚40˚
and eld of view
0˚
60˚
 Loading...