

Page 1
Gemini Arm Slide Kit
Model #2421-22TG and #2421-17TG
Installation Instructions
WorkRite Ergonomics
1450 Technology Lane
Petaluma, CA 94954
ph: 800.959.9675
fx: 800.930.8989
www.workriteergo.com
#1500079- Rev B
Page 2
Gemini Arm Slide Kit Installation Instructions
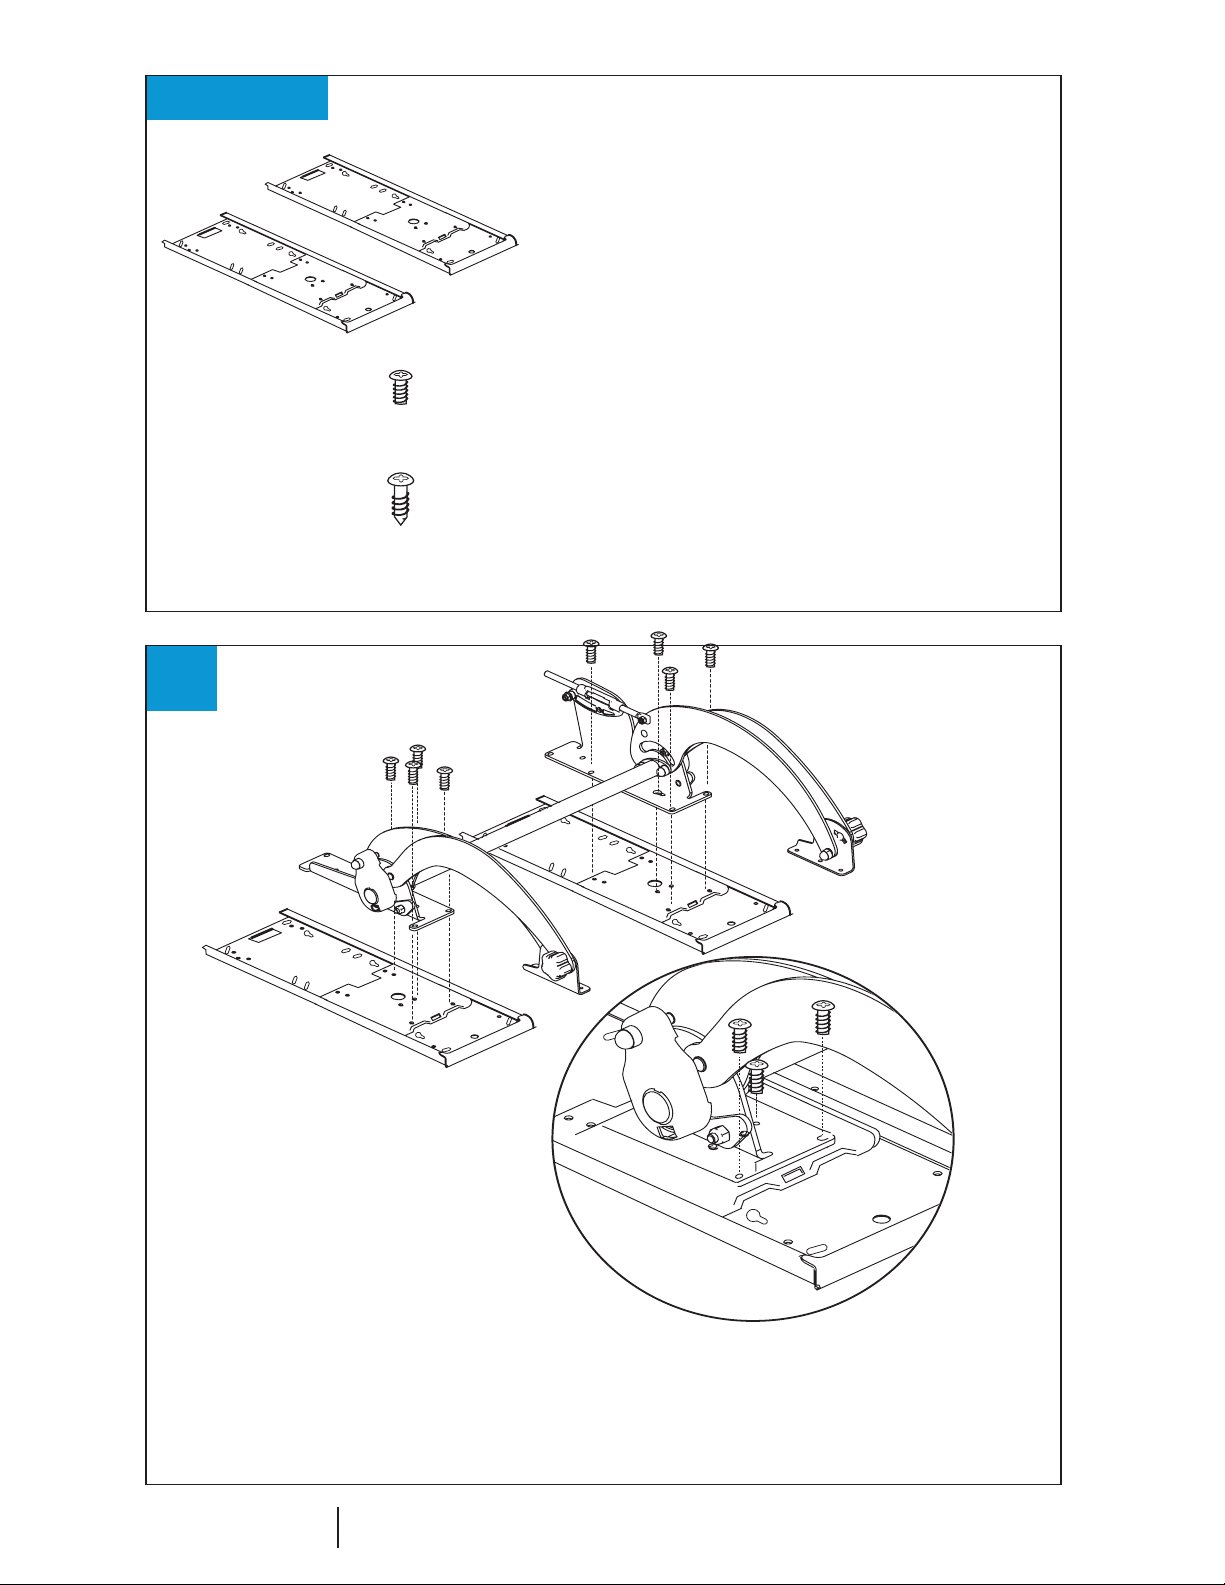
Contents
2 Tracks
1/4 x 20 x 1/2” Phillips pan head screws
8
#12 X 3/4" Wood screws
16
1
Attach the Gemini Arm
Install the Gemini Arm onto both glide tracks with the screws included.
Tighten all screws with a Phillips screwdriver.
www.workriteergo.com 800.959.9675
Page 3

Gemini Arm Slide Kit Installation Instructions
2
Position the Glide Tracks
If possible, remove the table
surface and place it upside
down before mounting the
Gemini Slide Kit.
Place the Gemini Slide Kit on
AA
up to 1"
A
the tabletop. Position the
tracks so that the fronts are
aligned with each other and
are within 1 inch from the
table edge.
IMPORTANT
The glide tracks must
!
be parallel for the Slide
Kit to function.
3
4
1/8"
A
B
Attach the Glide Tracks to Table
With 1/8" drill bit, drill 8 holes for each
A
track (16 total). Use the tracks as a
guide for the drill.
Be careful not to drill all the
way through the table top!
Attach both glide tracks onto the table
B
with the wood screws included.
Attach the Keyboard Platform
Mount your keyboard platform onto the
Gemini Arm with four #12 3/4" wood
screws.
If installing a WorkRite platform, use
fasteners supplied with platform.
www.workriteergo.com 800.959.9675
 Loading...