


STAGE 16 DMX
User Manual / Instrucciones de Usuario
STAGE 16 DMX
16 DMX CHANNEL CONSOLE
CONSOLA DMX DE 16 CANALES
English Version Page 1
Versión Español Página 25
This symbol on the product or on its packaging indicates that this product
shall not be trated as household waste. Instead it shall be handed over to
the applicable collection point for the recycling of electrical an electronic
equipment. By ensuring this product is disposed of correctly, you will help
prevent potential negative consequences for the environment and human
health, which could otherwise be caused by inappropriate waste handling
of this product. The recycling of amterials will help to conserve natural
resources. For more detailed information sabout recycling of this product,
please contact your local city office, your household waste disposal service
or the shop where you purchased the product.
Este símbolo en su equipo o embalaje, indica que el presente producto
no puede ser tratado como residuos domésticos normales, sino que deben
entregarse en el correspondiente punto de recogida de equipos electrónicos
y eléctricos. Asegurándose de que este producto es desechado
correctamente, Ud. está ayudando a prevenir las consecuencias negativas
para el medio ambiente y la salud humana que podrían derivarse de la
incorrecta manipulación de este producto. EL reciclaje de materiales
ayuda a conservar las reservas naturales. Para recibir más información,
sobre el reciclaje de este producto, contacte con su ayuntamiento, su
punto de recogida más cercano o el distribuidor donde adquirió el producto.

Contents
Features 1
General Instructions 2
1. Overview 3
1.1 Front View 3
1.2 Rear View 7
2. Operation Guide 8
2.1 Programming 8
2.1.1 Programmable Patterns 8
2.1.2 Assign Programming 11
2.1.3 Delete a Pattern 12
2.2 Running 13
2.2.1 Chase Mode 13
2.2.2 Manual Mode 13
2.2.3 Audio Mode 14
2.2.4 Loop Mode 14
2.2.5 Cross Mode 15
Specifications and improvements
in the design of this unit and this
manual are subject to change
without any prior written notice.
All rights reserved.
2.3 Patch Mode 18
2.4 Blind Mode 20
2.5 Manual Operation 21
2.6 MIDI Operation 21
2.6.1 MIDI Channel Setting 21
2.6.2 MIDI Implementation 22
2.7 Initialization 23
Technical Specifications 24

Features
Thank you for your purchase of this BOTEX product.
This DM-16 features include:
16 DMX channels
30 fixed patterns(31-60)
30 programmable patterns(01-30)
Each programmable pattern consists of a maximum of 99 scenes
The chase of patterns with Manual/Chase/Audio/Cross
Built-in microphone for Music triggering
MIDI control over patterns, scenes, Full On and Stand By
Power failure memory
NOTE:
A knowledge of MIDI and DMX is required to fully utilize this unit.
STAGE 16 DMX USER MANUAL/MANUAL DE USO PAGINA 1
General Instructions
Read the instruction in this manual carefully and thoroughly, as they give
important information regarding safety during use and maintenance. Keep this
manual with the unit, in order to consult it in the future. If the unit is sold or
given to another operator, make certain that it always has its manual, to enable
the new owner to read about its operation and relative instructions.
Warnings
DO NOT make any inflammable liquids, water or metal objects enter the unit.
Should any liquid be spilled on the unit, DISCONNECT the power supply to the unit
immediately.
STOP using the unit immediately In the event of serious operation problems and
either contact your local dealer for a check or contact us directly.
DO NOT open the unit--there are no user serviceable parts inside.
NEVER try to repair the unit yourself. Repairs by unqualified people could cause
damage or faulty operation. Contact your nearest dealer.
Cautions
This unit is NOT intended for home use.
After having removed the packaging check that the unit is NOT damaged in any way.
If in doubt, DON'T use it and contact an authorized dealer.
Packaging material (plastic bags, polystyrene foam, nails, etc.) MUST NOT be left
within children's reach, as it can be dangerous.
This unit must only be operated by adults. DO NOT allow children to tamper or play
with it.
NEVER use the unit under the following conditions:
In places subject to excessive humidity.
In places subject to vibrations or bumps.
In places with a temperature of over 45 C or less than 2 C/35.6 F./113 F
Protect the unit from excessive dryness or humidity (ideal conditions are between
35% and 80%).
DO NOT dismantle or modify the unit.
STAGE 16 DMX USER MANUAL/MANUAL DE USO PAGINA 2

1. Overview
1.1 Front View
25
26
11
24
22
23
21
10
8 9
7
20
19
18
17
16
15
14
13
12
2
1
STAGE 16 DMX USER MANUAL/MANUAL DE USO PAGINA 3
3
4
5
6

1. Overview
1.1 Front View
1. Channel LEDs 1-8
2. Channel Sliders
3. Flash Buttons 1-8
4. Channel LEDs 9-16
5. Latch Buttons 9-16
6. Flash Buttons 9-16
7. Master Slider
8. Level Knob
9. Speed/Fade Time Knob
Show the current intensity of the relevant channel
numbered from 1 to 8.
These 8 sliders are used to control the intensity of
channels 1 to 8.
These buttons are used to bring an individual or a group
of channels to full intensity.
Show the current intensity of the relevant channel
numbered from 9 to 16.
These 8 buttons are used for activating any of the 8
programmed scenes or programs.
These buttons are used to bring an individual or a group
of channels to full intensity.
This slider controls the output of channels 1-8, the M LED
shows the current intensity.
This slider is also used to advance the programs step by
step, the A & B LEDs show the activity of the program.
This knob controls the output of programs activated by the
Latch buttons.
This knob controls the speed at which the programs chase.
This knob also sets the initial fade in or out of programmed
scenes.
10. Audio Knob
11. Segment Display
12. Cross Button
13. Shift Button
STAGE 16 DMX USER MANUAL/MANUAL DE USO PAGINA 4
This knob controls the sensitivity of the audio input.
This 4-digit Segment Display shows the current
programming or function state.
Activates Cross mode for the chase of the programs.
A second tap will deactivate this function.
This button doesn't work when not used with other buttons.

1. Overview
1.1 Front View
14. Add/Kill Button
15. Loop/Loop Exit Button
16. Program/End
Step Button
17. Chase/Audio Button
18. Assign/Delete
Program Button
19. Tap Sync/
Manual Step Button
20. Stand By/
Manual Button
This button is used to change between Add and Kill mode.
In Add mode, multiple scenes or Flash buttons are enabled
to be on at a time.
In Kill mode, pressing any Flash button will kill any other
scenes or programs. The LED lights when Kill mode is active.
Activates Loop mode for the chase of programs.
Keep pressing the Shift button, tap this button to leave
Loop mode.
This button is used to activate Program mode.
In Program mode, keep pressing the Shift button, tap the
button to determine the end step of the program.
This button is used to activate Chase mode.
This button is also used to activate Audio mode when
pressing the Shift button.
This button is used to activate Assign mode.
This button is also used to delete the program when used
with the Shift button.
This button is used to set the chase speed by tapping the
button several times.
This button is also used to manual run the programs step
by step when used with the Shift button.
This button is used to kill all output except those from
Flash buttons.
This button is also used to activate Manual mode when
used with the Shift button.
21. Patch/
MIDI Channel Button
22. Full On Button
STAGE 16 DMX USER MANUAL/MANUAL DE USO PAGINA 5
This button is used to activate Patch mode.
This button is also used to activate the setup of MIDI
channel when used with the Shift button.
This button is used to bring a group of channels 1-8
to full intensity regardless of the Stand by button.

1. Overview
1.1 Front View
23. Pattern Down/
Fade Time Setup
24. Step Down/
Blind button
25. Step Up/
Cross Setup
26. Pattern Up/
Button Setup
This button is used to select the program in the order
of 60-1.
This button is also used to activate the setup of Fade Time
when used with the Shift button.
This button is used to select the step of the program.
This button is also used to activate Blind mode when used
with the Shift button.
This button is used to select the step of the program.
This button is also used to activate the setup of Cross when
used with the Shift button.
This button is used to select the program in the order
of 1-60.
This button is also used to activate the functions in the
following order; Channel Flash, Assign Kill and Assign Add.
STAGE 16 DMX USER MANUAL/MANUAL DE USO PAGINA 6

1. Overview
1.2 Rear View
1 2 3 4 5 6 7
1. DC Input
2. Power Switch
3. DMX Output
4. MIDI Thru
5. MIDI In
6. Audio Input
7. Foot Controller
DC 12-20V, 250 mA min.
This switch controls the turning on or off of the power.
This connector sends DMX signal to the fixture.
This connector sends MIDI signal to the MIDI sequencer.
This connector receives MIDI signal.
This jack accepts a line level audio input signal ranged
from 100mV to 1Vpp.
Provides Full On, Stand By and so on via the Foot
Controller(sold separately).
STAGE 16 DMX USER MANUAL/MANUAL DE USO PAGINA 7

2. Operation Guide
2.1 Programming
2.1.1 Programmable Patterns
30(01-30) programmable patterns may be programmed using the Channel
sliders 1-8 or Latch buttons 9-16.
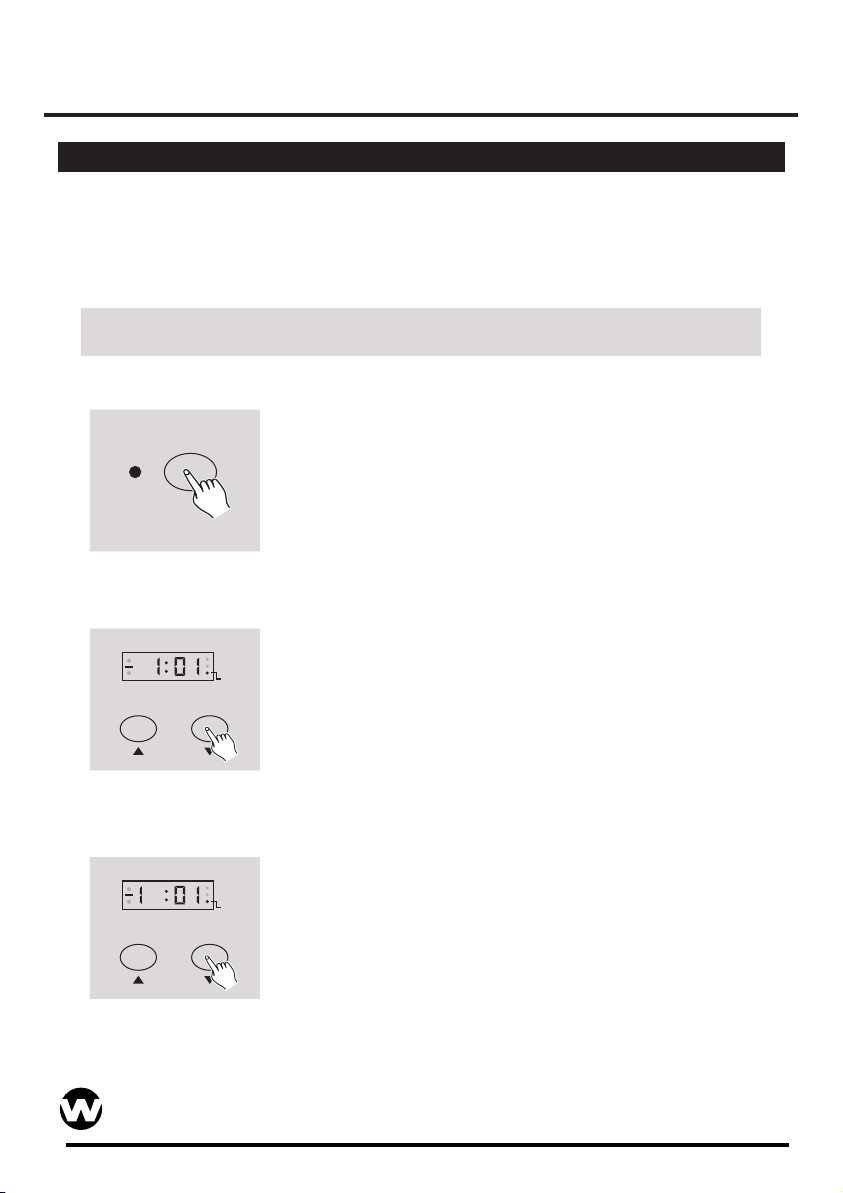
1. Press the Program button until its LED lights indicating Program mode is active.
2. Tap the Program Up/Down button to select the pattern you want to program, the
Segment Display shows the pattern you select.
3. Create a desired scene using the Channel sliders 1-8 or Latch buttons 9-16.
4. Once the scene is satisfactory, tap the Program button to program this scene
into memory.
5. Repeat steps 3-4 until the desired number of steps are programmed.
6. Tap the Step Down button once.
7. Keep pressing the Shift button, tap the End Step button to determine the
end step of the pattern, now you've programmed this pattern.
EXAMPLE: Program a pattern with channels 1-16 fully on in sequence
into the 11th programmable pattern.
1. Press the Program button until its LED lights
indicating Program mode is active.
Program
STAGE 16 DMX USER MANUAL/MANUAL DE USO PAGINA 8

2. Operation Guide
2.1.1 Programmable Patterns
Pattern
2. Tap the Pattern Up/Down button to select the 11th
pattern, the Segment Display shows your selection.
LATCH
9-16
Program
1
3. Move the Channel slider 1 to the top position and
Channel sliders 2-8 to the bottom.
2
3. Tap the Program button to program this scene into
memory, the Segment Display shows the next step.
4. Repeat steps 2-3 all channel sliders are programmed,
the Segment Display shows "11:09".
5. Tap the Latch button 9 until its LED lights.
STAGE 16 DMX USER MANUAL/MANUAL DE USO PAGINA 9

2. Operation Guide
2.1.1 Programmable Patterns
Program
6. Tap the Program button to program this step.
7. Repeat steps 5-6 until all Latch buttons are
programmed, the Segment Display shows "11:17".
6
Step
End Step
8. Tap the Step Down button once, the Segment
Display shows "11:16".
9. Keep pressing the Shift button, tap the End Step
button to determine the end step of this pattern.
Shift
Program
STAGE 16 DMX USER MANUAL/MANUAL DE USO PAGINA 10

2. Operation Guide
2.1.2 Assign Programming
The Flash buttons can be used to assign the programming of patterns.
1. Press the Assign button until its LED lights.
2. Create a desired scene using the Channel sliders 1-8 or Latch buttons 9-16.
3. Keep pressing the Assign button, tap the Flash button you wish to assign
programming of the pattern, all channel LEDs will flash briefly.
EXAMPLE: Program channels 1-4 fully on and channels 5-16 fully off
into the Flash 1 button.
1. Press the Assign button until its LED lights.
Assign
1 5
2. Move the Channel sliders 1-4 to top and the other
Channel sliders to bottom.
3. Keep pressing the Assign button, tap the Flash
FLASH
1-9
STAGE 16 DMX USER MANUAL/MANUAL DE USO PAGINA 11
Assign
button 1 to assign programming of the pattern.

2. Operation Guide
2.1.3 Delete a Pattern
Program
Pattern
1. Press the Program button until its LED lights
indicating Program mode is active.
2. Tap the Pattern Up/Down button to select the
pattern you wish to delete, the Segment Display
shows your selection.
Delete Program
3. Keep pressing the Shift button, tap the Delete
Program button to delete this pattern.
AssignShift
STAGE 16 DMX USER MANUAL/MANUAL DE USO PAGINA 12
12

2. Operation Guide
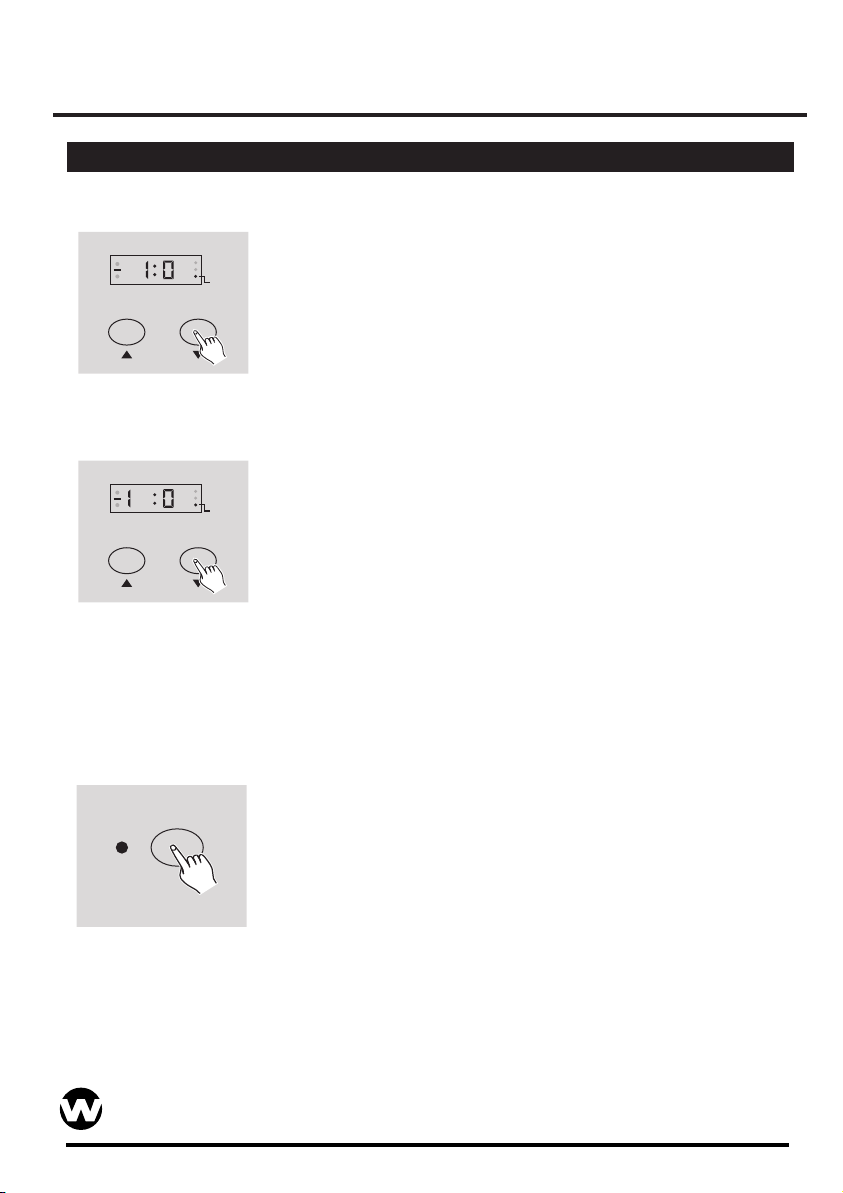
2.2 Running
2.2.1 Chase Mode
0022
Chase
쬀ࣅp 쬀ࣅp
22 2525
Tap Sync
2.2.2 Manual Mode
nu nu
55
Manual Step
Shift
Tap Sync
涨h涨h
the segment display lights indicating Chase
mode is active
In Chase mode, the pattern will chase automatically
once the pattern is selected. You can control the
chase of pattern using the Level knob or Speed/
Fade Time knob.
In Chase mode. Repeatedly tapping the Tap Sync
Tap the Chase button, the Chase indication in
㋘h샀s蓀㋘h샀s蓀
button establishes the chase speed. The last two
taps determine the speed with a maximum of 5
minutes and the Tap Sync indication in the segment
Display lights. Tap Sync will override any previous
setting of the Speed/Fade Time knob unless you
adjust the Speed/Fade Time knob again.
Keep pressing the Shift button, tap the Manual Step
button, the Manual Step indication in the segment
display lights idicating Manual mode is active.
In Manual mode, you can manually run the pattern
using the step Up/Down buttons.
STAGE 16 DMX USER MANUAL/MANUAL DE USO PAGINA 13

2. Operation Guide
2.2.3 Audio Mode2.2.3 Audio Mode
Keep pressing the Shift button tap the Audio
button, the Audio indication in the segment
0505
ShiftShift
AudioAudio
Chase
Chase
ߠuߠu
2.2.4 Loop Mode2.2.4 Loop Mode
In Chase mode, the Loop button allows you to continue the chase of
several patterns in sequence.
EXAMPLE: Continue the chase of pattern 31, 41 and 51 in sequence.
display lights indicating Audio mode is active.
In Audio mode, the chase of patterns will be
controlled by the external music rhythms
1. Tap the Chase button to activate Chase mode.
Chase
Chase
2. Tap the Pattern Up/Down button to select
pattern 31.
Pattern
STAGE 16 DMX USER MANUAL/MANUAL DE USO PAGINA 14

2. Operation Guide
2.2.4 Loop Mode2.2.4 Loop Mode
3. Tap the Loop button.
LoopLoop
4. Repeat steps 2-3 to select patter 41 and 51.
Wait for about 10 seconds, the three patterns you've selected will
continuously chase in sequence.
2.2.5 Cross Mode2.2.5 Cross Mode
In Chase mode, the scenes of pattern may fade in or out subsequently
using the Master Slider.
EXAMPLE: Chase the pattern with channels 1-8 to fade in sequentially.
Cross OnCross On
Cross SetupCross Setup
ShiftShift
STAGE 16 DMX USER MANUAL/MANUAL DE USO PAGINA 15
1. Keep pressing the Shift button, tap the Cross
Setup button until the Cross On LED lights.
2. Operation Guide
2.2.5 Cross Mode2.2.5 Cross Mode
PatternPattern
2. Tap the Pattern Up/Down button to select
the pattern you wish to run.
3. Move the Master Slider to top, the M LED
lights at full intensity.
4. Tap the Cross button to activate Cross mode.
CrossCross
5. Turn the Level knob to maximum causing A LED
lights at full intensity.
STAGE 16 DMX USER MANUAL/MANUAL DE USO PAGINA 16

2. Operation Guide
2.2.5 Cross Mode2.2.5 Cross Mode
6. Move the Master Slider slowly down, the A LED
fades out and the B LED fades in, the channel 8
fades down and the channel 1 fades up.
When the Master Slider is fully down, the channel
8 is fully off and the channel 1 is fully on.
7. Move the Master Slider slowly up, the A LED
fades in and the B LED fades out, the channel 1
fades down and the channel 2 fades up.
When the Master Slider is fully up, the channel
1 is fully off and the channel 2 is fully on.
8. Repeat steps 6-7 to manually run the pattern
step by step.
Cross OffCross Off
Cross SetupCross Setup
9. Keep pressing the Shift button, tap the Cross
Setup button until the Cross Off LED lights
indicating Cross is deactivated.
ShiftShift
STAGE 16 DMX USER MANUAL/MANUAL DE USO PAGINA 17

2. Operation Guide
2.3 Patch Mode2.3 Patch Mode
In Patch mode, you may easily allocate the outgoing channels(1-16) to
your light fixtures(DMX channels 1-96), zero output or full output.
EXAMPLE:Reverse outgoing channels 1-16 with DMX channels 16-1.
1. Press the Patch button until its LED lights
indicating Patch mode is active.
PatchPatch
00
StepStep
66
噘u噘u
ƨuƨioƨuƨio
2. Tap the Step Up/Down button until the Segment
Display shows "01" in the right two characters.
3. Tap the Pattern Up/Down button until the Segment
Display shows "16" in the left two characters.
The channel 16 is allocated to the DMX channel 1.
PatternPattern
STAGE 16 DMX USER MANUAL/MANUAL DE USO PAGINA 18

2. Operation Guide
2.3 Patch Mode2.3 Patch Mode
00
55 22
StepStep
PatternPattern
22
驠u驠u
ƘuƘioƘuƘio
4. Tap the Step Up/Down button until the Segment
Display shows "02" in the right two characters.
5. Tap the Pattern Up/Down button until the Segment
Display shows "15" in the left two characters.
The channel 15 is allocated to the DMX channel 2.
6. Repeat steps 4-5 until channel 1 is allocated to
DMX channel 16.
7. Press the Patch button until its LED goes out
indicating Patch mode is desactivated.
STAGE 16 DMX USER MANUAL/MANUAL DE USO PAGINA 19

2. Operation Guide
2.4 Blind Mode2.4 Blind Mode
EnableEnable
BlindBlind
1. Keep pressing the Shift button, tap the Blind
button until the Enable LED lights indicating
Blind mode is active.
ShiftShift
2. Keep pressing the Shift button, tap the desired
FLASHFLASH
1-81-8
ShiftShift
EnableEnable
BlindBlind
Flash button, the corresponding channel will be
off regardless of the chase of any pattern.
3. Keep pressing the Shift button, tap the Blind
button again causing the Enable LED goes
out, Blind is deactivated.
ShiftShift
STAGE 16 DMX USER MANUAL/MANUAL DE USO PAGINA 20

2. Operation Guide
2.5 Manual Operation2.5 Manual Operation
nunu
00
22
ManualManual
ShiftShift
Stand ByStand By
2.6 MIDI Operation2.6 MIDI Operation
2.6.1 MIDI Channel Setting2.6.1 MIDI Channel Setting
chch
8888
㋠Ň㋠Ň
㋐hi㋐hi
Keep pressing the Shift button, tap the Manual
button until the Manual indication in the Segment
Display lights indicating Manual is active.
Now you can control the channel output temporarily
using the Channel sliders , Flash buttons or Latch
buttons.
1. Keep pressing the Shift button, tap the MIDI
Channel button until the Segment Display
shows “CH:XX”
2. Tap the Step Up/Down button to select MIDI
channel.
ꨈtꨈt
3. Press both the shift and MIDI Channel buttons
again until the Segment Display doesn´t shows
“CH” indicating this unit is out of MIDI Channel
setting.
STAGE 16 DMX USER MANUAL/MANUAL DE USO PAGINA 21

2. Operation Guide
2.6.2 MIDI Implementation2.6.2 MIDI Implementation
1. During receiving MIDI data, MIDI data will be dumped and the MIDI Signal LED
will go out if there is no response within 10 minutes.
2. Be sure to make a MIDI Channel adjustment according to the setting of the
MIDI storage unit.
3. All the patterns turned on by MIDI will chase synchronously and not controlled
by the Level knob.
4. This unit receives Note On/Off signals according to the following table:
Note NO. Velocity Functions
22-81
82-97
99
101
102
STAGE 16 DMX USER MANUAL/MANUAL DE USO PAGINA 22
Pattern Master Turn On/Off patterns 1-60
Channel Intensity
Flash Buttons
Full On
Step
Stand By

2. Operation Guide
2.7 Initialization2.7 Initialization
When malfunction or mess occurs, you may make a initialization to
dump the memory.
LatchLatch
ButtonsButtons
9 13 10 14 11 15 12 169 13 10 14 11 15 12 16
Keep pressing the Shift button, tap the Latch buttons 9, 13, 10, 14, 11, 15, 12
and 16 in sequence, all LEDs and the Segment Display will go out indicating
this unit is initialized. Several latter, this unit recovers normal condition, now
you can program the pattern again.
NOTE: This operation does harm to the memory.
STAGE 16 DMX USER MANUAL/MANUAL DE USO PAGINA 23

Technical Specifications
Power Input ............................................... DC 12-20V, 250 mA min.
DMX Output .......................................................... 3 pin female XLR
MIDI Signal ................................................. 5 pin standard interface
Audio Input ................................................... By built-in microphone
Audio Signal ................................................................ 100mV-1Vpp
Dimensions ............................................................. 482x178x73mm
Weight(appro.) ........................................................................ 2.3 kg
STAGE 16 DMX USER MANUAL/MANUAL DE USO PAGINA 24

Contenidos
Caracteristicas 25
Instrucciones Generales 26
1. Vista General 27
1.1 Vista Frontal 27
1.2 Vista Trasera 31
2. Guía de Funcionamiento 32
2.1 Programando 32
2.1.1 Patrones Programables 32
2.1.2 Asignando Programación 35
2.1.3 Borrando un Patrón 36
2.2 Ejecutando 37
2.2.1 Modo Chase 37
2.2.2 Modo Manual 37
2.2.3 Modo Audio 38
2.2.4 Modo Loop 38
2.2.5 Modo Cross 39
Especificaciones y mejoras
en el diseño de esta unidad
y su manual, están sujetas
a cambio sin previo aviso
Reservados todos los
derechos.
2.3 Modo Patch 42
2.4 Modo Blind 44
2.5 Funcionamiento Manual 45
2.6 Funcionamiento MIDI 45
2.6.1 Configuración de canales MIDI 45
2.6.2 Implementación MIDI 46
2.7 Inicialización 47
Especificaciones Técnicas 48

Características
Gracias por la elección de un producto WORK ®
STAGE 16 DMX incluye las siguientes características:
16 canales DMX
30 patrones almacenados (31-60)
30 patrones programables (01-30)
Cada patrón programable consta de un máximo de 99 escenas
Se pueden encadenar patrones en modo Manual/Chase/Audio/Cross
Micrófono incorporado para disparo con música
Control MIDI sobre patrones, escenas, Full On y Stand By
Memoria ante fallos de alimentación
NOTA:
Se requiere un conocimiento sobre MIDI y DMX para el pleno
uso de esta unidad
STAGE 16 DMX USER MANUAL/MANUAL DE USO PAGINA 25

Instrucciones Generales
Lea las instrucciones contenidas en este manual cuidadosamente y a fondo, contienen
informacion importe para su seguridad durante su uso y su mantenimiento. Mantenga
este manual junto a la unidad, con tal de consultarlo en el futuro. Si la unidad es vendida a
otro operador, asegurese de incluir siempre este manual, para permitir que el nuevo
propietario lea las instrucciones sobre su funcionamiento.
AVISO
Este producto debe ser conectado a tierra
NO PERMITA que ningun liquido inflamable, agua u objetos metalicos entren en la unidad
Para prevenir riesgos de fuego o descargas electricas, no exponga el aparato a zonas de
alta temperatura o humedad
Tenga cuidado de no dañar el cable de red de la unidad
NO abra la unidad, no hay elementos operativos en el interior.
NUNCA Trate de reparar la unidad por si mismo. Las reparaciones por personal no
cualificado, podria causar daños o fallos de funcionamiento. Contacte con su distribuidor
Espere al menos un segundo para encender la unidad despues de apagarla.
PRECAUCION
Eesta unidad esta diseñada para usos en interiores.
Despues de retirar el embalaje, compruebe que la unidad no ha sido dañada. En caso
de duda, no la use y pongase en contacto con su distribuidor.
El material de embalaje (plasticos, cajas, gomaespuma, etc) no deben ser puestos al
alcance de los niños, pueden resultar peligrosos.
Deje de usar la unidad inmediatamente en el caso de problemas serios de funcionamiento
y pongase en contacto con su distribuidor.
No desmantele o modifique la unidad.
STAGE 16 DMX USER MANUAL/MANUAL DE USO PAGINA 26

1. Vista General
1.1 Vista Frontal
25
26
11
24
22
23
21
10
8 9
7
20
19
18
17
16
15
14
13
12
2
1
STAGE 16 DMX USER MANUAL/MANUAL DE USO PAGINA 27
3
4
5
6

1. Vista General
1.1 Vista Frontal
1. LEDs de canal 1-8
2. Faders de canal
3. Botones Flash 1-8
4. LEDs de canal 9-16
5. Botones Latch 9-16
6. Botones Flash 9-16
7. Fader Master
8. Mando Level
9. Mando Speed/Fade Time
Muestra la intensidad actual de los canales numerados
del 1 al 8.
Estos 8 faders se usan para controlar la intensidad de
los canales 1 al 8
Estos botones se usan para llevar a un canal individual
o grupo de canales a total intensidad.
Muestra la intensidad actual de los canales numerados
del 9 al 16.
Estos 8 botones se usan para activar cualquiera de los
8 escenas programadas o programas
Estos botones se usan para llevar a un canal individual
o grupo de canales a total intensidad.
Este fader controla la salida de los canales 1-8, el LED M
muestra la actividad presente.
El fader se usa tambien para avanzar en el programa paso
a paso, los LEDs A y B muestran la activdad del programa
Este mando controla la salida de los programas activados
por los botones Latch
Este mando controla la velocidad a la cual los programas
corren. Este mando configura tambien el fundido de entrada
y de salida de las escenas programadas.
10. Mando Audio
11. Pantalla
12. Botón Cross
13. Botón Shift
STAGE 16 DMX USER MANUAL/MANUAL DE USO PAGINA 28
Este mando controla la sensibilidad de la entrada de audio.
Esta pantalla con 4 display de segmento muestra la actual
programación o estado.
Activa el modo Cross para el chase de programas.
Una segunda pulsación desactiva la función
Este botón no funciona a no ser que se use con otros
botones.

1. Vista General
1.1 Vista Frontal
14. Add/Kill Button
15. Loop/Loop Exit Button
16. Program/End
Step Button
17. Chase/Audio Button
18. Assign/Delete
Program Button
19. Tap Sync/
Manual Step Button
20. Stand By/
Manual Button
Este botón se usa para cambiar entre modo Add y Kill
En modo Add, múltiples escenas o botones Flash son
habilitados para ser usados a la vez.
En modo Kill, presionando cualquier tecla Flash, eliminará
otra escena o programa. El LED se ilumina en mod Kill
Activa el modo Loop para en chase de programas.
Mantenga pulsada la tecla Shift, pulse esta tecla para
abandonar el modo Loop.
Esta tecla se usa para activa el modo Program.
En este modo, mantenga pulsado la tecla Shift, pulsa la
tecla para determinar el paso final del programa.
Este botón se usa para activa el modo Audio.
Este botón se usa además para activar el modo Audio
cuando presiona la tecla Shift.
Este botón se usa para activar el modo Assign.
Este botón se usa además para borrar un programa al
usarlo con la tecla Shift.
Este botón se usa para configurar la velocidad chase
pulsando la tecla varias veces.
Este botón se usa además para ejecutar manualmente los
Este botón se usa para apagar todas las salidas excepto
si se activan con la tecla Flash.
Tambien se usa para activar el modo Manual al usarlo
junto a la tecla Shift
21. Patch/
MIDI Channel Button
22. Full On Button
STAGE 16 DMX USER MANUAL/MANUAL DE USO PAGINA 29
Este botón se usa para activar el modo Patch.
Tambien se usa para activar la configuración del canal
MIDI si se usa junto a la tecla Shift.
Este botón se usa a llevar un grupo de canales 1-8 a
intensidad total a pesar de la tecla Stand by.

1. Vista General
1.1 Vista Frontal
23. Pattern Down/
Fade Time Setup
24. Step Down/
Blind button
25. Step Up/
Cross Setup
26. Pattern Up/
Button Setup
Este botón se usa para seleccionar el programa en
el orden de 60 - 1
Esta tecla se usa además para activar la configuración del
tiempo de fundido (Fade Time) al usarlo junto a Shift
Este botón se usa para seleccionar el paso del programa.
Este botón se usa para activar el modo Blind cuando se
usa con la telca Shift.
Esta tecla se usa para seleccionar el paso del programa
Tambien se usa para activar la configuración de Cross
cuando se usa junto a la tecla Shift.
Este botón se usa para seleccionar el programa de 1-60
Esta tecla se usa además para activar las funciones en
el order siguiente: Channel Flash, Assign Kill y Assign Add.
STAGE 16 DMX USER MANUAL/MANUAL DE USO PAGINA 30

1. Vista General
1.2 Vista Trasera
1 2 3 4 5 6 7
1. Entrada DC
2. Interruptor de red
3. DMX Output
4. MIDI Thru
5. MIDI In
6. Audio Input
7. Foot Controller
DC 12-20V, 250 mA min.
Este interruptor controla el encendido/apagado de la unidad.
Este conector envía señal DMX al robot.
Este conector envía señal MIDI a un secuenciador MIDI
Este conector recibe señal MIDI.
Este conector acepta señal de audio de nivel de línea
desde 100mV a 1Vpp.
Proporciona control Full On, Stand By mediante el
Controlador pedalera (Vendido por separado)
STAGE 16 DMX USER MANUAL/MANUAL DE USO PAGINA 31

2. Guía de Funcionamiento
2.1 Programando
2.1.1 Patrones Programables
30 (01-30) Patrones Programables pueden ser programados usando los
fader de canal 1-8 o las teclas Latch 9-16.
1. Presione la tecla Program hasta que su LED se ilumine indicando que está activo
2. Pulse la tecla Program Up/Down para seleccionar el patrón que desea, la pantalla
mostrará el patrón seleccionado.
3. Cree la escena deseada usando el fader de canal 1-8 o las teclas Latch 9-16
4. Una vez la escena es satisfactoria, pulse la tecla Program para programar la
escena en la memoria.
5. Repita los pasos 3 y 4 hasta programar el número de pasos deseado
6. Pulse la tecla Step Down una vez
7. Mantenga presionada la tecla Shift, pulse End Step para determinar el final
del patrón, ahora ha programado este patrón.
EJEMPLO:
Programe un patrón con los canales 1-16 encendidos en
secuencia dentro del patrón 11
1. Presione la tecla Program hasta que su
LED se ilumine, indicando que el modo
Program está activado.
Program
STAGE 16 DMX USER MANUAL/MANUAL DE USO PAGINA 32

2. Guía de Funcionamiento
2.1.1 Patrones Programables
2. Pulse la tecla Pattern Up/Down para seleccionar
el patrón 11, la pantalla muestra la selección
realizada.
Pattern
LATCH
9-16
Program
1
2
y los fader del 2 al 8 abajo del todo
3. Pulse la tecla Program para programar la escena
dentro de la memoria, la pantalla muestra el paso
siguiente.
4. Repita los paso 2 al 3, todos los canales se
programan y la pantalla muestra “11:09”
5. Pulse la tecla Latch 9 hasta que el LED se
ilumine
3. Mueva el fader de canal 1 a la posición superior
STAGE 16 DMX USER MANUAL/MANUAL DE USO PAGINA 33

2. Guía de Funcionamiento
2.1.1 Patrones Programables
6. Pulse la tecla Program para programas este
paso.
Program
7. Repita los pasos 5-6 hasta que todos los
botones Latch estén programados, la pantalla
muestra “11:17”
8. Pulse la tecla Step Down una vez, la pantalla
6
Step
muestra “11:16”
9. Mantenga presionada la tecla Shift, pulse la
End Step
tecla End Step para determinar el paso final
del patrón.
Shift
Program
STAGE 16 DMX USER MANUAL/MANUAL DE USO PAGINA 34

2. Guía de Funcionamiento
2.1.2 Asignando Programación
Los botones Flash pueden ser usados para asignar la programación de
patrones.
1. Presione la tecla Assign hasta que se ilumine el LED
2. Cree la escena deseada usando los potenciómetros 1-8 o las teclas Latch 9-16
3. Mantenga presionado la tecla Assign, pulse la tecla Flash a la que desea asignar
la programación del patrón, todos los LED de canal parpadearán.
EJEMPLO:
1 5
FLASH
1-9
Programe los canales 1-4 a máximo y los canales 5-6
apagados en la tecla Flash 1.
1. Presione la tecla Assign hasta que el LED se encienda
Assign
2. Mueva los potenciómetros de canal 1-4 a tope y
el resto al mínimo.
3. Mantenga presionado el botón Assign, pulse la tecla
Flash 1 para asignar la programación del patrón.
Assign
STAGE 16 DMX USER MANUAL/MANUAL DE USO PAGINA 35

2. Guía de Funcionamiento
2.1.3 Borrando un Patrón
1. Presione la tecla Program hasta que su LED se
ilumine, indicando que el modo Program está
activo.
Program
2. Pulse la tecla Pattern Up/Down para seleccionar
el patrón que desea borrar, la pantalla muestra
su selección.
Pattern
Delete Program
3. Mantenga presionado la tecla Shift, pulse la
tecla Delete Program para borrar el patrón
AssignShift
STAGE 16 DMX USER MANUAL/MANUAL DE USO PAGINA 36

2. Guía de Funcionamiento
2.2 Ejecutando
2.2.1 Modo Chase
Pulse la tecla Chase, el indicador Chase en la
0022
pantalla se ilumina indicando que el modo Chase
está activado
Chase
쬀ࣅp 쬀ࣅp
22 2525
Tap Sync
2.2.2 Modo Manual
nu nu
55
Manual Step
Shift
Tap Sync
En modo Chase, el patrón se pondrá en marcha
una vez seleccionado. Puede controlar el chase
del patrón usando el mando Level o el mando
Speed/Fade Time.
En modo Chase pulse repetidamente la tecla
㋘h샀s蓀㋘h샀s蓀
Tap Sync para establecer la velocidad de chase
Las dos últimas pulsaciones determinan la
velocidad con un máximo de 5 minutos, la
indicación Tap sync aparece en el display.
Esta función tendrá preferencia sobre cualquiera
configuración previa de Speed/Fade Time a menos
que ajuste el mando Speed/Fade Time otra vez.
Mantenga presionado la tecla Shift, pulse la tecla
Manual Step. El indicador manual Step en la pantalla
se iluminará indicando que el modo Manual está activo
En modo Manual, puede ejecutar manualmente los
patrones usando las teclas Step Up/Down
STAGE 16 DMX USER MANUAL/MANUAL DE USO PAGINA 37

2. Guía de Funcionamiento
2.2.3 Modo Audio 2.2.3 Modo Audio
Mantenga presionado la tecla Shift, pulse la tecla
0505
ShiftShift
AudioAudio
Chase
Chase
ߠuߠu
2.2.4 Modo Loop2.2.4 Modo Loop
En modo chase, la tecla Loop permite continuar con el chase de varios patrones
en modo secuencial.
EJEMPLO: Continue con los chase de los patrones 31, 41 y 51 en secuencia
Audio, el indicador Audio en la pantalla se ilumina
indicando que este modo se encuentra activo.
En modo Audio, el chase de los patrones será
controlado por el ritmo de la música externa
1. Pulse la tecla Chase para activar el modo Chase.
Chase
Chase
2. Pulse la tecla Pattern Up/Down para seleccionar el
patrón 31.
Pattern
STAGE 16 DMX USER MANUAL/MANUAL DE USO PAGINA 38

2. Guía de Funcionamiento
2.2.4 Loop Mode2.2.4 Loop Mode
3. Pulse la tecla Loop.
LoopLoop
4. Repita los pasos 2-3 para seleccionar patrones 41 y 51.
Espero unos 10 segundos, estos 3 patrones que han sido seleccionados, se
ejecutarán secuencialmente.
2.2.5 Modo Cross2.2.5 Modo Cross
En modo chase, las escenas de el patrón pueden usar fundido de entrada y de
salida usando el potenciómetro Master.
EJEMPLO: Ejecute el patrón con los canales 1-8 a fundido de entrada secuencialmente.
Cross OnCross On
Cross SetupCross Setup
ShiftShift
STAGE 16 DMX USER MANUAL/MANUAL DE USO PAGINA 39
1. Manteniendo presionado la tecla Shift, pulse la
tecla Cross setup hasta que el LED Cross On se
ilumine.

2. Guía de Funcionamiento
2.2.5 Modo Cross2.2.5 Modo Cross
2. Pulse la tecla Pattern Up/Down para seleccionar
el patrón que desea ejecutar
PatternPattern
3. Mueva el potenciómetro Master al máximo, el
LED M se ilumina a total intensidad.
4. Pulse la tecla Cross para activar el modo Cross.
CrossCross
5. Gire el mando Level al máximo lo que ocasiona
que el LED A se ilumine a intensidad total.
STAGE 16 DMX USER MANUAL/MANUAL DE USO PAGINA 40

2. Guía de Funcionamiento
2.2.5 Modo Cross2.2.5 Modo Cross
6. Mueva el potenciómetro Master lentamente hacia
abajo, el LED A se apagará y el LED B comenzará
a iluminarse, el canal 8 reduce la intensidad y el
canal 1 aumenta la intensidad.
Cuando el mando Master está abajo, el canal 8 está
completamente apagado y el canal 1 completamente
encendido.
7. Mueva el potenciómetro Master lentamente hacia
abajo, el LED A se encenderá y el LED B comenzará
a reducir, el canal 1 reduce la intensidad y el
canal 2 aumenta la intensidad.
Cuando el mando Master está arriba, el canal 1 está
completamente apagado y el canal 2 completamente
encendido.
8. Repita los pasos 6-7 para ejecutar manualmente
el patrón paso a paso.
Cross OffCross Off
Cross SetupCross Setup
9. Mantenga presionado la tecla Shift, pulse la tecla
Cross hasta que el LED Cross Off se ilumine
ShiftShift
STAGE 16 DMX USER MANUAL/MANUAL DE USO PAGINA 41
indicando que el modo Cross está desactivado
2. Guía de Funcionamiento
2.3 Modo Patch2.3 Modo Patch
1. En modo Patch, puede fácilmente asignar los canales de salida (1-16) hacia su
robot de luces (Canales DMX 1-96), si son salida 0 o salida total
EJEMPLO: Invertir los canales de salida 1-16 con los canales DMX 16-1
1. Presione la tecla Patch hasta que el LED se
ilumine indicando que el modo Patch está
activo.
PatchPatch
2. Pulse las teclas Up/Down hasta que la pantalla
00
噘u噘u
muestra “01” en los dos caracteres de la derecha.
StepStep
3. Pulse la tecla Pattern Up/Down hasta que la
66
ƨuƨioƨuƨio
pantalla muestra “16” en los dos caracteres de
la izquierda.
El canal 16 está asignado al canal 1 de DMX.
PatternPattern
STAGE 16 DMX USER MANUAL/MANUAL DE USO PAGINA 42
2. Guía de Funcionamiento
2.3 Modo Patch2.3 Modo Patch
4. Pulse la tecla Step Up/Down hasta que la
00
55 22
StepStep
PatternPattern
22
驠u驠u
ƘuƘioƘuƘio
pantalla muestra “02” en los dos caracteres
de la derecha.
5. Pulse la tecla pattern Up/Down hasta que la
pantalla muestra “15” en los dos caracteres
de la izquierda. El canal 15 ha sido asignado
al canal 2 de DMX.
6. Repita los pasos 4-5 hasta que el canal 1 esté
asignado al canal 16 de Dmx
7. Presione la tecla Patch hasta que el LED se
apague, indicando que el modo Patch está
desactivado.
STAGE 16 DMX USER MANUAL/MANUAL DE USO PAGINA 43

2. Guía de Funcionamiento
2.4 Modo Blind2.4 Modo Blind
1. Manteniendo presionada la tecla Shift, pulse
EnableEnable
BlindBlind
ShiftShift
FLASHFLASH
1-81-8
ShiftShift
la tecla Blind hasta que el LED Enable se
encienda, indicando que el modo Blind está
activo.
2. Mantenga pulsada la tecla Shift, pulse la
tecla Flash deseada, el canal correspondiente
se apagará a pesar del chase de cualquier
patrón.
3. Mantenga presionada la tecla Shift, al pulsar
otra vez la tecla Blind, causa que el LED
EnableEnable
BlindBlind
ShiftShift
STAGE 16 DMX USER MANUAL/MANUAL DE USO PAGINA 44
Enable se apague, Blind está desactivado.

2. Guía de Funcionamiento
2.5 Funcionamiento Manual2.5 Funcionamiento Manual
Mantenga presionada la tecla Shift, pulse la tecla
nunu
00
22
ManualManual
ShiftShift
Stand ByStand By
2.6 Funcionamiento MIDI2.6 Funcionamiento MIDI
2.6.1 Configuración de canales MIDI2.6.1 Configuración de canales MIDI
chch
8888
㋠Ň㋠Ň
Manual hasta que el indicador Manual en la
pantalla se ilumina, indicando que está activo.
Ahora puede controlar la salida de canal usando
los potenciómetros de canal, botones Flash o
teclas Latch.
1. Matenga presionada la tecla Shift, pulse la tecla
MIDI channel hasta que la pantalla muestre
“CH:XX”
㋐hi㋐hi
2. Pulse la tecla Step Up/Down para seleccionar
el canal MIDI
ꨈtꨈt
3. Presione a la vez Shift y MIDI Channels otra
vez hasta que la pantalla no muestre “CH”
indicando que la unidad está fuera de la
configuración de canal MIDI.
STAGE 16 DMX USER MANUAL/MANUAL DE USO PAGINA 45

2. Guía de Funcionamiento
2.6.2 Implementación MIDI2.6.2 Implementación MIDI
1. Durante la recepción de datos MIDI, estos datos serán volcados y el LED MIDI
Signal se apagará si no hay respuesta en 10 minutos.
2. Asegúrese hacer los ajustes de canal MIDI de acuerdo a la configuración de la
unidad almacenada MIDI
3. Todos los patrones pasan a funcionar por MIDI de manera sincrónica y no son
controlados por el mando Level.
4. La unidad recibe señal de notas On/Off de acuerdo a la siguiente tabla.
Note NO. Velocidad Funciones
22-81
82-97
99
101
102
Patrón master Patrones On/Off 1-60
Intensidad de canal
Botones Flash
Full On
Step
Stand By
STAGE 16 DMX USER MANUAL/MANUAL DE USO PAGINA 46

2. Guía de Funcionamiento
2.7 Inicialización2.7 Inicialización
Ante un mal funcionamiento o bloqueo de la unidad, debe proceder a una inicialización
del volcado de la memoria.
LatchLatch
ButtonsButtons
9 13 10 14 11 15 12 169 13 10 14 11 15 12 16
Mantenga presionado la tecla Shift, pulse los botones Latch 9, 13, 10, 14, 11, 15, 12 y
16 en secuencia, todos los LED y la pantalla se apagan indicando que la unidad se
ha inicializado. Pasado unos segundos la unidad recupara el estado normal, ahora
puede programar los patrones otra vez.
NOTA: Esta operación puede dañar la memoria
STAGE 16 DMX USER MANUAL/MANUAL DE USO PAGINA 47

Especificaciones Tecnicas
Alimetnación ............................................... DC 12-20V, 250 mA min.
Salida DMX ....................................................... XLR 3 pines hembra
Señal MIDI ................................................. Interfaz standard 5 pines
Entrada Audio ................................................... Micrófono incorporado
Señal de Audio ................................................................ 100mV-1Vpp
Dimensiones ............................................................. 482x178x73mm
Peso(aprox.) ........................................................................ 2.3 kg
STAGE 16 DMX USER MANUAL/MANUAL DE USO PAGINA 48

24-004-1854 Rev1.024-004-1854 Rev1.024-004-1854 Rev1.0
All Rights Reserved!All Rights Reserved!All Rights Reserved!
 Loading...