

Page 1
Assembly & Installation Instructions:
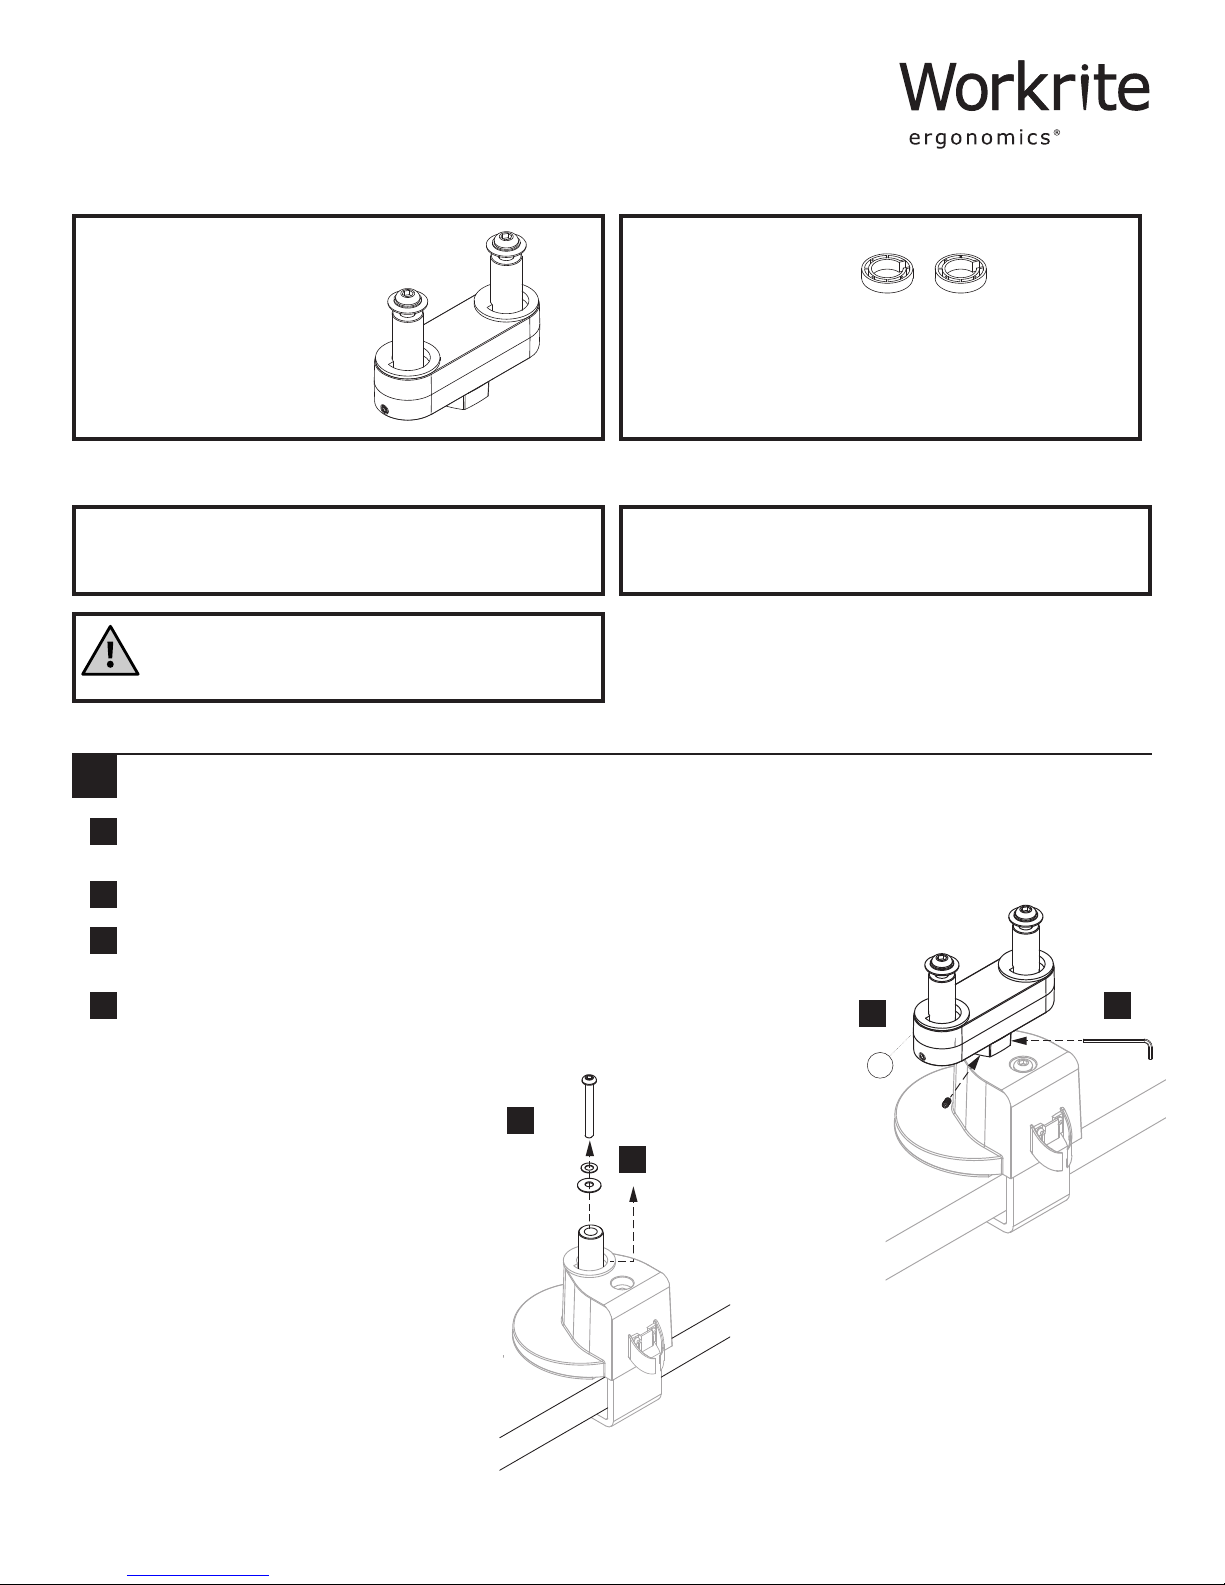
Dual Arm Adaptor CONF-ADPT-DA-S
Parts Included
Dual Arm Adaptor Assembly
A
Qty: 1
Static Arm Spacer
B
Qty: 2
Required Parts Sold Separately Tools Required
Conform Monitor Arm.
Selected base option with mounting hardware.
Do not use on hollow core tables.
Do not rotate or suspend arm (s) beyond table surface.
The weight dierence between the two monitors should not
exceed 15 lb.
1
Attach Dual Arm Adaptor to selected base option
Remove the Bolt and Washers from base (if not already removed)
a
and set aside.
Phillips head screwdriver, 2.5 mm Allen Wrench, 5 mm
Allen Wrench.
Remove the Pivot Limiter.
b
Place Dual Arm Adaptor Assembly (A) on the pin mount from your
c
selected base option.
Tighten the two pre-installed set screws with the 2.5 mm Allen Wrench
d d
(included with base) to secure the Adaptor to the base. The adaptor
should be locked in place and not rotate.
c
A
a
b
Optional C-Clamp
Note:
If you are installing Articulating
Arms, proceed to Step 2.
If you are installing Static Arms,
proceed to Step 3.
Base shown
1 of 2 Workrite Ergonomics | 800.959.9675 www.workriteergo.com
Page 2
2
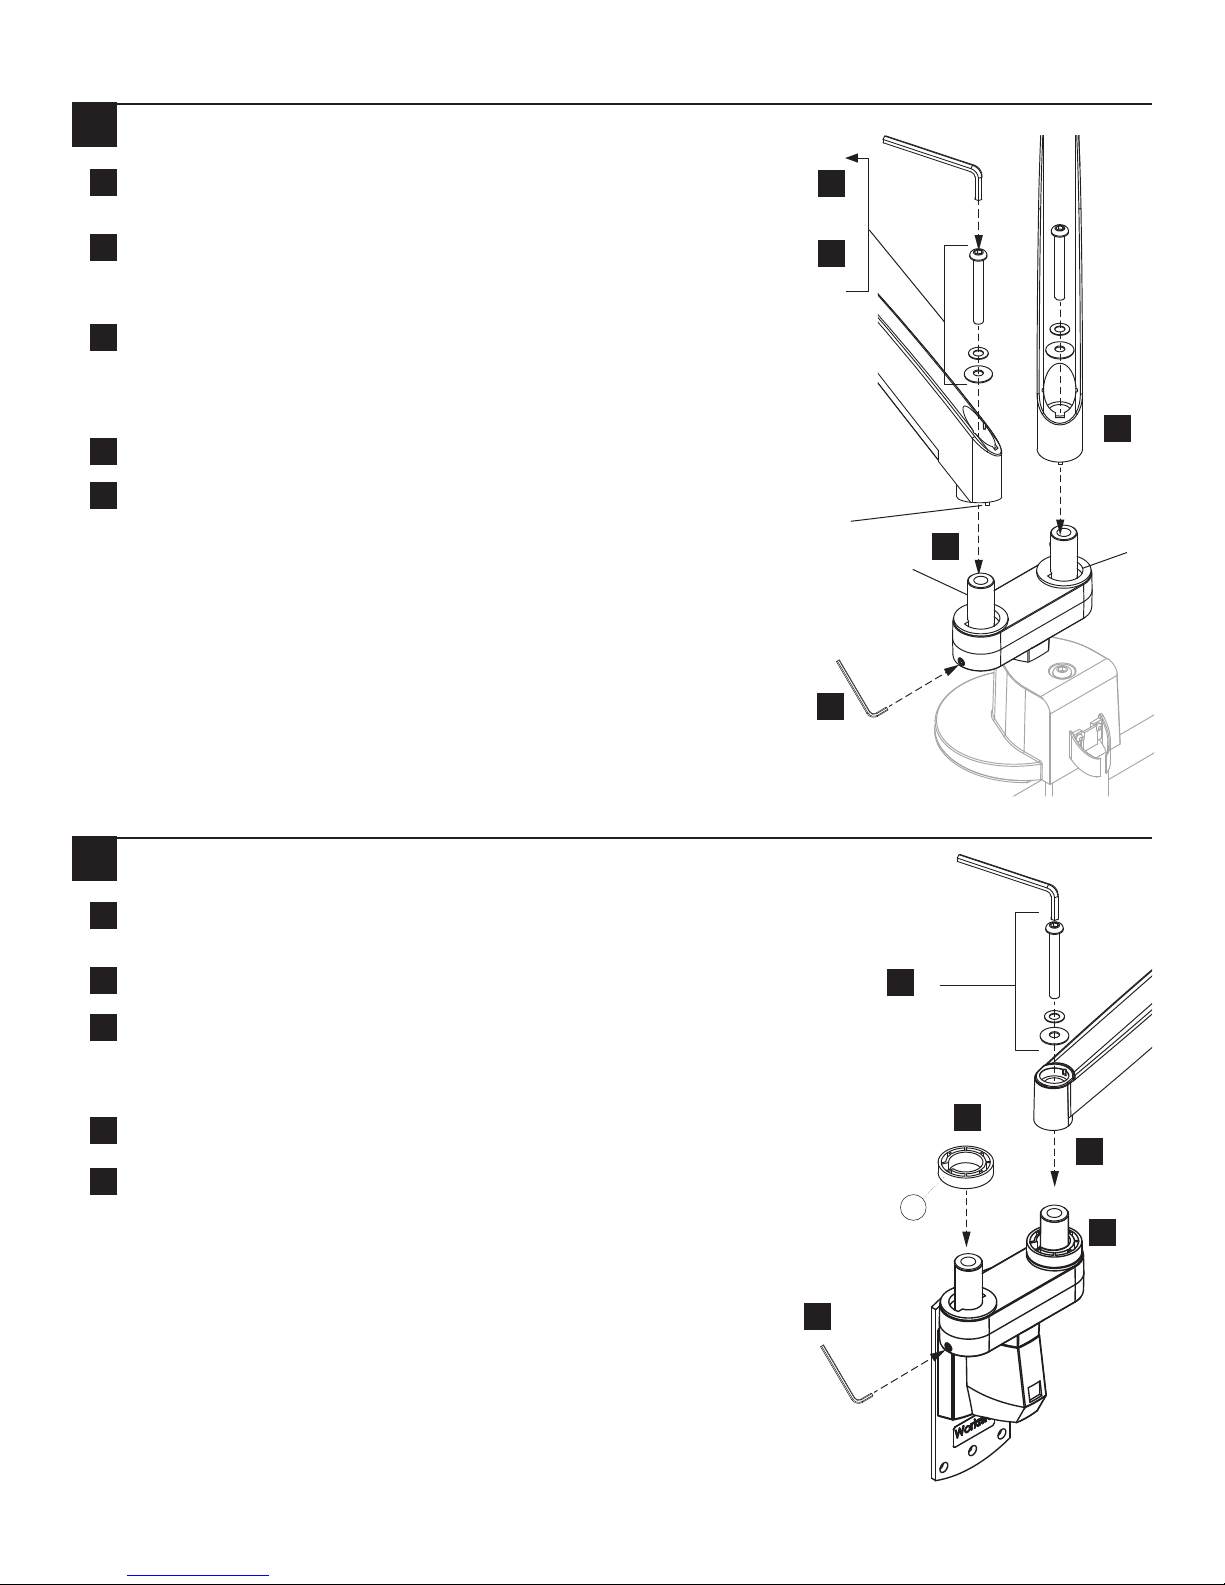
Attaching Conform Articulating Arms
Remove the set of two M8 × 72 mm Bolts and Washers from the
a
Dual Arm Adaptor.
Place the Conform Arm on the Dual Arm Adaptor post. Align
b
tooth in arm base with slot in Pivot Limiter. (Note: the slot
always facing the back side).
Insert the M8 × 72 mm Bolt with washers through the bottom of
c
the arm assembly and into the Adaptor as shown. Tighten with
5 mm Allen Wrench (included with base). Be sure the arm is
tight but rotates freely.
Repeat for other arm.
d
Once arms are attached, tighten installed set screws with 2.5
e
mm Allen Wrench (included with base) to fix Arms in place.
Optional
C-Clamp Base
Shown
a
Remove
c
Insert
Tooth
e
Pin
b
d
Slot
3
Attaching Conform Static Arms
Remove the set of two M8 × 72 mm Articulating Bolts and
a
Washers from the Dual Arm Adaptor.
Place Static Arms spacers (B).
b
Insert the M8 × 72 mm Bolt with washers through the bottom of
c
the arm assembly and into the Adaptor as shown. Tighten with
5 mm Allen Wrench (included with base). Be sure the arm is
tight but rotates freely.
Repeat for other arm.
d
Once arms are attached, tighten installed set screws with 2.5
e
mm Allen Wrench (included with base) to fix Arms in place.
a
Remove
d
c
B
b
e
Optional
Wall Plate Base
Shown
2 of 2 Workrite Ergonomics | 800.959.9675 www.workriteergo.com
1500258 Rev B
 Loading...