

Woodson W.HFC22, W.HFSQ Series, W.HFS23, W.HFS24, W.HFC23 Specification, Installation And Operation Manual
...Page 1
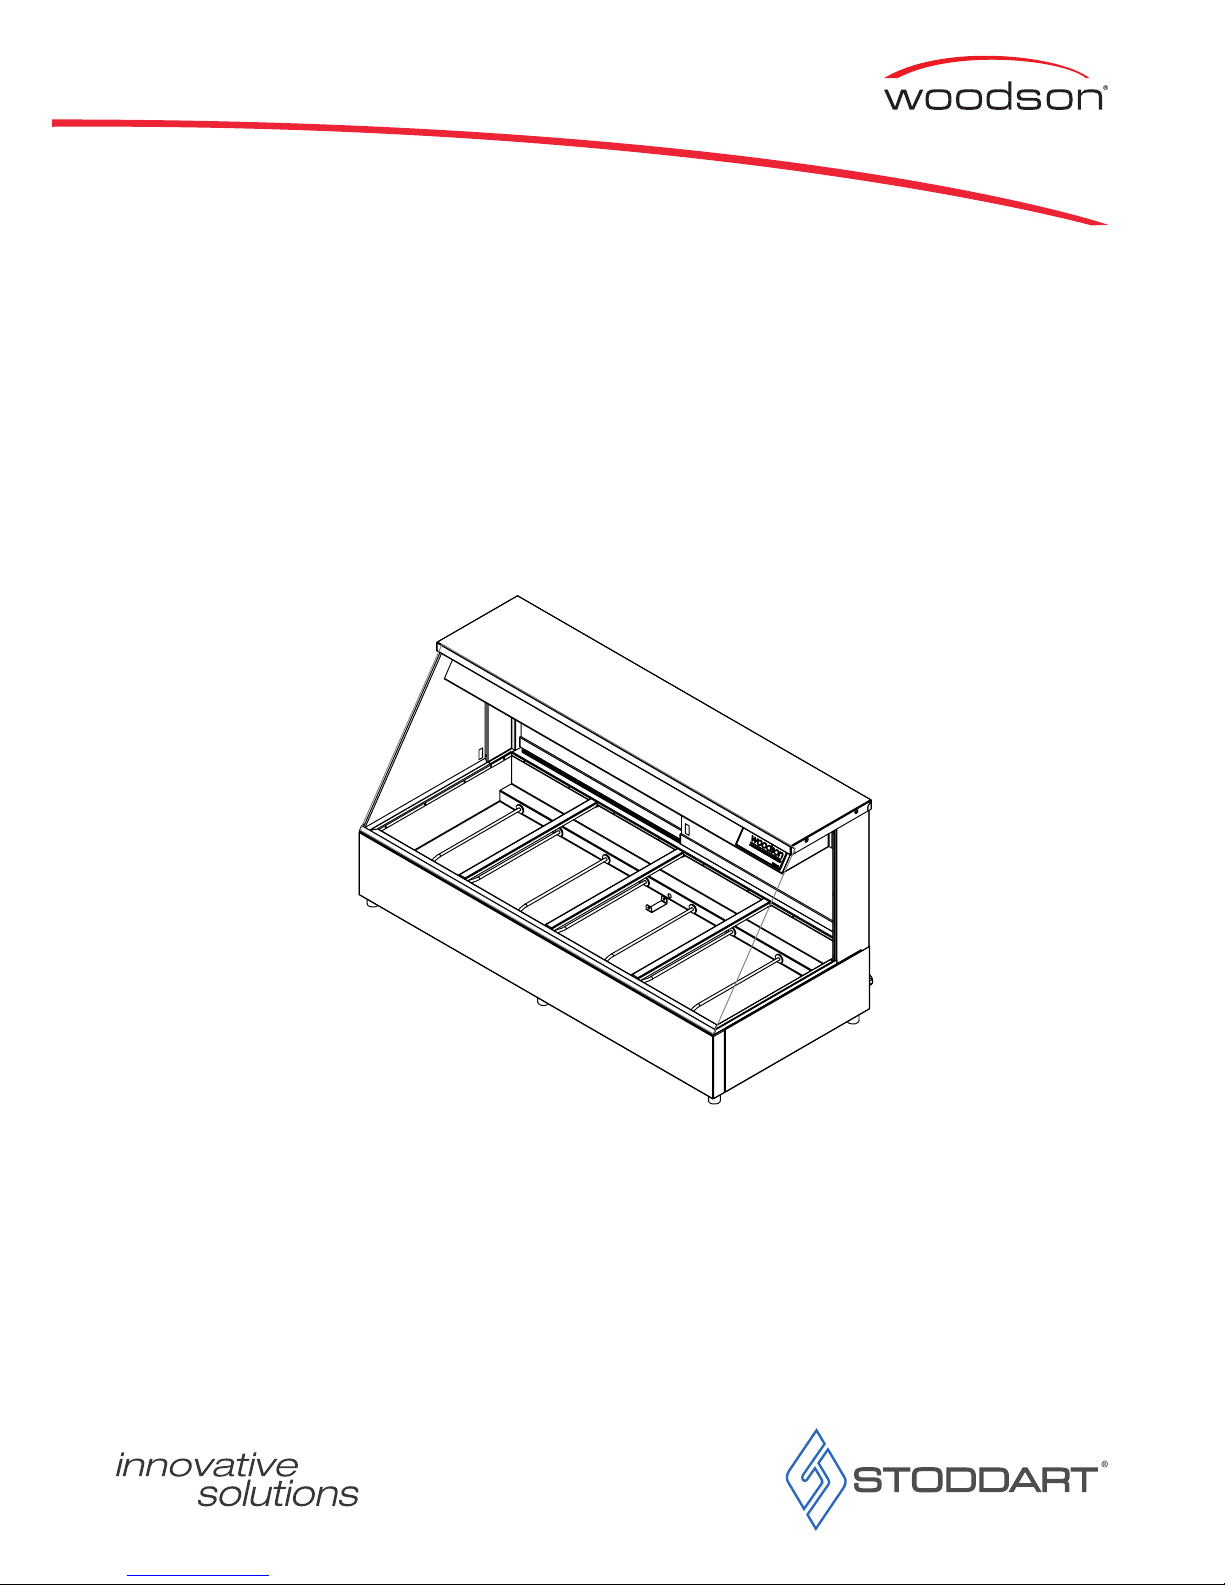
A guide on the use, care and maintenance
of your quality Woodson product
Models:
W.HFS, W.HFC & W.HFSQ
Hot Food Displays
SPECIFICATION, INSTALLATION
AND OPERATION MANUAL
READ ALL INSTRUCTIONS BEFORE USE
Revision Date: 27/02/2019
Page 2

Page Intentionally Left Blank
Page 1
Due to continuous product research and development,
the information contained herein is subject to change without notice.
www.stoddart.com.au
www.stoddart.co.nz
Page 3

Page 2
Due to continuous product research and development,
the information contained herein is subject to change without notice.
www.stoddart.com.au
www.stoddart.co.nz
Introduction
Your New Woodson Product � � � � � � � � � � � � � � � � � � � � � � � � � � � � � � � � � � � � � � � � � � � � � � � � � � � � � � � � 3
Warranty Registration � � � � � � � � � � � � � � � � � � � � � � � � � � � � � � � � � � � � � � � � � � � � � � � � � � � � � � � � � � � 3
Product Overview � � � � � � � � � � � � � � � � � � � � � � � � � � � � � � � � � � � � � � � � � � � � � � � � � � � � � � � � � � � � � � 3
Attention � � � � � � � � � � � � � � � � � � � � � � � � � � � � � � � � � � � � � � � � � � � � � � � � � � � � � � � � � � � � � � � � � � 4
General Information � � � � � � � � � � � � � � � � � � � � � � � � � � � � � � � � � � � � � � � � � � � � � � � � � � � � � � � � � � � �4
Service
Installation
Setting Up � � � � � � � � � � � � � � � � � � � � � � � � � � � � � � � � � � � � � � � � � � � � � � � � � � � � � � � � � � � � � � � � � 5
Handling
Unpacking
Positioning
Disposal
Electrical Connection � � � � � � � � � � � � � � � � � � � � � � � � � � � � � � � � � � � � � � � � � � � � � � � � � � � � � � � � � � � � 6
Information
Plumbing Connections � � � � � � � � � � � � � � � � � � � � � � � � � � � � � � � � � � � � � � � � � � � � � � � � � � � � � � � � � � �6
Information
Specication
Technical Specifications � � � � � � � � � � � � � � � � � � � � � � � � � � � � � � � � � � � � � � � � � � � � � � � � � � � � � � � � � � 7
W.HFSxx
Specication
W.HFSQxx
W.HFCxx
Operation
Initial Start-up & Operation � � � � � � � � � � � � � � � � � � � � � � � � � � � � � � � � � � � � � � � � � � � � � � � � � � � � � � � � � 9
Initial Start-up
Operation
Using as a Dry Unit
Using as a Wet Unit
GN Pans, Loading Hot Food Display � � � � � � � � � � � � � � � � � � � � � � � � � � � � � � � � � � � � � � � � � � � � � � � � � � � � 10
Gastronorm Pans
Loading Hot Food Display
Food Safety � � � � � � � � � � � � � � � � � � � � � � � � � � � � � � � � � � � � � � � � � � � � � � � � � � � � � � � � � � � � � � � � 10
Food Temperature
Food Storage
Cleaning � � � � � � � � � � � � � � � � � � � � � � � � � � � � � � � � � � � � � � � � � � � � � � � � � � � � � � � � � � � � � � � � � 11
General Information
Corrosion Protection
Surface Finish
Cleaning Schedule
Materials Required
Cleaning Procedure
Cleaning Procedure - External Surfaces
Replacing Heat Lamp Bulbs � � � � � � � � � � � � � � � � � � � � � � � � � � � � � � � � � � � � � � � � � � � � � � � � � � � � � � � 13
Troubleshooting � � � � � � � � � � � � � � � � � � � � � � � � � � � � � � � � � � � � � � � � � � � � � � � � � � � � � � � � � � � � � 14
Page 4
Page 3
Due to continuous product research and development,
the information contained herein is subject to change without notice.
www.stoddart.com.au
www.stoddart.co.nz
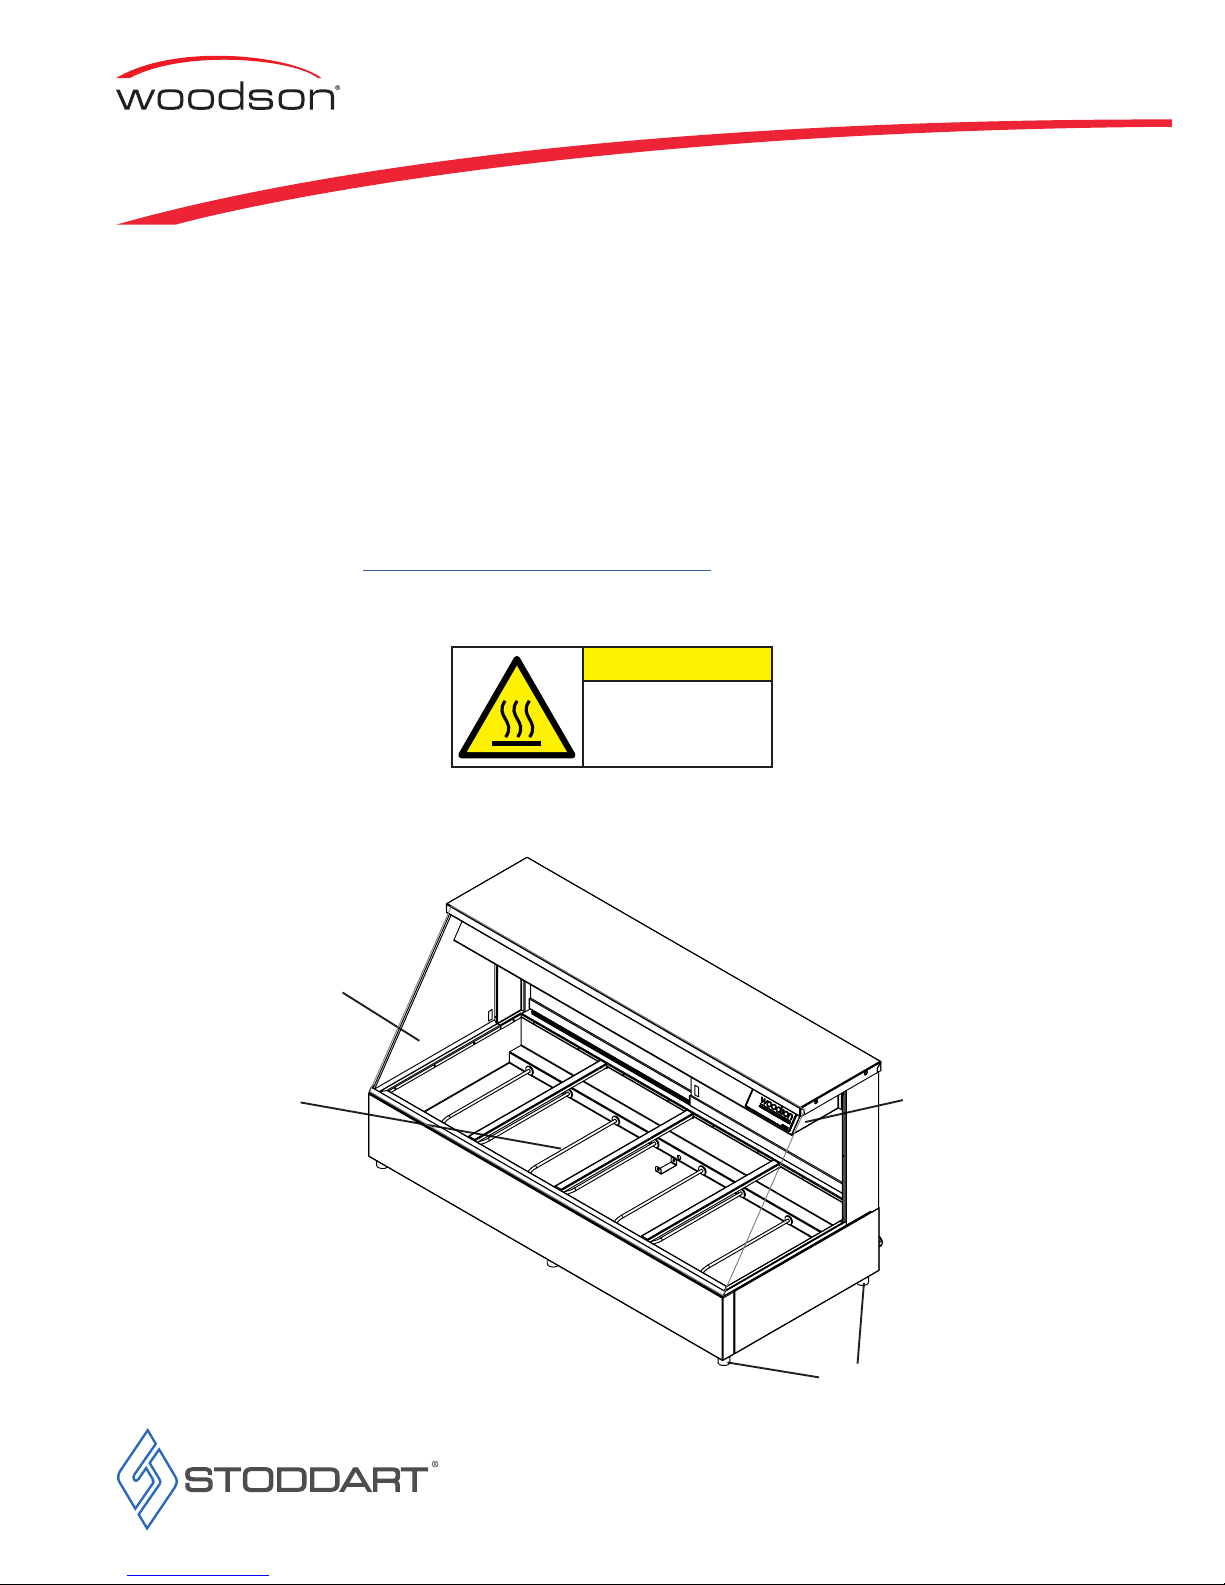
Hot Food Display Straight Glass
Profile - W�HFS24
Introduction
Front Glass
Heating
Element
Heat Lamp
Rubber Feet
CAUTION
Surface is Hot
Thank you for choosing this quality Woodson product� All our products are designed and made to meet the needs of food service professionals�
By using, caring for and maintaining your Woodson product according to these instructions, your Woodson product should give you many years
of reliable service�
Stoddart is a wholly Australian owned company, which manufactures and distributes Woodson commercial catering equipment�
Stoddart products are manufactured and/or engineered in Australia to provide excellent results whilst offering-value-for-money, ease-of-use
and reliability�
Stoddart manufacture and distribute a comprehensive range of equipment for kitchens, food preparation and presentation�
Confi guration may vary according to model�
To register your new product go to: http://www�stoddart�com�au/warranty-registration
Your New Woodson Product
Product Overview
Warranty Registration
Page 5
Page 4
Due to continuous product research and development,
the information contained herein is subject to change without notice.
www.stoddart.com.au
www.stoddart.co.nz
Introduction
• Only specifi cally trained/qualifi ed Technicians (Stoddart, one of our service agents, or a similarly qualifi ed persons) should carry out any
and all repairs, maintenance and services
Carefully read this instruction booklet, as it contains important advice for safe installation, operation and maintenance� Keep this booklet on
hand in a safe place for future reference by other operators or users�
Stoddart design, manufacture & distribute Food Service Equipment (appliances) exclusively for the commercial market.
This appliance is not designed nor intended for household or domestic use & must not be used for this purpose.
This product is intended for commercial use, and in line with Australian electrical safety standards the following warnings are provided:
• This product is not intended for use by persons (including children) with reduced physical, sensory or mental capabilities, or lack of
experience and knowledge, unless they have been given supervision or instruction concerning the use of the product by a person
responsible for their safety� Children should be supervised to ensure that they do not play with the product
• If the supply cord is damaged, it must be replaced by the manufacturer, its service agent or similarly qualifi ed persons in order to avoid
a hazard
• All units MUST be installed according to the procedures stated in the installation section of this manual
• In the case of new personnel, training is to be provided before operating the equipment
• DO NOT use this unit for any other purpose than its intended use
• DO NOT store explosive substances such as aerosol cans with a fl ammable propellant in or near this unit
• Keep fi ngers out of “pinch point” areas
• Unit is not waterproof DO NOT use jet sprays, hoses or pour water over/on the exterior of the unit
• Only use this unit with voltage specifi ed on the rating label
• Do NOT remove any cover panels that may be on the unit
• DO NOT use sharp objects to activate controls
• If any fault is detected, refer to troubleshooting
• Threaded fasteners can loosen in service� Regular inspection and tightening should be carried out as required
• The manufacturer declines any liability for damages to persons and/or things due to an improper/wrong and/or unreasonable use of the
machine
When using any electrical unit, safety precautions must always be observed�
Our units have been designed for high performance� Therefore, the unit must be used exclusively for the purpose for which it has been designed�
Read these instructions carefully and retain for future reference�
The manufacturer and distributor cannot be held responsible or liable for any injuries or damages of any kind occurred to persons,
units or others, due to abuse and misuse of this unit in regards to installation, removal, operation, servicing or maintenance, or lack of
conformity with the instructions indicated in this documentation�
Disclaimer
All units made by the manufacturer are delivered assembled, where possible, and ready to install� Any installation, removal, servicing,
maintenance and access or removal of any parts, panels or safety barriers that is not permitted, does not comply in accordance to this
documentation, or not performed by a TRAINED AND AUTHORISED SPECIALIST will result in the
IMMEDIATE LOSS OF THE WARRANTY.
The manufacturer cannot be held responsible or liable for any unauthorized modifi cations or repairs� All modifi cations or repairs must
be approved by the manufacturer in writing before initiating� All modifi cations or repairs performed to this unit must be performed at all
times by a TRAINED AND AUTHORISED SPECIALIST.
Attention
General Information
Service
Page 6
Page 5
Due to continuous product research and development,
the information contained herein is subject to change without notice.
www.stoddart.com.au
www.stoddart.co.nz
Installation
• Use suitable means to move the unit: e�g�
- For smaller items use two people
- For large items a lift truck or fork pallet trucks (the forks should reach more completely beneath the unit)�
• Check the unit for damage before and after unpacking� If unit is damaged, contact the distributor and manufacturer
• Should any item have physical damage, report the details to the freight company and to the agent responsible for the dispatch within
seven (7) days of receipt� No claims will be accepted or processed after this period
• The unit is supplied fully assembled
• Remove all protective plastic fi lm, tapes, ties and packers before installing and operating
• Clean off any remaining residue from the interior/exterior of the unit using a clean cloth dampened with warm soapy water
• Choose an area that is well ventilated and provides access for future maintenance
• Place the unit on a level stable work surface capable of supporting its weight
• Do not position the unit in: wet areas, near heat and/or steam sources, near fl ammable substances
• Allow an air gap between the unit and other objects or surfaces� We recommend a minimum gap of 100mm from all sides for normal
operational use (if the unit is near any heat sensitive material we suggest you allow additional space)
• Please consult national and local standards to ensure that your unit is positioned in accordance with any existing requirement
• At the end of the appliance’s working life, make sure it is scrapped & components recycled properly
• Current environmental protection laws in the state/country of use must be observed
• Doors must be removed before disposal (if applicable)
• Power supply cable must be removed before disposal
• For further information on the recycling of this product, contact the local dealer/agent or the local body responsible for waste disposal
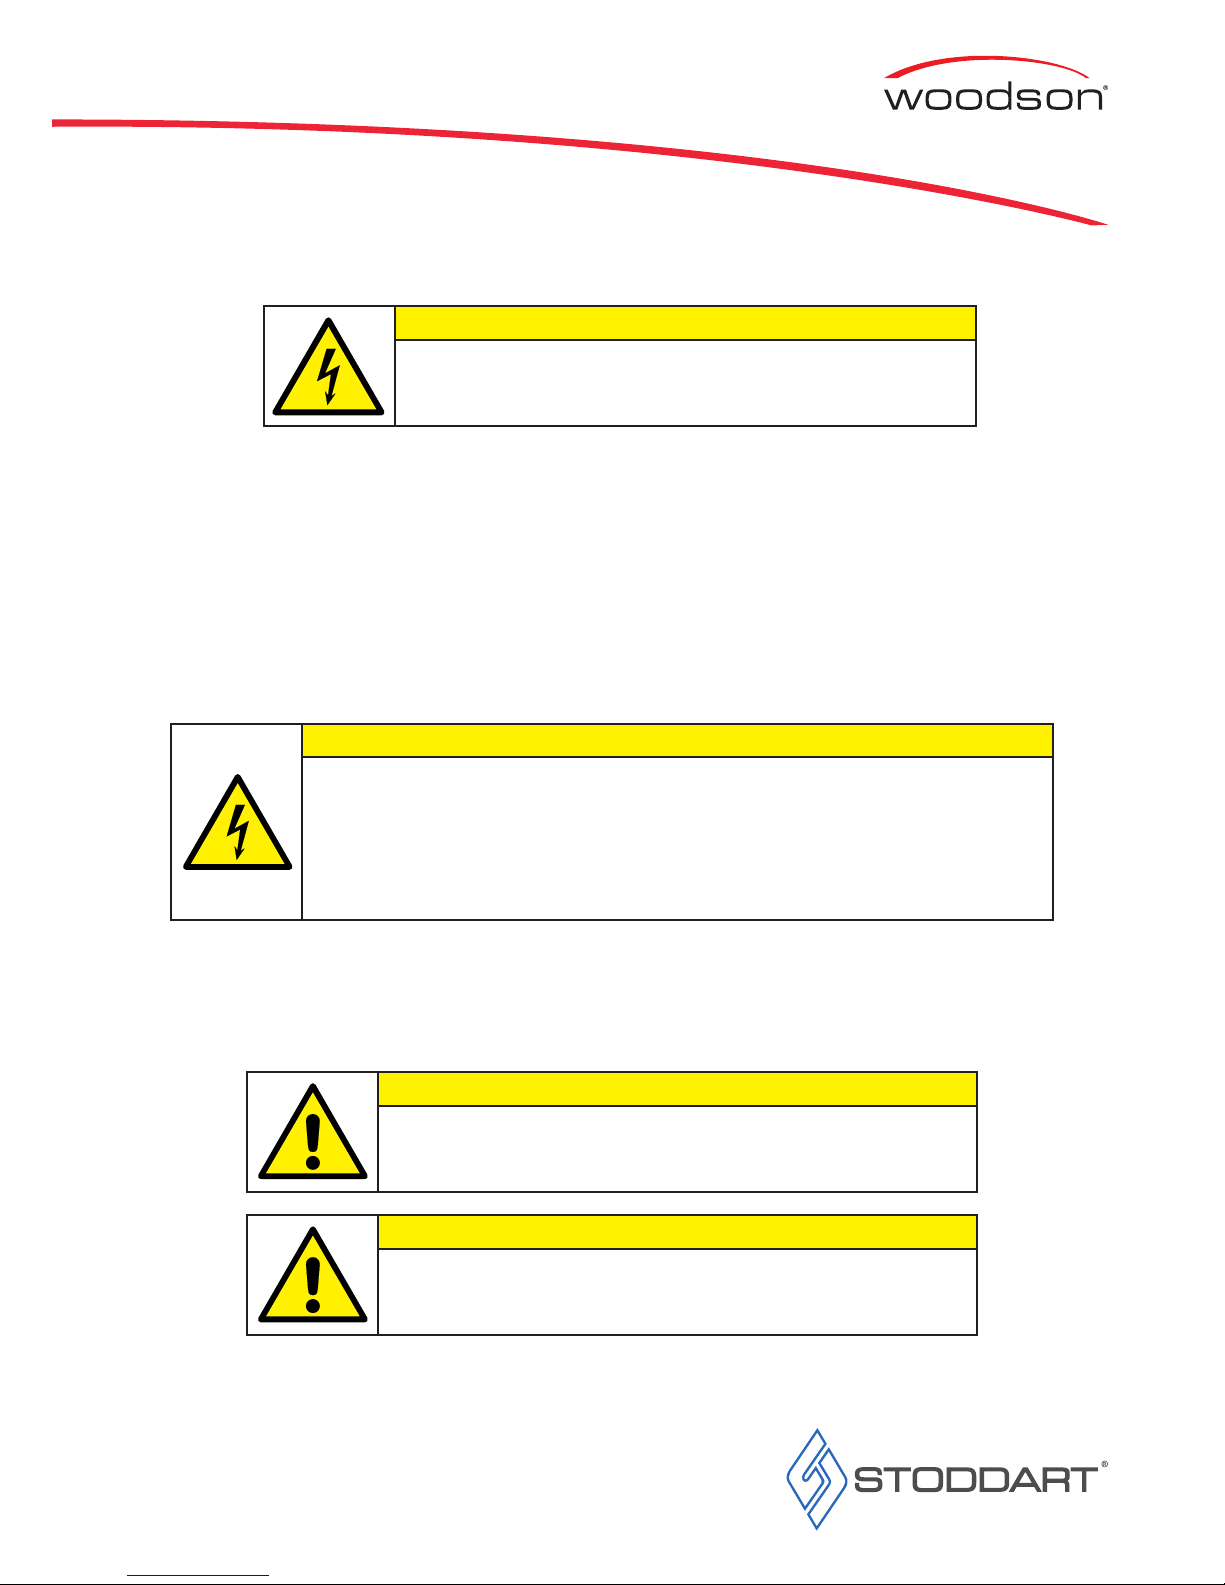
WARNING
Improper installation, adjustments, alterations, service or
maintenance can cause property damage, injury or death.
Setting Up
Handling
Unpacking
Positioning
Disposal
Page 7
Page 6
Due to continuous product research and development,
the information contained herein is subject to change without notice.
www.stoddart.com.au
www.stoddart.co.nz
Installation
Aggregate electrical ratings of the unit are expressed in kilowatts in this manual�
Single Phase Units:
Supplied with an appropriately rated plug and lead fi tted and be indicated as:
• 10A plug & lead fi tted
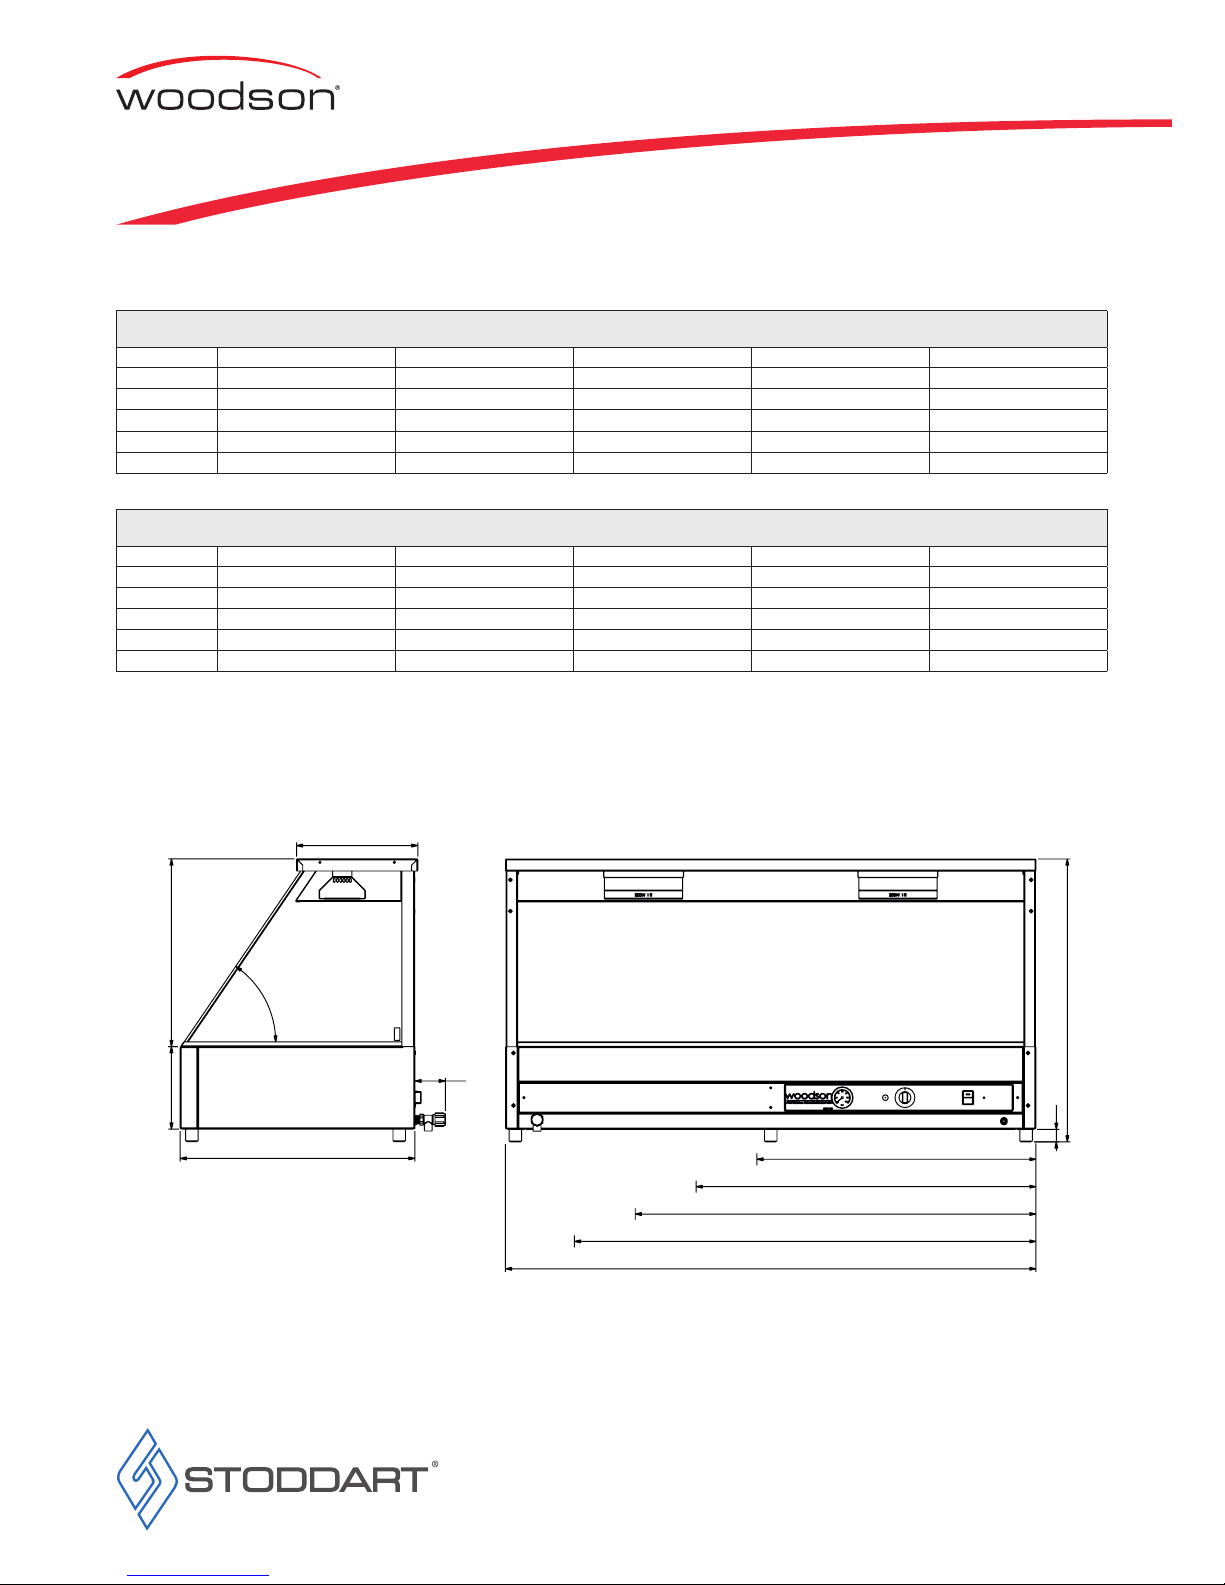
Some procedures in this manual require the power to the equipment to be turned
off and isolated. Turn the power OFF at the power point and unplug the power
supply lead by the plug body. If the power point is not readily accessible turn the
equipment off at the isolation switch or the circuit breaker in the switchboard.
Attach a yellow “CAUTION-DO NOT OPERATE” tag. This must be performed
where relevant unless the procedures specify otherwise.
FAILURE TO DO SO MAY RESULT IN ELECTRIC SHOCK.
WARNING
WARNING
This unit must be installed in accordance with AS/NZS 60335.1
Notes:
• If the supply cord is damaged, it must be replaced by the manufacturer, its service agent or similarly qualifi ed persons in order to avoid a
hazard� Please contact Stoddart for parts and we will advise how to do this in order to avoid any electrical hazard
• The power cable should be dry and/or isolated from moisture or water
Electrical Connection
Information
Plumbing Connections
• The unit is supplied with 15mm tap-style rear drain for fast and safe draining
• Baine Marie must be drained DAILY to a bucket or to a tundish via a hose
Information
IMPORTANT
This unit must be operated on potable water. If the water has a
high mineral content, pretreatment may be necessary or your
warranty could be voided.
IMPORTANT
This unit must be installed in accordance with AS/NZ 3500.1
Page 8
Page 7
Due to continuous product research and development,
the information contained herein is subject to change without notice.
www.stoddart.com.au
www.stoddart.co.nz
Specication
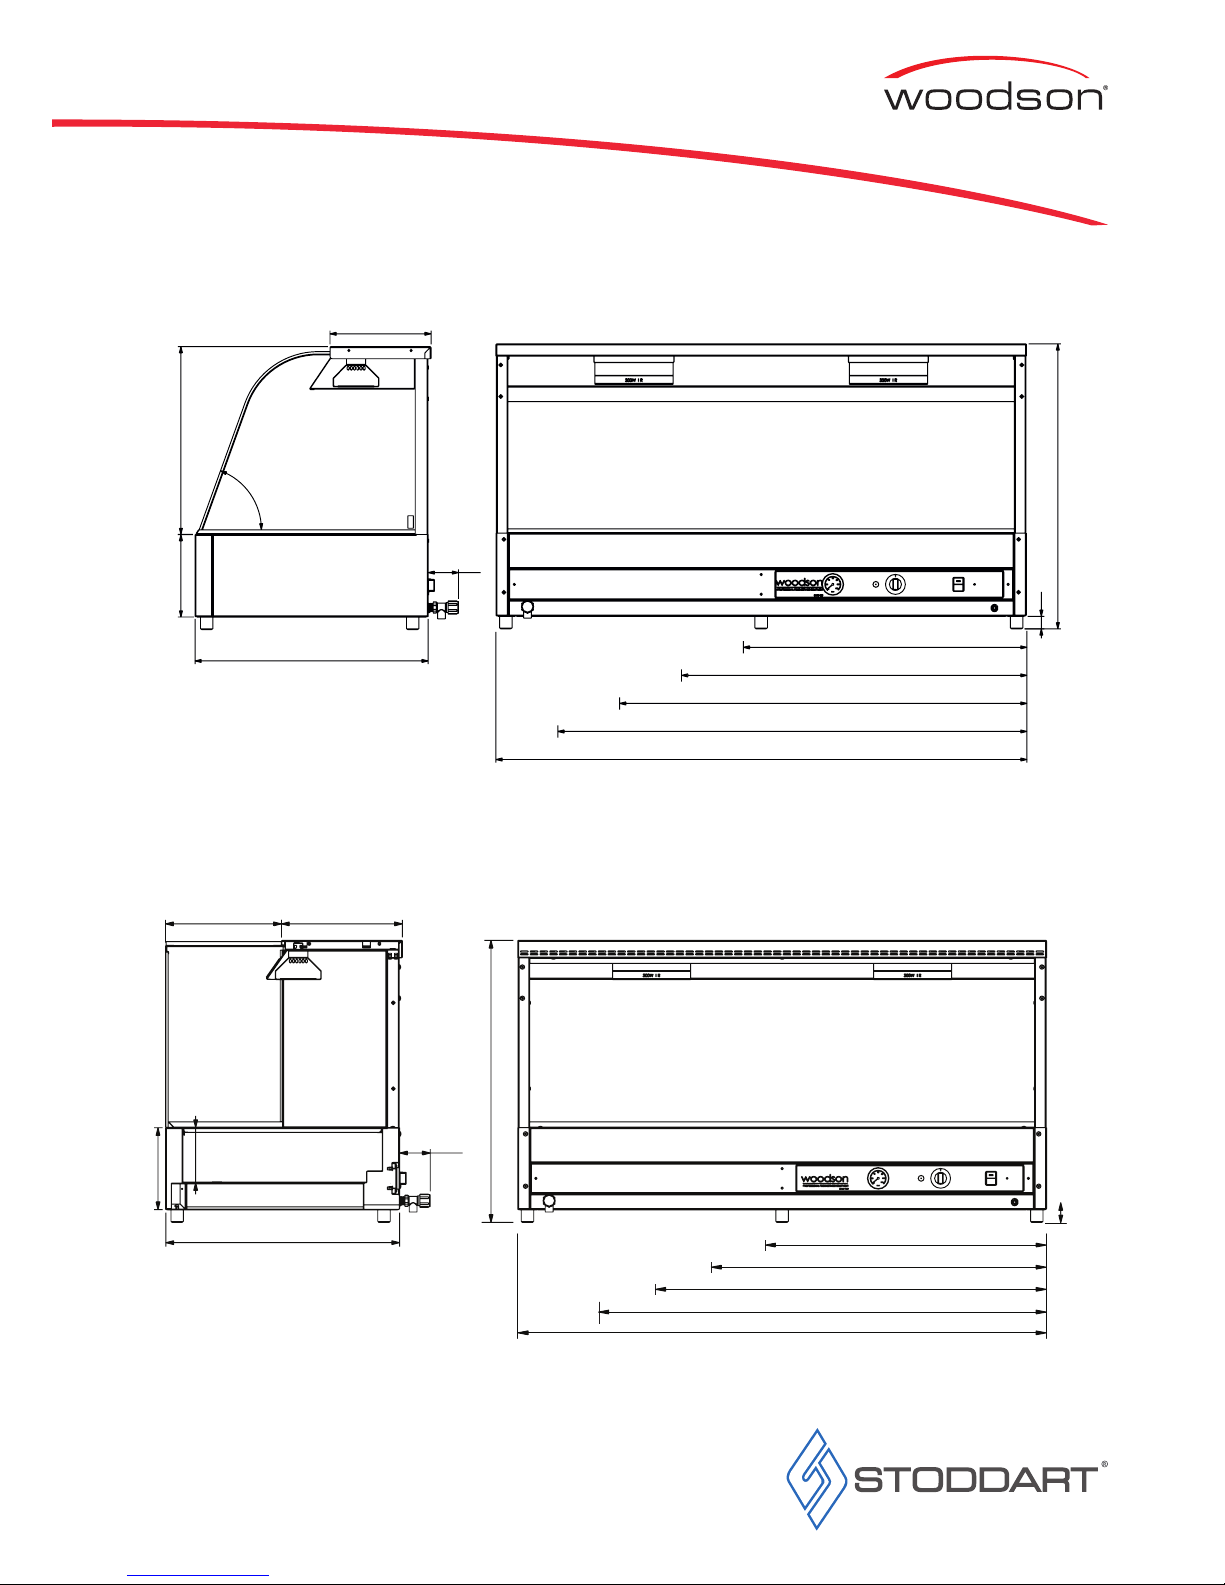
Technical Specications
Specications
Model W.HFS22 / W.HFC22 W.HFS23 / W.HFC23 W.HFS24 / W.HFC24 W.HFS25 / W.HFC25 W.HFS26 / W.HFC26
Height 725mm 725mm 725mm 725mm 725mm
Width 705mm 1030mm 1355mm 1680mm 2005mm
Depth 600mm 600mm 600mm 600mm 600mm
Power 1.5kW 2.4kW 3.0kW 3.3kW 3.6kW
AMPS 10A plug & lead fitted 10A plug & lead fitted 15A plug & lead fitted 15A plug & lead fitted 15A plug & lead fitted
Specications
Model W.HFSQ22 W.HFSQ23 W.HFSQ24 W.HFSQ25 W.HFSQ26
Height 705mm 705mm 705mm 705mm 705mm
Width 705mm 1030mm 1355mm 1680mm 2005mm
Depth 600mm 600mm 600mm 600mm 600mm
Power 1.5kW 2.4kW 3.0kW 3.3kW 3.6kW
AMPS 10A plug & lead fitted 10A plug & lead fitted 15A plug & lead fitted 15A plug & lead fitted 15A plug & lead fitted
W.HFSxx
310
480211
600
78
56°
723
32
2 module - 705mm
3 module - 1030mm
4 module - 1355mm
5 module - 1680mm
6 module - 2005mm
Page 9
Page 8
Due to continuous product research and development,
the information contained herein is subject to change without notice.
www.stoddart.com.au
www.stoddart.co.nz
Specication
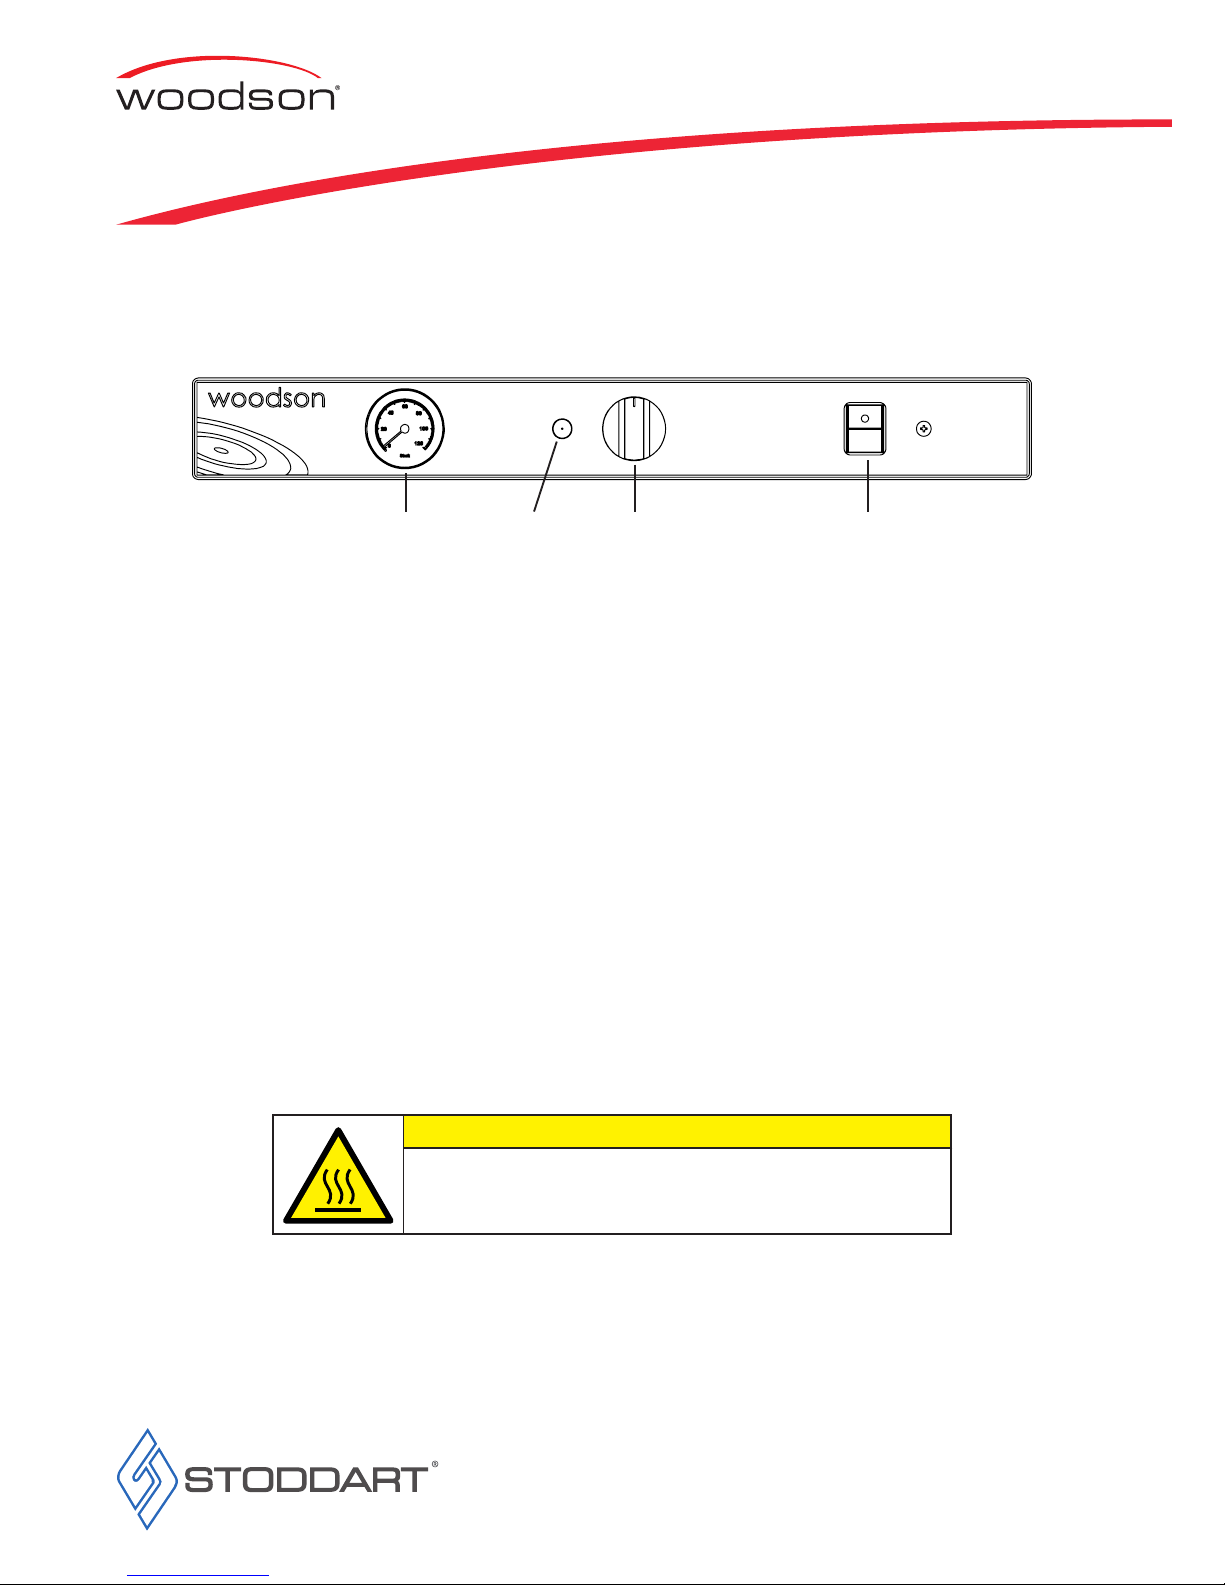
W.HFSQxx
W.HFCxx
2 module - 705mm
3 module - 1030mm
4 module - 1355mm
5 module - 1680mm
6 module - 2005mm
723
32
260
78
600
480211
70°
32
702
74
600
211
141
310
297
2 module - 705mm
3 module - 1030mm
4 module - 1355mm
5 module - 1680mm
6 module - 2005mm
Page 10
Page 9
Due to continuous product research and development,
the information contained herein is subject to change without notice.
www.stoddart.com.au
www.stoddart.co.nz
Initial Start-up & Operation
Initial Start-up
Note: The thermometer is meant as guide only� It indicates the temperature of the water (when used as a wet unit) or the temperature under the
food pans (when used as a dry unit)� It does not indicate the temperature of the food� Do not use the top of the unit as a serving area�
Using as a Wet Unit
Using as a Dry Unit
Operation
Upon setting up your equipment, the following steps must be followed as this range of food bars may be used WET or DRY�
Thermometer ThermostatIndicator light Lights On/Off
1� Place empty food pans inside Food Bar and switch on the overhead lamps
2� Turn the “Thermostat” to high for approximately 10-15 minutes and adjust back to the desired running temperature
1� Fill the main tank of the Food Bar with clean water (each day)� For use in areas where has a high chloride content (ie SA, WA or country
areas) demineralised water should be used in all cases�
2� Water should be filled to a level approximately 10mm above the element and then turn the “Thermostat” to high for approximately 10-
15 minutes and adjust back to the desired running temperature�
3� If the pans are floating remove some water from the well� Check water height throughout the time the unit is in use, refill the water if it
no longer covers the element
• Do not use Grids/Racks in bottom of pans as this causes a loss of heat transfer between the bottom of the pan (heat source) and the
product in the pan� Poor performance will occur with the use of Grids/Racks and Woodson will not cover warranty costs if this is found
to be the source of heating problems with the units�
• The thermometer “1” is meant as guide only� It indicates the temperature of the water (when used as a wet unit) or the temperature
under the food pans (when used as a dry unit)� It does not indicate the temperature of the food� Do not use the top of the unit as a
serving area� ENSURE THAT THE LAMPS ARE ALWAYS ON WHEN OPERATING AS A WET UNIT�
WARNING
The water in the well and the surfaces of this unit are
HOT when operating. Take caution and do NOT place
any part of the body in the water.
Operation
Page 11
Page 10
Due to continuous product research and development,
the information contained herein is subject to change without notice.
www.stoddart.com.au
www.stoddart.co.nz
• All Gastronorm pans and extra dividers are sold separately
• Each module can hold one 1/1 pan, two 1/2 pans, three 1/3 pans, four 1/4 pans, six 1/6 pans and nine 1/9 pans� Pan depths are 25mm,
65mm, 100mm and 150mm� Contact your distributer about the best possible depth for the product you intent to display
• For 1/6 and 1/9 Gastronorm pans, extra dividers are required
Gastronorm Pans
• All food MUST be pre-heated/cooked before placing in the unit� Attempting to cook food with this unit can lead to food poisoning
• Ensure the well is maintaining the food temperature over 65°C
• The temperature reached on the temperature gauge is the water/air temperature, NOT the food temperature
• It is important to regularly monitor the food temperature in the Bain Marie
Food Temperature
• All storage of food should comply with local health standards and regulations
• All pans should be cleaned and placed in night storage� No pans should be left in the unit
• This unit is NOT designed to store product after hours� The unit MUST be switched OFF
• If the unit is moved for night storage, ensure the castors are locked (mobile units only)
Food Storage
• Ensure that the Hot Food Display is switched ON and has reached operating temperature before placing any food in the unit
• All food placed in the well MUST be pre-heated/cooked
• Only Gastronorm pans are to be placed in the well
Loading Hot Food Display
GN Pans, Loading Hot Food Display
Food Safety
IMPORTANT
This unit is not designed to cook products, it only maintains
them above the regulated 65°C serving temperature.
Operation
Page 12
Page 11
Due to continuous product research and development,
the information contained herein is subject to change without notice.
www.stoddart.com.au
www.stoddart.co.nz
Cleaning
• Threaded fasteners can loosen in service� Regular inspection and adjustment should be carried out as required
• Cleaning is recommended for health and safety purposes and to prolong the life of the unit
• Do NOT use abrasive pads or cleaners on the stainless steel or any other metal parts of the unit
• Do NOT use industrial chemical cleaners, caustic based cleaners or bleaches and bleaching agents, many will damage the metals and
plastics used on this unit
• When drying, metal surfaces should be wiped with a soft cloth in the same direction as grained polish
• Do NOT remove any screws for cleaning� All internal sections of the unit are to be cleaned by a qualifi ed technician
• This unit is NOT waterproof, do NOT hose, do NOT pour water directly onto the unit, do NOT immerse in water
• Stainless steel exhibits good resistance to corrosion however, if not properly maintained stainless steel can rust and/or corrode
• Any sign of mild rust and/or corrosion should be thoroughly cleaned with warm soapy water and dried as soon as possible
• NEVER use abrasive pads or cleaners for cleaning
• All metal surfaces should be checked while cleaning for damage, scuffs or scrapes as these can lead to rust and further damage to the
product
• Mild rust and/or corrosion can be treated with a commercial cleaning agent that contains citric/oxalic/nitric/phosphoric acid� Do NOT
use cleaning agents with chlorides or other harsh chemicals as this can cause corrosion� After treatment, wash with warm (not hot)
soapy water and dry thoroughly
• Thoroughly wipe the surfaces dry after cleaning and do NOT let water pool on the unit� Check crevices and folds for pooling
• When using, ensure all liquids and moisture is cleaned up straight away� Food liquids such as juices from vegetables and fruits should
NOT be left on preparation surfaces
• Do NOT leave items on the stainless steel such as cutting boards, rubber mats and bottles
• To protect the polish, stainless steel should be dried by wiping a dry soft cloth in the same direction as grained polish
• For NON-food contact surfaces, a light oil can be wiped on the surfaces with a cloth to enhance the stainless steel surface� Wipe in the
direction of the grain
• Some commercial stainless steel cleaners can leave residue or fi lm on the metal; this may trap fi ne particles of food on the surface,
thus deeming the surfaces not food safe
IMPORTANT WARNING
IMPORTANT WARNING
Threaded fasteners can loosen in service.
Regular inspection and adjustment
should be carried out as required
This unit is NOT waterproof, do NOT
hose. DO NOT pour water directly onto
the unit. DO NOT immerse in water
Some commercial stainless steel
cleaners leave residue or lm on the
metal that may entrap ne particles of
food, deeming the surface not
FOOD SAFE.
Wait until the unit has cooled to a safe
temperature before undertaking any
cleaning or maintenance. Contact with
hot surfaces can cause burns and
serious injury.
General Information
Corrosion Protection
Surface Finish
Operation
Page 13

Page 12
Due to continuous product research and development,
the information contained herein is subject to change without notice.
www.stoddart.com.au
www.stoddart.co.nz
Materials Required
• Stainless Cleaner
• Non Abrasive Cleaning pad
• Clean Sanitised Cloth
• Paper Towel
• Container of warm water
• Appropriate PPE (Personal Protective Equipment)
Cleaning Schedule
• Daily cleaning is required for Hot Food Displays and external surfaces� This will help to maintain and prolong the efficiency of your unit
• The unit should be cleaned at the end of each work day
Cleaning Procedure
1� Isolate from the power supply
2� Using a good quality nylon brush remove crumbs and small food items
3� Wipe clean using a cloth dampened (not wet) with clean warm water until all soil has been removed
4� Using a clean sanitised cloth, thoroughly wipe the stainless steel and metal parts dry� Do NOT let water pool on the unit� Check crevices
and folds
Note: In some areas, particularly seaside environments, stainless steel can be subject to surface discolouration or “tea staining”
This can be removed with an appropriate cleaning agent which contains 10% sodium citrate� Ask your supplier of cleaning chemicals for a
suitable brand�
Cleaning Procedure - External Surfaces
1� Isolate from the power supply
2� Wearing Personal Protective Equipment (PPE), apply Stainless Cleaner with the Cleaner pad to the external surfaces
3� Scrub any baked on soil with the cleaner pad in the same direction as grained polish
4� Wipe clean using a cloth dampened with clean warm water until all Stainless Cleaner and soil has been removed
5� Using a clean sanitised cloth, thoroughly wipe the stainless steel and metal parts dry� Do NOT let water pool on the unit� Check crevices
and folds
Operation
Page 14
Page 13
Due to continuous product research and development,
the information contained herein is subject to change without notice.
www.stoddart.com.au
www.stoddart.co.nz
Replacing Heat Lamp Bulbs
Operation
• Bulbs should be allowed to cool for 10 - 15 minutes before removing
• All heat lamp fi tting are spring loaded for easy replacement
• Heat lamp bulbs should only be replaced with gloves or a soft cloth� No skin should touch the new bulb� If skin touches the new bulb,
wipe the bulb with a soft cloth and rubbing alcohol to remove all possible oils
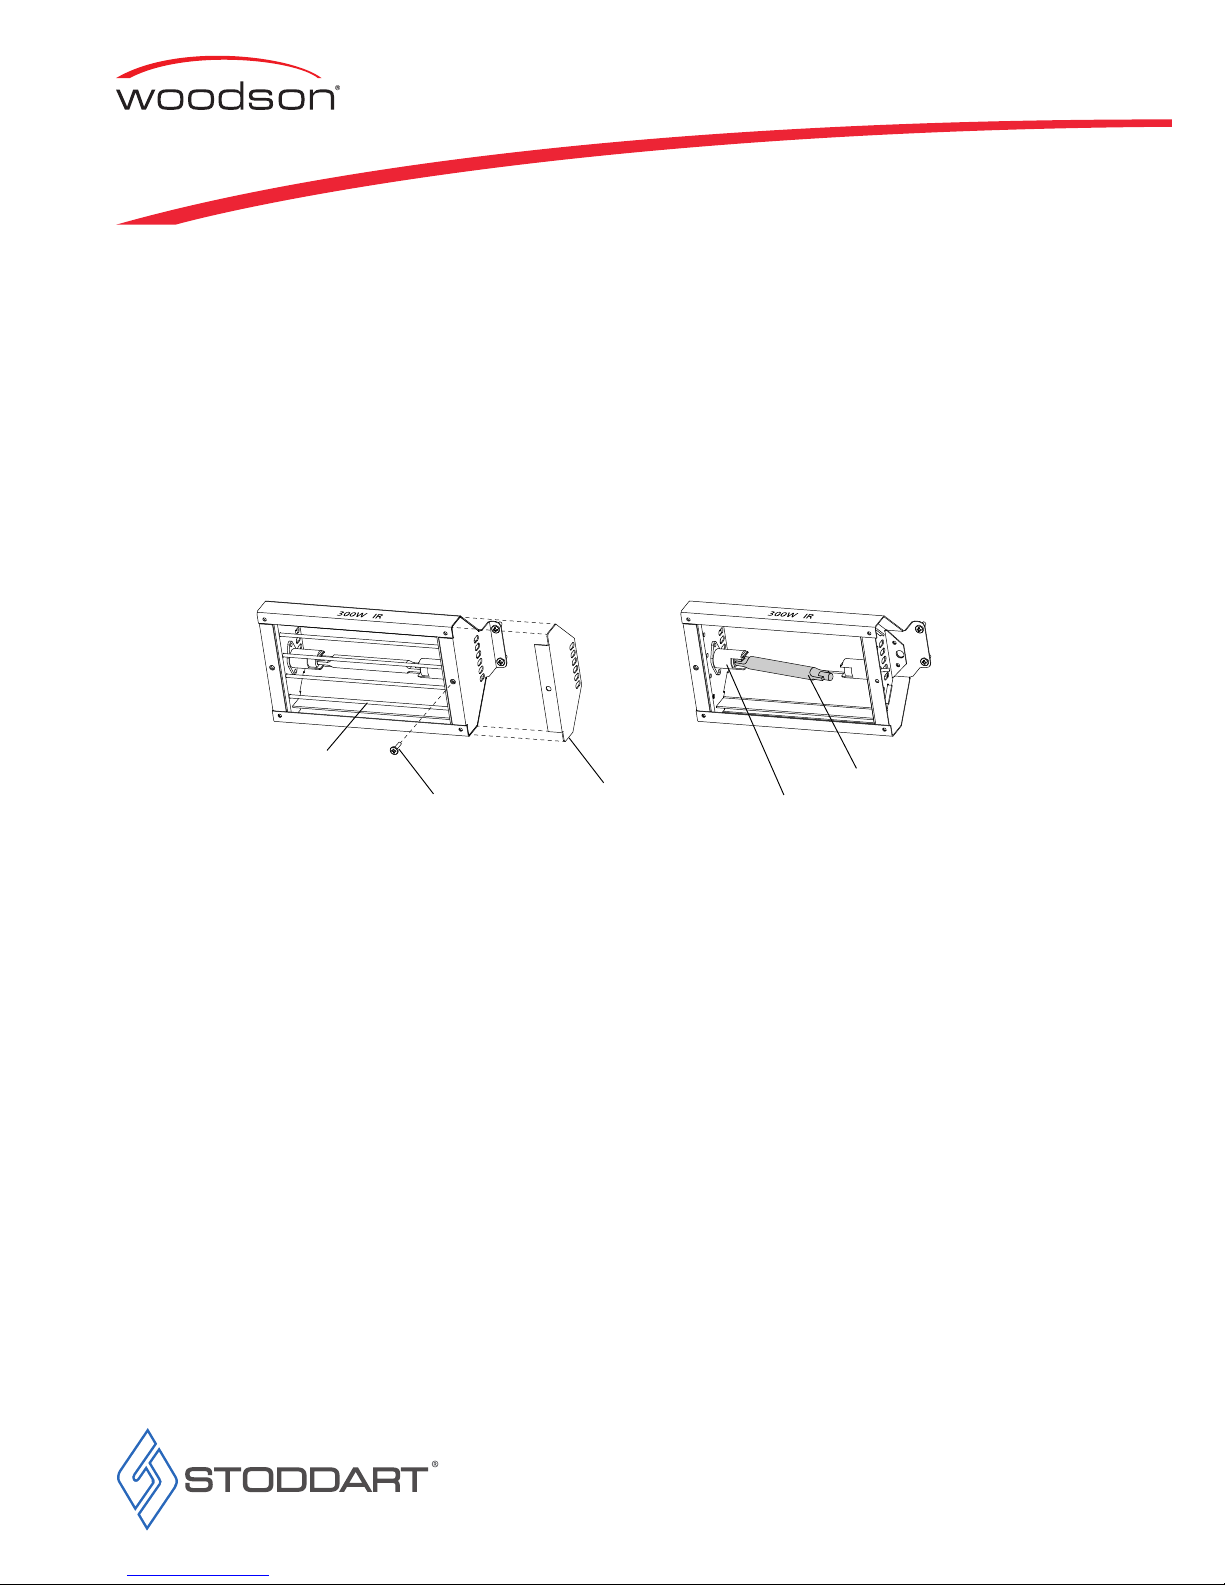
1� Isolate from the power supply
2� Take off the end capping by removing the retaining screw (do not discard)
3� Slide out the four lamp shield bars
4� Holding the old bulb with a soft cloth or glove, press into one of the sockets, rotate out and remove
5� Holding the new bulb with a soft cloth or glove, press into one of the sockets, rotate in and slowly release the bulb into the other socket,
ensuring that the bulb does NOT become broken
6� Re-install the lamp shield bars then place the end capping into position and secure with the retaining screw
Retaining Screw
End Capping
Bulb
Socket
Lamp Shield Bars
Page 15
Page 14
Due to continuous product research and development,
the information contained herein is subject to change without notice.
www.stoddart.com.au
www.stoddart.co.nz
Troubleshooting
Operation
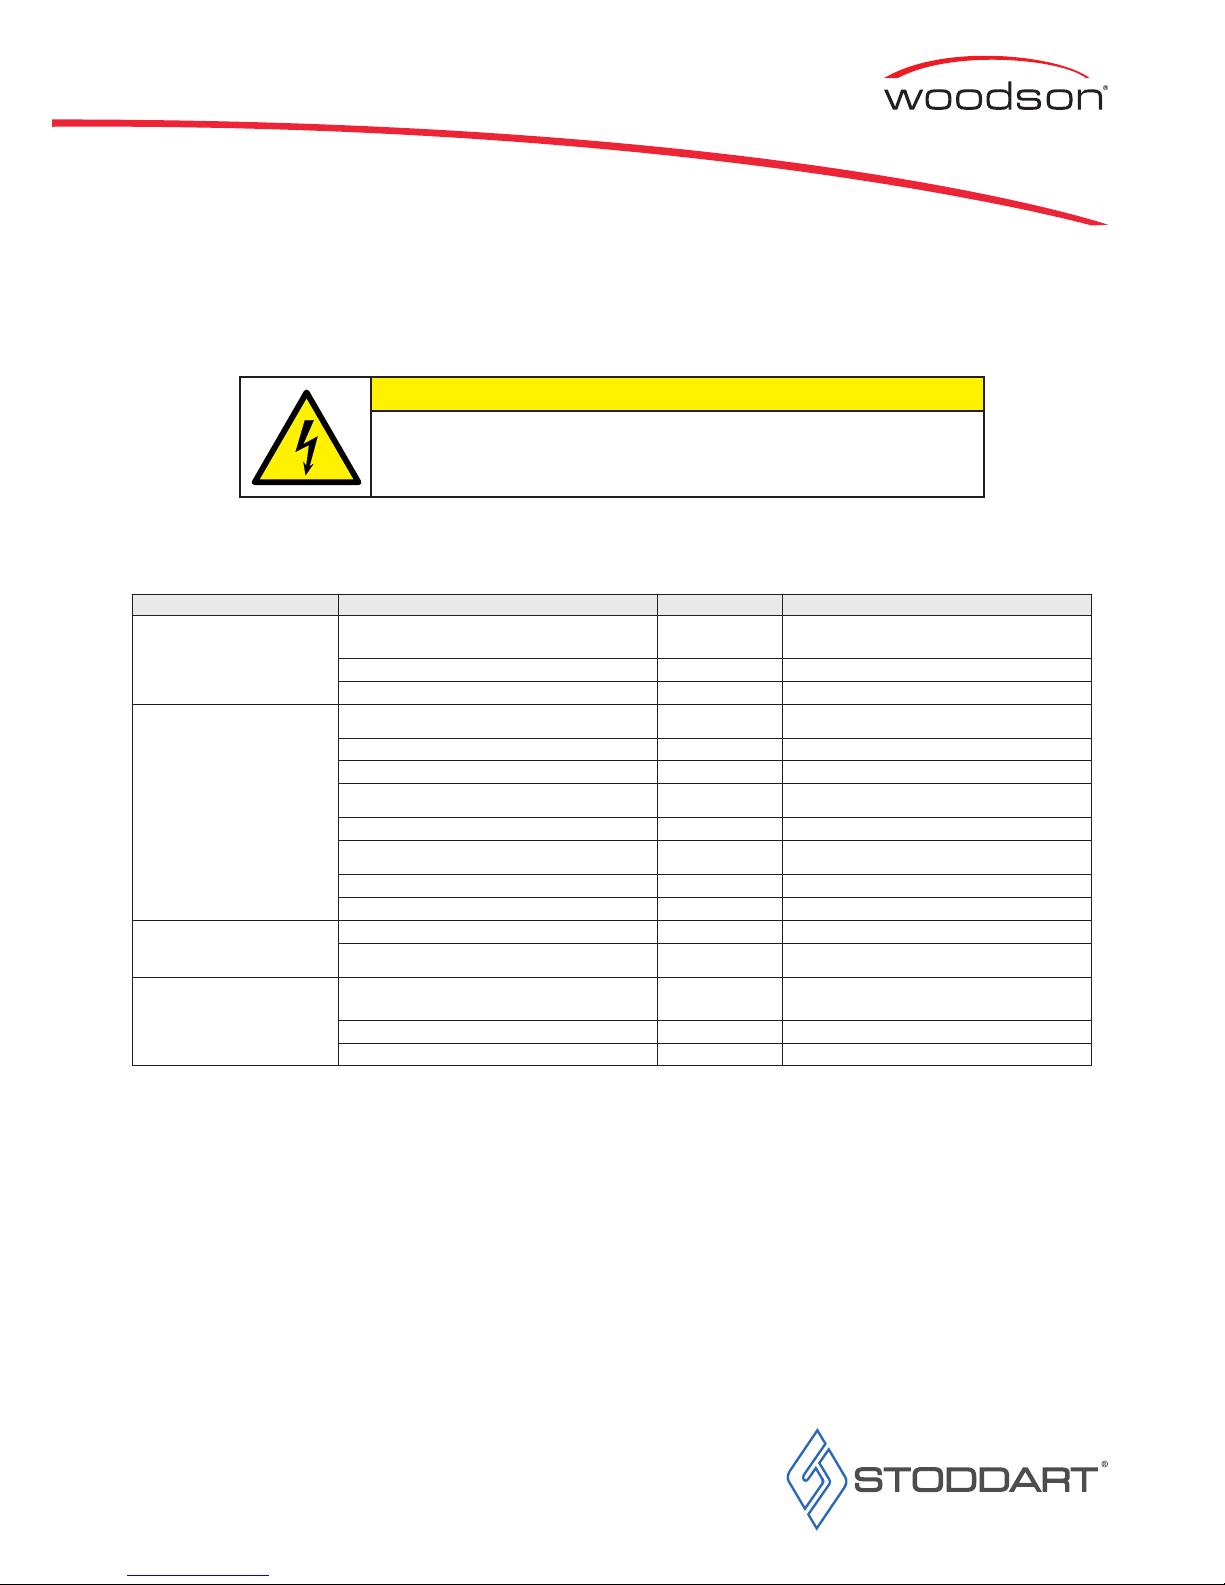
Problem Possible Causes Task Remedy
Unit does not operate / start
The mains isolating switch on the wall, circuit
breaker or fuses are OFF at the power board
O
Turn isolating switch, circuit breaker or fuses
ON
The power switch of the unit is OFF O Turn the power switch ON
Electrical wiring damaged T Replace / Fix electrical wiring
Well does not reach
temperature
Temperature not set to the right setting O Check setting and adjust the temperature
Exhaust fan above the unit O Move unit / exhaust fan
Cold items in wells O Remove items and heat properly
Cold water in the well O Close the water valve / Wait 30 minutes
Temperature gauge broken T Replace temperature gauge
Thermostat or Temperature probe broken T Replace thermostat
Mineral deposits on element T Filter water
Element blown T Replace element
Food not at desired
temperature
Thermostat set incorrectly O Adjust thermostat
Well is not reaching required temperature O/T See above
Water pooling around the unit
Drain not in the tundish / Bucket overflowing O
Place drain in the tundish / Clear and replace
bucket
Unit not level O Place unit of a level surface
Connection seals / BSB valve broken T Replace seals / BSB valve
Task Type - (O) = Operator
(T) = Technician Task
WARNING
Technician tasks are only to be completed by qualied service
people. Check faults before calling service technician.
• If any faults/issues occur with the unit, follow the below troubleshooting procedures
• If the troubleshooting procedures do not correct the problem, contact the Stoddart Service Department
Page 16
www.stoddart.com.au
International
Sales
Tel: +617 3440 7600
Email: [email protected]
Service / Spare Parts
Tel: +617 3440 7600
Email: [email protected]
Email: [email protected]
www.stoddart.co.nz
New Zealand Business Number: 6837694
New Zealand
Sales
Tel: 0800 79 1954
Email: [email protected]
Service / Spare Parts
Tel: 0800 935 714
Email: [email protected]
Email: [email protected]
www.stoddart.com.au
Australian Business Number: 16009690251
Australia
Sales
Tel: 1300 79 1954
Email: [email protected]
Service / Spare Parts
Tel: 1300 307 289
Email: [email protected]
Email: [email protected]
 Loading...