

Page 1
woodize.com
OPERATION MANUAL
LAMINA SIMPLON
BASIC
NIXIE CLOCK
Page 2
woodize.com
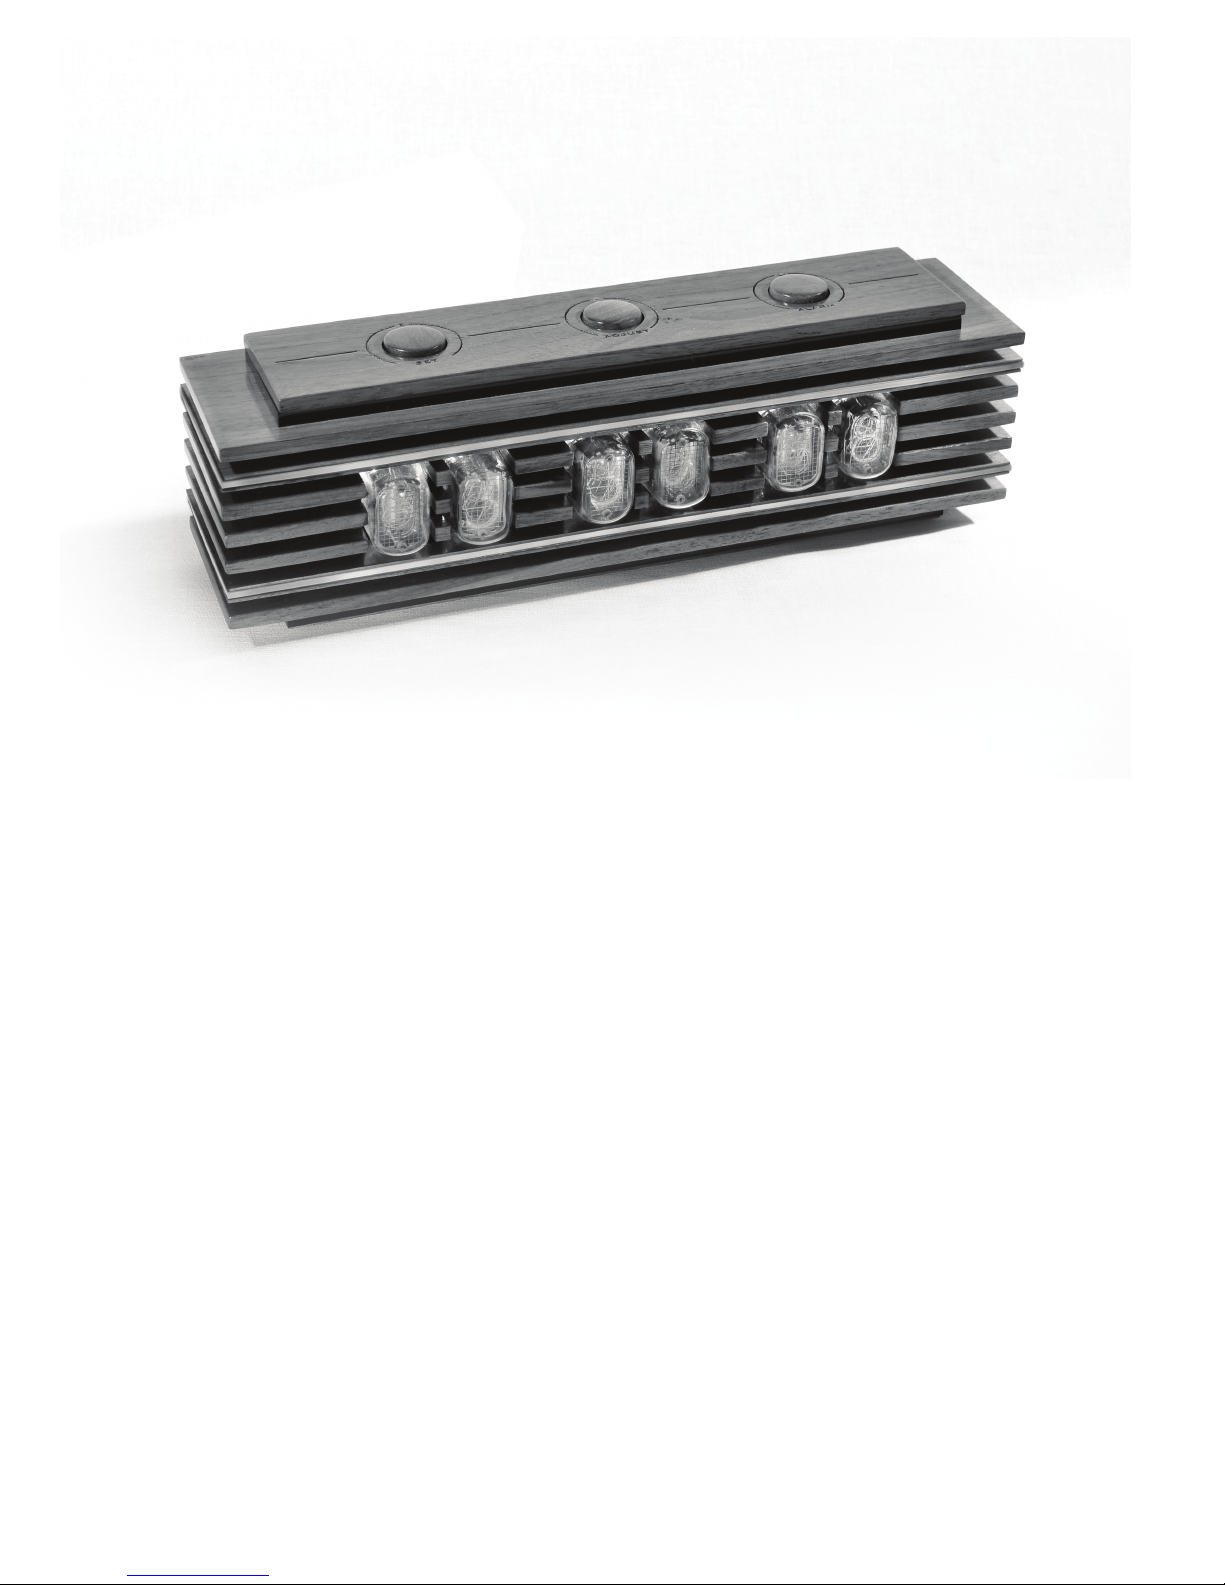
Lamina Simplon Nixie Clock
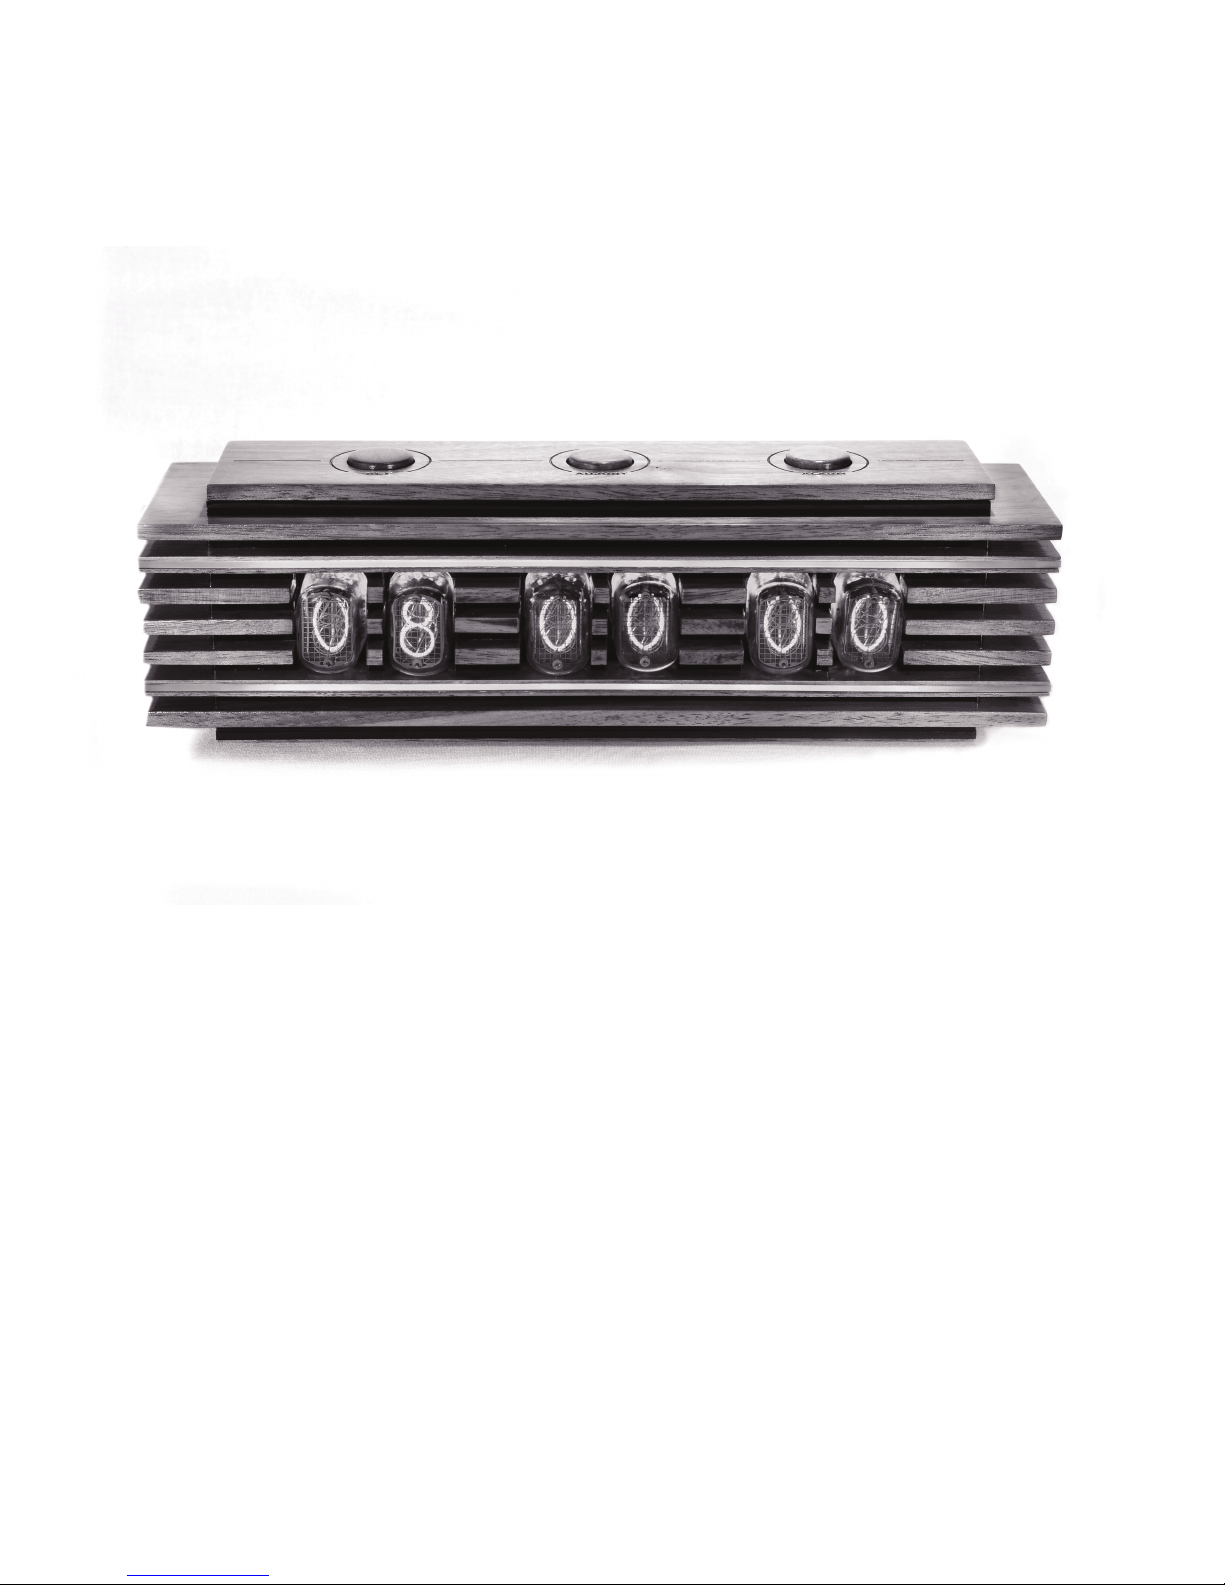
The Lamina Simplon Basic - nixie clock is designed as an alarm
clock for everyday use. This SIMPLON is not just a nixie clock! It is a
handcrafted, wooden framed timepiece with, programmable light
eects. The backlighted nixie tubes give remarkable eect to any
room, oce or displayed locations.
Make your unique clock more unique! The easy accessed setup
menu give endless possibilities to set your favorite colors to dierent time of the day, blinking, ashing or changing colors randomly!
With the optional GPS unit and your clock will be the most accurate nixie alarm clock ever.
The body of the clock is carefully selected ne American walnut
and highly polished acrylic.
This professionally hand made product will give you joy for every
day!
Congratulations for your new
Page 3

woodize.com
Pay attention!
Before remove your new clock from its box please read
the operation manual carefully and follow the instructions!
To keep your clock in perfect shape try to avoid any water or any
other liquid interact with the clock.
The wood is a living material. By the time it will be darker.
Any water and liquid might cause dark spots and miss colored
surfaces.
Use a ne brush or soft dry cloth to remove any dust.
Do not use any chemical cleaners!
Avoid to operate the clock in humid or very dusty environment!
Technical information
The clock operates from standard 12V, 1A power adaptor. Do not
use any 12V power adaptor below 1A.
Output connector size standard, 5.5mm, 2.1mm pin.
Optional GPS unit available at woodize.com. The GPS connector
cable is standard stereo 3.5mm mini-jack cable, up to 10m (30 feet)
GPS power 3.6V
Avoid to plug in or out the GPS while the clock is powered.
Page 4
woodize.com
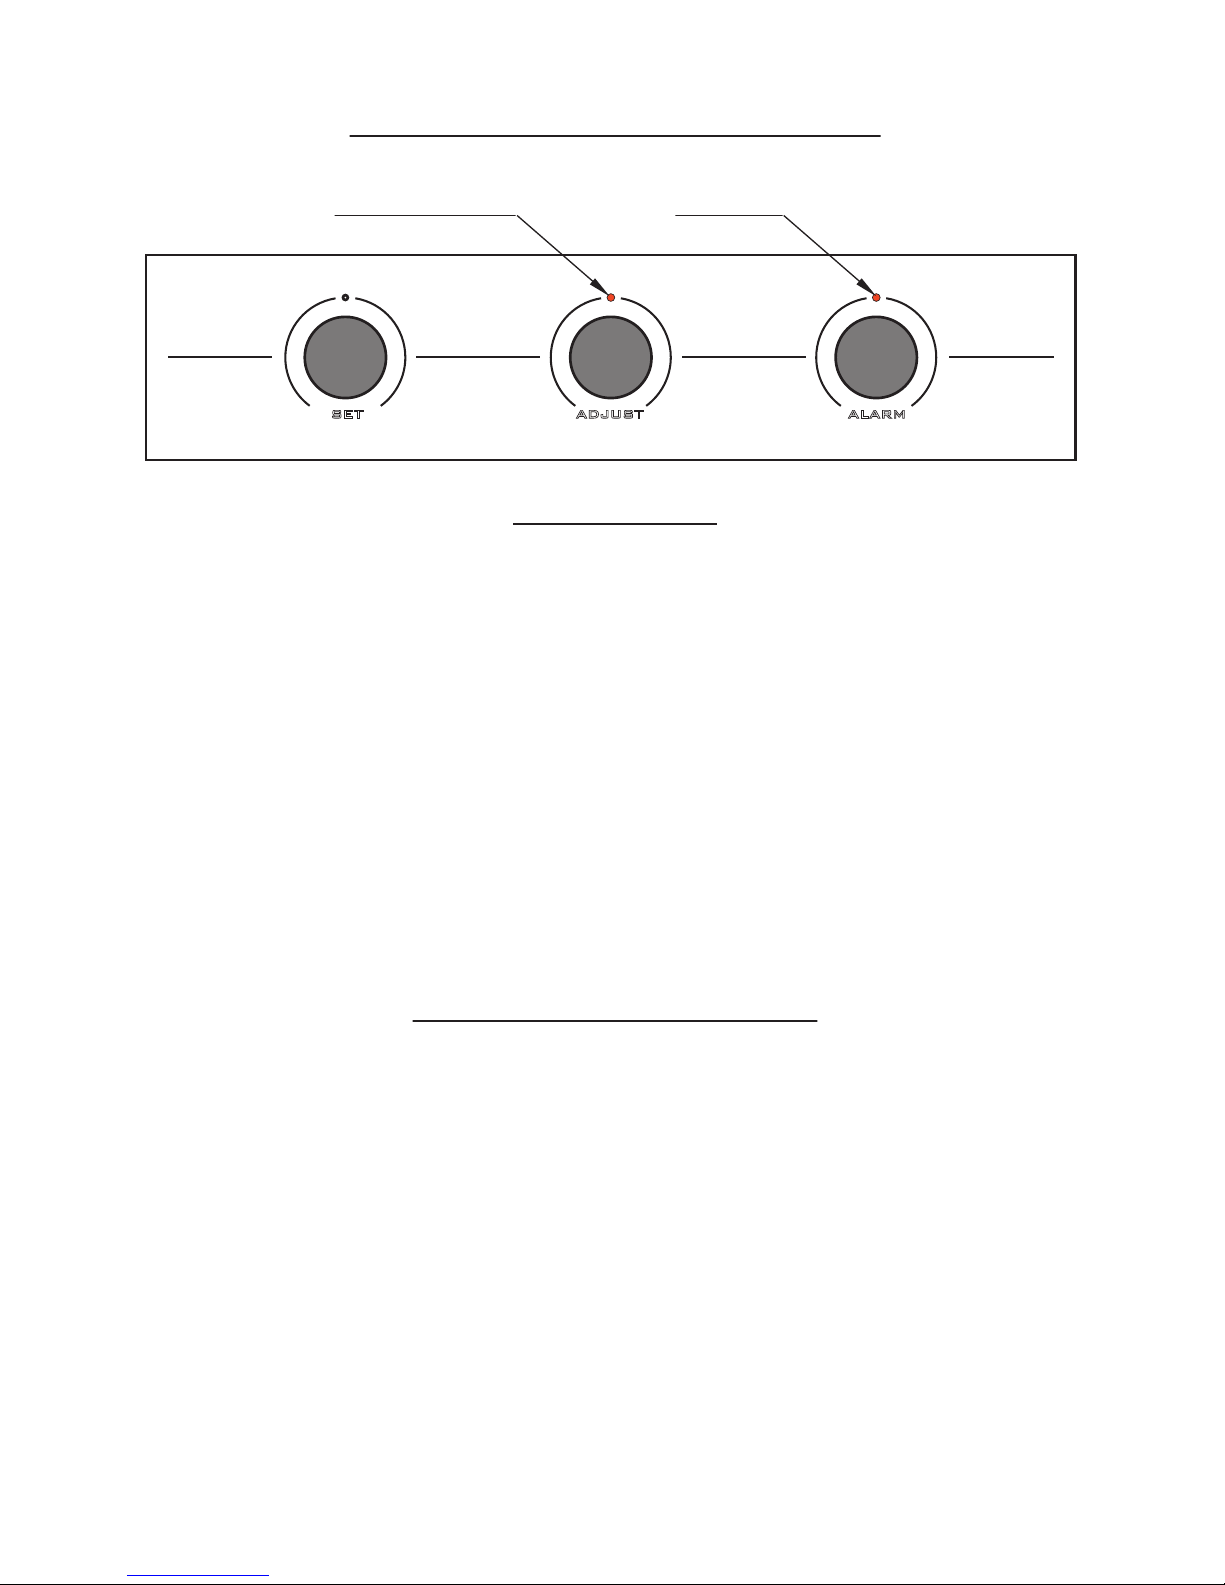
Clock operation / control buttons
Start the clock
Connect the power adaptor and the clock cable and plug the adaptor to your wall socket. On the tubes you will see 6-5 4-3 2-1 counting numbers. Press and hold the SET button for two beeps and the
clock will start. See next chapter how to set the date and time!
If your clock is showing the 6-5 4-3 2-1 numbers it means the clock
is in stand by mode. For exaple the clock was disconnected from
the power source for long hours. Pressing the SET button for 2
beeps will start the clock again and the date and time need to be
set.
GPS indicator light Alarm light
SET ADJUST ALARM
Set the date and the time
Press and hold the SET button for 2 beeps to enter date and time
setup!
Highlight the values what you wish to set by pressing the SET
button once!
Change the values by pressing the ADJUST button!
Press and hold the SET button for 2 beeps to exit the setup!
The clock does not have Daylight Saving time options! The timezone oset need to be adjusted manually twice a year in DST zone
countries.
Page 5

woodize.com
Set the alarm
The alarm time is always in 24 hours time format!
To see the scheduled alarm, press the ALARM button once.
Press and hold the ALARM button for 2 beeps to enter the alarm
setup.
Press the SET button the highlight the hours or the minutes and
press the ADJUST button to set the alarm hour and minute.
(see Adjust button extra functions next page)
Press and hold SET button for 2 beeps to exit the alarm setup.
Operate the alarm
When the alarm goes o, press ALARM button to snooze.
It repeats the alarm for 4 times in every 5 minutes!
(change snooze period, see the parameter settings chart)
To switch o the alarm for the rest of the day press and hold ALARM
button for two beeps while the alarm is ashing red and beepig.
Next day the alarm will go o again.
To switch the ALARM completely o, press and hold ALARM for
three beeps while the clock is showing the time.
When the alarm function is o, the alarm light will switches o. To
switch back on the alarm, press and hold ALARM button for three
beeps while the clock is showing the time, or set a new alarm.
(Entering and exiting the parameter settings, the alarm light will switch
back on, if the parameter 11 value is set to 1)
Page 6

woodize.com
ADJUST button extra functions during setup
Press once to changing values.
Press and hold for 2 beeps to reverse the step directions of the
values.
Press and hold for 3 beeps to reset the values to zero (only in
parameter setup menu!)
Press and hold down for 4 beeps and after for fast value change
(only in parameter setup menu!)
Using the optional GPS unit
Disconnect the power and plug in the optional GPS unit.
Re-power the clock, if the clock is not started, press and hold the
SET button for 2 beeps.
Enab
le GPS in the parameter settings menu and set your timezone
oset. The clock does not have Daylight Saving time options! The
timezone oset need to be adjusted manually twice a year in DST
zone countries.
(see parameter setting options, parameter 33, 34, 35, 36!)
Place the GPS near window to have a clear sight of the open sky.
Wait a few minutes and press and hold the ADJUST button for 2
beeps to receive signal from the GPS unit. The GPS unit synchronise
the clock in every hour.
Page 7

woodize.com
Clock button functions during normal operation mode
(Showing the time)
SET button
Press once to see date
Press and hold for 2 beeps to enter "Date and Time Setting Mode"
Press and hold for 2 beeps to exit "Date and Time / Alarm Setting
Mode"
Press and hold for 3 beeps to ENTER/EXIT "Parameter Setting Menu"
ADJUST button
Press twice to synchronizing Time & Date from GPS immediately
(if optional GPS unit is connected and enabled)
ALARM button
Press once to see scheduled alarm time.
During alarming, press and hold for 2 beeps to switch alarm o for
that day.
Press and hold for 2 beeps to enter "Set Alarm mode".
Press and hold for 3 beeps to toggle ALARM OFF/ON.
(only when the clock is showing the normal time)
During the "Show Date", "Show Alarm", "Countdown Nixie eect"
pressing any of the buttons, will not take any action.
Wait until you see the normal time to enter any submenu.
Page 8

woodize.com
PARAMETER SETTINGS
In the parameter settings menu the clock can be programmed for
dierent modes, activate and deactivate various settings.
Changing color values you can mix your own colors and choose
unique light eects.
Feel free to play with the parameter values!
There is always a way the reset the clock to its default settings.
To ENTER the parameter settings menu, press and hold the SET
button for 3 beeps.
The rst “00” parameter shows the program version of the clock.
This can not be changed. From the “01” parameter the values can
be set to dierent values, based on the following parameter chart.
If the clock is reset to default all parameters will be set to the values
of the right side of the chart.
To change the tubes back lights, please refer to the color chart!
The color of the clock digits are can not be changed.
To EXIT the parameter settings menu, press and hold the SET
button for 3 beeps anywhere in the parameter settings menu.
Page 9

woodize.com
XX-XX.XX
0: 12Hr mode, 1: 24 Hr mode
0: MM:DD:YY,
1: DD:MM:YY,
2: YY:MM:DD
0: OFF, 1: ON/Show
0
1
1
23:00
(11 PM)
06:00
(6 AM)
1
8
90
Not
Available
30
0
1
Not
Available
Not
Available
2
Not
Available
Not
Available
2
Firmware version
12/24 Hr format
Date display format
Leading Zero
Character Show/Hide
Hour of "Night Mode"
start
Hour of "Night Mode"
end
Nixie operation in
"Night mode"
Brightness of the Nixies
in "Night Mode"
Brightness of the Nixies
in "Day Mode"
Reserved for later use
Period of "Night Mode"
override
Alarm Repeat Mode
Snooze period
(4 times, then OFF)
Dot light in "Day Mode"
Dot light in "Night Mode"
Auto Date display
ON/OFF
Auto Date Backlight
Color Changing ON/OFF
Color of Backlight in
Auto Date Mode
RGB variables (see color value chart)
Nixie counting effect
0: None, 1: 5 min., 2: 10 min,
3: 15 min., 4: 20 min.
0: OFF, 1: AM/PM, 2: Sec flashing,
3: AM/PM and sec flashing, 4: ON
0: OFF, 1: AM/PM, 2: Sec flashing,
3: AM/PM and sec flashing, 4: ON
0: OFF, 1: Each minute 50-55 sec),
2: Every 10min 50-55 sec,
3: Each hour 50-55 sec
0: OFF, 1: ON
0: OFF, 1: every min.,
2: every 10min.
3: every hour, 4: at midnight
0 -> 23 Hr (24Hr format only)
0 -> 23 Hr (24Hr format only)
0: Nixies OFF,
1: Nixies (Dimmed) ON
0 -> 99
0 -> 99
0 -> 99 sec.
0: Alarm OFF,
1: Alarm ON each day
00
01
02
03
04
05
06
07
08
09
10
11
12
13
14
15
16
17
18
Parameter Value Default
Page 10

woodize.com
0: OFF, 1: ON, 2: Blinking/sec.
3: AM/PM color indication,
4: Color scan
Effect LED light
(2 lighted laminas)
RGB variables (see color value chart)
RGB variables (see color value chart)
RGB variables (see color value chart)
RGB variables (see color value chart)
RGB variables (see color value chart)
RGB variables (see color value chart)
RGB variables (see color value chart)
RGB variables (see color value chart)
0 -> 255
0 -> 255
0 - Normal brightness,
1 - Half brightness
0: OFF, 1: ON, 2: Blinking/sec.
3: AM/PM color indication,
4: Color scan
0: OFF, 1: ON
0: OFF, 1: ON
0 -> 12
0 -> 45
0: Positive, 1:Negative
1 unit: 0.18sec/day
(+/- 0.18sec/day --> 22sec/day)
At parameter 38 press and hold SET button for
3 beeps to exit the setup menu and press ADJUST
button for 1 beep to Restore Default Settings!
Not
Available
Not
Available
Not
Available
Not
Available
Not
Available
3
WHITE
OFF
ORANGE
VIOLET
150
5
0
0
0
0
0
0
128
Color of Effect lighting
in "Day Mode"
Color of Effect lighting
in "Night Mode"
Color of Effect lighting
in "AM indication Mode"
Color of Effect lighting
in "PM indication Mode"
Nixie LED light
Color of Nixie lighting
in "Day Mode"
Color of Nixie lighting
in "Night Mode"
Color of Nixie lighting
in "AM Mode"
Color of Nixie lighting
in "PM Mode"
Overall brightness of
LEDs in "Day Mode"
Overall brightness of
LEDs in "Night Mode"
Half brightness of the
LEDs in "Breath Mode"
LED BREATH effect
GPS Sync. ON/OFF
GPS Time Synch
Offset Hours
GPS Time Synch
Offset Mins
GPS Time Synch
Offset Polarity
Clock Fine Calibrate
Restore Default
Settings
19
20
21
22
23
24
25
26
27
28
29
30
31
32
33
34
35
36
37
38
Parameter Value Default
Page 11

woodize.com
Color reference chart
When you are at any of the color setup parameter, on the third nixie
digit from the left you see number 1, 2 or 3.
1=Red channel, increasing or reducing the red brightness.
2=Green channel, increasing or reducing the green brightness.
3=Blue channel, increasing or reducing the blue brightness.
Any light color can be mixed by changing the RGB values in the
parameter settings menu.
Each color value can be set from zero to 255. It means, that each
individual color has brightness value between 0 and 255. Zero
when its dark, 255 is the full brightness. Adjusting each color
brightnesses give a dierent color result.
Stepping between R, G and B color values, press the ALARM
button.
To change values press ADJUST button.
To reset current color to ZERO (dark) press and hold the ADJUST
button for three beeps.
Reverse step direction of setting RGB values, press and hold teheADJUST button for two beeps.
Press and hold down for 4 beeps and after - fast value changing
Page 12
woodize.com
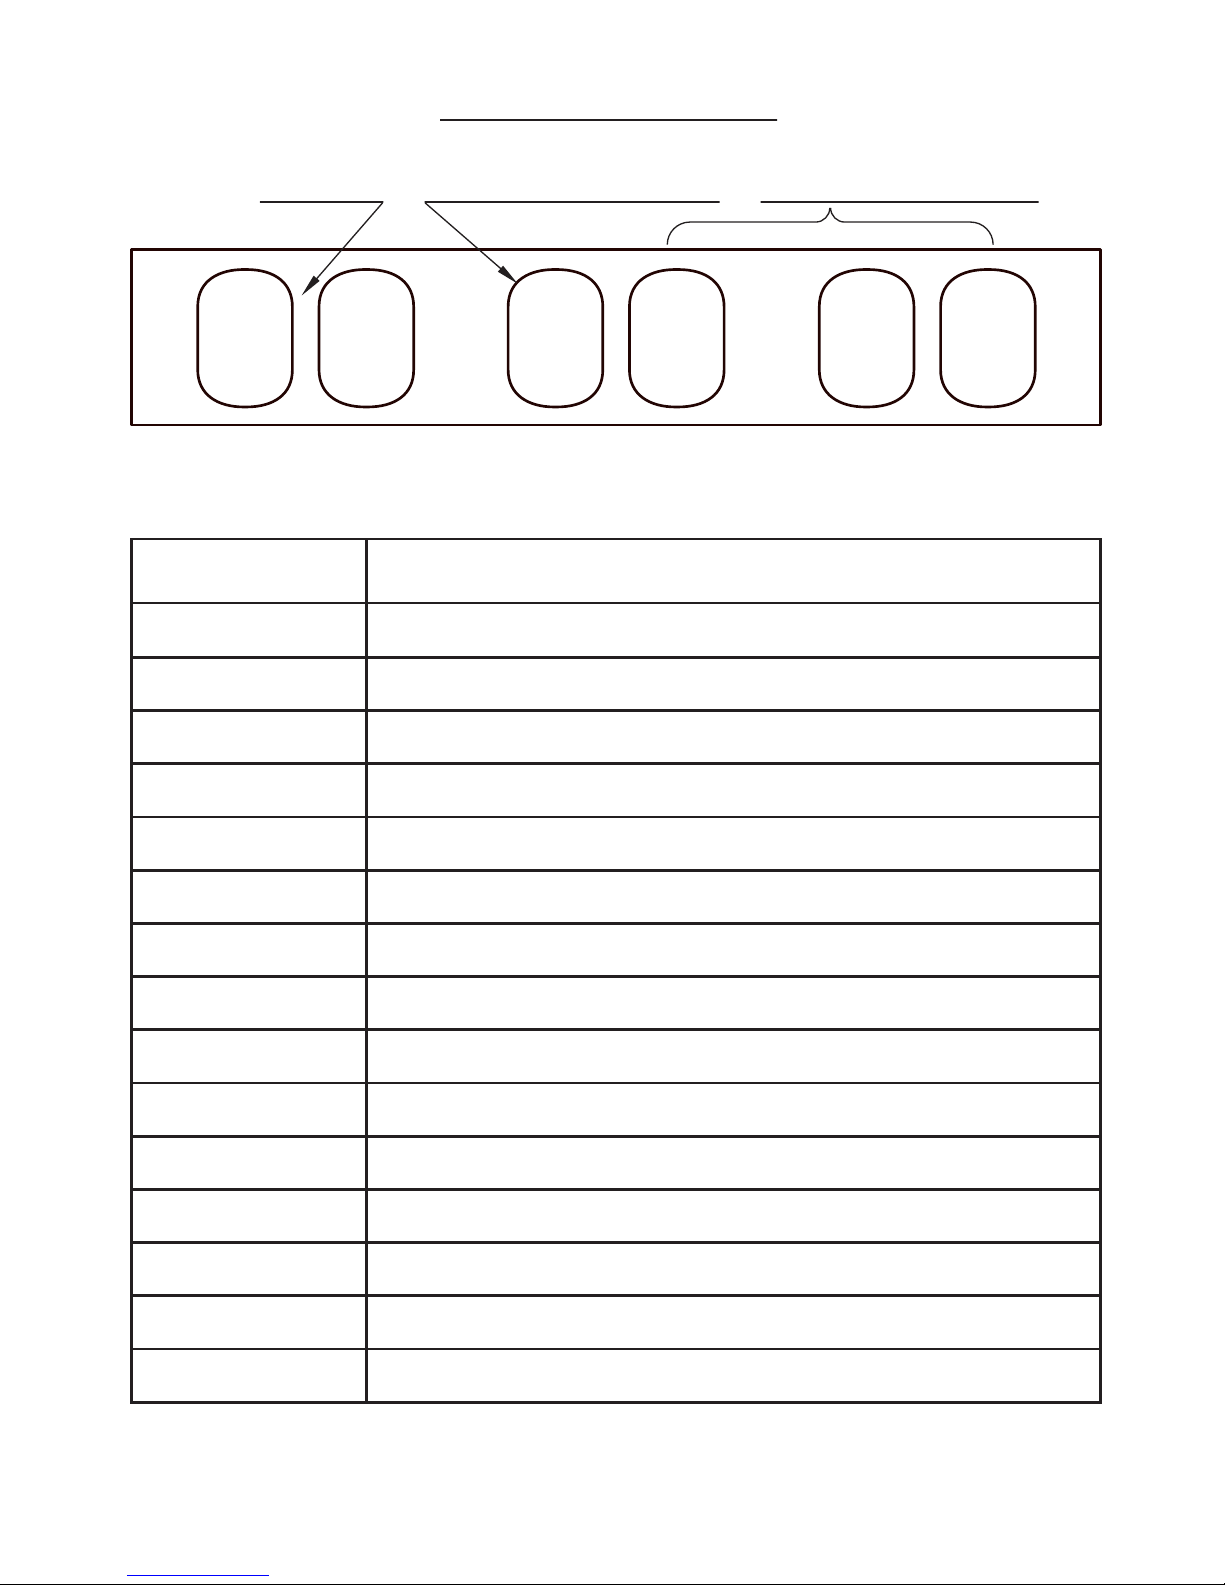
Color reference chart
BASIC COLORS: R (1) - G (2) - B (3) values
R=255, G=0, B=0
R=0, G=255, B=0
R=0, G=0, B=255
R=255, G=125, B=0
R=255, G=255, B=255
R=0, G=255, B=255
R=80, G=0, B=255
R=255, G=0, B=255
R=255, G=40, B=0
R=0, G=0, B=0
RED
GREEN
BLUE
YELLOW
WHITE
CYAN
VIOLET
MAGENTA
ORANGE
DARK/LIGHTS OFF
2 8 3 2 5 5
Example: Parameter 28 - (Afternoon, PM, nixie tube backlight color)
The B (blue) value of the color is on maximum (255)
Parameter 28 Third (BLUE) color from RGB mix Value of 255 from range 0-255
Feel free to experiment with your own colors by giving dierent values.
Page 13

woodize.com
Explanations of the parameter settings menu:
00 - The software version of the clock. Can not be changed!
01 - The time format. Set 24 Hrs format if you like to see afternoon for example 17:35, set 12 Hrs
format if you like to see for example 5:35 PM.
02 - Date format of the current date.
03 - When the displays are showing a single digit, for example 8 o'clock at the morning, the tubes
are not showing the "0" digit beside of the "8" character.
04 - The hour when the clock activate the "Night Mode" settings. The tubes are go OFF or dimmed,
based on your settings, and the color eect lights are switch to dimmed or to the given value
which is set in the “night Mode”. Can not be the same as the parameter 05.
Night mode saves energy!
05 - The hour when the "Night Mode" ends. Can not be the same as parameter 4
06 - Dene what the Nixie tubes do during night mode. If OFF than they are dark, when ON, the
parameter 07 value takes eect. (Dimmed by default)
07 - The brightness o the nixie digits during "Night mode"
08 - The brightness o the nixie digits during "Day mode"
09 - Reserved for later use
10 - If the tubes are OFF during “Night Mode”, the clock will show you the current time for the
given seconds long what you have set here, when the ADJUST button is pressed once.
11 - If this parameter value is "0" the alarm is disabled, no alarm will goes o, even if its set.
If it set to "1", the daily alarm repeat can be set.
12 - Snooze repeating period. "0" is o, no snooze after the rst alarm goes o. "1" when the alarm
repeat in every 5 minutes, "2" for every 10 minutes, "3" for every 15 minutes and "4" every 20
minutes. The snooze repeat the alarm 4 times then it switches OFF for that day.
13 - Dot lights are not applicable on this clock.
14 - Dot lights are not applicable on this clock.
15 - If its “0” the clock will not show the date automatically. If its “1” , the date will show
automatically in every 1 minutes, if its ”2”, in every 10 minutes, if its “3”, then in every hour.
16 - When the date is shown, the color of the lamina lights can be set to dierent color not applicable on this clock.
Page 14

woodize.com
Explanations of the parameter settings menu:
17 - The color of laminas - not applicable on this clock.
18 - The Nixie Count-Down eect is, when the numbers are rolling. This function only gives an
interesting eect. Set the values between “1” - “4” to for repeating. Set “0” to disable it.
19 - Lamina light - not applicable on this clock.
20 - "Day Mode" color on laminas - not applicable on this clock.
21 - "Night Mode" color parameter - not applicable on this clock.
22 - AM color parameter - not applicable on this clock.
23 - PM color parameter - not applicable on this clock.
24 - Nixie tube backlight can be set OFF (”0”), or showing one “Day Mode” color (”1”), (”2”) for the
same color blinking in each second, or switch colors indicating AM and PM time range. The
value (“4”) enables the RGB color, when the Lamina colors are constantly changing.
The RGB scan overrides all other color settings.
25 - "Day Mode" color shown, when the parameter 14 is "1" or "2". To set a color see the color
reference chart and feel free to play with it to nd your favorite settings. (White by default)
26 - This Nixie tube backlight color swap the “Day Mode”, when the clock goes to "Night Mode"
and parameter 28 is dierent from "0" To set a color see the color reference chart.
27 - This color indicate the AM time when the parameter 24 is set to "3", indicating AM/PM
timerange. "Night Mode" brightness will apply at parameter “28”. To set a color see the color
reference chart and feel free to play with it to nd your favorite settings. (Yellow by default.)
28 - This color indicate the PM time when the parameter 24 is set to "3", indicating AM/PM
timerange. "Night Mode" brightness will apply at parameter “28”. To set a color see the color
reference chart and feel free to play with it to nd your favorite settings. (Violet by default.)
29. - Global brightness of all the LED lights during "Day mode"
30 - Global brightness of all the LED lights during "Night mode"
31 - In dark environment the maximum brightness of the 'breath eect' might be too much. This
parameter allows to reduce the brightness to half. Set to “1” for reduce overall LED brightness
during 'breath' eect. This parameter applies for the 'breath" eect ONLY!
32 - Enable "breath" eect on all the LED lights. All lights are pulsing from low brightness to
higher. This feature overrides all color settings!
Page 15

woodize.com
Explanations of the parameter settings menu:
33 - The GPS synchronization is ON or OFF. Optional GPS unit needed to enable this function.
34 - Depending from your timezone, set the oset hours from the GMT. Plus or minus precursor
set by this parameter! No Daylight Saving Time (DST) mode. The time need to be adjusted
manually twice a year in DST zone countries.
35 - Depending from your timezone, set the oset minutes (if apply) from GMT.
36 - Hour/Minutes oset precursor + or - from GMT. “0” is, to east of UK (Europe and Asia), “1” is to
west from UK, all USA and America
37 - If your clock is running faster or slower, you can accurately set the clock without any GPS
unit. Study your clock behaviour, make notes for a few days before set anything. Press ADJUST
button to run the clock faster, press ALARM button to run slower.
Each incremental adds or subtracts 0.18 sec per day. Default middle value is 128. Range 0-255.
38 - Restore default settings! At parameter 38 press the ADJUST button for 1 beep to Restore
Default Settings, then press and hold SET button for 3 beeps to exit the setup menu to
activate the reset!!
Page 16
woodize.com
Material list:
IN-12 Nixie tubes
Glossy nished ne American walnut
Lacquered French maple
Acrylic
Optional GPS unit available :
www.woodize.com/products
Instructions and details:
woodize.com/store/products/lamina-simplon-nixie-clock
Lamina Simplon Nixie Clock
Designed and manufactured by
Zoltan Acs and Zoltan Varkonyi
©2013
Page 17
woodize.com
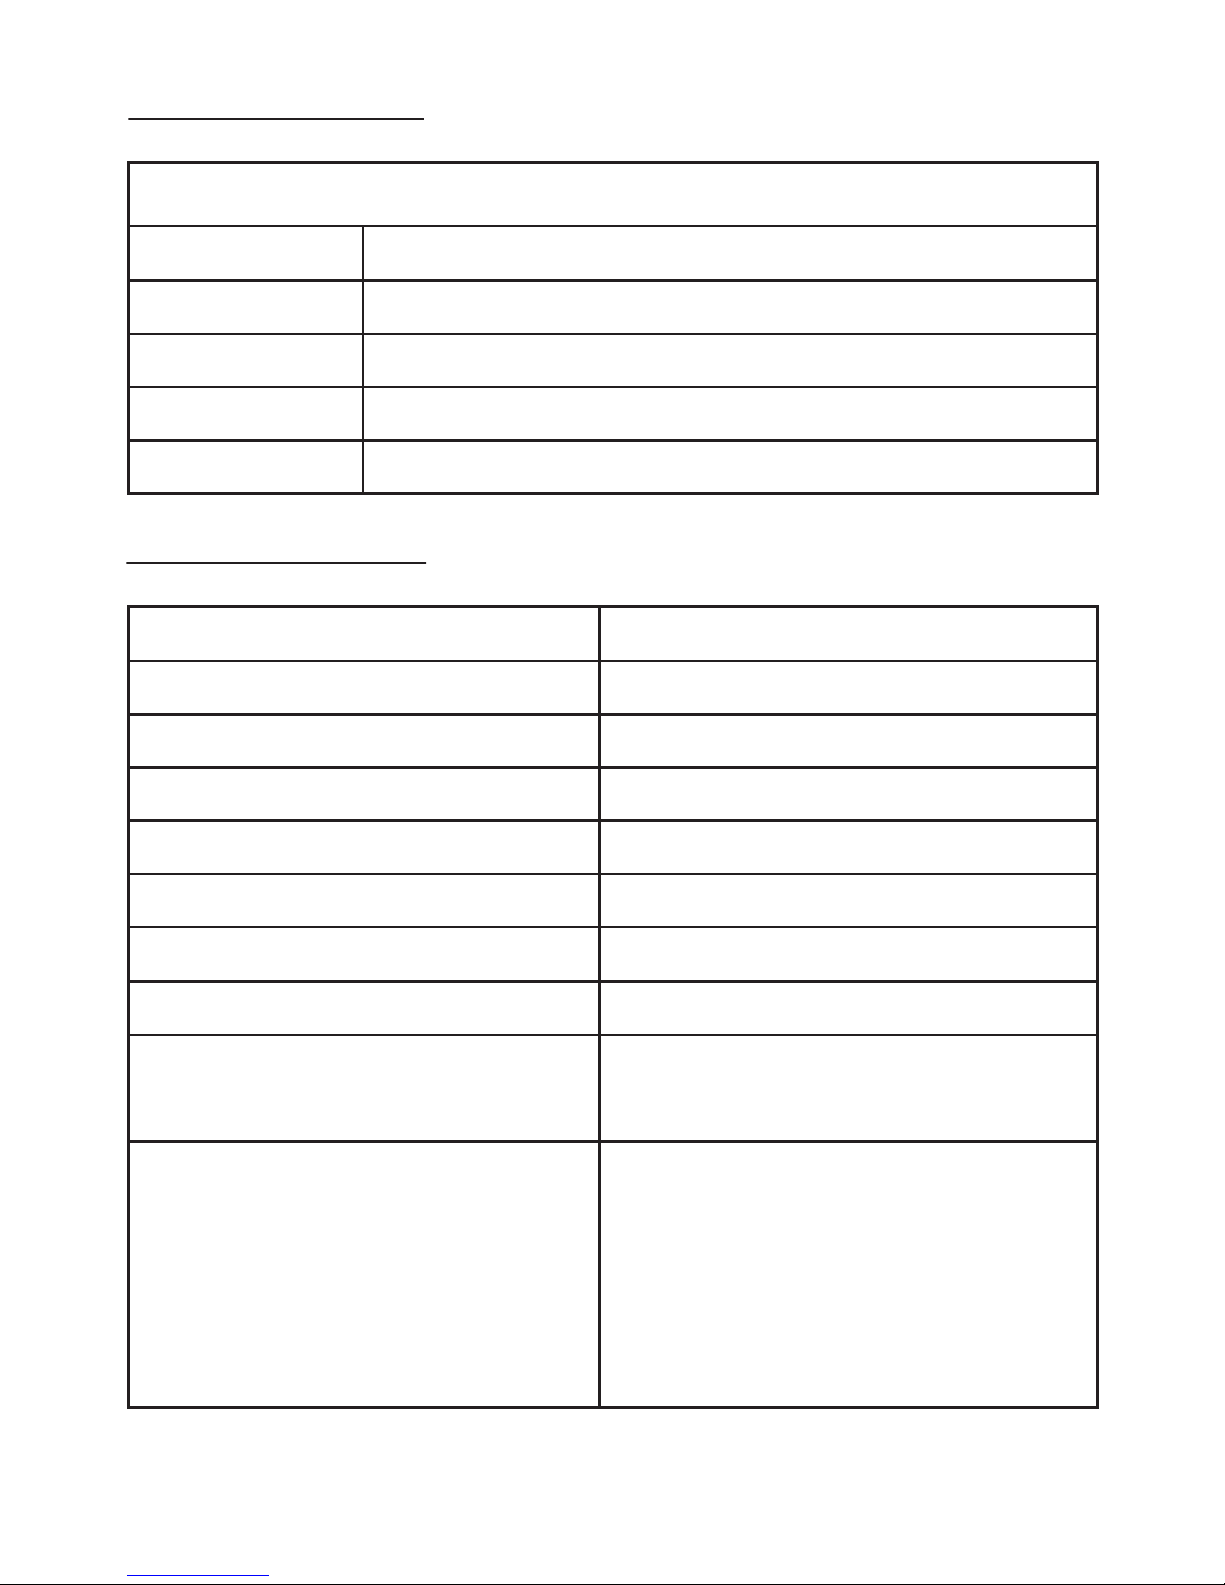
Product reference:
LAMINA SIMPLON NIXIE CLOCK
VERSION:
FIRMWARE:
SERIAL NUMBER:
ASSEMBLY DATE:
POWER ADAPTOR:
Delivered settings:
12/24 HOUR MODE:
NIGHT MODE:
DAY MODE COLORS (LAMINA / NIXIE):
NIGHT MODE COLORS (LAMINA / NIXIE):
AM MODE COLORS (LAMINA / NIXIE):
SHOW DATE COLOR:
COUNTING EFFECT:
OPTIONAL GPS:
LOCAL SETTINGS:
REMARKS:
PM MODE COLORS (LAMINA / NIXIE):
Page 18

woodize.com
 Loading...