

Page 1

USER MANUAL
Page 2
Conventions
The following symbols are used in this user guide:
Information:
This symbol is used to give you extr information about the
Wondrwall system or its operation.
Warning:
This symbol shows if there is potential hazard to people.
2
Page 3

Contents
Introduction 5
Installing 13
Connecting 21
Operating 37
Maintaining 45
Troubleshooting 47
Specifications 56
Programming 57
Index 60
Deutsche Version 63
3
Page 4
4
Page 5

Introduction
Welcome to Wondrwall enabled home. Using innovative hardware and cloud-based
learning technology, Wondrwall achieves groundbreaking advances in home energy
saving, home security and lifestyle personalisation.
Once installed, Wondrwall begins to build detailed picture of exactly how you use
your home. With complex understanding of your living patterns, Wondrwall plots the
optimal running of your home while making continual improvements.
Using the power of Amazon’s Alex platform, Wondrwall also gives you voice activated
access to the internet to allow you to check the weather or travel information, retrieve
the day’s events from your Google calendar, order taxi or products from Amazon for
example.
Wondrwall can also connect to your medi, playing music through speakers built into
each light switch.
5
Page 6
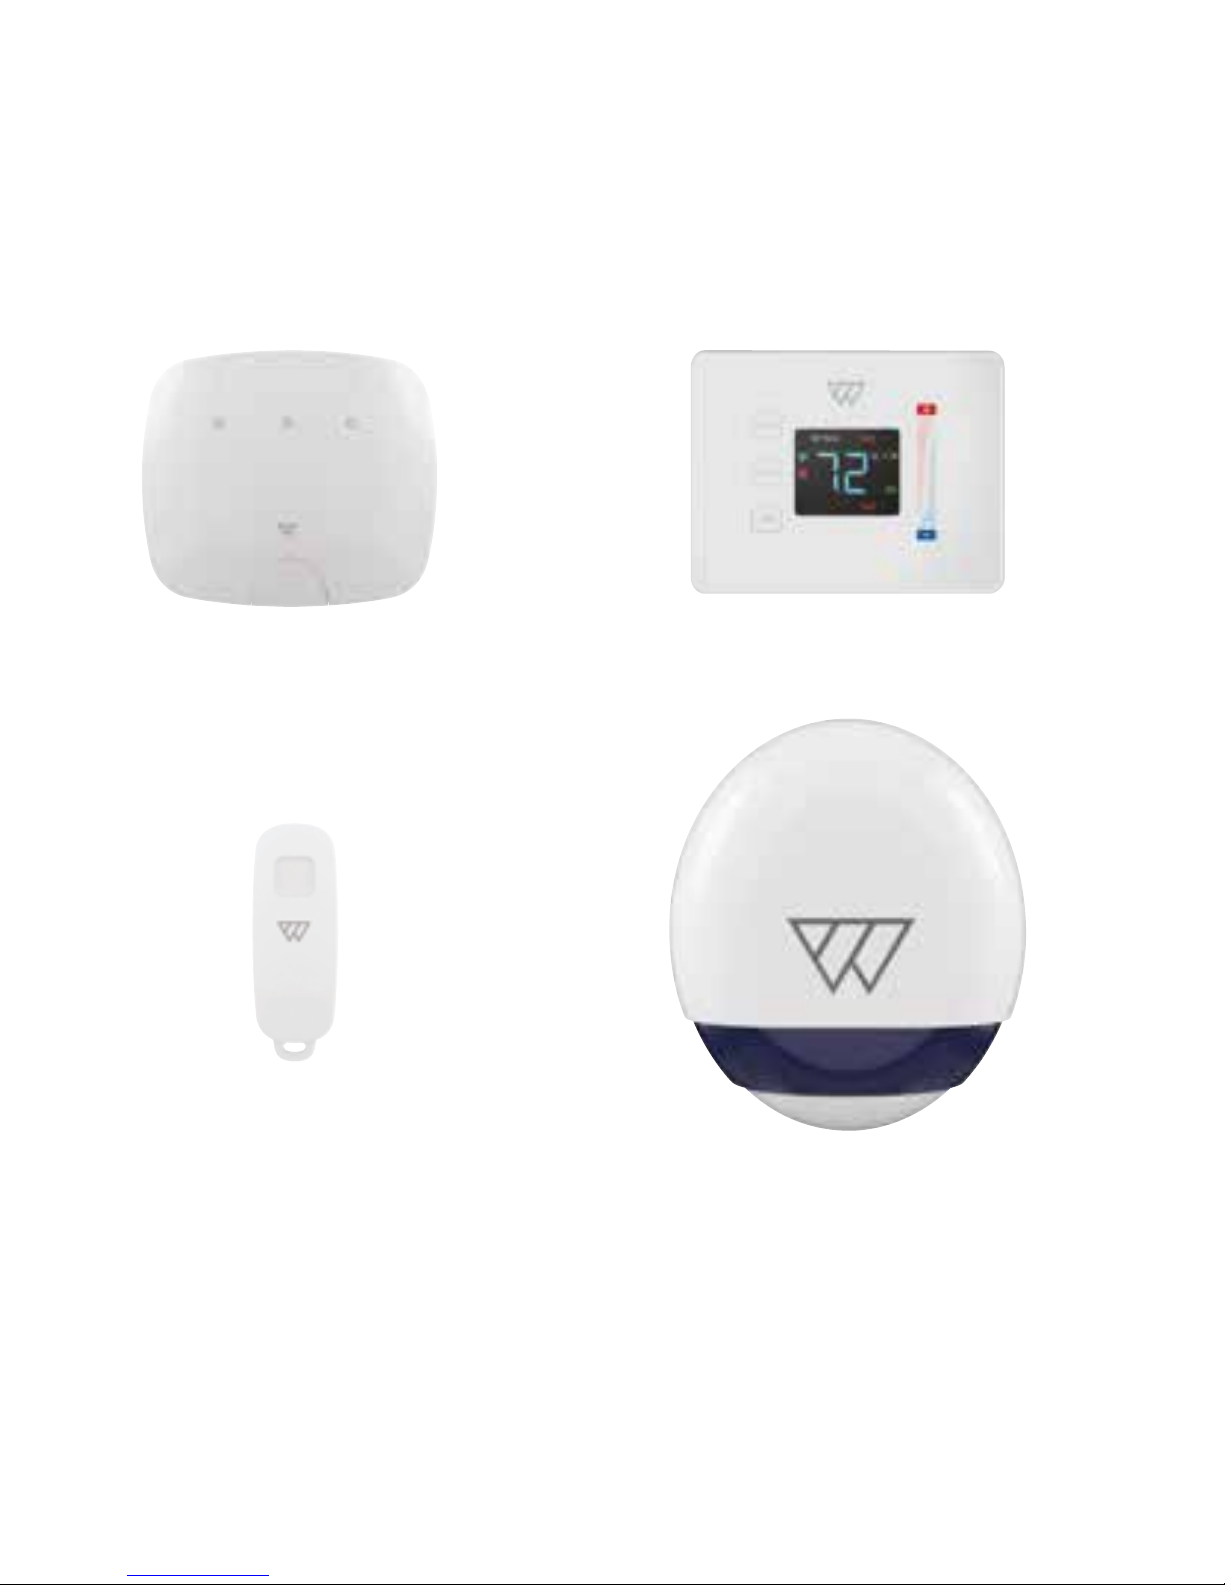
Light switch
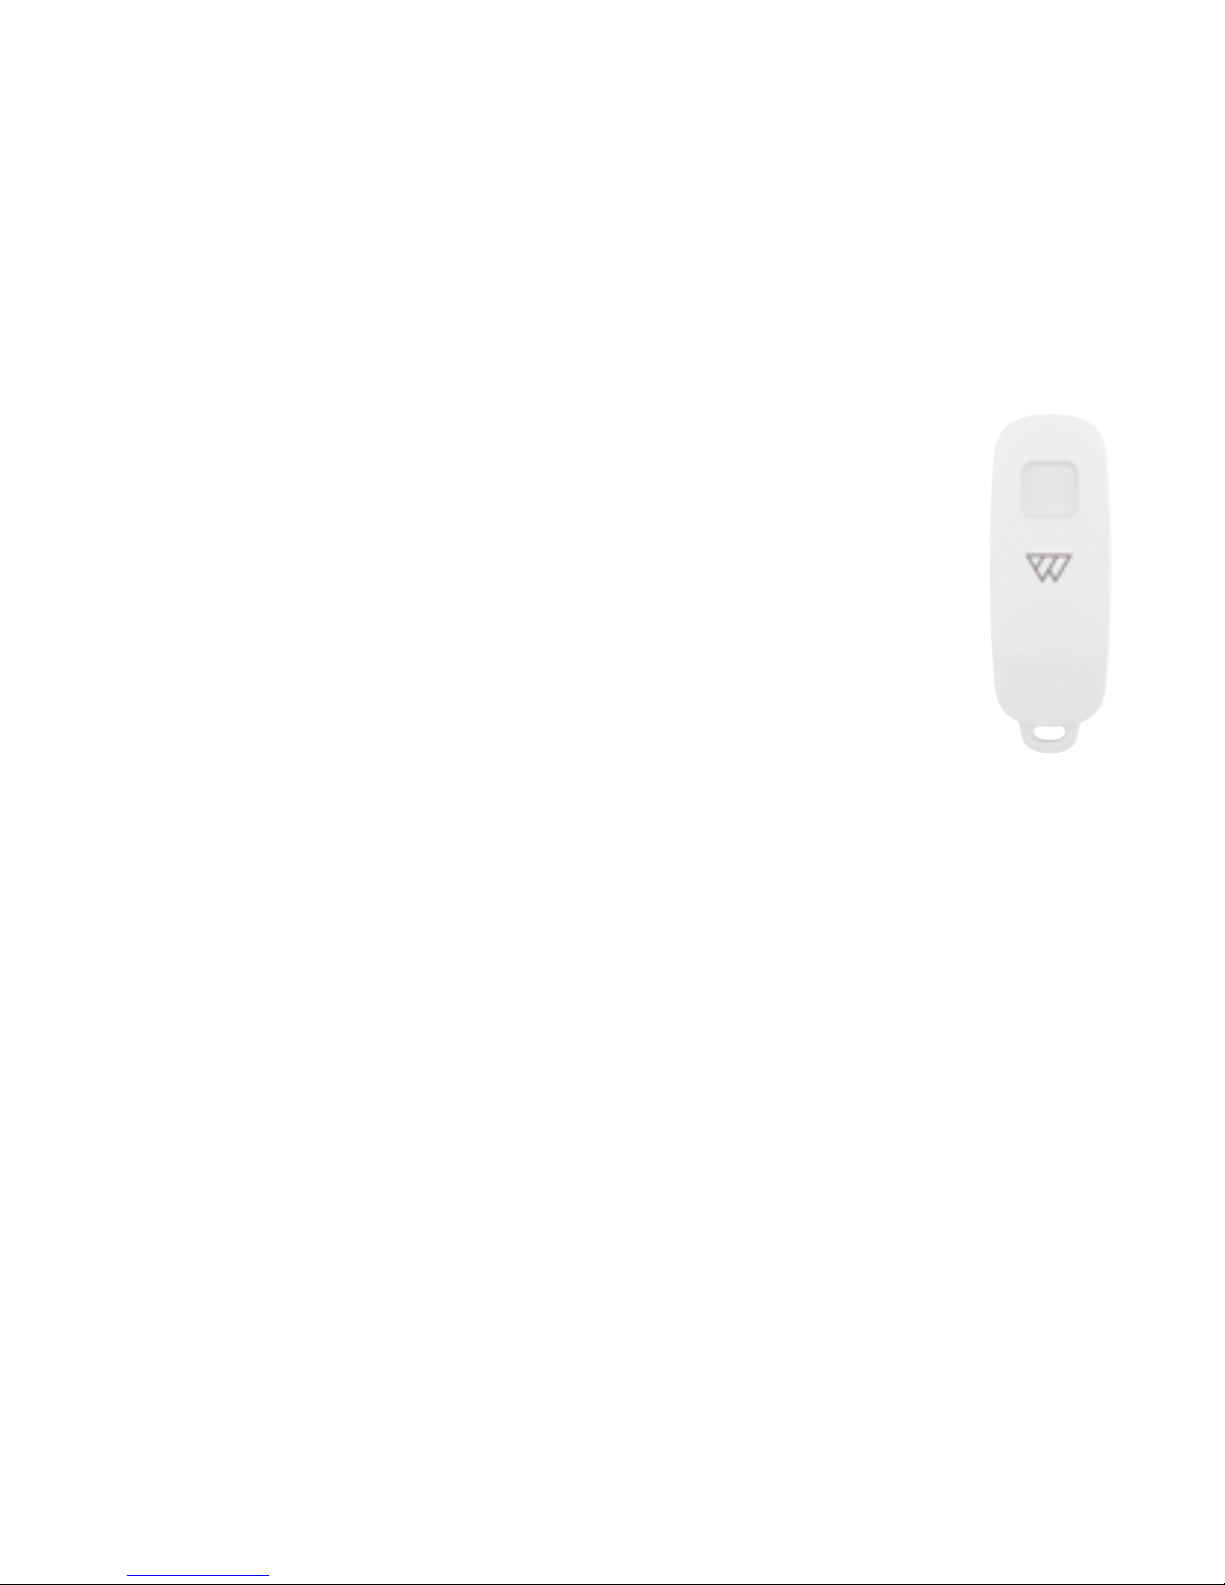
Key fob
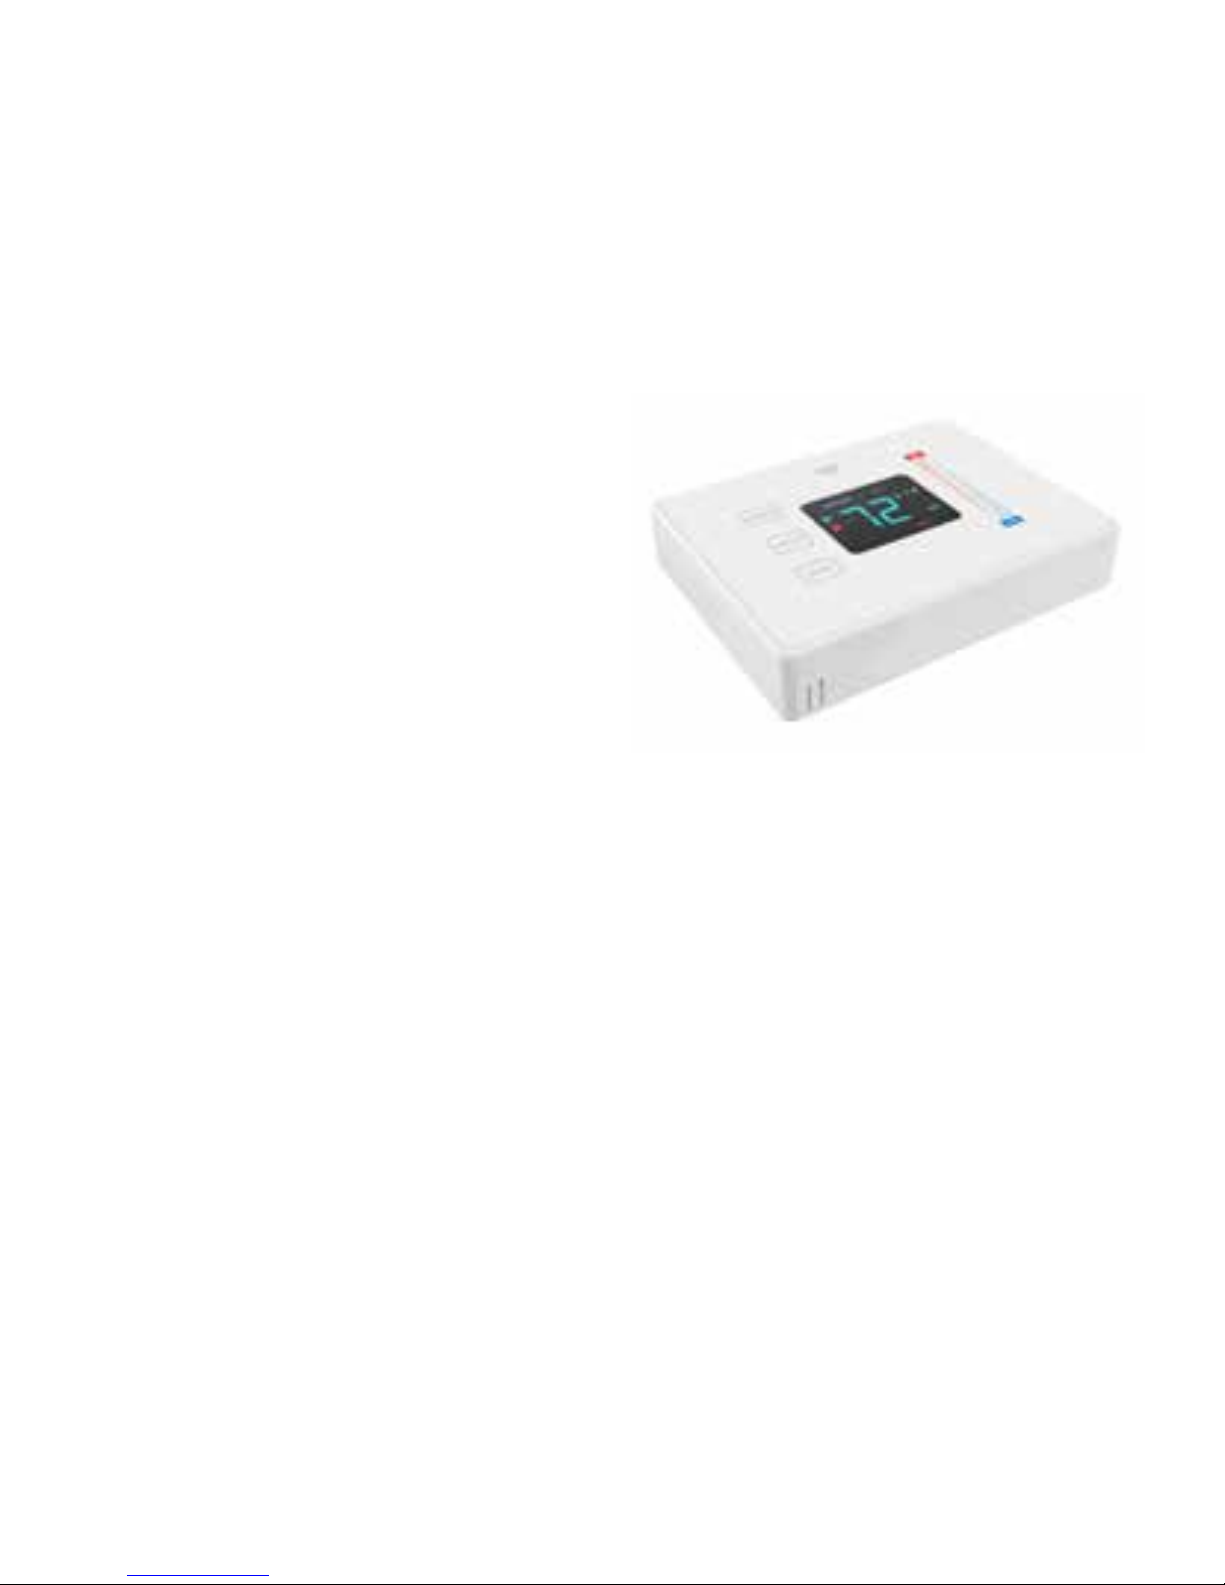
Thermostat
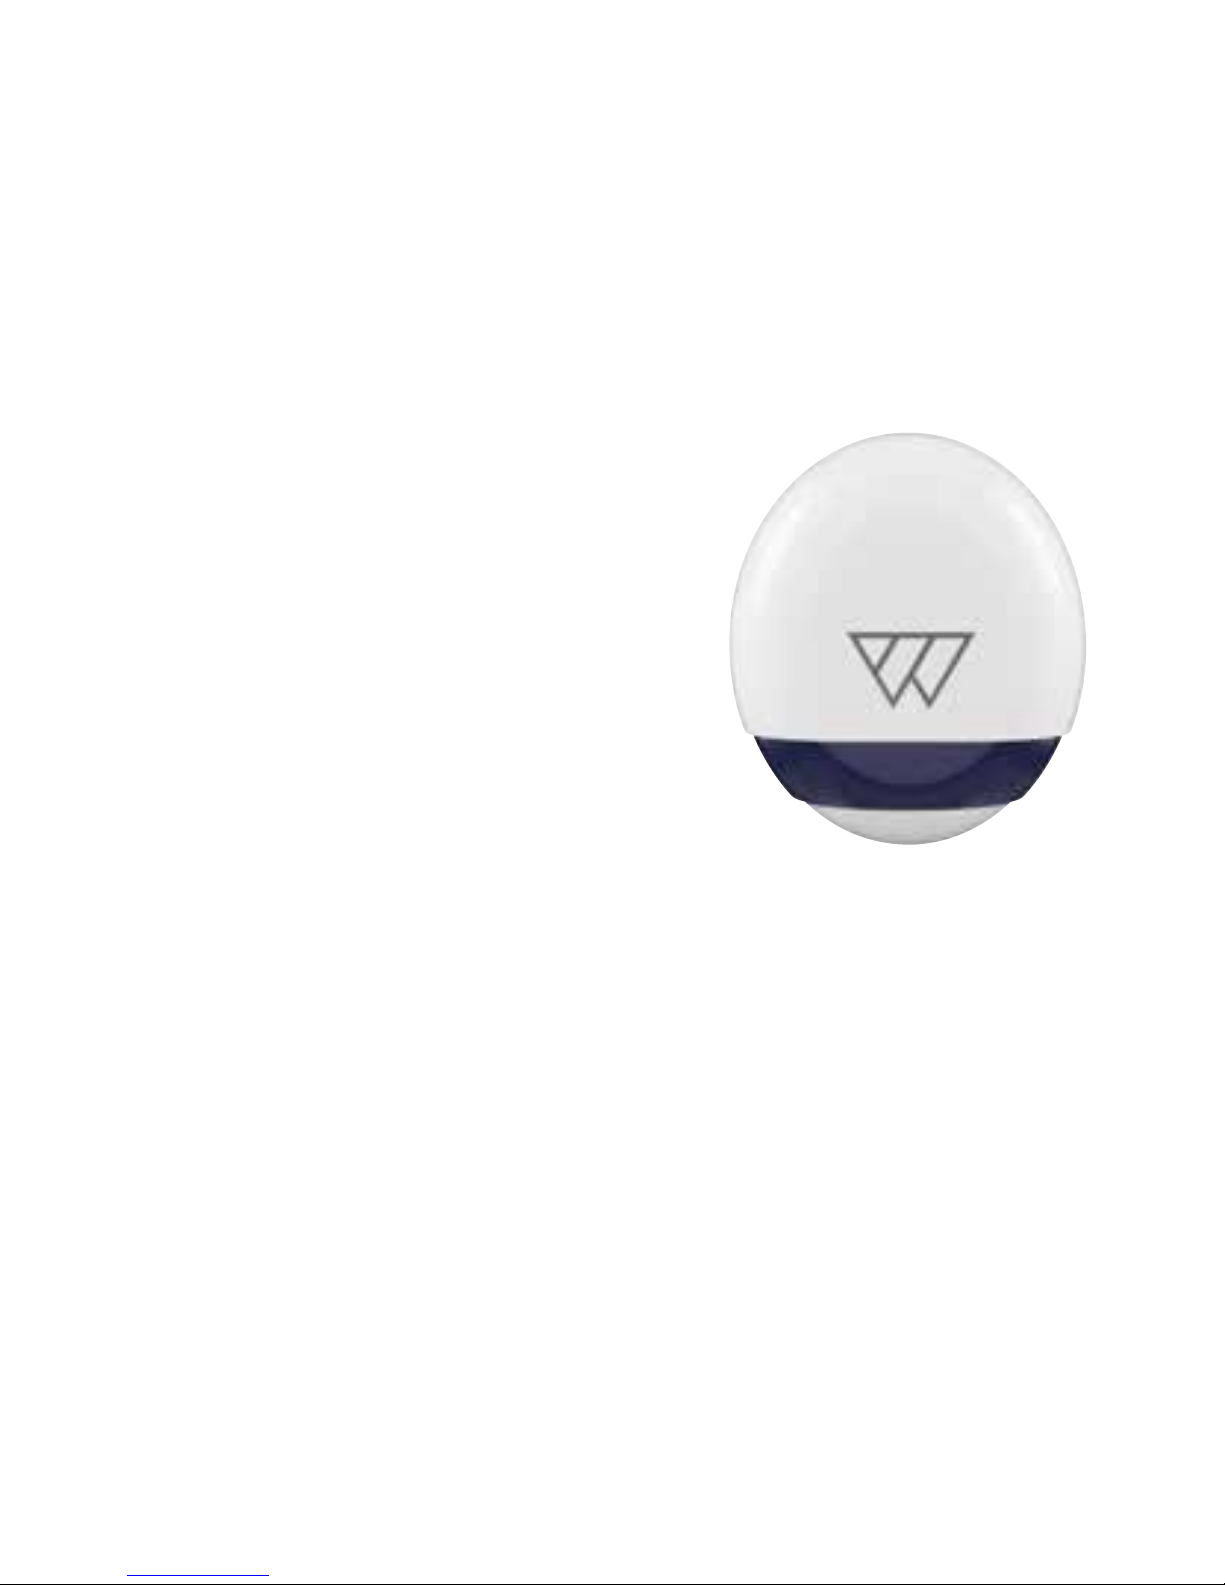
Siren
6
Page 7

What’s in the box?
Base Kit:
• 1 Light Switch
• 1 Thermostat
• 1 Siren
• 2 Key Fobs
• Installation kit
• User manual
Light Switch:
• 1 Light Switch
• Installation kit
• User manual
Key Fob:
• 1 Key Fob
• Battery
You will also need to download the Wondrwall
mobile App. This is available on the App Store
and on Google Play.
7
Page 8
Light Switch
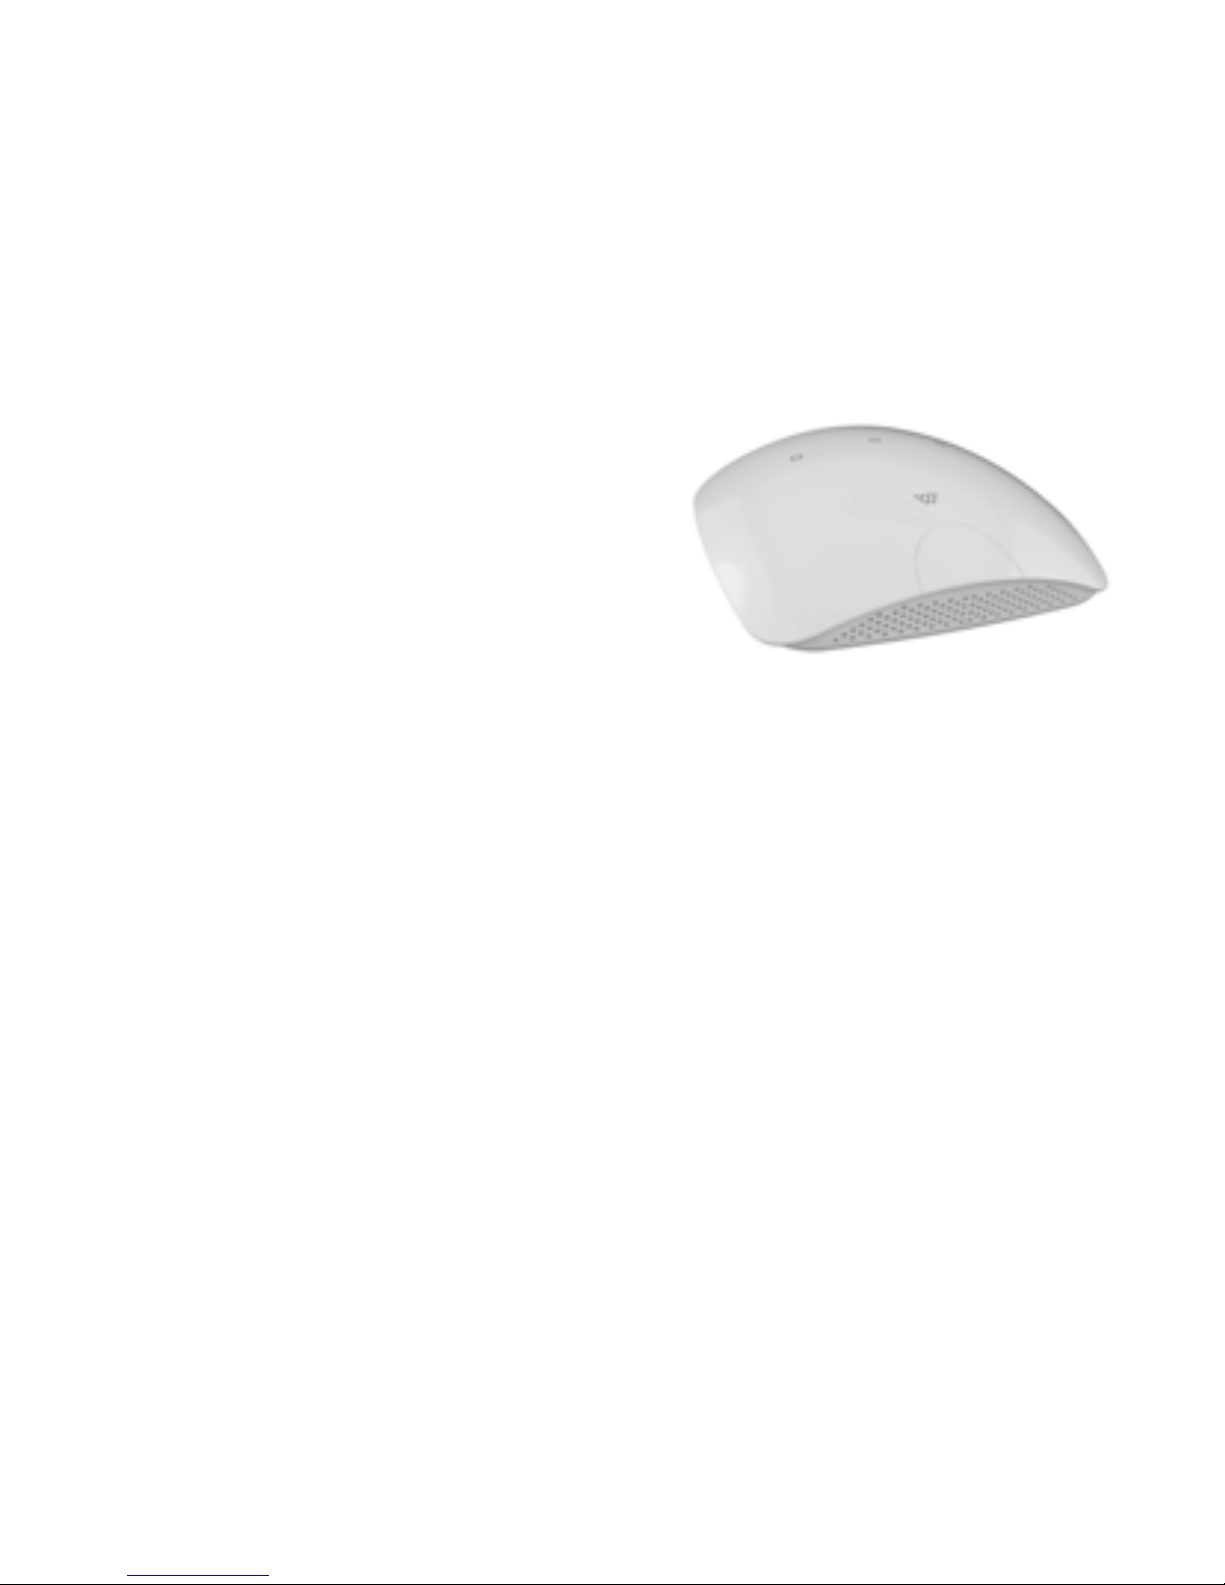
The light switch is the key to Wondrwall’s learning
capabilities. Light, motion, audio, heat and humidity
sensors within the device continuously monitor
your living patterns.
Using motion sensors, Wondrwall learns when you
wake up, leave for work and when you come home
again, and adjusts the temperature and lighting of
your home accordingly.
Lights in unoccupied rooms are automatically turned o when leaving home, saving
energy, and when nobody’s at home, Wondrwall activates Away Mode, lighting
dierent rooms at random to give the illusion of occupancy.
Wondrwall also identifies the sound of smoke alarm, flashing all lights inside the
house to make sure all inhabitants are awake and aware, as well as sending alerts to
each fitted light switch. The home will only listen for these sounds in away and
sleep mode.
Wondrwall can also play music through speakers built into each light switch using
Amazon Alex.
8
Page 9
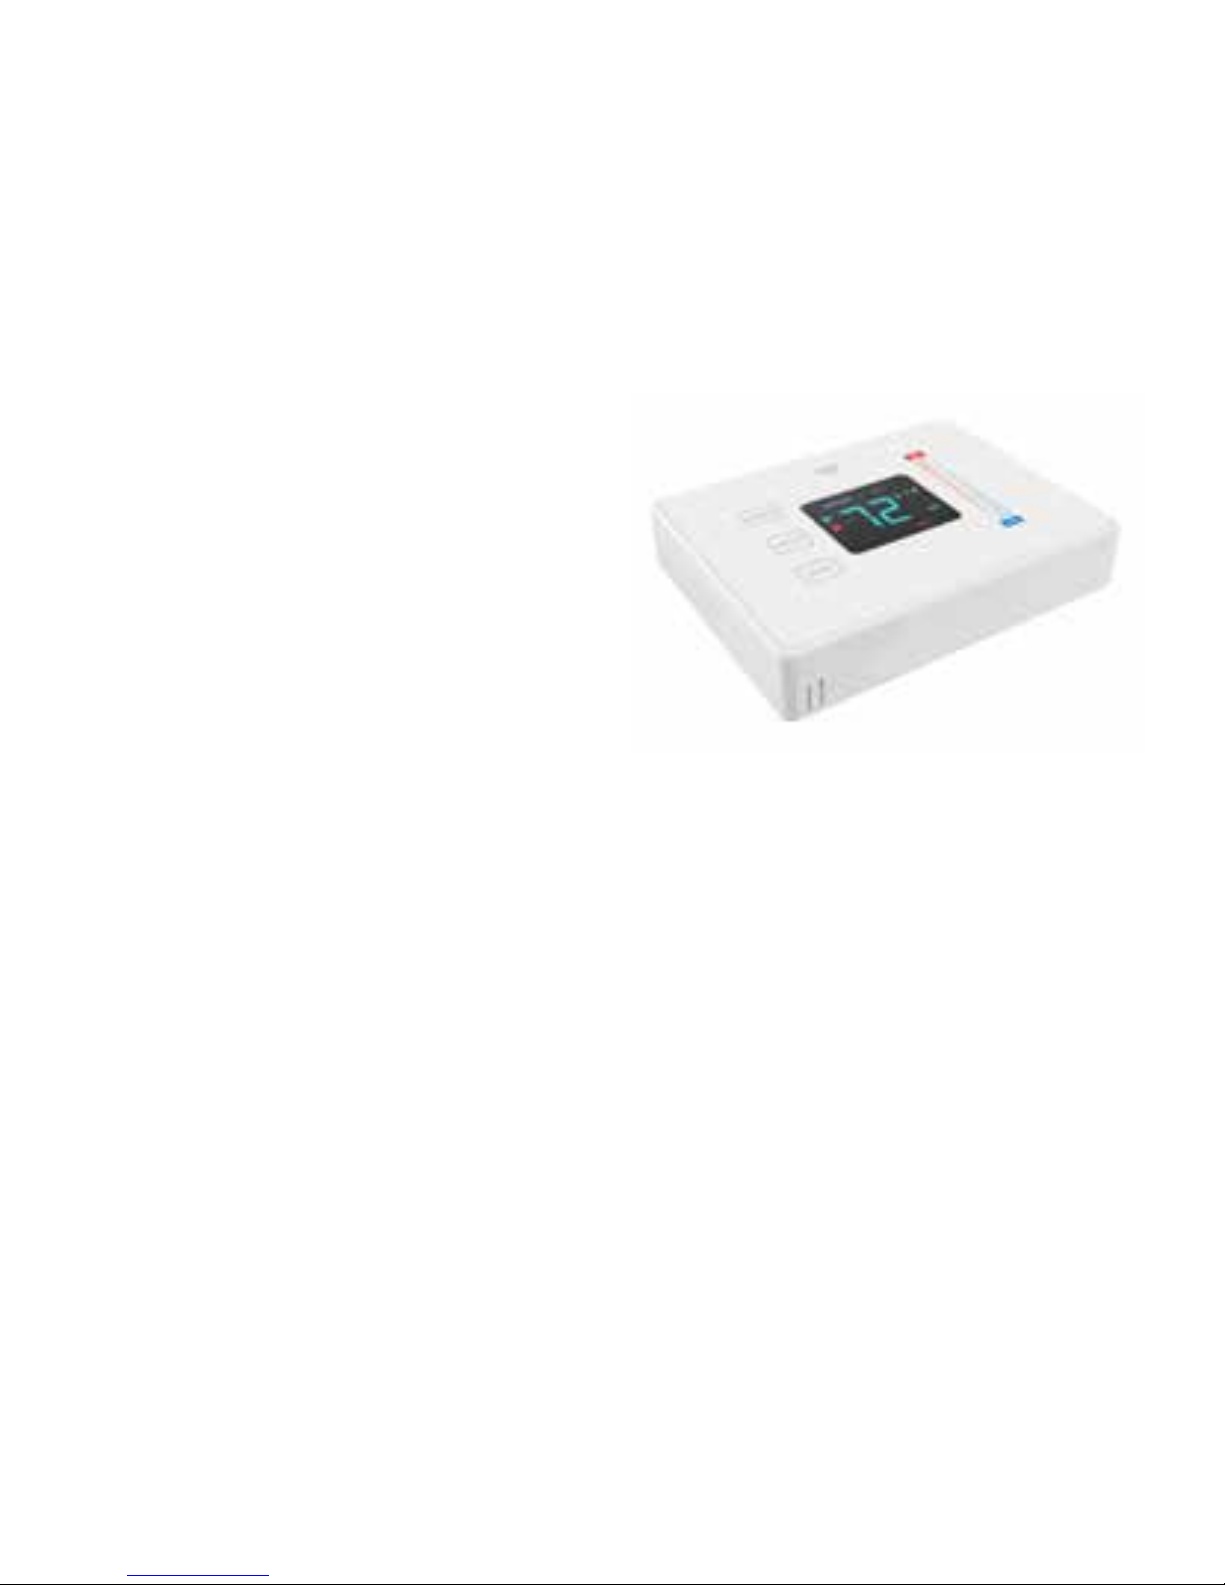
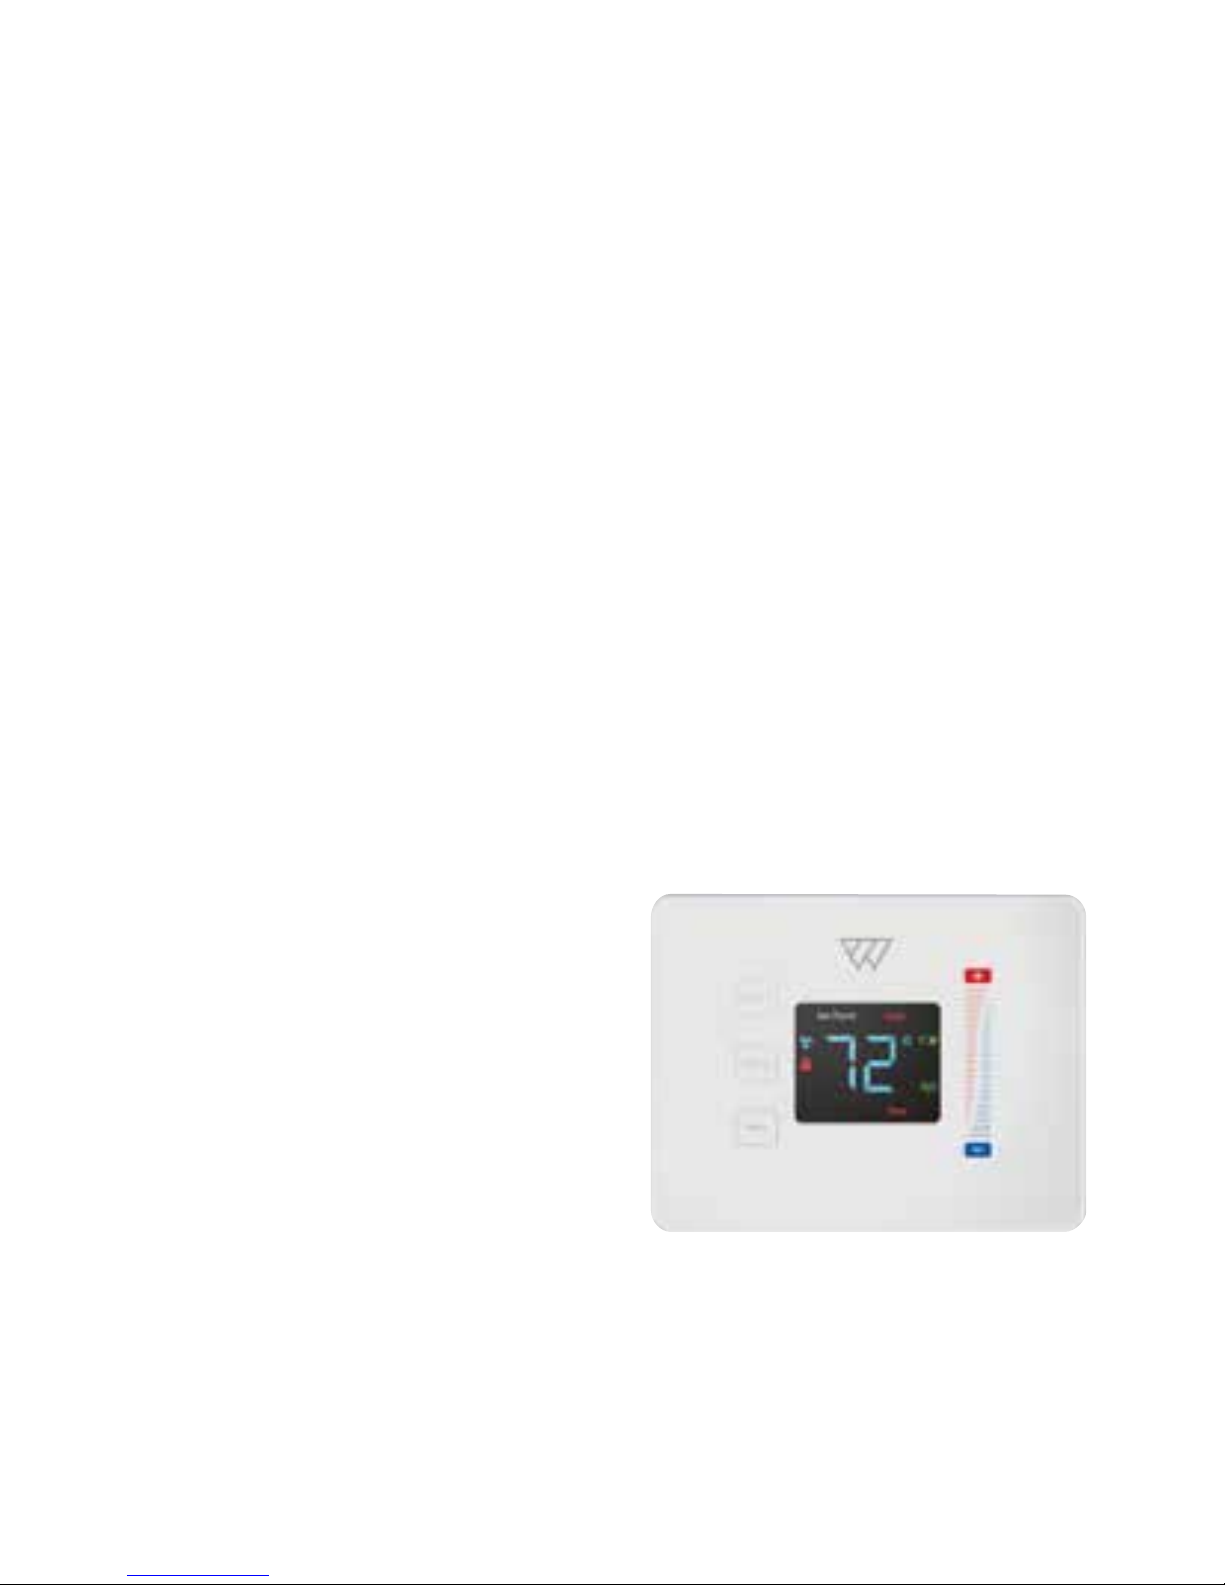
Thermostat
The thermostat is modern replacement
for traditional units.
Wondrwall learns your temperature
preferences and wakes you each morning
with just the right level of heating. The
system constantly adjusts and optimises
your internal environment throughout the
day, whatever the weather, making sure
you are always comfortable.
All Wondrwall’s adjustments are in real-time, and takes into consideration any
transport delays or other complications, and only starts to heat your home at just the
right moment.
Working from wired connection to your boiler, it’s simple to install and allows for
manual heating control on demand if required.
9
Page 10
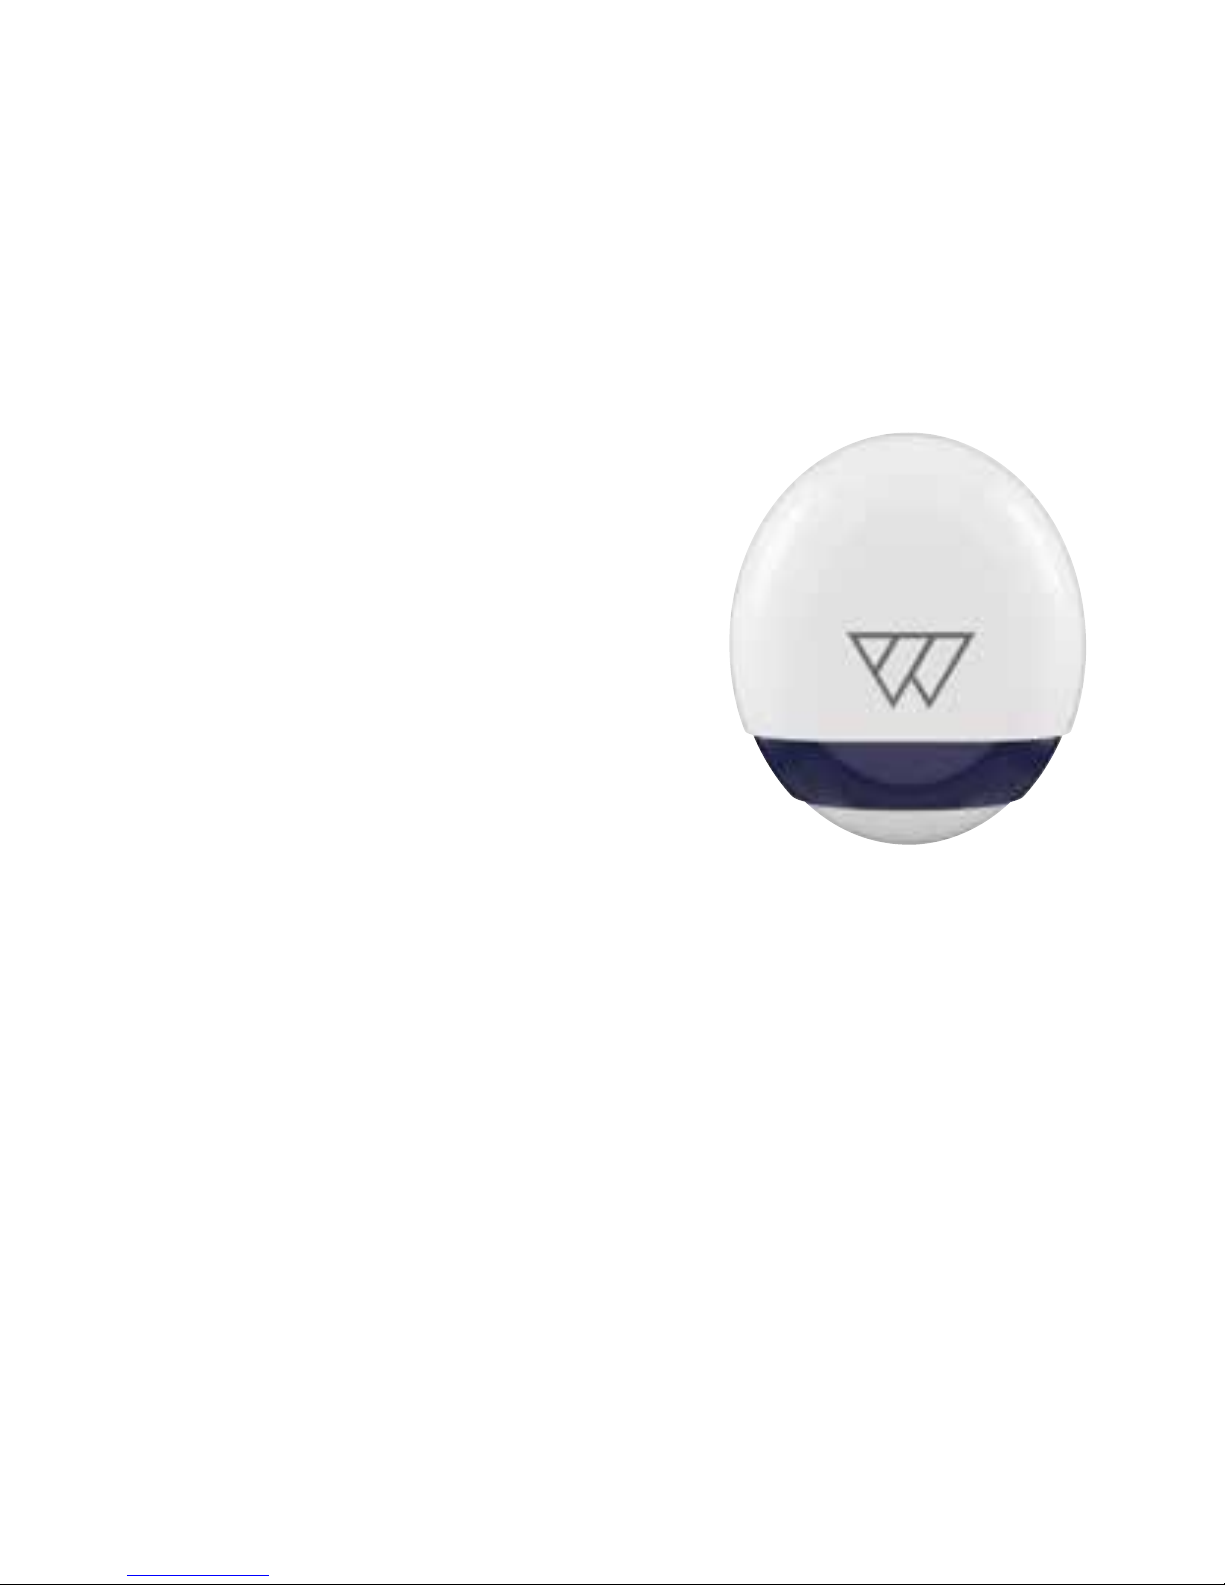
Siren
The siren replaces your existing home security alarm,
and supplements other existing devices such as smoke
alarms and carbon monoxide detectors.
Wondrwall’s voice technology reacts to the sound
of smashed window by activating the built-in siren,
flashing internal and external lights and alerting you
vi the Wondrwall app. Active only on Sleep and away
mode.
The siren works in harmony with the other Wondrwall
components and is wirelessly powered, allowing
flexible approach to where it’s positioned within your
property.
When an alarm is activated, the siren will sound and the strobe lights will flash in
sequence. The sound of the siren depends on the type of alarm:
Continuous for burglar or emergency alarm, or 2 second alarm with 1 second interval
for fire alarm.
10
Page 11
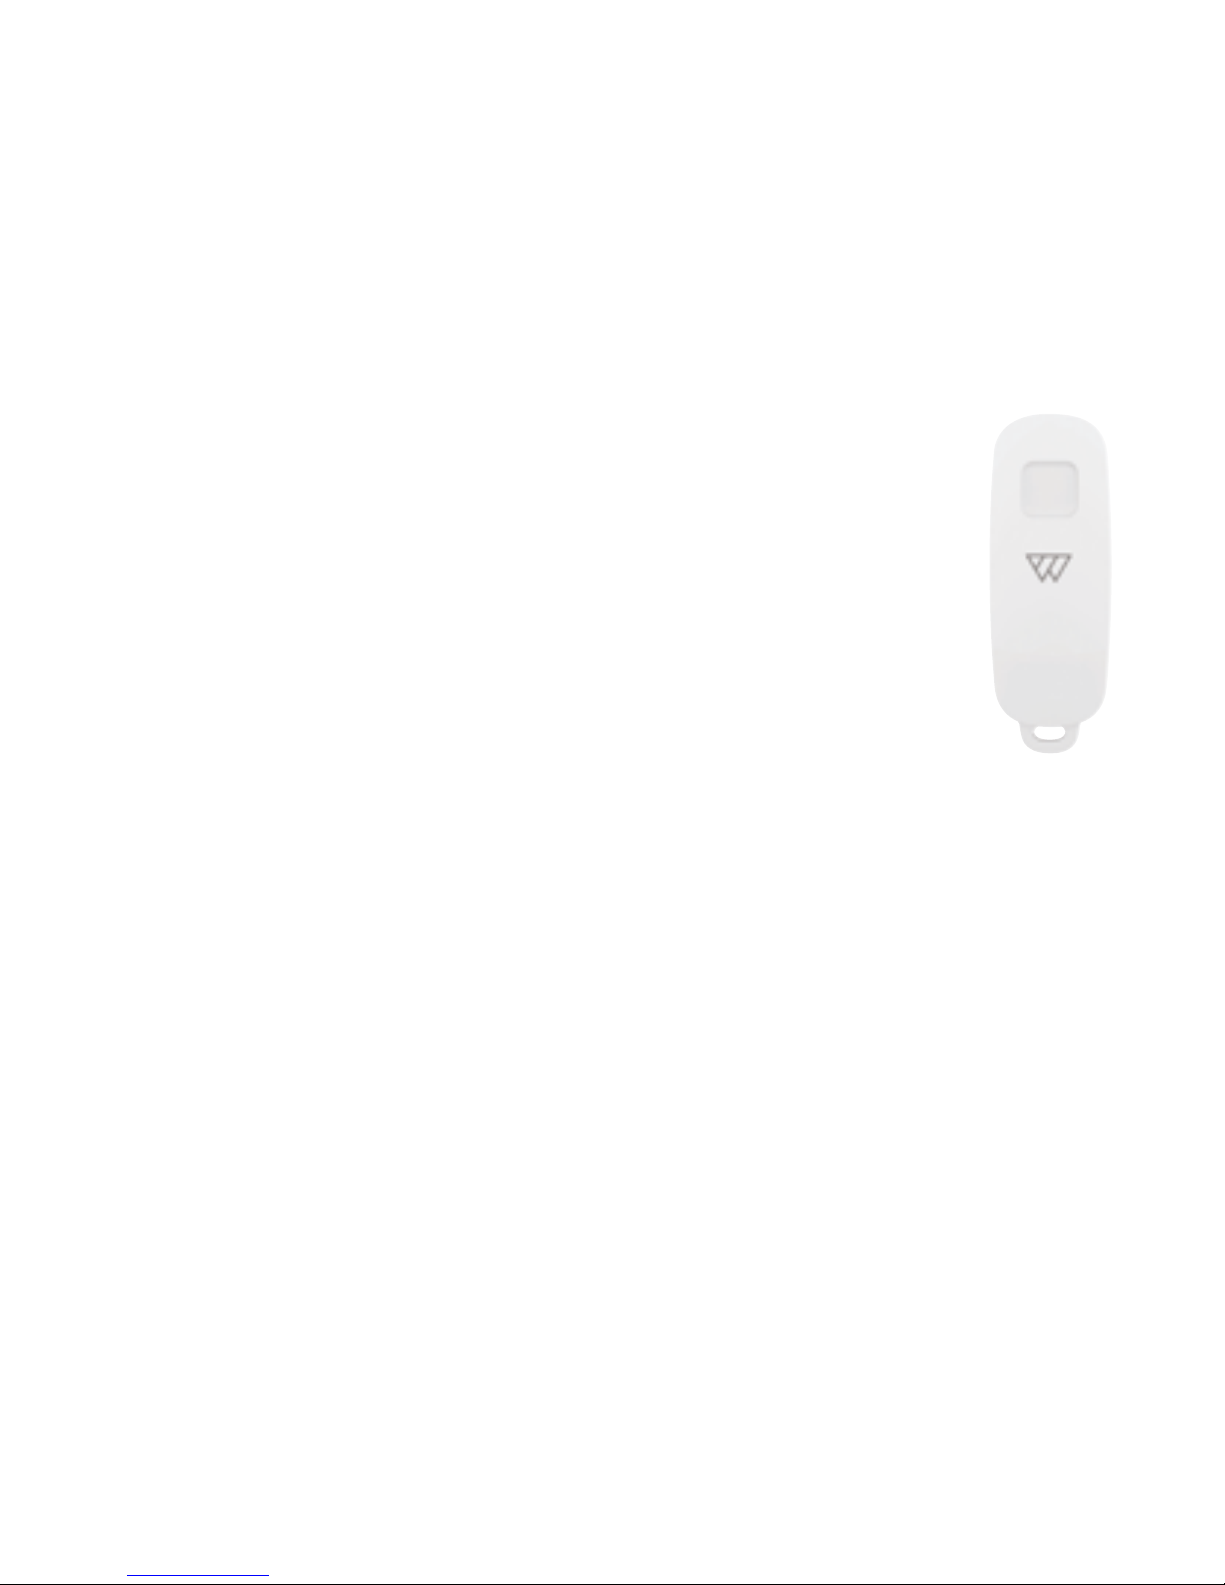
Key Fob
The key fob is your mobile connection to your home. The discreet
device performs automatic proximity-based arming and disarming
of the intruder protection system based on your proximity to the
property.
The fob features an integrated panic button: press the button to
simultaneously send an alert to all pre-programmed contacts.
In addition, the fob has useful check-in feature, notifying you as
family members return home vi the Wondrwall app.
11
Page 12
12
Page 13

Installing
We’ve designed Wondrwall to be as compatible with as many homes as possible. The
only pre-requisites are:
• Your existing light switches must have neutral line in place. If you are unsure,
consult qualified electrician.
• You must have wireless router with internet access available in the home.
• You must have traditional ‘wired’ thermostat in place, which can be replaced with
our thermostat (this usually only takes around 15 minutes).
The system will work if installed with just the base kit, but with limited functionality.
Our recommendation is replacing the standard light switches throughout the home to
experience the full power of Wondrwall.
The following pages explain how to install each component and pair it with your home
wireless network.
13
Page 14
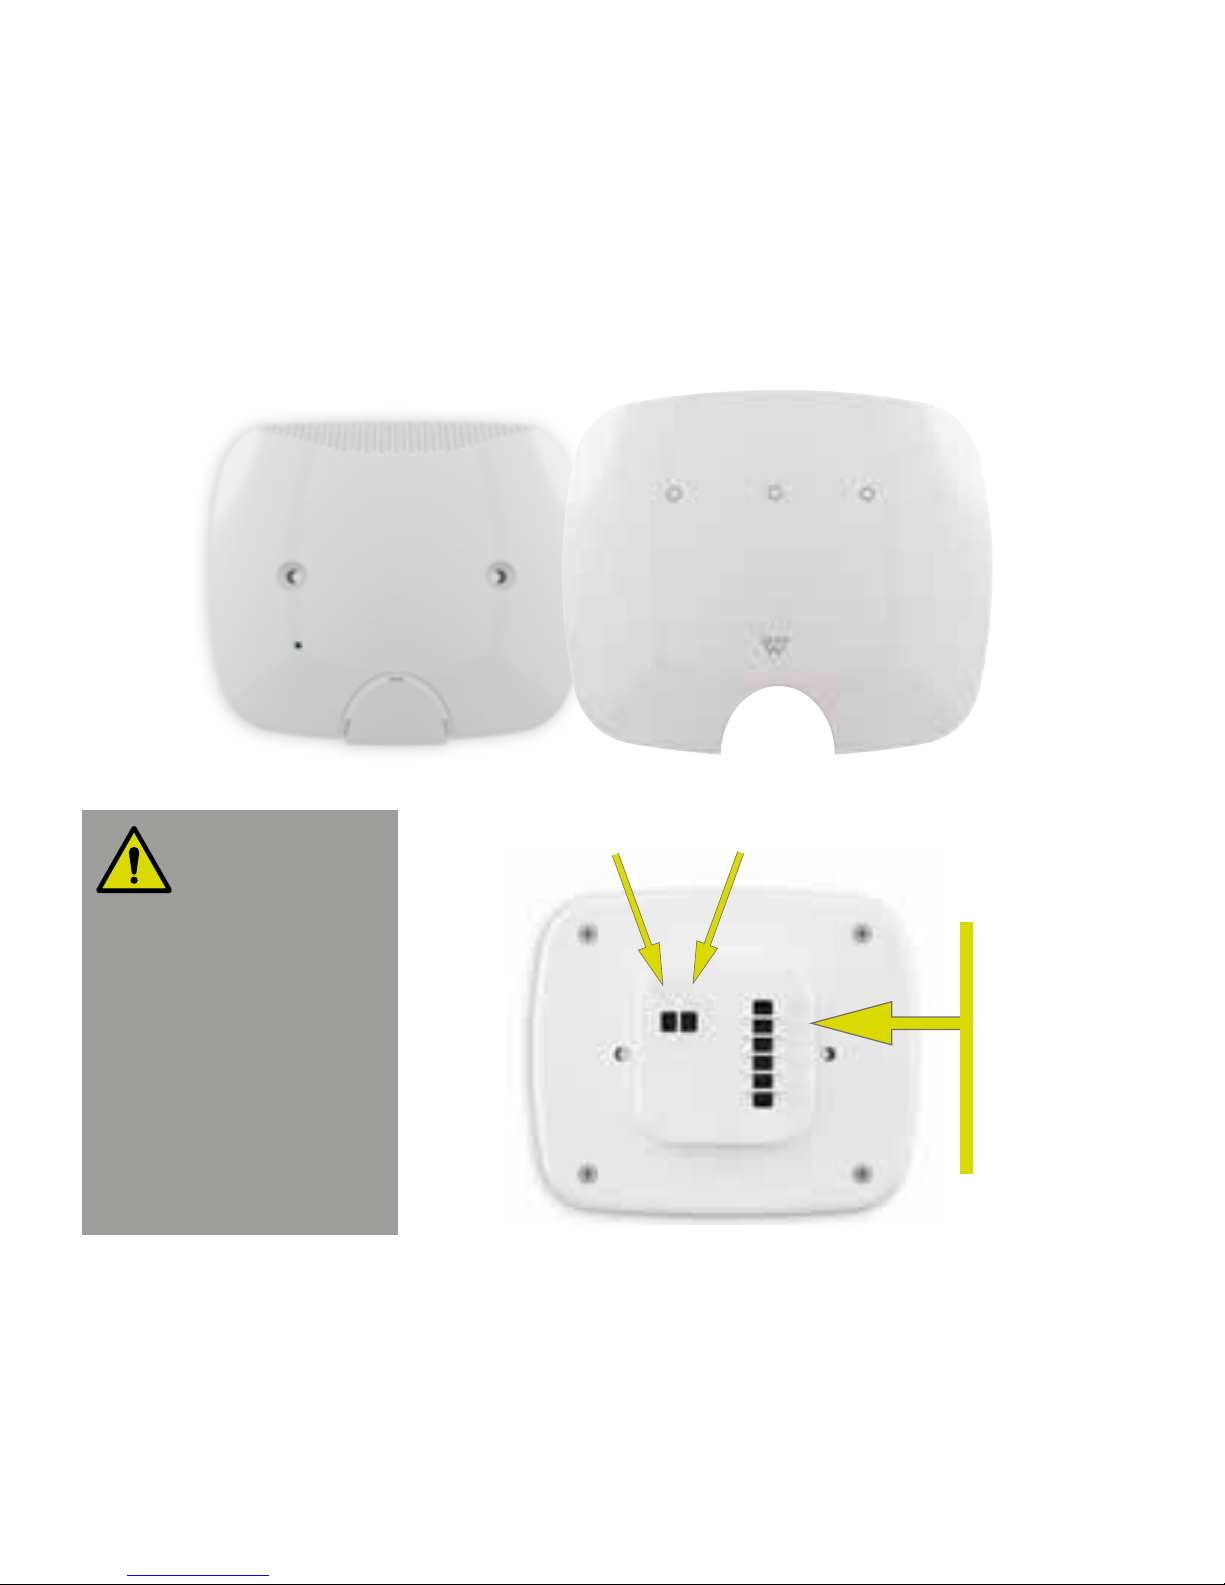
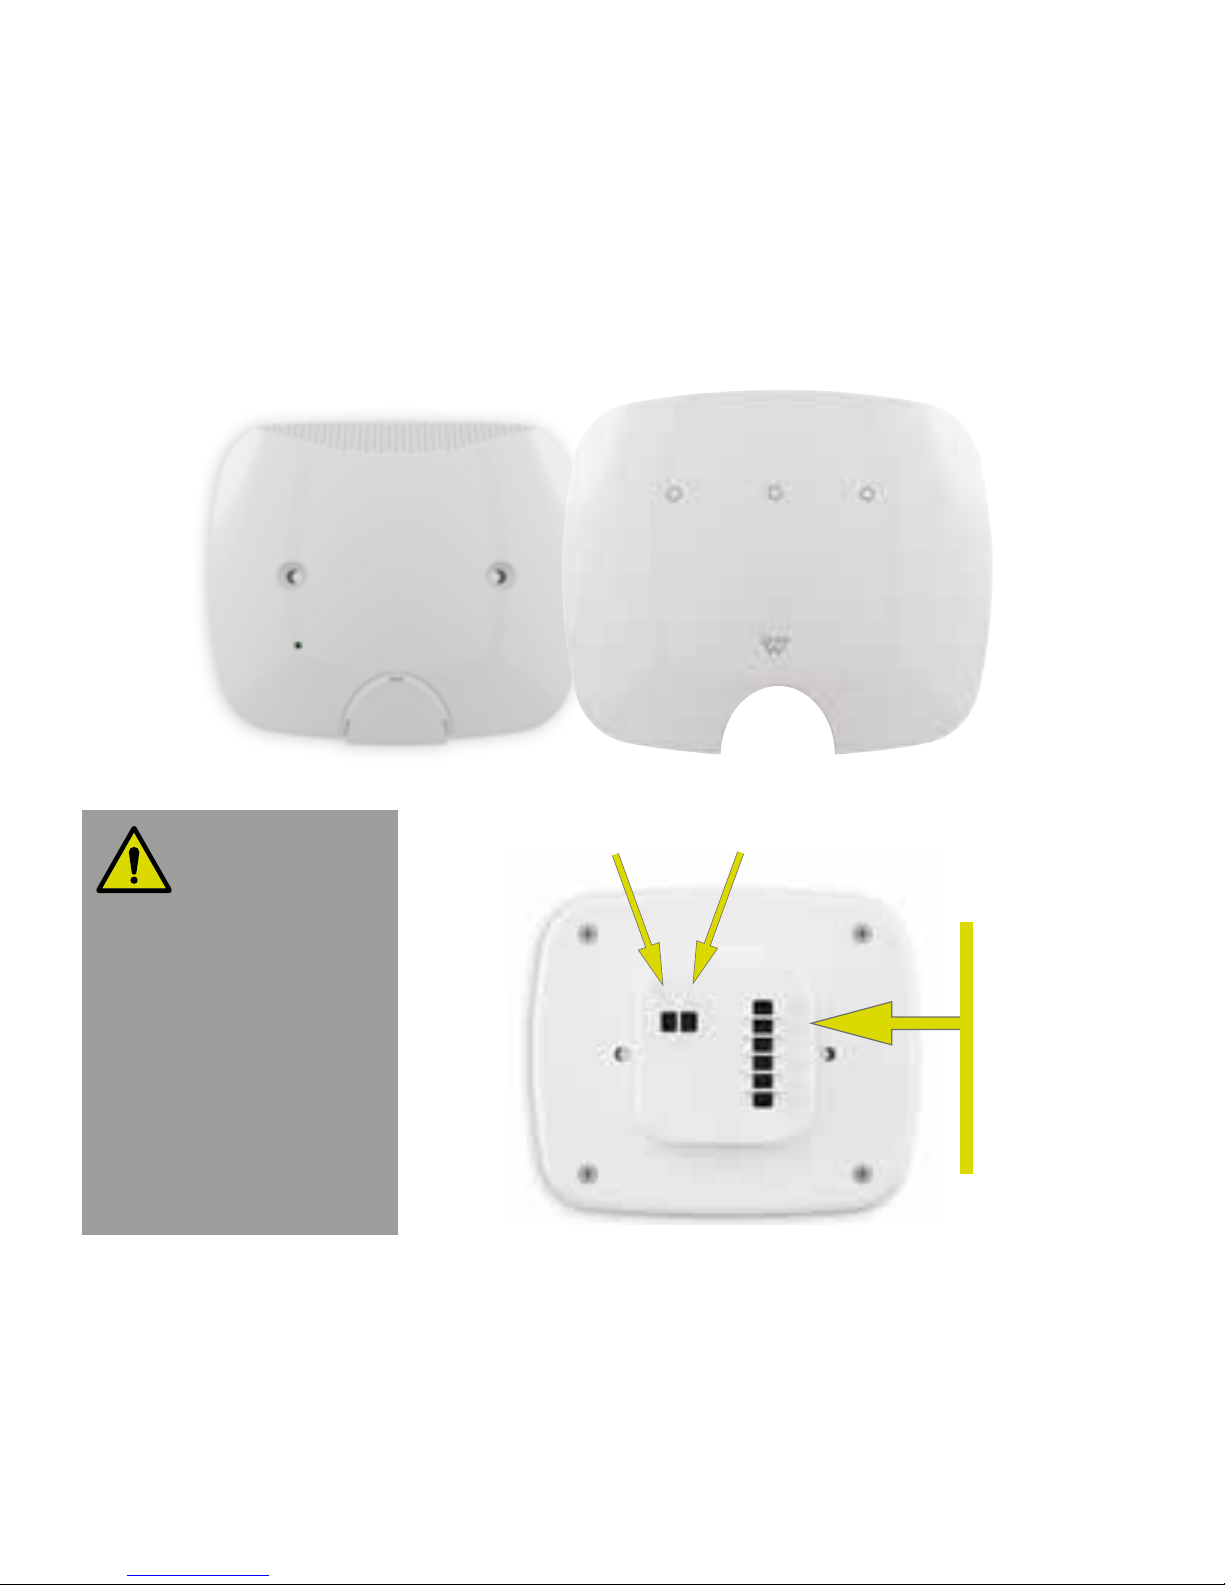
Light Switch
When you install the
light switch, you will
be dealing with mains
voltages (230 Vac).
If you are unsure about
how to do this, use
NICEIC approved
electrician.
N Inputs L
Outputs
L2
N2
L1
N1
L3
N3
14
Page 15

Light Switch
The light switch replaces standard single gang light switch. For the primary light
switch, choose one that is close to your wireless internet router or near the middle of
your home.
1. Switch o the mains power supply
that supplies the light switch.
Remove the old light switch.
2. Pull the side of the Wondrwall light
switch cover towards you to unclip it
from the base (A).
3. Connect the Live and Neutral input
cables to the L and N connectors on
the back of the light switch base (B).
The connection screws are above
the cable entry points.
4. Connect the Live and Neutral output
cables to the lights:
• If you only use 1 lighting circuit, use
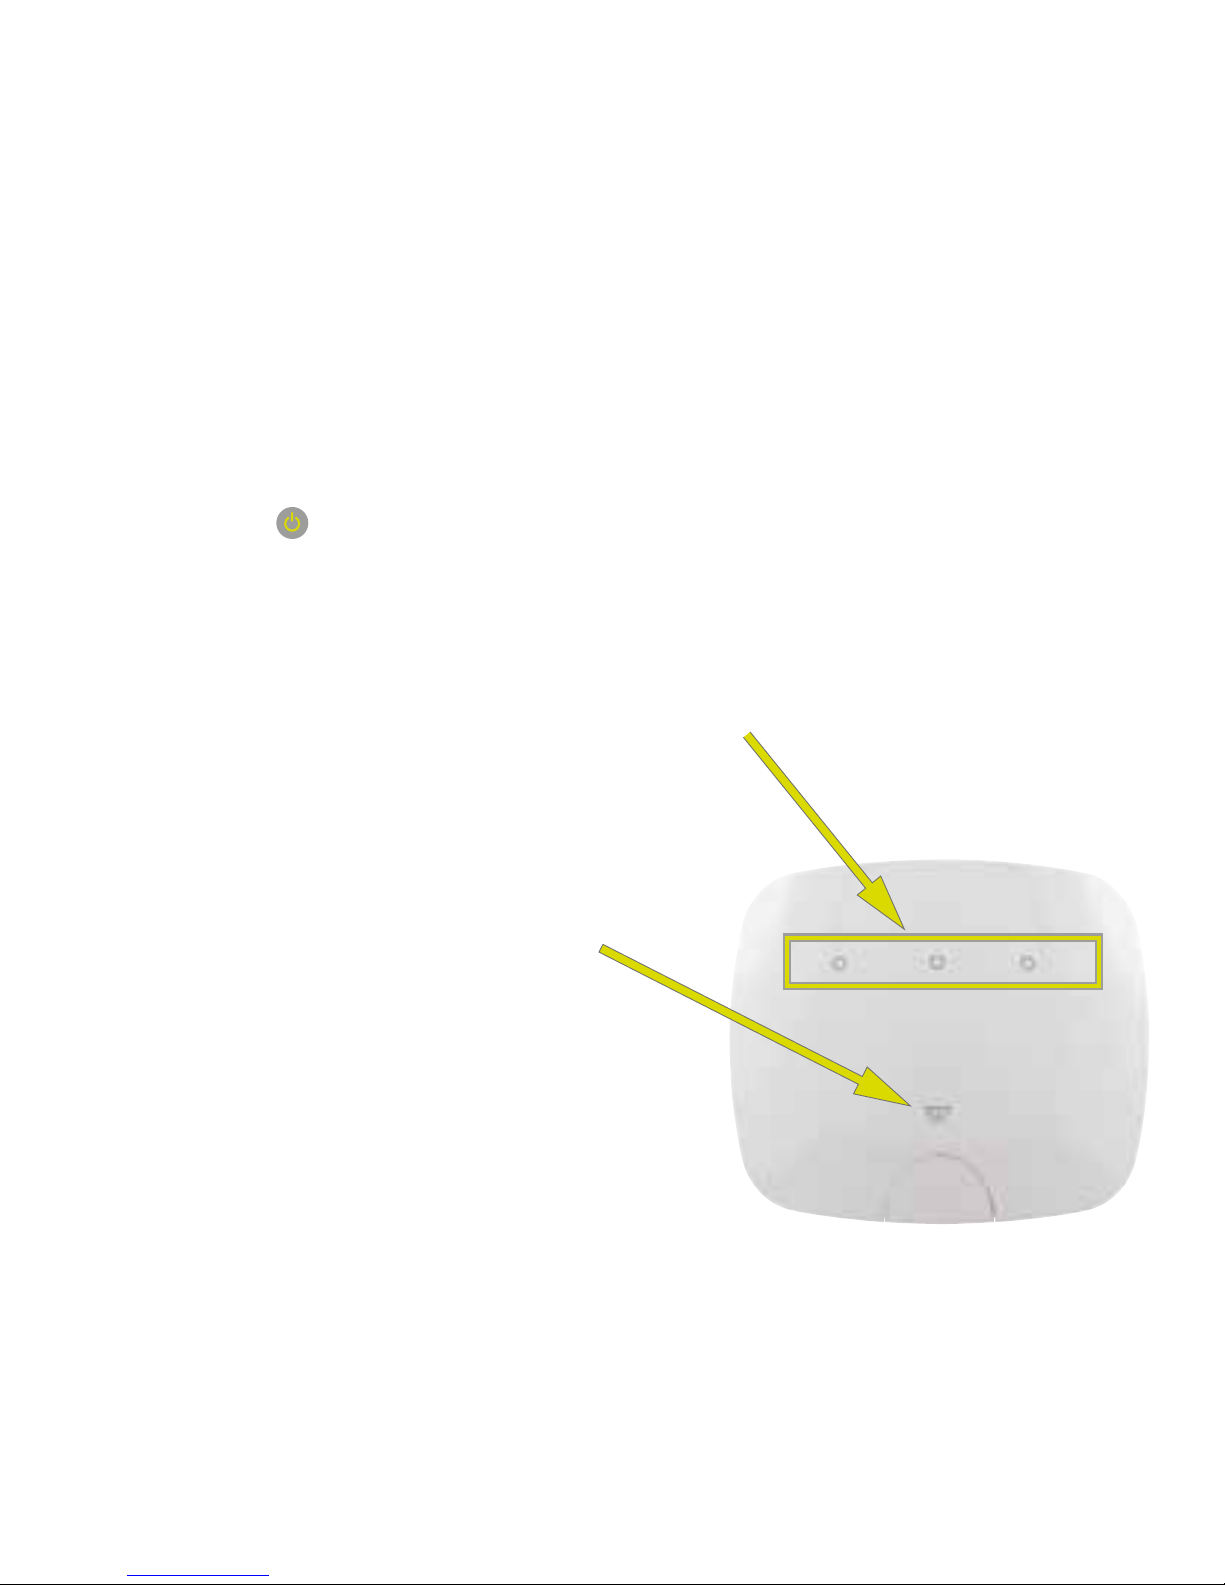
connections L1/N1. The middle LED
will light.
• For 2 circuits, use L2/N2 and L3/N3.
The outer LEDs will light.
• For 3 circuits use all output
connections. All LEDs will light.
5. Fix the light switch base to the wall. It
uses the same holes as your old light
switch. Screws are supplied.
6. Clip the light switch cover back onto
the base.
7. You can now pair the light switch
with other Wondrwall components
(see page 27).
8. Repeat this for each light switch that
you want to use.
15
Page 16
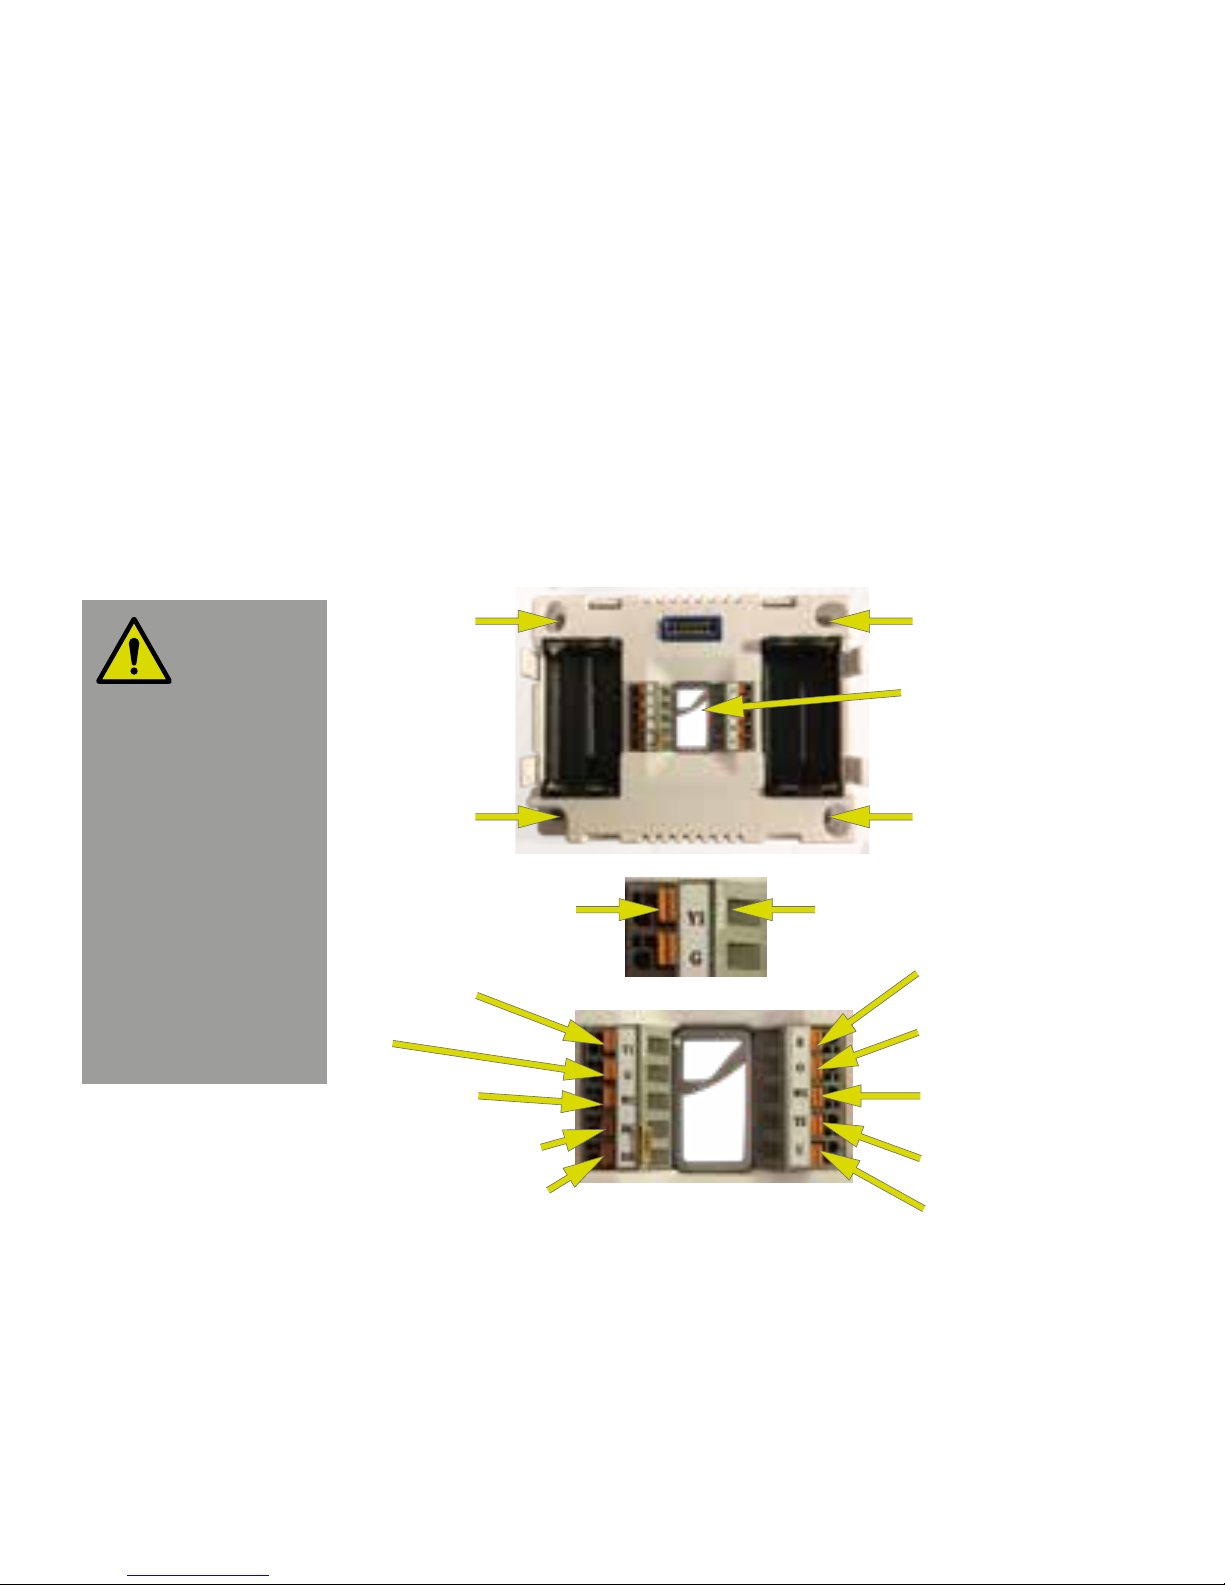
If you are unsure
about how
to do this, or
prefer not to
perform this
task, consult
NICEIC approved
electrician or
licensed HVAC
professional.
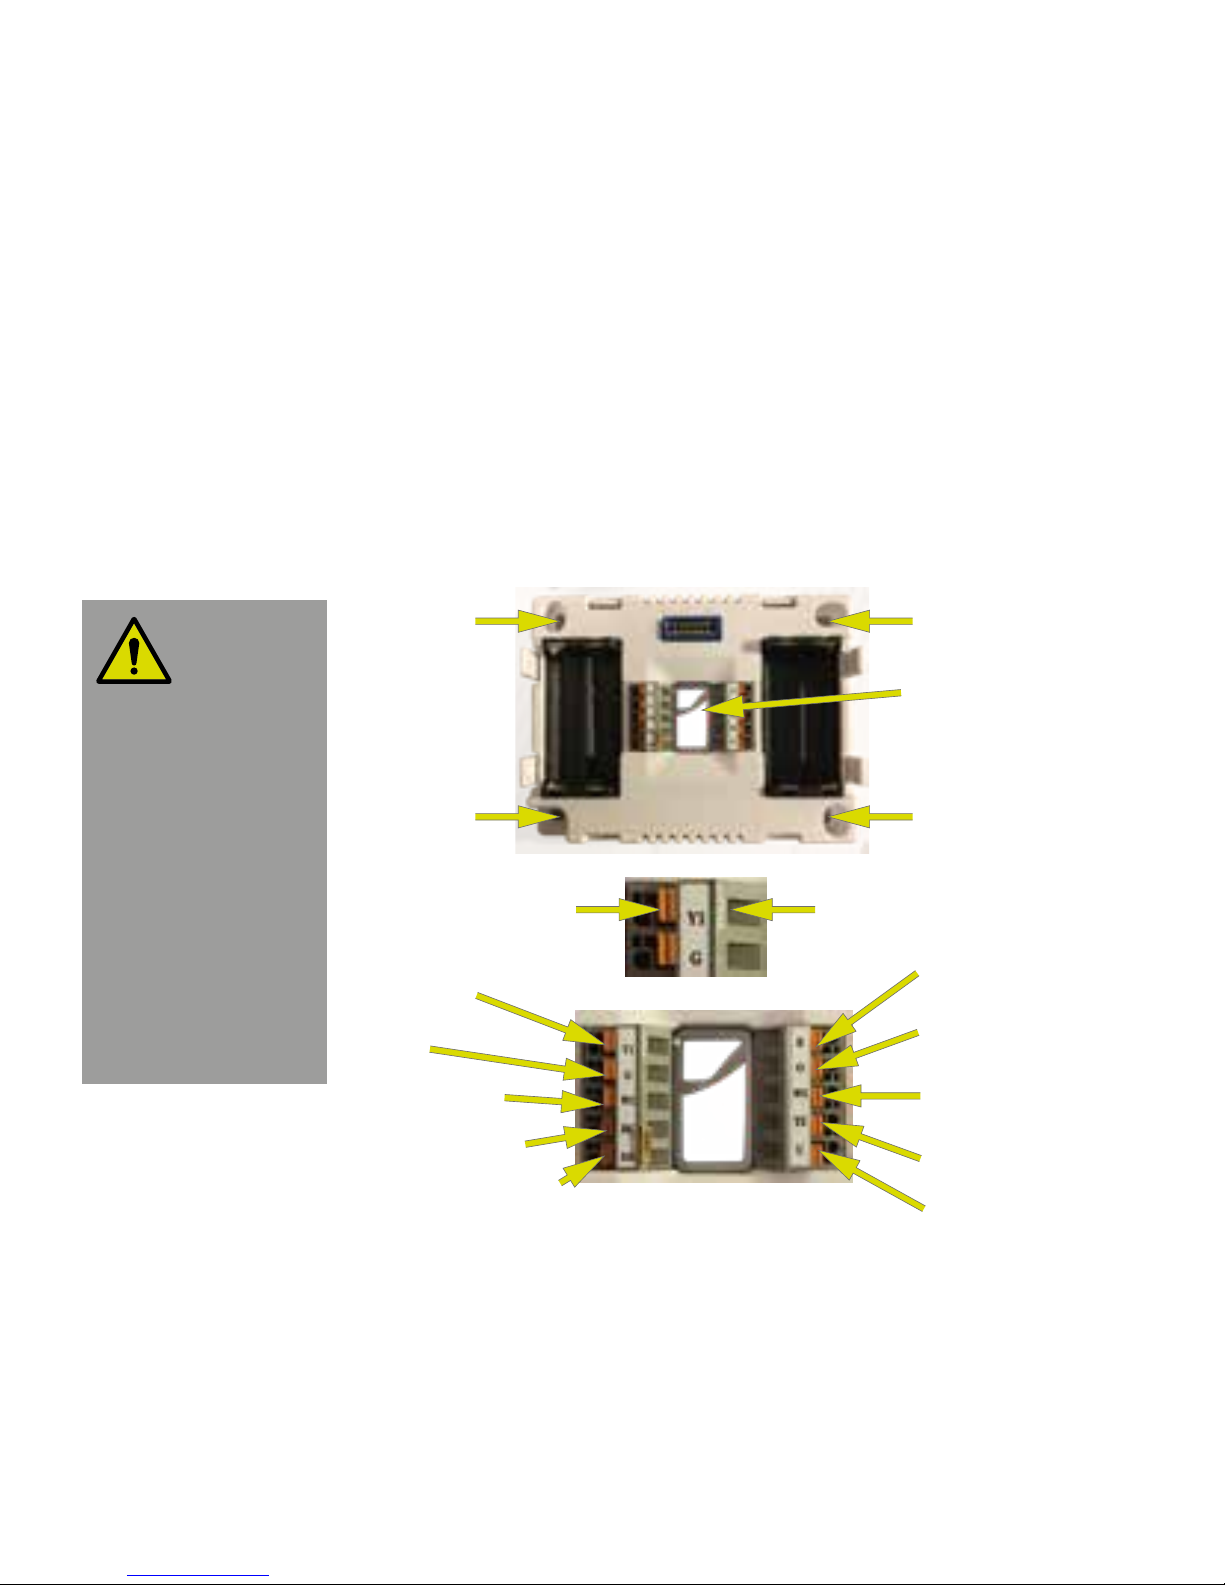
Thermostat
The Wondrwall thermostat replaces your existing thermostat, or for new installations,
locate it about 1.5m (5 feet) o the floor. Site it away from any heating or cooling
sources such as direct sunlight, hot water pipes or fireplaces, lamps, outside doors or
windows, damp areas or areas that lack air circulation.
A
A
A
A
B
DC
Cool control/
compressor
Fan
Heat control
Power from cooling
Power from heating
Heat pump c/o
(+ in heat)
Heat pump c/o
(+ in cool)
2nd stage heat/
aux heat
2nd stage cool
control
Common
16
Page 17

Thermostat
1. Switch o the electricity supply to
your HVAC unit or boiler and remove
the cover from the old thermostat.
2. Make note of the terminal location
for each wire connected to the
thermostat wiring terminals.
3. Remove each wire from the old
thermostat and secure them so they
do not fall back into the wall. Attach
label to each wire as you identify
each wire to ensure that you match
the correct wire and terminal.
4. Remove the old thermostat from
the wall. Leave at least 75mm (3”)
of wire for each connection to the
thermostat wiring terminal. Remove
3 mm (1/8”) of insulation from each
wire and twist the wires to give
sturdy end.
5. Remove the cover from the
Wondrwall thermostat. Hold onto
the ribbon loop on the back of
the thermostat and pull the cover
forwards.
6. Hold the thermostat base against the
wall where you intend to mount it and
mark the three mounting holes (A).
7. Drill the mounting holes and insert
the wall plugs (if necessary). Pull the
cables through the hole in the base
(B) then use Philips screwdriver to
screw the thermostat base to the
wall.
8. Connect the wires: Push down the
orange spring clip (C) of the correct
connector and insert the wire fully
into the correct hole (D). Release the
spring clip. Check the wire is secure.
9. Replace the thermostat cover. Push
it so it clicks and covers the base.
10. Turn on the power to your HVAC
system or boiler.
17
Page 18
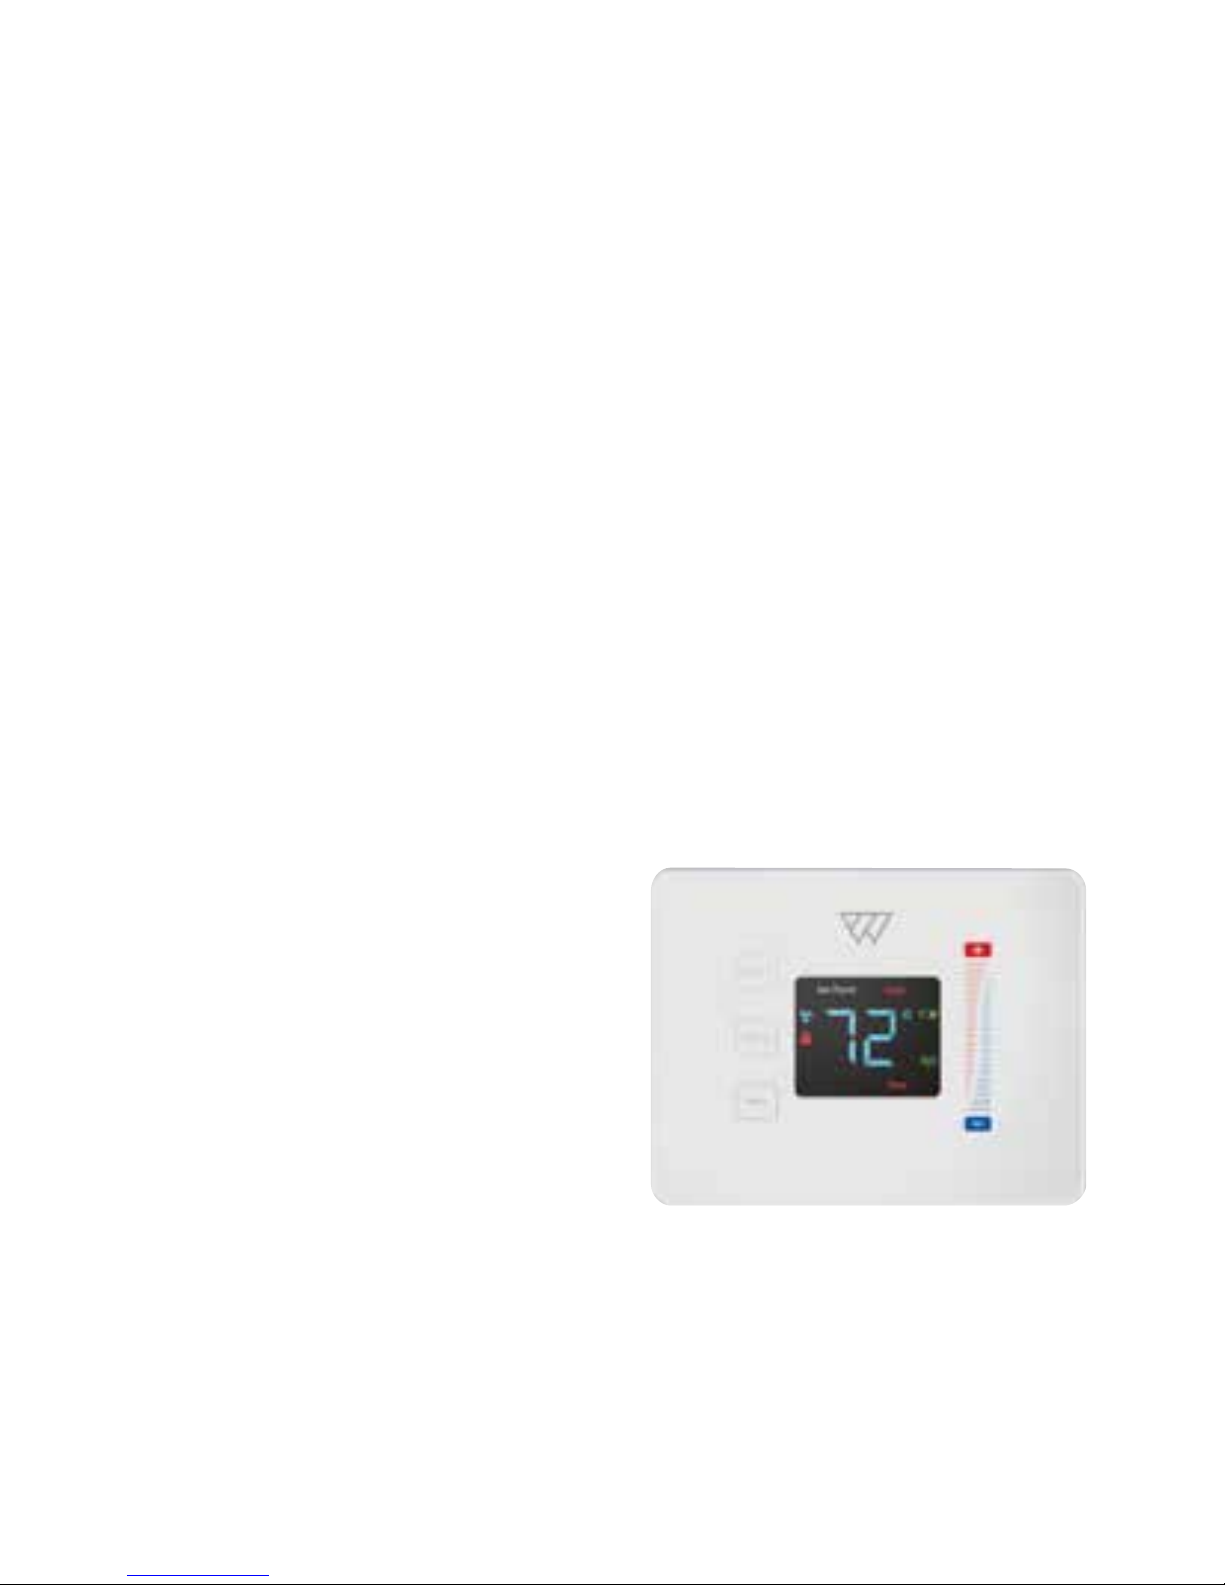
Thermostat (continued)
You can now pair the thermostat with other Wondrwall components (page 31).
Things to be aware of when installing the thermostat:
1. If you have separate power for RH
and RC, you need to remove the
factory installed jumper between RH
and RC.
2. Many systems do not provide
common ‘C’ wire. In this case, install
4 AA batteries for the unit to operate.
3. The thermostat automatically
detects your system type by the
connections you make. The display
will show ‘E0’ until the unit has been
properly connected and reset (by
pulling o and refitting the front
cover).
4. The thermostat is configured to work
with single-stage cool, single-stage
gas, oil or fuel heat (non-heat pump,
single-speed fans. If your system is
dierent, refer to the programming
section on page 57 to configure the
thermostat to your system.
18
Page 19
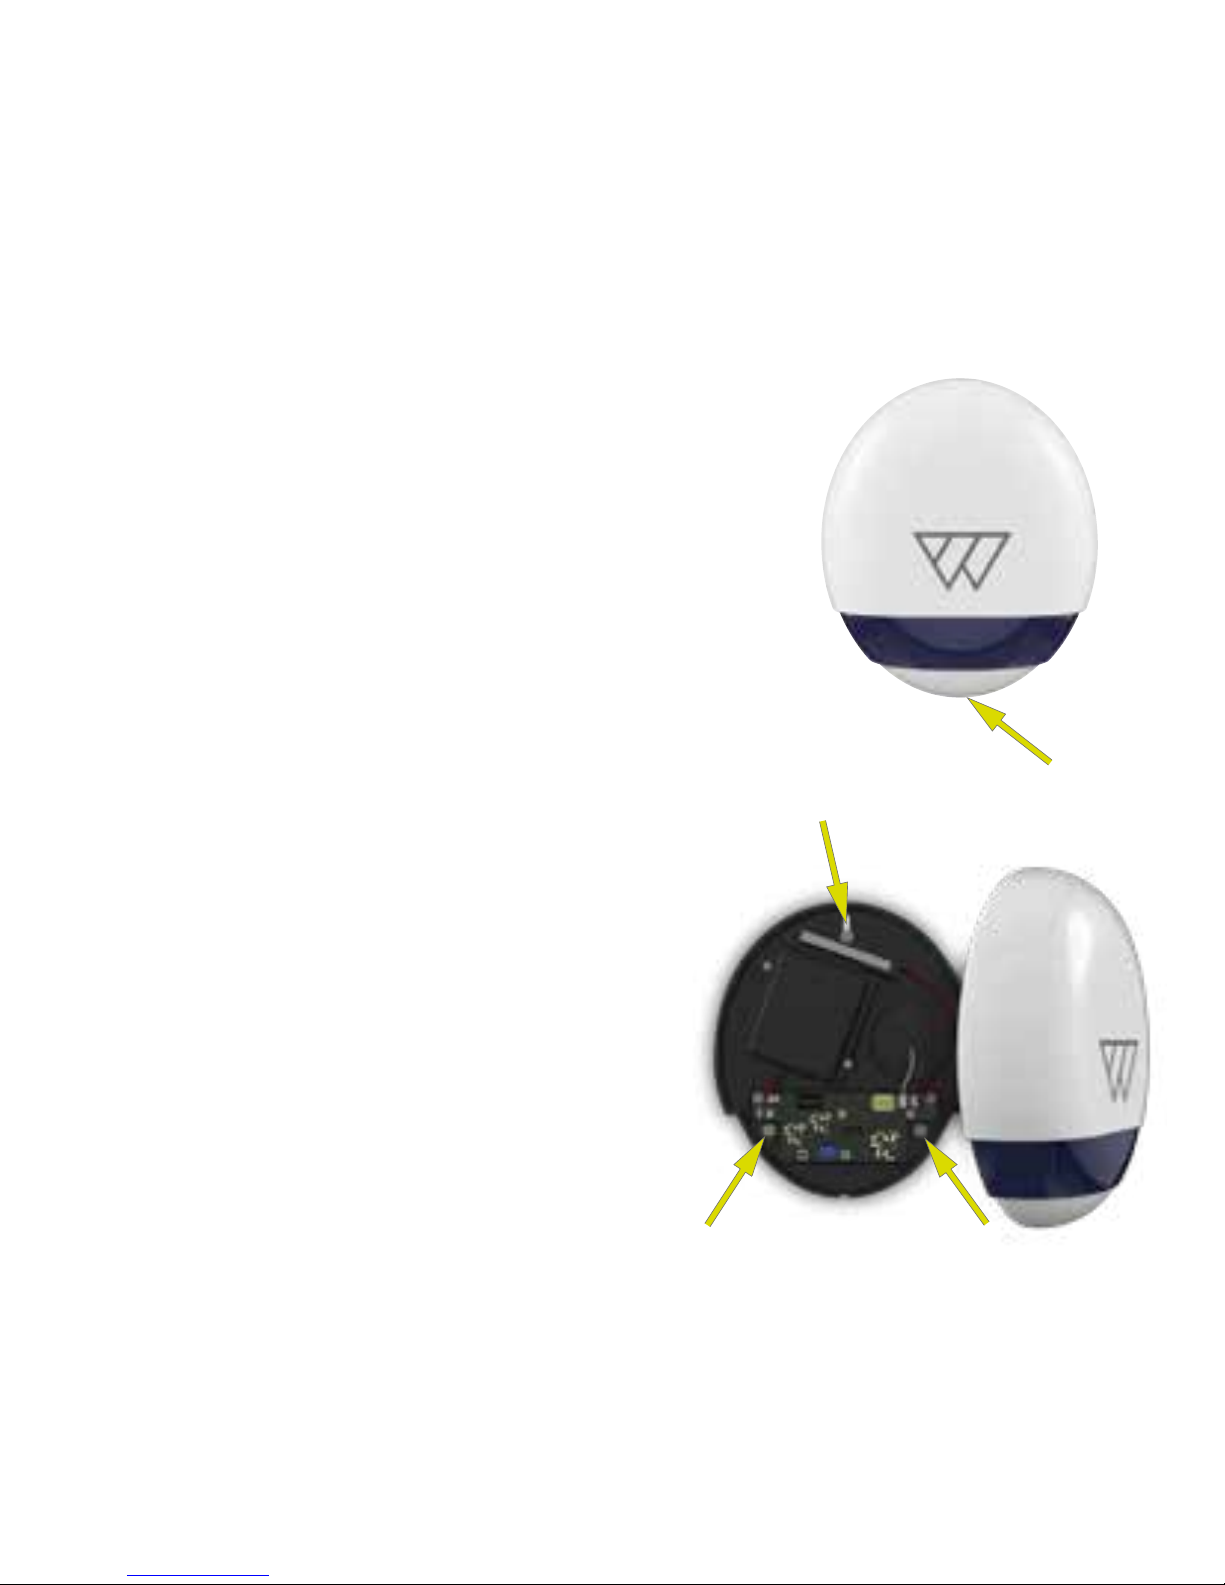
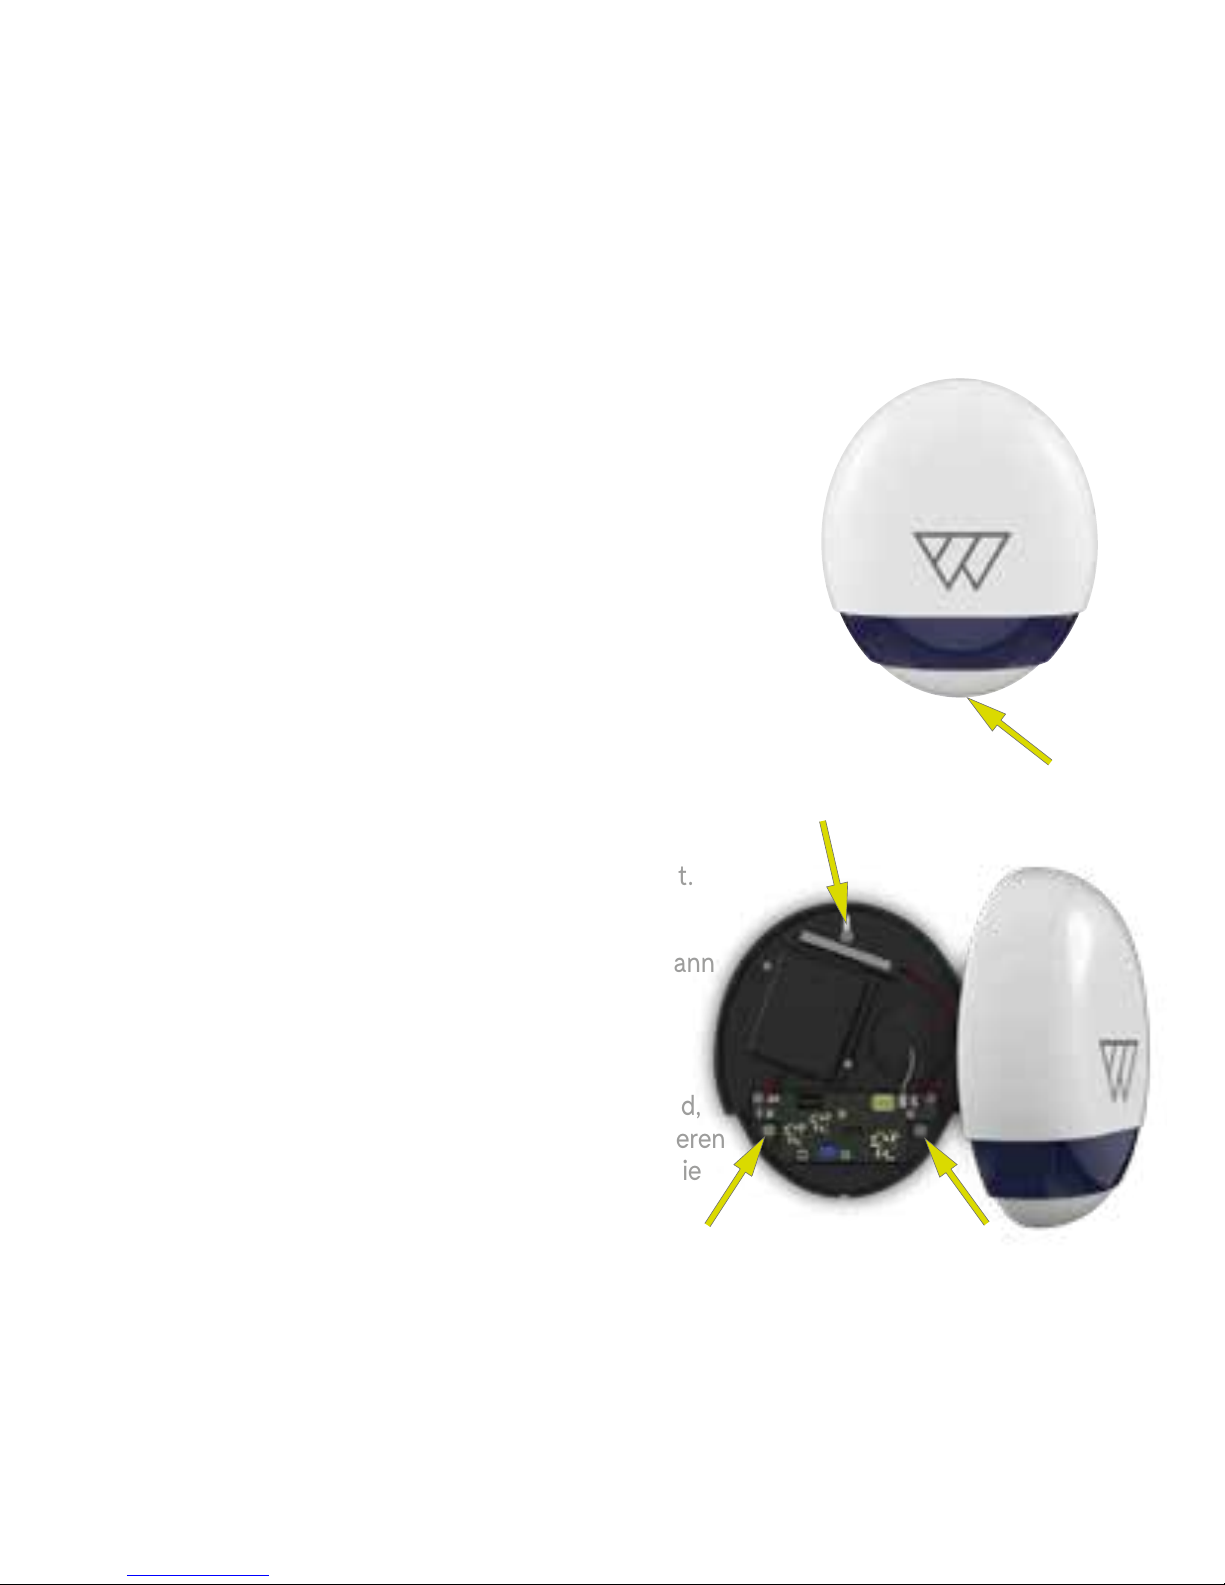
Siren
The siren has waterproof case and is designed to
be mounted on an exterior wall of your property.
Mount the siren as high as possible so its siren and
strobe light will attract attention when an alarm is
activated.
Three wall plugs and screws are supplied to mount
it to the wall.
Remove the cover:
1. Use Philips screwdriver to loosen the
bottom screw (A) until the screw head is
clear of the cover.
2. Carefully pull the bottom of the cover until
it clears the screw, then remove the cover.
Mount the siren:
3. Hold the siren base against the wall where
you intend to mount it and mark the three
mounting holes (B). Drill the holes and
insert the wall plugs.
A
B
19
Page 20
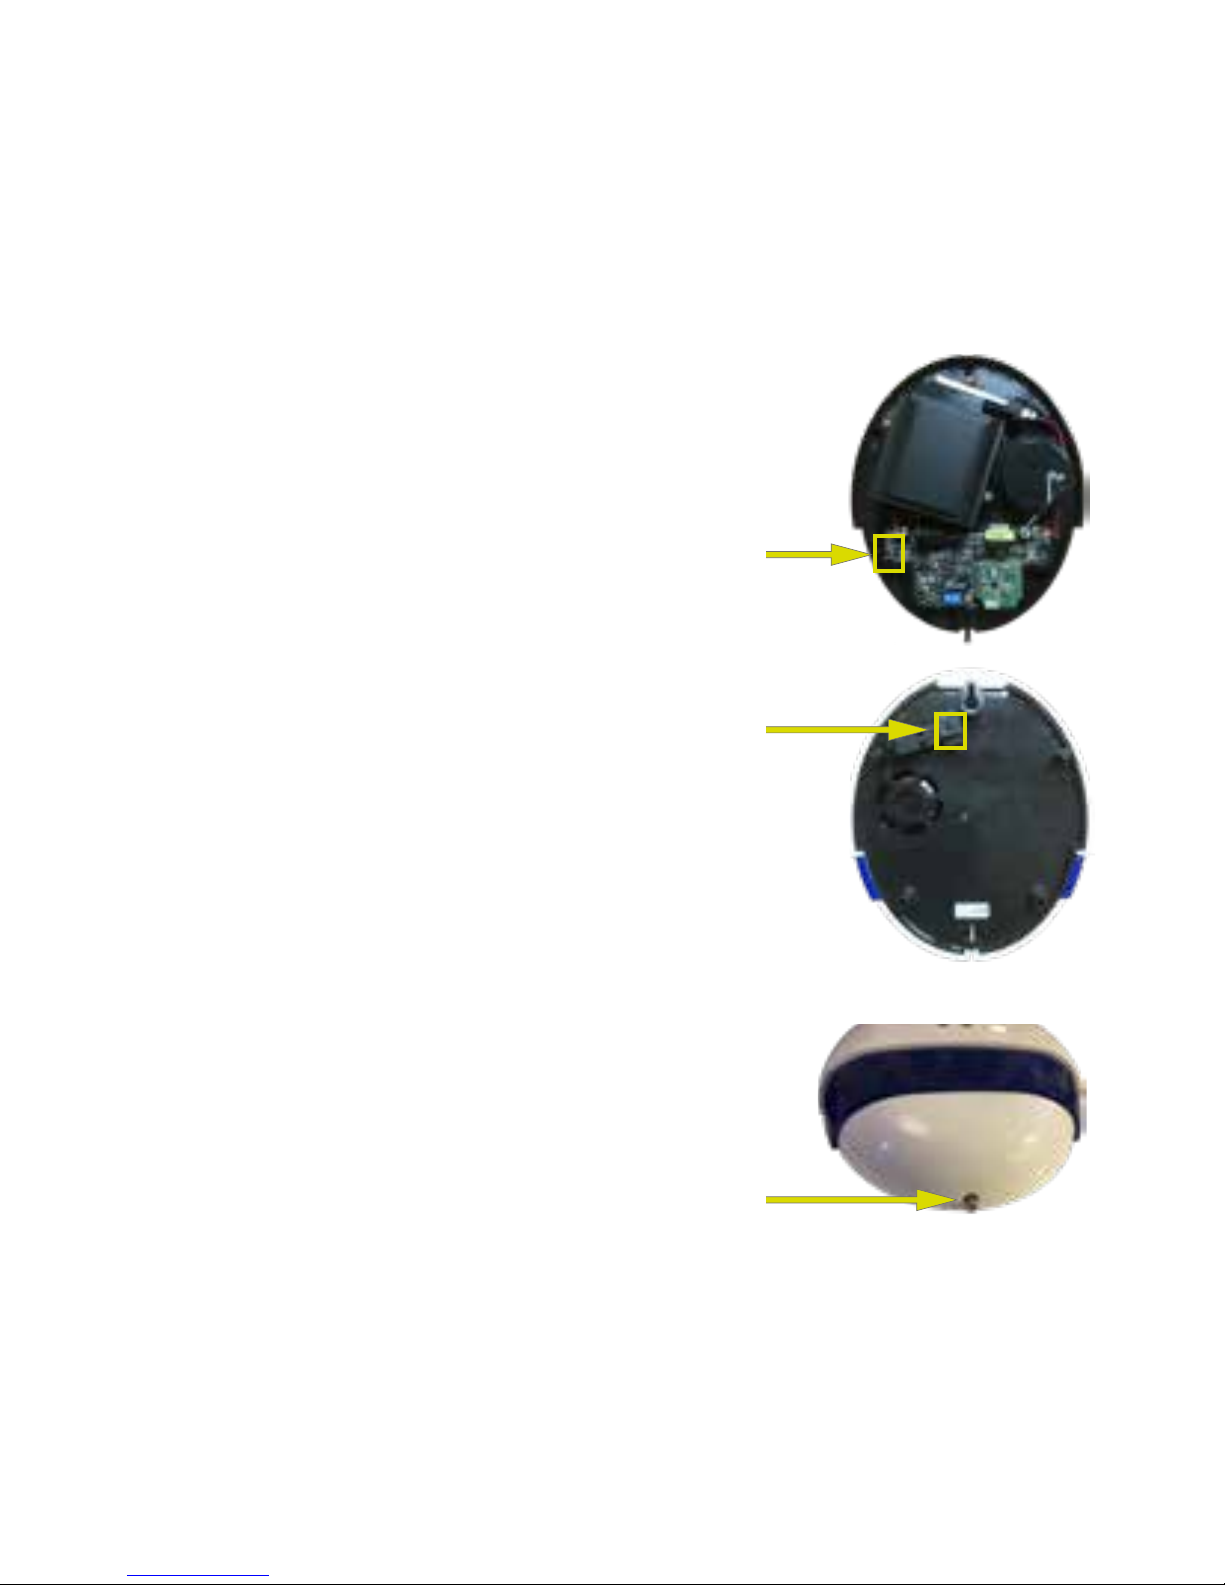
Siren (continued)
4. Before you mount the siren, we recommend that
you pair the siren with the Wondrwall system
(page 33).
5. Switch the battery switch to ON (C).
6. Test that the siren operates correctly. To do this,
arm the alarm from the Wondrwall app, then move
in front of motion sensor.
7. Use Philips screwdriver to screw the siren base
to the wall. Make sure the tamper switch (D) is
fully depressed against the wall. (If there is gap,
pack it with suitable spacing material).
Replace the cover:
8. Hook the lip at the top of the cover over the top
of the base.
9. Carefully push the bottom of the cover towards
the base so that the bottom screw slides into the
slot on the cover (E).
10. Tighten the bottom screw using Philips
screwdriver.
E
C
D
20
Page 21

Connecting
The Wondrwall system uses energy ecient ZigBee technology that ensures reliable
operation without impacting your already crowded wi-fi setup.
Every light switch has in-built wi-fi, allowing them to operate independently but which
is also the means by which the main device connects to the cloud and the machine
learning and predictive modelling platform. Even if the wi-fi goes down, the Wondrwall
system continues to operate since each switch has its own operating.
Bluetooth is included in every switch to allow them to pair to any other Bluetooth
device opening huge range of possibilities.
To set up the Wondrwall network, you must first pair the primary light switch to your
wireless router and network, using the Wondrwall App which is available on the App
Store and on Google Play.
21
Page 22
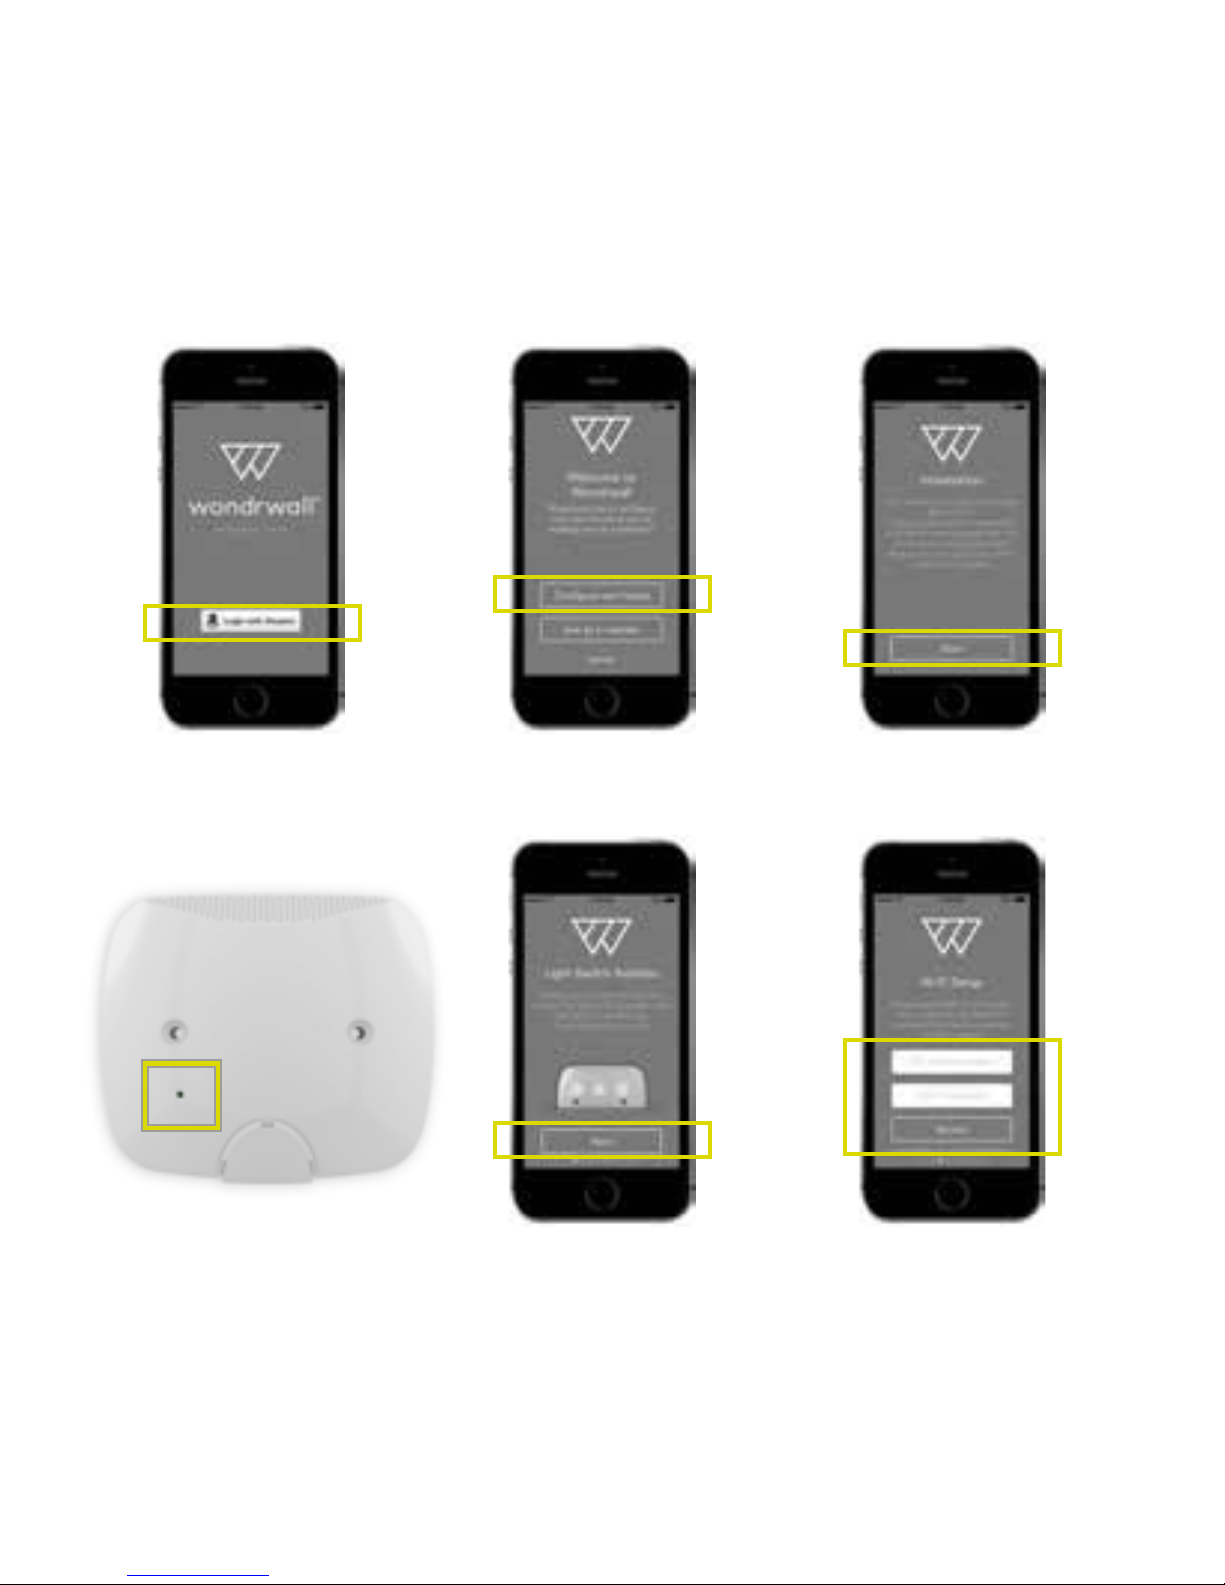
A
D
B
E
C
F
22
Page 23

Pair the primary light switch
The primary light switch will be the main hub of the Wondrwall network. Select the
light switch in the middle of your home, nearest to your wireless router.
1. Open the Wondrwall app and press Login with Amazon (A). Follow the on-screen
instructions to login to your Amazon account. On the Wondrwall welcome screen,
press Configure own house (B).
2. Press Start on the Initialisation screen (C) to open the Install wizard which gives
step-by-step instructions.
3. Remove the front cover of the light switch to locate the functional button (D). Press
Next on the app.
4. Use pin to press and hold the button for about 20 seconds until all three LEDs
flash. Release the functional button and press Next on the app (E).
5. Enter your network SSID and password in the Wi-Fi Setup screen (F) to join your
home wireless network. Press Access.
23
Page 24
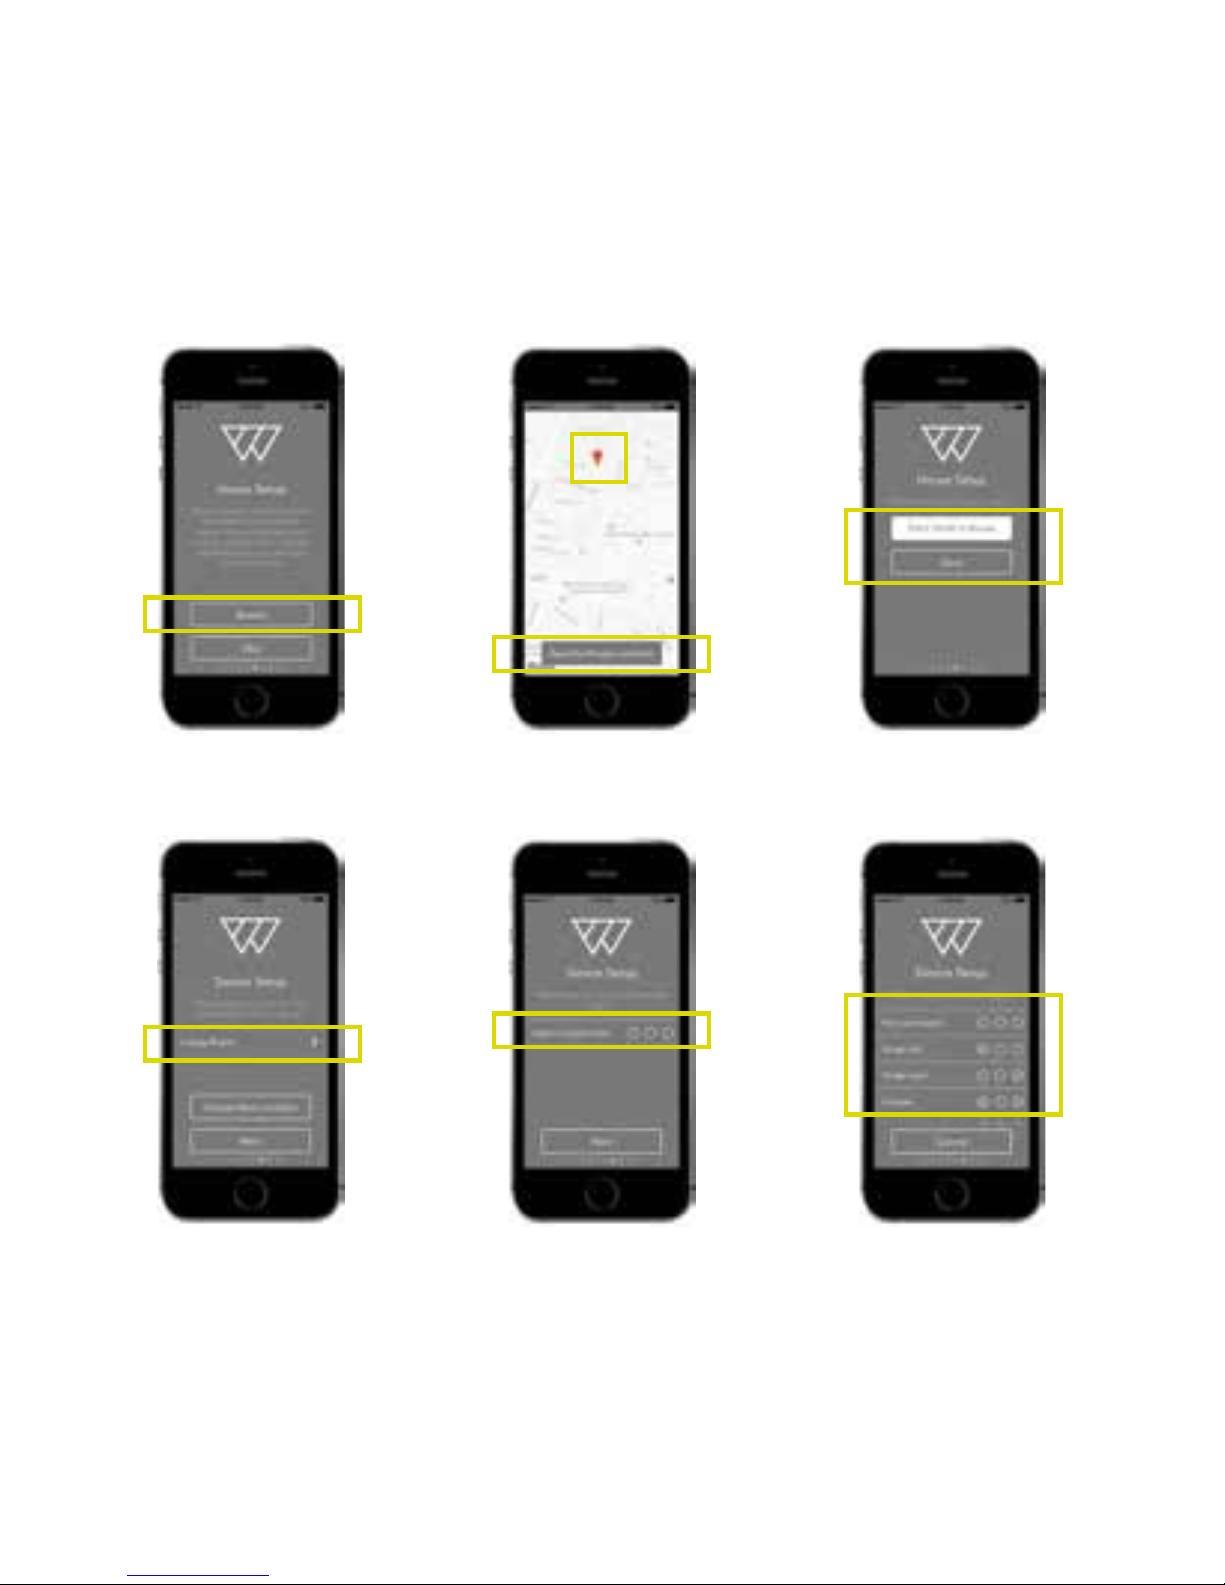
G
J
H
K
I
L
24
Page 25

Pair the primary light switch (continued)
6. Press Specify on the House Setup screen to specify your home location (G). This
feature allows Wondrwall to adjust the environment and energy consumption
settings depending on how far you are from home. (Press Skip to skip this step).
7. A map shows your current location (H). Press Specify House Location.
8. Name your house in the next screen and press Save (I).
9. Now, press the displayed location name (J) to show list of existing locations.
Press the one you require to select it. Alternatively, press Create new location to
specify new location. Press Next.
10. Type in name for the light switch and press Save.
11. Press Select socket state (K) and choose the option from the list (L) that best
describes how the light switch is wired. The selected socket state will display on
the screen. Press Next.
12. Finally press Finish on the Success screen to end the installation, or press Add
another device to continue pairing the rest of your Wondrwall devices.
25
Page 26
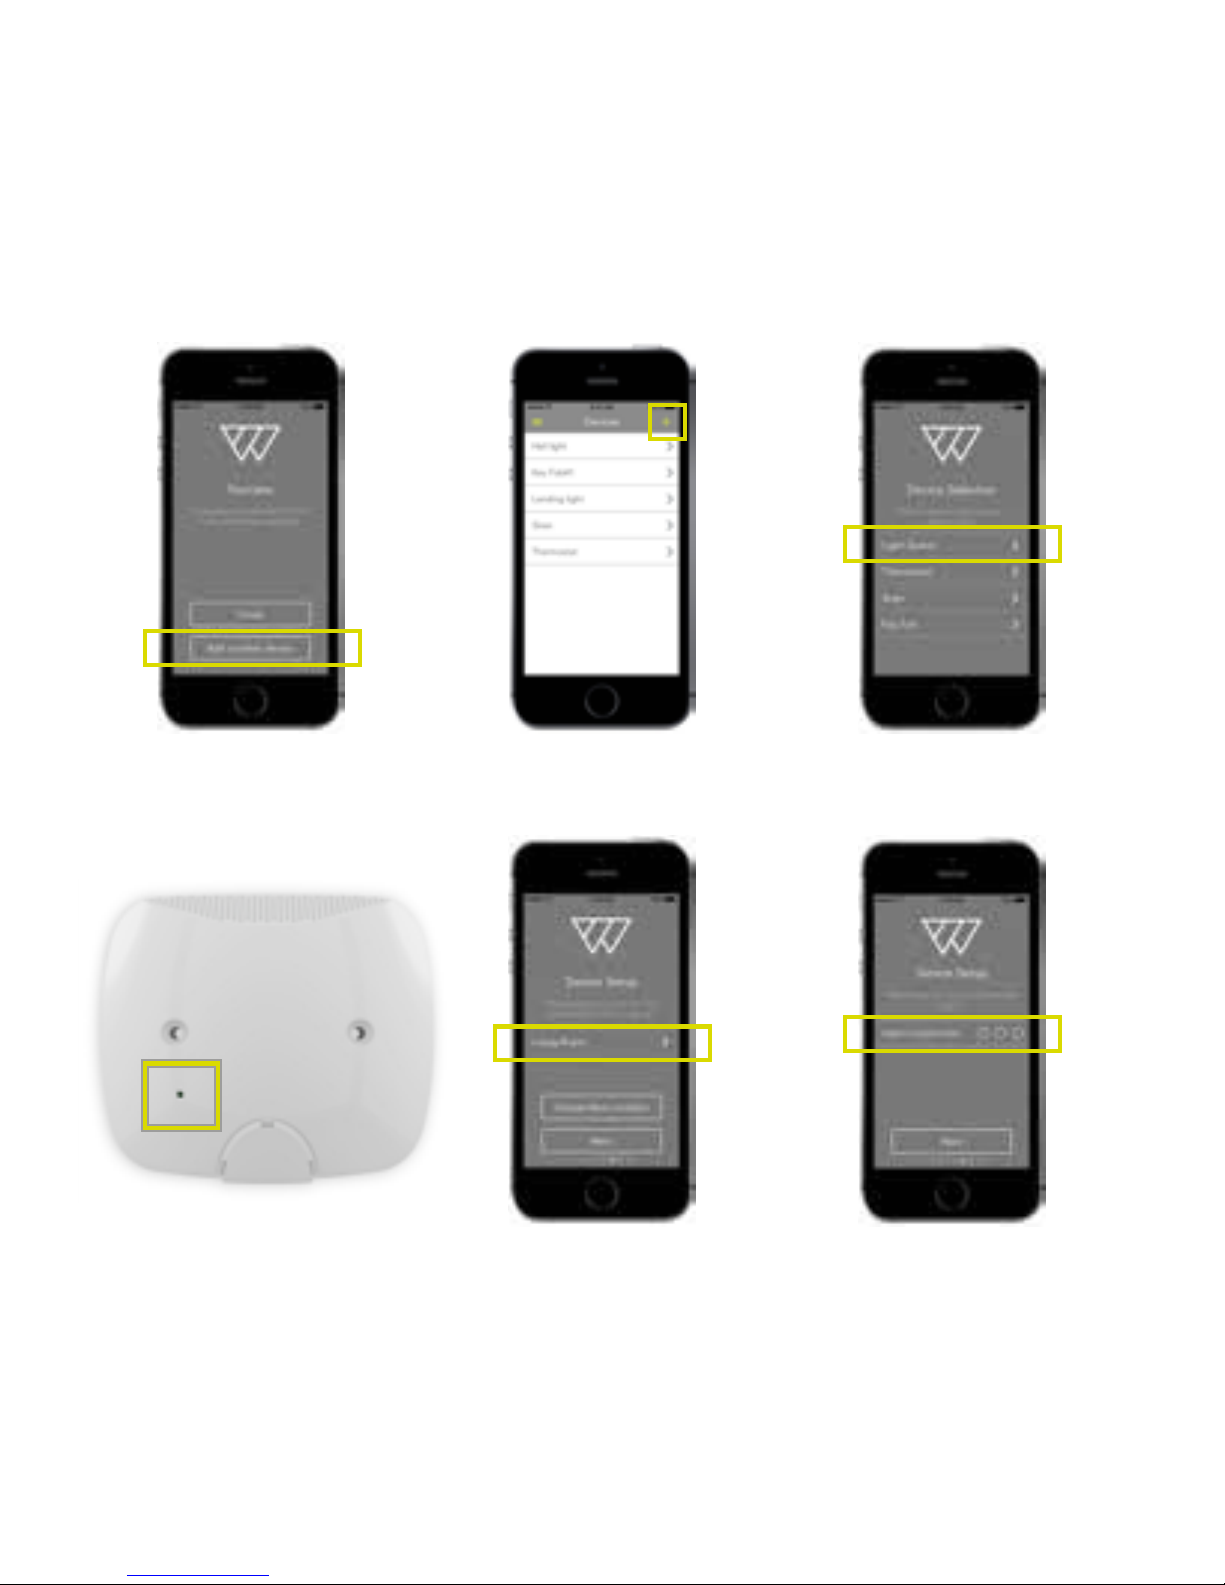
A
D
B
E
C
F
26
Page 27

Pair more light switches
1. Either press Add another device in the Success screen (A), or the + on the Devices
screen (B), then select Light switch from the Device Selection list (C).
2. Remove the front cover of the light switch to locate the functional button (D). Press
Next on the app. Use pin to press and hold the button for about 20 seconds until
all three LEDs flash. Release the functional button and press Next on the app.
3. Now, press the displayed location name (E) to show list of existing locations
(scroll down if necessary). Press the one you require to select it. Alternatively,
press Create new location to specify new location. Press Next.
4. Type in name for the light switch and press Save.
5. Press Select socket state (F) and choose the option from the list that best
describes how the light switch is wired. The selected socket state will display on
the screen. Press Next.
6. Finally press Finish on the Success screen to end the installation, or press Add
another device to continue pairing more devices.
27
Page 28
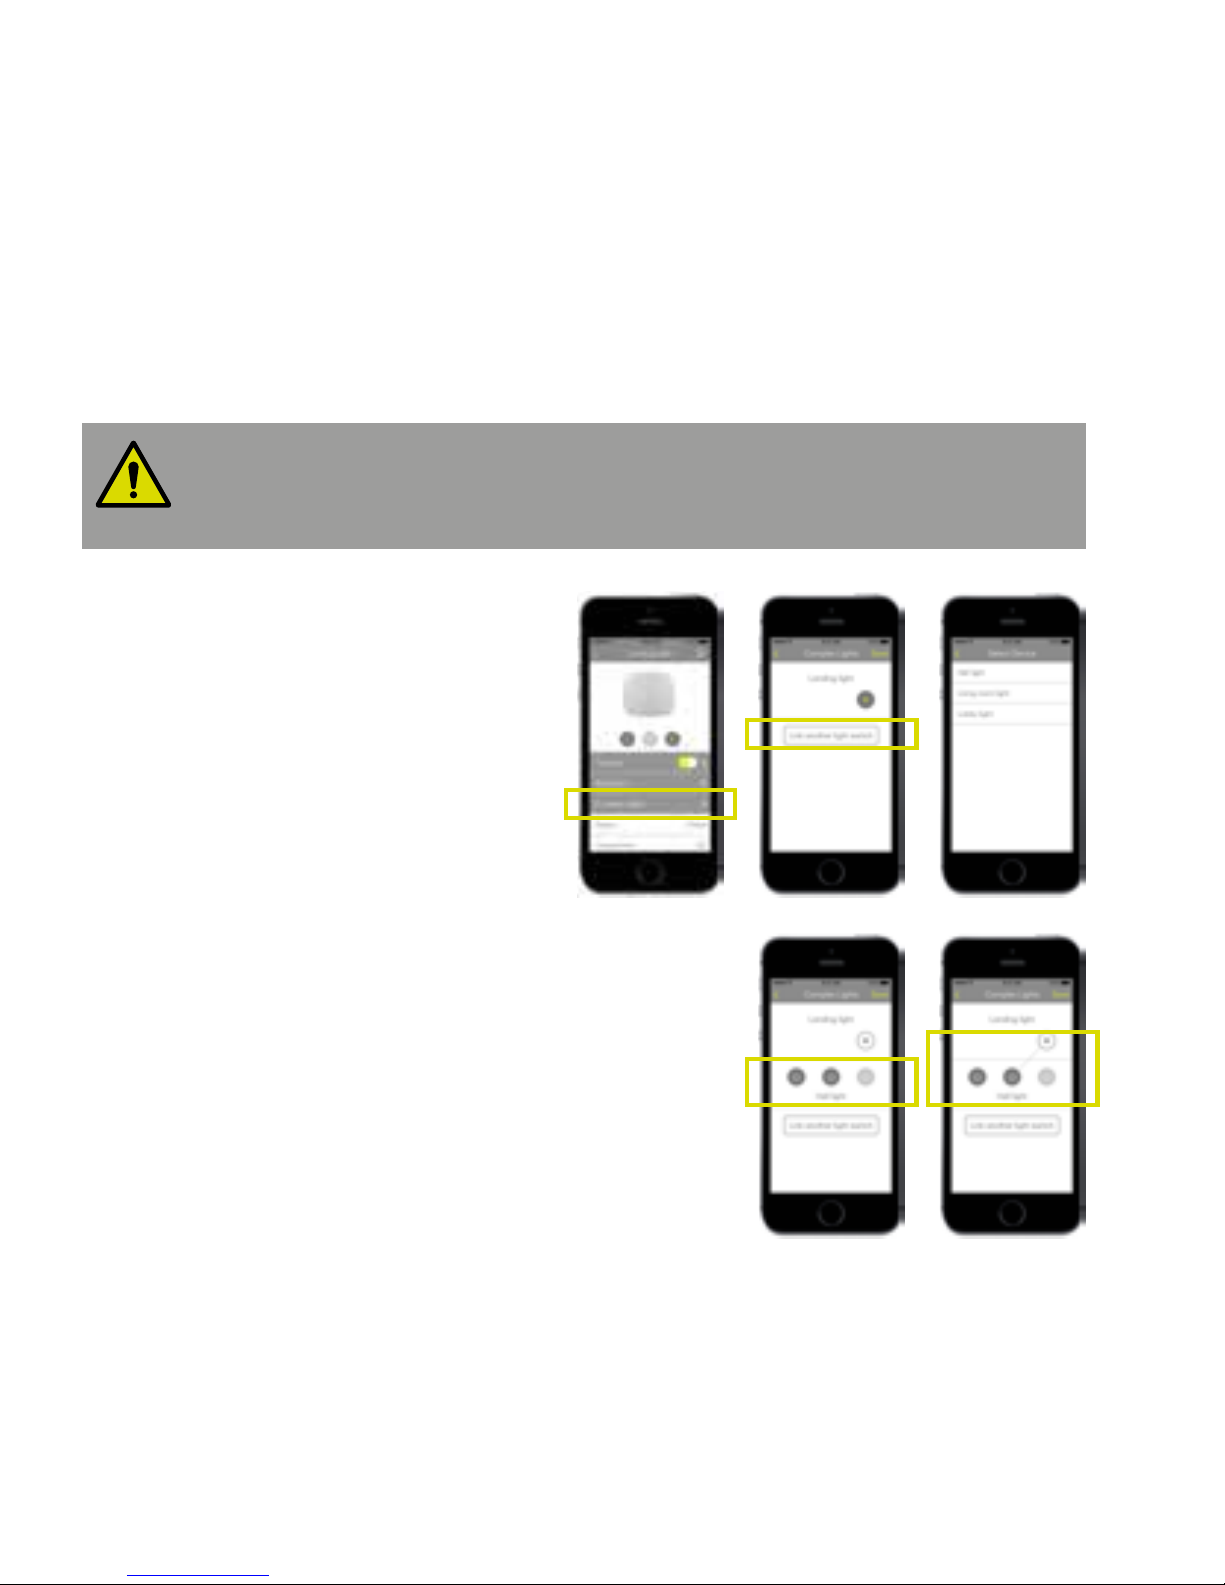
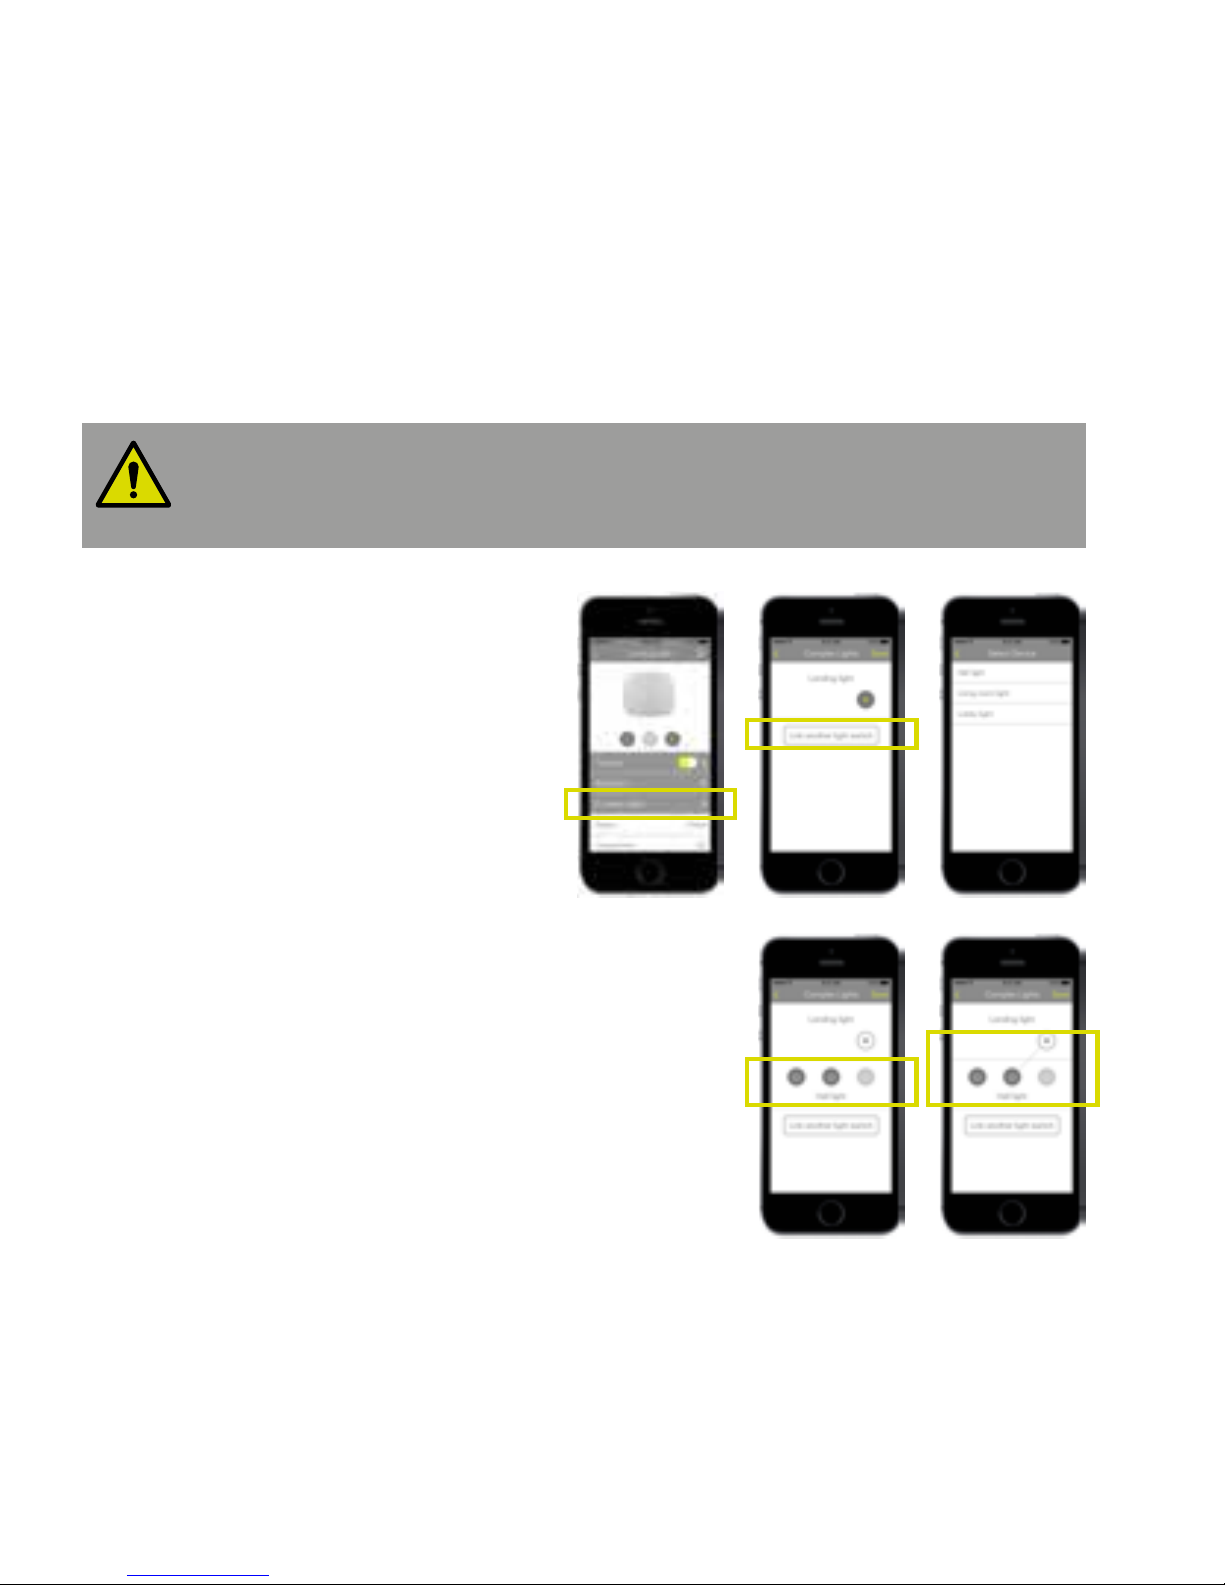
Staircase light switches
When installing light switches at the top and bottom of staircase, you
must link the upstairs and downstairs switches together so that both
light switches control the light that illuminates the stairs.
To link two lights:
1. Select Light switch 1 in the Devices
screen and press Complex Lights (A).
2. Press Link another light switch in
the Complex Lights page (B).
3. Select Light switch 2 from the list (C).
4. Press one or more on/o buttons on
the Light switch 2 (D). This links those
buttons on Light switch 2 to the light
connected to Light switch 1. The link is shown
by dotted line (E). Press Save to save the
arrangement.
Both light switches now control the same light.
5. Repeat this procedure to link any more light switches.
A B C
D E
28
Page 29
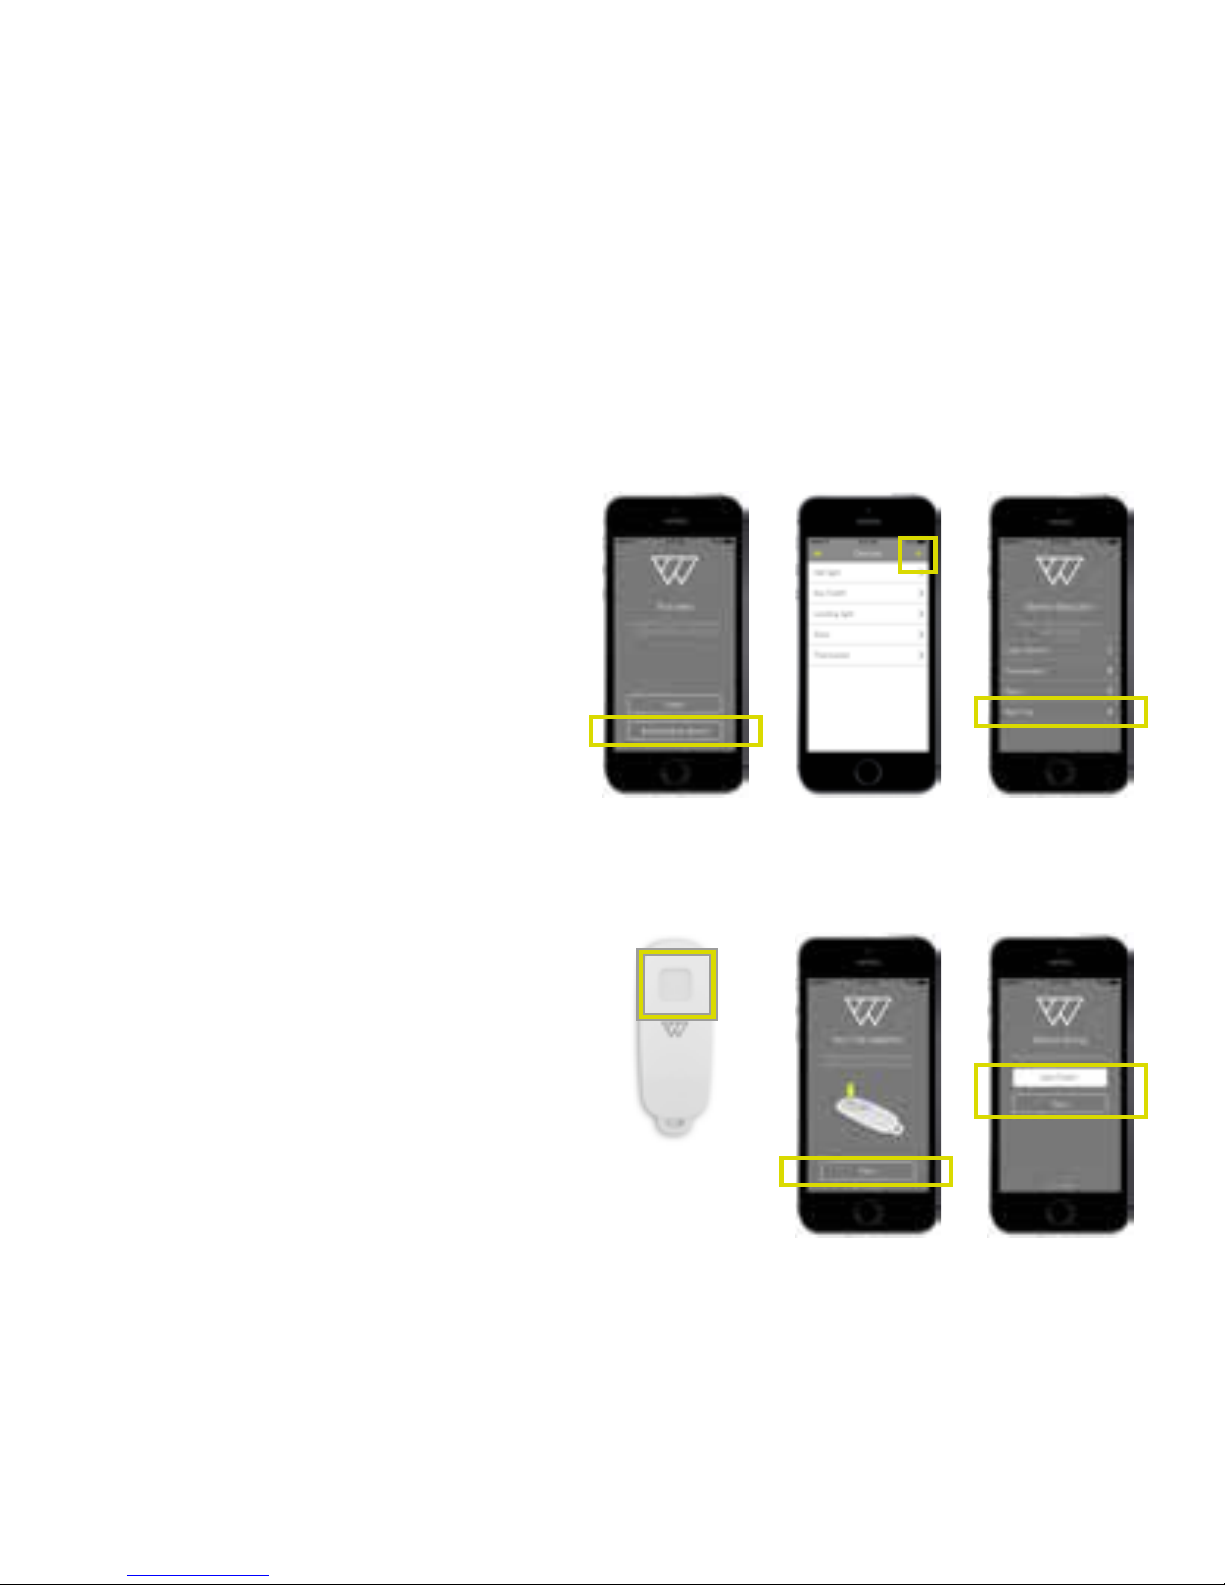
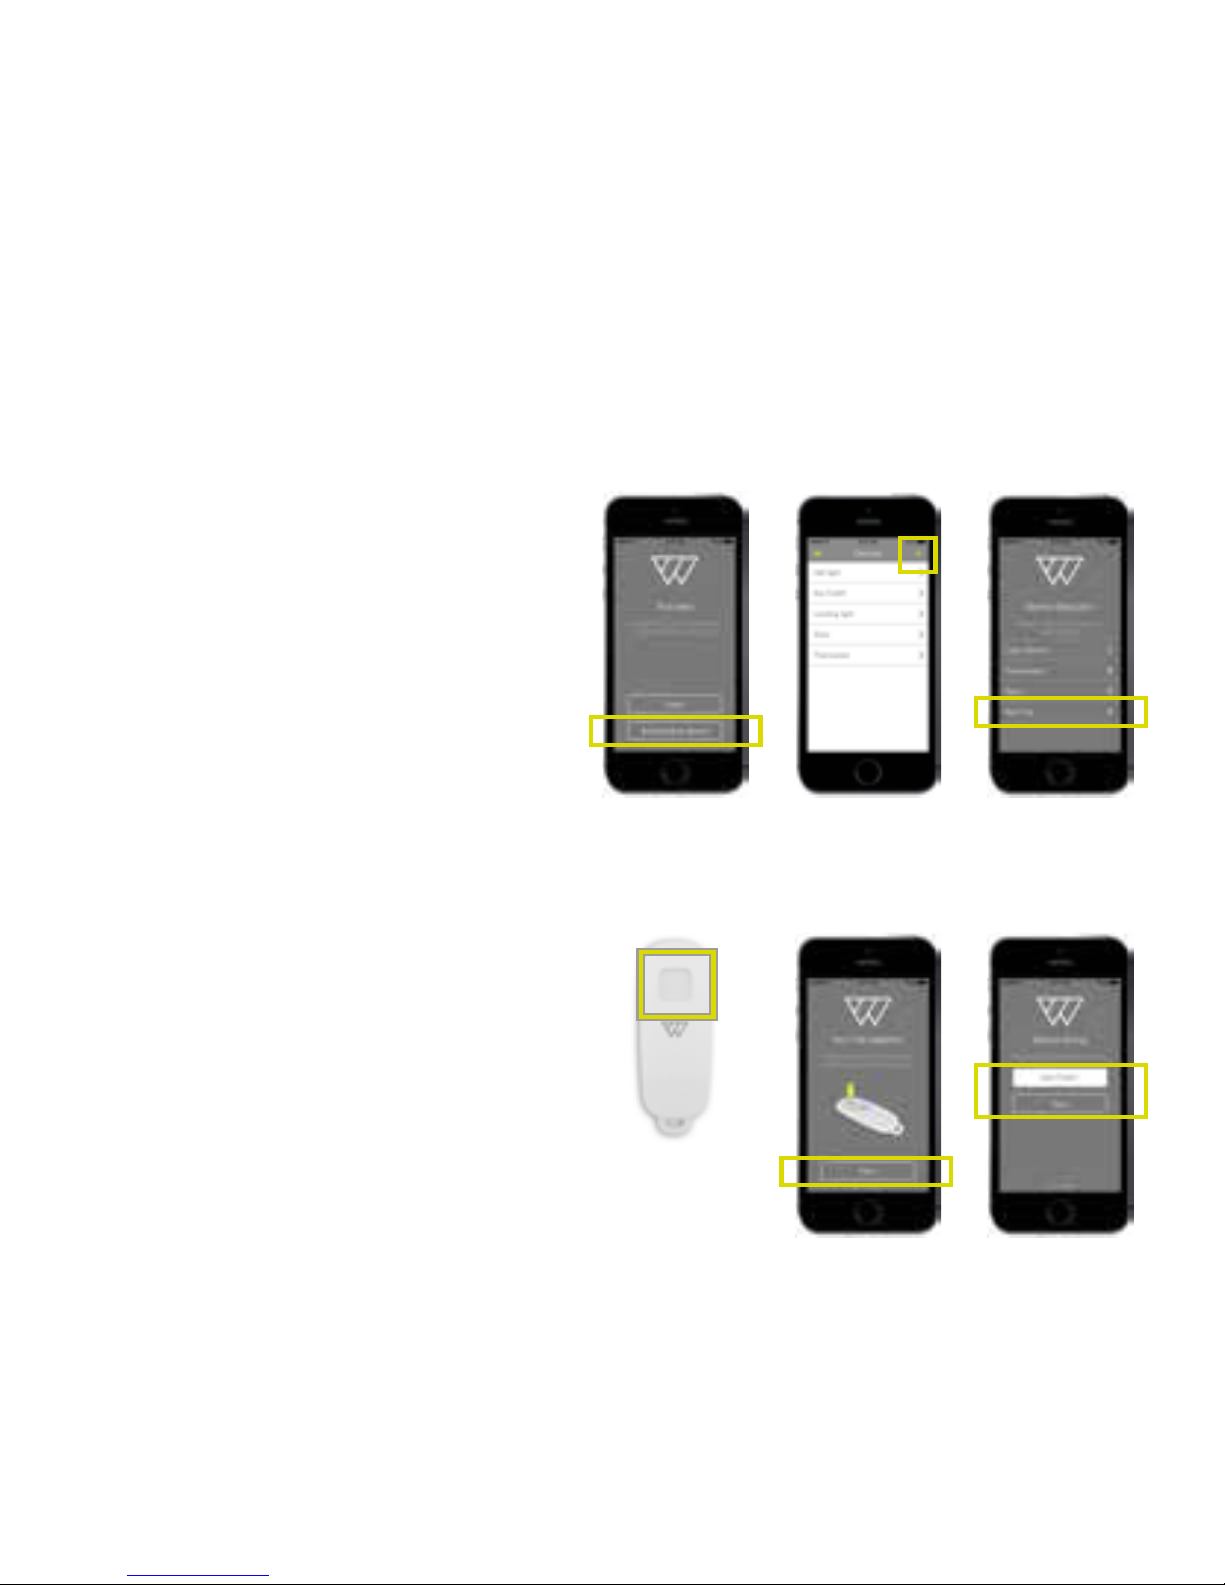
Pair the key fobs
1. Either click Add another
device in the Success screen
(A), or the + on the Devices
screen (B), then select Key Fob
from the Device Selection list
(C).
2. Make sure the battery is
inserted into the key fob, then
press the button (D). Press
Next on the app.
3. Type in name for the key fob
(F) and press Save.
4. Press Finish on the Success
screen to end the installation
or Add another device to
continue pairing the rest of
your Wondrwall devices.
A
D
B
E
C
F
29
Page 30
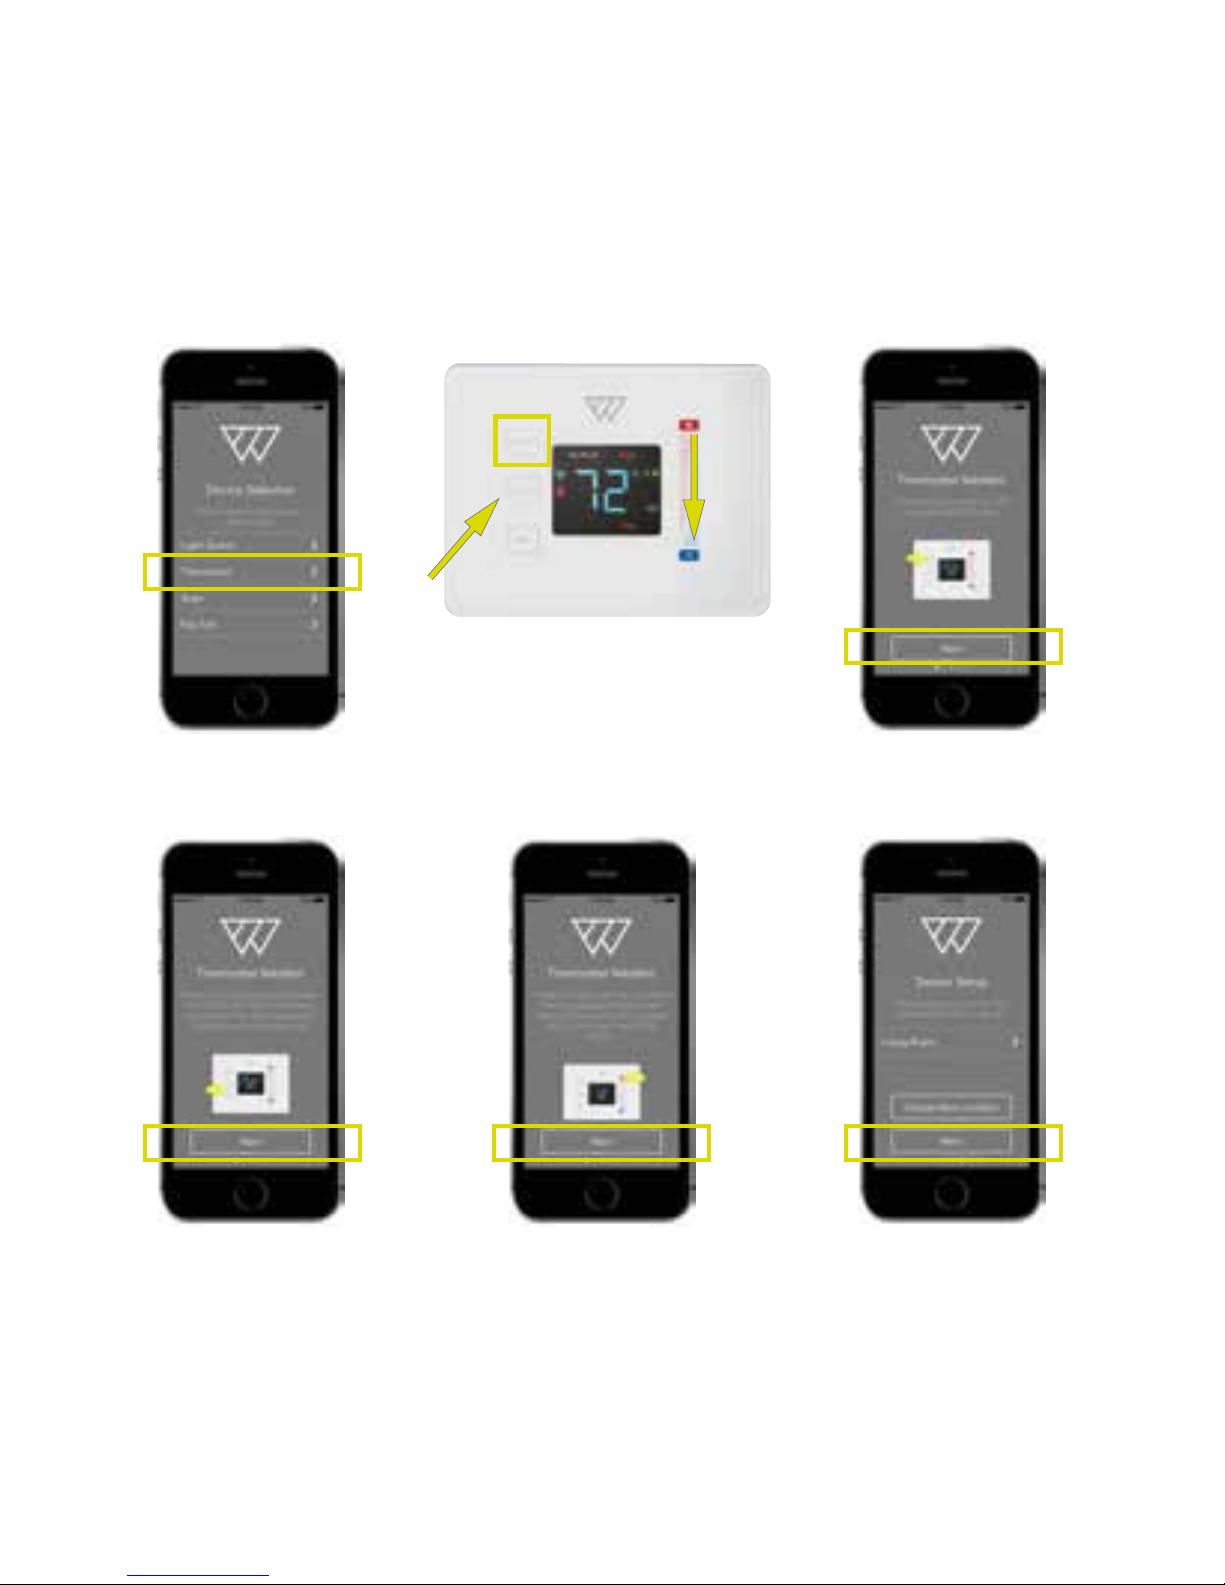
A
D
B
E
C
F
30
Page 31

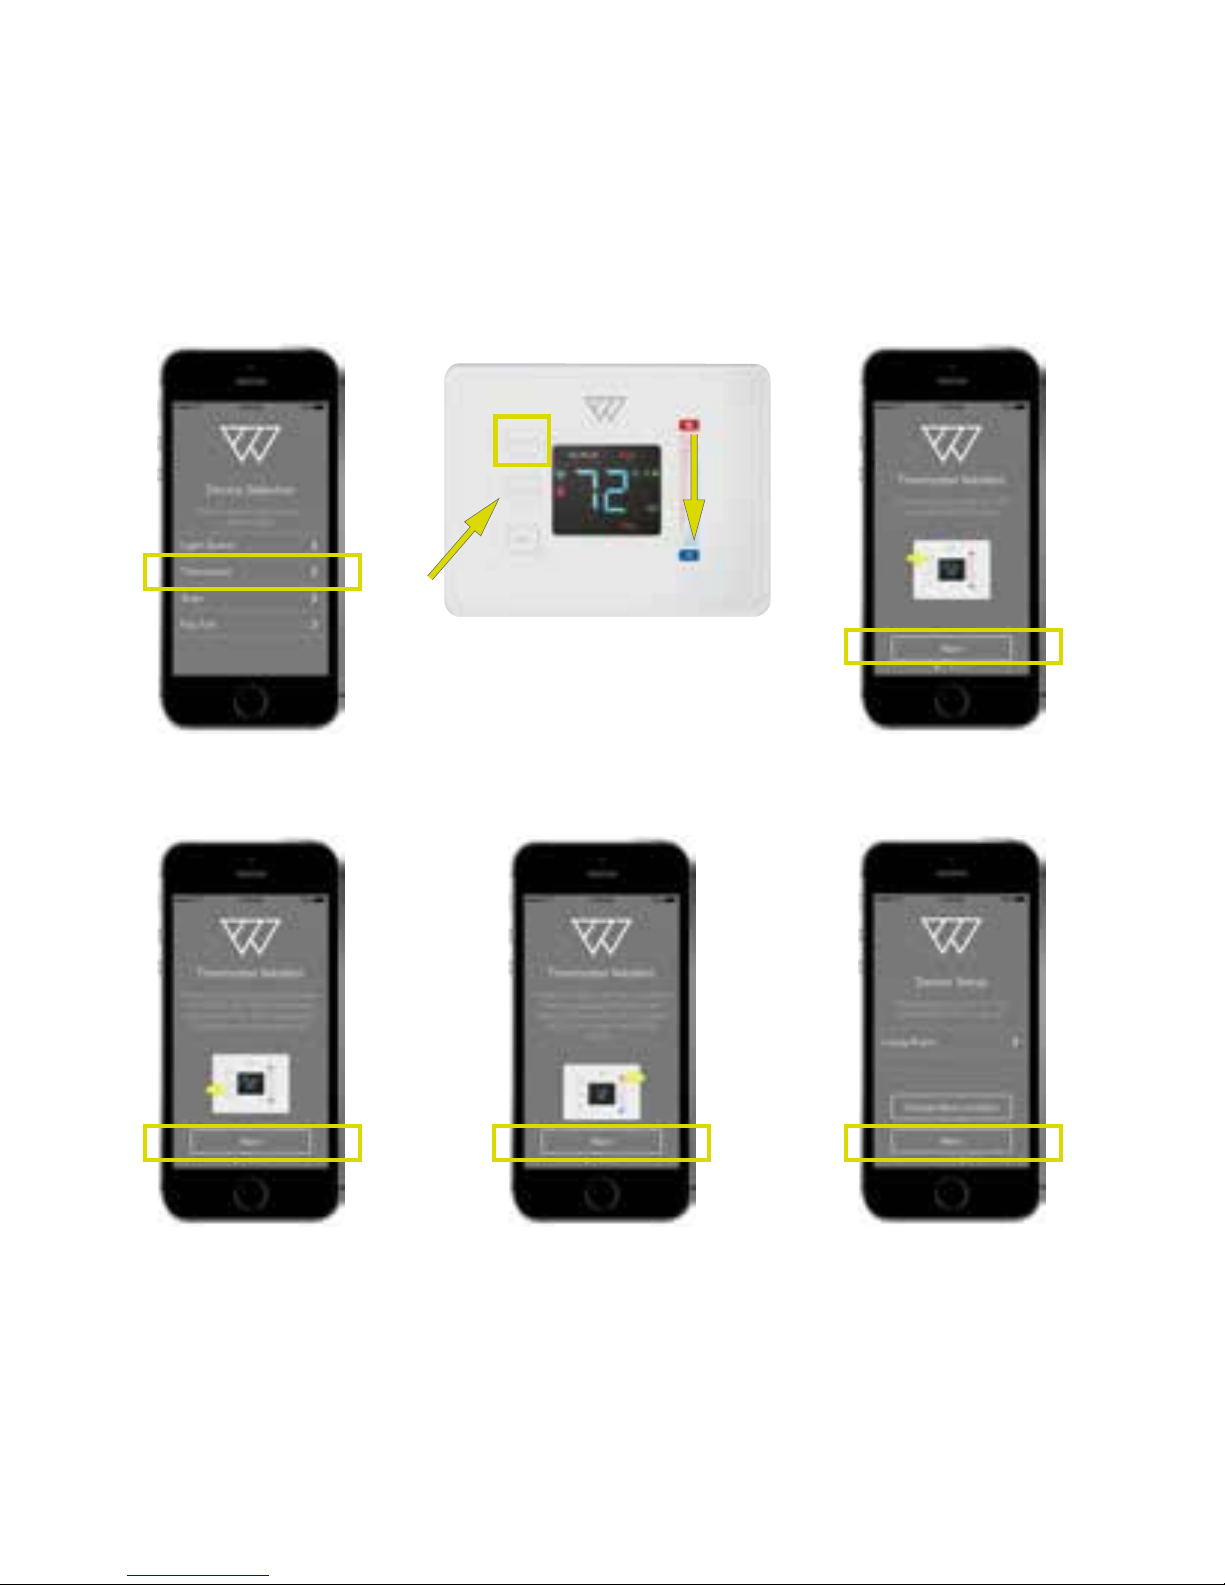
Pair the thermostat
1. Either click Add another device in the Success screen, or the + on the Devices
screen, then select Thermostat from the Device Selection list (A).
2. Press the MODE button on the front of the thermostat (B) until OFF is displayed on
the screen. Press Next on the app (C).
3. Press and hold the space between the HOLD and FAN buttons and at the same
time, swipe finger down the right-hand slider (B). The display will change to 01.
Press Next on the app (D).
4. Use the slider to set the display to 12, then press HOLD. This enters the ‘Join
Network’ menu. Now use the slider again to set the display to 01 and press HOLD to
pair with the Wondrwall network, then press MODE. Press Next on the app (E).
5. Now, press the displayed location name (F) to show list of existing locations
(scroll down if necessary). Press the one you require to select it. Alternatively,
press Create new location to specify new location. Press Next.
6. Finally either press Finish on the Success screen to end the installation or Add
another device to continue pairing devices.
31
Page 32
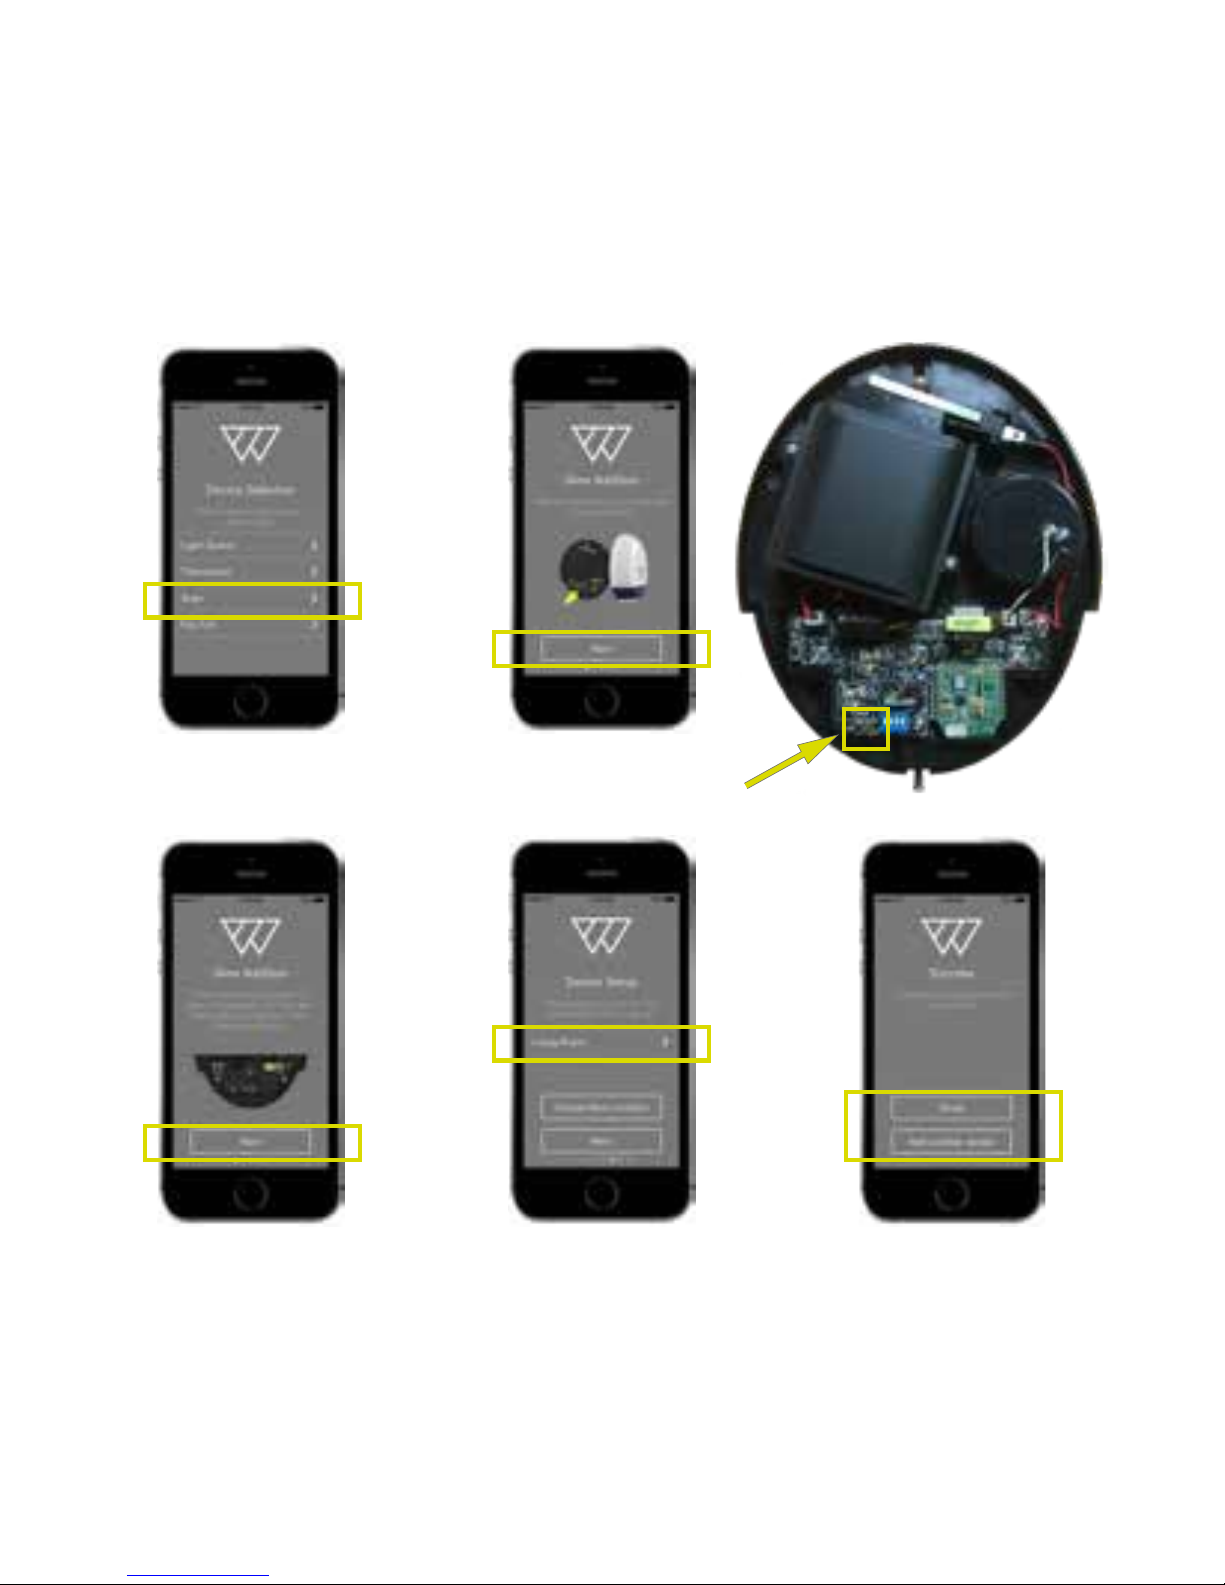
A
D
B
E
C
F
32
Page 33

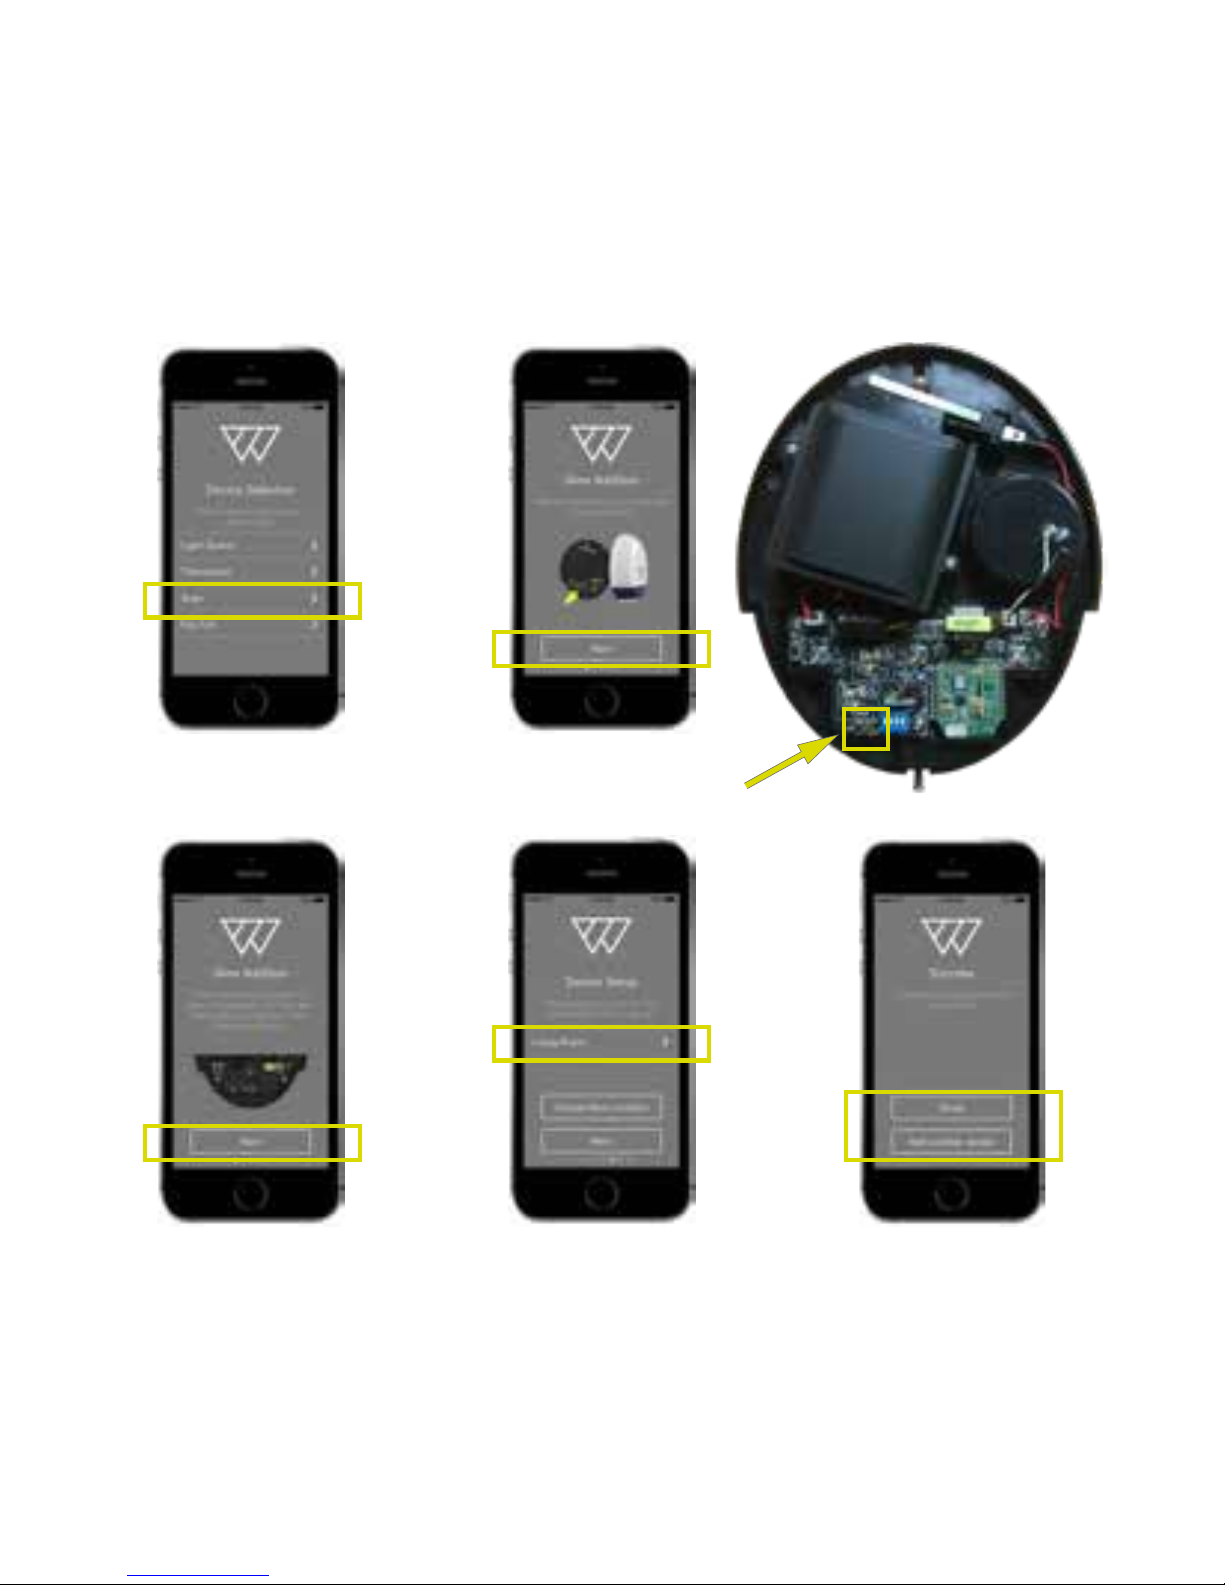
Pair the siren
We recommend that you pair the siren before you fix it to the wall.
1. Either click Add another device in the Success screen, or the + on the Devices
screen, then select Siren from the Device Selection list (A).
2. Remove the cover (page 19). Press Next on the app (B).
3. Press and hold the function button (C) for about 10 seconds until the right hand
LED flashes. Release the button. The siren is now connected to the Wondrwall
network. Press Next on the app (D).
4. Now, press the displayed location name (E) to show list of existing locations
(scroll down if necessary). Press the one you require to select it. Alternatively,
press Create new location to specify new location. Press Next.
5. Finally either press Finish on the Success screen (F) to end the installation or Add
another device to continue pairing the rest of your Wondrwall devices.
6. Replace the cover (page 20).
33
Page 34

Connect to Amazon Alex
1. Go to http://alex.amazon.com and login with your Amazon account username and
password.
2. Select Skills from the menu at the left hand side of the Alex portal, and search for
“Wondrwall Home Automation”.
3. Click on Wondrwall Home Automation in the list to display its screen. Click
Enable to activate the skill and to add it to your Alex skill list. Alex automatically
discovers your Wondrwall devices.
4. You can now use Alex and control your Wondrwall system through Alex voice
control. The Wondrwall Home Automation screen lists example commands to give
your Wondrwall system, for example, “Alex, turn on the bedroom light”. (For more
information about General Alex features, see www.alex.amazon.com).
5. If you add more devices, add them by selecting Smart Home from the menu at the
left hand side of the Alex portal. Click on Manage Devices and Discover Devices,
or say “Discover Devices”.
34
Page 35

Process for Alex activation on Light Switch:
Light Switch will send an activation request after the device has been through the
commissioning process.
You will receive request to the application “Enable Alex Voice Service” dialog will be shown.
The dialog can be shown from screens:
Home screen
Device details
Device info screen
You must select “Ok” from dialog and confirm action from the browser window which
will be open automatically.
If you select cancel from the dialog you will have the ability to activate it by using
“reactivation” in the light switch info screen.
35
Page 36
36
Page 37
Operating
Once the Wondrwall system is set up, it works in the background, learning how you live
and making your life easier. This section describes any tasks that you may need to do
on the devices themselves.
Wondrwall app
Common icons that you will see in the app are:
Menu: Press this to display and hide the menu.
Information: Press this to display more information about device.
More: Press this to display more options.
Back: Press this to return back to the previous page.
Add: Press this to add new device, location or house member.
37
Page 38
Wondrwall app: pages
The Wondrwall app is self-explanatory, however this section will help you navigate
around the app.
The Menu gives access to the following pages:
Home: The Home page displays the current Wondrwall status and
temperature.
Wondrwall learns your normal routines, but you can touch the
Home, Away and Sleep mode buttons allow you to select the
most appropriate mode at any time. (Set up these modes vi the
Behaviour button on any light switch device page).
The Heating, Lighting and Security buttons allow you to control your
system from your phone.
38
Page 39
Devices: The Devices page displays list of your devices. To add another
device, press
. (See the Connecting section).
To view and edit device in the list, touch the device name to display
status information, or set the Home/Away/Sleep mode behaviour
(light switches only).
Press
to show device information, change its name and location or
to delete the device. Press Save if you make any changes.
Notifications: The Notifications page displays list of any system notifications e.g.
alarms.
The notifications can be filtered by type, and acknowledged by
pressing
.
Locations: The Locations page lists all the locations of devices in your Wondrwall
system. Press
to add new location, or
to delete location.
39
Page 40
Wondrwall app: pages (continued)
Members: The Members page lists the members of your house who can access
the system but have limited editing ability.
Press
to generate an access token to give to new member. They
need to use this token when they press Join as member on the
login page of the Wondrwall app.
Settings: The Settings page allows you to select the temperature scale (°C or
°F), the time zone, notifications settings within your phone settings
and to log out of the system.
Press Save if you make any changes.
About: The About page displays the Wondrwall version.
40
Page 41
Heating
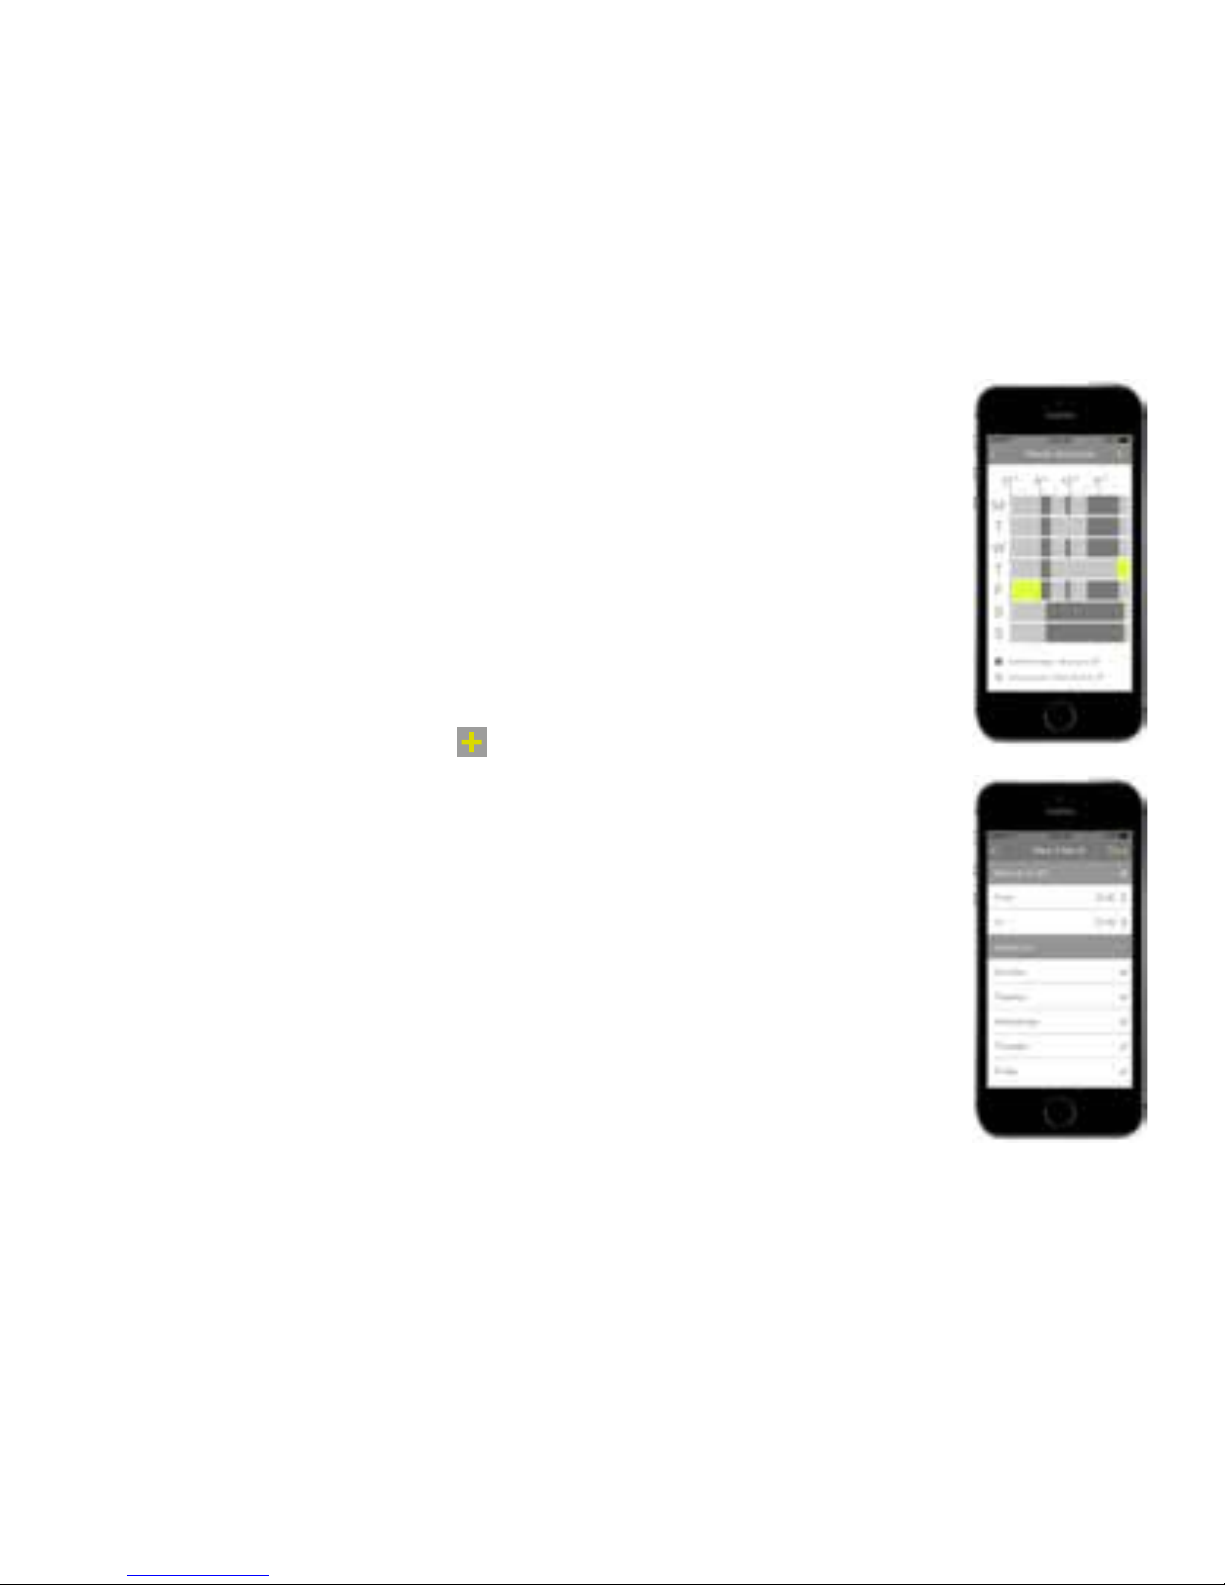
Heating schedule
To see the heating schedule, press the Heating button on the Home
page to display the thermostat status page.
Press Schedule to display the schedule screen which shows the
settings when the house is occupied (comfort preset - dark grey),
when it is unoccupied (saving preset - light grey) or if the schedule is
overriden (green).
To add new setting, press
and set the temperature, start and
stop times and the days for repeating the setting. Press Save.
To override the heating schedule, on the Thermostat page, set the
mode (cool, heat or emergency heat (boost)) and slide the schedule
switch to the right (green). The schedule is now overriden until the
schedule switch is moved back to the left (grey).
41
Page 42
Thermostat: changing temperature setpoints
To increase the temperature setpoint, slide your finger upwards along the slider
towards the
icon.
To decrease the temperature setpoint, slide your finger downwards along the slider
towards the
icon.
The setpoint displays on the thermostat page.
Thermostat: changing temperature display
The default setting for temperature on the thermostat is °F. To change to °C:
1. Enter programming mode (page 57).
2. Press HOLD, then the
icon until the display reads 00 to select the Celcius
option, then press HOLD to save the new setting.
3. Press MODE to return to normal operation.
42
Page 43
Lighting
Switch lights on/o
On the app: Press the Lighting button on the Home page to display the Lighting status
page. Press
to switch light on and o.
To turn o all lights in the system, switch the Turn all O switch to the left (grey).
At the light switch: Press circle on the front of the light switch to turn the light on
and o. Which one depends on the number of lighting circuits you have: central circle
for one circuit, the outer circles for two lighting circuits, or all three circles for three
circuits.
Light switch: voice control
Touch the W icon on the front of the
light switch and ask question or give
command, such as “what is the weather
today?” or “make it warmer”.
43
Page 44

Security
To see the all security devices on the system, press the Security button on the Home
page.
To add more security devices, press
.
To set the security options for each device, press the device name on the security
page. Slide the switches to the right to set the option (on - dark grey) or to the left to
unset the option (o - light grey).
For light switches, press Security to show the options of silent panic, detect motion,
detect fire alarm, detect glass breakage. For key fobs, set the panic button on or o.
The security options for each device can be switched on individually, or slide the Alarm
All switch to the right to switch on all devices.
Key fob: panic button
To raise an alarm, simply press the button on the key fob. The siren will sound and
simultaneously send an alert to all your house members who are logged into the
system.
44
Page 45
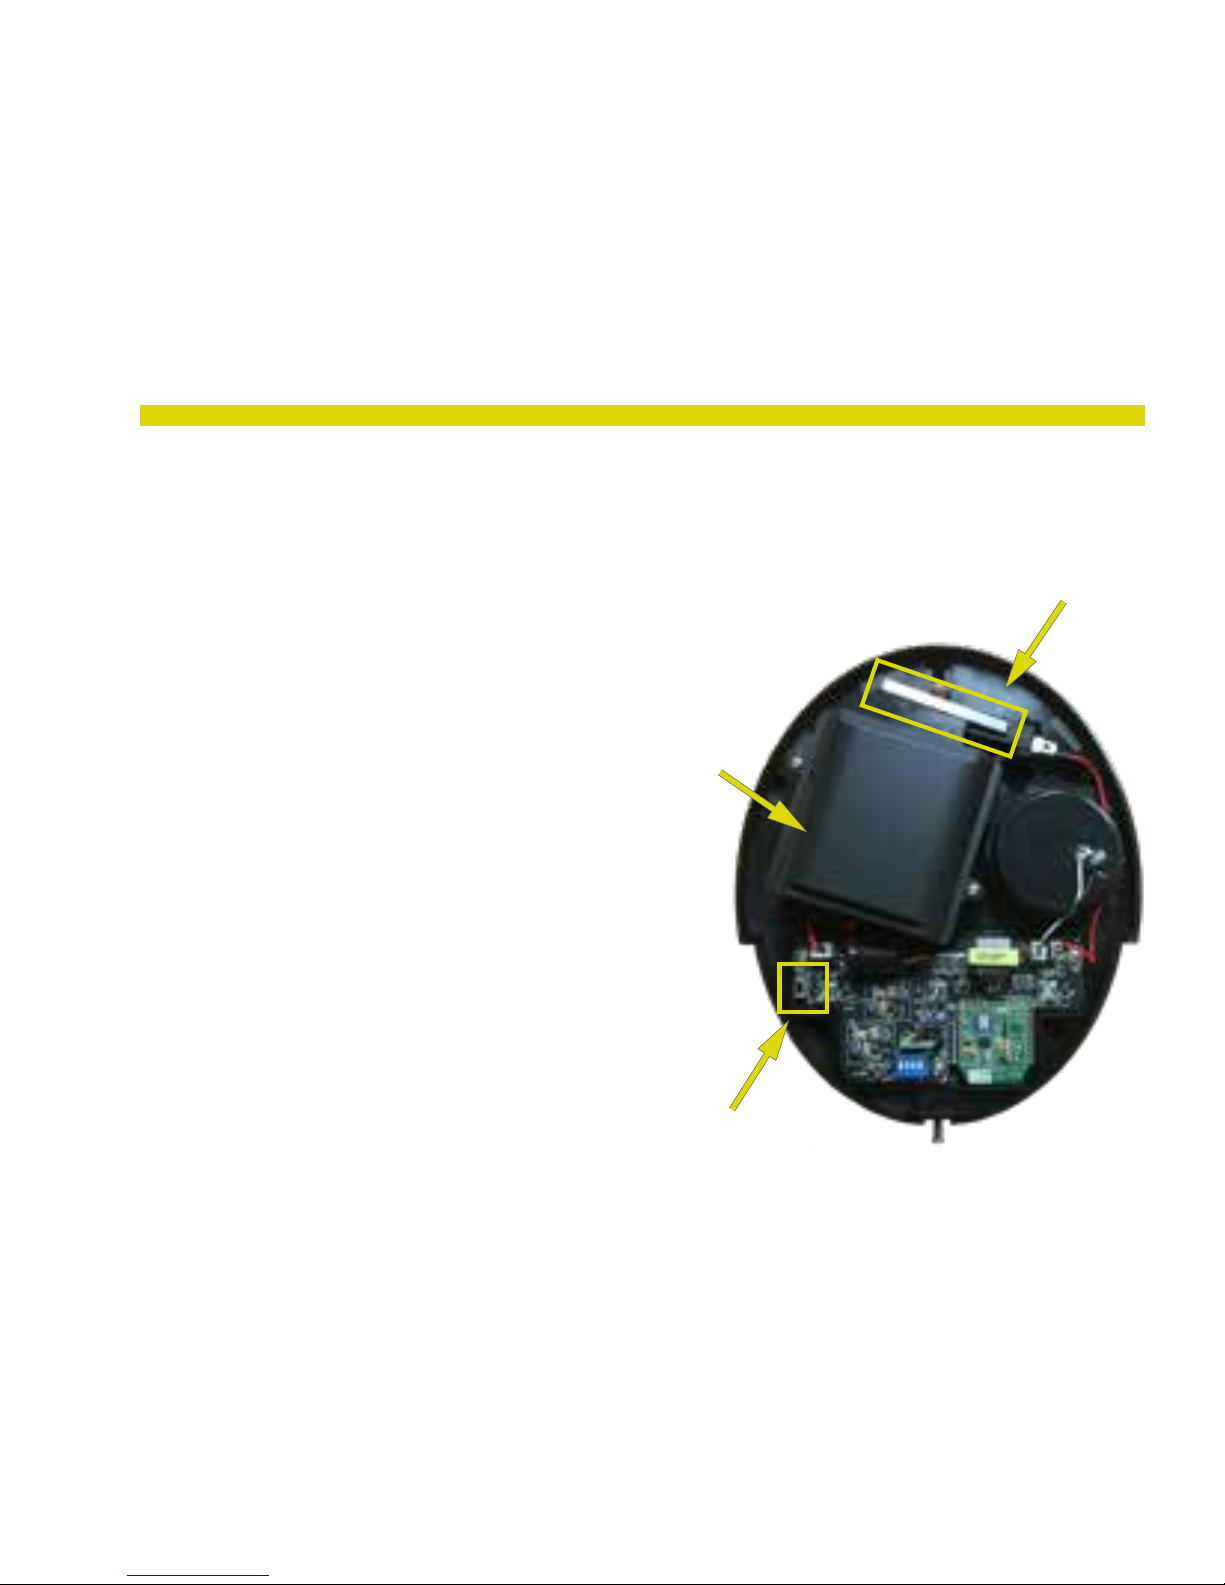
Maintaining
There is little maintenance to do on the Wondrwall system, other than changing
batteries in the siren, thermostat (if batteries are fitted) and key fobs:
Siren:
1. Remove the cover (page 19).
2. Switch the battery switch to OFF (A).
3. Unscrew the two fixing screws on the
battery compartment lid (B) and remove
the lid.
4. Remove the old batteries. Press the tamper
switch (C) twice to fully discharge the siren.
5. Insert new batteries. You will need two 1.5V
alkaline D-cell / MN1300 / LR20 batteries.
6. Replace the battery compartment lid (B)
and switch the battery switch (A) to ON.
7. Replace the siren cover (page 20).
C
B
A
45
Page 46

Thermostat:
Batteries are only fitted in thermostat if your system does not have ‘C’ (common) wire.
1. Remove the cover from the Wondrwall thermostat. Hold onto the ribbon loop on
the back of the thermostat and pull the cover forwards.
2. Remove the old batteries from the base and replace them with new ones. You will
need 4, 1.5V alkaline AA / MN1500 / LR6 batteries.
3. Replace the thermostat cover. Push it so it clicks and covers the base.
Key fob:
1. Unscrew the fixing screw on the back of the key fob and remove the front cover.
2. Remove the old battery and replace it with new one. CR2032 Energizer brand
battery and not any CR2032 battery.
3. Re-assemble the key fob and tighten the fixing screw.
Cleaning
The Wondrwall devices do not need any special cleaning treatments, other than
normal household dusting.
Do not use abrasive products on the Wondrwall devices
46
Page 47

Troubleshooting
General:
What happens if I leave my key fob at home?
Your key fob is not required for any aspect of the Wondrwall system to work
eectively, so if you don’t have your key fob with you it simply means Wondrwall
cannot use locational information from the fob to make real-time decisions. As
result, you will have to use the app to manually arm/disarm your home alarm.
What is ‘local control’?
Local control means that the various Wondrwall components all communicate with
each other without having to share information on the cloud. This means you are not
restricted by your home’s Wi-Fi capability, as the devices don’t require the internet to
communicate with each other.
Can I reset the system to factory default settings?
Yes, the Wondrwall system can be reset to factory pre-sets using the app.
47
Page 48

My thermostat keeps indicating low battery even after I’ve changed the
battery. What do I do?
• Try cleaning the battery contacts.
• Make sure the batteries are fresh and supplying the required voltage.
• Your thermostat may be faulty. Contact Wondrwall.
How can I adjust the information feedback for Wondrwall?
Use the app to tailor Wondrwall’s information gathering to your personal needs. Motion
sensors can be turned o for areas of the home they’re not required in. This can be
adjusted for each room individually. In addition, the listening features for the smoke
alarm detection and window-break detection can also be turned on and o (page 44).
Will Wondrwall save me money?
Yes. By automating and optimizing the home’s heating and lighting, Wondrwall prevents
wasted energy saving on your energy bill.
Can I override Wondrwall’s operation?
The Wondrwall App allows you to manually configure and update preferences, as well
as override any aspect of your heating, lighting and security programme.
Are my devices running out of power/battery?
Wondrwall monitors battery-powered devices and notifies you vi notification on
the app if the batteries need to be changed.
48
Page 49

Heating:
The temperature in my home is much higher than Wondrwall is currently
indicating. Why?
The Wondrwall system can take an average temperature across the whole home, so it
may be that this is an average temperature and not the thermostat temperature.
Wondrwall is heating my home too eciently in the evening.
From the app Home page, select Heating. In the Mode option, select Cool and specify
the temperature you prefer. This overrides the normal schedule.
Wondrwall did not heat up my home as usual in anticipation of me
returning home.
Check your location settings within the app and your phone. Realtime adjustments
can only be made when Wondrwall can determine your GPS location to estimate
journey.
How do I manually adjust the maximum temperature reached by
Wondrwall?
All temperature adjustments can be made vi the app in the same way as was done for
set up.
In the app, select Heating. The Thermostat screen shows the temperature settings.
Press Mode and select Heat. Press + or - to adjust the maximum temperature.
49
Page 50

My room is too warm. How do I override the automatic adjustments?
You can control Wondrwall with voice commands. Touch the light switch to activate
the ‘Push to talk’ feature (page 43). Go to Skills in your Alex portal (http://alex.
amazon.com) for list of voice commands.
You can also use the app to make relevant adjustments. Select Heating. The
Thermostat screen shows the temperature settings. Press Mode and select Cool.
Press + or - to adjust the temperature.
What should I do if my boiler isn’t working?
If your heating doesn’t work – you’ve tried adjusting it vi the app and it doesn’t
respond, please check your boiler to make sure it is turned on.
Lighting:
The light switch in my guest bedroom keeps blinking repeatedly. This is
unusual as that room is hardly ever used.
The light switch could be responding to the changes in the room temperature as
heating programmes kick in. Alternatively the light switch may just be faulty.
50
Page 51

Alarms:
My alarm keeps going o in the middle of the night for no apparent
reason.
The alarm is triggered by motion, so try turning o motion sensors at night if anyone is
likely to get up during the night.
From the app Home page, select Security, and in the security option of each light
switch, turn o the Detect motion switch.
My alarm siren has gone o for the past 3 days for no obvious reason.
There is no sign of break-in.
Do you have any large pets wandering around the house while you are away?
Disconnect the alarm siren and check the batteries, otherwise, please contact
Wondrwall technical support.
Window break detection has twice set o my alarm because bird flew
into the window. How do I disarm this feature as it’s likely to happen
again?
From the app Home page, select Security, and in the security option of each light
switch, turn o the Detect glass breakage switch.
51
Page 52

Connecting:
I am away from home and the system is not connecting as I cannot
remotely access any of my control features for the house. What should
I do?
It is possible the Wi-Fi signal in your home is down. Check the connectivity on your
phone and make sure you don’t have any firewalls rejecting Wondrwall.
I can’t connect new key fob to the Wondrwall system.
To connect new fob you need to go through the pairing process for new key fob
(page 29).
To delete key fob, select the key fob in the Devices screen. Press the icon (top
right), then Delete Device.
My Wondrwall system is not coming online.
Check your fusebox. Wondrwall needs live power source in order to function.
My app is not connecting to the system.
Check your wi-fi connection. A wi-fi signal is necessary for the app to connect to
Wondrwall.
52
Page 53

I can’t log onto my Wondrwall account on the App.
• Check the Wondrwall system status.
• Verify you’re using the right email and password.
• Check your router or firewall settings.
• If problem is not resolved contact Wondrwall technical support.
Will my Wondrwall system switch o if my broadband is turned o or
stops working?
No. Your light switches will still operate and allow you to control your lighting as
decisions are made locally. Your thermostat and alarm siren will also work as usual.
The internet connection is required for the system to autonomously control, but lack
of signal will not prevent you from the basic functions of control lighting and heating.
Wondrwall is not connecting to my music player to play sound through
the light switch speakers. What is the problem?
It is possible you are using music player not integrated with Wondrwall. Your light
switch can play sound from Amazon Music or the radio.
53
Page 54

Alex:
My Alex function is not working in one of my rooms.
This light switch may be too far away from the router. Try adding wi-fi booster to the
home.
My children have ordered something by using Alex vi the ‘push to talk’
feature. How can I stop this in the future?
Go to Settings in your Alex portal (http://alex.amazon.com). Select Voice
Purchasing and either deactivate voice purchasing or set PIN. Remember to save
your changes.
Voice technology features such as the weather and trac updates and
voice command are not working.
Go to Skills in your Alex portal (http://alex.amazon.com) and check that the
Wondrwall Home Automation skill is still enabled.
54
Page 55

Alex does not automatically discover my other smart home devices.
Try to manually add the device:
• Select Smart Home from the menu at the left hand side of the Alex portal.
• Click on Manage Devices and Discover Devices.
• If that doesn’t work your device may not be recognised by the Alex platform.
Alex does not control my other smart home devices.
It is possible your device is not Alex Skills enabled.
If Alex does not report problem, but the device doesn’t react to the command,
check if you can control the device from the Wondrwall app. If the device works,
delete the device from Alex and manually add it.
55
Page 56
Specifications
Dimensions
Item
Height Width Depth Weight
mm mm mm g
Base kit* packaging 384.0 262.0 65.0 1716
Thermostat 104.8 135.3 28.7 317
Alarm siren 212.5 179.0 53.0 694
Key fob 77.0 26.8 17.7 30
Light switch 134.0 104.0 27.0 350
* Base kit comprises: 1 thermostat, 1 alarm siren, 1 light switch and 2 key fobs
Batteries
Item Battery Type Quantity
Thermostat AA 4
Alarm Siren D 2
Key Fob CR2032 Energizer 1
Light Switch None None
56
Page 57

Programming
This section describes how to change the default settings in the thermostat.
Thermostat: programming mode
1. Press the MODE button on the front of the thermostat (D) until OFF is displayed on
the screen.
2. Press and hold the space between the HOLD and FAN buttons and at the same
time, swipe finger down the right-hand slider. The display will change to 01 to
indicate you are in programming mode.
3. Press HOLD, then the
or icons until the display shows the required option
(see table), then press HOLD again to save the new setting.
4. Press MODE to return to normal operation.
57
Page 58
Programming (continued)
Menu ID Description (defaults in bold)
01 Temperature display: 00 Celcius; 01 Fahrenheit
02 Heat system type: 00 Non-heat pump; 01 Heat pump
03 Heat source: 00 Electric; 01 Gas / oil / fuel
04 Temperature calibration: ± 2.5°C; ± 4.5°F
05 Set minimum heat point: Default 44°F; 7°C
06 Set maximum heat point: Default 86°F; 30°C
07 Set minimum cool point: Default 44°F; 7°C
08 Set maximum cool point: Default 86°F; 30°C
09 Set minimum deadband: Default 1.8°F; 1.0°C
10 Sequence of operation:
00: cool only
01: cool w/reheat
02: heat only
03: heat w/reheat
04: full auto
05: full auto w/reheat
58
Page 59
Programming (continued)
Menu ID Description (defaults in bold)
11 Easy mode: 11 Yes
12 Join network: 01 Yes
13 Leave network: 11 Yes
14 Rejoin network: 01 Yes
15 Detect system type: 01 Yes
16 Reset: 01 Yes
17 Factory reset: 11 Yes
18 Display configuration and network settings
19 Reset counter
20 Standby display brightness: 0 - 99
59
Page 60

Index
about page 40
add new member 40
Alex 5, 34
connect 34
away mode 38
base kit
contents 7
battery replacement
key fob 46
siren 45
thermostat 46
cleaning 46
conventions 2
devices page 39
heating 41
schedule 41
override 41
home mode 38
home page 38
installing 13
internet 5
key fob 7
battery replacement 46
description 11
maintenance 46
pair 29
panic button 44
lighting 43
lights on/o 43
light switch
contents 7
description 8
installation 15
pair 25
primary 25
staircase 28
voice control 43
locations page 39
manual conventions 2
member
add 40
members page 40
60
Page 61

menu 37
music 5
notifications page 39
operating 37
pairing
key fobs 29
light switches 27
primary light switch 25
siren 33
thermostat 31
pair primary light switch 25
panic button 44
primary light switch 21
pair 25
security 44
options 44
settings page 40
siren
battery replacement 45
description 10
installation 19
maintainance 45
pair 33
remove cover 19
replace the cover 20
sleep mode 38
specifications 56
temperature
display 40, 41
setpoints 42
temperature setting 40
thermostat
batteries 18
battery replacement 46
changing temperature display 42
changing temperature setpoints 42
description 9
installation 16
maintenance 46
pair 31
setpoints 42
voice control 43
what’s in the box? 7
61
Page 62

Index (continued)
Wondrwall app 7, 37
about page 40
devices page 39
heating 41
heating schedule 41
override 41
home page 38
lighting 50
locations page 43
members page 40
menu 37
notifications page 39
security 44
settings page 40
voice control 43
ZigBee 21
62
Page 63

GEBRAUCHSANWEISUNG
63
Page 64
Konventionen
Die folgenden Symbole werden in dem Benutzerhandbuch benutzt.
Information:
Dieses Symbol wird verwendet, um zusätzliche Informationen zum Wondrwall
System oder seiner Benutzung zu geben.
Warnung:
Dieses Symbol zeigt eine potentielle Gefahr für Menschen.
64
Page 65

Inhalte
Einleitung 67
Installation 75
Verbinden 89
Bedienung 104
Instandhaltung 113
Fehlerbehebung 116
Spezifikationen 121
Programmierung 123
Verzeichnis 127
65
Page 66
66
Page 67

Einleitung
Willkommen in einem Haushalt mit Wondrwall. Durch die Benutzung innovativer Hardware
und Cloud-basierter, lernender Technologie, erreicht Wondrwall bahnbrechende Vorteile
im Stromsparen zu Hause, Heim-Sicherheit und der Lifestyle Personalisierung.
Sobald installiert, beginnt Wondrwall ein detailreiches Bild davon anzufertigen, wie Sie
Ihr Heim nutzen. Mit dem komplexen Verständnis von Lebensweisen stellt Wondrwall
eine Grafik dazu auf, wie Sie Ihr zu Hause am Besten organisieren und dabei stetig
Verbesserungen machen.
Durch die Benutzung der Kraft von Amazon’s Alex Plattform bietet Wondrwall ebenfalls
sprachaktivierten Zugang zum Internet, um es Ihnen zu ermöglichen, das Wetter oder
Reiseinformationen zu prüfen, die Termine des Tage sim Google Kalender einzusehen, ein
Taxi oder ein Produkt von Amazon zu bestellen.
Wondrwall kann sich ebenfalls mit Ihrer Medi verbinden und Musik über Lautsprecher
spielen, die in jeden Lichtschalter eingebaut sind.
67
Page 68
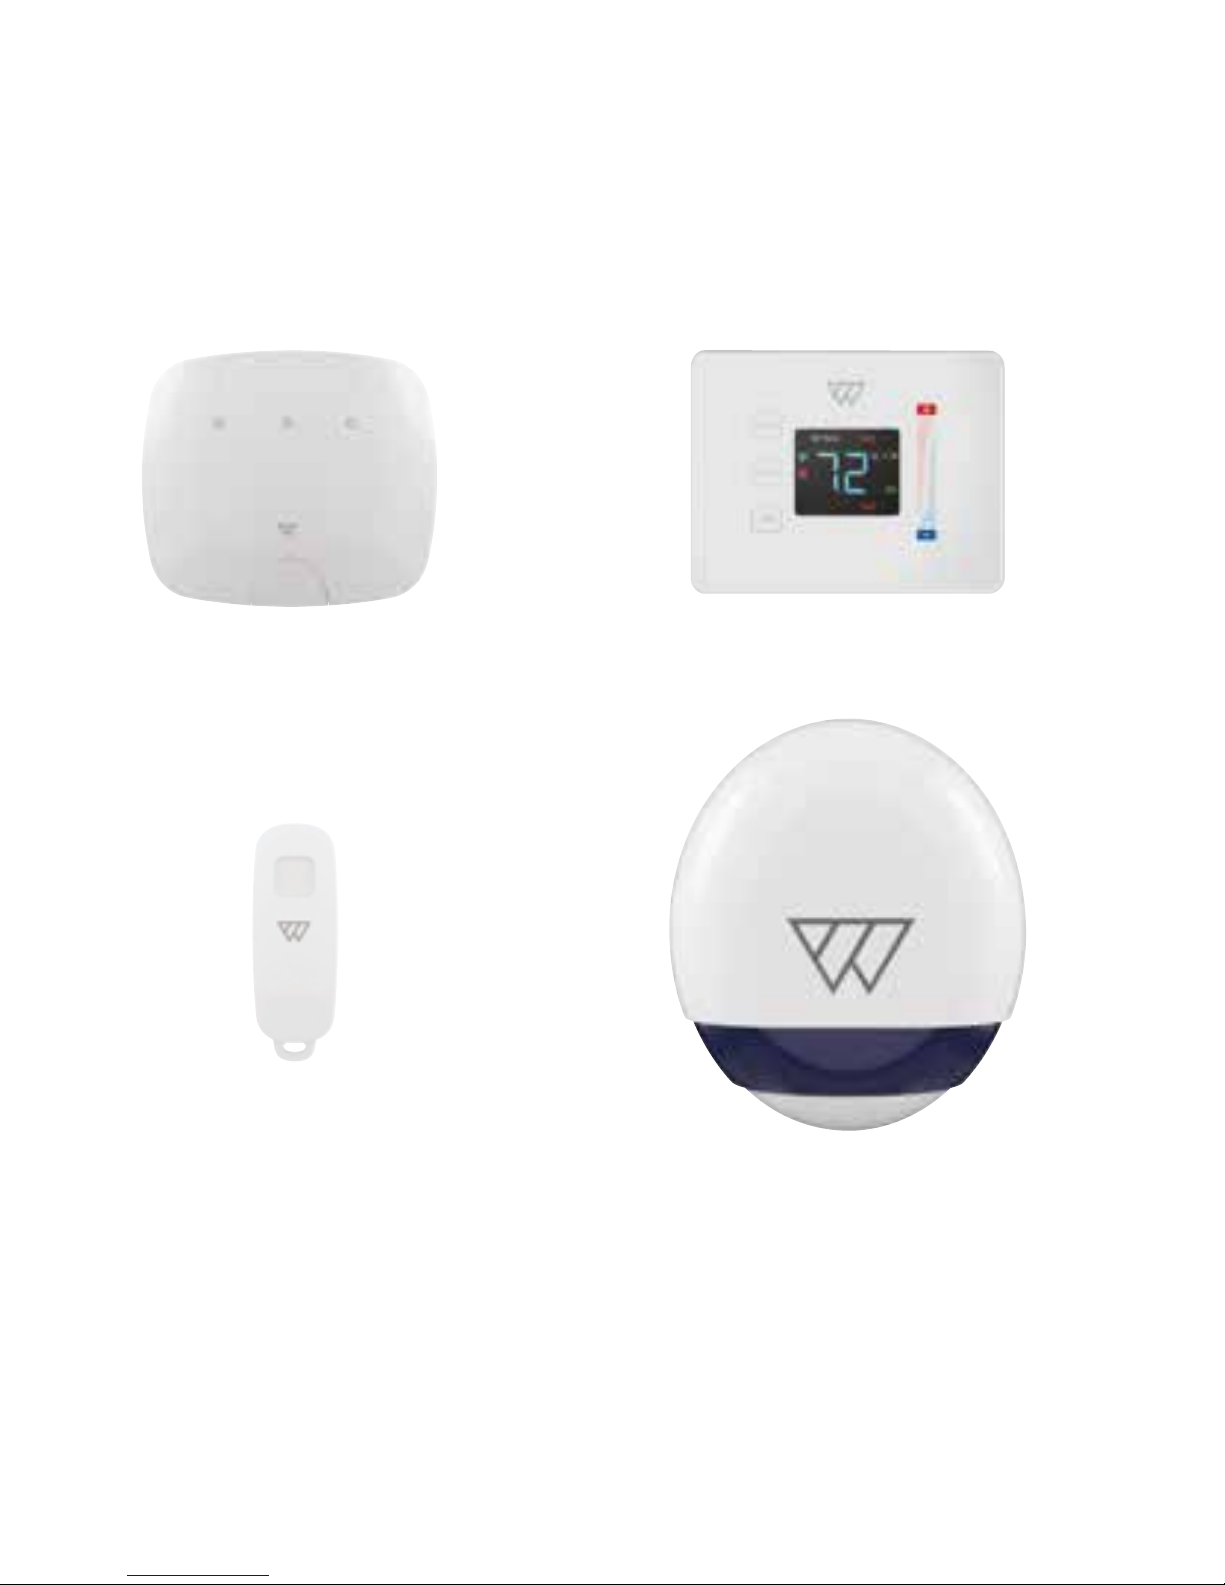
Lichtschalter
Schlüsselanhänger
Thermostat
Sirene
68
Page 69

Was ist in der Box?
Basis-Kit:
• 1 Lichtschalter
• 1 Thermostat
• 1 Sirene
• 2 Schlüssel-anhänger
• Installations- Kit
• Gebrauchs-anweisung
Lichtschalter:
• 1 Lichtschalter
• Installations-Kit
• Gebrauchsanweisung
Schlüsselanhänger:
• 1 Schlüsselanhänger
• Batterie
Der Download der Wondrwall Mobil App ist
benötigt. Diese finden Sie im App Store und auf
Google Play.
69
Page 70
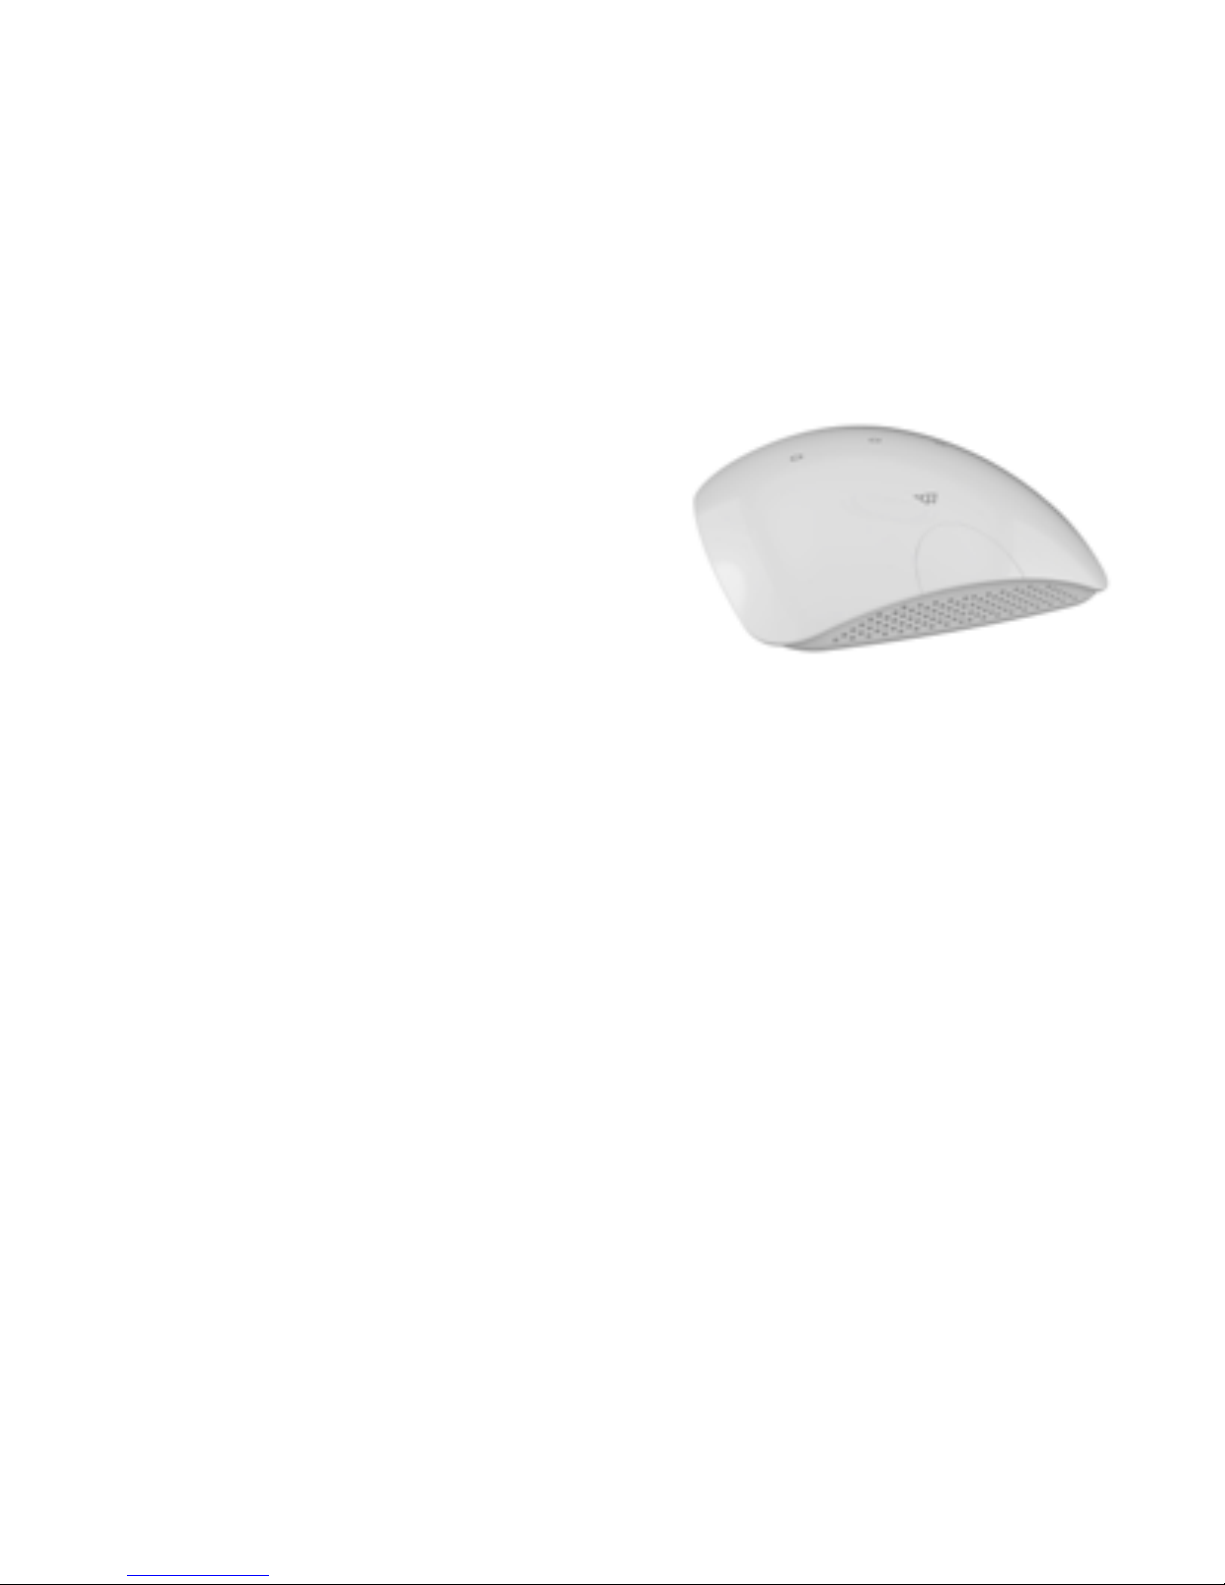
Lichtschalter
Der Lichtschalter ist der Schlüssel zu Wondrwalls
Lern-Fähigkeiten. Licht, Bewegung, Ton, Hitze und
Luftfeuchtigkeits-Sensoren innerhalb des Gerätes
bewachen stetig Ihre Lebensweise.
Mit der Benutzung von Bewegungssensoren lernt
Wondrwall, wann Sie aufwachen, zur Arbeit gehen
und wann Sie wieder nach Hause kommen und passt
die Temperatur und die Beleuchtung entsprechend
für Ihr Heim an.
Lichter in unbenutzten Räumen werden automatisch ausgeschaltet wenn man das Haus
verlässt, was Strom spart und wenn niemand Zuhause ist, aktiviert Wondrwall den AwayModus, in welchem willkürlich verschiedene Räume beleuchtet werden um die Illusion zu
erzeugen, dass jemand d ist.
Wondrwall identifiziert ebenfalls den Ton eines Rauchmelders, wobei es alle Lichter im
Haus aufblitzen lässt um sicher zu stellen, dass alle Bewohner des Hauses wach sind,
Bescheid wissen und es sendet ebenfalls Alarme an alle angebrachten Lichtschalter.
Dieser Alarm wird nur im Abwesenheits- und Schlafmodus aktiviert.
Wondrwall kann auch Musik spielen mit in Lichtschaltern eingebauten Lautsprechern, die
Amazon Alex benutzen.
70
Page 71
Thermostat
Das Thermostat ist ein moderner Ersatz zu
traditionellen Einheiten.
Wondrwall erlernt Ihre TemperaturPreferenzen und weckt Sie jeden Morgen
mit dem richtigen Grad an Wärme. Das
System passt sich stetig an und optimiert
die innere Umgebung während des Tages,
egal welches Wetter, es stellt sicher, dass
Sie sich immer wohl fühlen.
Alle Wondrwall Anpassungen geschehen in
Echtzeit, und ziehen jede Art von Transportverspätung oder Komplikationen in Betracht.
Sie beginnen immer genau im richtigen Moment, Ihr Heim zu heizen.
Durch eine verkabelte Verbindung mit Ihrem Heizkessel ist es einfach zu installieren und
erlaubt die manuelle Steuerung der Heizung nach Bedarf.
71
Page 72
Sirene
Die Sirene ersetzt Ihren existierenden HeimsicherheitsAlarm und ergänzt andere bereits vorhandene Geräte, wie
den Rauchmelder oder den Kohlenmonoxid-Detektor.
Wondrwall’s Sprachtechnologie reagiert auf den Ton
von zerbrochenem Glas durch die Aktivierung der
eingebauten Sirene, was dazu führt, dass innere und
äußere Lichter aufleuchten und Sie durch die
Wondrwall-App benachrichtigt werden. Diese Funktion
ist nur im Abwesenheits- und Schlafmodus aktiviert.
Die Sirene arbeitet in Harmonie mit den anderen
Wondrwall Komponenten und wird kabellos mit Strom
versorgt, was es Ihnen erlaubt, das Gerät flexibel
innerhalb Ihres Eigentums zu platzieren.
Wenn ein Alarm aktiviert wird, wird die Sirene einen Ton von sich geben und Lichter in
Sequenzen aufleuchten lassen. Der Ton der Sirene hängt von der Art des Alarmes ab:
Andauernd bei Einbrechern oder einem Notfall-Alarm, oder ein 2 Sekunden Alarm mit
1-sekündigem Intervall bei einem Feuer-Alarm.
72
Page 73
Schlüsselanhänger
Der Schlüsselanhänger ist Ihre mobile Verbindung zu Ihrem Heim. Das
diskrete Gerät führt eine automatische Nähe-gebundene Scharf- und
Unscharfstellung des Schutzsystemes gegen Eindringlinge, basierend auf
Ihrer Nähe zu Ihrem Eigentum, ein.
Der Anhänger besitzt einen integrierten Panik-Knopf: Drücken Sie den
Knopf, um gleichzeitig alle zuvor programmierten Kontakte davon in
Kenntnis zu setzen.
Zusätzlich hat der Anhänger ein nützliches Check-in-Feature, welches Sie
über die Wondrwall-App benachrichtigt, wenn Familienmitglieder nach
Hause zurückkehren.
73
Page 74
74
Page 75

Installation
Wir haben Wondrwall so gestaltet, dass es zu so vielen Heimen wie möglich passt. Die
einzigen Voraussetzungen sind:
• Ihre bereits verbauten Lichtschalter müssen eine neutrale Verkabelung haben.Wenn
Sie sich unsicher sind, konsultieren Sie einen qualifizierten Elektriker.
• Sie benötigen einen kabellosen Router mit Internetanschluss in Ihrem Heim.
• Sie benötigen ein traditionelles, “verkabeltes” Thermostat, welches mit unserem
Thermostat ersetzt werden kann (dies nimmt normalerweise nur 15 Minuten in
Anspruch).
Das System funktioniert, wenn nur das Basis-Kit installiert ist, doch mit limitierter
Funktionalität. Unsere Empfehlung ist, die Lichtschalter im ganzen Haus auszutauschen
um die volle Kraft von Wondrwall zu erleben. Die folgenden Seiten erklären, wie jede
Komponente installiert und mit Ihrem kabellosen Netzwerk gekoppelt werden kann.
75
Page 76
Lichtschalter
Wenn Sie die
Lichtschalter
installieren, arbeiten
Sie mit dem Netzstrom
(230 Vac). Wenn Sie sich
unsicher darüber sind,
nutzen Sie L1 einen
qualifizierten Elektriker.
N Inputs L
Outputs
L2
N2
L1
N1
L3
N3
76
Page 77

Lichtschalter
Der Lichtschalter ersetzt einen normalen Einfach-Lichtschalter. Für den Hauptschalter
wählen Sie einen aus, der sich nah an Ihrem W-Lan Router, oder in der Mitte Ihres Heimes
befindet.
1. Schalten Sie die Hauptstromzufuhr, mit
welcher der Lichtschalter verbunden
ist, ab. Entfernen Sie den alten
Lichtschalter.
2. Ziehen Sie die Seite der Wondrwall
Lichtschalter-Abdeckung zu sich und
nehmen Sie sie von der Basis (A).
3. Verbinden Sie die Live und
Neutralen Input Kabel mit den L und
N Anschlüssen an der Rückseite
der Lichtschalter-Basis (B) Die
Verbindungsschrauben befinden sich
überhalb des Kabeleingangspunktes.
4. Verbinden Sie die Kabel mit den
Lichtern:
• Wenn Sie nur einen
Beleuchtungsschaltkreis nutzen,
nutzen Sie die Verbindungen L1/N1. Die
mittlere LED wird leuchten.
• Bei zwei Schaltkreisen nutzen Sie L2/
N2 und L3/N3. Die äußere LED wird
leuchten.
• Bei drei Schaltkreisen nutzen Sie
alle Output-Verbindungen. Alle LEDs
werden aufleuchten.
5. Fixieren Sie die Basis an der Wand. Es
werden dieselben Löcher benutzt,
wie bei Ihrem alten Lichtschalter.
Schrauben sind mitgeliefert.
6. Stecken Sie die Abdeckung wieder auf
die Basis.
7. Sie können den Lichtschalter nun mit
anderen Wondrwall Komponenten
verbinden. (Siehe Seite 89).
8. Wiederholen Sie die Schritte für
jeden Lichtschalter, den Sie benutzen
möchten.
77
Page 78
Wenn Sie sich
unsicher sind,
wie man das
macht, oder
Sie ziehen vor,
diese Aufgabe
nicht selbst
zu erledigen,
konsultieren Sie
einen Elektriker.
Thermostat
Das Wondrwall Thermostat ersetzt Ihr altes Thermostat, oder für die Neuanbringung,
setzten Sie es 1.5 m (5 feet) über dem Boden an. Halten Sie es von Wärme- oder
Kältequellen entfernt, wie dem direkten Sonnenlicht, Heißwasserrohren oder
Feuerstellen, Lampen, Außentüren oder Fenstern, feuchten Bereichen oder Bereichen mit
einem Mangel an Luftzirkulation.
A
A
A
A
B
DC
Kältesteuerung /
Kompressor
Lüftung
Hitzesteuerung
Strom für Kühlung
Strom für Heizenergie
Wärmepumpe c/o
(+ in Hitze)
Wärmepumpe c/o
(+ in Kälte)
Hitze 2. Stufe/
aux Hitze
2. Stufe KälteSteuerung
Allgemein
78
Page 79

Thermostat
1. Schalten Sie die Stromzufuhr zu Ihrer
HVAC Einheit oder Boiler ab und entfernen
Sie die Abdeckung des alten Thermostats.
2. Notieren Sie sich die Platzierung
der Kabel, die mit dem Thermostat
verbunden sind.
3. Entfernen Sie alle Kabel von dem alten
Thermostat und sichern Sie sie, damit
sie nicht zurück in die Wand fallen.
Befestigen Sie ein Schild an jedem Kabel
während Sie diese identifizieren, um
sicher zu gehen, dass die Kabel später
mit den Terminals zusammenpassen.
4. Entfernen Sie das alte Thermostat von
der Wand. Lassen Sie wenigstens 75 mm
(3”) des Kabels frei für die Verkabelung
des Thermostats. Entfernen Sie 3 mm
(1/8”) der Isolierung von jedem Kabel und
verdrehen Sie die Drähte, um ein festes
Ende zu erhalten.
5. Entfernen Sie die Abdeckung des
Wondrwall Thermostats. Halten Sie die
Schleife auf der Rückseite fest und
ziehen Sie die Abdeckung nach vorne.
6. Halten Sie die Thermostat-Basis an die
Wand, an welcher Sie es befestigen
möchten und markieren Sie die drei
Befestigungslöcher (A).
7. Bohren Sie die Befestigungslöcher und
(wenn nötig) benutzten Sie die Dübel.
Ziehen Sie die Kabel durch das Loch in
der Basis (B), dann benutzen Sie einen
Philips Schraubenzieher um die Basis an
der Wand zu befestigen.
8. Verbinden Sie die Kabel: Drücke Sie den
orange-farbenen Clip der korrekten
Verbindug herunter (C) und setzen Sie
das Kabel vollständg in das korrekte Loch
(D). Lassen Sie den Clip los. Vergewissern
Sie sich, dass das Kabel gesichert ist.
9. Setzen Sie die Thermostat-Abdeckung
wieder auf. Drücken Sie, bis es klickt und
die Basis abgedeckt ist.
10. Schalten Sie den Strom zu Ihrem HVAC
System oder Boiler wieder an.
79
Page 80
Thermostat (Fortsetzung)
Sie können nun das Thermostat mit anderen Wondrwall Komponenten verbinden (Seite 93).
Dinge die Sie beachten sollten, wenn Sie das Thermostat installieren:
1. Wenn Sie getrennte Energiequellen für
RH und RC nutzen, müssen Sie den ab
Werk installierten Jumper zwischen
RH und RC entfernen.
2. Viele Systeme bieten keine
gewöhnlichen ‘C’ Kabel. In diesem Fall
benutzen Sie 4 AA Batterien um die
Einheit in Betrieb zu nehmen.
3. Das Thermostat erkennt die Art
Ihres Systems automatisch durch
die Verbindungen, die Sie erstellen.
Das Display wird ‘E0’ anzeigen, bis
die Einheit korrekt verbunden und
zurückgesetzt wurde (Indem Sie die
Front-Abdeckung abziehen und erneut
anbringen).
4. Das Thermostat ist so konfiguriert,
dass es mit einstufiger Kühlung,
einstufigem Gas, Öl oder Kraftsto
(Nicht-Heizpumpe, einfache Lüftung)
funktioniert. Sollte Ihr System 21
anders ausgestattet sein, beziehen sie
sich auf den Programmier-Teil auf Seite
70, um Ihr Thermostat entsprechend
Ihrem System zu installieren.
80
Page 81
Sirene
Die Sirene ist wasserfest gestaltet, um an einer
Außenwand Ihres Eigentums angebracht werden zu
können.
Bringen Sie die Sirene so hoch wie möglich an, sodass
der Alarm und die Lichter Aufmerksamkeit erregen,
wenn der Alarm ausgelöst wird.
Drei Wandanschlüsse und Schrauben sind beigelegt,
um die Sirene an der Wand anzubringen.
Entfernen Sie die Abdeckung:
1. Nutzen Sie einen Philips Schraubenzieher
um die untere Schraube (A) zu lösen, bis der
Schraubenkopf von der Abdeckung befreit ist.
2. Ziehen Sie vorsichtig an der Unterseite der
Abdeckung bis diese die Schraube freigibt, dann
entfernen Sie die Abdeckung.
Die Sirene anbringen:
3. Halten Sie die Basis der Sirene gegen die Wand,
an der Sie diese befestigen möchten und markieren
Sie die drei Befestigungslöcher (B). Bohren Sie die
Löcher und setzen Sie die Dübel ein.
A
B
81
Page 82
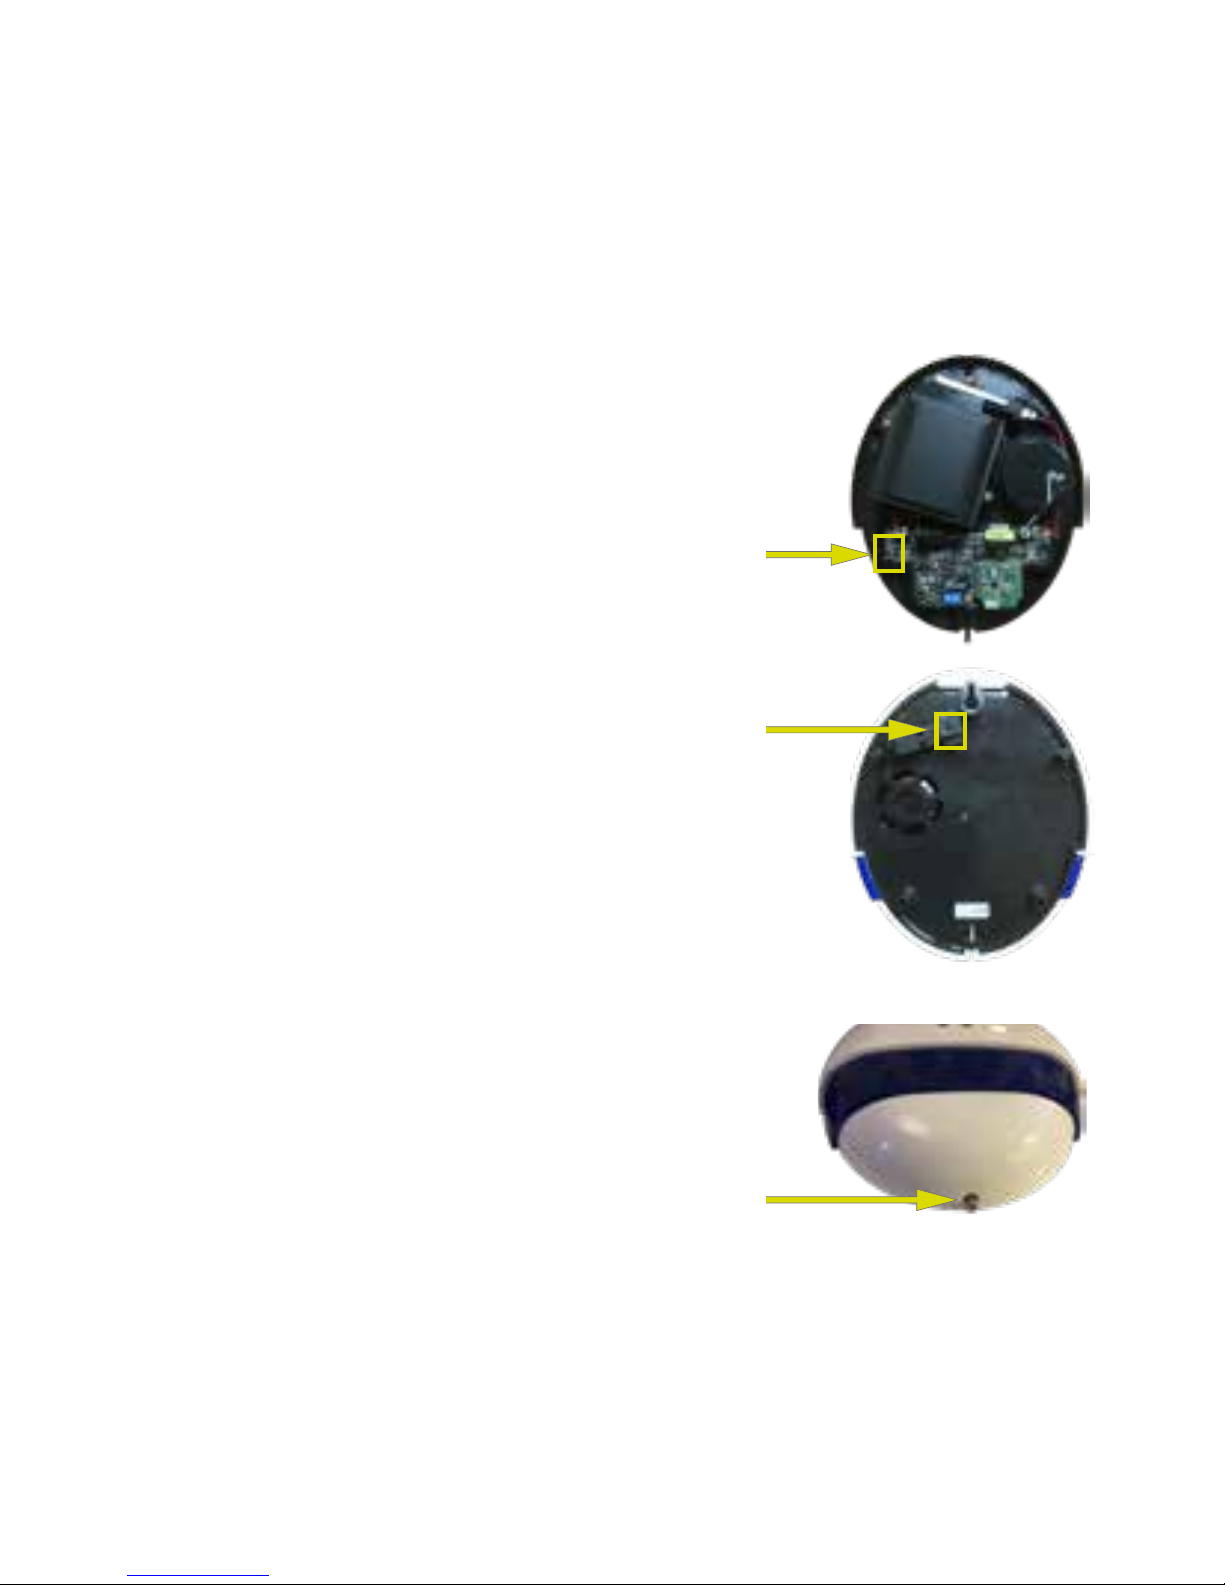
Sirene (Fortsetzung)
4. Bevor Sie die Sirene befestigen empfehlen wir, dass Sie die
Sirene mit dem Wondrwall System koppeln (Seite 95).
5. Legen sie den Batterieschalter auf AN (C).
6. Überprüfen Sie, ob die Sirene korrekt funktioniert.
Um dies zu tun aktivieren Sie den Alarm in der Wondrwall
App und bewegen sich dann vor einem Bewegungssensor.
7. Nutzen sie einen Philips Schraubenzieher um die
Sirenenbasis in die Wand zu schrauben. Stellen Sie
sicher, dass der Tamper-Schalter (D) vollständig gegen
die Wand gedrückt ist (Falls dort eine Lücke sein sollte,
verschließen Sie diese mit entsprechendem Füllmaterial).
Setzen Sie die Abdeckung zurück in Position:
8. Haken Sie die Lippe an der Oberseite der Abdeckung über
die Oberseite der Basis.
9. Drücken Sie vorsichtig die Unterseite der Abdeckung auf
die Basis, sodass die untere Schraube in das Loch in der
Abdeckung (E) rutscht.
10. Ziehen Sie die untere Schraube mit einem Philips
Schraubenzieher fest.
E
C
D
82
Page 83

Verbindung
Das Wondrwall System nutzt Energie-eziente ZigBee Technologie, welche einen
verlässlichen Betrieb sicherstellt, ohne Einfluss auf ihr W-Lan Setup zu nehmen.
Jeder Lichtschalter ist mit eingebautem W-Lan Signal ausgestattet, welches ihnen
erlaubt, unabhängig zu arbeiten, doch dies bedeutet auch, dass sich das Hauptgerät
mit der Cloud und von der Plattform für Vorhersagemodelle verbindet. Selbst wenn
das W-Lan nicht verfügbar ist, wird das Wondrwall System weiterarbeiten, denn jeder
Schalter hat seinen eigenen Betrieb
Bluetooth ist in jedem Schalter enthalten und erlaubt es Ihnen, sich mit anderen
Bluetooth-Geräten zu verbinden, was unglaublich viele Möglichkeiten bietet.
Um das Wondrwall Netzwerk aufzubauen, müssen Sie zuerst den Haupt-Lichtschalter mit
Ihrem W-Lan Router und Netzwerk verbinden, indem Sie die Wondrwall App nutzen, die
im App Store und auf Google Play verfügbar sind.
83
Page 84
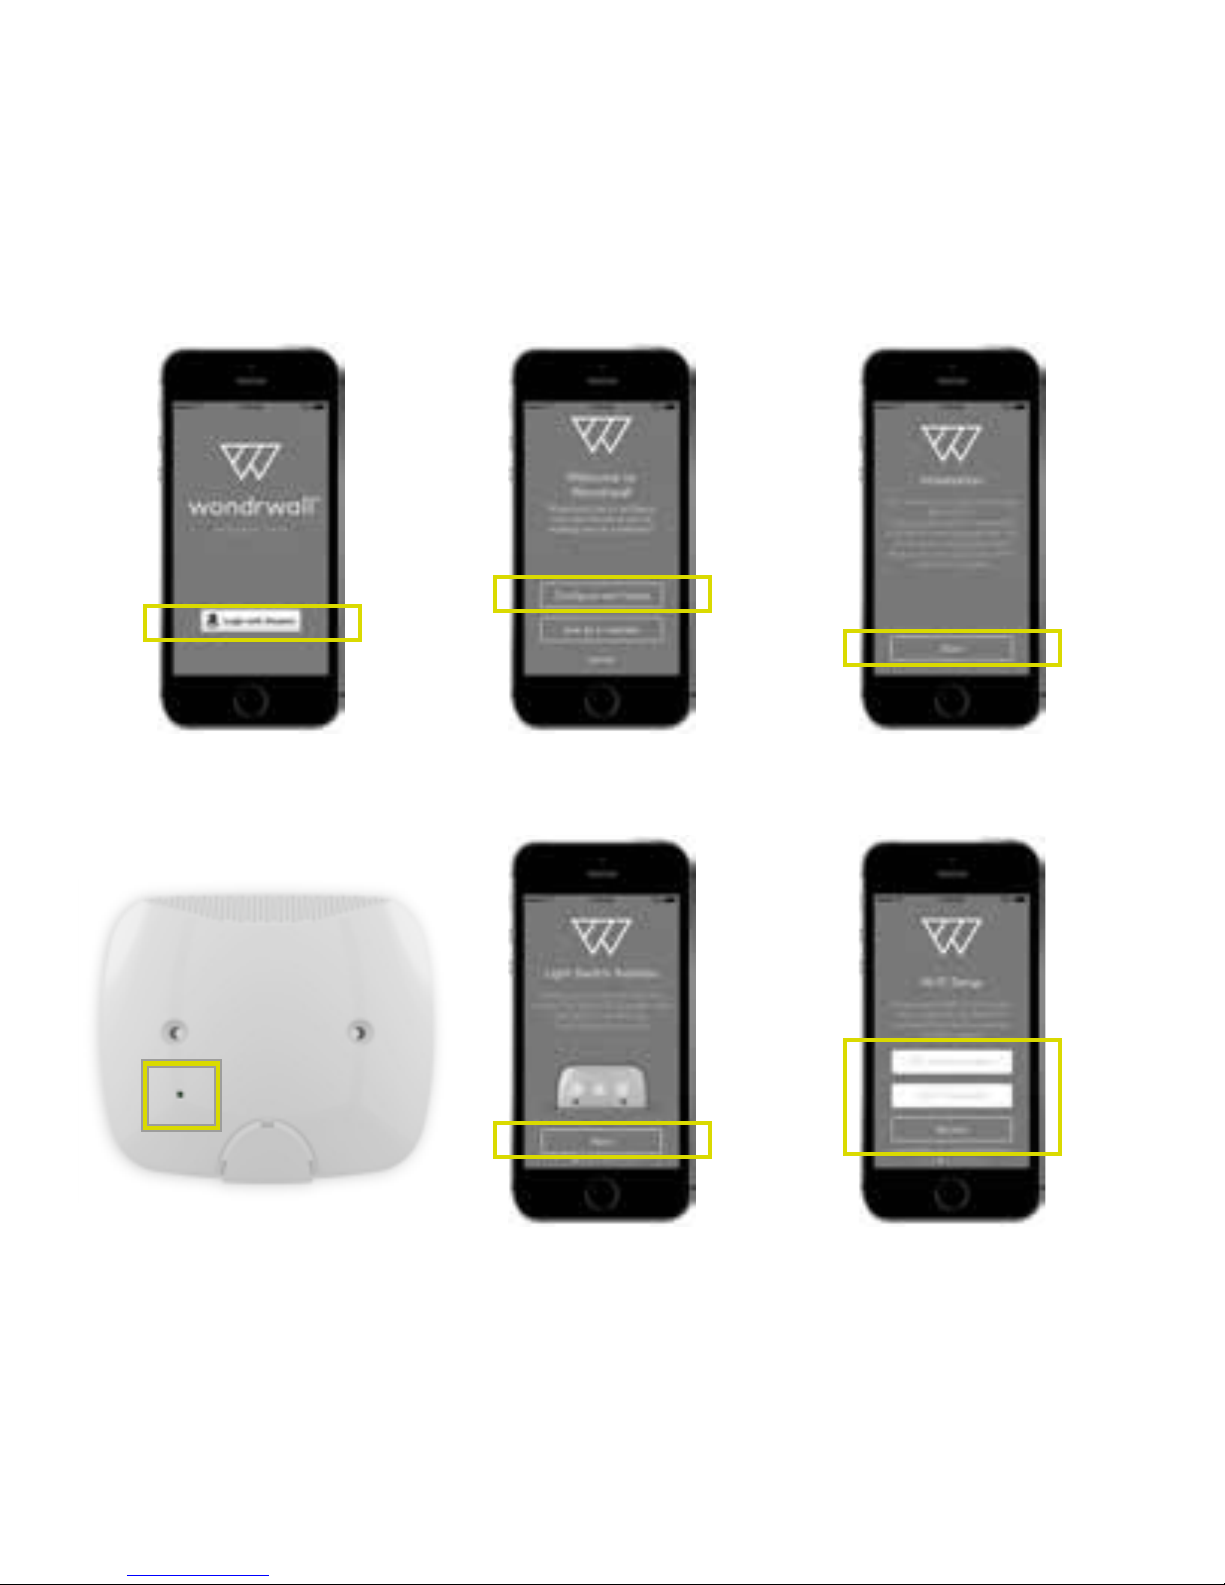
A
D
B
E
C
F
84
Page 85

Verbinden Sie den Haupt-Lichtschalter
Der Haupt-Lichtschalter wird zum Knotenpunkt des Wondrwall Netzwerks. Wählen Sie
den Lichtschalter, der sich in der Mitte Ihres Heimes befindet, am Nächsten zu Ihrem
W-Lan Router.
1. Önen Sie die Wondrwall App und drücken Sie auf Login mit Amazon (A). Folgen
Sie den Bildschirm Anleitungen, um sich in Ihren Amazon Account einzuloggen. Im
Wondrwall Willkommen-Bildschirm drücken Sie Konfiguriere eigenes Haus (B).
2. Drücken Sie Start auf dem Initialisierungs-Bildschirm (C), um den Install-Wizard zu
starten, welcher Ihnen eine Schritt-für-Schritt Anleitung önet.
3. Entfernen Sie die Front-Abdeckung Ihres Lichtschalters und suchen Sie den
Funktions-Knopf (D). Drücken Sie Nächste in der App.
4. Nutzen Sie eine Nadel, um den Knopf zu drücken und für ungefähr 20 Sekunden
zu halten, bis alle drei LEDs blinken. Lassen Sie den Knopf los und drücken Sie auf
Nächste in der App (E).
5. Geben Sie SSID und Passwort Ihres Netzwerkes im W-Lan Setup Bildschirm ein (F),
um dem kabellosen Netzwerk Ihres Heimes beizutreten. Drücken Sie auf Zutritt.
85
Page 86
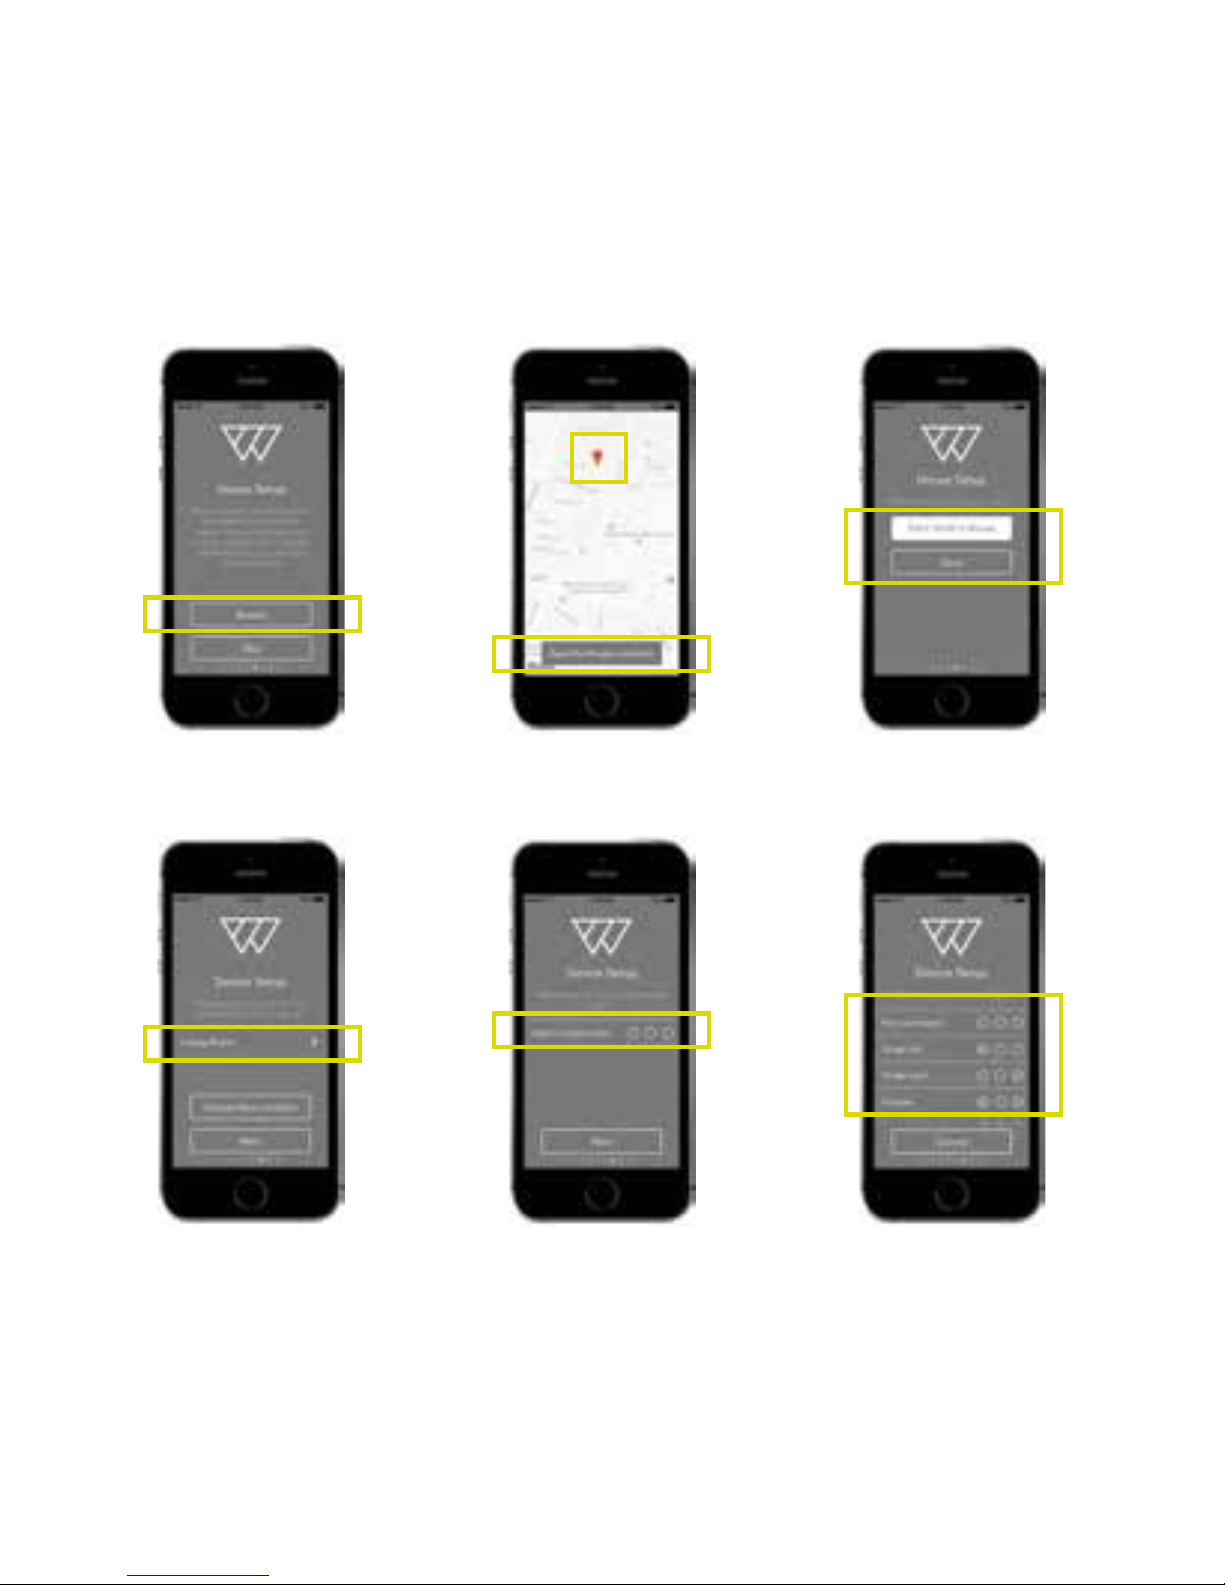
G
J
H
K
I
L
86
Page 87

Verbinden Sie den Haupt-Lichtschalter
(Fortsetzung)
6. Drücken sie auf Festlegen auf dem Haus-Setup Bildschirm um den Standort Ihres
Hauses festzulegen (G). Diese Funktion erlaubt es Wondrwall, die Umgebungs- und
Energieverbrauch-Einstellungen anzupassen, je nach dem, wie weit Sie von zu Hause
entfernt sind. (Drücken Sie Skip um diesen Punkt zu überspringen).
7. Eine Karte zeigt Ihren aktuellen Standort an (H). Drücken Sie auf Haus-Standort
festlegen.
8. Benennen Sie Ihr Haus im nächsten Schritt und drücken Sie auf Speichern (I).
9. Nun drücken Sie auf den angezeigten Standort-Namen (E), um eine Liste der
existierenden Standorte (runterscrollen wenn nötig) anzuzeigen. Wählen Sie den
richtigen Standort aus. Alternativ können Sie auf Erstelle neuen Standort drücken, um
einen neuen Standort zu bestimmen. Drücken Sie auf Nächste.
10. Geben Sie einen Namen für den Lichtschalter ein und drücken Sie auf Speichern.
11. Drücken Sie auf Socket Zustand auswählen (F) und wählen die Option aus der Liste,
die am Besten beschreibt, wie der Lichtschalter verkabelt ist. Der ausgewählte Socket
Zustand wird auf dem Bildschirm angezeigt. Drücken Sie auf Nächste.
12. Schließlich drücken Sie auf Beenden in demSuccess-Bildschirm, um die Installation zu
beenden, oder drücken Sie auf Ein weiteres Gerät hinzufügen um die Kopplung mit
weiteren Geräten fortzusetzen.
87
Page 88
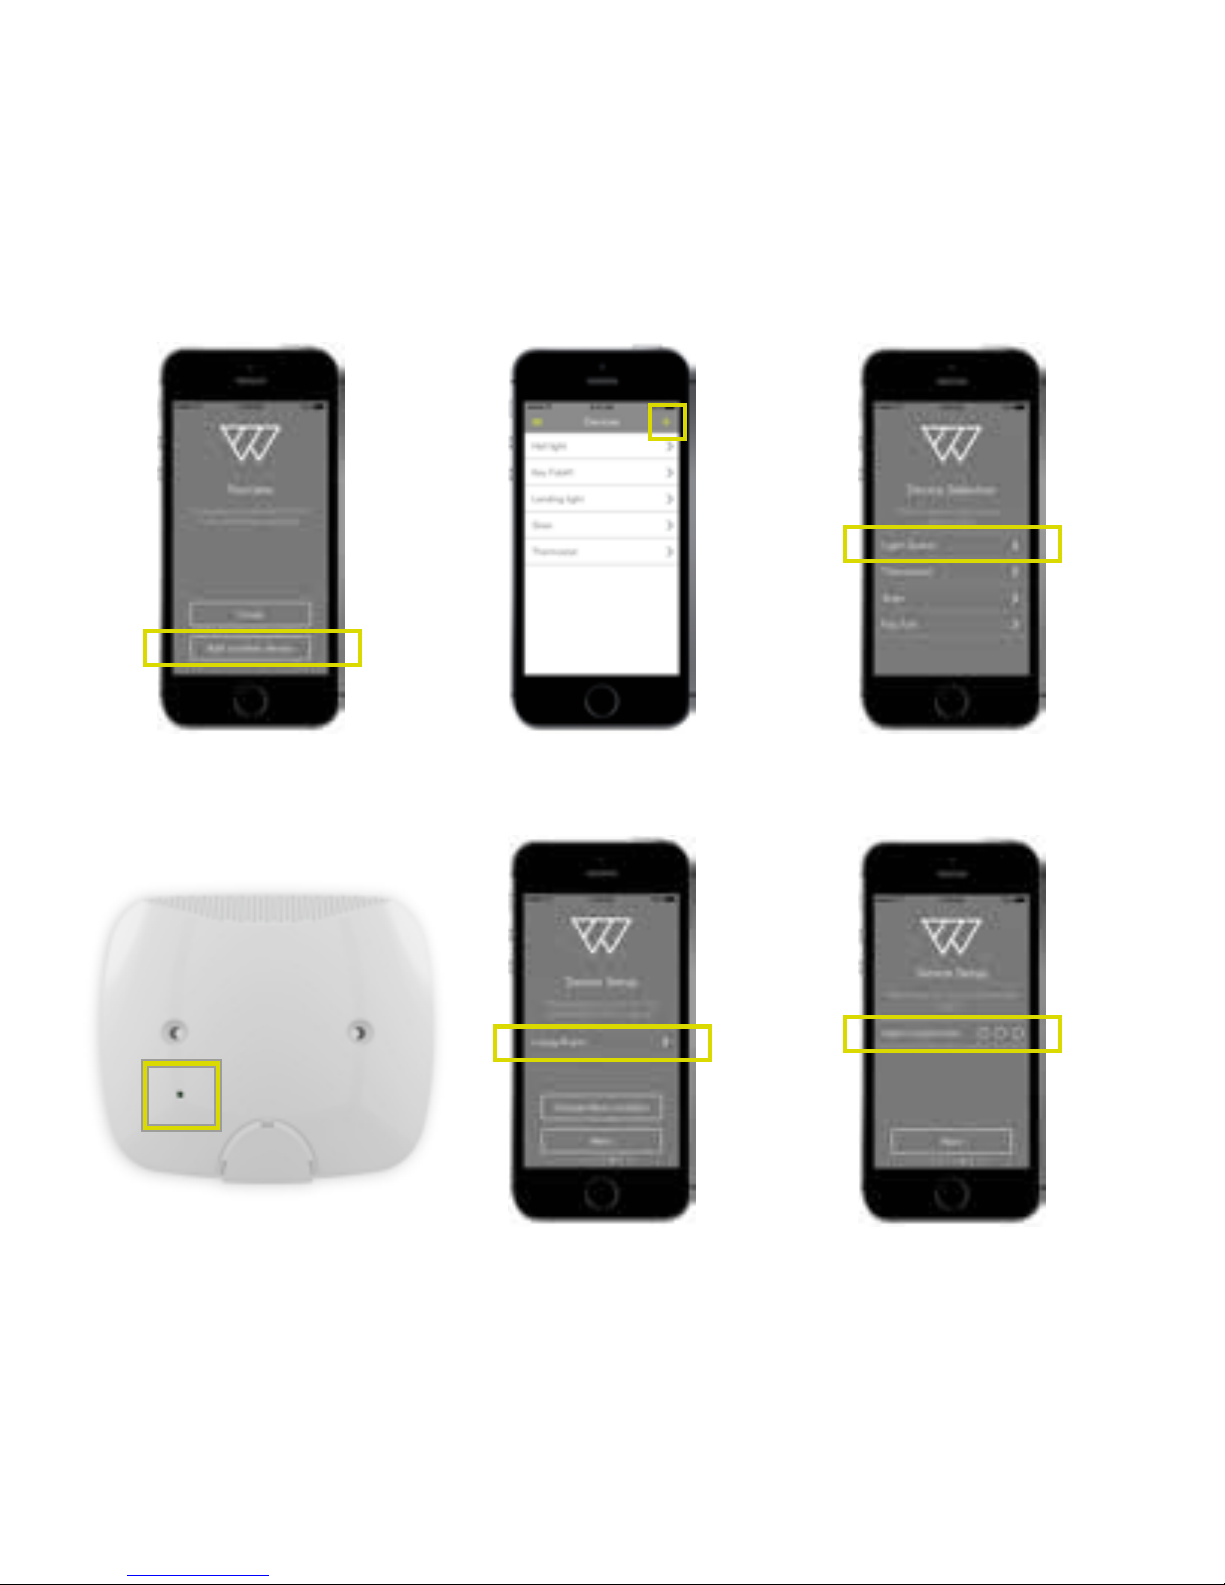
A
D
B
E
C
F
88
Page 89

Mehrere Lichtschalter verbinden
1. Entweder drücken Sie auf Ein anderes Gerät hinzufügen auf dem Success-Bildschirm
(A), oder das + auf dem Geräte-Bildschirm (B), dann wählen Sie Lichtschalter aus der
Geräte-Auswahlliste (C).
2. Entfernen Sie die Front-Abdeckung des Lichtschalters und finden Sie den Funktions-
Knopf (D). Drücken Sie Nächste in der App. Nutzen Sie eine Nadel um den Knopf zu
drücken und für circ 20 Sekunden zu halten, bis alle drei LEDs aufblinken. Lassen Sie
den Knopf los und drücken Sie auf Nächste in der App.
3. Nun drücken Sie auf den angezeigten Standort-Namen (E) um eine Liste der
existierenden Standorte (runterscrollen wenn nötig) anzuzeigen. Wählen Sie den
richtigen Standort aus. Alternativ können Sie auf Erstelle neuen Standort drücken, um
einen neuen Standort zu bestimmen. Drücken Sie auf Nächste.
4. Geben Sie einen Namen für den Lichtschalter ein und drücken Sie auf Speichern.
5. Drücken Sie auf Socket Zustand auswählen (F) und wählen die Option aus der Liste,
die am Besten beschreibt, wie der Lichtschalter verkabelt ist. Der ausgewählte Socket
Zustand wird auf dem Bildschirm angezeigt. Drücken Sie auf Nächste.
6. Schließlich drücken Sie auf Beenden in dem Success-Bildschirm, um die Installation zu
beenden, oder drücken Sie auf Ein weiteres Gerät hinzufügen um die Kopplung mit
weiteren Geräten fortzusetzen.
89
Page 90
Treppen-Lichtschalter
Wenn Sie Lichtschalter oben und unten an einer Treppe installieren,
müssen Sie die beiden Lichtschalter miteinander verbinden, sodass beide
Schalter das Licht kontrollieren, welches auf die Treppen fällt.
Um zwei Lichtschalter zu verbinden:
1. Wählen Sie Lichtschalter 1 im GeräteBildschirm und drücken Sie auf
Komplexe Lichter (A).
2. Drücken Sie auf Einen anderen
Lichtschalter verbinden auf derselben
Seite (B).
3. Wählen Sie Lichtschalter 2 aus der
Liste aus (C).
4. Drücken Sie einen oder mehrere An/Aus Knöpfe am
Lichtschalter 2 (D). Dies verbindet die Knöpfe des
Lichtschalter 2 mit dem Lichtschalter 1. Die Verbindung
wird mit einer gepunkteten Linie angezeigt (E).
Drücken Sie Speichern um dies zu speichern. Beide
Lichtschalter kontrollieren nun dasselbe Licht.
5. Wiederholen Sie diesen Prozess, wenn Sie weitere
Lichtschalter verbinden möchten.
A B C
D E
90
Page 91
Die Schlüsselanhänger koppeln
1. Klicken Sie entweder auf Ein neues
Gerät hinzufügen im Success-
Bildschirm (A) oder das + im
Gerätebildschirm (B), dann wählen
Sie Schlüsselanhänger aus der
Geräte-Auswahlliste (C) aus.
2. Stellen Sie sicher, dass die
Batterien im Schlüsselanhänger
eingesetzt sind, dann drücken Sie
den Knopf (D). Drücken Sie auf
Nächste in der App.
3. Geben Sie einen Namen für den
Anhänger ein (F) und drücken Sie
auf Speichern.
4. Drücken Sie auf Fertigstellen auf
dem Success-Bildschirm um die
Installation zu beenden oder Ein
weiteres Gerät hinzufügen um
mit der Kopplung von Wondrwall
Geräten fortzufahren.
A
D
B
E
C
F
91
Page 92
A
D
B
E
C
F
92
Page 93

Das Thermostat verbinden
1. Entweder klicken Sie auf Ein weiteres Gerät hinzufügen im Success-Bildschirm, oder
+ in dem Geräte-Bildschirm, dann wählen Sie Thermostat aus der Geräteliste aus. (A).
2. Drücken Sie den Modus Knopf an der Vorderseite des Thermostats (B) bis AUS
angezeigt wird. Drücken Sie Nächste in der App (C).
3. Drücken und halten Sie die Stelle zwischen den HOLD und Lüftung Knöpfen
gleichzeitig, wischen Sie mit dem Finger den rechten Regler herunter (B). Das Display
wird zu 01 wechseln. Drücken Sie Nächste in der App.
4. Nutzen Sie den Regler um das Display auf 12 zu setzen, dann drücken Sie auf HOLD.
Dies bringt Sie in das ‘Netzwerk beitreten’ Menü. Nun nutzen Sie den Regler noch
einmal um das Display auf 01 zu setzen und drücken HOLD tum es mit dem Wondrwall
Netzwerk zu verbinden. Drücken Sie Nächste in der App.
5. Nun drücken Sie auf den angezeigten Standort-Namen (E), um eine Liste der
existierenden Standorte anzuzeigen. Wählen sie den benötigten Standort. Alternativ
können Sie auch auf Erstelle einen neuen Standort drücken um einen neuen Standort
zu bestimmen. Drücken Sie Nächste.
6. Drücken Sie auf Fertigstellen auf dem Success-Bildschirm um die Installation zu
beenden oder Ein weiteres Gerät hinzufügen um mit der Kopplung von Wondrwall
Geräten fortzufahren.
93
Page 94
A
D
B
E
C
F
94
Page 95

Koppeln Sie die Sirenen
Wir empfehlen Ihnen, die Sirenen zu koppeln, bevor sie an die Wand angebracht werden.
1. Entwededer klicken Sie auf ein neues Gerät hinzufügen im Success-Bildschirm, oder
auf das + im Geräte-Bildschirm. Dann wählen Sie sirene aus der Liste der Geräte aus.
(A)
2. Entfernen sie die abdeckung (Seite 81). Drücken Sie Nächste in der App (B).
3. Drücken und halten Sie den Funktions-Knopf (C) für etw 10 Sekunden bis die rechte
LED blinkt. Lassen Sie den Knopf los. Die Sirene ist nun mit dem Wondrwall Netzwerk
verbunden. Drücken Sie Nächste in der App. (D)
4. Nun drücken Sie auf den angezeigten Standort-Namen (E), um eine Liste der
existierenden Standorte anzuzeigen. Wählen Sie den benötigten Standort. Alternativ
können Sie auch auf Erstelle einen neuen Standort drücken um einen neuen Standort
zu bestimmen. Drücken Sie Nächste.
5. Drücken Sie auf Fertigstellen auf dem Success-Bildschirm um die Installation zu
beenden oder Ein weiteres Gerät hinzufügen um mit der Kopplung von Wondrwall
Geräten fortzufahren.
6. Bringen Sie die Abdeckung wieder an (Seite 82).
95
Page 96

Mit Amazon Alex verbinden
1. Gehen Sie zu http://alex.amazon.com und loggen Sie sich mit Ihrem AmazonAccount Benutzernamen und Passwort ein.
2. Wählen Sie Skills aus dem Menü auf der linken Seite des Alex Portals aus und
suchen Sie “Wondrwall Home Automation”.
3. Klicken Sie auf Wondrwall Home Automation in der Liste um dessen Bildschirm
anzuzeigen. Klicken Sie auf Aktivieren um den Skill zu Ihrer Alex Skill-Liste
hinzuzufügen. Alex findet Ihre Wondrwall Geräte automatisch.
4. Sie können Alex nun verwenden und steuern Ihr Wondrwall System durch die
Sprachsteuerung von Alex. Der Wondrwall Home Automation Bildschirm listet
Beispielbefehle auf, die Sie ihrem Wondrwall System geben können, zum Beispiel:
“Alex, schalte das Schlafzimmer-Licht an“. (Für weitere Informationen generell zu
Alex-Funktionen, besuchen Sie www.alex. amazon.com).
5. Wenn Sie weitere Geräte hinzufügen, tun Sie dies, indem Sie auf Smart Home im
Menü auf der linken Seite des Alex Portals auswählen. Klicken Sie auf Geräte
managen und Geräte finden, oder sagen Sie “Finde Geräte“.
96
Page 97

Prozess der Alex-Aktivierung auf dem Lichtschalter:
Der Lichtschalter wird eine Aktivierungsanfrage senden nach dem
Einrichtungsprozess.
Sie werden eine Anfrage erhalten auf “Aktiviere Alex Voice Service”. Dialog wird auf
folgenden Seiten gezeigt:
Startseite
Geräte Details
Geräte Info Seite
Sie müssen ‘OK’ auswählen und den nächsten Schritt bestätigen vom Fenster, das sich
automatisch önet.
Wenn Sie ‘Abrechen’ auswählen, können Sie dies über ‘Reaktivierung’ in dem
Lichtschalter-Info Fenster aktivieren.
97
Page 98
98
Page 99
Betrieb
Sobald das Wondrwall System aufgesetzt ist, arbeitet es im Hintergrund, lernt, wie Sie
leben und macht Ihnen das Leben einfacher. Dieser Teil beschreibt alle Aufgaben, die Sie
an den Geräten selbst ausführen müssen.
Wondrwall app
Häufig vorkommende Icons, die Sie in der App sehen werden, sind:
Menü: Drücken Sie dies, um das Menü aufzurufen und zu schließen.
Informationen: Drücken Sie hier drauf um mehr Informationen zu einem
Gerät anzuzeigen.
Mehr: Mehr Optionen anzeigen.
Zurück: Zur vorherigen Seite zurück gelangen.
Hinzufügen: Ein neues Gerät, Standort oder Familienmitglied hinzufügen
99
Page 100
Wondrwall app: Seiten
Die Wondrwall App ist selbsterklärend, doch es gibt einige Bereiche, die Ihnen dabei
helfen, durch die App zu navigieren.
Das Menü erlaubt den Zugang zu den folgenden Seiten:
Home: Die Homepage zeigt den aktuellen Wondrwall Status und die
Temperatur.
Wondrwall erlent Ihre normale Routine, doch Sie können Home,
Away und Sleep Modus-Knöpfe berühren, die es Ihnen erlauben, den
passendsten Modus jederzeit auszuwählen.
Die Heizung, Beleuchtung und Sicherheit Buttons erlauben es Ihnen,
Ihr System mit dem Telefon zu steuern.
100
 Loading...