

Wolo 860 User Manual
Installation Instructions for
Model 860 AIR RAGE™ AIR TANK & COMPRESSOR
Your purchase of an AIR RAGE Air Tank & Compressor is a perfect choice to power your high-pressure air
horns, tools and accessories. The Wolo name, with more than thirty years of experience, is your guarantee of
a superior horn product. If you need help installing this product, our technicians are available to answer your
questions, Monday through Friday from 9 AM to 4 PM EST by calling 1-888-550-HORN (4676).
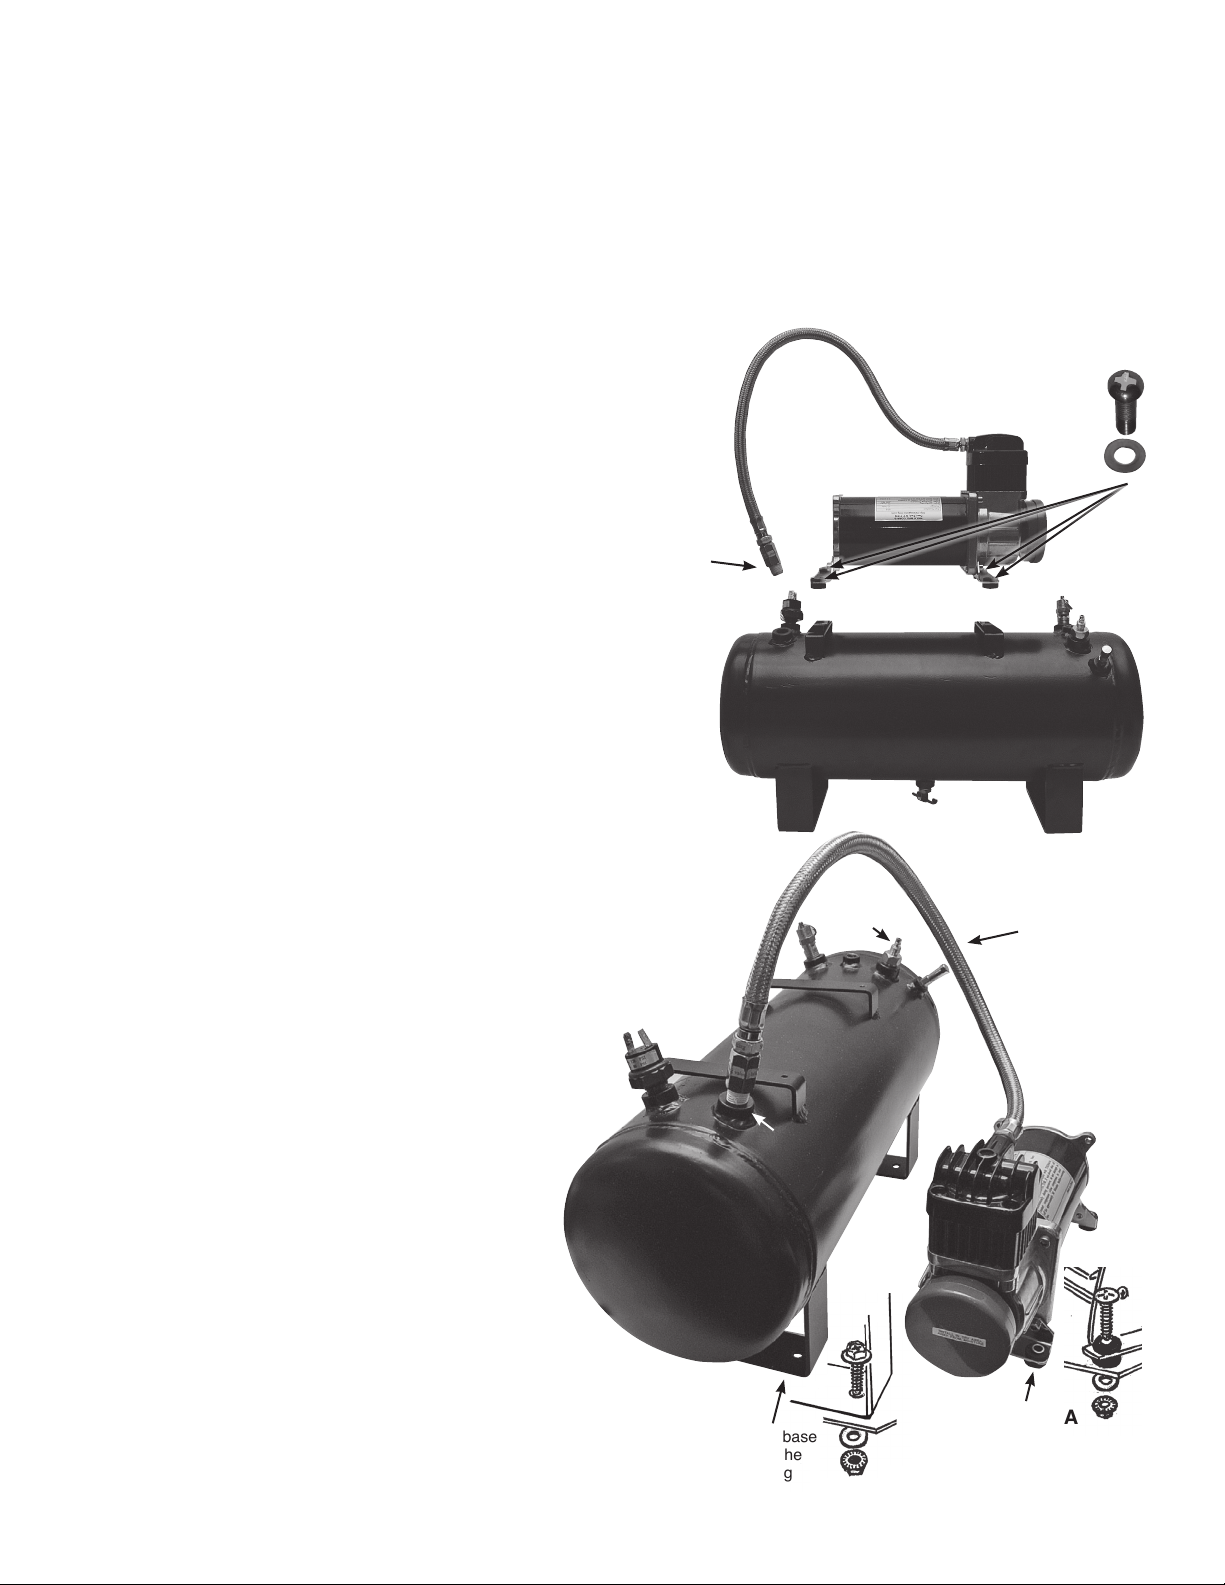
IMPORTANT: The compressor comes pre-mounted
to the air storage tank. The installer has the option to
separate the compressor from the tank and mount it
independently.
INDEPENDENT COMPRESSOR / TANK MOUNTING
(Fig. 1):
1. If the method of mounting the compressor is to be
independent of the tank, remove the four screws that
secure the compressor to the tank, then disconnect
the braided hose from the tank. You will now be able
to separate the compressor from the tank.
COMPRESSOR and TANK INSTALLATION (Fig. 2):
IMPORTANT! When selecting a mounting location for
the compressor, make sure that the compressor’s
braided hose will be close enough to the tank’s inlet
connection.
COMPRESSOR INSTALLATION (Fig. 2A):
2. Locate a convenient location to mount the
compressor that will be dry. If the location
is the engine compartment make sure
the compressor is safe from the heat of
the exhaust manifold and try to mount
compressor as far to the front of vehicle as
possible to provide optimum airow around
compressor. IMPORTANT! Do not mount
on a plastic fender well, or on exible
material.
3. Using the compressor’s mounting base as
a template, mark the hole locations and
drill to size, use a 3/16” drill bit. Secure the
compressor to the mounting surface using
the hardware provided. (Fig. 2A)
Fig. 1
Disconnect
the braided
hose
Fig. 2
Tank’s
outlet
connection
Tank’s inlet
connection
Remove
the four
screws
Make sure
that the
locations
of the
compressor
and the tank
will be close
enough to
allow the
braided hose
to connect to
tank’s inlet
TANK INSTALLATION (Fig. 2B):
4. The mounting location for the tank should
be easily reachable so that the tank
can be periodically serviced, draining
condensation, water from the petcock
located on the bottom of the tank.
5. Use the tank’s mounting bracket as a
template, mark the hole locations and drill
to size 15/32”. Secure tank with hardware
provided.
Use the tank’s mounting base
Fig. 2B
as a template to mark the
15/32” holes for drilling
Use the compressor’s mounting
Fig. 2A
base as a template to mark the
3/16” holes for drilling
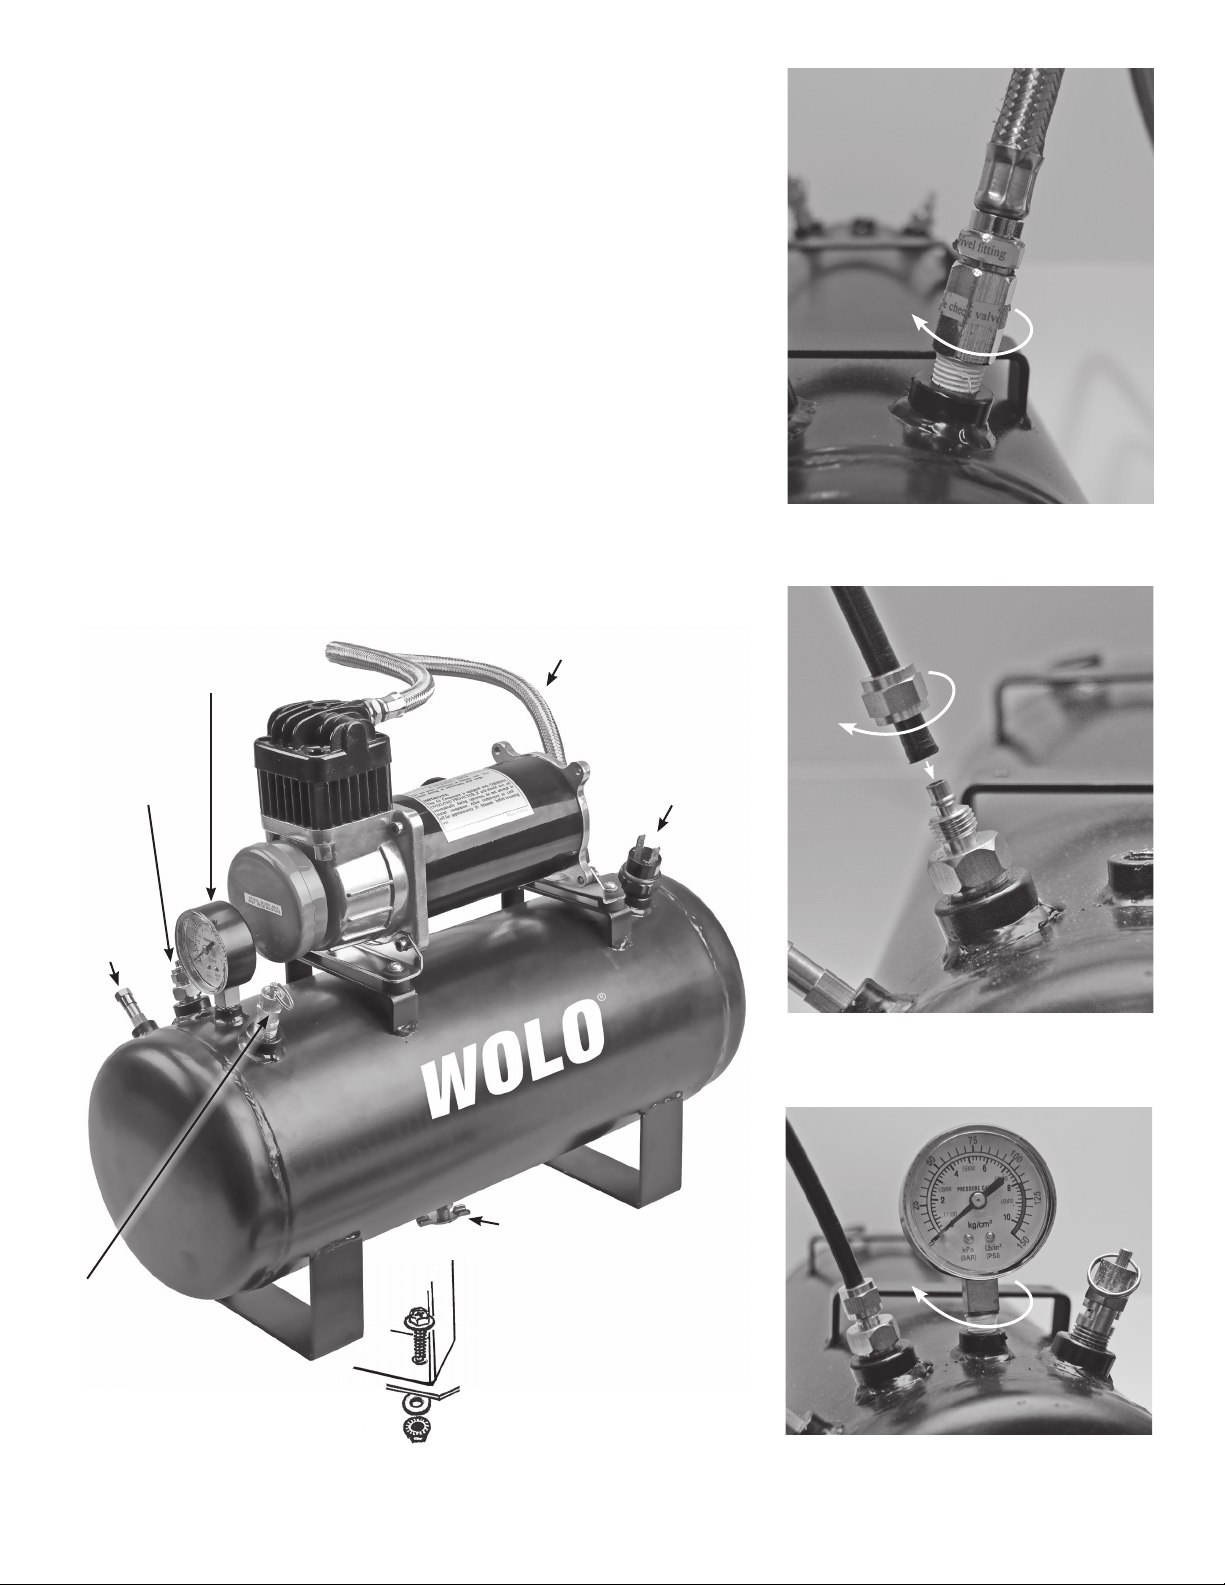
HOSE INSTALLATION (Fig. 3 and Fig. 4):
6. If the compressor was separated from the tank, connect the
stainless steel braided hose from the compressor to tanks inlet
port. (Fig. 3.) IMPORTANT: Make sure the threaded tting
on the end of the braided hose has either been wrapped with
®
Teon
tape or coated with pipe sealant to prevent air leaks.
7. Using the high-pressure plastic hose provided, cut to size to
be able to connect the tank to inlet tting of the accessory or
valve requiring high-pressure air. Place the brass nut from the
tank’s outlet tting onto the high-pressure plastic hose. Push
the plastic hose fully onto the outlet tting, tighten the brass nut
onto the outlet tting. (Fig. 4.).
CAUTION: Do not over tighten the brass nut.
8. The other end of the plastic hose is connected to the accessory
or valve requiring high-pressure air.
PRESSURE GAUGE INSTALLATION (FIG. 5)
9. Install the pressure gauge to tank. IMPORTANT: The threads of
®
the gauge have been wrapped with Teon
tape to prevent air
leaks, do not remove the tape. CAUTION: Do not over tighten
the gauge when installing.
Turn
clockwise
Fig. 3 Connecting the metal braided hose
High-pressure
tank outlet
Schrader
Valve-
to connect
to 20’
coiled
hose
Pressure
Gauge
Braided
hose
Turn brass nut
clockwise
Pressure
Switch
Fig. 4 Connecting the high-pressure
plastic hose
Turn
clockwise
Pressure
relief
valve
Use the tank’s mounting base
as a template to mark the
15/32” holes for drilling
Petcock
should be easily
reachable so that
the tank can be
periodically serviced
Shown above: Compressor mounted on the tank
Fig. 5 Connecting the pressure gauge
 Loading...