

USE & CARE GUIDE
GUIDE D’UTILISATION ET D’ENTRETIEN
GUIA DE USOS Y C UIDADOS
Le invitamos a leer cuidadosamente este
instructivo antes de usar su aparato.

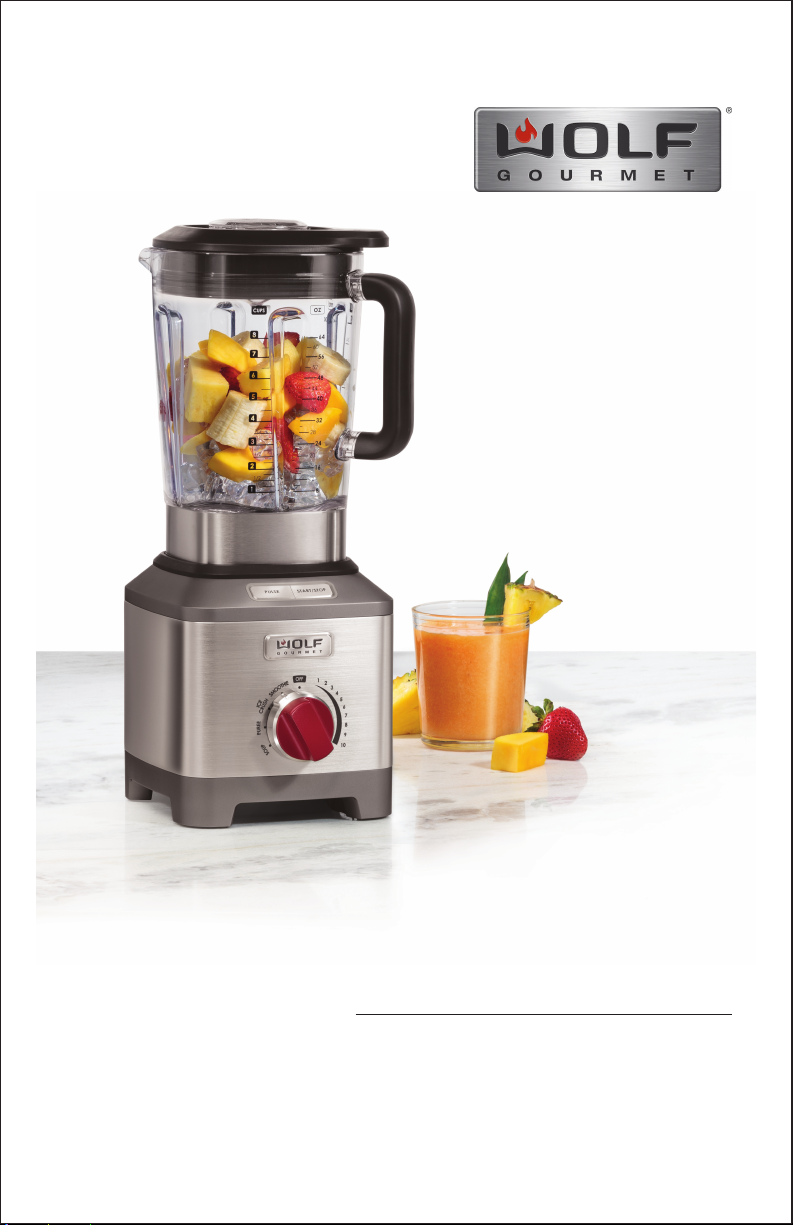
WOLF GOURMET BLENDER
Welcome
Thank you for your purchase of this Wolf Gourmet product.
We look forward to being part of your kitchen for years to
come. Wolf is a third-generation family-owned company that
has a personal stake in the preparation of your food. With
family ownership comes a great attention to detail and an
uncompromised dedication to creating exceptional products.
Wolf built its business and reputation on helping home cooks
achieve the best results possible. With Wolf Gourmet’s
precise control, the dish you envision will be the dish you
serve.
2 |

WOLF GOURMET BLENDER
Contents
4
Safety Precautions
7
Wolf Gourmet Blender
Parts and Features
9
Getting Started
11
How to Use Variable Speed Control
12
Blender Tips
14
Care and Cleaning
15
Troubleshooting
16
Wolf Gourmet Warranty
Customer Care
As a Wolf Gourmet owner, you can count
on our support. Our customer care
center is here to help you should the
need arise. Simply call 844-885-8770 to
speak with one of our product experts.
In Mexico, please contact the customer
service center at 800 400 4372. We are
condent this guide will answer your
questions about the features, operation,
and maintenance of your Wolf Gourmet
product. If you have additional questions,
please contact us by phone or visit us
online at wolfgourmet.com.
Register Your Product
We strongly encourage you to register your
Wolf Gourmet appliance. It’s important to us
that you get the most out of your products.
By registering you will:
• Become a Wolf Gourmet culinary
insider.
• Have ongoing support from Wolf
Gourmet.
• Activate your warranty and record your
purchase.
• Be alerted to any service updates.
• Receive occasional emails to help you
maintain and enjoy your appliances.
To register, visit wolfgourmet.com/registration
or call 844-885-8770. In Mexico, please visit
wolfgourmet.com.mx or call 800 400 4372.
wolfgourmet.com | 3

SAFETY PRECAUTIONS
IMPORTANT SAFEGUARDS
When using electrical appliances, basic safety precautions should always be
followed to reduce the risk of re, electric shock, and/or injury to persons,
including the following:
• Read all instructions.
• This appliance is not intended for use by persons with reduced physical,
sensory, or mental capabilities, or lack of experience and knowledge, unless
they are closely supervised and instructed concerning use of the appliance
by a person responsible for their safety.
• This appliance shall not be used by children. Keep the appliance and its cord
out of reach of children.
• Close supervision is necessary when any appliance is used near children.
Children should be supervised to ensure that they do not play with the
appliance.
• Turn the appliance OFF( ), then unplug from outlet when not in use, before
putting on or taking off parts, and before cleaning. To unplug, grasp the plug
and pull from the outlet. Never pull from the power cord.
• To protect against risk of electrical shock, do not put cord, plug, base, or
motor in water or other liquid.
• Unplug cord from outlet when not in use, before putting on or taking off
parts, and before cleaning.
• Avoid contact with moving parts.
• Do not operate any appliance with a damaged supply cord or plug, or
after the appliance malfunctions or has been dropped or damaged in any
manner. Supply cord replacement and repairs must be conducted by the
manufacturer, its service agent, or similarly qualied persons in order to
avoid a hazard. Call the provided customer service number for information on
examination, repair, or adjustment.
• The use of attachments, including canning jars, not recommended or sold by
the appliance manufacturer may cause a risk of injury to persons.
• Do not use outdoors.
• Do not let cord hang over edge of table or counter or touch hot surfaces,
including stove
• Do not place on or near a hot gas or electric burner, or in a heated oven.
• Keep hands and utensils, other than the tamper provided, out of container
while blending to reduce the risk of severe injury to persons or damage to
the blender. The cover must remain in place when using the tamper through
the cover opening. A scraper may be used but must be used only when the
blender is not running.
• Blades are sharp; handle carefully—especially when assembling,
disassembling, emptying or cleaning blender jar.
• Do not use a broken, chipped, or cracked blender jar.
• Do not use broken, cracked, or loose cutting blade assembly.
• Always operate blender with lid and emulsion cap assembly in place. Remove
emulsion cap assembly only for adding ingredients or to insert the tamper.
4 |

SAFETY PRECAUTIONS
IMPORTANT SAFEGUARDS continued
• When blending hot liquids or ingredients, remove center emulsion cap
assembly from the lid. Use caution: spray or excess steaming may cause
scalding and burns. Do not exceed the 6-cup (1420-ml) level. Always begin
processing on lowest speed. Keep hands and other exposed skin from the lid
opening to prevent possible burns.
• Ensure cutter assembly is tight and secure to jar. Injury can result if moving
blades accidentally become exposed.
• If the jar should twist or rotate when the motor is switched ON, switch OFF (
) immediately and tighten jar in collar or on blender base.
• Do not leave blender unattended while it is operating.
• Check that the appliance is OFF ( ) before plugging cord into wall outlet. To
disconnect, turn the control to OFF ( ); then remove plug from wall outlet.
To unplug, grasp the plug and pull from the outlet. Never pull from the power
cord.
• Do not use appliance for other than intended purpose.
• CAUTION! In order to avoid a hazard due to inadvertent resetting of the
thermal cut-out, this appliance must not be supplied through an external
switching device, such as a timer, or connected to a circuit that is regularly
switched on and off by the utility.
• Be careful if hot liquid is poured into the blender container as it can be
ejected out of the appliance due to a sudden steaming.
SAVE THESE INSTRUCTIONS
wolfgourmet.com | 5

SAFETY PRECAUTIONS
Other Consumer Safety Information
This appliance is intended for household use only. Use for food or liquids only.
WARNING
a grounded (3-prong) plug to reduce the risk of electric shock. The plug fits only
one way into a grounded outlet. Do not defeat the safety purpose of the plug by
modifying the plug in any way or by using an adapter. If the plug does not fit into the
outlet, have an electrician replace the outlet.
The length of the cord used on this appliance was selected to reduce the hazards
of becoming tangled in or tripping over a longer cord. If a longer cord is necessary,
an approved extension cord may be used. The electrical rating of the extension cord
must be equal to or greater than the rating of the appliance. The extension cord
must be a grounding-type, 3-wire cord. Care must be taken to arrange the extension
cord so that it will not drape over the countertop or tabletop where it can be pulled
on by children or accidentally tripped over.
If the cutting blade assembly locks and will not move, it will damage the motor.
Do not use. Call the customer care center for information.
Do not place blender jar in the freezer filled with food or liquid. This can result in
damage to the cutting blade assembly, jar, blender, and possibly result in personal
injury.
NOTE: This machine is equipped with motor overload protection. If the
motor stops during operation due to overheating, unplug and allow it to cool
down for approximately 15 minutes. Plug machine back in to resume normal
operation.
Electrical Shock Hazard: This appliance is provided with
Wattage/Peak Power Information
The wattage/ampere rating of the blender is determined by an Underwriters
Laboratory test and is based on available cutting blade assembly, jar
combinations, and attachments that may not be provided with your unit, but
are available as replacement parts. This is a measure of input wattage/amperes
after 30 seconds of operation. The blender as provided may draw significantly
less power.
Peak power is the measure of the motor wattage during the first seconds
of operation. This is when a blender requires the most power to crush ice,
frozen fruit, etc. This is a better measure of what a blender motor can
consume when power is needed most.
6 |
WOLF GOURMET BLENDER PARTS AND FEATURES
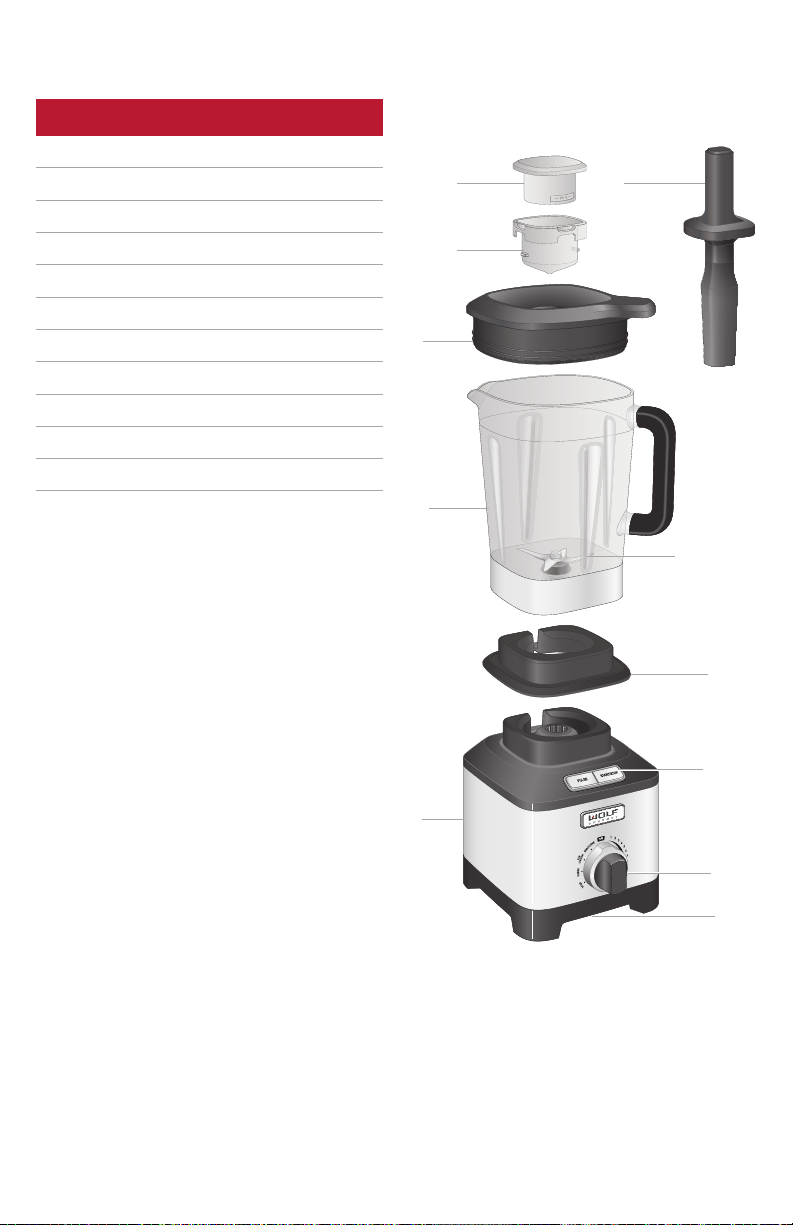
PARTS AND FEATURES
1a
Filler Cap
1b
Emulsion Cup
2
Lid
3
Tamper
4
Blender Jar
5
Cutting Blade Assembly
6
Jar Pad
7
Control Buttons
8
Control Knob
9
Base
10
Rating Plate Location
1a
1b
2
4
3
5
9
Wolf Gourmet
Blender
6
7
8
10
wolfgourmet.com | 7

Parts and Features
1. Emulsion Cap Assembly: The two-piece cap has a filler cap inside an emulsion cup.
The filler cap has markings for easy measuring, while the emulsion cup is used to
make fine dressings and marinades. When both parts are removed, ingredients can
be added or the tamper may be inserted into the lid.
2. Lid: The lid fits securely into blender jar and can be easily removed by lifting the logo
tab. To keep the spout of the pitcher mess-free, place logo tab above the handle of
the pitcher.
3. Tamper: The tamper mixes thick or frozen mixtures that cannot be processed with
regular blending. It prevents air pockets from forming and is a handy tool when
making nut butters.
4. Blender Jar: The durable jar is clearly marked with ounces, cups, and milliliters. Your
jar was made of a special co-polyester material selected for its weight, durability, and
glass-like clarity. For care and cleaning of the jar, see page 14.
5. Cutting Blade Assembly: The cutting blade assembly is permanently installed in the
blender jar.
6. Jar Pad: Simply lift to remove the rubber pad for easy cleaning.
7. Control Buttons: Two buttons are located on top of the
base. Use START/STOP with any setting. Use PULSE with
any variable speed when using the VARIABLE SPEED
CONTROL.
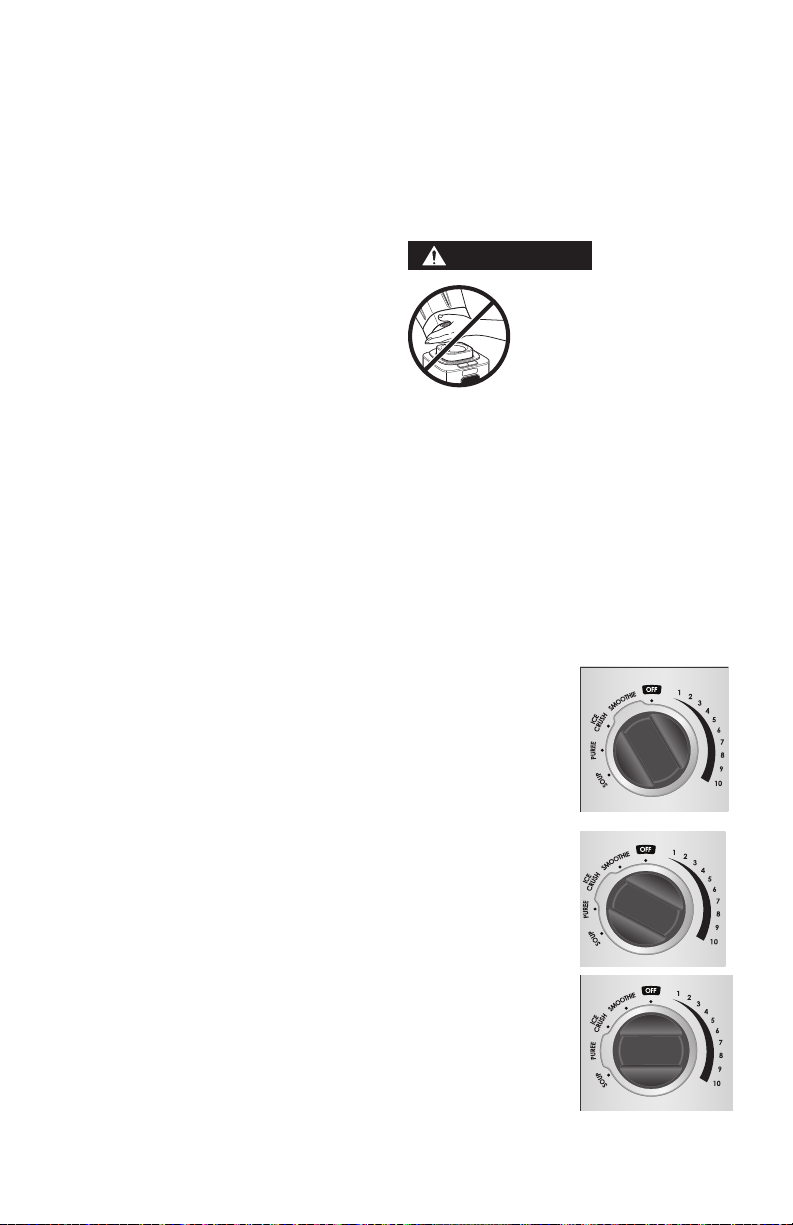
8. Control Knob: Rotate knob to select PROGRAM, OFF,
or VARIABLE SPEED CONTROL. When using VARIABLE
SPEED, select any speed for blending and pulsing by
rotating the Control Knob from 1 to 10.
9. Base: Contains the motor. DO NOT IMMERSE BASE IN WATER.
10. Rating Plate Location: Model number and rating information can be found under
the base.
Automatic Overload Protection: The Wolf Gourmet Blender is equipped with motor
overload protection. If the motor stops during operation due to overheating, unplug
and allow it to cool down for about 15 minutes. Plug Blender back in to resume
normal operation.
8 |
GETTING STARTED
Preparing the Blender
After unpacking the Blender, wash
everything except blender base in hot,
soapy water. Dry thoroughly. Wipe blender
base with a damp cloth or sponge. DO
NOT IMMERSE BASE IN WATER. Care
should be taken when handling cutting
blade assembly since it is very sharp. Refer
to care recommendations on page 14.
IMPO RTA NT: Blender jar and cutting
blade assembly are subject to wear
during normal use. Always inspect jar for
nicks, chips, or cracks. Always inspect
cutting blade assembly for broken,
cracked, or loose blades. If jar or cutting
blade assembly is damaged, do not use.
Call our customer care center to obtain
replacement parts.
Selecting Blender Settings
Select from four program settings or use
VARIABLE SPEED CONTROL for precise
speed control.
WARNING
Burn Hazard
Metal parts under blending jar get hot after
use. Do not touch.
Settings
Programs are optimized for recipe categories and vary in blending speed and duration.
The Blender automatically stops at the end of the program.
1. Turn the Control Knob counterclockwise from OFF to one
of the following programs:
a. SMOOTHIE – Blends frozen or fresh smoothies.
Blender pulses three times at the beginning to chop
ice or frozen ingredients and then ramps up to run on
high for a total of 55 seconds. See SMOOTHIE tips
on page 13.
b. ICE CRUSH – Breaks ice into pieces small enough
for slushies or fine cocktails. Blender continuously
pulses from low to medium for 1 minute. See ICE
CRUSH tips on page 13.
c. PUREE – Gives a smooth, creamy consistency to
fruit or vegetables and a fine texture when grinding
grain and making powdered sugar. Blender slowly
ramps up from low to high, running for 1 minute,
15 seconds. See PUREE tips on page 13.
wolfgourmet.com | 9

d. SOUP – Purees and heats ingredients to just under
the boiling point. Do not blend more than 6 cups
(1420 ml) on this program. When making soups,
start with cold or room-temperature ingredients.
Emulsion cap assembly can be kept in lid. Blender
runs for 6 minutes, 45 seconds. See SOUP tips on
page 13.
2. Fill by opening lid and adding ingredients. Replace lid.
3. Press START/STOP.
4. Blender will automatically stop at the end of the program.
5. To stop the Blender at any time during the program, press START/STOP.
If reactivated by pressing START/STOP again, the program will start at the
beginning.
6. Rotate Control Knob to OFF to turn off power.
WARNING
Burn Hazard
When blending hot liquids, avoid contact with spray or steam by:
• Always removing emulsion cap assembly.
• Always beginning blending on the lowest speed.
• Never exceeding the 6-cup (1420-ml) level.
• Always keeping hands and other exposed skin away from the lid opening.
10 |

HOW TO USE VARIABLE SPEED CONTROL
Using Variable Speed Control
VARIABLE SPEED CONTROL allows precise control of blending speeds.
1. Turn Control Knob from OFF.
2. Rotate Control Knob clockwise to 1.
3. Fill by opening lid and adding ingredients. Replace lid.
4. Press START/STOP.
5. Increase speed by slowly rotating the Control Knob
clockwise.
6. Press START/STOP at any time to stop Blender.
7. Rotate Control Knob to OFF to turn off power.
Pulse
PULSE can be used with the VARIABLE SPEED
CONTROL setting to control chopping action or to
encourage mixing of ingredients.
1. Rotate Control Knob from OFF to VARIABLE SPEED CONTROL.
2. Rotate Control Knob clockwise to 1. Always start at 1 and adjust to a higher speed
after starting blender.
3. Fill by opening lid and adding ingredients. Replace lid.
4. Press PULSE button.
5. Increase PULSE speed by rotating Control Knob clockwise.
6. Hold PULSE button for the desired time.
7. Rotate Control Knob back to OFF.
wolfgourmet.com | 11

BLENDER TIPS
GENERAL
• For best performance, the minimum amount of liquid needed per recipe is one cup
(8 ounces [237 ml]).
• For thick smoothies or purees that are not blending well, using the tamper and incorporating
a small amount of additional liquid may be all that is necessary to improve the results. Start
by adding 1/4 cup (59 ml).
• To add foods while Blender is operating, remove emulsion cap assembly and add
ingredients through the opening.
• Do not store food or liquids in the blender jar.
• Avoid bumping or dropping the Blender when in operation or at any time.
• Cutting large whole fruits and vegetables may allow them to blend more quickly.
• Do not fill blender jar past highest graduation marking.
• Blender jar material is susceptible to impacts with hard ingredients, such as nuts, seeds,
grains, and kernels, which may result in minor impact marks or the appearance of being
cloudy. These are aesthetic issues and will not affect future blending performance.
• If blending action stops during blending or ingredients stick to sides of the jar, insert
tamper to help move the mixture around or add more liquid to the blender jar.
USING THE TAMPER
• When blending very thick or frozen mixtures, such as peanut butter or sorbet, air
pockets may occasionally form due to the high speed of the blades, which can
cause ingredients to stop blending. This is called cavitation. If cavitation occurs, use
the tamper to push the ingredients towards the blade. The tamper is designed to
fit perfectly inside the opening in the jar’s lid so it may be used while the Blender is
running. It will not touch the blade. ONLY use the tamper with the jar lid in place.
1. Remove emulsion cap assembly. Insert tamper through hole in blender lid.
2. Blender jar should not be more than two-thirds full when the tamper is used during
blending.
3. Do not use tamper with hot liquids.
4. If needed to help ingredients circulate, point the tamper toward the sides or corners
of the container. Do not try to force the tamper deeper into the container and closer
to the blades.
PREVENTING OVERLOADING
• Do not process recipes at lower speeds or higher speeds than recommended.
• Do not process recipes longer than recommended.
12 |

SMOOTHIE
• The SMOOTHIE setting was designed for pourable beverages made with liquid, fruits
or vegetables, and a frozen component (ice or frozen fruit). For best results when using
the SMOOTHIE setting, add liquids first, then ingredients softer to harder. Add frozen
ingredients and ice last. To achieve a pourable consistency and to keep the Blender
running smoothly, the following guidelines should be used:
1. Ideally there should be 1½ cups (355 ml) liquid for every 2 cups (473 ml) of ice or
frozen fruit. A higher ratio of frozen ingredients may cause cavitation. Use the tamper
to push ingredients toward the blade during the cycle if needed.
2. For best results, use at least 1 cup (237 ml) of liquid for every 1 cup (237 ml) of leafy
greens. If using a larger quantity of leafy greens, after blending on the SMOOTHIE
setting, you may want to blend 20 seconds longer on high to achieve an extra silky
smoothie or use VARIABLE SPEED CONTROL to blend to your desired consistency.
Juicy fresh fruits such as grapes, oranges, strawberries, pineapple, and melons are
considered as a liquid for purposes of achieving the proper ratio of liquids to frozen
ingredients or leafy greens.
ICE CRUSH
• Different types of ice may require different methods of crushing depending on the
quantity of ice.
• To crush crescent-shaped ice produced by most home ice makers and the cube ice
made in trays, make sure the blender jar is dry, add no more than 5 cups (1.2 L) of ice, and
run the ICE CRUSH cycle. This will produce a dry, uffy ice perfect for snow cones.
• Cubes produced by undercounter or commercial ice machines and bagged ice is wetter
and requires a different method. To crush wet ice, ll the blender jar with the desired
amount of ice. It can be lled to the 8-cup capacity line. Next add water to the blender jar
until the ice oats above the blades. Run the ICE CRUSH cycle. Drain off excess water.
This will produce a wet ice that is perfect for frozen drinks. Wet ice may also be crushed
without using water if the Blender is lled with no more than 4 cups (946 ml) of ice.
PUREE
• The PUREE setting is best used to achieve a smooth consistency when blending cooked
or soft fruits and vegetables, for making creamy dips such as hummus, and for grinding
grains.
• Blend fresh whole juices (without frozen ingredients) on the PUREE setting for best
results.
SOUP
• Do not blend more than 6 cups (1420 ml) on this program.
• When making soups, start with cold or room-temperature ingredients.
• Emulsion cap assembly can be kept in lid.
wolfgourmet.com | 13

CARE AND CLEANING
Care Recommendations
WARNING
Electrical Shock Hazard
Disconnect power before cleaning. Do not
immerse cord, plug, base, or motor in water
or other liquid.
BEFORE CLEANING
1. Unplug cord.
2. Lift blender jar assembly off the base.
3. Remove emulsion cap assembly and lid.
CLEANING
Base, Cord
Blender Jar
Blender Lid,
Emulsion Cap
Assembly,
Tamper, Jar Pad
Wipe with a damp cloth or sponge. Do not use abrasive or corrosive cleaners.
HAND-WASH ONLY. Alternative is to ll jar halfway with water and add 2–3 drops
of dish soap. Blend for 30 seconds. Rinse and dry thoroughly.
For a more thorough cleaning, sprinkle 1/4 cup (59 ml) baking soda in Blender.
Add 1 cup (237 ml) white vinegar. Mixture will bubble. When bubbling subsides,
add 2 cups (473 ml) water and blend on the SOUP cycle. Wash any remaining
residue with dish soap and water. Rinse and dry thoroughly.
These items can be washed in a dishwasher. DO NOT use the “SANI” setting
when washing in the dishwasher. “SANI” cycle temperatures could damage
product. Parts may also be washed with hot, soapy water. Care should be
taken when handling the cutting blade assembly since it is very sharp. Rinse
and dry thoroughly.
Recommendations
• To maintain the aesthetic characteristics
of the blender jar, carefully wash and dry
immediately after every use.
• Use of a soft brush, like a baby
bottle brush, and dish detergent are
recommended for removal of tough oils
or stubborn ingredients from the jar and
may be helpful in cleaning beneath the
jar blades.
14 |
• Use a dish towel or soft cloth for drying.
• If the jar does not appear clean after the
rst wash, repeat.
• Avoid the use of abrasive or rough
cleaners, scouring pads, brushes,
and steel wool since they will cause
scratches during the cleaning process.
• Soaking your jar in vinegar or a 10%
bleach solution (up to 8 hrs) may be
helpful in removing some stains or signs
of cloudiness.

TROUBLESHOOTING
Troubleshooting
Blender fails to start.
• Make sure Control Knob is not in the OFF position.
• Ensure the unit is securely plugged into an outlet of proper voltage and frequency.
• Check to see if fuse for outlet has blown or if circuit breaker has tripped.
Unit does not respond to button commands.
• Turn power off and back on using Control Knob to reset controls.
• If unit does not respond, call our customer care center.
Blender smells like it is burning.
• Turn Blender off, unplug, and allow to cool for 20 minutes.
• Although motors are tested during the manufacturing process, heavy use may cause
curing of motor windings. The smell may quickly dissipate after a few heavy uses.
• If smell continues after additional heavy uses, call our customer care center.
There is grease around the bottom of the blender jar or on the countertop.
• Monitor the problem and source. This may indicate an issue with the jar bearings.
• Call our customer care center if the condition persists.
Blender jar is cloudy or stained. How can I clean it?
• Some cloudiness may be natural after use. Minerals from fruits, produce, and leafy
greens, in addition to the oils of various nut butters, can sometimes cause a lm on
the blender jar.
• Sprinkle 1/4 cup (59 ml) baking soda in Blender. Add 1 cup (237 ml) white vinegar.
Mixture will bubble. When bubbling subsides, add 2 cups (473 ml) water and blend
on the SOUP cycle. Wash any remaining residue with dish soap and water. Rinse and
dry thoroughly.
Wolf, Wolf & Design, Wolf Gourmet, W & Design and the color red as applied to knobs are registered trademarks and
service marks of Wolf Appliance, Inc. Sub-Zero, Sub-Zero & Design, Dual Refrigeration, The Living Kitchen, Great American
Kitchens, The Fine Art of Kitchen Design, and Ingredients are registered trademarks and service marks of Sub-Zero, Inc. All
other trademarks or registered trademarks are property of their respective owners in the United States and other countries.
wolfgourmet.com | 15
 Loading...