

Page 1
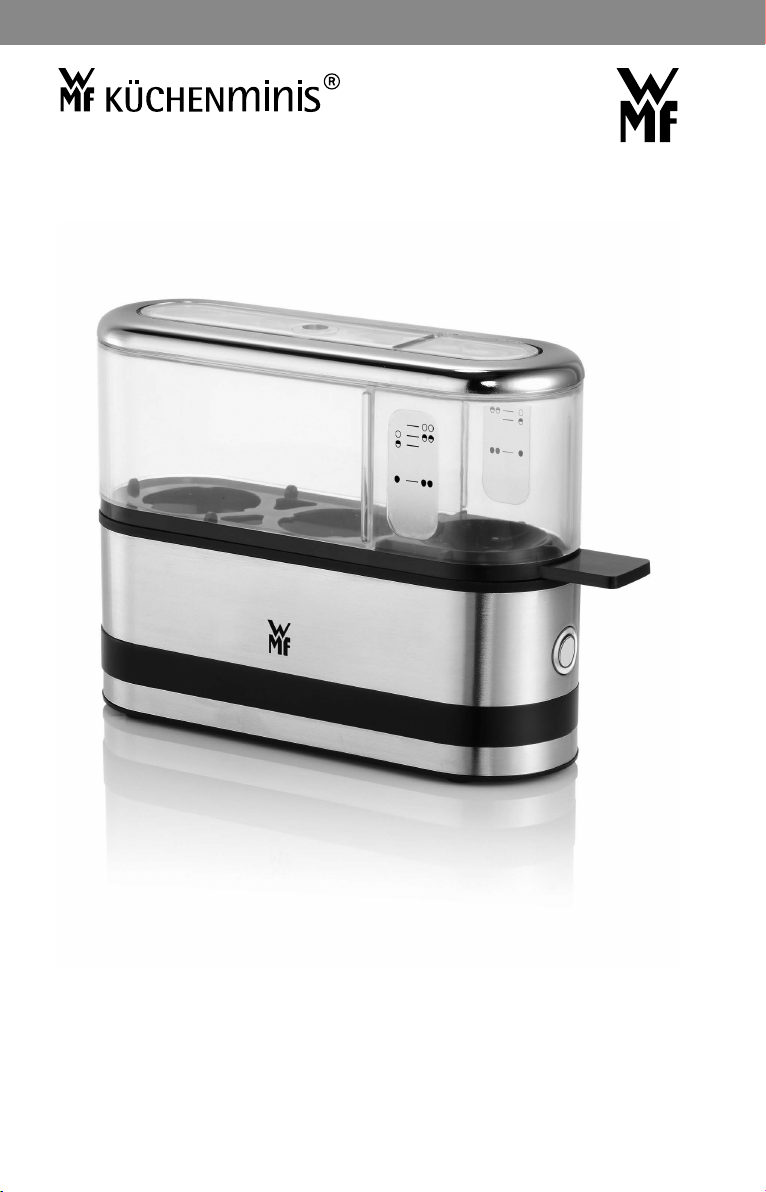
2-Eier-Kocher
de
Gebrauchsanweisung 4
en
Operating Manual 10
fr
Mode d’emploi 16
it
Istruzioni per l’uso 22
es
Instrucciones de uso 28
nl
Gebruiksaanwijzing 34
da
Brugsanvisning 40
sv
Användarguide 46
fi
Käyttöohje 52
no
Bruksanvisning 58
Page 2
2
1b
1c
2
3
5
1a
4
6
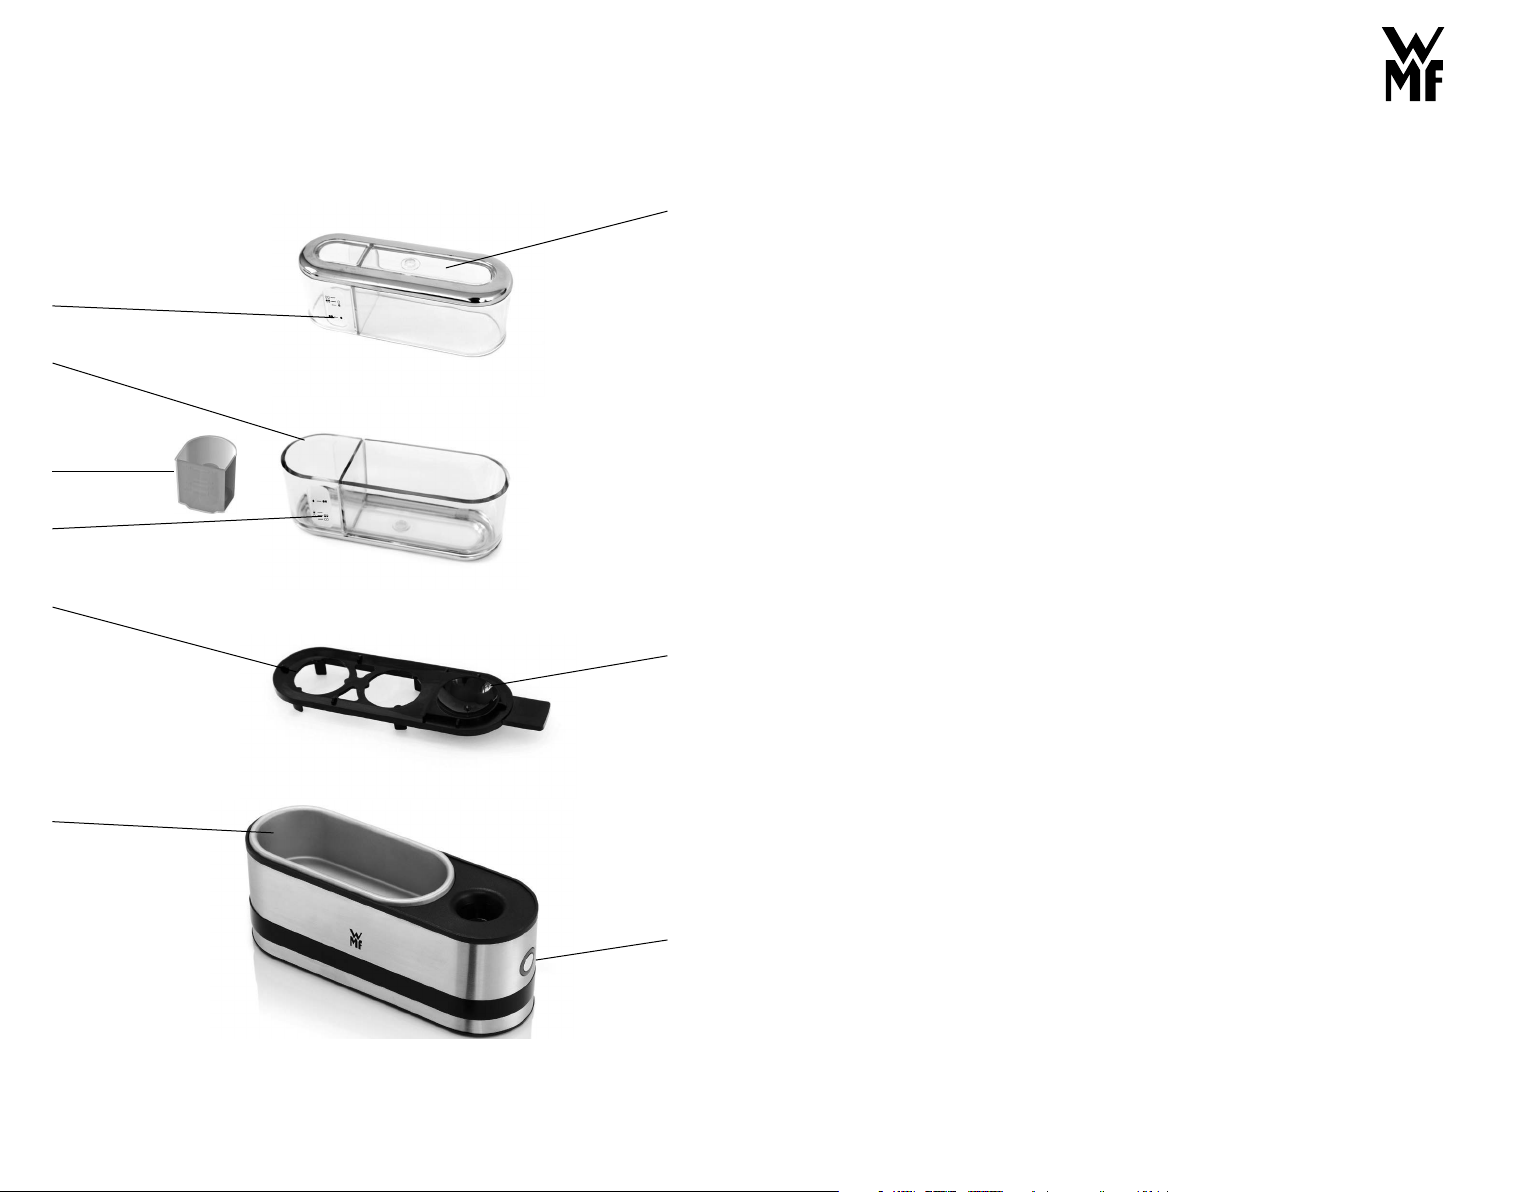
Aufbau 2-Eier-Kocher
1 a) Haube mit intgriertem Wasserdosierer
b) Integrierter Wasserdosierer
c) Messbecher
2 Grifffl äche
3 Eiereinsatz
4 Eipick
5 Edelstahlheizschale
6 Ein/Aus-Taste
Set-up of the 2-egg boiler
1 a) Cover with integrated water measuring device
b) Integrated water measuring device
c) Measuring mug
2 Gripping surface
3 Egg insert
4 Egg piercer
5 Stainless steel heating bowl
6 On/off button
Montage du cuit-œufs pour 2 œufs
1 a) Couvercle avec doseur d‘eau intégré
b) Doseur d‘eau intégré
c) Bol gradué
2 Poignées
3 Support à œufs
4 Pique-œuf
5 Coque chauffante en inox
6 Touche marche/arrêt
Struttura del cuociuova per 2 uova
1 a) coperchio con dosatore d‘acqua integrato
b) dosatore d‘acqua integrato
c) misurino
2 superfi cie di presa
3 portauova
4 fora-uova
5 Vasca di cottura in acciaio inox
6 interruttore di accensione/spegnimento
Componentes del hervidor de 2
huevos
1 a) Cubierta con dosifi cador de agua integrado
b) Dosifi cador de agua integrado
c) Recipiente medidor
2 Superfi cie de manejo
3 Interior para huevos
4 Alfi ler
5 Bandeja calefactora de acero inoxidable
6 Tecla de encendido/apagado
Opbouw van de eierkoker voor 2
eieren
1 a) Deksel met geïntegreerde waterdosering
b) Geïntegreerde waterdosering
c) Maatbeker
2 Handgrepen
3 Inzetstuk voor eieren
4 Eierprikker
5 Verwarmingsschaal van roestvrij staal
6 Aan/Uit-knop
Opbygning æggekoger til 2 æg
1 a) Låg med integreret målebæger
b) Integreret målebæger
c) Målebæger
2 Holdefl ade
3 Æggeholder
4 Nål
5 Varmeskål i rustfrit stål
6 Tænd/slukknap
Konstruktion äggkokare för 2 ägg
1 a) Lock med integrerad vattendoserare
b) Integrerad vattendoserare
c) Doseringsmått
2 Handtag
3 Ägginsats
4 Äggpigg
5 Hölje i rostfritt stål
6 På/av-knapp
2 munan keittimen rakenne
1 a) Kupu, johon on integroituna
vedenannostelija
b) Integroitu vedenannostelija
c) Mittakuppi
2 Otealue
3 Munateline
4 Munanlävistin
5 Jaloteräksinen vesiallas
6 Virtapainike
Oppbygning av eggekoker for 2 egg
1 a) Deksel med integrert vanndosering
b) Integrert vanndosering
c) Målebeger
2 Gripefl ate
3 Eggeinnsats
4 Nål til å stikke hull i egget med
5 Oppvarmingsskål i rustfritt stål
6 På/av-knapp
Page 3

Gebrauchsanweisung
dede
Wichtige Sicherheitshinweise
▪ Diese Geräte können von Kindern ab 8 Jahren sowie von
Personen mit reduzierten physischen, sensorischen oder
mentalen Fähigkeiten oder Mangel an Erfahrung und/
oder Wissen benutzt werden, wenn sie beaufsichtigt oder
bezüglich des sicheren Gebrauchs des Gerätes unterwiesen
wurden und die daraus resultierenden Gefahren verstanden
haben.
Kinder dürfen nicht mit dem Gerät spielen.
Reinigung und Benutzer-Wartung dürfen nicht durch Kinder
durchgeführt werden, es sei denn, sie sind älter als 8 Jahre
und beaufsichtigt.
▪ Bewahren Sie das Gerät und seine Zuleitung außerhalb der
Reichweite von Kindern unter 8 Jahren auf.
▪ Das Gerät nicht in Wasser tauchen.
▪ Wenn die Anschlussleitung dieses Gerätes beschädigt wird,
muss sie durch den zentralen Kundendienst des Herstellers
oder eine ähnlich qualifizierte Person ersetzt werden. Durch
unsachgemäße Reparaturen können erhebliche Gefahren für
den Benutzer entstehen.
▪ Dieses Gerät ist dafür bestimmt, im Haushalt und ähnlichen
Anwendungen verwendet zu werden, wie beispielsweise:
⋅ in Küchen für Mitarbeiter in Läden, Büros und anderen
gewerblichen Bereichen;
⋅ in landwirtschaftlichen Anwesen;
⋅ von Kunden in Hotels, Motels und anderen Wohnein-
richtungen;
⋅ in Frühstückspensionen.
Das Gerät ist nicht für den rein gewerblichen Gebrauch
bestimmt.
▪ Reinigen Sie nach Verwendung des Gerätes alle Flächen/
Teile, die mit Nahrungsmitteln in Berührung gekommen sind.
Bitte befolgen Sie die Hinweise im Kapitel „Reinigung und
Pflege“.
▪ Betreiben Sie das Gerät nur entsprechend dieser
Gebrauchsanweisung. Bei unsachgemäßem Gebrauch
besteht Verletzungsgefahr!
▪ Vorsicht, Verbrennungsgefahr: Die Temperatur der
berührbaren Oberflächen kann sehr heiß werden. Auch nach
dem Ausschalten des Gerätes, bleibt dieses noch einige Zeit
heiß.
▪ Achtung - Vorsicht beim Umgang mit der Eieranstechnadel.
Verletzungsgefahr!
Vor dem Benutzen
Die Gebrauchsanweisung aufmerksam lesen. Sie enthält wichtige Hinweise für den
Gebrauch, die Sicherheit und die Wartung des Gerätes.
Sie soll sorgfältig aufbewahrt und gegebenenfalls an Nachbenutzer weitergegeben werden.
Beim Gebrauch die Sicherheitshinweise beachten.
Technische Daten
Nennspannung: 220-240 V~ 50-60 Hz
Leistungsaufnahme: 250 W
Schutzklasse: I
Weitere Sicherheitshinweise
▪ Gerät nur an eine vorschriftsmäßig installierte Schutzkontaktsteckdose anschließen.
Zuleitung und Stecker müssen trocken sein.
▪ Die Anschlussleitung nicht über scharfe Kanten ziehen oder einklemmen, nicht herun-
terhängen lassen sowie vor Hitze und Öl schützen. Sie darf die heiße Heizschale und die
Haube nicht berühren.
▪ Den Netzstecker nicht an der Leitung oder mit nassen Händen aus der Steckdose ziehen.
▪ Das Gerät nicht auf heiße Oberflächen wie Herdplatten oder Ähnliches stellen und nicht
in der Nähe offener Flammen betreiben.
▪ Das Gerät nicht auf wasserempfindliche Oberflächen abstellen. Wasserspritzer könnten
diese beschädigen.
▪ Vorsicht, das Gerät wird heiß. Verbrühungsgefahr durch austretenden Dampf. Das Gerät
während des Betriebes nicht verrücken und nicht am Netzkabel ziehen.
▪ Das Gerät nur unter Aufsicht betreiben.
▪ Das Gerät nicht in Betrieb nehmen bzw. sofort Netzstecker ziehen, wenn:
⋅ Gerät oder Netzkabel beschädigt ist;
⋅ das Gerät undicht ist;
⋅ der Verdacht auf einen Defekt nach einem Sturz o. Ä. besteht.
In diesen Fällen das Gerät zur Reparatur geben.
▪ Der Netzstecker ist zu ziehen:
⋅ bei Störungen während des Betriebes,
⋅ vor jeder Reinigung und Pflege,
⋅ nach dem Gebrauch.
▪ Das Gerät regelmäßig entkalken.
4 5
Page 4
de
▪ Bei Zweckentfremdung, falscher Bedienung oder nicht fachgerechter Reparatur wird
keine Haftung für eventuelle Schäden übernommen.
Ebenso sind Garantieleistungen in solchen Fällen ausgeschlossen.
▪ Verpackungsmaterial, wie z. B. Folienbeutel gehören nicht in Kinderhände.
Verwendung
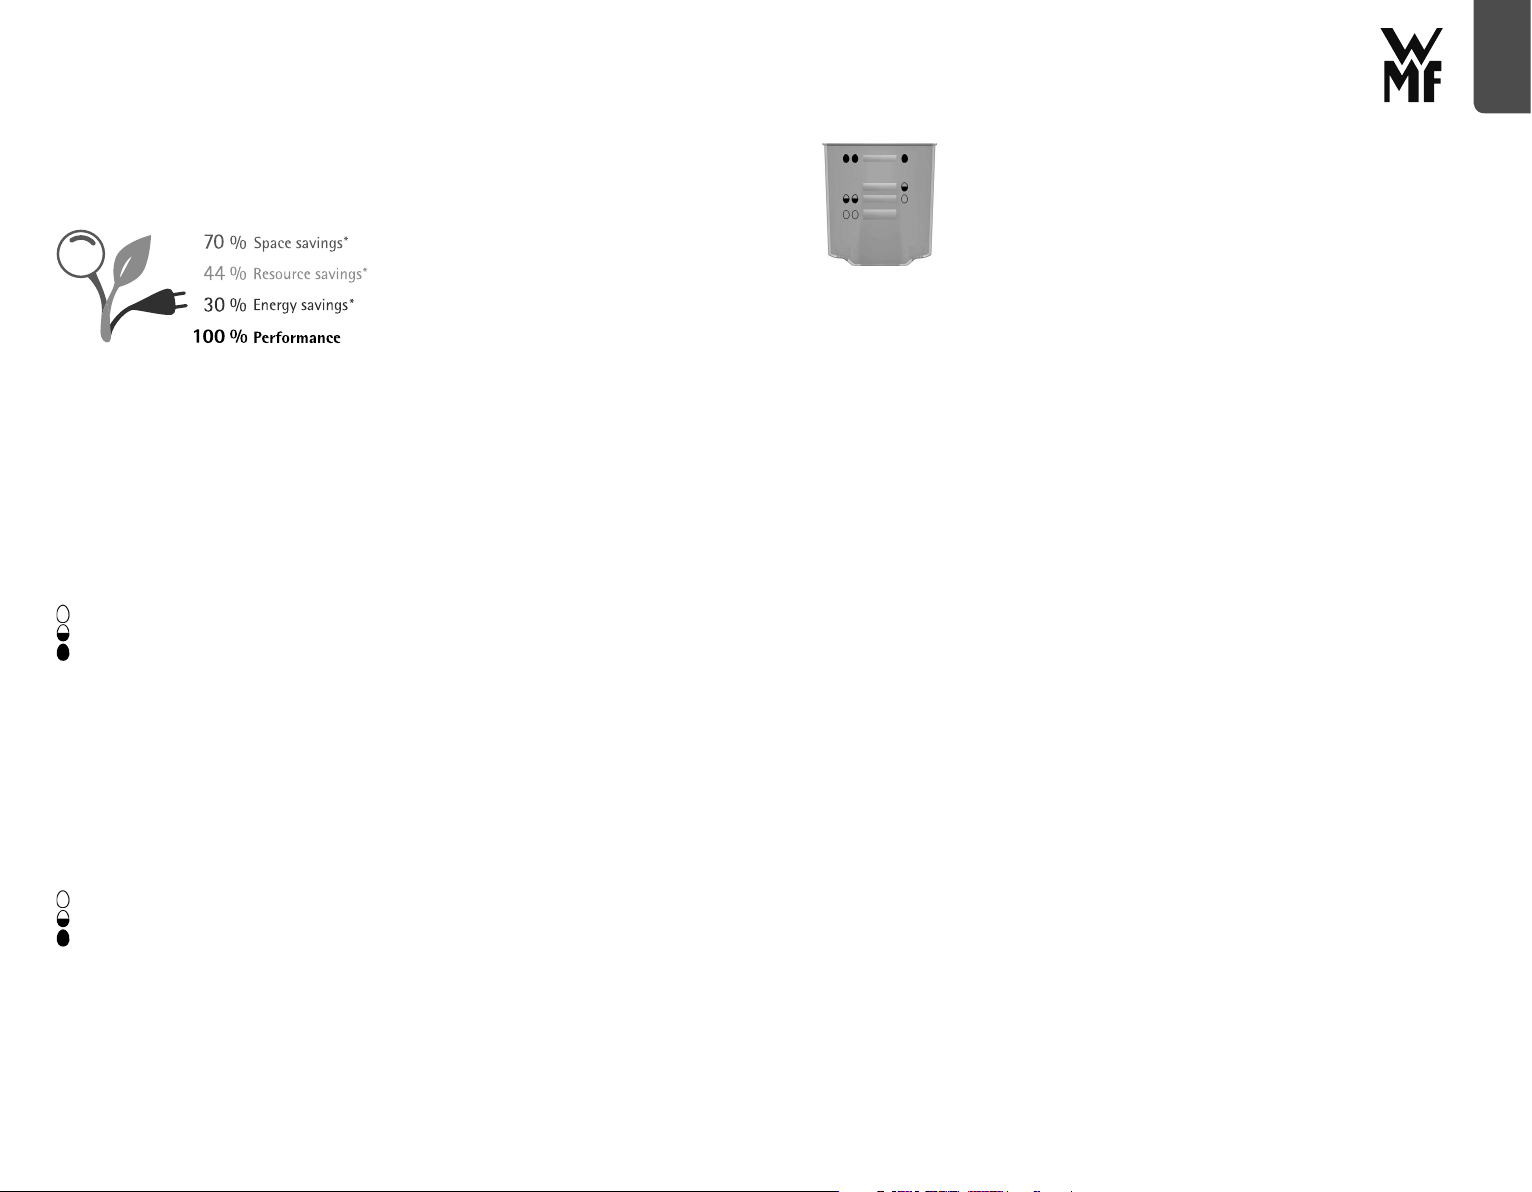
Sie können mit dem Gerät ein oder zwei Eier punktgenau zubereiten, Sie haben dabei die
Wahl zwischen weichen, mittelharten und harten Eiern. Mit WMF KÜCHENminis® 2-EierKocher können Sie Eier der Größe S-XL zubereiten.
*Im Vergleich zum WMF STELIO Eierkocher.
Geprüft durch technikzuhause.de. Die Ressourcenersparnis bezieht sich auf Materialeinsatz
und Transportvolumen. Messung der Energieersparnis beim Kochen von 1 bzw. 2 Eiern
(mittelhart).
Wasserdosierer
Der Wasserdosierer (1b) ist in der Haube (1a) integriert. Die Haube mit integriertem Wasserdosierer (1a) besteht aus hochwertigem Tritan® und ist BPA-frei. Bei den im Wasserdosierer
(1b) angegebenen Wassermengen handelt es sich um Richtwerte für 1 bzw. 2 Eier der Größe
M. Abweichungen können durch die Größe, Aufbewahrungszeit und Temperatur der Eier
entstehen.
Die Symbole für die unterschiedlichen Härtegrade und Anzahl der Eier sind am Wasserdosierer angebracht.
weiche Eier
mittelharte Eier
harte Eier
Wenn Sie größere Eier verwenden, füllen Sie etwas mehr Wasser ein, für kleinere Eier etwas
weniger.
Sollten die Eier zu weich sein, füllen Sie beim nächsten Mal etwas mehr Wasser ein. Sind die
Eier zu hart, etwas weniger Wasser einfüllen.
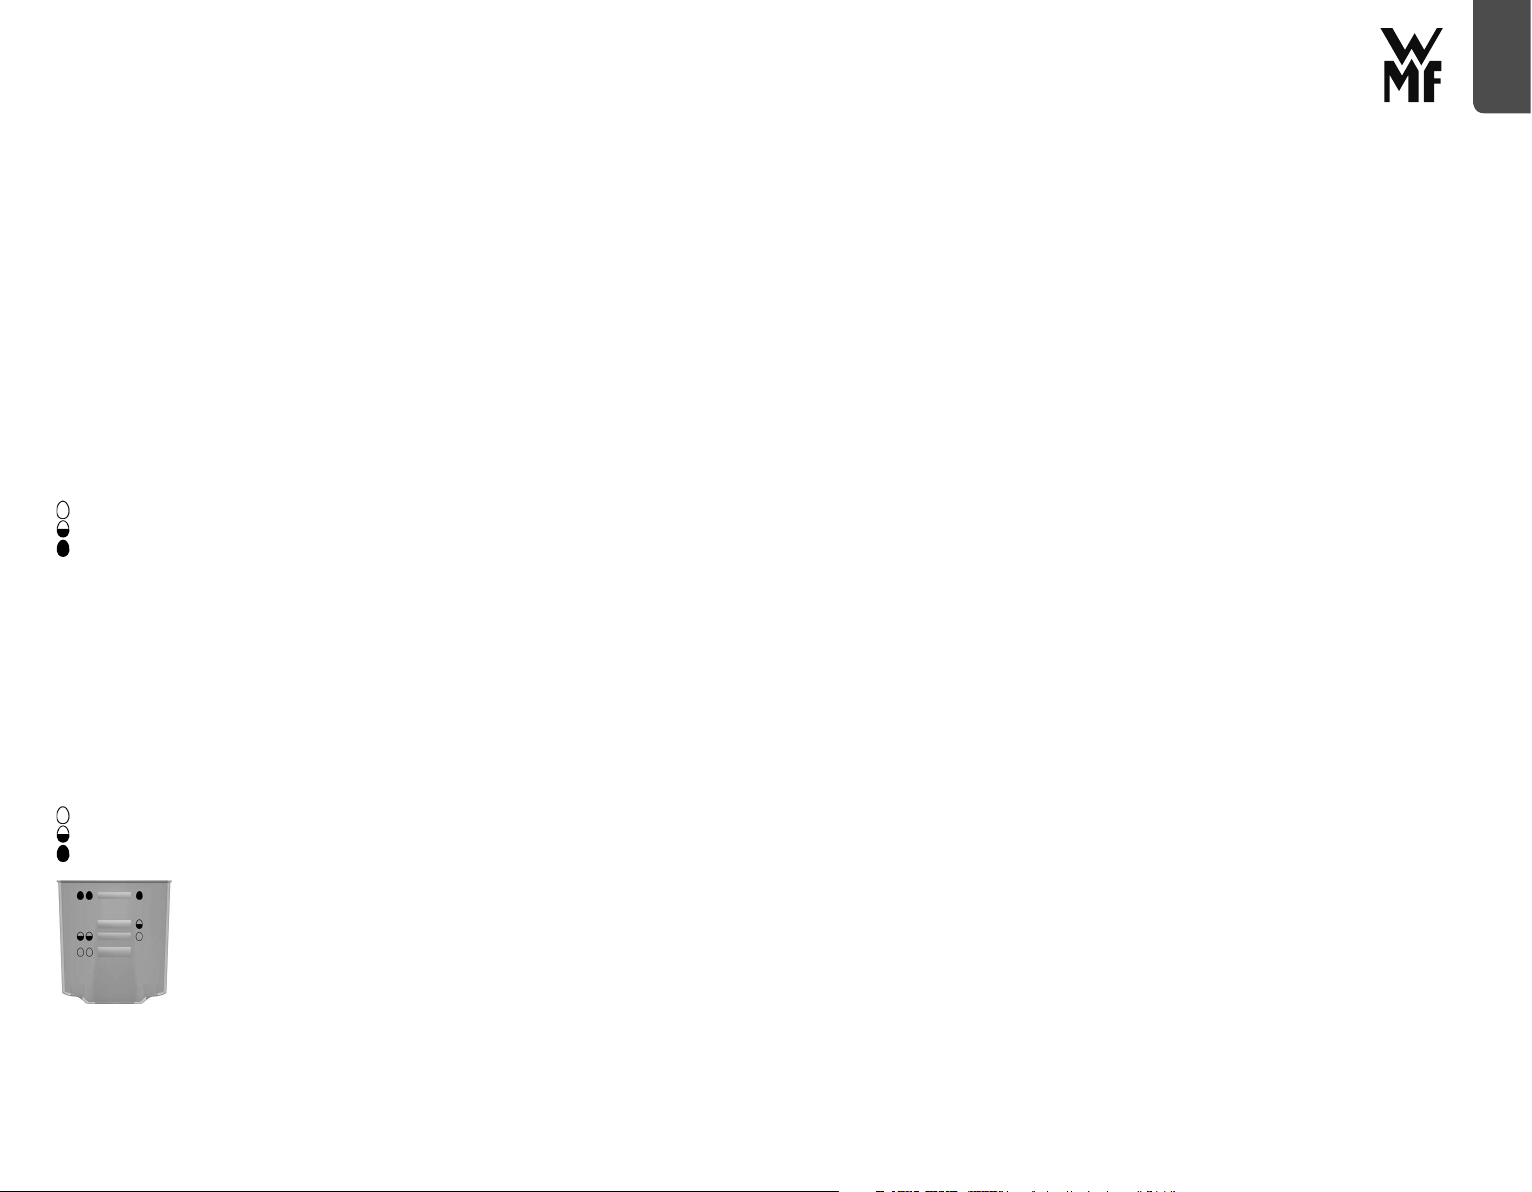
Messbecher
Alternativ zum integrierten Wasserdosierer (1b) können Sie auch den mitgelieferten Messbecher (1c) verwenden. Dieser befindet sich in der Haube (1a), kann einfach entnommen
und zum Aufbewahren wieder eingesetzt werden.
Die Symbole für die unterschiedlichen Härtegrade und Anzahl der Eier sind
am Messbecher angebracht.
weiche Eier
mittelharte Eier
harte Eier
Für den jeweiligen Eieranzahl bzw. Härtegrad ist ein Bereich angegeben.
Füllen Sie das Wasser für Eier der Größe S nur bis zum unteren, für Eier
der Größe XL bis zum oberen Rand des jeweiligen Bereiches.
Abweichungen können durch die Größe, Aufbewahrungszeit und Temperatur der Eier entstehen.
Eipick
Um das Aufplatzen der Eier beim Kochen zu vermeiden, können Sie die Eier an der stumpfen Seite mit dem Eipick (4) anstechen. Dieser ist auf dem Eiereinsatz (3) angebracht.
Inbetriebnahme
▪ Wickeln Sie das Kabel bis zur gewünschten Länge ab. Die nicht benötigte Länge der
Anschlussleitung können Sie am Boden des Eierkochers aufwickeln. Stellen Sie das Gerät
auf eine trockene, rutschfeste und ebene, waagerechte Unterlage auf.
Achten Sie darauf, dass das Gerät vom Strom getrennt ist.
▪ Nehmen Sie die Haube (1a) mit dem integrierten Wasserdosierer ab.
Fassen Sie die Haube (1a) immer nur an den Griffflächen (2) an.
▪ Füllen Sie nun abhängig von der Anzahl der Eier (1 oder 2) sowie des gewünschten
Härtegrades die benötigte Menge Wasser in den Wasserdosierer (1b). Alternativ können
Sie auch den mitgelieferten Messbecher (1c)verwenden.
▪ Geben Sie die abgemessene Wassermenge in die kalte Heizschale (5).
Achten Sie darauf, dass Sie nicht mehr Wasser in die Heizschale (5) einfüllen, als für die
gewünschte Zubereitung angegeben ist. Ansonsten besteht die Gefahr, dass das Wasser
überkocht.
▪ Legen Sie die Eier auf den Eiereinsatz (3) und setzen Sie die Haube (1a) auf das Gerät.
▪ Stecken Sie erst jetzt den Netzstecker in die Steckdose.
▪ Schalten Sie das Gerät mit der Ein/Aus-Taste (6) ein, die Kontrollleuchte leuchtet weiß
und zeigt an, dass das Gerät in Betrieb ist.
▪ Sobald die Eier fertig sind, ertönt ein Signalton.
Schalten Sie das Gerät an der Ein/Aus-Taste (6) aus und ziehen Sie den Netzstecker.
Hinweis: Sie können das Geräte jederzeit durch Drücken der Ein/Aus-Taste (6) wieder
ausschalten.
▪ Heben Sie vorsichtig die Haube (1a) ab. Fassen Sie die Haube (1a) immer nur an den
Griffflächen (2) an.
Achtung: Verbrühungsgefahr durch austretenden Dampf!
▪ Nehmen Sie den Eiereinsatz (3) heraus und schrecken Sie die Eier unter kaltem Wasser
ab, damit diese nicht nachgaren.
Zum Anrichten der Eier, können Sie auch den Eiereinsatz (3) verwenden.
Sicherheitssystem
Ein Thermostat schützt den Eierkocher bei versehentlichem Betrieb ohne Wasser vor Überhitzung, indem er das Gerät abschaltet. Vor einer erneuten Inbetriebnahme den Eierkocher
unbedingt abkühlen lassen.
Sollte bei unsachgemäßem Gebrauch der erste Thermostat versagen, so sorgt ein zusätzlicher Temperaturbegrenzer für einen zuverlässigen Schutz.
6 7
Page 5
de
Reinigung und Pflege
Reinigung
Netzstecker ziehen und das Gerät abkühlen lassen. Das Gerät nicht in Wasser
tauchen, sondern mit einem feuchten Tuch, dem etwas Spülmittel beigegeben wird, abwischen und anschließend trockenreiben. Keine scharfen und
scheuernden Reinigungsmittel verwenden.
Die Heizschale (5) besteht aus nichtrostendem Edelstahl. Sollten sich dennoch
Rostflecken zeigen, so sind dies nur auf der Oberfläche festhaftende Ablagerungen. Sie sollten sofort mit einem Edelstahl-Putzmittel entfernt werden.
Eiereinsatz (3) und Haube mit integriertem Wasserdosierer (1a) bestehen aus
hochwertigem Tritan® und können in der Spülmaschine gereinigt werden.
Entkalken
Kalkablagerungen führen zu Energieverlusten und beeinträchtigen die
Lebensdauer des Gerätes und das Kochergebnis. Es schaltet vorzeitig ab, wenn
die Kalkschicht zu stark ist. Sie ist dann nur noch sehr schwer zu entfernen.
Entkalken Sie deshalb regelmäßig.
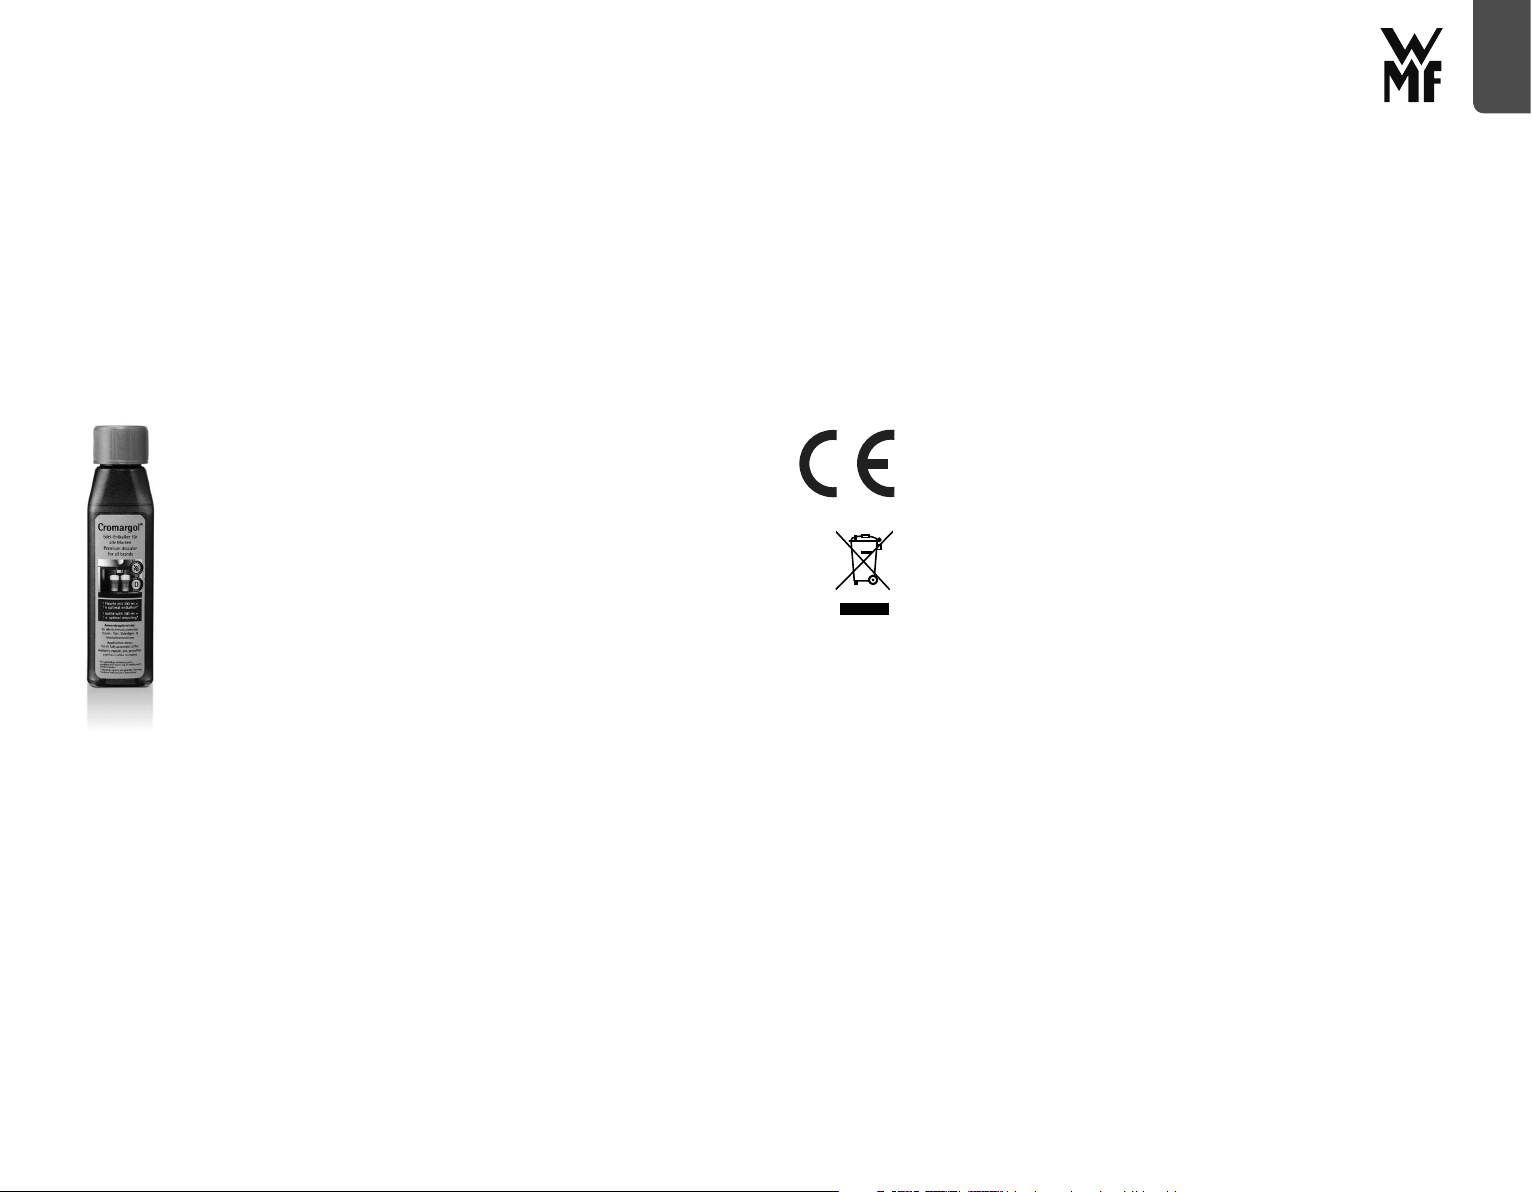
Wir empfehlen die Verwendung von Cromargol®. Dieses ist hochwirksam,
lebensmittelsicher, geschmacks- und geruchsneutral. Durch die spezielle
Pflegeformel mit 6 hochwertigen und schützenden Additiven ist Cromargol®
zudem sehr materialschonend.
Sie bekommen Cromargol® in der Regel dort, wo das Gerät gekauft wurde
oder im ausgewählten Fachhandel. Der Cromargol® Entkalker ist nur in
Deutschland und Österreich erhältlich.
▪ Gerät vor der Entkalkung vom Netz trennen und abkühlen lassen.
▪ Eine halbe Portion (50 ml) Cromargol® in die Heizschale (5) einfüllen
und Gerät stehen lassen, bis der Kalkbelag am Boden entfernt ist. Dann
die Heizschale (5) bis über den Kalkrand an der Wandung mit kaltem
Leitungswasser auffüllen und 15 Minuten stehen lassen.
▪ Anschließend ausgießen und gründlich mit kaltem Leitungswasser ausspü-
len.
▪ Andere Entkalkungsmittel nach Herstellerangaben dosieren und
anwenden.
Lösung während der Entkalkung nicht erhitzen.
Achtung, für Schäden, die durch Nichtbeachtung der Entkalkungsvorschrift
entstehen, besteht kein Garantieanspruch.
Garantie-Information
Für unsere Geräte übernehmen wir gegenüber dem Endkunden eine
24-monatige Haltbarkeitsgarantie. Sie beginnt mit dem Kauf des Gerätes
durch den Endkunden und gilt im Gebiet der Bundesrepublik Deutschland.
Ansprüche aus dieser Garantie sind unter Vorlage des Kaufbelegs direkt
gegenüber unserem zentralen Kundendienst geltend zu machen.
Von der Garantie ausgeschlossen sind Schäden durch normalen Verschleiß,
unsachgemäßen Gebrauch, Nichteinhaltung der Entkalkungsanweisung sowie
unterbliebene Pflege.
Der Endkunde besitzt zusätzlich zu den Ansprüchen aus dieser Garantie
gesetzliche Ansprüche wegen Mängeln des Gerätes gegenüber seinem direkten Verkäufer/Händler, die durch diese Garantie nicht eingeschränkt werden.
Das Gerät entspricht den Europäischen Richtlinien 2014/35/EU, 2014/30/EU
und 2009/125/EU.
Dieses Produkt darf am Ende seiner Lebensdauer nicht über den normalen
Haushaltsabfall entsorgt werden, sondern muss an einem Sammelpunkt
für das Recycling von elektrischen und elektronischen Geräten abgegeben
werden.
Die Werkstoffe sind gemäß ihrer Kennzeichnung wiederverwertbar. Mit der
Wiederverwendung, der stofflichen Verwertung oder anderen Formen der
Verwertung von Altgeräten leisten Sie einen wichtigen Beitrag zum Schutze
unserer Umwelt.
Bitte erfragen Sie bei der Gemeindeverwaltung die zuständige Entsorgungsstelle.
Änderungen vorbehalten
8 9
Page 6

Operating Manual
enen
Important safety information
▪ These appliances can be used by children older than eight
years of age as well as by people with limited physical,
sensory or mental capabilities and persons lacking
experience and/or lacking knowledge, if they are supervised
or have received instructions on how to use the appliance
safely and have understood the resulting risks.
Children must not play with the appliance.
Children must not clean or maintain the appliance unless
they are older than eight years of age and are supervised.
▪ Keep the appliance and its cable out of the reach of children
under eight years of age.
▪ Do not immerse the appliance in water.
▪ If the appliance’s connection cable is damaged it must be
replaced by the manufacturer’s central customer service
department or by a similarly qualified person. Improper
repairs may result in a serious risk to users.
▪ This appliance is designed for use in households and similar
environments such as:
⋅ in kitchens – for employees in shops, offices and other
commercial areas;
⋅ on agricultural property;
⋅ by customers in hotels, motels and other residential
facilities;
⋅ in bed-and-breakfast establishments.
The appliance is not intended for purely commercial use.
▪ After using the appliance and accessories, clean all surfaces/
parts that have come into contact with food. Follow the
instructions in the “Cleaning and care” section.
▪ Always use the appliance in accordance with these
instructions. Improper use can result in electric shocks and
other hazards.
▪ Caution! Risk of burns! The temperature of accessible
surfaces can become very hot. They also remain hot for
some time after the appliance has been switched off.
▪ Caution - Be careful when handling the egg piercing pin.
Risk of injury!
Prior to use
Read the instructions for use carefully. They contain important information about the use,
safety and care of the appliance.
They should be kept in a safe place and passed on to further users if necessary.
Observe the safety information when using the appliance.
Technical data
Rated voltage: 220–240 V ~ 50–60 Hz
Power consumption: 250 W
Protection class: I
Additional safety instructions
▪ Only connect the appliance to earthed wall sockets that have been installed in
accordance with the regulations. The cable and plug must be dry.
▪ Do not pull or clamp the connecting cable over sharp edges. Do not leave it dangling
and protect it from heat and oil. You must not touch the hot heating bowl or the cover.
▪ Never pull the mains plug out of the socket by the cable or with wet hands.
▪ Do not place the appliance on hot surfaces such as on hotplates or similar areas, and do
not operate near naked flames.
▪ Do not place the appliance on water-sensitive surfaces. Water spray may damage them.
▪ Caution, the appliance gets hot. Risk of scalding from escaping steam. Do not move the
appliance during operation and do not pull on the mains cable.
▪ Only operate the appliance under supervision.
▪ Stop using the appliance and/or pull out the mains plug immediately if:
⋅ the appliance or mains cable is damaged;
⋅ the appliance is leaking;
⋅ you suspect the appliance is faulty after dropping it, for example.
In such cases, arrange for the appliance to be repaired.
▪ Pull the mains plug:
⋅ if the appliance malfunctions during use;
⋅ before cleaning and care;
⋅ after use.
▪ Descale the appliance regularly.
▪ We accept no liability for any damages caused as a result of misuse, incorrect operation
or improper repairs.
Claims under warranty are likewise excluded in such cases.
▪ Packaging materials, such as plastic bags, must be kept out of the reach of children.
10 11
Page 7
en
Use
You can use the appliance to cook one or two eggs with the utmost precision, and you can
choose between soft, medium-hard or hard-boiled eggs. The WMF KITCHENminis® two egg
boiler is suitable for cooking S–XL eggs.
* Compared to WMF STELIO egg boiler.
Confirmed by technikzuhause.de. Resource savings refer to material usage and
transportation volume. Measurement of energy savings by cooking 1 or 2 eggs (medium).
Water measuring device
The water measuring device (1b) is integrated into the cover (1a). The cover with integrated
water measuring device (1a) is made of high-quality Tritan® and is BPA-free. The water
quantities specified on the water measuring device (1b) are guide values for one or two
medium-sized eggs. Deviations can occur due to the size, storage time and temperature of
the eggs.
The symbols for the different levels of hardness and the number of eggs are indicated on
the water measuring device.
Soft eggs
Medium-hard eggs
Hard eggs
If you are using larger eggs add a little more water, and for smaller eggs use a little less.
If the eggs are too soft, add a little more water next time. If the eggs are too hard, use a
little less water next time.
Measuring mug
As an alternative to the integrated water measuring device (1b), you can also use the
measuring mug (1c) provided. This is located beneath the cover (1a) and you can simply
remove it and then return it for storage.
The symbols for the different levels of hardness and the number of eggs are indicated on
the measuring mug.
soft eggs
medium-hard eggs
hard eggs
A range is specified for each level of hardness and number of eggs.
For size S eggs only fill with water to the lower range. For size XL eggs fill
to the top edge of the respective range.
Deviations may occur due to the size, storage time and temperature of
the eggs.
Egg piercer
To prevent the eggs from exploding during cooking, use the egg piercer (4) to pierce the
underside of the eggs. The egg piercer is attached to the egg insert (3).
Starting up the appliance
▪ Unwind the cable to the required length. You can wind the remaining non-required
cable onto the base of the egg boiler. Place the appliance on a dry, slip-resistant and
even horizontal surface.
Make sure the appliance is not connected to the mains power supply.
▪ Remove the cover (1a) with the integrated water measuring device.
Always use the gripping surfaces (2) when handling the cover (1a).
▪ Depending on the number of eggs (one or two) and the desired level of hardness,
you now fill the the water measuring device (1b) with the required water quantity.
Alternatively, you can use the measuring mug (1c) provided.
▪ Pour the measured water quantity into the cold heating bowl (5).
Make sure you do not fill the heating bowl (5) with more water than is specified for the
desired preparation. Otherwise you risk overboiling the water.
▪ Place the eggs on the egg insert (3) and fit the cover (1a) on the appliance.
▪ Now you can insert the mains plug into the socket.
▪ Press the On/off button (6) to turn the appliance on; the indicator light is lit white to
indicate that the appliance is in operation.
▪ Once the eggs are cooked, the appliance emits an acoustic signal.
Press the On/off button (6) on the appliance to turn it off and then pull out the mains
plug.
Note: You can turn the appliance off again at any time by pressing the On/off button
(6).
▪ Carefully remove the cover (1a). Always use the gripping surfaces (2) when handling the
cover (1a).
Warning: Risk of scalding from escaping steam!
▪ Remove the egg insert (3) and rinse the eggs under cold water so that they do not
continue to cook.
You can also use the egg insert (3) to serve the eggs.
Safety system
If the egg boiler is operated accidentally without water, a thermostat switches the
appliance off to protect it from overheating. You must allow the egg boiler to cool down
before you operate it again.
Should the first thermostat malfunction due to improper use, an additional temperature
limiter provides reliable protection.
12 13
Page 8

en
Cleaning and care
Cleaning
Remove the mains plug and allow the appliance to cool down. Do not
immerse the appliance in water, but rather clean it using a damp cloth
with a little washing-up liquid and then dry it. Do not use any harsh or
abrasive cleaning agents.
The heating bowl (5) is made of stainless steel. If rust spots do appear
however, they are only deposits that have formed on the surface. You
must remove these immediately using a stainless steel cleaning agent.
The egg insert (3) and cover with integrated water measuring device (1a)
are made of high-quality Tritan® and can be cleaned in the dishwasher.
Descaling
Limescale deposits lead to energy losses and have a negative effect
upon the appliance service as well as the cooking results. The appliance
switches off prematurely if the layer of limescale is too thick. The
limescale is then very difficult to remove. Therefore descale the appliance
regularly.
We recommend using Cromargol®. This product is highly effective, food
safe and is neutral in taste and smell. Thanks to its special care formula
with six high-quality and protective additives, Cromargol® is also very
gentle on materials.
You can usually purchase Cromargol® from the store where you have
purchased your appliance or from your chosen dealer. The Cromargol®
decalcifier is only available in Germany and Austria.
▪ Prior to descaling, unplug the appliance from the mains and allow it
to cool down.
▪ Pour half a portion (50 ml) of Cromargol® into the heating bowl
(5) and leave the appliance to stand until the layer of limescale has
detached from the base. Then fill the heating bowl (5) with cold tap
water to cover the limescale ring on the wall and leave to stand for
15 minutes.
▪ Then pour out and thoroughly rinse with cold tap water.
▪ Measure out and use other descaling agents according to the
manufacturer’s instructions.
Do not heat the solution during descaling.
Caution: the warranty does not cover damage caused by not observing
the descaling instructions.
For UK use only
• This product is supplied with a 13 A plug conforming to BS 1363 fitted to
the mains lead. If the plug is unsuitable for your socket outlets or needs to be
replaced, please note the following. If the plug is a non-rewireable one, cut
it from the mains lead and immediately dispose of it. Never insert it into a
socket outlet as there is a very great risk of an electric shock.
• The replacement of the plug at the mains lead has to be done according to
the following instructions:
Warning - This appliance must be earthed!
Important: The wires in this mains lead are coloured in accordance with the
following code:
green/yellow Earth
blue Neutral
brown Live
As the colours of the wires in the mains lead of this appliance may not
correspond with the coloured markings identifying the terminals in your
plug, proceed as follows:
⋅ the wire which is coloured green and yellow must be connected to
the terminal which is marked with the letter E or by the earth symbol
, or coloured green or green and yellow,
⋅ the wire which is coloured blue must be connected to the terminal
which is marked with the letter N or coloured black,
⋅ the wire which is coloured brown must be connected to the terminal
which is marked with the letter L or coloured red.
• If a 13 A (BS 1363) plug is used it must be fitted with a 3 A fuse
conforming to BS 1362 and be ASTA approved. If any other type of plug
is used, the appliance must be protected by a 5 A fuse either in the plug
or adapter or at the distribution board. If in doubt - consult a qualified
electrician.
• Never use the plug without closing the fuse cover.
The appliance complies with the European directives 2014/35/EU, 2014/30/EU
and 2009/125/EU.
At the end of its lifetime this product must not be disposed of through the
normal domestic waste, but it should be handed to an assembly point for
the recycling of electrical and electronical appliances. You can inquire about
details at the local administration.
Subject to technical changes.
14 15
Page 9

Mode d’emploi
frfr
Consignes de sécurité importantes
▪ Les enfants à partir de 8 ans ainsi des personnes ayant des
capacités physiques, sensorielles ou mentales restreintes
ou ayant un manque d’expérience et/ou de connaissance,
peuvent utiliser ces appareils s’ils sont surveillés et s’ils ont
été instruits pour utiliser cet appareil en toute sécurité et
s’ils ont compris les dangers pouvant résulter de l’usage de
l’appareil.
Les enfants n’ont pas le droit de jouer avec cet appareil.
Les enfants n’ont pas le droit d’effectuer le nettoyage et la
maintenance sauf s’ils sont âgés de plus de 8 ans et sous
surveillance.
▪ Conservez l’appareil et son câble d’alimentation en dehors
de la portée des enfants de moins de huit ans.
▪ Ne plongez pas l’appareil dans l’eau.
▪ Si le câble d’alimentation de l’appareil est endommagé, il
doit être remplacé par le SAV central du fabricant ou par
une personne qualifiée. Des réparations non conformes
peuvent engendrer de graves dangers pour l’utilisateur.
▪ L’appareil est conçu pour un usage domestique ou pour des
applications similaires telles que:
⋅ dans des cuisines pour le personnel dans des boutiques,
des bureaux ou d’autres secteurs professionnels;
⋅ dans des exploitations agricoles;
⋅ par des clients dans des hôtels, des motels et d’autres
établissements;
⋅ dans des chambres d’hôtes.
L’appareil n’est pas conçu pour un usage purement
commercial.
▪ Après avoir utilisé les accessoires et l’appareil, nettoyez
toutes les surfaces/pièces qui sont entrées en contact avec
les aliments. Veuillez suivre les instructions du chapitre «
Nettoyage et entretien ».
▪ N’utilisez l’appareil que conformément aux présentes
instructions. Une utilisation non conforme peut entrainer
une décharge électrique ou d’autres dangers.
▪ Attention, risque de brûlure : La température des surfaces
de contact peut devenir extrêmement brûlante. Même après
la mise hors tension de l’appareil, celui-ci reste brûlant
pendant un certain temps.
▪ Attention lors de la manipulation du pique-œuf. Risque de
blessure!
Avant l‘utilisation
Lire attentivement le mode d’emploi. Il contient des consignes importantes pour
l’utilisation, la sécurité et l’entretien de l’appareil.
Il doit être conservé soigneusement et transmis en cas de remise à une tierce personne.
Respectez les consignes de sécurité lors de l’utilisation.
Caractéristiques techniques
Tension du secteur : 220-240 V~ 50-60 Hz
Puissance : 250 W
Catégorie de protection : I
Consignes de sécurité supplémentaires
▪ Brancher l’appareil uniquement dans une prise électrique sécurisée, installée
conformément aux prescriptions. Le câble d’alimentation et la prise doivent être secs.
▪ Ne pas tirer le cordon d’alimentation sur des bords tranchants, ne pas le coincer, ne pas
le laisser pendre et le protéger de la chaleur et de l’huile. Il ne peut pas toucher la coque
chauffante du couvercle.
▪ Ne pas débrancher l’appareil en tirant sur le câble ou avec les mains mouillées.
▪ Ne pas poser l’appareil sur des surfaces chaudes telles que des plaques de cuisson ou
équivalent et ne pas l’utiliser à proximité d’une flamme.
▪ Ne pas déposer l’appareil sur des surfaces sensibles à l’eau. Des projections d’eau
pourraient les endommager.
▪ Attention, l’appareil chauffe. Danger d’ébouillantage par la vapeur qui s’échappe.
Ne pas déplacer l’appareil durant le fonctionnement et ne pas tirer sur le câble
d’alimentation.
▪ Faire fonctionner l’appareil uniquement sous surveillance.
▪ Ne pas mettre l’appareil en marche ou le débrancher immédiatement si :
⋅ l’appareil ou le câble d’alimentation sont endommagés.
⋅ l’appareil fuit;
⋅ une défaillance est soupçonnée suite à une chute ou équivalent.
Dans ces cas, emporter l’appareil en réparation.
▪ Il faut débrancher la fiche secteur :
⋅ en cas de dysfonctionnements durant l’utilisation,
⋅ avant chaque nettoyage et entretien,
⋅ après l’utilisation.
16 17
Page 10
fr
▪ Détartrer régulièrement l’appareil.
▪ Nous déclinons toute responsabilité pour des dommages éventuels en cas d’utilisation
détournée, de mauvaise utilisation, de réparation inappropriée.
Dans de tels cas, toute intervention sous garantie est exclue.
▪ Le matériel d’emballage, comme p.ex. les sachets en plastiques ne sont pas destinés aux
enfants.
Utilisation
L’appareil vous permet de cuire à point un ou deux œufs, vous avez le choix entre des œufs
mollets, mi-durs ou durs. Grâce au cuit-œufs WMF KITCHENminis® pour deux œufs, vous pouvez
préparer des œufs des tailles S à XL.
Doseur d’eau
Le doseur d’eau (1b) est intégré dans le couvercle (1a). Le couvercle avec doseur d’eau
(1a) intégré se compose de Tritan® et ne contient pas de BPA. Le doseur d’eau (1b) avec
indication des quantités d’eau donne des valeurs indicatives pour un ou deux œufs de taille
M. La taille, la durée de conservation et la température peuvent entraîner des fluctuations.
Les symboles indiquant les différents degrés de dureté et le nombre d’œufs se trouvent sur
le doseur d’eau.
œufs mollets
œufs mi-durs
œufs durs
Si vous utilisez de gros œufs, rajoutez un peu d’eau et, pour les plus petits œufs, versez-en
un peu moins.
Si les œufs ne sont pas assez cuits, rajoutez un peu plus d’eau la prochaine fois. Si les œufs
sont trop durs, mettez un peu moins d’eau.
Bol gradué
Vous pouvez également utiliser le bol gradué (1b) fourni en alternative au doseur d‘eau
intégré. Celui-ci se trouve dans le capot (1a), peut être retiré facilement et remis en place
pour stockage.
Les symboles concernant les différentes durées de cuisson et le nombre d‘œufs sont
indiqués sur le bol gradué (1c).
œufs coques
œufs mollets
œufs durs
Une zone est indiquée pour chaque durée de cuisson et le nombre d‘œufs
Remplissez d‘eau pour la zone respective, jusqu‘au niveau inférieur pour
les œufs de petite taille et jusqu‘au niveau supérieur pour les gros œufs.
Des écarts peuvent exister en fonction de la taille, de la durée de
conservation et de la température.
Pique-œuf
Afin d’éviter que les œufs éclatent lors de la cuisson, percez-les sur leur côté rond avec le
pique-œuf (4). Celui-ci se trouve sur le support d’œufs (3).
Mise en service
▪ Déroulez le câble sur la longueur souhaitée. Vous pouvez enrouler le reste du câble de
dont vous n’avez pas besoin autour du fond du cuit-œufs.
Posez l’appareil sur une surface sèche, antidérapante, plane et horizontale.
Veillez à ce que l’appareil soit débranché du secteur.
▪ Retirez le couvercle (1a) avec doseur d’eau intégré.
Ne saisissez le couvercle (1a) qu’aux poignées (2).
▪ Remplissez maintenant la quantité d’eau souhaitée, peu importe le nombre d’œufs (1 ou
2) ou la quantité d’eau nécessaire du doseur d’eau (1b). Vous pouvez également utiliser
le verre gradué (1c) fourni.
▪ Versez la quantité d’eau mesurée dans la coque chauffante (5).
Veillez à ne pas verser plus d’eau dans la coque chauffante (5) qu’il n’est indiqué pour la
préparation souhaitée. Sinon, l’eau risque de déborder.
▪ Posez les œufs sur le support (3) et posez le couvercle (1a) sur l’appareil.
▪ Branchez l’appareil seulement maintenant.
▪ Allumez l’appareil avec la touche marche / arrêt (6), la diode de contrôle s’allume en
blanc et indique que l’appareil fonctionne.
▪ Dès que les œufs sont cuits, un signal sonore retentit.
Éteignez l’appareil avec la touche marche / arrêt (6) et débranchez la fiche.
Remarque: Vous pouvez à tout moment à nouveau éteindre l’appareil en appuyant sur
la touche marche / arrêt (6).
▪ Soulevez prudemment le couvercle (1a). Ne saisissez le couvercle (1a) qu’aux poignées
(2).
Attention: Danger d’ébouillantage par la vapeur qui s’échappe!
▪ Retirez le support à œufs (3) et passez les œufs sous l’eau froide pour qu’ils ne
continuent pas à cuire.
Vous pouvez aussi utiliser le support (3) pour présenter les œufs.
Système de sécurité
Un thermostat protège le cuit-œufs d’une surchauffe si l’appareil est mis accidentellement
en marche sans eau en éteignant l’appareil. Laissez absolument refroidir le cuit-œufs avant
de le remettre en service.
Si le premier thermostat devait tomber en panne lors d’une utilisation non conforme, un
limiteur thermique supplémentaire apporte une sécurité fiable.
Nettoyage et Entretien
Nettoyage
Débrancher l’appareil et le laisser refroidir. Ne pas plonger l’appareil dans l’eau, mais
l’essuyer avec un chiffon humide, imbibé d’un peu d’agent de rinçage et le sécher ensuite.
Ne pas utiliser de nettoyants corrosifs ou abrasifs.
La coque chauffante (5) est composée d’acier inoxydable. Si toutefois des taches de rouille
devaient apparaître, il s’agit uniquement de dépôts qui adhérent à la surface. Ils devraient
être enlevés immédiatement avec un agent nettoyant spécial pour aciers inoxydables.
Le support à œufs (3) avec couvercle et doseur d’eau intégré (1a) se compose de Tritan®, ces
éléments peuvent être nettoyés au lave-vaisselle.
18 19
Page 11

fr
Détartrer
Des dépôts calcaires peuvent causer des pertes d’énergie et influencent
la durée de vie de l’appareil, ainsi que le résultat de cuisson. L’appareil
s’éteint trop tôt si la couche calcaire est trop importante. Cette couche
se laisse alors très difficilement enlever. Détartrez pour cette raison
régulièrement votre bouilloire.
Nous vous conseillons d’utiliser Cromargol®. Il est très efficace, sans
danger pour les aliments et neutre en goût et en odeur. Grâce à la
formule de soin spéciale avec 6 additifs protecteurs de haute qualité,
Cromargol® n’abîme pas la matière.
Vous trouverez généralement du Cromargol® là où vous avez trouvé
votre appareil ou chez vos revendeurs spécialisés. Le détartrant
Cromargol® est uniquement disponible en Allemagne et en Autriche.
▪ Débrancher l’appareil avant le détartrage et le laisser refroidir.
▪ Verser une demi-portion (50 ml) de Cromargol® dans la coque
chauffante (5) et laisser tremper jusqu’à ce que les dépôts de
calcaire du fond soient partis. Remplir ensuite la coque chauffante
(5) jusqu’au-dessus de la limite du calcaire sur les parois avec de
l’eau froide et laisser reposer durant 15 minutes.
▪ Vider l’appareil ensuite et le rincer soigneusement avec de l’eau potable
froide.
▪ Doser et utiliser d’autres agents détartrants en suivant les
instructions des fabricants.
Ne pas chauffer la solution durant le processus de détartrage.
Attention, aucun droit à garantie n’est engagé pour des dommages dus
au non-respect des prescriptions du détartrage.
Cet appareil est conforme auxdirectives européennes 2014/35/EU, 2014/30/EU
et 2009/125/EU.
Quand il n‘est plus utilisable (fin de vie),vous ne devez pas jeter ce produit
avecles ordures ménagères mais le remettreau point de recyclage des
appareilsélectriques et électroniques le plus proche (oudéchetterie). Si vous
avez besoin de détailssupplémentaires, vous pouvez également vousadresser à
la mairie de votre commune.
Sous réserve de changements techniques.
20 21
Page 12

Istruzioni per l’uso
itit
Importanti indicazioni per la sicurezza
▪ Questi apparecchi possono essere utilizzati da bambini a
partire dagli 8 anni di età e da persone con ridotte capacità
fisiche, sensoriali o mentali o che mancano di esperienza
e/o di conoscenza, solo se sono sorvegliate o se sono state
istruite riguardo all’utilizzo sicuro dell’apparecchio e se ne
hanno compreso i pericoli risultanti.
I bambini non devono giocare con l’apparecchio.
La pulizia e la manutenzione a carico dell’utente non devono
essere eseguiti da bambini, eccetto nel caso in cui essi
abbiano più di 8 anni e siano sorvegliati.
▪ Conservare l’apparecchio e il suo cavo di alimentazione al di
fuori della portata di bambini di età inferiore a 8 anni.
▪ Non immergere l’apparecchio in acqua.
▪ Se il cavo di collegamento dell’apparecchio è guasto,
bisogna farlo sostituire dal servizio clienti centrale del
fabbricante o da un’altra persona competente del settore. Le
riparazioni improprie recano un grande pericolo per l’utente.
▪ Questo apparecchio può essere utilizzato solo in ambito
domestico e in applicazioni simili, come ad esempio:
⋅ in cucine per i dipendenti di negozi, uffici e altri settori
commerciali;
⋅ in tenute agricole;
⋅ da clienti in hotel, motel e altri impianti di soggiorno;
⋅ in bed & breakfast.
Questo apparecchio non è destinato ad un uso puramente
commerciale.
▪ Terminato l’utilizzo degli accessori e dell’apparecchio,
pulire tutte le superfici/parti che sono state a contatto con
gli alimenti. Seguire le indicazioni contenute nel capitolo
“Pulizia e cura”.
▪ Usare il dispositivo solo conformemente a queste istruzioni.
L’uso inadeguato può provocare shock elettrici o altri rischi.
▪ Attenzione, rischio di ustioni: la temperatura delle superfici
che si possono toccare può essere molto alta. Anche dopo
lo spegnimento dell’apparecchio, la temperatura può restare
calda ancora per un po’ di tempo.
▪ Attenzione - Prestare attenzione nell’utilizzo del pungi
uovo. Sussiste il pericolo di ferimenti!
Prima dell‘uso
Leggere attentamente le istruzioni per l’uso. Forniscono indicazioni importanti riguardanti
l’uso, la sicurezza e la manutenzione dell’apparecchio.
Vanno conservate con cura ed eventualmente trasmesse all’utente successivo.
Durante l’uso osservare scrupolosamente le istruzioni per la sicurezza.
Dati tecnici
Tensione nominale: 220-240 V~ 50-60 Hz
Potenza assorbita: 250 W
Classe di protezione: I
Ulteriori istruzioni di sicurezza
▪ Collegare l’apparecchio soltanto a una presa schuko installata a norma. Il cavo di
alimentazione e il connettore devono essere asciutti.
▪ Non tirare o incastrare il cavo di collegamento contro spigoli taglienti, non lasciarlo
sospeso e proteggerlo dal calore e dall’olio. Evitare il contatto con la vasca di cottura
calda e con il coperchio
▪ Non staccare la spina dalla presa, tirandola per il cavo o con le mani bagnate.
▪ Non collocare l’apparecchio su superfici calde come piastre e non metterlo in funzione
in prossimità di fiamme libere.
▪ Non disporre l’apparecchio su superfici sensibili all’acqua. Gli spruzzi d’acqua potrebbero
danneggiarlo.
▪ Attenzione, l’apparecchio diventa rovente. Pericolo di ustione dovuto al vapore che
fuoriesce. Non spostare l’apparecchio durante il funzionamento e non tirare il cavo di
rete.
▪ Far funzionare l’apparecchio solo se supervisionati.
▪ Non mettere in funzione l’apparecchio e staccare subito la spina, se:
⋅ l’apparecchio o il cavo d’alimentazione sono guasti;
⋅ l’apparecchio non è ermetico;
⋅ si sospetta un difetto dopo una caduta o un evento simile.
In questi casi far riparare l’apparecchio.
▪ Il connettore di rete deve essere estratto:
⋅ in caso di guasti nel funzionamento,
⋅ prima di ogni pulizia e manutenzione,
⋅ dopo l’uso.
▪ Decalcificare regolarmente l’apparecchio.
▪ Non ci si assume alcuna responsabilità in caso di uso per uno scopo diverso da quello
previsto, per un utilizzo errato oppure in caso di riparazione non professionale.
In questi casi sono escluse anche le richieste di garanzia.
22 23
Page 13

it
▪ Tenere fuori dalla portata dei bambini il materiale da imballaggio, come ad esempio i
sacchetti di pellicola.
Utilizzo
Questo apparecchio permette la cottura al punto giusto di uno o due uova scegliendo tra uova
alla coque, con cottura media o sode. Con WMF KITCHENminis® Cuociuova per 2 uova potete
preparare uova di tutte le grandezze, dalla S alla XL.
Dosatore d’acqua
Il dosatore d’acqua (1b) è integrato nel coperchio (1a). Il coperchio con dosatore d’acqua
integrato (1a) è realizzato in Tritan® di alta qualità e privo di BPA. Le quantità d’acqua
indicate sul dosatore d’acqua sono indicative e si riferiscono alla cottura di 1 o 2 uova
della grandezza M. Possibili variazioni dipendono da grandezza, tempo di conservazione e
temperatura delle uova.
Le icone con i diversi gradi di cottura e il numero di uova sono collocate sul dosatore
d’acqua.
uova alla coque
uova con cottura media
uova sode
Per uova più grandi basta versare un po’ d’acqua in più, per uova più piccoli invece un po’
d’acqua in meno.
Se le uova risultano essere troppo poco cotte, versare un po’d’acqua in più al prossimo
utilizzo. Se le uova risultano essere troppo sode, versare un po’ d’acqua in meno.
Misurino
In alternativa al dosatore d‘acqua (1b) è possibile usare il misurino fornito. Esso si trova nel
coperchio (1a) e può essere facilmente rimosso e riposizionato.
Le icone con i diversi gradi di cottura e il numero di uova sono collocate sul misurino (1c).
uova alla coque
uova con cottura media
uova sode
È indicata un‘area per il rispettivo grado di durezza o numero di uova.
Versare l‘acqua per le uova della grandezza S fino al bordo inferiore, per
le uova della grandezza XL fino al bordo superiore della rispettiva area.
Possono verificarsi delle variazioni a seconda della grandezza, del tempo
di conservazione e della temperatura delle uova.
Fora-uova
Per evitare la rottura del guscio durante la cottura, praticare con il fora-
uova (4) un foro sul lato ottuso dell’uovo. Il fora-uova è collocato sul portauova (3).
Prima messa in servizio
▪ Svolgere il cavo alla lunghezza desiderata. Avvolgere la lunghezza del cavo di
collegamento in eccesso intorno alla base del cuociuova Posizionare l’apparecchio sopra
un piano asciutto, antiscivolo e orizzontale, a livello.
Assicurarsi che l’apparecchio non sia collegato alla presa di corrente.
▪ Togliere il coperchio (1a) con dosatore d’acqua integrato.
Afferrare il coperchio (1a) solo ed esclusivamente dalle superfici di presa (2).
▪ A questo punto riempire il dosatore d’acqua (1b) con la quantità d’acqua necessaria, in
funzione del numero di uova (1 o 2) e del grado di cottura desiderato. In alternativa è
possibile usare il misurino fornito (1c).
▪ Versare la quantità d’acqua misurata nella vasca di cottura (5) fredda.
Fare attenzione a non versare nella vasca (5) più acqua del necessario per raggiungere
il grado di cottura desiderato. Altrimenti c’è il rischio che l’acqua trabocchi durante la
cottura.
▪ Deporre le uova sul portauova (3) e posizionare il coperchio (1b) sull’apparecchio.
▪ Inserire la spina nella presa di corrente.
▪ Accendere l’apparecchio con l’interruttore di accensione/spegnimento (6), la spia di
controlla diventa bianca indicando che l’apparecchio è in funzione.
▪ A fine cottura viene emesso un segnale acustico.
Spegnere l’apparecchio attraverso l’interruttore di accensione/spegnimento (6) e togliere
la spina dalla presa.
Nota: Premendo l’interruttore di accensione/spegnimento (6) è possibile spegnere
l’apparecchio in qualsiasi momento.
▪ Sollevare il coperchio (1a) con cautela. Afferrare il coperchio (1a) solo ed esclusivamente
dalle superfici di presa (2).
Attenzione: Pericolo di ustione dovuto al vapore che fuoriesce.
▪ Estrarre il portauova (3) e raffreddare le uova con l’acqua fredda per fermare la cottura.
Potete servire le uova anche con il portauova (3).
Sistema di sicurezza
Un termostato protegge il cuociuova da surriscaldamento in caso di accensioni involontarie
in assenza di acqua, spegnendo l’apparecchio. Fare raffreddare il cuociuova prima di
riutilizzarlo.
Se in caso di uso improprio dovesse guastarsi il primo termostato, un ulteriore limitatore
della temperatura provvede ad una protezione affidabile.
Pulizia e manutenzione
Pulizia
Estrarre il connettore di rete e far raffreddare l’apparecchio. Non immergere l’apparecchio
in acqua, bensì strofinarlo con un panno umido, a cui sia stato aggiunto un po’ di detersivo
e successivamente asciugarlo. Non usare detergenti corrosivi e abrasivi.
La vasca di cottura (5) è realizzata in acciaio inox. Se ciononostante dovessero comparire
delle macchie di ruggine, queste sono soltanto depositi rimasti attaccati sulla superficie. Essi
devono essere rimossi immediatamente con un detergente per l’acciaio inox.
Portauova (3) e coperchio con dosatore d’acqua integrato (1a) sono realizzati in Tritan® di
alta qualità e possono essere lavati in lavastoviglie
24 25
Page 14

it
Decalcificazione
I depositi di calcare portano a perdite energetiche e pregiudicano la
durata dell’apparecchio e il risultato della cottura. L’apparecchio si
spegne precocemente se lo strato di calcare è troppo spesso. A questo
punto il deposito sarà difficile da rimuovere. Pertanto, decalcificare
regolarmente.
Consigliamo l’utilizzo di Cromargol®. Questo prodotto è altamente
efficace, sicuro per uso alimentare, insapore e inodore. Grazie alla
speciale formula protettiva con 6 additivi protettivi di alta qualità
Cromargol® è inoltre molto delicato sul materiale.
Cromargol® è di solito disponibile nel negozio di rivendita
dell’apparecchio o nei negozi specializzati. Il decalcificante Cromargol®
è disponibile solo in Germania e Austria.
▪ Staccare l’apparecchio dalla rete prima della decalcificazione e
lasciarlo raffreddare.
▪ Versare mezza dose (50 ml) di Cromargol® nella vasca di cottura (5)
e lasciare riposare l’apparecchio finché il calcare si stacca dal fondo.
Poi riempire la bacinella di cottura (5) fin sopra il bordo del calcare
sulla parete con acqua fredda dal rubinetto e lasciare riposare per 15
minuti.
▪ In seguito versare l’acqua e risciacquare a fondo con acqua di
rubinetto fredda.
▪ Per l’utilizzo di altri decalcificanti, fare riferimento alle istruzioni
fornite dai rispettivi produttori.
Non riscaldare la soluzione durante la decalcificazione.
Attenzione, per danni dovuti alla mancata osservanza delle disposizioni di
decalcificazione decade ogni garanzia.
L’apparecchio è conforme alle direttiveeuropee 2014/35/EU, 2014/30/EU e
2009/125/EU.
Questo prodotto, quando non è piùusabile, non deve venire gettato nei
rifiuticasalinghi ma portato in un punto diraccolta di riciclaggio per
apparecchielettrici e elettronici. Informazioni dettagliate si possono ottenere
presso le relativeamministrazioni comunali.
Salvo cambiamenti tecnici.
26 27
Page 15

Instrucciones de uso
eses
Advertencias de seguridad importantes
▪ Estos aparatos pueden ser utilizados por niños mayores de
8 años y por personas con limitaciones físicas, psíquicas
o sensoriales, o que carezcan de la experiencia y/o los
conocimientos necesarios para usarlos, siempre que los usen
bajo vigilancia o reciban las instrucciones necesarias para
una utilización segura del aparato y comprendan los peligros
derivados de ella.
Los niños no deben jugar con el aparato.
Asimismo, los niños no deben realizar su limpieza ni
mantenimiento, a no ser que sean mayores de 8 años y lo
hagan vigilados.
▪ Mantenga el aparato y el cable de alimentación lejos del
alcance de niños menores de 8 años.
▪ No sumerja el aparato en agua.
▪ Si el cable de conexión del aparato está dañado, deberá
ser sustituido por el departamento de atención al cliente
central del fabricante o por una persona cualificada. Las
reparaciones inadecuadas podrían suponer un serio peligro
para el usuario.
▪ Este aparato está diseñado para uso doméstico u otras
aplicaciones similares, tales como:
⋅ en cocinas para el personal de tiendas, oficinas y otros
ámbitos comerciales;
⋅ en fincas agrícolas;
⋅ para clientes de hoteles, moteles y otros
establecimientos de hospedaje;
⋅ en pensiones con desayuno.
No está diseñado para un uso puramente comercial.
▪ Luego de la utilización, limpie todas las superficies y piezas
del aparato y los accesorios que hayan estado en contacto
con alimentos. Siga las indicaciones contenidas en el
capítulo “Limpieza y cuidados”.
▪ Utilice el aparato solo de conformidad con estas
instrucciones de uso. El uso incorrecto puede tener como
consecuencia una descarga eléctrica u otro tipo de peligros.
▪ Cuidado, peligro de quemaduras: Las superficies de contacto
pueden calentarse mucho. Mantienen su temperatura
durante algún tiempo incluso después de apagarse el
aparato.
▪ Atención - Tenga cuidado al usar el alfiler para pinchar los
huevos. ¡Peligro de lesiones!
Antes de usar
Lea detenidamente las instrucciones de uso. Contienen información importante sobre el
uso, la seguridad y el mantenimiento del aparato.
Guárdelas en un lugar seguro y entréguelas a futuros usuarios cuando corresponda.
Respete siempre las precauciones de seguridad durante el uso.
Datos técnicos
Tensión nominal: 220-240 V~ 50-60 Hz
Consumo de energía: 250 W
Clase de protección: I
Otras advertencias de seguridad
▪ Conecte el aparato solamente en una toma de corriente con puesta a tierra que esté
instalada correctamente según las normativas correspondientes.
El cable y el enchufe deben estar secos.
▪ No tire del cable de conexión cuando éste se encuentre sobre bordes afilados ni lo
aprisione, no deje que cuelgue y protéjalo del calor y del aceite. No debe entrar en
contacto con la bandeja calefactora ni la cubierta.
▪ No desenchufe nunca el aparato tirando del cable o con las manos mojadas.
▪ No ponga el aparato a funcionar sobre superficies calientes, como placas de cocina o
lugares similares, y manténgalo alejado de las llamas abiertas.
▪ No lo coloque sobre superficies sensibles al agua. Las salpicaduras de agua podrían dañar
las superficies.
▪ Cuidado, el aparato se calienta. Existe peligro de quemaduras por vapor.
No mueva el aparato mientras esté funcionando ni tire del cable de red.
▪ No deje el aparato funcionando sin vigilancia.
▪ No ponga en funcionamiento el aparato y desconéctelo inmediatamente de la red si:
⋅ el aparato o el cable de red están dañados;
⋅ el aparato no cierra herméticamente;
⋅ sospecha que se haya podido producir alguna avería después de una caída del
aparato o algo similar.
En estos casos, envíe el aparato para que sea reparado.
▪ Desenchufe el cable de red:
⋅ si se ha producido un fallo durante el uso del aparato;
⋅ antes de la limpieza y cuidados del aparato;
⋅ después de usar el aparato.
28 29
Page 16

es
▪ Descalcifique el aparato regularmente.
▪ No asumiremos ninguna responsabilidad por posibles daños en caso de un uso diferente
al previsto, un manejo incorrecto o una reparación que no haya sido realizada por
profesionales.
En estos casos están excluidas también las prestaciones de garantía.
▪ El material de embalaje, como las bolsas de plástico, no es apto para los niños.
Utilización
Con el aparato puede cocer con precisión uno o dos huevos, pudiendo elegir entre huevos
blandos, semiduros o duros. Con el hervidor de 2 huevos WMF KITCHENminis® puede
preparar huevos de los tamaños S hasta XL.
Dosificador de agua
El dosificador de agua (1b) está integrado en la cubierta (1a). La cubierta con el dosificador
de agua integrado (1a) está hecha de Tritan® de alta calidad y no contiene BPA. Las
cantidades de agua indicadas en el dosificador de agua (1b) son valores orientativos para
1 o 2 huevos del tamaño M. Pueden producirse divergencias a consecuencia del tamaño, el
tiempo de almacenamiento y la temperatura de los huevos.
Los símbolos para los diferentes grados de dureza y la cantidad de los huevos se encuentran
en el dosificador de agua.
huevos blandos
huevos semiduros
huevos duros
Si cuece huevos más grandes, ponga un poco más de agua; para huevos más pequeños, un
poco menos.
Si los huevos quedan demasiado blandos, ponga la próxima vez un poco más de agua. Si los
huevos quedan demasiado duros, utilice un poco menos de agua.
Recipiente medidor
Además del dosificador de agua (1b) integrado puede utilizar alternativamente el recipiente
medidor suministrado. Está ubicado en la tapa (1a) y se puede extraer y guardar fácilmente.
Los símbolos de los distintos grados de dureza y el número de huevos figuran en el
recipiente medidor (1c).
huevos blandos
huevos semiduros
huevos duros
Se ha dispuesto un margen para el grado de dureza y el número de
huevos en cuestión.
Para huevos de tamaño S agregue agua hasta el borde inferior; para
huevos de tamaño XL hasta el borde superior del margen
correspondiente.
Alfiler para pinchar los huevos
Para evitar que los huevos se revienten mientras se cuecen, puede pincharlos en el extremo
más ancho con el alfiler (4). Este se encuentra en el interior para los huevos (3).
Puesta en funcionamiento
▪ Desenrolle el cable hasta la longitud que desee. Puede enrollar la longitud del cable de
conexión que no necesite en el suelo del hervidor de huevos. Coloque el aparato sobre
una base seca, antideslizante, plana y horizontal.
El aparato no debe estar conectado a la red eléctrica.
▪ Retire la cubierta (1a) con el dosificador de agua integrado.
Sujete la cubierta (1a) siempre solo por las superficies de manejo (2).
▪ Mida con el dosificador de agua (1b) la cantidad de agua necesaria para la cantidad de
huevos (1 o 2) y el grado de dureza que desee. Como alternativa puede usar también la
jarra graduada (1c) suministrada.
▪ La cantidad de agua medida debe introducirse en la bandeja calefactora fría (5).
Cerciórese de introducir en la bandeja calefactora (5) solo la cantidad de agua necesaria
para la preparación deseada. En caso contrario el agua podría rebosarse al hervir.
▪ Coloque los huevos en el interior para huevos (3) y coloque la cubierta (1a) en el
aparato.
▪ Solo ahora conecte el enchufe de red en la toma de corriente.
▪ Encienda el aparato con la tecla de encendido/apagado (6); la luz de control se ilumina
en blanco, indicando que el aparato está funcionando.
▪ En cuanto los huevos están listos se escucha un tono de aviso.
Apague el aparato con la tecla de encendido/apagado (6) y desenchufe el cable de red
Indicación: Puede apagar el aparato de nuevo en cualquier momento pulsando la tecla
de encendido/apagado (6).
▪ Retire la cubierta (1a) con cuidado. Sostenga la cubierta (1a) siempre por las superficies
de manejo (2).
Atención: ¡Peligro de quemaduras por vapor caliente!
▪ Saque el interior para huevos (3) y enfríe los huevos con agua fría para que no
continúen cociéndose.
También puede servir los huevos con el interior para huevos (3).
Sistema de seguridad
Un termostato protege el hervidor de huevos contra el sobrecalentamiento y lo desconecta
en caso de que funcione sin agua por descuido. Antes de usar de nuevo el hervidor de
huevos, deje que se enfríe.
En caso de que el primer termostato fallara por un uso indebido, un limitador de
temperatura adicional garantiza una protección segura
Puede haber divergencias debido al tamaño, tiempo de conservación y
temperatura de los huevos
30 31
Page 17

es
Limpieza y cuidados
Limpieza
Desconecte el enchufe de red y deje enfriar el aparato. No sumerja el
aparato en agua, solo límpielo con un paño húmedo y algo de detergente,
y luego frótelo para secarlo bien. No utilice agentes de limpieza abrasivos
o corrosivos.
La bandeja calefactora (5) está hecha de acero inoxidable. Si a pesar de
ello aparecen manchas de óxido, se trata solo de residuos adheridos a la
superficie. Debe eliminarlos de inmediato con un limpiador para acero
inoxidable.
El interior para huevos (3) y la cubierta con el dosificador de agua
integrado (1a) son de Tritan® de alta calidad y pueden limpiarse en el
lavavajillas.
Descalcificar
Las deposiciones de cal producen pérdidas de energía e influyen
negativamente sobre la vida útil del aparato y el resultado de la cocción.
El aparato se apaga prematuramente cuando tiene una gran capa de cal.
En ese caso resulta sumamente difícil eliminarla. Por eso, le sugerimos
que descalcifique el aparato regularmente.
Le recomendamos que utilice Cromargol®. Es un producto sumamente
eficiente, seguro para los alimentos y no tiene sabor ni olor. Gracias a su
fórmula de cuidados especial con 6 aditivos protectores de alta calidad,
Cromargol® protege además el material.
Generalmente puede adquirir Cromargol® en el mismo lugar en el que
compró el aparato o en el comercio especializado. El descalcificador
Cromargol® solo está disponible en Alemania y Austria.
▪ Antes de descalcificar el aparato, desenchúfelo de la red eléctrica y
déjelo enfriar.
▪ Vierta media porción (50 ml) de Cromargol® en la bandeja calefactora
(5) y espere hasta que la capa de cal en el fondo se disuelva. Después
llene la bandeja calefactora (5) con agua fría del grifo hasta por
encima del borde de cal y deje el aparato así durante 15 minutos.
▪ Seguidamente vierta el agua y lave bien el aparato con agua fría del
grifo.
▪ Cuando utilice otros descalcificadores, aplíquelos y dosifíquelos
según las instrucciones del fabricante.
No caliente la solución mientras esté descalcificando.
Atención: la garantía no cubre los daños provocados por no seguir las
indicaciones de descalcificación.
Este aparato cumple con las directivasde la UE 2014/35/EU, 2014/30/EU y
2009/125/EU.
Este producto no puede desecharsejunto con los residuos domésticosnormales
al final de su vida útil, sino quedebe entregarse en un centro derecolección
para el reciclaje de aparatoseléctrico y electrónicos. Para obtener más
detallesal respecto consulte en su administracióncomunal.Bajo reserva de
modificaciones técnicas.
32 33
Page 18

Gebruiksaanwijzing
nlnl
Belangrijke veiligheidsinstructies
▪ Deze apparaten mogen door kinderen vanaf 8 jaar en door
personen met verminderde fysieke, sensorische of mentale
vaardigheden of gebrek aan ervaring en/of kennis worden
gebruikt, wanneer ze onder toezicht staan of over het veilige
gebruik van het apparaat zijn geïnstrueerd en de daaruit
resulterende risico’s hebben begrepen.
Kinderen mogen niet met het apparaat spelen.
Reiniging en gebruikersonderhoud mogen niet door kinderen
worden uitgevoerd, behalve wanneer ze ouder zijn dan 8
jaar en onder toezicht staan.
▪ Bewaar het apparaat en de stroomkabel buiten bereik van
kinderen jonger dan 8 jaar.
▪ U mag het apparaat niet in water onderdompelen.
▪ Wanneer de stroomkabel van dit apparaat beschadigd is,
mag deze alleen door de centrale klantenservice van de
fabrikant of door een vergelijkbaar gekwalificeerde persoon
worden vervangen. Door onvakkundige reparaties kunnen
aanzienlijke gevaren ontstaan voor de gebruiker.
▪ Dit apparaat is bedoeld voor huishoudelijk en vergelijkbaar
gebruik, zoals bijvoorbeeld:
⋅ in de keuken door medewerkers van winkels, kantoren
en andere zakelijke omgevingen;
⋅ bij agrarische bedrijven;
⋅ door klanten van hotels, motels en andere
verblijfsomgevingen;
⋅ in pensions.
Het apparaat is niet bedoeld voor puur zakelijk gebruik.
▪ Reinig na het gebruik van de accessoires en het apparaat
alle oppervlakken en onderdelen die met levensmiddelen in
aanraking zijn gekomen. Volgt u alstublieft de instructies in
het hoofdstuk “Reiniging en onderhoud”.
▪ Het apparaat mag uitsluitend in navolging van deze
aanwijzing worden gebruikt. Ondeskundig gebruik kan een
elektrische schok of andere risicovolle momenten tot gevolg
hebben.
▪ Opgelet, gevaar voor brandwonden: De contactvlakken
kunnen zeer heet worden. Ook na het uitschakelen van het
apparaat, blijven de verwarmingsvlakken nog enige tijd heet.
▪ Let op - Voorzichtig in de omgang met de eierprikker.
Verwondingsgevaar!
Voor het gebruik
Lees de gebruiksaanwijzing zorgvuldig door. Deze bevat belangrijke aanwijzingen voor het
gebruik, de veiligheid en het onderhoud van het apparaat.
U moet hem zorgvuldig bewaren en eventueel aan een volgende gebruiker doorgeven.
Tijdens het gebruik de veiligheidsinstructies in acht nemen.
Technische gegevens
Nominale spanning: 220-240 V~ 50/-60 Hz
Vermogen: 250 W
Veiligheidsklasse: I
Aanvullende veiligheidstips
▪ U mag het apparaat alleen op een correct geplaatst en geaard stopcontact aansluiten.
Kabel en stekker moeten droog zijn.
▪ Zorg ervoor dat de stroomkabel niet langs scherpe randen loopt of beklemd raakt, laat
hem niet naar beneden hangen en bescherm hem tegen hitte en olie. De kabel mag de
hete eierkoker en de deksel niet aanraken.
▪ U mag de stekker niet aan de kabel en niet met natte handen uit het stopcontact
trekken.
▪ Plaats het apparaat niet op een heet oppervlak zoals een kookplaat of iets soortgelijks
en gebruik het niet in de buurt van open vuur.
▪ Plaats het apparaat niet op oppervlakken die niet tegen water bestand zijn. Opspattend
water kan deze oppervlakken beschadigen.
▪ Voorzichtig, het apparaat wordt heet. Verbrandingsgevaar door ontsnappende
waterdamp. Trek tijdens het gebruik niet aan het apparaat en niet aan de stroomkabel.
▪ Gebruik het apparaat alleen onder toezicht.
▪ Neem het apparaat niet in gebruik of trek direct de stekker uit het stopcontact wanneer:
⋅ het apparaat of de stroomkabel is beschadigd;
⋅ het apparaat lekt;
⋅ na een val etc. het vermoeden bestaat dat het apparaat defect is.
In dat geval moet u het apparaat ter reparatie afgeven.
▪ U moet de stekker uit het stopcontact trekken als:
⋅ er tijdens gebruik storingen optreden,
⋅ u het apparaat reinigt of onderhoud pleegt,
⋅ na gebruik.
34 35
Page 19

nl
▪ Ontkalk het apparaat regelmatig.
▪ Bij onjuist gebruik, verkeerde bediening of onvakkundige reparatie stellen wij ons niet
aansprakelijk voor eventuele schade.
In dergelijke gevallen zijn garantievergoedingen ook uitgesloten.
▪ Verpakkingsmaterialen, zoals bijv. plastic zakken, horen niet in kinderhanden.
Gebruik
U kunt met het apparaat een of twee eieren nauwkeurig koken. U hebt daarbij de keuze uit
zacht, halfzacht en hard. Met WMF KITCHENminis® eierkoker voor 2 eieren kunt u eieren van
het formaat S tot XL koken.
Waterdosering
De waterdosering (1b) is geïntegreerd in de deksel (1a). De deksel met geïntegreerde
waterdosering (1a) bestaat uit hoogwaardig Tritan® en is BPA-vrij. Bij de in de waterdosering
(1b) aangegeven waterhoeveelheid betreft het richtwaarden voor 1 of 2 eieren van het
formaat M. Afwijkingen kunnen op basis van het formaat, de bewaartijd en de temperatuur
van de eieren ontstaan.
De symbolen voor de verschillende hardheden en het aantal eieren zijn aangebracht op de
waterdosering.
zachte eieren
halfzachte eieren
harde eieren
Als u grotere eieren gebruik, voegt u iets meer water toe, voor kleinere eieren, iets minder
water.
Als de eieren te zacht zijn, voegt u een volgende keer iets meer water toe. Zijn de eieren
echter te hard, dan voegt u volgende keer iets minder water toe.
Maatbeker
Als alternatief voor de geïntegreerde waterdoseerder (1b) kunt u ook de meegeleverde
maatbeker (1c) gebruiken. Deze bevindt zich in de kap (1a), kan eenvoudig worden
afgenomen kan voor het bewaren weer worden aangebracht.
De symbolen voor de diverse hardheidsgraden en het aantal eieren zijn
op de maatbeker aangebracht.
zachtgekookte eieren
matig hardgekookte eieren
hardgekookte eieren
Voor de betreffende hardheidsgraad of het aantal eieren is een bereik
aangeduid.
Vul het water voor de eieren van de maat S slechts tot de onderste rand,
voor eieren van de maat XL tot de bovenste rand van het betreffende
bereik.
Eierprikker
Om het barsten van het ei bij het koken te voorkomen, kunt u het ei aan de bolle kant met
de eierprikker (4) inprikken. Dit staat op het inzetstuk voor de eieren (3) weergegeven.
In gebruik nemen
▪ Ingebruikname De niet benodigde lengte van de stroomkabel kunt u in de bodem van de
eierkoker oprollen. Plaats het apparaat op een droog, anti-slip en vlakke en horizontale
ondergrond.
Controleer of de stekker van het apparaat niet in het stopcontact steekt.
▪ De deksel (1a) met de geïntegreerde waterdosering afnemen.
Hierbij dient u de deksel (1a) uitsluitend via de handgrepen (2) aan te raken.
▪ Afhankelijk van het aantal eieren (1 of 2) en de gewenste hardheid, vult u vervolgens
de benodigde hoeveelheid water in de waterdosering (1b). U kunt ook de meegeleverde
maatbeker (1c) gebruiken.
▪ De afgemeten hoeveelheid water in de koude eierkoker (5) vullen.
Controleer echter dat u niet meer water in de eierkoker (5) vult dan voor de gewenste
bereiding is aangegeven. Anders loopt u het risico dat het water overkookt.
▪ Plaats de eieren op het inzetstuk voor de eieren (3) en plaats de deksel (1a) op het
apparaat.
▪ Nu steekt u pas de stekker in het stopcontact.
▪ Het apparaat met de knop Aan/Uit (6) inschakelen, het controlelampje gaat in een witte
kleur branden en geeft aan dat het apparaat actief is.
▪ Zodra de eieren gereed zijn, wordt een akoestisch signaal weergegeven. Het apparaat
met de knop Aan/Uit (6) uitschakelen en vervolgens de stekker uit het stopcontact
nemen.
Aanwijzing: U kunt het apparaat op elke gewenst moment via de knop Aan/Uit (6) weer
uitschakelen.
▪ De deksel (1a) voorzichtig afnemen. Hierbij dient u de deksel (1a) uitsluitend via de
handgrepen (2) aan te raken.
Let op: Verbrandingsgevaar door ontsnappende waterdamp!
▪ Het inzetstuk voor de eieren (3) uitnemen en de eieren onder koud water stromend
water laten schrikken, zodat zij niet nakoken.
Voor het presenteren van de eieren, kunt u ook het inzetstuk voor de eieren (3)
gebruiken.
Veiligheidssysteem
Een thermostaat beveiligd de eierkoker tegen oververhitting als gevolg van onbedoeld
gebruik zonder water. De thermostaat schakelt het apparaat in dat geval uit. Het is
belangrijk dat u de eierkoker laat afkoelen voordat u deze weer gaat gebruiken.
Wanneer bij onvakkundig gebruik de eerste thermostaat niet werkt, dan zorgt een extra
temperatuurbegrenzer voor een betrouwbare beveiliging.
Er zijn afwijkingen mogelijk door de maat, de bewaartijd en de
temperatuur van de eieren.
36 37
Page 20

nl
Reiniging en onderhoud
Reiniging
Trek de stekker uit het stopcontact en laat het apparaat afkoelen. Dompel het
apparaat niet onder in water, veeg hem af met een vochtige doek waaraan
u een beetje afwasmiddel hebt toegevoegd en wrijf hem vervolgens droog.
Gebruik geen bijtende en schurende schoonmaakmiddelen.
De eierkoker (5) is gemaakt van roestvrij staal. Wanneer er echter toch
roestvlekken ontstaan, dan zitten deze alleen aan de buitenkant van het
oppervlak. U moet deze vlekken onmiddellijk met een poetsmiddel voor
roestvrij staal verwijderen.
Het inzetstuk voor de eieren (3) en het deksel met geïntegreerde
waterdosering (1a) zijn gemaakt van hoogwaardig Tritan® en kunnen in de
vaatwasmachine worden gereinigd.
Ontkalken
Kalkafzetting kan leiden tot energieverlies en de levensduur van het apparaat
evenals het kookresultaat, negatief beïnvloeden. Wanneer de kalklaag te
dik is schakelt hij vroegtijdig uit. De kalkaanslag is dan slechts moeilijk te
verwijderen. Ontkalk het apparaat daarom regelmatig.
Wij adviseren u Cromargol®te gebruiken. Dit product is uiterst effectief,
voedselveilig en bovendien smaak- en reukvrij. Op basis van de speciale
verzorgende formule met 6 hoogwaardige en beschermende additieven zal
Cromargol® bovendien het materiaal uitstekend beschermen.
U kunt Cromargol® in het algemeen daar kopen waar u ook het apparaat
hebt gekocht, of in een speciaalzaak. De Cromargol® ontkalker is uitsluitend
verkrijgbaar in Duitsland en Oostenrijk.
▪ Trek de stekker van het apparaat voor het ontkalken uit het stopcontact
en laat het afkoelen.
▪ Een halve hoeveelheid (50 ml) Cromargol® in de eierkoker (5) vullen en
het apparaat laten staan tot de kalkaanslag van de bodem is verwijderd.
Vul daarna de eierkoker (5) tot boven de kalkrand op de wand met koud
kraanwater en laat het 15 minuten staan.
▪ Giet de koker vervolgens leeg en spoel hem grondig uit met kraanwater.
▪ Voeg voor andere ontkalkingsmiddelen de hoeveelheid toe zoals
vermeld door de betreffende fabrikant.
U mag de oplossing tijdens het ontkalken niet verwarmen.
Let op, bij beschadigingen of schade die ontstaan wanneer de instructies voor
het ontkalken niet in acht worden genomen, vervalt de garantie.
Het apparaat voldoet aan de Europeserichtlijnen 2014/35/EU, 2014/30/EU en
2009/125/EU.
Dit product mag na afloop van zijn levensduur niet met het
normalehuishoudafval verwijderd worden, maarmoet bij een verzamelplaats
voor elektrische en elektronische apparaten worden afgegeven. Details zijn bij
uw gemeentebestuur te verkrijgen.
Technische veranderingen voorbehouden.
38 39
Page 21

Brugsanvisning
dada
Vigtige sikkerhedsforskrifter
▪ Dette apparat kan bruges af børn fra 8 år samt personer med
nedsat fysisk, sansemæssig eller psykisk kapacitet eller med
manglende erfaring og/eller viden, hvis de er under opsyn af
en voksen eller er blevet undervist i brugen af apparatet og
har forstået de farer, der kan opstå i forbindelse med brugen
af apparatet.
▪ Børn må ikke lege med apparatet.
▪ Rengøring og vedligeholdelse må ikke udføres af børn,
medmindre de er over 8 år gamle og er under opsyn.
▪ Opbevar apparatet og dets ledning uden for små børns
rækkevidde.
▪ Apparatet må ikke dyppes i vand.
▪ Hvis apparatets ledning beskadiges, skal producentens
kundeservice eller en kvalificeret person sørge for
udskiftning af den. Ukorrekt udførte reparationer kan
medføre alvorlige farer for brugeren.
▪ Dette apparat er beregnet til anvendelse i husholdninger og
lignende indretninger såsom:
⋅ Køkkener til medarbejdere i forretninger, kontorer og
andre erhvervsområder.
⋅ Landbrugsvirksomheder.
⋅ Kunder i hoteller, moteller og andre
overnatningsmuligheder.
⋅ Pensioner, bed & breakfast.
Apparatet er ikke beregnet til industrianvendelse.
▪ Efter anvendelse af apparatet og dets tilbehør rengøres alle
flader og dele, der har været i berøring med fødevarerne.
Følg anvisningerne i afsnittet ”Rengøring og pleje”.
▪ Brug kun apparatet i overensstemmelse med denne
vejledning. Ukorrekt brug kan medføre stød eller andre
farlige situationer.
▪ Vigtigt - forsigtigt ved omgang med æggeprikkeren. Fare
for at komme til skade!
Før brug
Læs brugsanvisningen omhyggeligt igennem. Den indeholder vigtige henvisninger om brug,
sikkerhed og vedligeholdelse af apparatet.
Den skal gemmes og gives til den nye bruger, hvis apparatet videregives til en anden.
Overhold sikkerhedsforskrifterne ved brug af apparatet.
Tekniske data
Mærkespænding: 220-240 V ~ 50-60 Hz
Effektforbrug: 250 W
Kapslingsklasse: I
Flere sikkerhedsforskrifter
▪ Tilslut kun apparatet til en korrekt installeret stikdåse. Ledning og stik skal være tørre.
▪ Ledningen må ikke trækkes over skarpe kanter eller klemmes, den må ikke hænge ned,
og den skal beskyttes mod varme og olie. Den må ikke berøre den varme varmeskål og
låget.
▪ Stikket må ikke trækkes ud af stikdåsen ved at trække i ledningen eller med våde
hænder.
▪ Apparatet må ikke stilles på varme overflader som kogeplader eller lignende og må ikke
bruges i nærheden af åben ild.
▪ Apparatet må ikke stilles på vandfølsomme overflader. Der kan forekomme vandsprøjt.
▪ Forsigtigt, apparatet bliver varmt. Fare for skoldning på grund af damp. Apparatet må
ikke flyttes under brug, og træk ikke i apparatet ved hjælp af kablet.
▪ Brug kun apparatet under opsyn.
▪ Tag ikke apparatet i brug, eller træk straks stikket ud, hvis:
⋅ Apparatet eller kablet er beskadiget.
⋅ Apparatet er utæt.
⋅ Der er mistanke om defekt efter et fald eller lignende.
I disse tilfælde skal apparatet afleveres til reparation.
▪ Træk stikket ud:
⋅ Ved fejl under drift.
⋅ Før hver rengøring og pleje.
⋅ Efter brug.
▪ Apparatet skal afkalkes regelmæssigt.
▪ Der hæftes ikke for eventuelle skader på grund af ukorrekt anvendelse, forkert betjening
eller reparation udført af ikke-fagmand.
Ligeledes udelukkes garantiydelse i sådanne tilfælde.
▪ Emballage som eksempelvis foliepose skal opbevares utilgængeligt for børn.
Anvendelse
Du kan tilberede et eller to æg nøjagtigt efter dit ønske med apparatet. Du kan vælge
mellem blødkogte, smilende og hårdkogte æg. Med WMF KITCHENminis® æggekogeren til 2
æg kan du tilberede æg af størrelsen S-XL.
▪ OBS, risiko for forbrænding: Overfladen kan blive meget
varm. Også når apparatet er slukket, forbliver det varmt i
lang tid.
40 41
Page 22

da
Målebæger
Målebægeret (1b) er integreret i låget (1a). Låget med integreret målebæger (1a) er
fremstillet af førsteklasses Tritan® og er uden BPA. Vandmængderne, som er anført i
målebægeret (1b), er vejledende mængder for 1 eller 2 æg af størrelsen M. Der kan opstå
afvigelser på grund af æggenes størrelse, opbevaringstid og temperatur.
Symbolerne for de forskellige hårdhedsgrader og antal æg er anført på målebægeret.
Blødkogte æg
Smilende æg
Hårdkogte æg
Hvis du vil koge større æg, skal du fylde lidt mere vand i, og lidt mindre vand ved mindre
æg.
Hvis æggene er for bløde, skal du fylde lidt mere vand i næste gang. Hvis æggene er for
hårde, skal du fylde lidt mindre vand i næste gang.
Målebæger
Alternativt til den integrerede vanddosering (1b) kan det medfølgende målebæger også
bruges. Det befinder sig i dækslet (1a), kan nemt tages ud og sættes i igen til opbevaring.
Symbolerne for de forskellige hårdhedsgrader og antal æg er anbragt på målebægeret (1c).
blødkogte æg
smilende æg
hårdkogte æg
Der er anført et område for den pågældende hårdhedsgrad og antal æg.
Hæld vand på til den nederste kant for det pågældende område for æg
størrelse S og til den øverste kant for æg størrelse XL.
Der kan opstå afvigelser på grund af størrelse, opbevaringstid og
temperatur.
Ibrugtagning
▪ Rul den ønskede længde kabel ud. Overskydende kabel kan vikles op i bunden af
æggekogeren. Stil apparatet på en tør, skridsikker og vandret plan overflade.
Sørg for, at der ikke er tilsluttet strøm til apparatet.
▪ Fjern låget (1a) med det integrerede målebæger.
Sørg for altid kun at tage fat i låget (1a) ved holdefladerne (2).
▪ Fyld nu den nødvendige mængde vand i målebægeret (1b) afhængigt af antal æg (1
eller 2) og den ønskede hårdhedsgrad. Alternativt kan det medfølgende målebæger (1c)
også bruges.
▪ Hæld den afmålte vandmængde i den kolde varmeskål (5).
Sørg for ikke at hælde mere vand i varmeskålen (5) end det, der er anført for den
ønskede tilberedning. Ellers er der fare for, at vandet koger over.
▪ Sæt æggene i æggeholderen (3), og sæt låget (1a) på apparatet.
▪ Først nu sættes stikket i stikdåsen.
▪ Tænd apparatet med tænd/slukknappen (6), kontrollampen lyser hvidt og angiver, at
apparatet er i brug.
▪ Når æggene er færdige, udsendes et signal.
Sluk apparatet på tænd/slukknappen (6), og træk stikket ud af stikkontakten.
Bemærk: Du kan altid slukke apparatet igen ved at trykke på tænd/slukknappen (6).
▪ Fjern forsigtigt låget (1a). Sørg for altid kun at tage fat i låget (1a) ved holdefladerne
(2).
Vigtigt: Fare for skoldning på grund af damp!
▪ Tag æggeholderen (3) ud, og afkøl æggene med koldt vand, så de ikke koger videre.
Æggeholderen (3) kan bruges til servering af æggene.
Sikkerhedssystem
En termostat beskytter æggekogeren mod overophedning ved utilsigtet brug uden vand,
idet den slukker apparatet. Æggekogeren skal altid køle af, før den bruges igen.
Hvis den første termostat skulle svigte ved ukorrekt anvendelse, sørger en ekstra
temperaturbegrænser for pålidelig beskyttelse.
Rengøring og pleje
Æggeprikker
Hvis du vil undgå, at æggene revner under kogningen, skal du prikke hul i æggenes tykke
ende med æggeprikkeren (4). Den sidder i æggeholderen (3).
42 43
Rengøring
Træk stikket ud af stikkontakten, og lad apparatet køle af. Apparatet må ikke dyppes i vand.
Tør det af med en fugtig klud, som er tilsat lidt opvaskemiddel, og tør efter med en tør klud.
Brug ikke slibende rengøringsmidler.
Varmeskålen (5) er lavet af rustfrit stål. Hvis der alligevel skulle opstå rustpletter, er der
blot tale om aflejringer, som har sat sig fast på overfladen. De skal straks fjernes med et
pudsemiddel til rustfrit stål.
Æggeholderen (3) og låget med integreret målebæger (1a) er fremstillet af Tritan® og kan
komme i opvaskemaskinen.
Page 23

da
Afkalkning
Kalkaflejringer medfører energitab og påvirker apparatets levetid og
kogeresultatet. Den slukker for tidligt, hvis kalklaget er for tykt. Så er det
meget vanskeligt at fjerne det. Afkalk derfor regelmæssigt.
Vi anbefaler at bruge Cromargol®. Det er meget effektivt, smags- og
lugtneutralt og velegnet til apparater til levnedsmidler. Takket være
den specielle plejeformel med 6 beskyttende additiver af høj kvalitet er
Cromargol® derudover meget skånsomt for materialerne.
Cromargol® kan som regel fås der, hvor du har købt apparatet, eller hos
udvalgte faghandlere. Cromargol® afkalkningsmiddel fås kun i Tyskland og
Østrig.
▪ Træk stikket ud af stikkontakten, og lad apparatet køle af før afkalkning.
▪ Hæld 50 ml Cromargol® i varmeskålen (5), og lad apparatet stå, indtil
kalkbelægningen i bunden er væk. Hæld derefter koldt vand i varmeskålen
(5) til over kalkranden på siderne, og lad apparatet stå i 15 minutter.
▪ Hæld vandet ud, og skyl grundigt med koldt vand.
▪ Andre afkalkningsmidler doseres og bruges i henhold til producentens
angivelser.
Opløsningen må ikke opvarmes under afkalkning.
Vigtigt, garantikravet bortfalder ved skader, som skyldes manglende
overholdelse af forskrifterne om afkalkning.
Apparatet er i overensstemmelse med de europæiske direktiver 2014/35/EU,
2014/30/EU og 2009/125/EU.
Når dette produkt er blevet gammelt og skal kasseres, må det ikke smides
ud sammen med det almindelige husholdningsaffald; det skal afleveres til et
indsamlingssted for genbrug af elektrisk og elektronisk udstyr.
Materialerne skal genbruges iht. deres mærkning. Med genbrugen,
materialegenvindingen eller andre former for genbrug af gamle apparater
yder du et vigtigt bidrag til at beskytte vores miljø.
Spørg venligst kommunen, hvor det ansvarlige bortskaffelsessted findes.
Med forbehold for ændringer
44 45
Page 24

Användarguide
svsv
Viktiga säkerhetsanvisningar
▪ Apparaten är inte avsedd att användas av barn under 8 år
eller av personer med nedsatt fysisk, psykisk eller sensorisk
förmåga eller av personer som saknar den kunskap och/
eller erfarenhet som krävs om inte de personerna först får
instruktioner hur man använder apparaten på ett säkert sätt
och förstår de risker som finns.
Barn får inte leka med apparaten.
Rengöring och användarunderhåll bör inte utföras av barn,
såvida de inte övervakas och är över 8 år.
▪ Håll apparaten och tillhörande kabel oåtkomliga för barn
under 8 år.
▪ Sänk inte ner apparaten i vatten.
▪ Om strömkabeln skulle skadas måste ersättning ske via
tillverkarens centrala kundtjänst eller av en av tillverkaren
godkänd person. Om apparaten inte lagas på ett
fackmannamässigt och korrekt sätt kan detta innebära stor
fara för användaren.
▪ Apparaten är avsedd att användas i hushåll och liknande
tillämpningar som:
⋅ i kök för personal i butiker, kontor och andra
kommersiella miljöer
⋅ i jord- och lantbruksmiljö
⋅ av kunder i hotell, motell och liknande logier
⋅ Bed & Breakfast
Apparaten är inte avsedd att användas i rent kommersiellt
syfte.
▪ Efter användning av tillbehören och apparaten ska alla ytor/
delar som kommit i beröring med livsmedel rengöras. Följ
anvisningarna i kapitlet ”Rengöring och skötsel”.
▪ Apparaten får endast användas i enlighet med denna
bruksanvisning. Otillåten användning kan leda till elektriska
stötar eller andra riskmoment.
▪ Obs! Risk för brännskador: Yttemperaturen kan bli mycket
hög. Även efter att apparaten stängts av är ytorna varma i
ytterligare en stund.
▪ Varning - Var försiktig när du hanterar
ägghåltagningsnålen. Fara för personskador!
Före användning
Läs alltid användarguiden noga. Den innehåller viktig information om hur du ska använda
och sköta apparaten så att den fungerar säkert och länge.
Förvara användarguiden på ett säkert ställe så att du vid behov kan ge den vidare till näste
ägare.
Följ säkerhetsanvisningarna för hur apparaten ska användas.
Tekniska data
Nominell spänning: 220-240 V~ 50-60 Hz
Effekt: 250 W
Skyddsklass: I
Ytterligare säkerhetsinformation
▪ Anslut apparaten bara till korrekt installerat jordat uttag. Strömkabel och kontakt måste
vara torra.
▪ Dra eller kläm inte in anslutningskabeln runt skarpa kanter. Låt den inte hänga fritt och
skydda den från värme och olja. Vidrör inte den varma värmeskålen och hättan.
▪ Dra inte ur nätkontakten från vägguttaget om du har våta händer och inte heller genom
att dra direkt i strömkabeln.
▪ Ställ inte apparaten på heta ytor som plattor och liknande, och inte nära öppen låga.
▪ Ställ inte apparaten på vattenkänsliga ytor. Vattenstänk kan skada den.
▪ Varning, apparaten blir varm. Brännskaderisk på grund av utströmmande ånga. När
apparaten används får man inte skaka den, inte heller dra i sladden.
▪ Apparaten får endast användas under uppsikt.
▪ Om följande skulle inträffa, ska du inte använda apparaten och genast dra ur kontakten:
⋅ Apparaten eller strömkabeln är skadad
⋅ Apparaten läcker
⋅ Du misstänker att apparaten kan ha tagit skada när den fallit i golvet eller liknande.
I sådana fall ska du alltid lämna in apparaten för lagning.
▪ Ta ur kontakten:
⋅ om det vid användning skulle uppstå problem
⋅ före varje rengöringstillfälle
⋅ efter användning
▪ Avkalka maskinen regelbundet.
▪ I händelse av missbruk, felaktig användning eller reparation tas inget ansvar för
eventuella skador.
Om sådan skada skulle uppstå omfattas den inte av tillverkarens produktgaranti
▪ Förpackningsmaterial som plastpåsar hör inte hemma i händerna på barn.
46 47
Page 25

sv
Användning
Med apparaten kan du tillaga ett eller två ägg exakt, och du kan välja mellan löskokt,
mellanhårt och hårdkokt ägg. Med 2-äggs-kokaren WMF KITCHENminis® kan du tillaga ägg
i storlekarna S-XL.
Vattendoserare
Vattendoseraren (1b) är integrerad i locket (1a). locket med integrerad vattendoserare
(1a) består av högkvalitativ Tritan® och är BPA-fri. Den i vattendoseraren (1b) indikerade
vattenmängden är ett riktvärde för 1 respektive 2 medelstora ägg (storlek M). Avvikelser
kan orsakas av äggens storlek, lagringstid och temperatur.
Symbolerna för de olika graderna av hårdhet och antalet ägg är anslagna på
vattendoseraren.
löskokta ägg
medelhårda ägg
hårdkokta ägg
Om du använder större ägg, fyller du i lite mer vatten, och för mindre ägg lite mindre
vatten.
Är äggen för löskokta, fyller du på lite mer vatten nästa gång. Är äggen för hårdkokta, fyller
du på lite mindre vatten.
Doseringsmått
Istället för den inbyggda vattendoseraren (1b) kan du använda det medföljande
doseringsmåttet. Detta återfinns i kåpan (1a) och kan lätt tas bort och sättas tillbaka för
vidare förvaring.
Symbolerna för de olika hårdhetsgraderna och antalet ägg är angivna
‚på doseringsmåttet (1c).
löskokta ägg
medelkokta ägg
hårdkokta ägg
För varje hårdhetsgrad respektive antal ägg är ett intervall angivet.
Fyll på vatten till intervallets underkant för ägg av storlek S och till
intervallets överkant för ägg av storlek XL.
Avvikelser kan orsakas av äggens storlek, lagringstid och temperatur.
Äggpigg
För att förhindra att äggen spricker under tillagningen, kan du sticka hål
på den platta sidan av ägget med äggpiggen (4). Denna är monterad inuti ägginsatsen (3).
Första användningen
▪ Linda sladden till önskad längd. Anslutningskabelns överflödiga längd kan lindas upp på
undersidan av äggkokaren. Placera apparaten på en torr, halkfri, plan och jämn yta.
Se till att enheten är bortkopplad från eluttaget.
▪ Ta bort locket (1a) från den integrerade vattendoseraren.
Håll alltid locket (1a) i handtagen (2).
▪ Fyll på erforderlig mängd vatten i vattendoseraren (1b) beroende på såväl antalet ägg
(1 eller 2) som önskad hårdhetsgrad. Alternativt kan det medföljande mätkärlet (1c)
användas.
▪ Häll i den uppmätta mängden vatten i den kalla värmeskålen (5).
Se till så att du inte fyller på mer vatten i värmeskålen (5) än vad som anges för den
önskade tillagningen. Annars finns det en risk för att vattnet kokar över.
▪ Placera äggen på ägginsatsen (3) och sätt på locket (1a) till apparaten.
▪ Anslut ena änden av sladden i vägguttaget.
▪ Slå på apparaten med På/av-knappen (6), kontrollampan lyser vitt och visar att
apparaten är i drift.
▪ När äggen är klara hörs en ljudsignal.
Stäng av enheten med på/av-knappen (6) och dra ut nätsladden.
Anmärkning: Du kan när som helst stänga av apparaten genom att åter trycka på på/
av-knappen (6).
▪ Lyft försiktigt av locket (1a). Håll alltid locket (1a) i handtagen (2).
Varning: Brännskaderisk på grund av utströmmande ånga.
▪ Ta ur ägginsatsen (2) och kyl ned äggen under kallt vatten så att tillagningen upphör.
Ägginsatsen (3) kan också användas för att servera äggen.
Säkerhetssystem
Genom att stänga av apparaten skyddar en termostat äggkokaren från överhettning om
den skulle köras utan vatten. Låt äggkokaren svalna innan den används på nytt.
Skulle den första termostaten inte fungera vid felaktig användning, finns en extra
temperaturbegränsare som ger tillförlitligt skydd.
Rengöring och skötsel
Rengöring
Dra ur kontakten och låt apparaten svalna. Sänk inte ner apparaten i vatten. Torka av
den med fuktad trasa med lite diskmedel, och torka sedan torrt. Använd inga hårda och
frätande rengöringsmedel.
Värmeskålen (5) består av rostfritt stål. Skulle det ändå bli rostfläckar, sitter de bara på ytan.
De ska omedelbart tas bort med rengöringsmedel för rostfritt stål.
Ägginsatsen (3) och locket med integrerad vattendoserare (1a) består av högkvalitativ
Tritan® och tål maskindisk.
48 49
Page 26

sv
Avkalkning
Kalkavlagringar resulterar i energiförluster och påverkar livslängden på
apparaten. Apparaten stängs av i förtid när kalkskiktet är för tjockt. I det
läget är det mycket svårt att få bort kalken. Avkalka därför regelbundet.
Vi rekommenderar att du använder Cromargol®. Detta är mycket effektivt,
livsmedelssäkert, smaklöst och luktfritt. Tack vare sin särskilda vårdande
formel med 6 högkvalitativa och skyddande tillsatser är Cromargol ® också
mycket skonsam mot materialet.
Du hittar oftast Cromargol® där enheten köptes eller hos utvalda
återförsäljare. Cromargol® avkalkningsmedel säljs endast i Tyskland och
Österrike.
▪ Ta ut kontakten och låt apparaten svalna innan du börjar med
avkalkningen.
▪ Fyll på en halv portion (50 ml) Cromargol ® i värmeskålen (5) och lämna
enheten tills kalkavlagringar har avlägsnats från botten. Fyll sedan
värmeskålen (5) med kallt vatten upp till kalkranden och låt stå i 15
minuter.
▪ Häll sedan ut vattnet och skölj noggrant med kallt kranvatten.
▪ Använd och dosera andra avkalkningsmedel enligt tillverkarens
anvisningar.
Hetta inte upp lösningen under avkalkningen.
Observera att garantin inte gäller för skador som orsakats av att man inte
följt avkalkningsinstruktionerna.
Apparaten motsvarar EU-direktiven 2014/35/EU, 2014/30/EU och 2009/125/
EU.
När denna produkt är förbrukad, får den inte lämnas som normalt
hushållsavfall, utan måste lämnas in till uppsamlingsstation för recycling av
elektriska och elektroniska apparater.
Materialet kan återanvändas motsvarande märkning. Vid återanvändning,
materialrecycling eller andra former av återanvändning av gamla apparater
lämnar du ett viktigt bidrag till miljöskyddet.
Fråga kommunförvaltningen om lämpliga avfallsstationer.
Förbehåll för ändringar.
50 51
Page 27

Käyttöohje
fifi
Tärkeitä turvaohjeita
▪ Alle 8-vuotiaat lapset sekä fyysisiltä, aistimellisilta tai
henkisiltä kyvyiltään rajoittuneet tai kokemattomat ja/tai
taitamattomat henkilöt saavat käyttää näitä laitteita, jos
käyttöä valvotaan tai heitä on opastettu käyttämään laitetta
turvallisesti ja he ovat ymmärtäneet laitteen käyttöön
liittyvät vaarat.
Lapset eivät saa käyttää tätä laitetta.
Lapset eivät saa puhdistaa eivätkä käyttöhuoltaa laitetta,
paitsi jos he ovat yli 8-vuotiaita ja valvonnan alaisina.
▪ Laite ja sen liitäntäjohto on pidettävä poissa alle
8-vuotiaiden lasten ulottuvilta.
▪ Laitetta ei saa upottaa veteen.
▪ Jos laitteen liitäntäjohto vahingoittuu, tulee sen
vaihtaminen antaa valmistajan asiakaspalvelun tai vastaavan
ammattitaitoisen henkilön tehtäväksi. Virheellisesti tehdyt
korjaukset voivat aiheuttaa käyttäjälle huomattavia vaaroja.
▪ Laite on tarkoitettu käytettäväksi kotitalouksissa ja muissa
vastaavissa sovelluksissa, kuten:
⋅ työpaikkakeittiöissä kaupoissa, toimistoissa ja muissa
kaupallisissa ympäristöissä,
⋅ maatalousalueilla,
⋅ asiakastiloissa hotelleissa, motelleissa ja muissa
majoituspaikoissa,
⋅ aamiaismajoitusta tarjoavissa majataloissa.
Laitetta ei ole tarkoitettu puhtaasti kaupalliseen käyttöön.
▪ Puhdista tarvikkeen ja laitteen käytön jälkeen kaikki pinnat/
osat, jotka ovat olleet kosketuksissa ruoka-aineiden kanssa.
Noudata kappaleen ”Puhdistus ja huolto” ohjeita.
▪ Laitetta saa käyttää vain tämän oppaan mukaisesti.
Virheellisestä käytöstä voi aiheutua sähköisku tai muita
vaaroja.
▪ Varo, palovammojen vaara: Laitteen ulkopinnat voivat
kuumentua hyvin kuumiksi. Ulkopinnat pysyvät kuumina
vielä jonkin aikaa sen jälkeen, kun laite on sammutettu.
▪ Huomio - Käsittele munanlävistintä varoen.
Tapaturmavaara!
Ennen käyttöä
Lue käyttöohje huolellisesti. Se sisältää tärkeitä laitteen käyttöä, turvallisuutta ja huoltoa
koskevia ohjeita.
Säilytä käyttöohje huolellisesti ja anna tarvittaessa eteenpäin seuraavalle käyttäjälle.
Noudata käytön yhteydessä turvallisuusohjeita.
Tekniset tiedot
Nimellisjännite: 220-240 V~ 50-60 Hz
Ottoteho: 250 W
Suojaluokka: I
Muita turvallisuusohjeita
▪ Kytke laite vain määräysten mukaisesti asennettuun maadoitettuun pistorasiaan.
Liitäntäjohdon ja pistokkeen tulee olla kuivia.
▪ Älä vedä liitäntäjohtoa terävien reunojen yli tai ympäri äläkä anna johdon roikkua
reunan yli. Suojaa johto kuumuudelta ja öljyltä. Kuumaa vesiallasta ja kupua ei saa
koskettaa.
▪ Älä irrota verkkopistoketta pistorasiasta johdosta vetämällä tai märin käsin.
▪ Älä aseta laitetta kuumille pinnoille, kuten liedelle, äläkä käytä sitä avotulen lähellä.
▪ Laitetta ei saa sijoittaa vedelle herkille pinnoille. Vesiroiskeet voivat vaurioittaa sitä.
▪ Varo, laite kuumenee. Ulostuleva höyry aiheuttaa palovammavaaran. Laitetta ei saa
siirtää käytön aikana eikä sitä saa vetää verkkojohdosta.
▪ Laitetta saa käyttää vain valvottuna.
▪ Laitetta ei saa ottaa käyttöön ja/tai verkkopistoke on irrotettava pistorasiasta heti, jos:
⋅ laite tai verkkojohto on vaurioitunut,
⋅ laite ei ole tiivis,
⋅ epäillään esim. putoamisesta johtuvaa vikaa.
Näissä tapauksissa laite täytyy toimittaa korjattavaksi.
▪ Verkkopistoke on irrotettava pistorasiasta:
⋅ jos käytön aikana ilmenee häiriöitä,
⋅ ennen jokaista puhdistus- tai hoitokertaa,
⋅ käytön jälkeen.
▪ Suorita laitteelle säännöllisesti kalkinpoisto.
▪ Valmistaja ei vastaa tarkoituksenvastaisesta, virheellisestä ja epäammattimaisesta
korjauksesta mahdollisesti aiheutuvista vahingoista.
Myöskään takuu ei kata sellaisia tapauksia.
▪ Pakkausmateriaalit, kuten foliopussit, eivät kuulu lasten käsiin.
52 53
Page 28

fi
Käyttö
Laitteella voidaan keittää erittäin tarkasti yksi tai kaksi munaa; voit valita asetukseksi löysät,
keskikovat tai kovat munat. 2 munan keittimellä WMF KITCHENminis® voidaan keittää
kokojen S-XL munia.
Vedenannostelija
Vedenannostelija (1b) on integroituna kupuun (1a). Kupu, johon on integroituna
vedenannostelija (1a), on korkealaatuista Tritan®-materiaalia eikä sisällä BPA:ta.
Vedenannostelijalle (1b) ilmoitetut vesimäärät ovat yhdelle tai kahdelle M-koon munalle
annettuja ohjearvoja. Poikkeamia arvoihin aiheuttavat munien koko, säilytysaika ja
lämpötila.
Munien eri kovuusasteiden symbolit ja lukumäärä on merkitty vedenannostelijaan.
löysät munat
keskikovat munat
kovat munat
Jos käytät suurehkoja munia, lisää vettä hieman enemmän, pienehköille munille hieman
vähemmän.
Jos munat ovat liian löysiä, lisää hieman enemmän vettä seuraavalla kerralla. Jos munat
ovat liian kovia, lisää vettä hieman vähemmän.
Mittakuppi
Integroidun vedenannostelijan (1b) vaihtoehtona voidaan käyttää mukana toimitettua
mittakuppia. Se sijaitsee kuvussa (1a), on helposti irrotettavissa ja voidaan asettaa takaisin
paikalleen säilytystä varten.
Munien eri kovuusasteiden ja lukumäärien merkit ovat
kiinnitettyinä mittakuppiin (1c).
pehmeät munat
keskikovat munat
kovat munat
Kullekin kovuusasteelle ja/tai munamäärälle on annettu alue.
Lisää S-koon munia varten vettä vain kyseisen alueen alareunaan,
XL-koon munia varten kyseisen alueen yläreunaan saakka.
Munien koko, säilytysaika ja lämpötila voivat aiheuttaa poikkeamia.
Munanlävistin
Munien halkeaminen keittämisen aikana voidaan estää pistämällä munia
tylpältä puolelta munanlävistimellä (4). Se on kiinnitetty munatelineeseen (3).
Käyttöönotto
▪ Kelaa johto auki haluttuun pituuteen. Liitäntäjohdon turha pituus voidaan kelata
munankeittimen pohjaan. Sijoita laite kuivalle, liukumattomalle ja tasaiselle
vaakasuoralle alustalle.
Varmista, että laite on irrotettuna verkkovirrasta.
▪ Irrota kupu (1a), johon on integroituna vedenannostelija.
Kuvusta (1a) saa ottaa kiinni vain otealueilta (2).
▪ Lisää sitten munien lukumäärästä (1 tai 2) sekä halutusta kovuudesta riippuen tarvittava
vesimäärä vedenannostelijaan (1b). Vaihtoehtoisesti voidaan käyttää myös oheista
mitta-astiaa (1c).
▪ Lisää sitten mitattu vesimäärä kylmään vesialtaaseen (5).
Vesialtaaseen (5) ei saa lisätä enempää vettä kuin mitä on määrätty haluttua
valmistustapaa varten. Muutoin on olemassa veden ylikiehumisen vaara.
▪ Laita munat munatelineeseen (3) ja aseta kupu (1a) laitteen päälle.
▪ Kytke sitten verkkopistoke pistorasiaan.
▪ Kytke laitteeseen virta virtapainikkeesta (6), merkkivalo syttyy valkoisena ja ilmaisee,
että laite on toiminnassa.
▪ Heti kun munat ovat valmiita, kuuluu merkkiääni.
Katkaise laitteesta virta virtapainikkeesta (6) ja irrota verkkopistoke pistorasiasta.
Vihje: Laitteesta voidaan katkaista virta milloin tahansa virtapainiketta (6) painamalla.
▪ Nosta kupu (1a) varoen pois. Kuvusta (1a) saa ottaa kiinni vain otealueilta (2).
Huomio: Ulostuleva höyry aiheuttaa palovammavaaran!
▪ Ota munateline (3) ulos ja huuhtele munia kylmässä vedessä, ettei niiden kypsyminen
jatku.
Munatelinettä (3) voidaan käyttää myös munien tarjoiluun.
Turvajärjestelmä
Termostaatti suojaa munankeitintä ylikuumenemiselta katkaisemalla laitteesta virran, jos
laitetta käytetään tahattomasti ilman vettä. Munankeittimen täytyy ehdottomasti antaa
jäähtyä ennen kuin sitä käytetään jälleen.
Jos ensimmäinen termostaatti pettää virheellisen käytön aikana, ylimääräinen
lämpötilanrajoitin takaa luotettavan suojan.
Puhdistus ja hoito
Puhdistus
Irrota verkkopistoke pistorasiasta ja anna laitteen jäähtyä. Älä upota laitetta veteen, vaan
pyyhi se kostealla rätillä, johon on lisätty hieman astianpesuainetta, ja hankaa laite sitten
kuivaksi. Voimakkaita ja hankaavia puhdistusaineita ei saa käyttää.
Vesiallas (5) on valmistettu ruostumattomasta jaloteräksestä. Jos siinä näkyy silti
ruostetahroja, ne ovat vain pintaan kiinnittyneitä kerrostumia. Ne täytyy poistaa heti
jaloteräksen puhdistusaineella.
Munateline (3) ja kupu, johon on integroituna vedenannostelija (1a), ovat korkealaatuista
Tritan®-materiaalia ja ne voidaan pestä astianpesukoneessa.
54 55
Page 29

fi
Kalkinpoisto
Kalkkikerrostumat aiheuttavat energiahäviöitä ja lyhentävät laitteen
kestoikää ja heikentävät keittämistulosta. Laite kytkeytyy ennenaikaisesti
pois päältä, jos kalkkikerros on liian paksu. Se on silloin myös erittäin vaikea
poistaa. Suorita sen vuoksi kalkinpoisto säännöllisesti.
Suosittelemme Cromargol®-aineen käyttöä. Se on erittäin tehokasta,
elintarvikkeille turvallista, maultaan ja hajultaan neutraalia. Cromargol® on
lisäksi materiaalia hyvin suojaavaa sen erityisen hoitokoostumuksen ansiosta,
joka sisältää 6 korkealaatuista ja suojaavaa lisäainetta.
Cromargol® on yleensä myynnissä paikassa, josta laite on ostettu, sekä
valikoiduissa ammattiliikkeissä. Cromargol®-kalkinpoistoaine on saatavilla
vain Saksassa ja Itävallassa.
▪ Irrota laitteen pistoke pistorasiasta ja anna jäähtyä ennen kalkinpoistoa.
▪ Lisää puoli annosta (50 ml) Cromargol®-ainetta vesialtaaseen (5) ja anna
laitteen seistä, kunnes kalkkikerrostuma on irronnut pohjasta. Lisää sitten
vesialtaaseen (5) hanavettä seinämässä olevan kalkkireunaman yläpuolelle
saakka ja anna seistä 15 minuuttia.
▪ Kaada sitten liuos pois ja huuhtele perusteellisesti hanavedellä.
▪ Jos käytät muita kalkinpoistoaineita, noudata annostelussa ja
käytössä valmistajan antamia ohjeita.
Liuosta ei saa kuumentaa kalkinpoiston aikana.
Huomaa, ettei takuu korvaa kalkinpoisto-ohjeiden laiminlyönnistä johtuvia
vahinkoja.
Laite vastaa Euroopan direktiivien 2014/35/EU, 2014/30/EU ja 2009/125/EU
määräyksiä.
Tätä tuotetta ei saa hävittää sen elinkaaren päätyttyä tavallisten
kotitalousjätteiden mukana, vaan se tulee toimittaa sähkökäyttöisten ja
elektronisten laitteiden keräyspisteseen kierrätystä varten.
Valmistusaineet soveltuvat uusiokäyttöön tunnusmerkintänsä mukaisesti.
Uusiokäytön, raaka-aineiden hyödyntämisen tai muunlaisten käytettyjen
laitteiden hyödyntämisen avulla autat omalta osaltasi suojelemaan luontoa.
Ole hyvä ja tiedustele kunnanhallinnolta, missä ovat tähän tarkoitetut
kierrätyspisteet.
Oikeus muutoksiin pidätetään
56 57
Page 30

Bruksanvisning
nono
Viktige sikkerhetsanvisninger
▪ Disse apparatene kan brukes av barn fra og med 8 år
gamle, samt personer med begrensede fysiske, sensoriske
eller mentale evner eller som mangler erfaring og/eller
kunnskaper, hvis de er under tilsyn eller har fått opplæring
i sikker bruk av apparatet og forstår farene tilknyttet
apparatet.
Barn må ikke leke med apparatet.
Rengjøring og vedlikehold må ikke utføres av barn, med
mindre de er eldre enn 8 år og under tilsyn.
▪ Oppbevar apparatet og ledningen utilgjengelig for barn
under 8 år.
▪ Ikke senk apparatet ned i vann.
▪ Hvis apparatets strømledning blir skadet, må den byttes av
produsentens kundeserviceavdeling eller av en person med
tilsvarende kvalifikasjon. Feilaktige reparasjoner kan utsette
brukeren for store farer.
▪ Dette apparatet er beregnet for bruk i husholdninger og
lignende bruksområder, for eksempel:
⋅ på kjøkkenet, samt personalet i butikker, kontorer og
andre næringsområder
⋅ i landbruksvirksomheter
⋅ av kunder på hoteller, moteller, samt andre boenheter;
⋅ i frokostpensjonater.
Apparatet er ikke beregnet til kommersiell bruk.
▪ Rengjør alle områder/deler som kommer i kontakt med
mat på tilbehøret og apparatet etter hver gangs bruk. Følg
rådene i kapittelet ”Rengjøring og vedlikehold”.
▪ Apparatet skal bare brukes slik det er beskrevet i denne
bruksanvisningen. Ukyndig bruk kan forårsake elektrisk støt
eller andre risikomomenter.
▪ Forsiktig, fare for forbrenning: Temperaturen på overflatene
kan bli svært høy. Apparatet forblir varmt en stund etter at
det er slått av.
▪ Viktig - Vær forsiktig når du bruker nålen til å stikke hull i
egget. Fare for skade!
Før bruk
Les bruksanvisningen grundig. Den gir viktig informasjon om bruk, sikkerhet og vedlikehold
av apparatet.
Den bør være oppbevares nøye og gis videre til eventuelle fremtidige brukere.
Følg sikkerhetsanvisningene når du bruker apparatet.
Tekniske data
Nominell spenning: 220-240 V~ 50-60 Hz
Strømforbruk: 250 W
Beskyttelsesklasse: I
Mer sikkerhetsinformasjon
▪ Apparatet må kun kobles til en forskriftsmessig installert stikkontakt. Strømledning og
støpsel må være tørre.
▪ Strømledningen må ikke dras eller klemmes over skarpe kanter. Den må heller ikke henge
løst, samtidig som den må være beskyttet mot varme og olje. Ikke berør den varme
oppvarmingsskålen eller dekselet.
▪ Støpselet må ikke trekkes ut av stikkontakten etter strømledningen eller med våte
hender
▪ Apparatet må ikke settes på varme overflater som kokeplater o.l. eller brukes i nærheten
av åpne flammer.
▪ Plasser ikke apparatet på vannfølsomme overflater. Vannsprut kan skade disse.
▪ Forsiktig, apparatet er varmt. Fare for skålding fra damp som kommer ut. Apparatet må
ikke flyttes under bruk og ikke dras i kabelen.
▪ Apparatet skal kun brukes under tilsyn.
▪ Apparatet må ikke tas i bruk og støpselet skal trekkes ut umiddelbart dersom:
⋅ apparatet eller strømkabelen er skadet
⋅ apparatet lekker
⋅ du mistenker at det har skjedd en skade etter at apparatet har falt i gulvet eller
tilsvarende.
I slike tilfeller må apparatet leveres inn til reparasjon.
▪ Støpselet må trekkes ut:
⋅ hvis det oppstår feil under bruk
⋅ før rengjøring og vedlikehold
⋅ etter bruk
▪ Apparatet må avkalkes regelmessig.
▪ Ved feil bruk av apparatet, feil betjening eller ikke fagmessig reparasjon, påtar vi oss ikke
noe ansvar for eventuelle skader.
I slike tilfeller bortfaller også garantien.
▪ Emballasjematerialer, f.eks. plastposer, hører ikke hjemme i barnehender.
58 59
Page 31

no
Bruksområde
Med dette apparatet kan du tilberede ett eller to egg nøyaktig slik du vil ha dem. Du kan
velge mellom bløte, medium eller harde egg. Med WMF KITCHENminis® eggekoker for 2 egg
kan du tilberede egg i størrelsene S-XL.
Vanndosering
Vanndosering (1b) er integrert i dekselet (1a). Dekselet med integrert vanndosering (1a)
består av høyverdig Tritan® og er BPA-fri. Vannmengdene som er angitt i vanndoseringen
(1b) er veiledende verdier for hhv. 1 og 2 egg i størrelse M. Dette kan avvike på grunn av
eggenes størrelse, oppbevaringstid og temperatur.
Symbolene for eggenes ulike hardhetsgrader og antall finnes på vanndoseringen.
bløte egg
medium egg
harde egg
Hvis du bruker større egg, fyller du i litt mer vann, for mindre egg noe mindre.
Hvis eggene er for myke, fyller du neste gang i litt mer vann. Hvis eggene er for harde,
fyller du neste gang i litt mindre vann.
Målebeger
Som alternativ til det integrerte måleutstyret (1b) kan du også bruke det medfølgende
målebegeret (1c). Det er plassert i dekselet (1a) og er enkelt å ta ut og sette inn igjen etter
bruk.
Symbolene for de ulike hardhetsgradene og antall egg
finner du på målebegeret:
bløtkokt egg
smilende egg
hardkokt egg
Det er angitt områder for hardhetsgrad og/eller antall egg.
Ved små egg fyller du vann til den nederste kanten og ved ekstra store
egg til den øverste kanten i det aktuelle området.
Avvik kan forekomme basert på størrelse, lagringstid og temperaturen på
egget.
Nål til å stikke hull i eggene
For å unngå at eggene sprekker, kan du stikke eggene med nålen (4). Denne finner du på
eggeinnsatsen.
Ta apparatet i bruk
▪ Vikle ut ledningen til ønsket lengde. Den delen av ledningen du ikke trenger, kan du
vikle opp i bunnen av eggekokeren. Sett apparatet på et tørt, sklisikkert og jevnt,
vannrett underlag.
Kontroller at apparatet ikke er koblet til strømnettet.
▪ Ta av dekselet (1a) med den integrerte vanndoseringen.
Ta alltid bare tak i gripeflatene (2) når du løfter dekselet.
▪ Fyll den nødvendige mengden vann i vanndoseringen, avhengig av antall egg (1 eller 2)
samt hvor harde du ønsker eggene. Alternativt kan du også bruke målebegeret (1c) som
fulgte med i leveransen.
▪ Tilsett den oppmålte vannmengden i den kalde oppvarmingsskålen (5).
Pass på at du ikke fyller i mer vann i oppvarmingsskålen enn det som er angitt for den
ønskede tilberedningsmåten. Ellers er det fare for at eggene blir overkokt.
▪ Legg eggene på eggeinnsatsen (3) og sett på dekselet (1a) på apparatet.
▪ Først nå kan støpselet settes i stikkontakten.
▪ Slå på apparatet med på/av-knappen (6). Kontrollampen lyser hvitt og viser at apparatet
er i drift.
▪ Så snart eggene er ferdige, hører du en signaltone.
Slå av apparatet med på/av-knappen (6) og trekk ut støpselet.
Merknad: Du kan når som helst slå av apparatet med på/av-knappen (6).
▪ Løft dekselet (1a) forsiktig opp. Ta alltid bare tak i gripeflatene (2) når du løfter dekselet
(1a).
Viktig: Fare for skålding fra damp som kommer ut!
▪ Ta ut eggeinnsatsen og bråkjøl eggene i kaldt vann, slik at de slutter å koke.
Du kan også bruke eggene når du skal anrette eggene på bordet.
Sikkerhetssystem
En termostat beskytter eggekokeren mot overoppheting ved utilsiktet bruk uten vann ved å
slå enheten. Før du bruker eggekokeren neste gang, må den alltid være helt avkjølt.
Hvis den første termostaten skulle svikte ved feil bruk, sikrer en ekstra temperaturbegrenser
for pålitelig beskyttelse.
Rengjøring og vedlikehold
Rengjøring
Trekk ut støpselet og la enheten avkjøles. Dypp ikke enheten i vann, men tørk den med
en fuktig klut og litt rengjøringsmiddel og tørk deretter. Bruk ikke skarpe og skurende
rengjøringsmidler.
Oppvarmingsskålen (5) består av rustfritt stål. Dersom det likevel skulle oppstå rustflekker,
er de bare avleiringer på overflaten. De bør fjernes straks med et rengjøringsmiddel til
rustfritt stål.
Eggeinnsatsen (3) og dekselet med den integrerte vanndoseringen (1a) består av høyverdig
Tritan® og kan vaskes i oppvaskmaskin.
60 61
Page 32

no
Avkalking
Kalkavleiringer fører til energitap og påvirker både apparatets levetid og
kokeresultatet. Det slås av for tidlig når kalklaget er for tykt. Dette betyr at
det er svært vanskelig å fjerne. Avkalk derfor regelmessig.
Vi anbefaler at du bruker Cromargol®. Dette er et effektiv, smaks- og
luktnøytralt middel som er godkjent for bruk til næringsmidler. Med den
spesielle sammensetningen med 6 høyverdige og beskyttende additiver er
Cromargol® også svært skånsom mot materialene.
Du får vanligvis Cromargol® samme sted som apparatet ble kjøpt, eller hos
utvalgte fagforhandlere. Cromargol® avkalkningsmiddel er kun tilgjengelig i
Tyskland og Østerrike.
▪ Koble apparatet fra strømmen før avkalking og la det avkjøles.
▪ Fyll en halv porsjon (50 ml) Cromargol® i oppvarmingsskålen (5) og
la apparatet stå inntil kalkbelegget i bunnen er borte. Fyll deretter
oppvarmingsskålen (5) til over kalkranden på sideveggen med kaldt vann
fra springen og la stå i 15 minutter.
▪ Hell ut vannet og skyll med kaldt vann fra springen.
▪ Dosér og bruk andre avkalkningsmidler etter opplysninger fra
produsenten.
Løsningen må ikke oppvarmes under avkalkingen.
Forsiktig – skader forårsaket av unnlatelse av å følge
avkalkingsbestemmelsene dekkes ikke av garantien.
Apparatet oppfyller kravene i henhold til direktivene 2014/35/EU, 2014/30/EU
og 2009/125/EU.
Dette produktet må ikke kastes som vanlig husholdningsavfall etter endt
levetid, men må leveres inn til mottak for gjenvinning av EE-produkter.
Ifølge merkingen på materialene kan disse gjenvinnes. Ved gjenbruk,
gjenvinning av stoffene og andre former for bruk av kasserte apparater yter
du et viktig bidrag til miljøet.
Vennligst forhør deg hos kommunen hvor du kan levere EE-avfall.
Endringer forbeholdes
62 63
Page 33

Kundendienst-Adresse:
WMF consumer electric GmbH
Standort Trepesch
Steinstraße 19
D-90419 Nürnberg
Germany
Tel.: +49 (0) 7331 256 256
eMail: service-wmf@wmf-ce.de
Hersteller:
WMF consumer electric GmbH
Messerschmittstraße 4
D-89343 Jettingen-Scheppach
Germany
www.wmf-ce.de
Änderungen vorbehalten - IB-15020011-07-1703
type: 0415020011
 Loading...