Page 1

Darburka
Virtual Percussionist
Page 2

Page 3

Darburka
Virtual Percussionist
Page 4

The information in this document is subject to change without notice and does not represent a commitment on the part of Wizoo Sound Design GmbH.
The software described by this document is subject to a License Agreement and may
not be copied to other media.
No part of this publication may be copied, reproduced or otherwise transmitted or
recorded, for any purpose, without prior written permission by Wizoo Sound Design
GmbH. All product names and company names are ™ or ® trademarks of their respective owners.
Producer Peter Gorges
Head of Delevopment Paul Kellett
Percussion Recordings:
Producer: Lothar Krell
Engineer Stempel
Co-ordinator Basem Darwisch-Schürmann
Percussion Artists Suat Borazan, Mohamet Zaki
Virtual Instrument:
Audio Engine Paul Kellett
Playback Algorithms Mario Reinsch
User Interface Benjamin Wendelstein
Ambience and Dynamics Klaus Piehl, Matthias Klag
Audio Preparation:
Sound Design Mark Ovenden
Editors Malte Bieler, Sascha Haske, Wilhelm-Paul de Gast, Jan Schmidt
User Interface Design and 3D Instrument Rendering Schmidtdesign, Hamburg
Wizoo and Darbuka are trademarks of Wizoo Sound Design GmbH. VST is a registered
trademark of Steinberg Media Technologies GmbH. The Audio Unit logo and the Audio
Unit symbol are trademarks of Apple Computer Inc. RTAS is a registered trademark of
Avid Technology, Inc. and its subsidiaries and divisions. Pentium is a registered trademark of Intel Corporation in the U.S. and other countries. AMD is a trademark of
Advanced Micro Devices Inc. The Mac logo is a trademark used under license. Macintosh, Power Macintosh and Mac OS are registered trademarks used under license.
Microsoft and Windows XP are either registered trademarks or trademarks of Microsoft
Corporation in the United States and/or other countries. All other product and company
names are ™ or ® of their respective holders.
Unauthorized copying, hiring and lending of this software is strictly prohibited. All specifications are subject to change without notice.
© 2004 Wizoo Sound Design GmbH
All rights reserved.
Made in Germany.
Page 5
Welcome
The overwhelming success of our first virtual musician—the Virtual Guitarist—proved that there’s a huge demand for intelligent music tools that
put you in the producers’ rather than the musicians’ chair; tools that produce professional, authentic tracks based on real performances from
skilled musicians. Why waste a lot of time trying to imitate a Darbuka
player with a MIDI track and some multisamples? Why not just hire
best guys for the job?
Thanks to the proprietary FlexGroove engine Wizoo’s Virtual percussionists deliver nothing less than real performances recorded by real musicians, with you in full control. Everything from the groove, the arrangement, the timing and the tempo to the mix is in your hands, ready to make
your song special.
The grooves of ‘Darbuka’ were performed by Suat Borazan and Mohamed
Zaki, two of the best Middle-Eastern percussion players in the world and
definitely big stars in their countries. Whether you’re into Middle-Eastern
music or just want to add the flavor to your tracks—these guys deliver with
cultural credibility and musical performances like nothing that was affordable for any of us—in the pre-Darbuka era that is.
Best regards,
the
Peter Gorges
Page 6

Page 7

Contents
1
System Requirements & Installation
Minimum System Requirements PC . . . . . . . . . . . . . . . . . . . . . . 11
Minimum System Requirements Mac . . . . . . . . . . . . . . . . . . . . . 11
Installing Darbuka PC . . . . . . . . . . . . . . . . . . . . . . . . . . . . . . . . . . 12
Uninstalling Darbuka PC . . . . . . . . . . . . . . . . . . . . . . . . . . . . . . . . 12
Installing Darbuka Mac . . . . . . . . . . . . . . . . . . . . . . . . . . . . . . . . . 12
Uninstalling Darbuka Mac . . . . . . . . . . . . . . . . . . . . . . . . . . . . . . . 13
Product Certification . . . . . . . . . . . . . . . . . . . . . . . . . . . . . . . . . . . 13
On-line Certification . . . . . . . . . . . . . . . . . . . . . . . . . . . . . . . . 14
Off-line Certification . . . . . . . . . . . . . . . . . . . . . . . . . . . . . . . . 14
Demo Licences . . . . . . . . . . . . . . . . . . . . . . . . . . . . . . . . . . . . . . . . 15
2
General Overview
What Is a Style? . . . . . . . . . . . . . . . . . . . . . . . . . . . . . . . . . . . . . . . . 17
Previewing Styles . . . . . . . . . . . . . . . . . . . . . . . . . . . . . . . . . . . . . . 17
Style Info . . . . . . . . . . . . . . . . . . . . . . . . . . . . . . . . . . . . . . . . . . . . . 18
Loading Styles . . . . . . . . . . . . . . . . . . . . . . . . . . . . . . . . . . . . . . . . . 18
Playing Styles . . . . . . . . . . . . . . . . . . . . . . . . . . . . . . . . . . . . . . . . . 19
Saving Styles . . . . . . . . . . . . . . . . . . . . . . . . . . . . . . . . . . . . . . . . . . 20
The Color Keyboard . . . . . . . . . . . . . . . . . . . . . . . . . . . . . . . . . . . . 21
Latch . . . . . . . . . . . . . . . . . . . . . . . . . . . . . . . . . . . . . . . . . . . . 22
What Is aTrack? . . . . . . . . . . . . . . . . . . . . . . . . . . . . . . . . . . . . . . . . 22
Track Tabs . . . . . . . . . . . . . . . . . . . . . . . . . . . . . . . . . . . . . . . . . . . . 23
Scrolling Track Tabs . . . . . . . . . . . . . . . . . . . . . . . . . . . . . . . . . . . . 23
The Instrument Symbols . . . . . . . . . . . . . . . . . . . . . . . . . . . . . . . . 24
Adding Tracks . . . . . . . . . . . . . . . . . . . . . . . . . . . . . . . . . . . . . . . . . 25
. . . . . . . . . . . . . . . . . . . . . . . . . . . . . . . . . . . . 17
. . . . . . . . . . . . . . . . . . . 11
7
Page 8

Contents
Replacing Tracks . . . . . . . . . . . . . . . . . . . . . . . . . . . . . . . . . . . . . . . 25
Copying Tracks . . . . . . . . . . . . . . . . . . . . . . . . . . . . . . . . . . . . . . . . . 26
Moving Tracks . . . . . . . . . . . . . . . . . . . . . . . . . . . . . . . . . . . . . . . . . 26
Deleting Tracks . . . . . . . . . . . . . . . . . . . . . . . . . . . . . . . . . . . . . . . . 26
Sorting Styles in the Styles Selector . . . . . . . . . . . . . . . . . . . . . . . . 26
Changing Darbuka’s Master Volume . . . . . . . . . . . . . . . . . . . . . . . 27
XXL Mode . . . . . . . . . . . . . . . . . . . . . . . . . . . . . . . . . . . . . . . . . . . . . 27
3
The Play Page
. . . . . . . . . . . . . . . . . . . . . . . . . . . . . . . . . . . . . . . . 29
Speed . . . . . . . . . . . . . . . . . . . . . . . . . . . . . . . . . . . . . . . . . . . . . . . . 29
Variance . . . . . . . . . . . . . . . . . . . . . . . . . . . . . . . . . . . . . . . . . . . . . . 30
Timing . . . . . . . . . . . . . . . . . . . . . . . . . . . . . . . . . . . . . . . . . . . . . . . 30
Quantize . . . . . . . . . . . . . . . . . . . . . . . . . . . . . . . . . . . . . . . . . . . . . . 31
Swing . . . . . . . . . . . . . . . . . . . . . . . . . . . . . . . . . . . . . . . . . . . . . . . . 31
Muting Track Types . . . . . . . . . . . . . . . . . . . . . . . . . . . . . . . . . . . . . 31
Complexity . . . . . . . . . . . . . . . . . . . . . . . . . . . . . . . . . . . . . . . . . . . . 32
Master Ambience . . . . . . . . . . . . . . . . . . . . . . . . . . . . . . . . . . . . . . . 32
Ambience in Stereo . . . . . . . . . . . . . . . . . . . . . . . . . . . . . . . . . 33
Ambience in Surround . . . . . . . . . . . . . . . . . . . . . . . . . . . . . . 33
Ambience Controls . . . . . . . . . . . . . . . . . . . . . . . . . . . . . . . . . 34
Master Equalizer . . . . . . . . . . . . . . . . . . . . . . . . . . . . . . . . . . . . . . . 34
Master Dynamics . . . . . . . . . . . . . . . . . . . . . . . . . . . . . . . . . . . . . . . 34
Stereo and Surround . . . . . . . . . . . . . . . . . . . . . . . . . . . . . . . . 35
4
The Mix Page
. . . . . . . . . . . . . . . . . . . . . . . . . . . . . . . . . . . . . . . . . 37
Mixing Tracks . . . . . . . . . . . . . . . . . . . . . . . . . . . . . . . . . . . . . . . . . . 37
Mixing Tracks Using the Stage . . . . . . . . . . . . . . . . . . . . . . . . . . . . 38
Vertical Movement . . . . . . . . . . . . . . . . . . . . . . . . . . . . . . . . . . 38
Horizontal Movement . . . . . . . . . . . . . . . . . . . . . . . . . . . . . . . 40
The Track Mixer . . . . . . . . . . . . . . . . . . . . . . . . . . . . . . . . . . . . . . . . 40
EQ . . . . . . . . . . . . . . . . . . . . . . . . . . . . . . . . . . . . . . . . . . . . . . . 40
Punch . . . . . . . . . . . . . . . . . . . . . . . . . . . . . . . . . . . . . . . . . . . . 41
Level . . . . . . . . . . . . . . . . . . . . . . . . . . . . . . . . . . . . . . . . . . . . . 42
Pan . . . . . . . . . . . . . . . . . . . . . . . . . . . . . . . . . . . . . . . . . . . . . . 42
Ambience . . . . . . . . . . . . . . . . . . . . . . . . . . . . . . . . . . . . . . . . . 42
Assigning Tracks to Outputs . . . . . . . . . . . . . . . . . . . . . . . . . . 43
8
Page 9

Contents
Working in Surround . . . . . . . . . . . . . . . . . . . . . . . . . . . . . . . . . . . 43
Enabling Surround Mode . . . . . . . . . . . . . . . . . . . . . . . . . . . . 44
Placing Tracks in the Surround Panorama . . . . . . . . . . . . . . 44
5
The Edit Page
. . . . . . . . . . . . . . . . . . . . . . . . . . . . . . . . . . . . . . . . 45
What Is a Part? . . . . . . . . . . . . . . . . . . . . . . . . . . . . . . . . . . . . . . . . 45
What Is a Pattern? . . . . . . . . . . . . . . . . . . . . . . . . . . . . . . . . . . . . . . 46
Arranging with Darbuka . . . . . . . . . . . . . . . . . . . . . . . . . . . . . . . . 46
The Pattern Selector . . . . . . . . . . . . . . . . . . . . . . . . . . . . . . . . . . . . 49
Naming a Pattern . . . . . . . . . . . . . . . . . . . . . . . . . . . . . . . . . . . . . . 49
Moving Patterns . . . . . . . . . . . . . . . . . . . . . . . . . . . . . . . . . . . . . . . 49
Setting Play Modes . . . . . . . . . . . . . . . . . . . . . . . . . . . . . . . . . . . . . 50
Color Shading . . . . . . . . . . . . . . . . . . . . . . . . . . . . . . . . . . . . . . . . . 51
Arranging in the Pattern Arranger . . . . . . . . . . . . . . . . . . . . . . . . 51
Using the Mouse Wheel . . . . . . . . . . . . . . . . . . . . . . . . . . . . . 51
Using Key Commands . . . . . . . . . . . . . . . . . . . . . . . . . . . . . . 51
Choosing All Parts in a Pattern . . . . . . . . . . . . . . . . . . . . . . . 52
Choosing a Whole Track . . . . . . . . . . . . . . . . . . . . . . . . . . . . 52
Choosing a Single Part . . . . . . . . . . . . . . . . . . . . . . . . . . . . . . 53
Selecting Parts . . . . . . . . . . . . . . . . . . . . . . . . . . . . . . . . . . . . . . . . . 53
Special Options in the Part Menu . . . . . . . . . . . . . . . . . . . . . . . . . 54
The Part Parameters . . . . . . . . . . . . . . . . . . . . . . . . . . . . . . . . . . . . 55
6
Performing with Darbuka
. . . . . . . . . . . . . . . . . . . . . . . . . . . . . 57
Using MIDI Controller CCs . . . . . . . . . . . . . . . . . . . . . . . . . . . . . 57
Default MIDI Controller Settings . . . . . . . . . . . . . . . . . . . . . . . . . 58
MIDI Channels 2 to 15 . . . . . . . . . . . . . . . . . . . . . . . . . . . . . . . . . . 58
MIDI Controllers for channels 2 to 15 . . . . . . . . . . . . . . . . . . . . . 59
Using Track Mute Keys . . . . . . . . . . . . . . . . . . . . . . . . . . . . . . . . . 59
Color Coding . . . . . . . . . . . . . . . . . . . . . . . . . . . . . . . . . . . . . . . . . . 59
7
The Setup Page
. . . . . . . . . . . . . . . . . . . . . . . . . . . . . . . . . . . . . . 61
Main Outputs . . . . . . . . . . . . . . . . . . . . . . . . . . . . . . . . . . . . . . . . . 61
Individual Outputs . . . . . . . . . . . . . . . . . . . . . . . . . . . . . . . . . . . . . 62
Mute Mode . . . . . . . . . . . . . . . . . . . . . . . . . . . . . . . . . . . . . . . . . . . 62
Sync Mode . . . . . . . . . . . . . . . . . . . . . . . . . . . . . . . . . . . . . . . . . . . . 63
9
Page 10

Contents
Pattern Change . . . . . . . . . . . . . . . . . . . . . . . . . . . . . . . . . . . . . . . . 64
Quantize . . . . . . . . . . . . . . . . . . . . . . . . . . . . . . . . . . . . . . . . . . 64
Time Sig. . . . . . . . . . . . . . . . . . . . . . . . . . . . . . . . . . . . . . . . . . . 64
Mix Page Vertical Axis . . . . . . . . . . . . . . . . . . . . . . . . . . . . . . . . . . . 65
Knob Mode . . . . . . . . . . . . . . . . . . . . . . . . . . . . . . . . . . . . . . . . . . . . 66
Tooltips . . . . . . . . . . . . . . . . . . . . . . . . . . . . . . . . . . . . . . . . . . . . . . . 67
Save As Defaults . . . . . . . . . . . . . . . . . . . . . . . . . . . . . . . . . . . . . . . 67
Default MIDI CC Assignments . . . . . . . . . . . . . . . . . . . . . . . . . . . 67
8
The Producer and Percussionists
. . . . . . . . . . . . . . . . . . . . . . . 69
Lothar Krell . . . . . . . . . . . . . . . . . . . . . . . . . . . . . . . . . . . . . . . . . . . . 69
Suat Borazan . . . . . . . . . . . . . . . . . . . . . . . . . . . . . . . . . . . . . . . . . . 69
Mohamed Zaki . . . . . . . . . . . . . . . . . . . . . . . . . . . . . . . . . . . . . . . . . 70
Basem Darwisch-Schürmann . . . . . . . . . . . . . . . . . . . . . . . . . . . . . 70
9
The Instruments
. . . . . . . . . . . . . . . . . . . . . . . . . . . . . . . . . . . . . . 71
Darbuka . . . . . . . . . . . . . . . . . . . . . . . . . . . . . . . . . . . . . . . . . . . . . . 71
Douhola . . . . . . . . . . . . . . . . . . . . . . . . . . . . . . . . . . . . . . . . . . . . . . 72
Bendir . . . . . . . . . . . . . . . . . . . . . . . . . . . . . . . . . . . . . . . . . . . . . . . . 73
Riqq . . . . . . . . . . . . . . . . . . . . . . . . . . . . . . . . . . . . . . . . . . . . . . . . . . 73
Sagat . . . . . . . . . . . . . . . . . . . . . . . . . . . . . . . . . . . . . . . . . . . . . . . . . 74
Tura . . . . . . . . . . . . . . . . . . . . . . . . . . . . . . . . . . . . . . . . . . . . . . . . . . 75
Bongos . . . . . . . . . . . . . . . . . . . . . . . . . . . . . . . . . . . . . . . . . . . . . . . 76
Shaker . . . . . . . . . . . . . . . . . . . . . . . . . . . . . . . . . . . . . . . . . . . . . . . . 77
Reversed . . . . . . . . . . . . . . . . . . . . . . . . . . . . . . . . . . . . . . . . . . . . . . 77
10
Style Information
. . . . . . . . . . . . . . . . . . . . . . . . . . . . . . . . . . . . . 79
Index of Parameters and Values
10
. . . . . . . . . . . . . . . . . . . . . . . . . . . . 83
Page 11

1 System Requirements & Installation
Minimum System Requirements PC
❖
Pentium® III 500 MHz or AMD7. (Pentium 4/Athlon 1 GHz or faster
recommended.)
❖
256 MB RAM.
❖
2 GB free hard disk space.
❖
Windows® XP.
❖
VST 2.0 compatible host software.
❖
MIDI Interface.
❖
DVD-ROM drive for installation.
❖
Internet connection for software certification.
Minimum System Requirements Mac
❖
Power Macintosh® G3 500 MHz. (G4 or faster recommended.)
❖
256 MB RAM.
❖
2 GB free hard disk space.
❖
Mac® OS X Version 10.3.2 or higher.
❖
VST 2.0, AU or RTAS compatible host software.
❖
MIDI Interface.
❖
DVD-ROM drive for installation.
❖
Internet connection for software activation.
The actual performance of virtual instruments depends on the performance of the computer you use.
11
Page 12

System Requirements & Installation
Installing Darbuka PC
To install Darbuka on a PC:
1
Power up your computer and launch Windows XP.
2
Insert the Darbuka DVD into the computer’s DVD drive.
3
Open the folder ‘PC’ from the DVD and double-click Darbuka
Setup.exe.
Uninstalling Darbuka PC
To uninstall Darbuka on a PC:
1
Open the Control Panel of your windows system.
2
Double-click ‘Add or Remove Programs’.
3
Select ‘Darbuka’ from the list.
4
Click ‘Remove’ and follow the instructions.
Installing Darbuka Mac
To install Darbuka on a Macintosh:
1
Power up your computer launching Mac OS X.
2
Insert the Darbuka DVD into the computer’s DVD drive.
3
Open the folder ‘OS X’ from the DVD, then open the subfolder used by
your host application. Please check the ReadMe files for further information.
12
Page 13

Uninstalling Darbuka Mac
Uninstalling Darbuka Mac
To uninstall Darbuka on a Macintosh:
1
Delete the Darbuka Data folder /Library/Audio/Plug-Ins/VST/Wizoo/
Darbuka Data/.
If you have installed the Darbuka content somewhere else on your Macintosh and are
not sure where, use the Mac OS X Find feature ([Command][F]) and search for ‘Darbuka
Data’.
2
Delete whichever Plug-ins you have installed:
❖
VST/Library/Audio/Plug-Ins/VST/Wizoo/Darbuka.vst
❖
Audio Unit/Library/Audio/Plug-Ins/Components/Darbuka.component
❖
RTAS/Library/Application Support/Digidesign/Plug-Ins/Darbuka.rtas
Product Certification
Product Certification is a fast and easy process that certifies your purchased Wizoo product for unlimited legal use on your system. All Wizoo
products—demo and full versions—require a certification.
The certification process is integrated into your Wizoo product and can be
executed using a standard web browser and email client—there is no need
to install additional applications or hardware.
To certify your Wizoo product, proceed as follows:
1
Open your Wizoo plug-in in your host application (sequencer).
2
Click the ‘Setup’ button on the user interface.
3
Enter the Product Certification Code provided on the card inside the
Darbuka box into he field labelled ‘Product Certification’.
Note: If your plug-in does not allow you to enter text, you have to uncheck the ‘Always
on top’ option. For this purpose, right-click into the menu bar of the plug-in window
(above the actual plug-in interface graphic) and uncheck this option.
13
Page 14

System Requirements & Installation
Now you have two options. If your music computer is connected to the internet, proceed with ‘On-line Certification’, if not refer to the ‘Off-line Certification’ instructions below.
On-line Certification
1
Make sure you have established an internet connection.
2
Click the button ‘Certify Online’.
3
The plug-in retrieves the Wizoo Certification form from the server and
opens it in your web browser.
4
Enter the required information into all fields if possible, at least fill out
the ones marked with an asterisk (*). The ‘Product Certificate’ field will
automatically get filled out by the certification server.
5
Click the ‘Submit’ button to send your certification request. Your certificate will be emailed to the address you provided.
6
Receive your email and double-click the file attached to it. Your Wizoo
product will be certified and enabled for permanent use. As a confirmation, the ‘Product Certification’ field in the Setup page will read ‘Product certified …’.
If your email gets received on a computer other than your music workstation, then please transfer the attached file to your music computer and
double-click it there to complete the certification process.
Off-line Certification
If your music computer is not connected to the Internet, you can carry out
certification on any other computer with an internet connection—e. g.
your office or home computer.
1
Click the button ‘Certify Off-line’.
2
Check your desktop folder for a html file named after the product.
Transfer this file to your internet-connected computer.
3
On your internet computer, establish a connection and double-click the
html file. It will be opened in your web browser and take you to the Certification form on the Wizoo server.
14
Page 15

Demo Licences
4
Fill out all fields if possible, the fields marked with an asterisk are obligatory. The ‘Product Certificate’ field will be filled out automatically.
5
Click the ‘Submit’ button to complete your certification request. Your
certificate will be emailed to the address you provided.
6
Open your email and transfer the attached file to the computer where
the Wizoo product is installed.
7
Here, double-click the file to complete certification. As a confirmation,
the ‘Product Certification’ field in the Setup page will read ‘Product certified …’.
Demo Licences
Included on your product installer DVD you will find other demo versions
of our products. A demo version allows you to test the full product over a
period of 30 days.
To activate a Wizoo demo version simply follow the procedure described
above but do not enter any Certification code in the Product Certification
dialog.
15
Page 16

Page 17
2 General Overview
Darbuka is a very easy to use yet sophisticated virtual percussion instrument that plays real multi-track percussion recordings at any tempo and
gives you the freedom to edit numerous aspects of every instrument’s performance and sound.
Let’s take a quick tour of Darbuka and check out the most important general features.
What Is a Style?
A
Style
is a full authentic percussion arrangement, complete with up to
fourteen individual
mixer settings and a lot of other important information. When you save or
load a
Style
you are basically saving or loading every parameter in Darbuka.
Previewing Styles
Before loading a
example of every
choosing one in the
Tracks
, up to sixty-one
Style
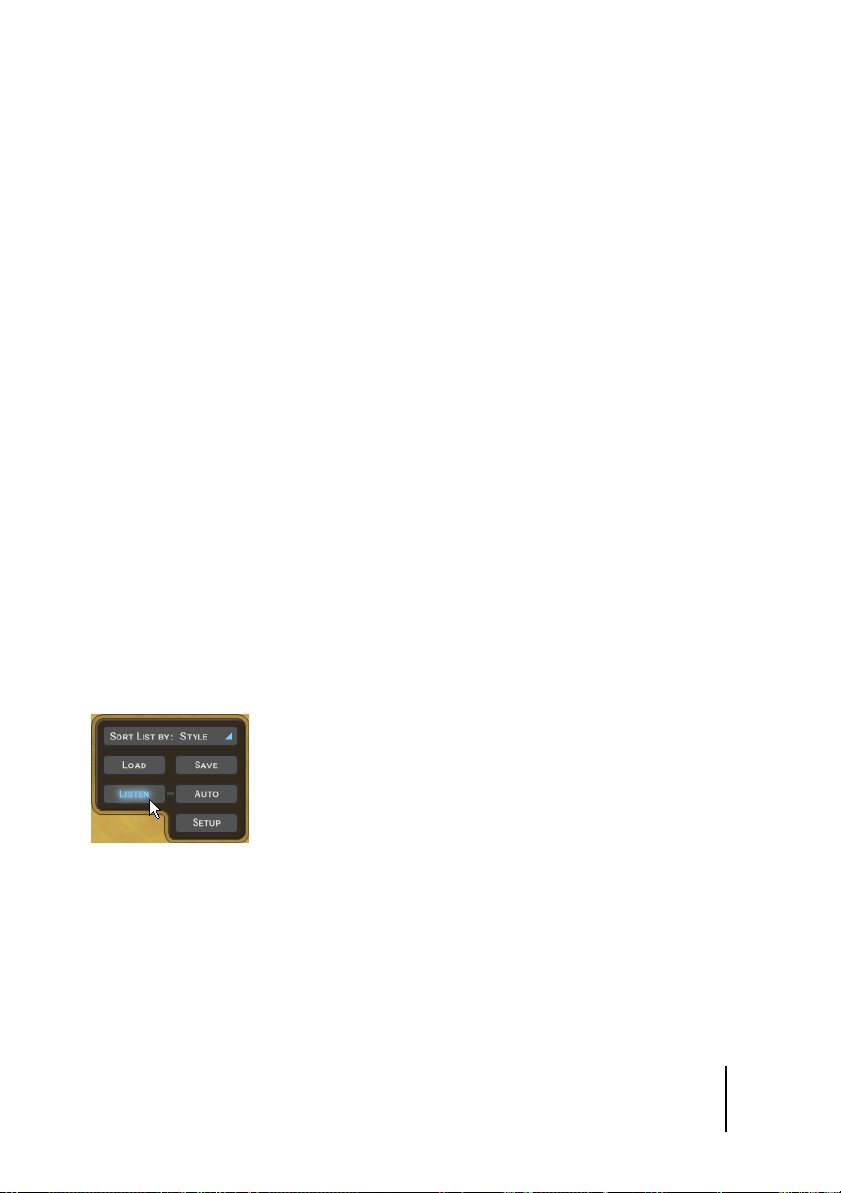
you might like to hear what it sounds like. A short
Style
(played at its original tempo) can be heard by simply
Styles Selector
and clicking
Patterns
Listen.
(or arrangements), fills,
listen
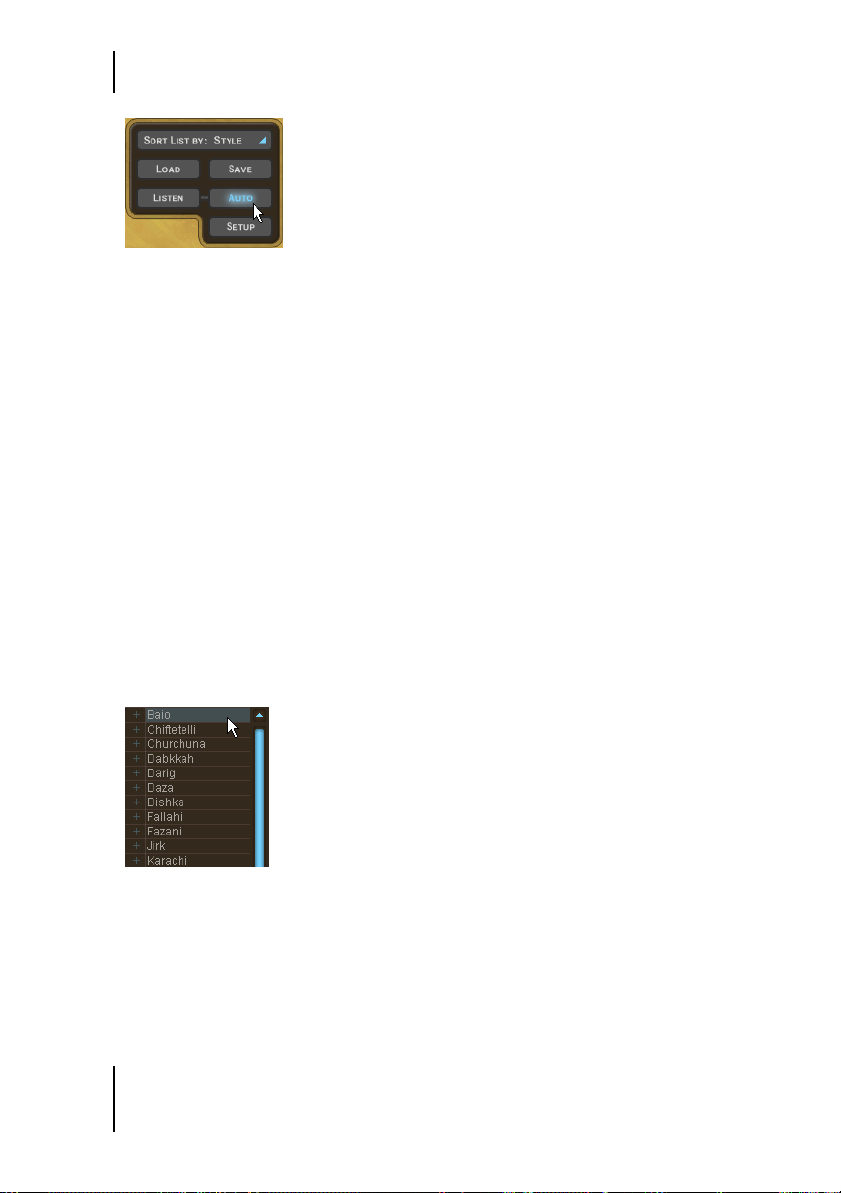
If you would like to hear a preview every time you click a
Selector
then click
Auto
.
Style
in the
Styles
17
Page 18
General Overview
Auto
Listen is disabled when Darbuka is playing.
Style Info
When you click a Style in the Styles Selector, information such as tempo and
time signature is displayed in the info display in the top center of Darbuka
or as a tooltip above the Styles Selector. You can sort Styles by tempo and
time signature by using the Sort List option below the Styles Selector.
Loading Styles
There are four easy ways to load a Style:
1 By double-clicking it in the Styles Selector menu on the left of Darbuka.
Styles selector
The Styles Selector.
2 Using Drag and Drop: Click the Style you want from the Styles Selector
with your left mouse button, drag it anywhere to the right of the Styles
Selector, and release your mouse button.
18
Page 19

Playing Styles
When using Drag and Drop a ‘+’ symbol is displayed next to your mouse pointer.
3 Highlighting a Style in the Styles Selector and clicking Load.
Load
4 Using the usual Load Instrument menu provided by your host applica-
tion.
Load instrument
The last option will probably be the slowest since you will have to navigate to the
folder containing the Styles.
Playing Styles
Now that you’ve loaded a Style, just play a note on your MIDI keyboard (try
C2) and Darbuka will start to play at the tempo of your host application,
even if it is currently stopped. Try playing another note (C#2 for example),
Darbuka will change to another variation of the rhythm.
If you want Darbuka to stop, play C6 on your MIDI keyboard.
19
Page 20

General Overview
Saving Styles
If you are using Darbuka in a sequencer project you don’t need to save the
Style you have been working on; all settings are saved with your song. If
you’ve customized or created your own Styles and want to save them, there
are two ways:
1 Click the Save button (bottom left) and you’ll be presented with a fa-
miliar Save dialog …
Save 1
… or
2 choose Save Instrument from the usual Save/Load menu provided by
your host application.
Save Instrument
When you save a Style it will automatically be included in the Styles Selector listing.
20
Page 21

The Color Keyboard
The Color Keyboard
The funky looking keyboard at the bottom of Darbuka is not just a fine example of modern interface design, you can also play it by clicking your
mouse on any key. The first key at the left of the Color Keyboard is MIDI
note C1 (36).
Color Keyboard display
The Color Keyboard.
Our GUI programmer chose his favorite food colors for the keyboard display. Not only are they mouth watering but they also provide a lot of useful
information about what Darbuka will do when you play a MIDI key or click
the Color Keyboard.
❖ Blue: The blue keys show normal rhythm grooves. The light blue color
is for lighter grooves (with less instruments), the dark blue for fuller
grooves.
The color shading can be changed by you to help you find the rhythms you want more
quickly, particularly useful in a live situation (see Color Coding in the Performing With
Darbuka chapter of this manual).
❖ Green: Green keys are for fills. Light green is for light fills or solos and
dark green for fuller fills.
❖ Yellow: The yellow keys are Mute Keys. When played they will mute or
unmute Tracks for easy arranging ‘on the fly’. For more info check out
the Performing With Darbuka chapter of this manual.
❖ Red: The red keys are the Stop and End keys. Whenever you press a blue
or green key Darbuka will play, so there is no need for a start key. The
first of the red keys will play a rhythm ending and the second will stop
Darbuka instantly.
All color keys can be assigned to any MIDI note (see the chapter The Edit Page.
21
Page 22

General Overview
Latch
The small blue square to the left of the Color Keyboard is the Latch Mode Se-
lector.
Latch
When Latch mode is active Darbuka plays continuously from the moment
you play the first key until it receives a Stop or End. When Latch mode is off
Darbuka will only play while you are holding a key down.
What Is aTrack?
A Track is the performance of a single percussionist, complete with all of
the variations, fills and solos he has played for a Style. All Tracks can be
loaded independently, added to an already loaded Style, or replace any
loaded Track.
To see the Tracks available in a Style just click the small ‘+’ arrow to the left
of the Style name in the Styles Selector.
Load Instrument view
22
Page 23

Track Tabs
Track Tabs
All Tracks loaded into Darbuka (up to fourteen) are displayed using Track
Tabs.
Instrument Tabs
The Track Tabs.
Track Tabs are shown on all pages of Darbuka and display each Track’s
name, a level meter and the Track’s Solo and Mute status.
Every Track can be independently edited in a multitude of ways. To select a
Track for editing, just click its tab; all other Track Tabs become unselected
(gray).
Instrument selection
Your computer’s [arrow left] and [arrow right] keys select Tracks to the left and right.
The [Home] and [End] keys take you to the first and last Track Tabs.
Scrolling Track Tabs
Darbuka displays up to eight Track Tabs at a time but a Style may have as
many as fourteen Tracks. There are two ways to see Tracks not currently dis-
played:
❖ Place your mouse pointer above any Track Tab and use your mouse
wheel.
❖ Click the scroll arrows at the right of the Track Tabs.
Scroll arrows
The Track scroll arrows.
23
Page 24

General Overview
The Instrument Symbols
Below the Track Tabs is a dark rectangular area containing a colored sym-
bol for the percussion instrument played by a Track. This area also con-
tains a few functions that are worth mentioning.
Instrument Display Area
The Instrument Symbols area.
❖ Track Volumes: Although most of your mixing will happen on the Mix
Page we’ve hidden a handy little feature that no-one except you guys
who read manuals will know about. Using your mouse wheel in the in-
strument symbol area allows you to control Track volumes on the Play
Page. Give it a try, it’s pretty useful.
Hold [Shift] for fine adjustment.
❖ Track Info: Right-clicking (Mac: [Ctrl]-Click) in the instrument symbol
area will open an information box with a picture and description of the
instrument played on that track. This information is always displayed
in English but is also available in other languages in The Instruments
chapter of this manual.
24
Page 25

Adding Tracks
Darbuka
❖ Track Mute Status: When a track is muted the instrument symbol
changes from colored to grey. This way you always have an overview of
all muted instruments.
Adding Tracks
When you load or add a Track to a Style, you are adding all of the properties
it formerly had, including information about what is played by which
MIDI keys and sound edit settings.
To add a Track either:
❖ Double click it in the Styles Selector menu or
❖ drag and drop the Track anywhere to the right of the Styles Selector (ex-
cept onto an existing Track Tab) and release your mouse button or
❖ select the Track in the Styles Selector and click Load.
Replacing Tracks
To replace a Track simply drag and drop the new Track onto the tab of the
Track you wish to replace. This works for Tracks listed in the Styles Selector
as well as for Track Tabs.
25
Page 26

General Overview
Copying Tracks
To make a copy of a Track click and drag the Track Tab to an empty place in
the Track Tabs display.
Moving Tracks
To move a Track to a different Tab position hold [Shift] and drag and drop
the Ta b.
Deleting Tracks
To delete or remove an already loaded Track click its Track Tab, drag it
above or below the Tabs strip and release your mouse button.
Sorting Styles in the Styles Selector
To help you find the Style you need quickly and easily Darbuka has three
sorting modes.
❖ Name: With this option selected Styles are displayed in alphabetical or-
der.
❖ Region: All of the percussion grooves in Darbuka come from particular
geographical regions. When you choose Sort List By Region you can view
Styles according to their area of origin.
❖ Tempo: Although Darbuka plays Styles at any tempo, sometimes you
might like to choose a Style that was recorded at something close to
your song tempo, or play a Style at its traditional tempo. The Te mp o op-
tion collects all Styles of a similar original tempo and groups them into
folders by bpm (beats per minute).
❖ Time Sig.: When this option is selected all Styles are sorted and dis-
played in their recorded traditional time signatures.
26
Page 27
Changing Darbuka’s Master Volume
Changing Darbuka’s Master Volume
All of the percussion Tracks in Darbuka have been mixed and Darbuka’s
output level is optimized for all Styles, but you still may find it occasionally
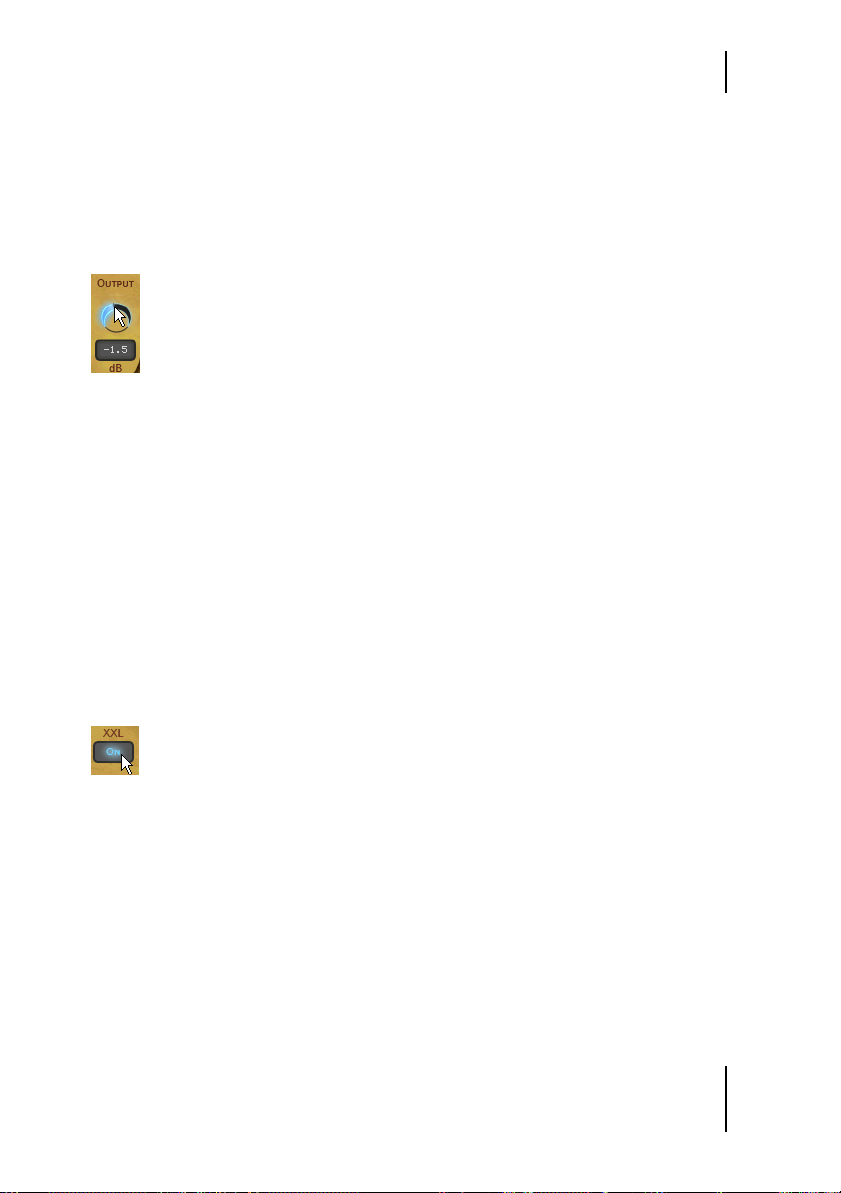
useful to turn the whole percussion instrument up or down in volume.
Just use the Output knob in the lower right hand corner.
Master Volume
XXL Mode
All of the percussion performances in Darbuka have been recorded and
processed in extremely high audio quality, This also means large file sizes
and this is XXL Mode.
To save you loading time and RAM we’ve provided a very efficient professional quality Normal playback mode (which uses a ‘lossless’ form of data
compression) and a full quality XXL mode. The difference between these
modes is virtually inaudible. Darbuka defaults to playing in Normal mode
but if loading time and RAM are no issue for you just click the XXL On feature.
XXL On
If you would like Darbuka to operate always in XXL mode, then choose XXL On and
click the Save As Defaults feature on the Setup Page.
27
Page 28

Page 29
3 The Play Page
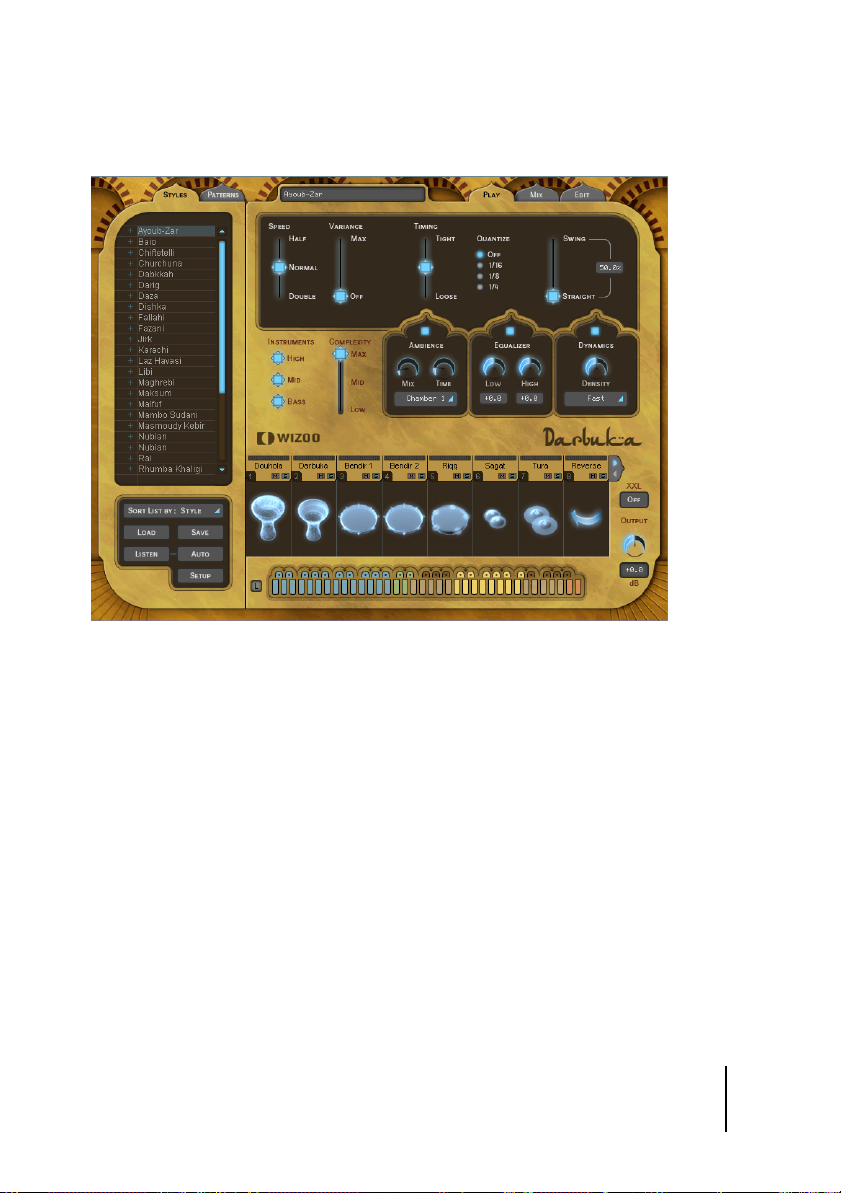
Play Page
The first page you’ll see when you start Darbuka is the Play Page. On this
page you will find most of the general controls for the whole percussion instrument, the types of controls that affect all or most Tracks being played in
a Style. Let’s take a deeper look at what’s possible and what might be useful
when making music with Darbuka.
Speed
The Speed control allows you to run Darbuka at normal, half or double
your song tempo. This can be very useful in some situations:
29
Page 30

The Play Page
Maybe you’re working on a slow groove masterpiece that’s 80 beats per
minute but running your host application at 160, you’ve been working for
months and you realize that the last thing you need is some Douholas in
the middle eight, you load a Style in anticipation and your lovely delicate
middle eight is now full of drummers on Guarana, the cat gives birth, light
bulbs explode… Never fear, we at Wizoo value our cats and our light bulbs:
With a casual flick of the Speed switch to Half the world will become normal again.
Speed control can also be quite a useful creative tool, allowing you the flexibility to play a nice syncopated 80 BPM groove over a 160 bpm
Drum’n’Bass track or an interesting half time groove over a 110 bpm pop
song. It’s up to you, Darbuka has no tempo limits.
Variance
Variance is a sophisticated feature with a very simple control. What it does
is replace percussion hits within each Track with other percussion hits that
sound similar from within the Style, in effect adding variation to each
Track. A setting of Max replaces a lot of hits with similar hits and the Off
setting plays the groove exactly as the original percussionists played it.
Timing
The Timing control might also be called humanize or even quantize. Setting Timing to the center value of fifty percent plays the percussion grooves
with all the natural anticipations and feel of the real players, increasing the
value towards Tight quantizes the timing to strict machine like precision,
and decreasing towards Loose exaggerates the natural live timing.
30
Page 31
Quantize
Quantize
Quantize sets a maximum musical timing resolution. Any percussion hits
that fall outside of this timing grid are removed. For example you may like
a particular Style but there are a lot of 32nd and 64th note rolls and fills
and what you’d really like is for the groove to be simpler. Try setting Quan-
tize to a value of 1/16th, all of the busy fills are removed and only the notes
that fall close to a 16th note in the bar remain, in effect simplifying the
groove. Of course you can simplify Styles quite a lot, right down to a 1/4
note value.
Experimenting with combinations of the Tempo and Quantize features can lead to in-
teresting and useful rhythmic variations.
Swing
Swing is a feature most are familiar with. This control pushes the timing of
all Tracks in a Style from their original position in a groove towards a triplet
timing. In some cases a Style is already naturally playing a triplet feel in
which case the Swing control pushes the triplet beats to an even later position in the bar.
Muting Track Types
Instrument group mute
31
Page 32

The Play Page
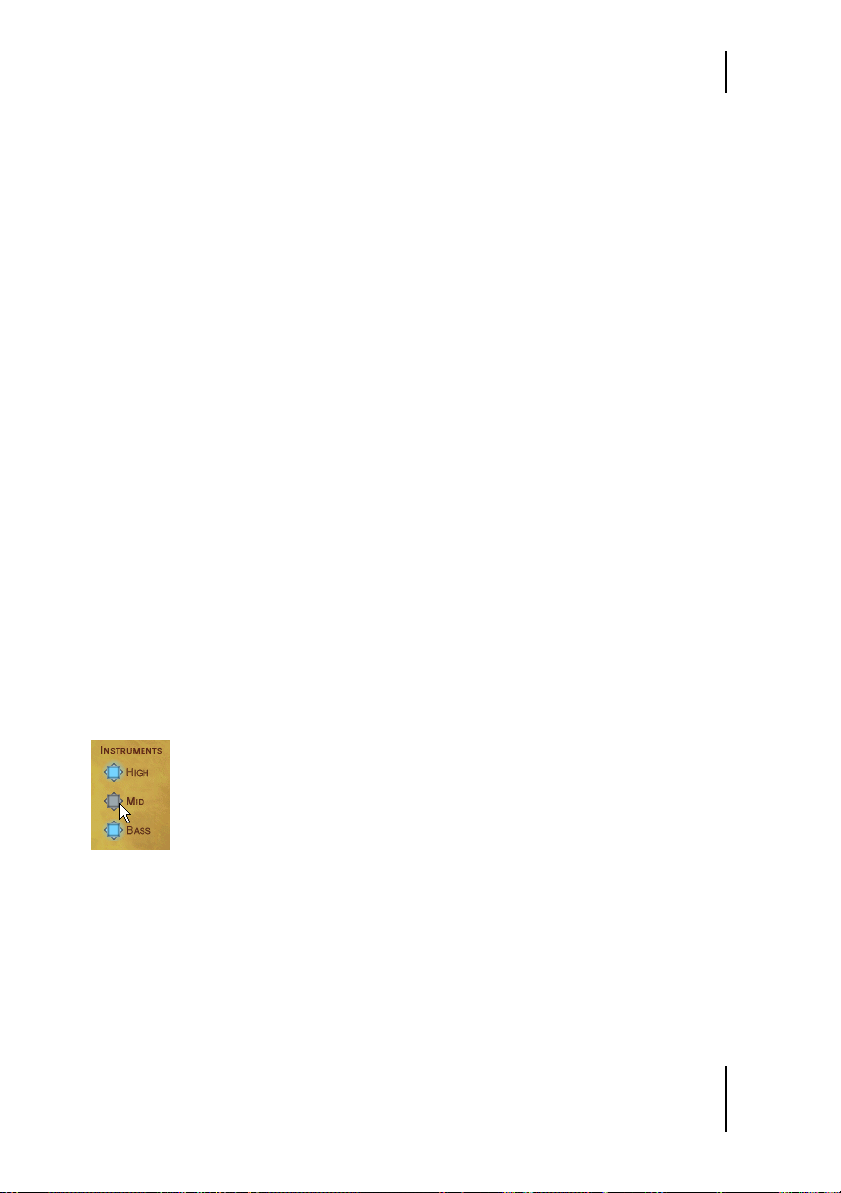
The Tracks activation section is a handy time saving feature and useful in
many situations. All Tracks have been grouped together by type. The differ-
ent buttons allow you to quickly activate or deactivate families of Tracks.
This can be useful when previewing Styles or Patterns, when mixing, or
maybe you only want to use particular percussion instruments in your
composition.
Using the Tracks activation section will definitely save you time.
Group Tracks Assigned
High Riqq, Sagat, Tura, Shaker, Claps
Mid Darbuka, Bendir, Bongos
Bass Douhola, Reverse
Complexity
Despite its name, Complexity is easy to use and might even be called ‘simplicity’. What it does is remove the least important percussion hits played
by each Track in the Style. A setting of Mid removes some hits and the Low
setting removes all but the most essential hits in the groove.
Master Ambience
Ambience is a very high quality surround compatible reverb. Each percussion Track in a Style has its own Ambience send amount, set in the Track
Mix on the Mix Page (See the Track Mix section of this manual).
All Styles have a light natural Ambience setting already.
32
Page 33

Master Ambience
Master Reverb
Ambience in Stereo
When Darbuka is used in Stereo mode (set in the Main Outputs section of
the Setup Page) the dry percussion mix is sent to stereo output 1 and the
Ambience signal is sent to stereo output 2 in your host application so you
can easily mix.
Support for additional outputs in Audio Unit and RTAS hosts currently depends on the
version of the host application being used. To ensure maximum compatibility, the initial version of Darbuka only provides a stereo output in Audio Unit or RTAS hosts, and
as a result the Front/Rear and Output controls on the Mix Page will not function. As
soon as Audio Unit and RTAS host updates are available, this functionality will be implemented in Darbuka and an update will be released on the Wizoo website.
Ambience in Surround
In Surround mode (Main Outputs section of the Setup Page) the dry percus-
sion mix and Ambience outputs are combined. Front left and right (wet and
dry) go to the first stereo output, and rear left and right (wet and dry) go to
the second stereo output.
Because the Master Ambience is a true surround reverb you will notice that when you
move Tracks within the surround panorama, the sound character of the Ambience will
change just like in a natural room. For example, if you pan a Track to the left rear
corner, the Ambience level and early reflections of the Ambience will be more pronounced for that Track in the left rear corner.
33
Page 34

The Play Page
All Styles already have a light Ambience but there’s nothing to stop you
from adjusting the Ambience to whatever you like. Just select an Ambience
type from the drop down list, set the Ambience output level using the Mix
control and adjust the length of your Ambience with the Time parameter.
Ambience Controls
Ambience has three simple and effective parameters:
❖ Choose the Ambience character from the drop down menu at the bot-
tom of the Ambience feature.
❖ Set a balance between Ambience and direct signal with the Mix knob.
❖ Set an Ambience length with the Time parameter.
Master Equalizer
The Master Equalizer is a two band EQ, useful for sweetening your overall
mix. As with the Master Dynamics and Ambience, the Master Equalizer is a
four channel surround compatible effect.
The Master Equalizer is also applied to the Ambience signal.
Master Dynamics
The Master Dynamics is a high quality compressor that can be applied to
control the dynamic range of the stereo and surround channels. To use the
Master Dynamics just select one of the three presets from the drop down
menu and use the Density control to set the compression amount you
would like.
34
Page 35

Master Dynamics
Master Dynamics
❖ The Fast preset maximizes the volume of Tracks while suppressing their
attacks.
❖ Tight controls the dynamic range of the attack and main body of the per-
cussion instruments in the track equally.
❖ Slow accentuates instrument attacks while minimizing un-natural
sounding compression artefacts.
Stereo and Surround
In stereo mode the dry percussion mix output and the Ambience stereo output are linked, meaning that when the compressor is reacting to a loud signal in the dry output (for example) the compression character is also reflected in the Ambience output.
In surround mode the Dynamics affect all four channels simultaneously,
meaning that if the compression reacts to a loud Track in the rear right
channel then all other surround channels are also affected.
Support for additional outputs in Audio Unit and RTAS hosts currently depends on the
version of the host application being used. To ensure maximum compatibility, the initial version of Darbuka only provides a stereo output in Audio Unit or RTAS hosts, and
as a result the Front/Rear and Output controls on the Mix page will not function. As
soon as Audio Unit and RTAS host updates are available, this functionality will be implemented in Darbuka and an update will be released on the Wizoo website.
35
Page 36

Page 37

4 The Mix Page
Mix Page
Mixing Tracks
The Mix Page offers all you need to balance, pan, equalize and add effects
to any of the Tracks in your percussion groove, as well as a few other handy
features.
The Mix Page parameters affect a Track for all Patterns used in the Style. If you want
to tweak a Track just for particular Patterns check out the Part Parameters section of
this manual).
37
Page 38

The Mix Page
Mixing Tracks Using the Stage
The fastest and easiest way to mix or balance Tracks is by using the Stage
feature at the top of the Mix Page.
Stage
The Stage allows you to mix Tracks visually by simply clicking their instrument symbols and dragging them.
Instrument symbols of muted tracks appear gray but are still fully functional, i. e. can
be selected and moved.
Limiting movement: By holding [Shift]/[Alt] you can limit dragging to horizontal/vertical
direction.
Vertical Movement
To choose which mix parameter is changed when moving a Track vertically
on the Stage click in the upper left corner of the Stage and make a selection
from the drop down menu. Alternatively you can also go to the Mix Page
Vertical Axis menu in the Setup Page and make a selection from the drop
down menu there.
38
Page 39

Mixing Tracks Using the Stage
Choose front rear balance
❖ No Vertical Axis (None): When this option is chosen, vertical move-
ment of a Symbol in the Stage has no effect on the Track.
❖ Level: When Level is selected, vertical movement in the Stage controls
individual Track volumes.
❖ Ambience: This option allows you to visually mix Ambience Send
amounts for each Track via the Stage.
❖ Front/Rear: This may be the fastest and most intuitive setting for creat-
ing a surround panorama. The top of the Stage becomes the front left
and right, the bottom becomes the rear left and right.
❖ Room Mode: Just imagine you’re in a room, surrounded by percussion
instruments. Simply put, that’s what we call ‘Room Mode’.
While in all other modes the Stage is a X/Y coordinate system, here the
Stage represents a top view on a real recording room with the listener
in the center and the instruments around him. The borders of the Stage
acting like real walls.
Of course, the Room Mode is most realistic in Surround Mode, because
only there are the front and rear positions reflected in the resulting audio signal.
In Room Mode, Level, Ambience and Pan controls are linked together
to emulate the natural acoustic behaviour of a room. I. e. when you
move an instrument away from the center (listener’s position) to the
top right corner, the following things happen at the same time:
– Level slightly decreases.
– Ambience increases in level (less direct signal, more reflections from
the walls) and changes in character to match the surround position as
well as the exact distances between listener, instrument and walls.
– Pan moves all the way to the right.
– Front/Rear moves all the way to the front.
You can regard the listener—which in fact is the audio output—as being a surround
microphone setup at the listener position.
39
Page 40

The Mix Page
Horizontal Movement
Horizontal movement of Tracks on the Stage will always affect the panning
of the Tracks.
Occasionally Tracks may obscure each other on the stage. To select and bring a Track
to the front simply click its Track Tab.
Anytime a Track is moved on the Stage the relevant parameter knobs will move to re-
flect the changes.
The Track Mixer
Each Track used in a Style has its own Track Mixer containing the most
common and useful features you’ll need to set your Track mix.
To choose a Track to mix just click its Track Tab.
Mixing Strip
The Track Mixer for the snare is displayed.
You might find the Track Solo and Mute buttons useful when balancing your mix.
Most of the Track Mixer features are just like what you would find on a
mixing console or in your host application mixer.
EQ
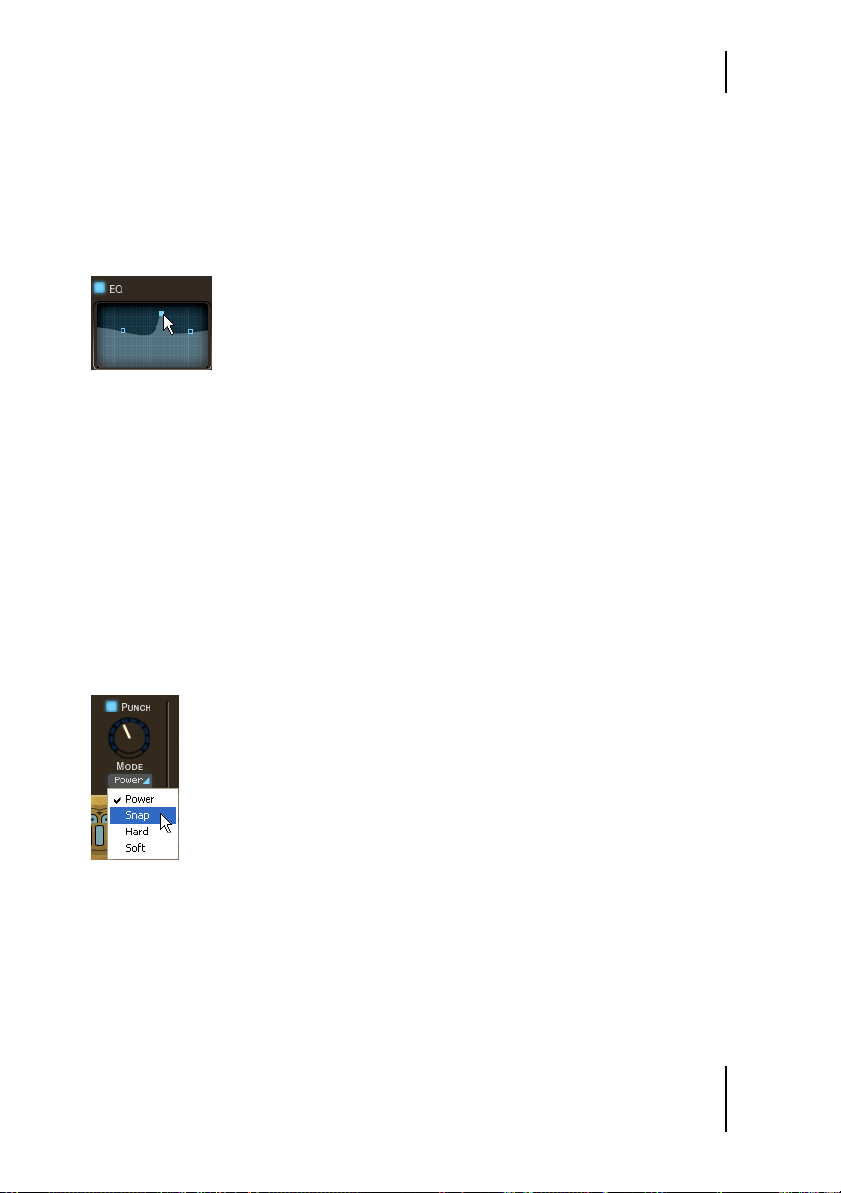
Each Track has its own three band equalizer. To EQ a Track simply click
and hold your left mouse button over any of the three blue handles in the
EQ display. Moving your mouse horizontally adjusts the center frequency
of the equalizer band, vertical movement controls the volume of the frequency area.
40
Page 41
The Track Mixer
Holding the [Alt] key and moving horizontally while holding the left
mouse button allows you to define the Q setting (or range of frequencies
affected) for the middle band of the equalizer.
[Control]-clicking a blue handle (Mac: [Cmd]-click) resets the Equalizer
band level to zero.
Eq
The EQ on/off button (top left corner) could be useful for comparing the effect of your
equalization on the original signal.
Punch
Punch is a very powerful and creative control, allowing you to change the
shape of an instrument’s attack and body. This could be used for example
to subtly emphasize the attack of a Douhola, to make the dynamic range of
the Sagat less extreme or to make a Bendir sound more processed and
electronic.
Punch
Punch has four modes, each with a distinctive character and sound shaping quality. To emphasize the effect of the Punch feature just turn the knob
clockwise; gain reduction is displayed by the meter surrounding the Punch
knob.
41
Page 42

The Mix Page
❖ Power: As its name suggests Power will make a Track sound more pow-
erful by controlling the volume of the attack portion of the instruments
in a Track and raising the level of the body of the instruments.
❖ Snap: This mode is useful to accentuate the attack of instruments, to
make them poke out of the mix.
❖ Hard: This a very strong compression setting that really forces the
quieter aspects of each percussion hit to become very loud.
❖ Soft: For a gentle amount of Punch control over a Track use the Soft
mode. This affects the attack and the body in equal amounts but doesn’t
have the force of the other Punch modes.
Using extreme amounts of Punch can lead to some surprising and interesting results.
Level
The Level control in the Track Mixer allows you to set the general volume of
each Track in the Style. This control (as with all others in the Track Mixer)
affects the whole Track for all Patterns used in a Style.
To change the volume of a Track for a particular Pattern, take a look at the Part Param-
eters section of this manual.
Pan
Places a Track within the stereo image and controls the left/right position
when working in surround mode.
Graphical stereo panning and surround position placement is possible using the Stage.
Ambience
To set the send amount for any Track to the Master Ambience, use the Ambi-
ence Send feature in the Track Mixer.
The controls for the Master Ambience are found on the Play Page.
42
 Loading...