

Wixey WR510 User Manual
1
NOTICE
:
FIG 1
FIG 2
FIG 3
FIG 4
Wixey
PLANER READOUT
MODEL WR510
machine before installing the Planer Readout on it.
Always turn off the power and unplug your
INSTRUCTIONS
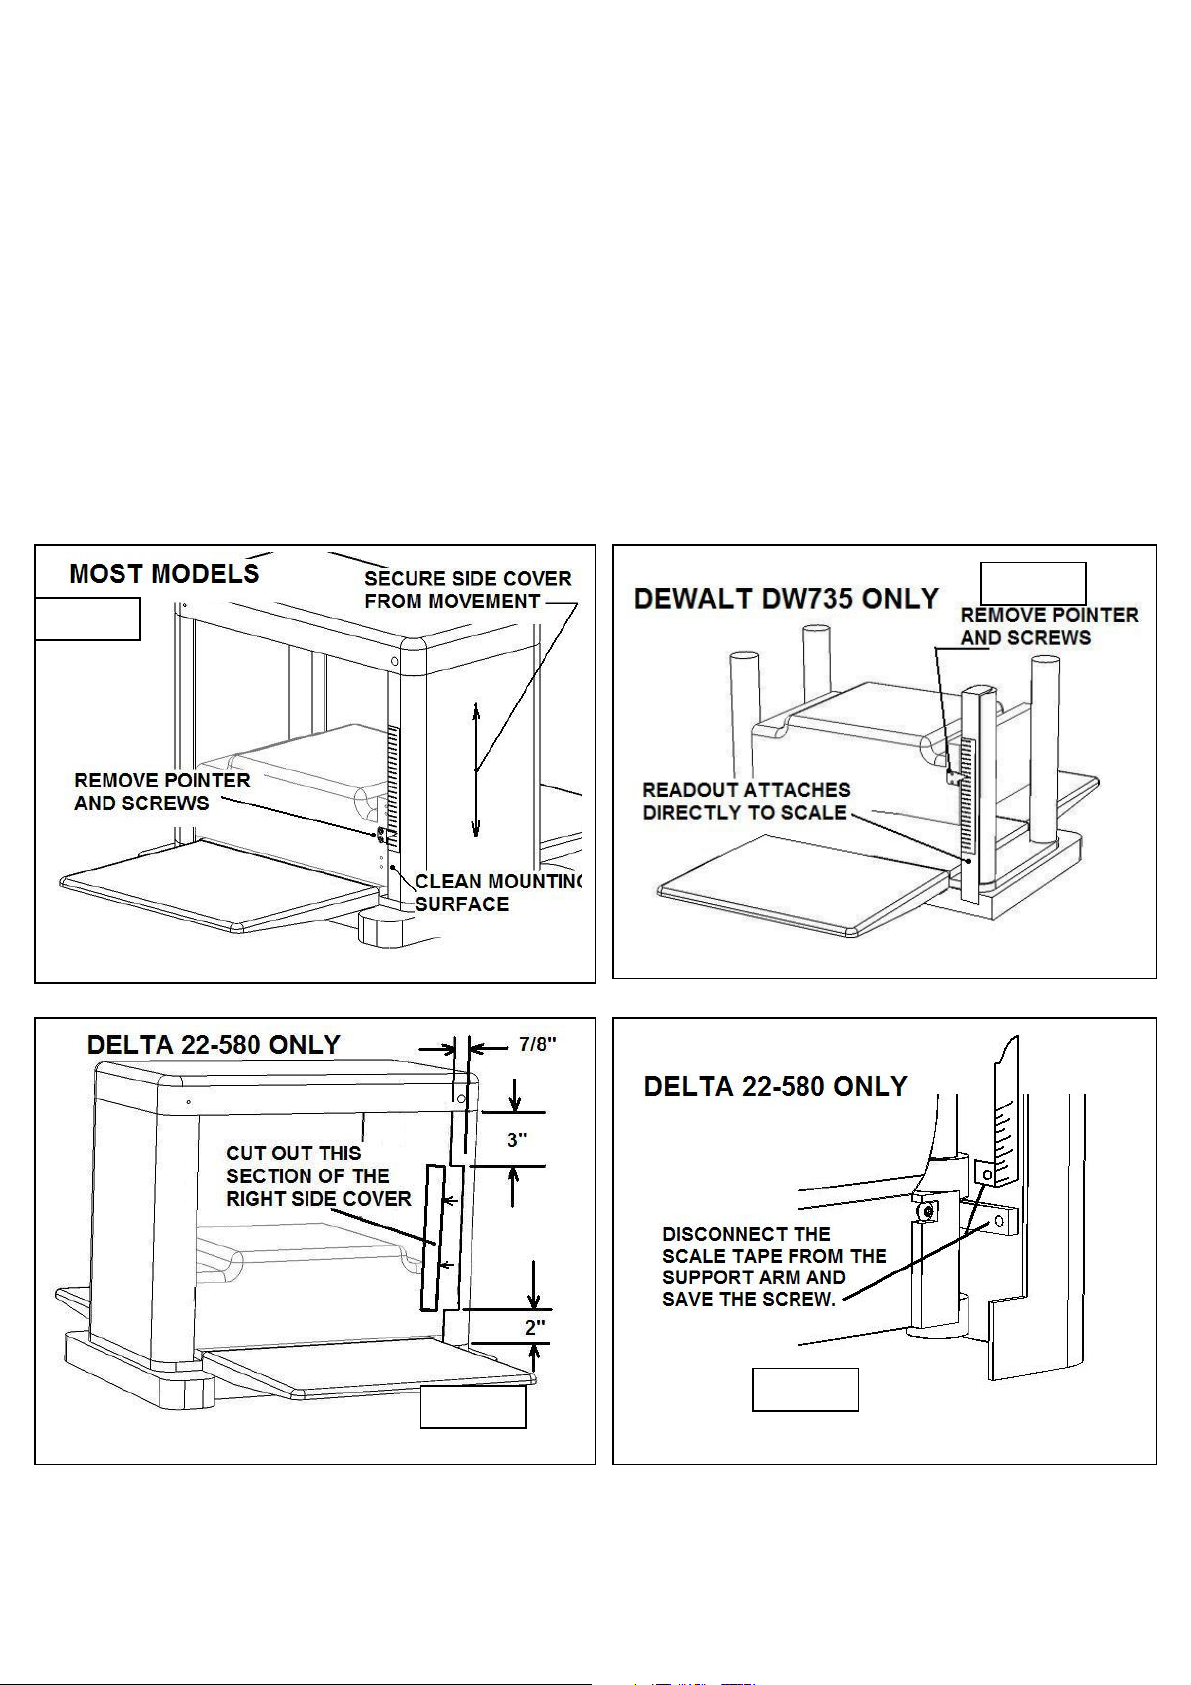
1- Prepare your Planer
If your planer has preset depth stops, lower the cutter head until it contacts any one of the stops. If it does not
have a preset stop, lower it as low as it will go which is usually 1/8”.
Most models will refer to FIG 1. For the Dewalt model DW735 refer to FIG 2 and for the Delta model 22-580
refer to both FIG 3 and FIG 4.
2
FIG 5
FIG 6
FIG 7
FIG 8
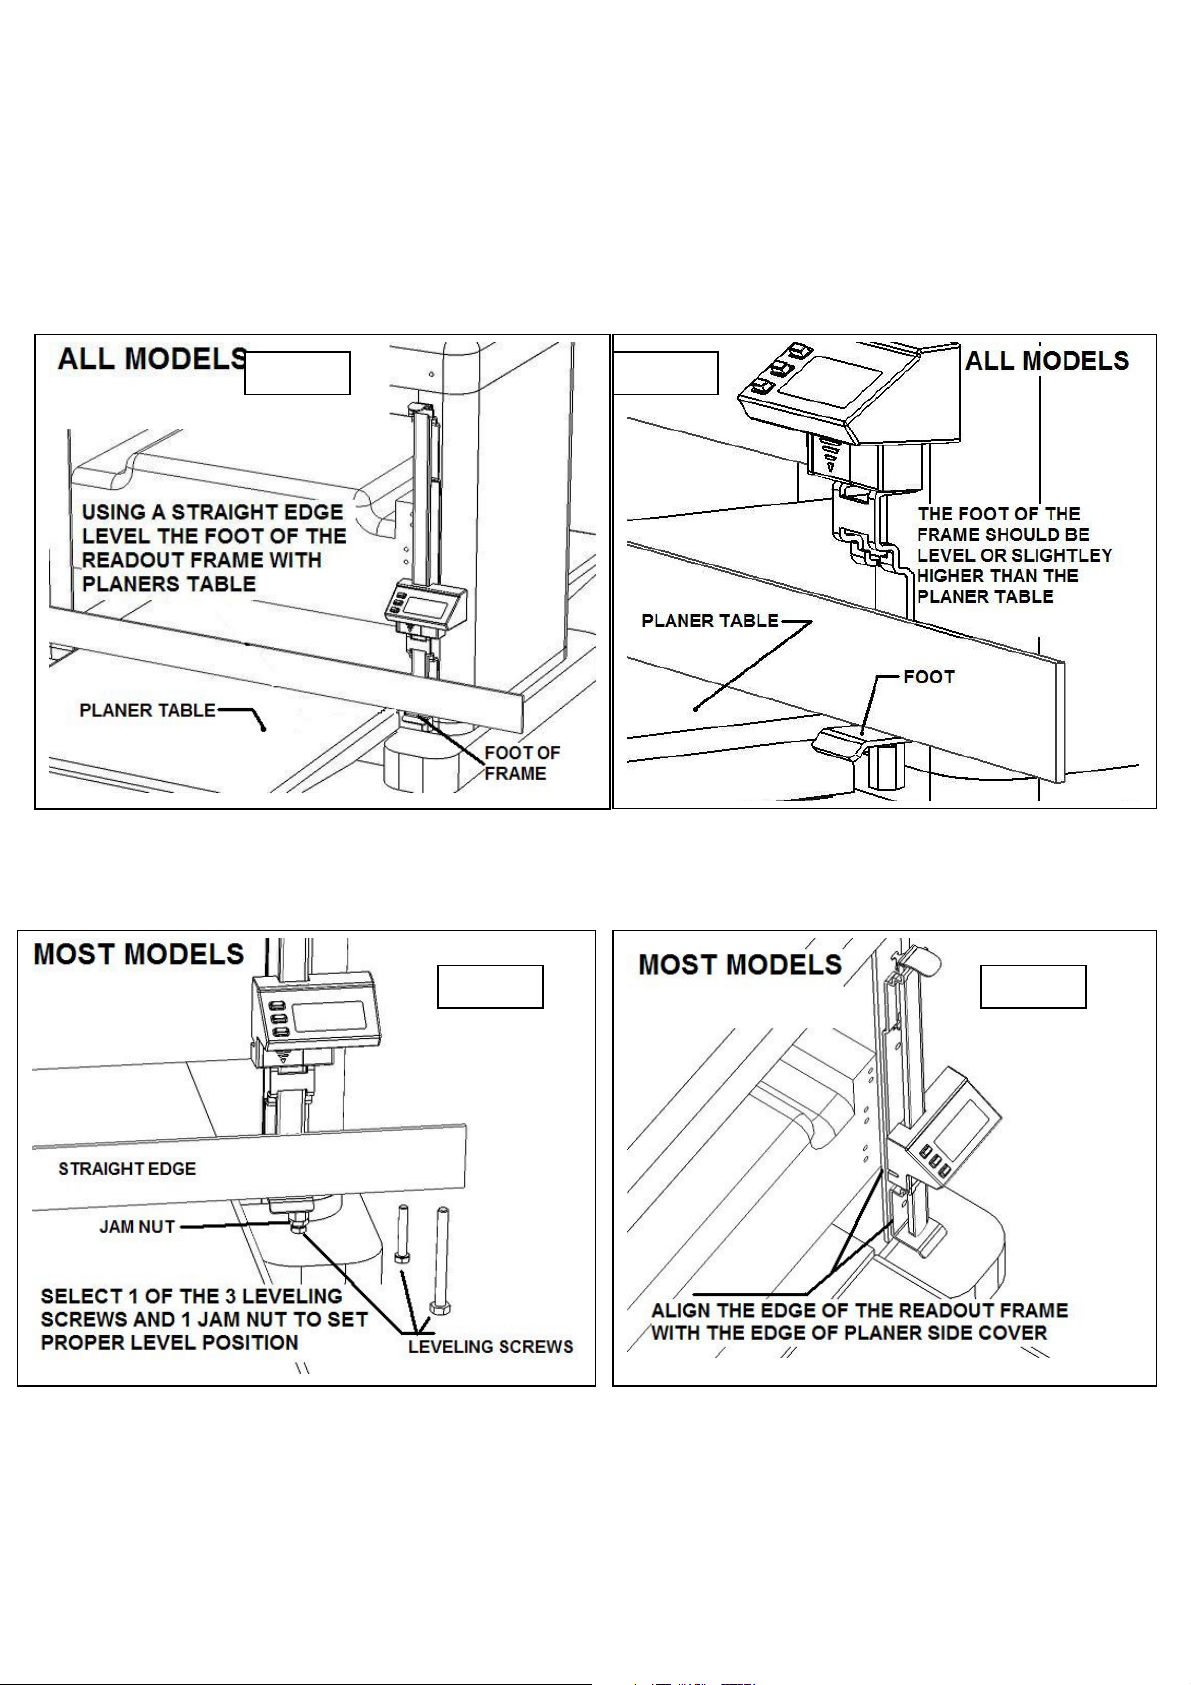
2- Position the Readout assembly
Although the WR510 Planer Readout will function properly mounted many ways, it is recommended that the
foot of the frame is mounted level to or slightly above the surface of the planer table of your planer ( FIG 5 and
FIG 6). It is very important that the foot is never lower than the planer table as it will cause calibration problems
(see trouble shooting in section 10)
Most planer models have a portion of their base casting that can support a leveling screw as shown in FIG 7.
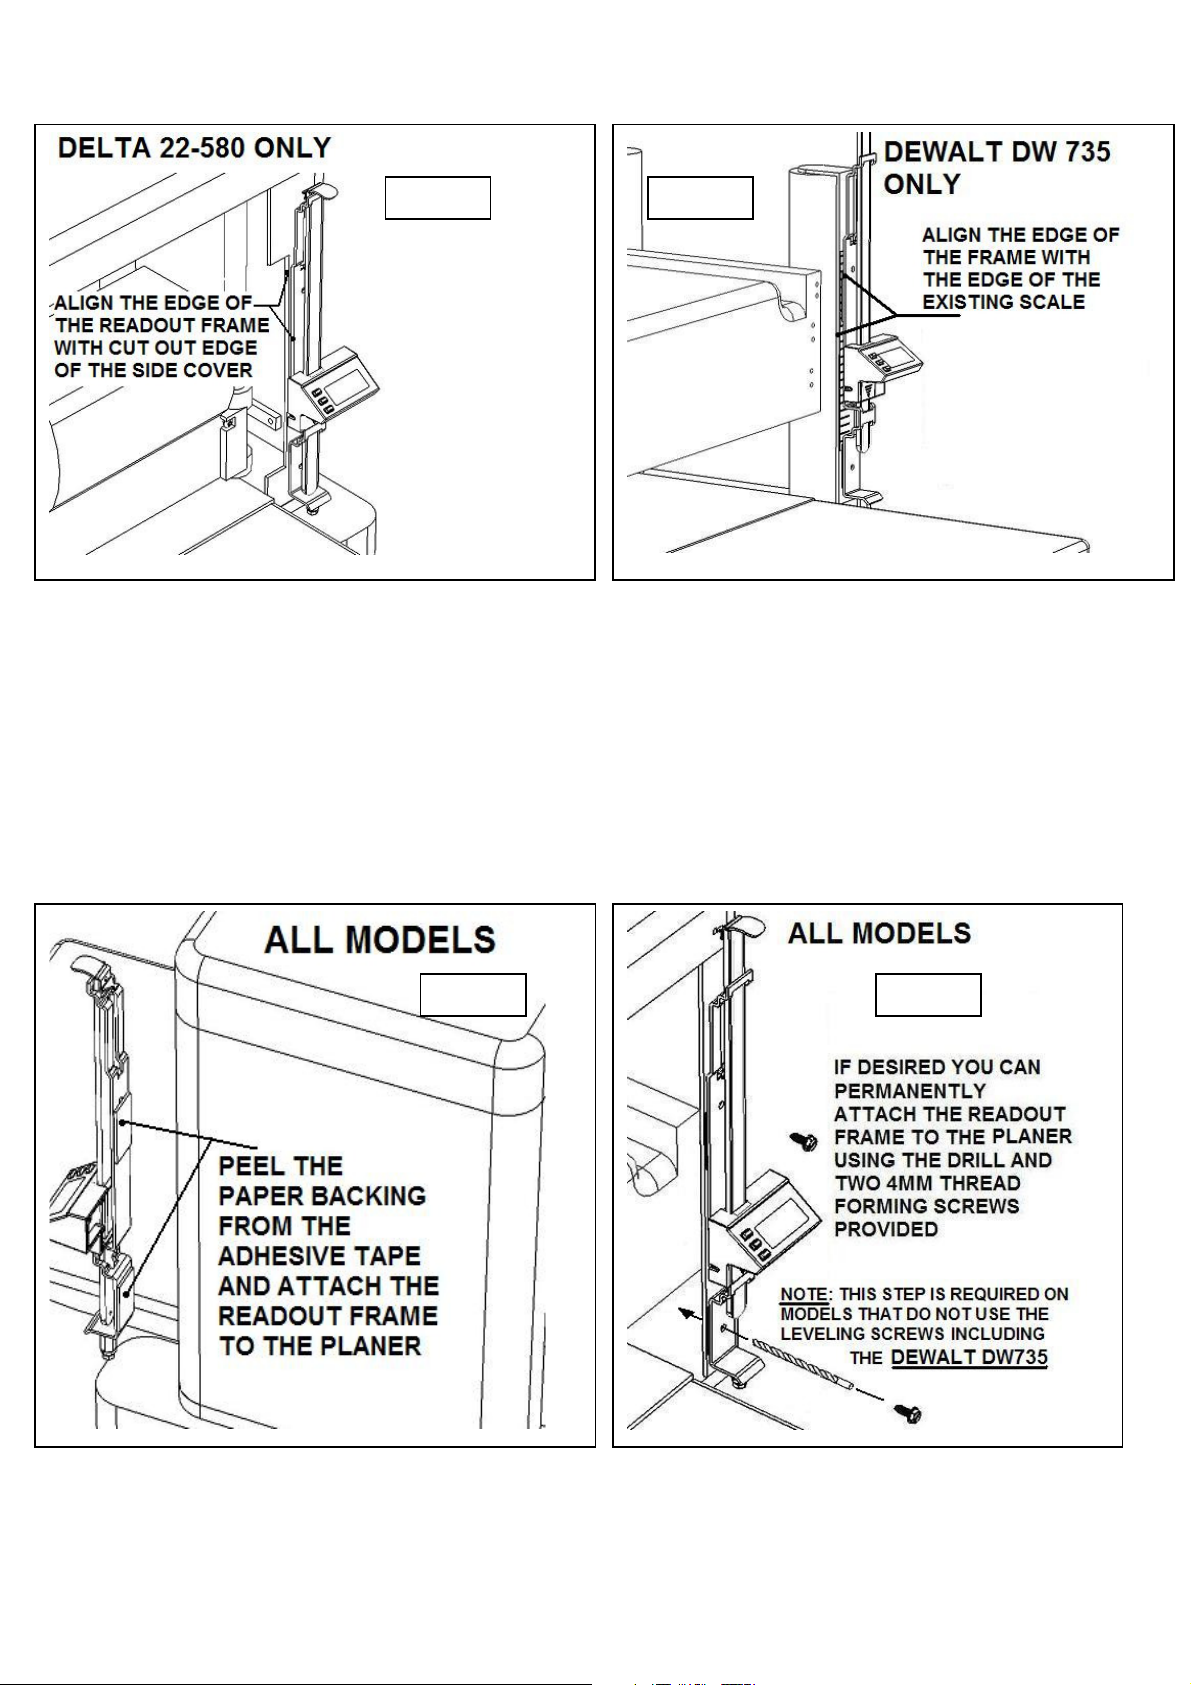
Typically the frame of the Planer Readout will align with the edge of the side cover as shown in FIG 8. See FIG
9 for aligning the frame with the Delta model 22-580 and FIG 10 for the Dewalt Model DW735
3
FIG 9
FIG
10
FIG
11 FIG
12
3- Attach the Readout assembly to your Planer
Peel the paper backing from the foam tape and attach the Readout assembly to your planer as shown in FIG
11. If you are using a leveling screw the high strength foam tape will secure your Readout assembly indefinitely.
For installations that do not use the leveling screw such as the Dewalt model DW735 and for a more secure
mounting you can permanently attach the assembly using thread forming screws as shown in FIG 12.
 Loading...