

Witbee WEP-9716 User Manual

Instruction Manual
Model: wep-9716
Congratulations on purchasing your Witbee Personal Tablet Pc! To get the most use of your purchase,
please take the time to carefully read through this manual.
1. Before using the Device
Before using the device, please read this chapter and teach your kids about these information. For further
details, please refer to the safety instructions and announcement.
1.1. Acknowledgement
Thanks for your purchase of our product. The product is a Table Pc, with a touch screen native resolution of
1024x800 pixels. It is designed with Boxchip A10 high speed processor and 1GB,DDR III and 16GB flash storage
memory. The operating system is Android 4.0.
The product has built in WIFI, a front and back facing camera, is designed to provide a fast and easy internet
experience, and displays HD video and images.
1.2. Precautions
z Please always keep the device dry. To avoid damaging the device, please keep the device, battery and
charger from water and moisture, and don’t operate the device or charger when your hands are wet.
z Do not drop or strike the device against a hard surface.
z Never disassemble the device or its accessories as this will immediately VOID any and all warranties
you have for the device.
z Never use the device when operating a vehicle.
z In hospitals and areas vulnerable to EMI such as an airplane, please follow the area’s posted rules and
regulations regarding electronic devices.
z To avoid electrical damage, please power off the device before entering an area with unshielded high
voltage.
z Subjecting the device to an area with a powerful magnetic field may erase all data on the device.
z This device can connect to the internet, and has access to chartrooms, messenger programs, etc.
Please always supervise children using the device.
z Please comply with your areas rules and regulations regarding the use of electronic devices, and
respect others’ privacy and legal rights while using the device.
2. Introduction
2.1 Charging the Battery
When you first receive the device, please fully charge the battery before use. It takes approximately 4 hours to
completely charge a drained battery. When charging, please only use the supplies A/C wall adapter.
2.2 Status and Reminders
Reminder icons:
1
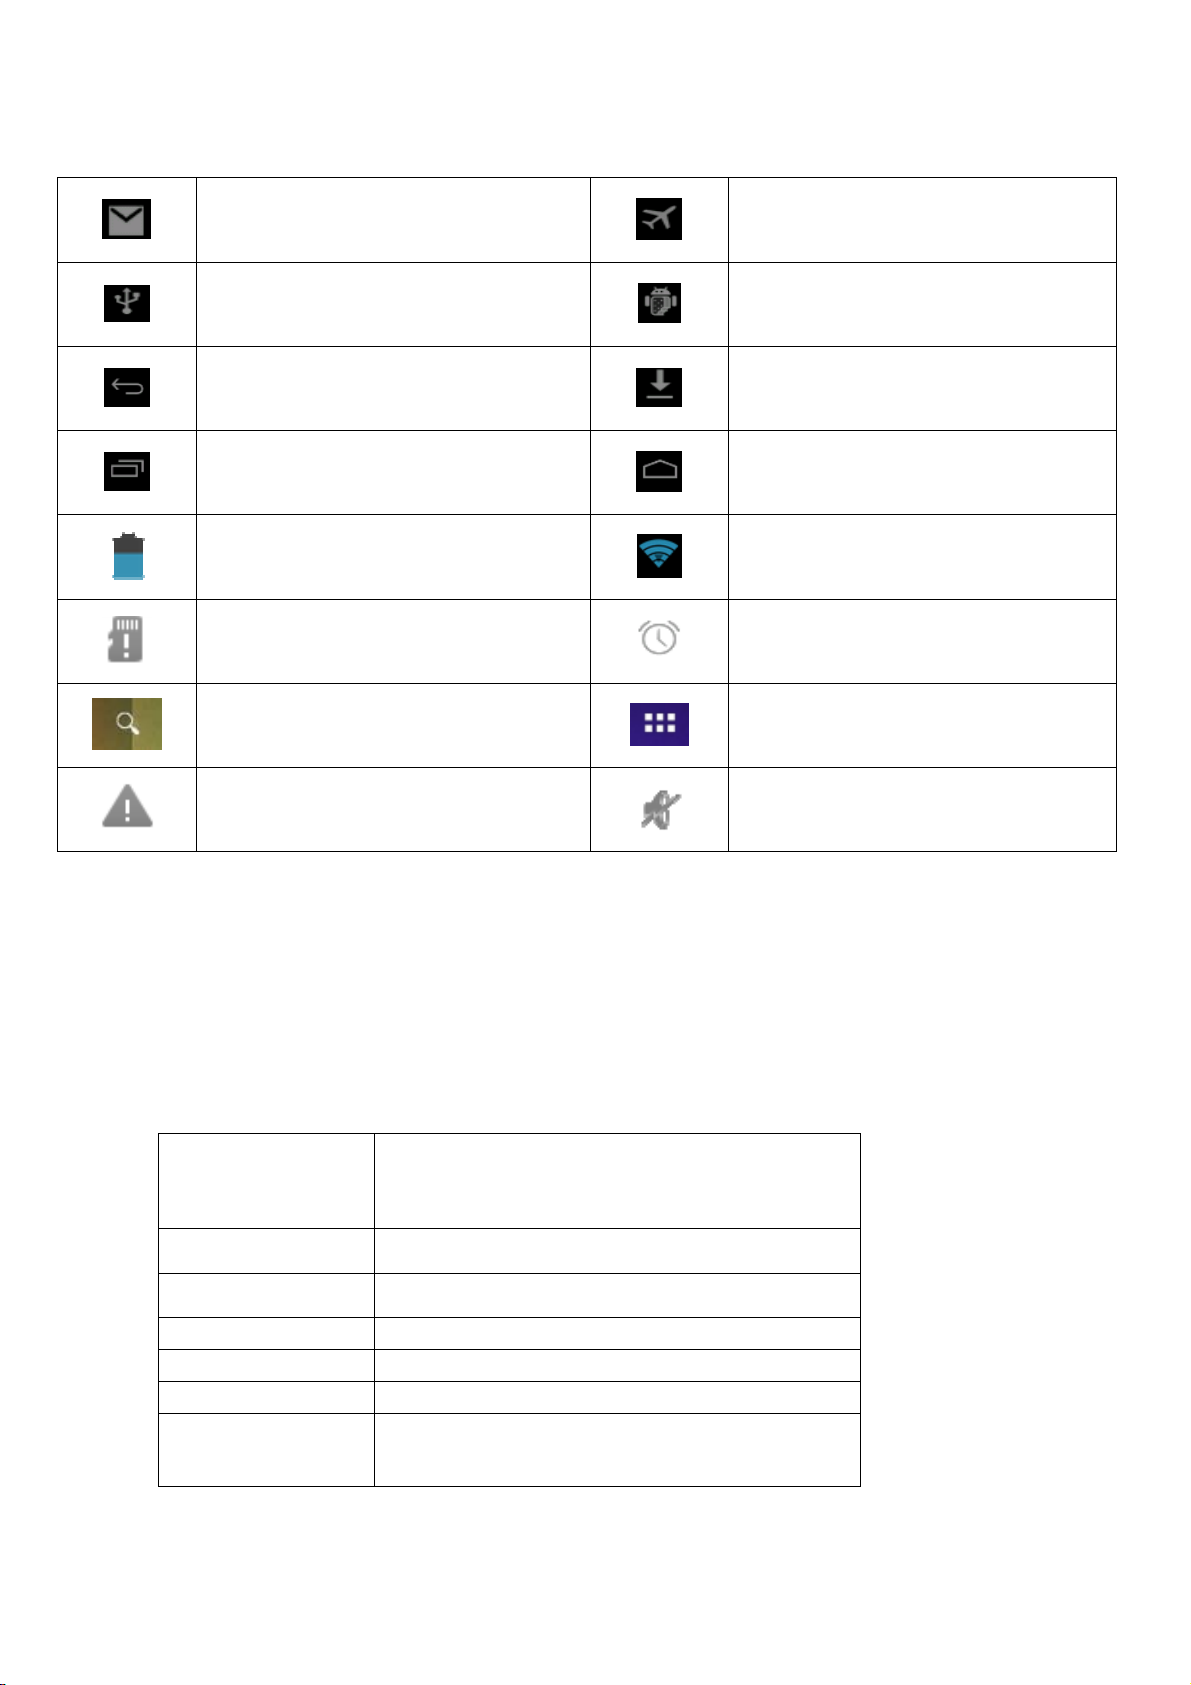
When an icon appears in your reminder window (lower right hand corner of your screen) you can tap the icon
to open your reminder. Below are several of the most common reminder icons.
New email
USB is connected
Return icon
recent application icon
Battery volume mark
No SD card
Google search
airplane mode
USB adjustment is connected
downloading
Home icon
WIFI signal icon
Alarm on
Application icon
General Notice
2.3 Button and touchpad functions
functions:
Power(power)
Vol +(up)
Vol-(down)
CHARGER PORT
HDMI PORT
EAR JACK
Back icon(back)
Press and hold this button to turn the device on
and off. Tap this button briefly to put the player in
standby or wake the player up
Press to increase volume
Press to decrease volume
D55V 2A IN
1080P HDMI
3.5MM ear phone
tap this on any screen to return to the previous
screen.
Mute
2
2.4 power up and Shut down
Power up
Press and hold the Power button for three seconds to power on..
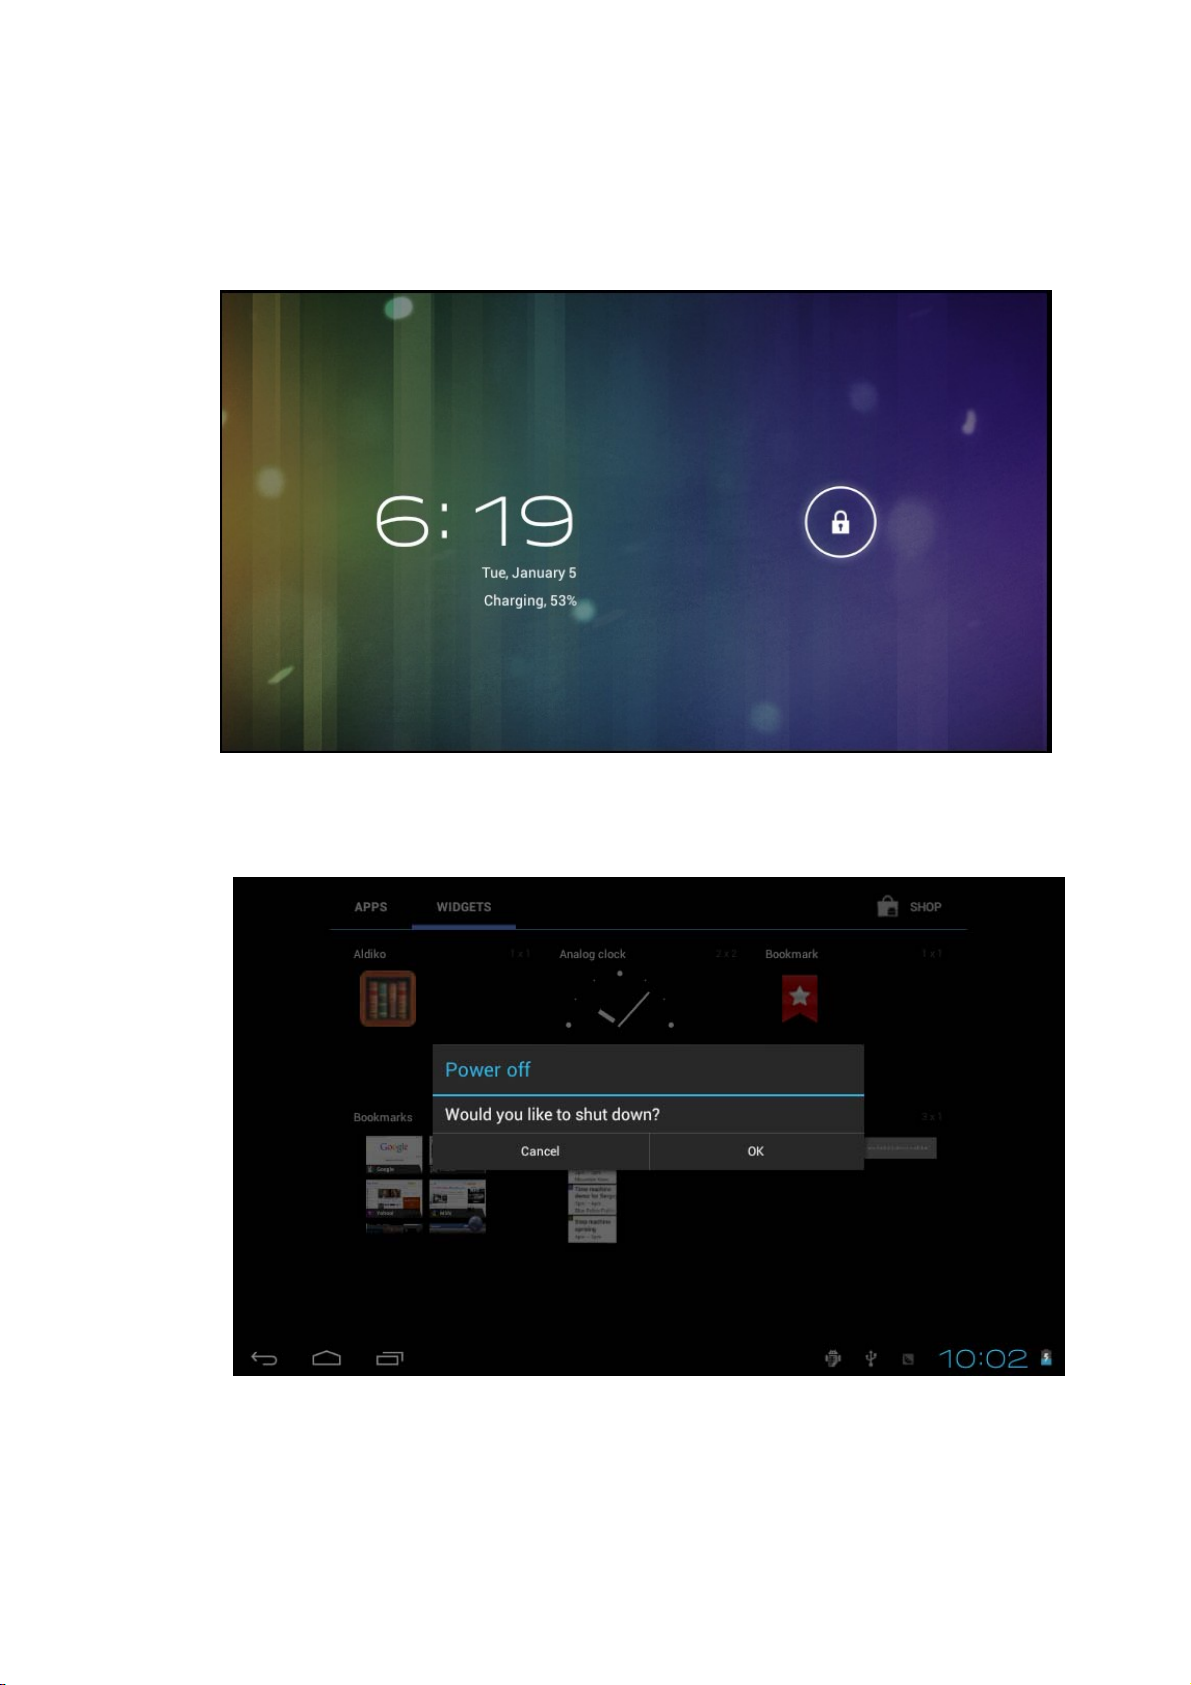
Shut down
Press and hold the Power button for 3 seconds, it will popup shut down window. Tap “ok” to confirm the power
off, or tap “Cancel” to continue using the device.
Standby mode
Tapping the power button will place the device in standby mode, tapping it again will wake the player back up.
Please note that if the player sits idle, the device will enter standby mode automatically to conserve battery
life.
3

3. Main interface UI
Note- To scroll the screen left, place your finger on the left side of the screen and slide it to the right. To
scroll right, place your finger on the right side of the screen and slide it to the left. To scroll up,
place your finger at the top of the screen and slide it down. To scroll down, place your finger at the
bottom and slide it up.
The main portion of your UI is referred to the “Desktop”
The second most used portion of your UI is the apps menu, accessed by tapping the apps icon
main menu.
on the
3.1 icon and application management
4
1) To move the icons on the Desktop:
Press and hold an icon in your apps menu to drag it to your desktop. Once you have reached the location
you want to drop the icon, let go of the screen.
2).Delete the icons on the desktop
Touch and hold desktop icons, then drag it to the
icon from your desktop, the app will still be located in your apps menu.
“Remove” icon. Please note that this will only delete the
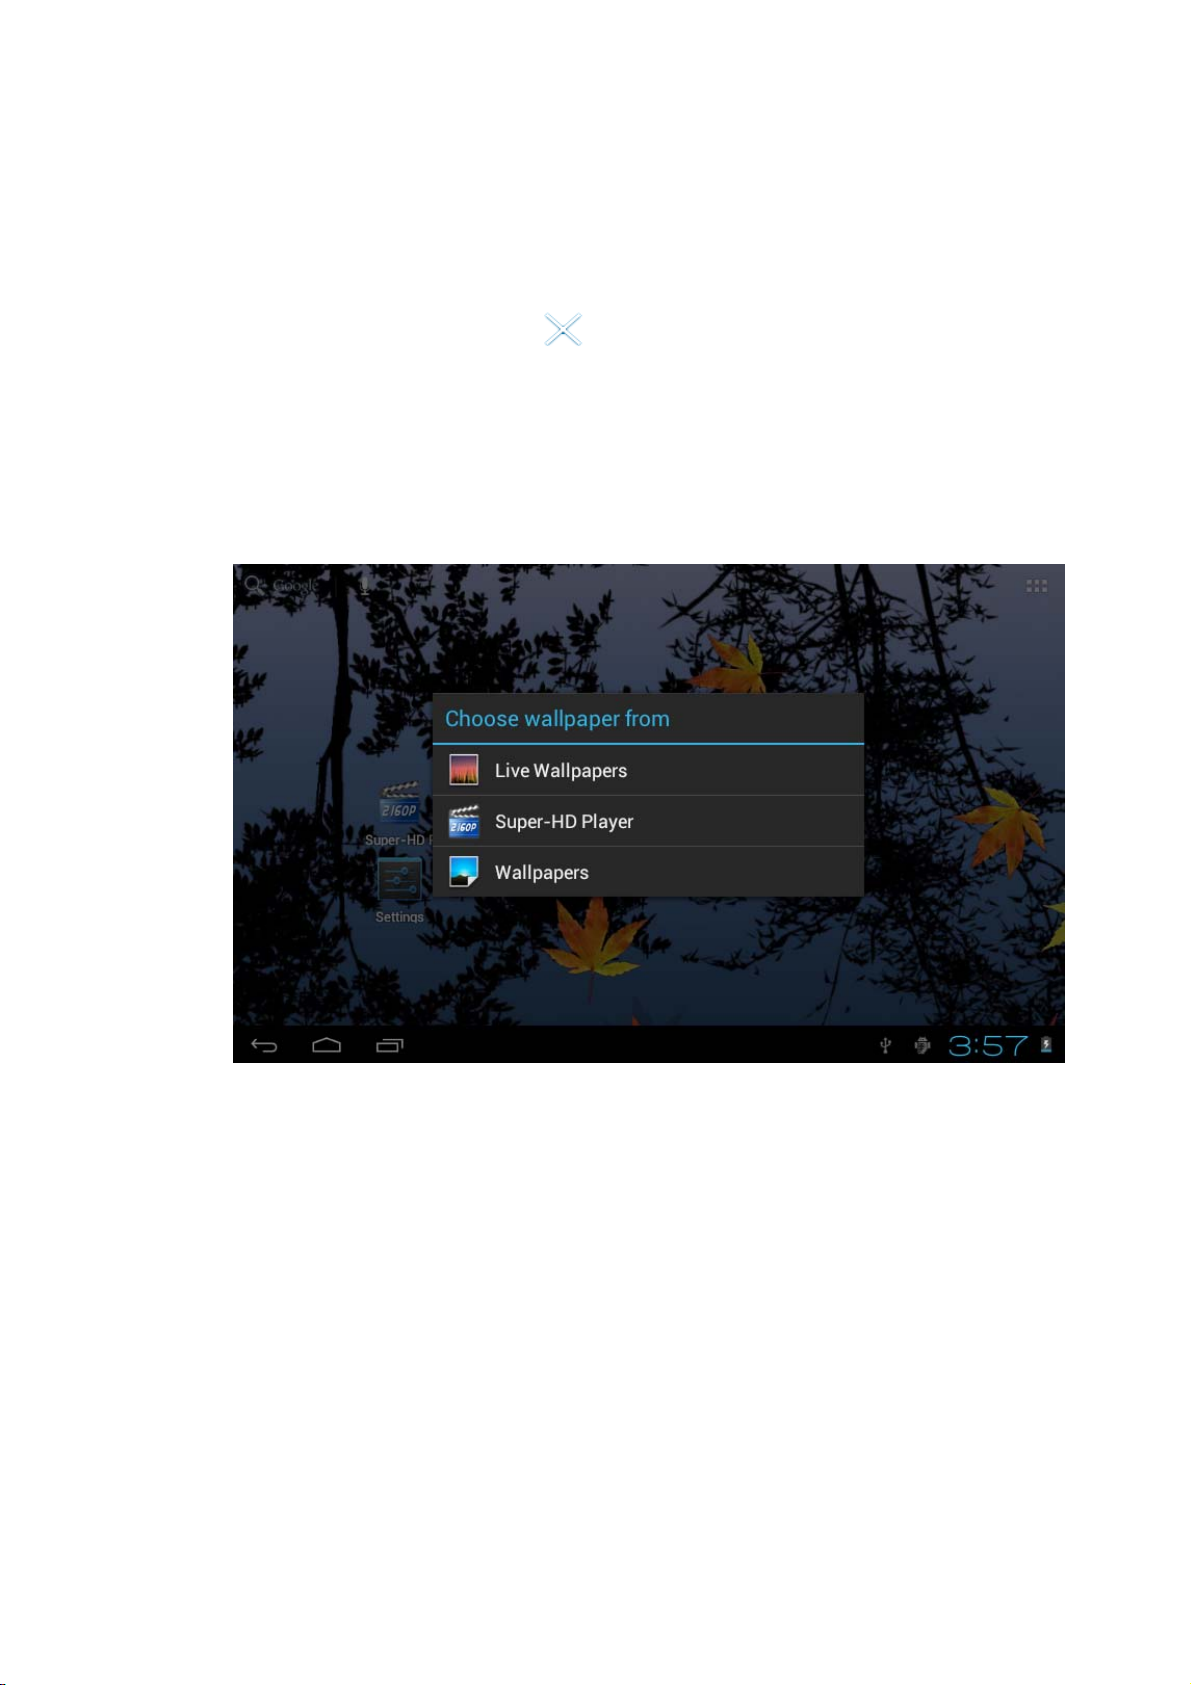
3.2 Change the desktop wallpaper
1)Touch and hold an empty spot on main screen, a window will open with several selections.
2)select the image gallery or wallpapers gallery to choose image.
5
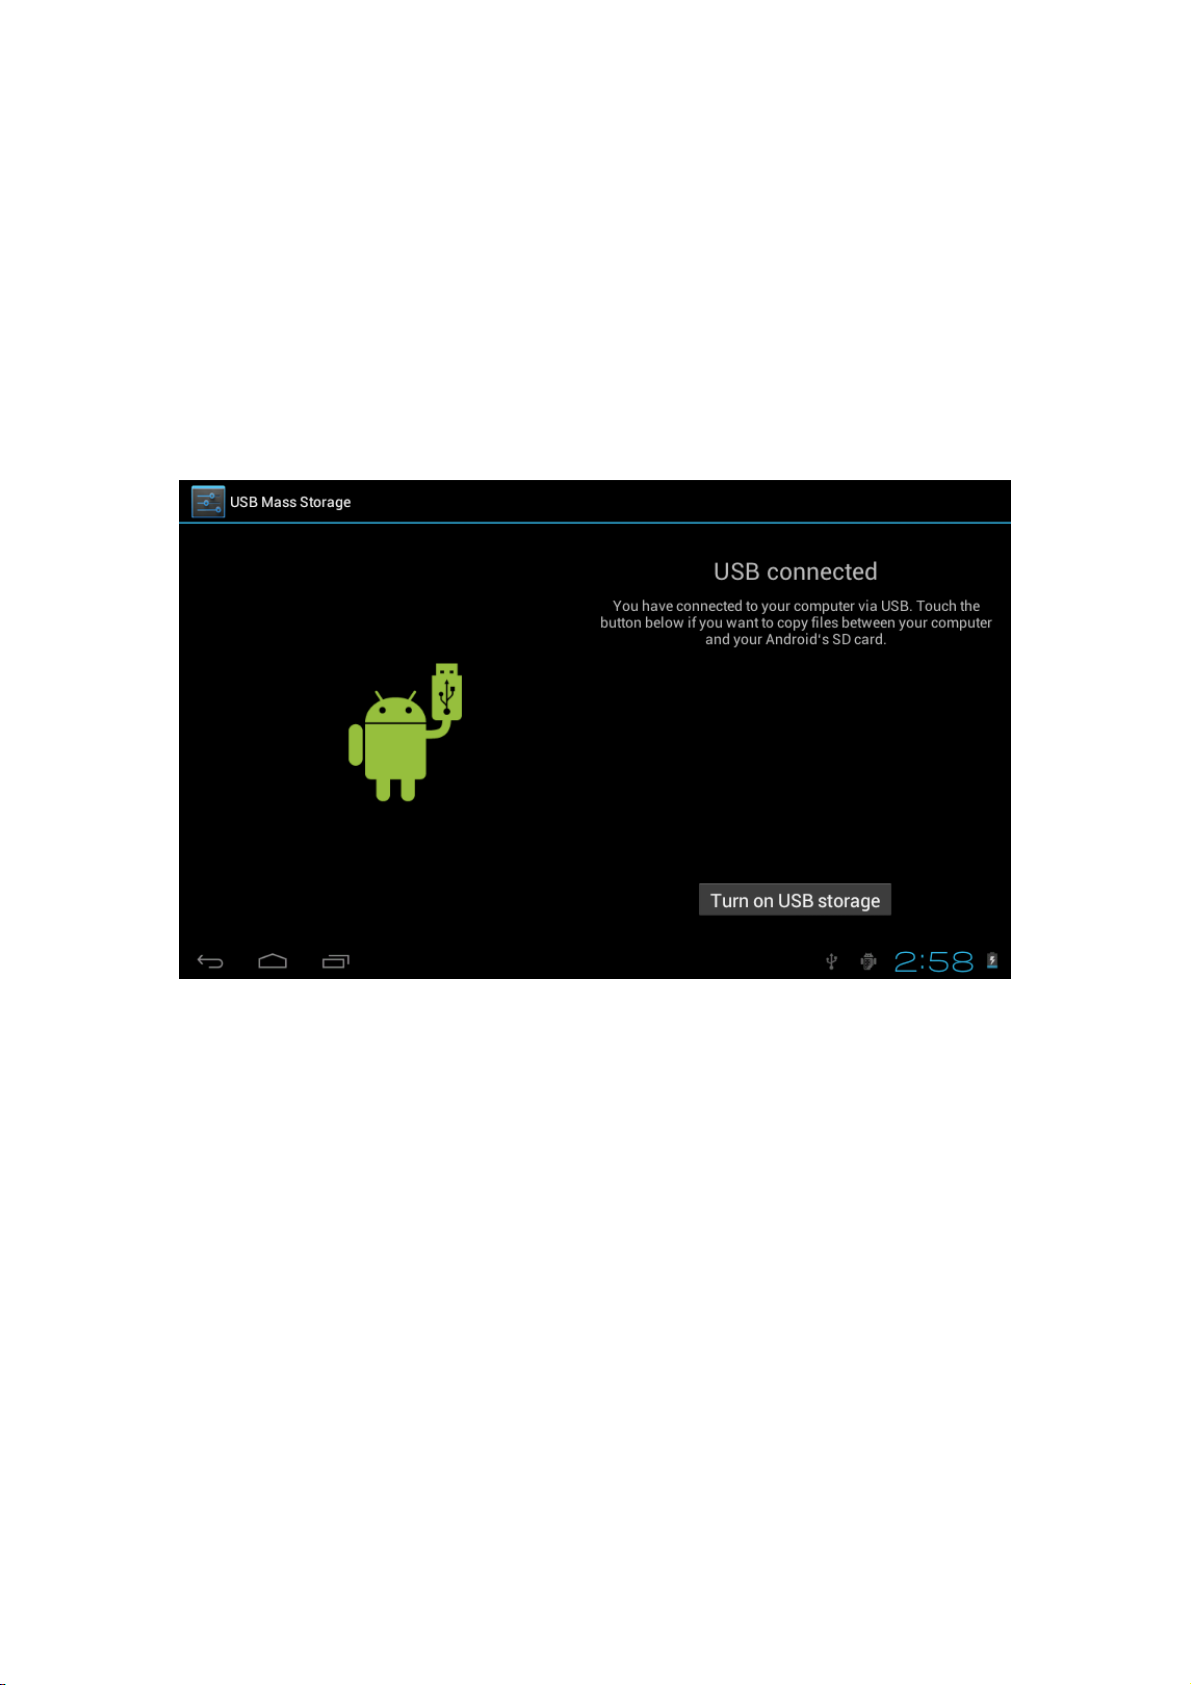
4. USB Connection & input words
4.1 USB Connection
1) when connected to a computer via USB, the below window will open. Select “Turn on USB storage” and the
device will act as a removable disk drive, allowing you to add ro delete files to both an inserted SD card
and the internal memory.
.
6
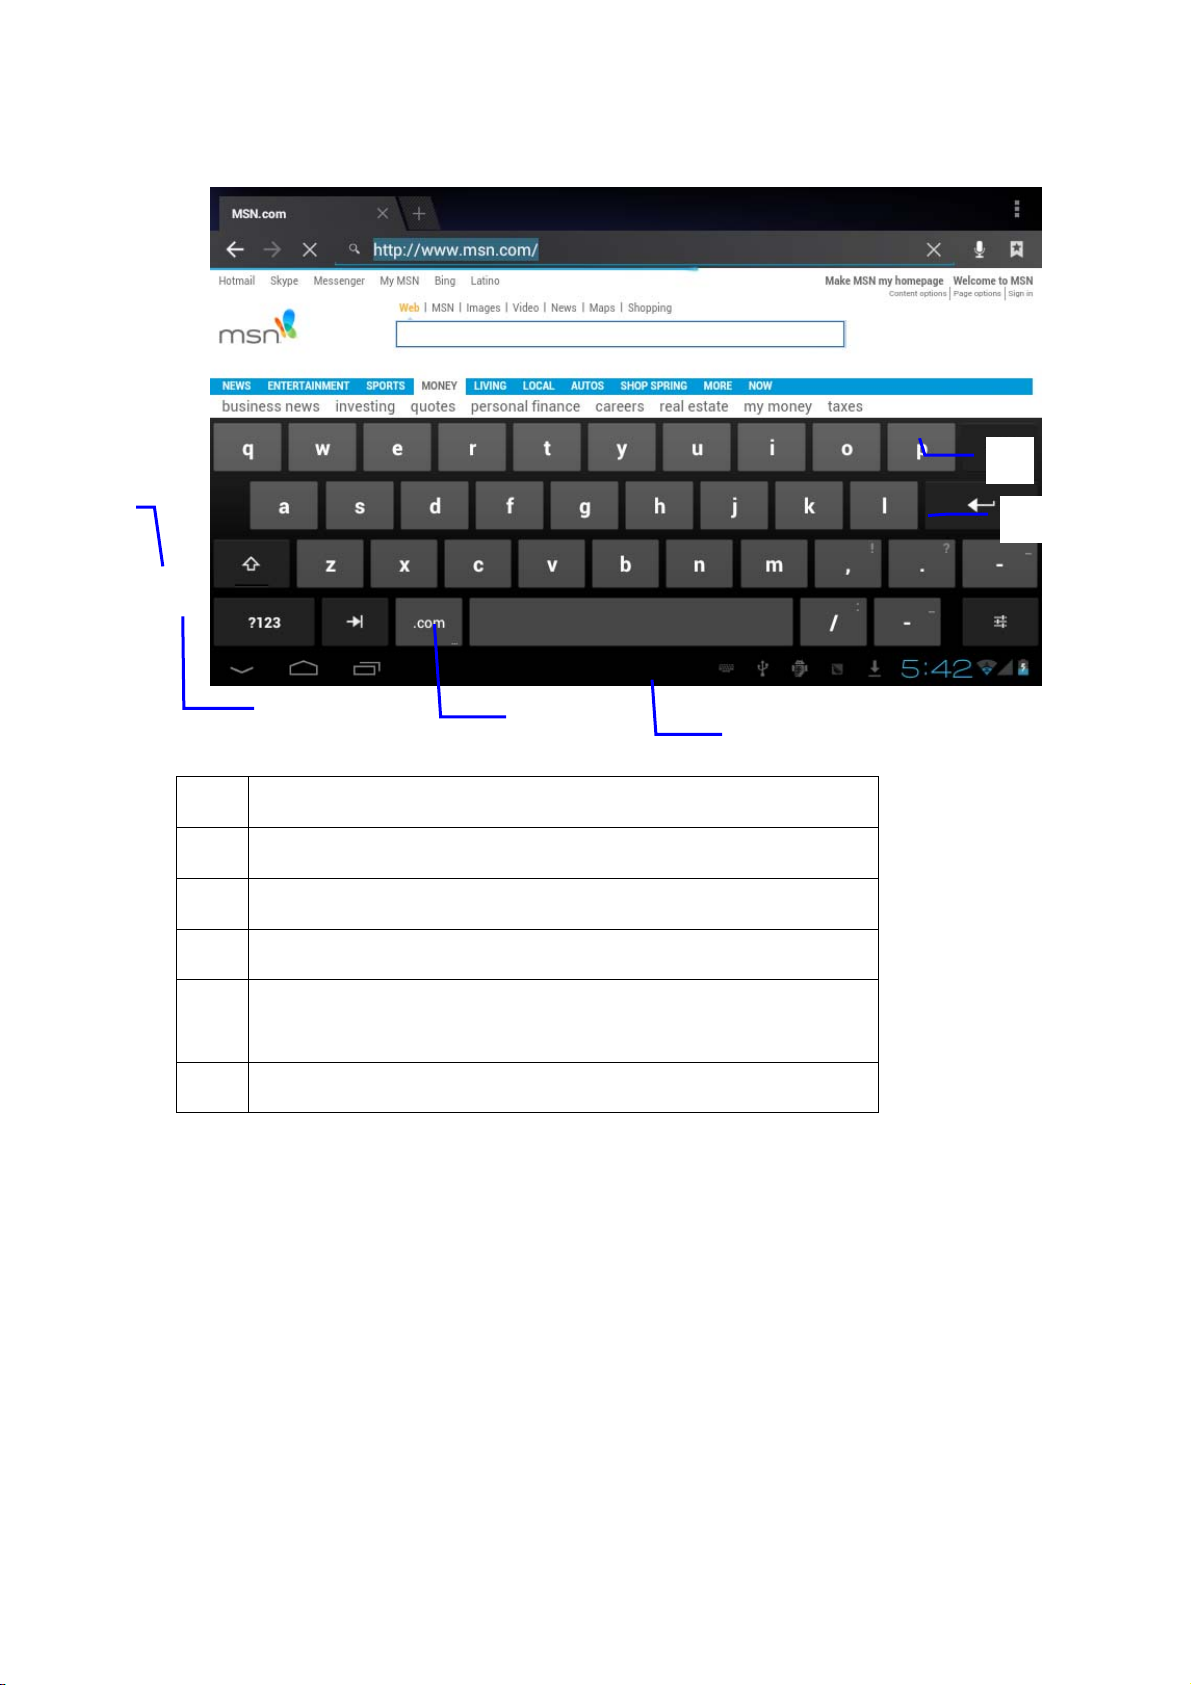
Using the Android keyboard
⑥
⑤
①
②
switch between caps and lowercase letters
1
Switch between letter and symbol/number mode
2
spacebar
3
Enter button
4
Delete- tapping once will delete the last input character, press and
5
hold to delete all entered characters
Select a different Keyboard (if installed)
6
③
④
5.Basic settings
5.1 Voice and display
1) Sound and volume setting
1.Tap the setting icon.
2.Tap Sound.
3.Tap volume to adjust the volume for music and video.
4.or press “VOL +” or “VOL – Button” to adjust the volume.
7
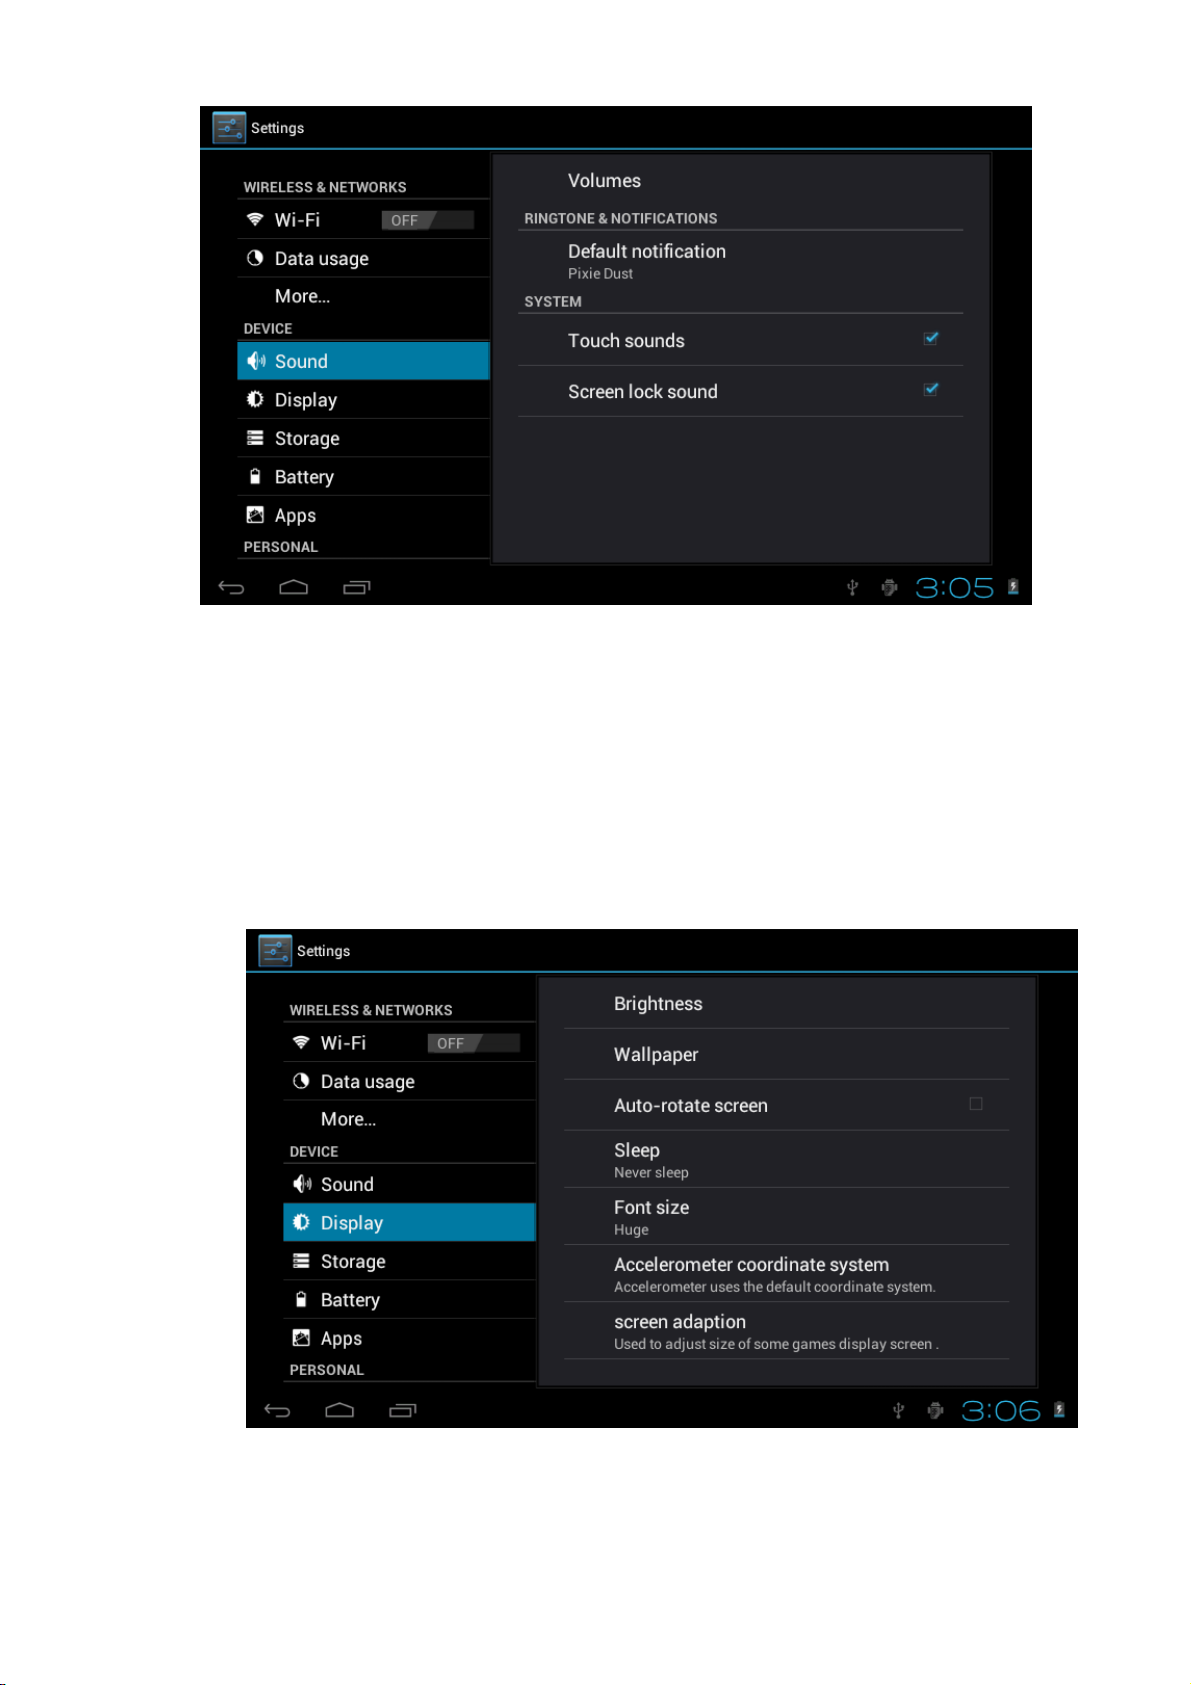
2) Display setting
Adjust the brightness of your screen
1. Tap the setting icon.
2. Tap displayÆTap brightness, a slide bar will open. Slide this bar to the right to increase brightness, and to
the left to decrease brightness
3. Tap OK.
5.2 Adjust screen standby time
1). Tap the setting icon.
2). Tap display->Tap “Sleep”, select the amount of idle time you want to pass before the device enters standby
8
 Loading...