

Page 1
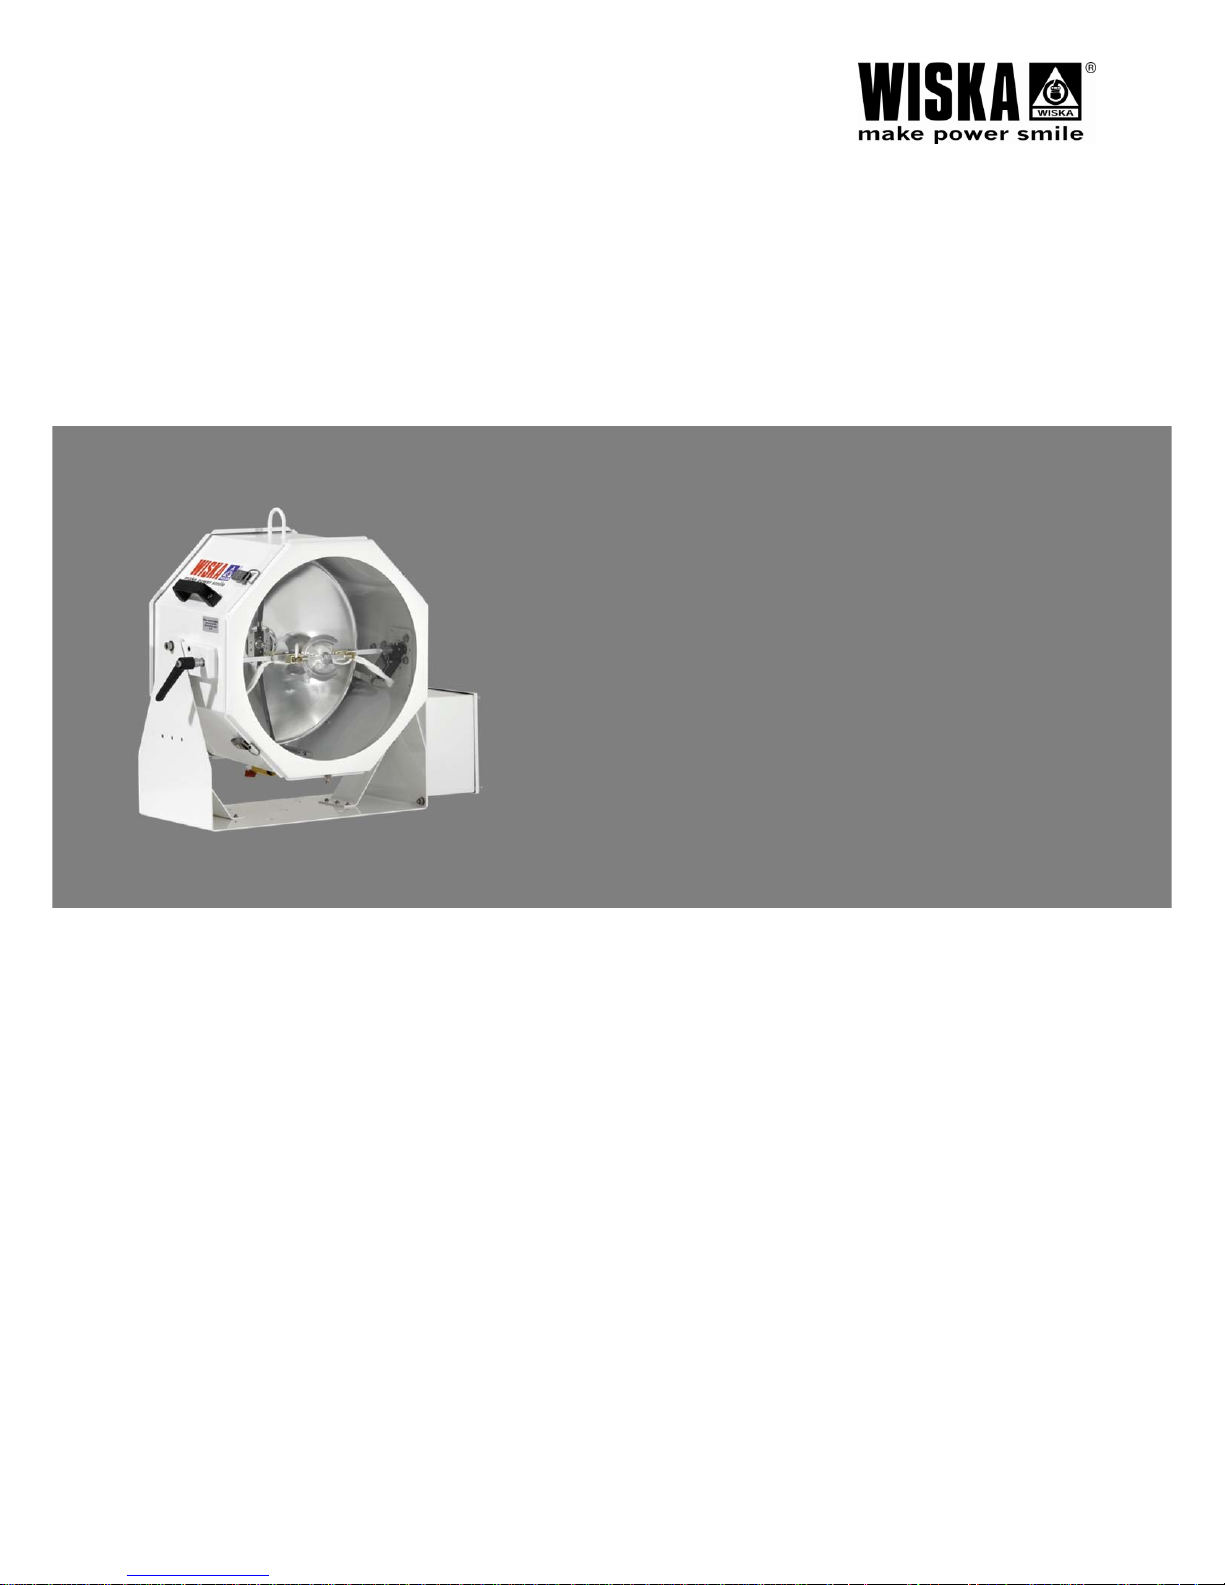
OPERATING INSTRUCTIONS
SUEZ CANAL SEARCHLIGHT
SKS 575
230 V 50/60 Hz
Page 2

50100935001_SKS-575(Ver2)Rev.02112012E About these instructions
2
Contents
1. ABOUT THESE INSTRUCTIONS .................................................. 3
1.1 Symbols and guidance signs in these instructions ......................... 3
1.2 Who are these instructions for? ...................................................... 3
2. SAFETY .......................................................................................... 4
2.1 General information ........................................................................ 4
2.2 How to handle metal halide lamps ................................................. 4
2.3 Protective measures in case of a broken lamp .............................. 5
2.4 Safety devices ................................................................................ 6
2.5 Operating conditions ....................................................................... 6
2.6 Maintenance / Cleaning .................................................................. 6
3. AN OVERVIEW OF THE UNIT ...................................................... 7
3.1 Layout drawing ............................................................................... 7
3.2 Technical data ................................................................................ 8
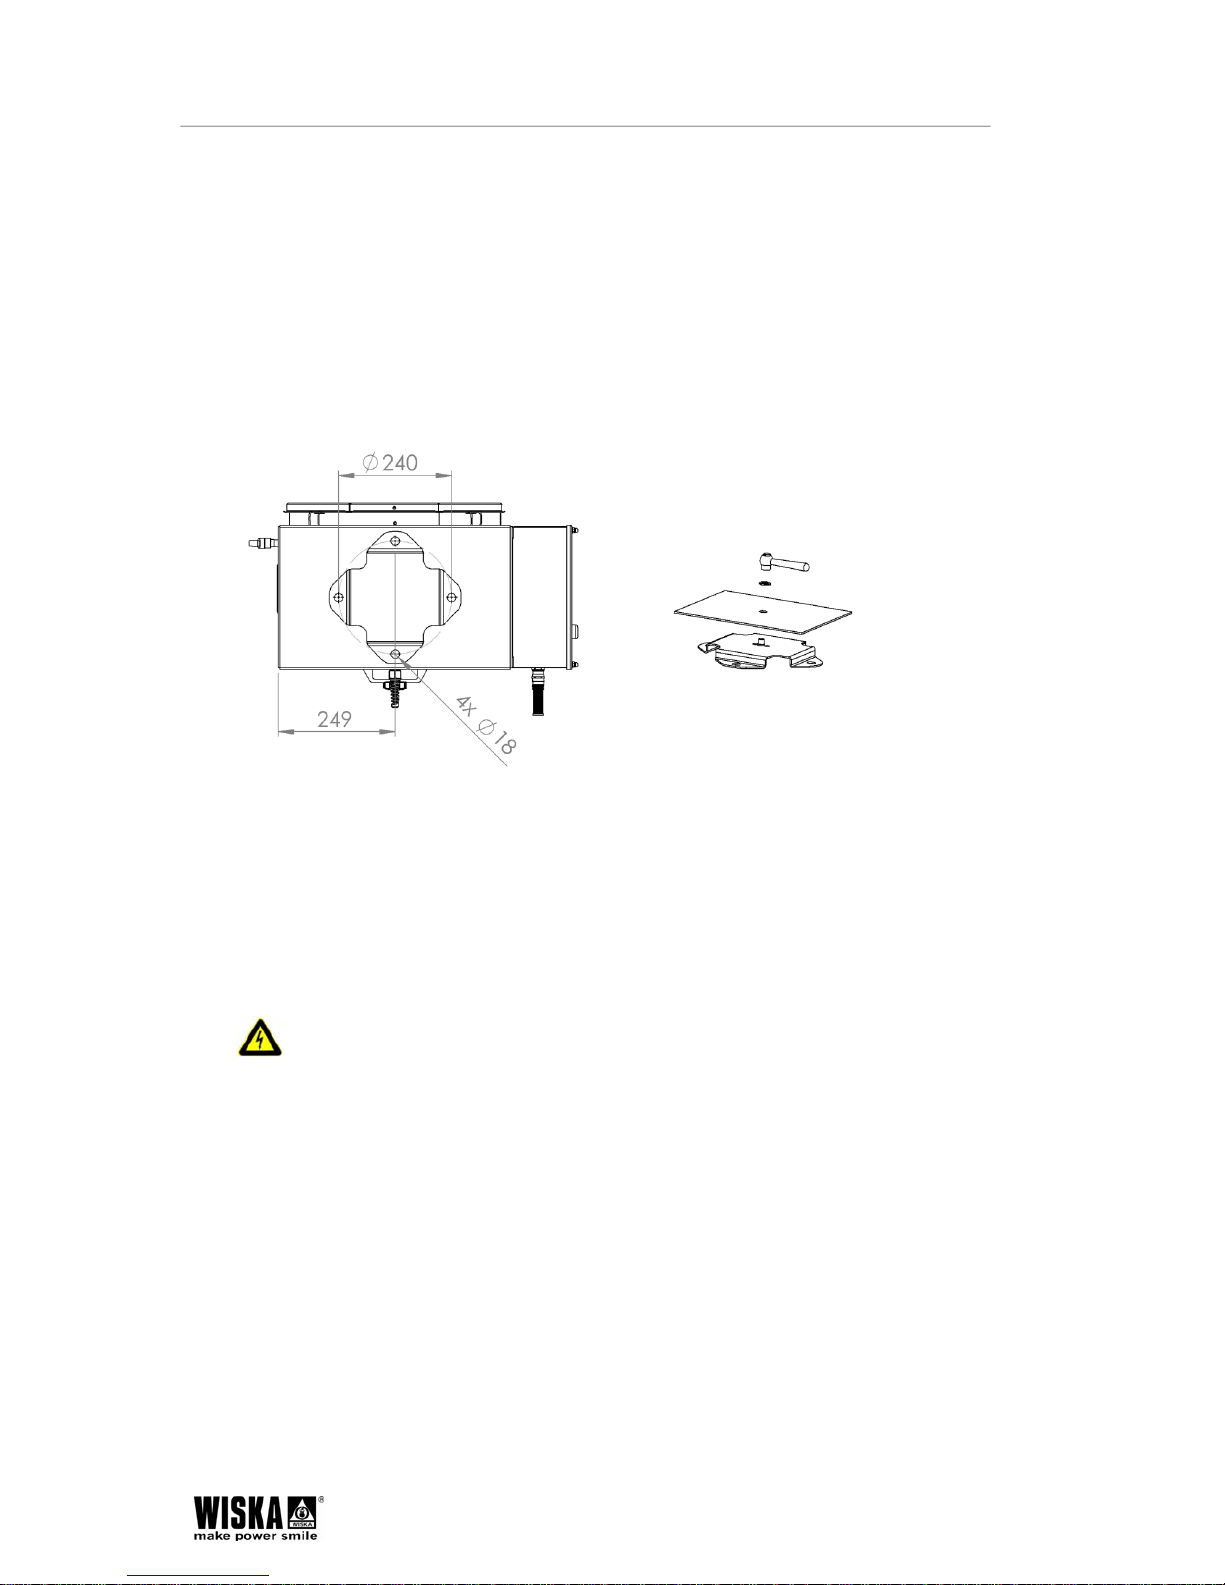
3.3 Dimensions ..................................................................................... 9
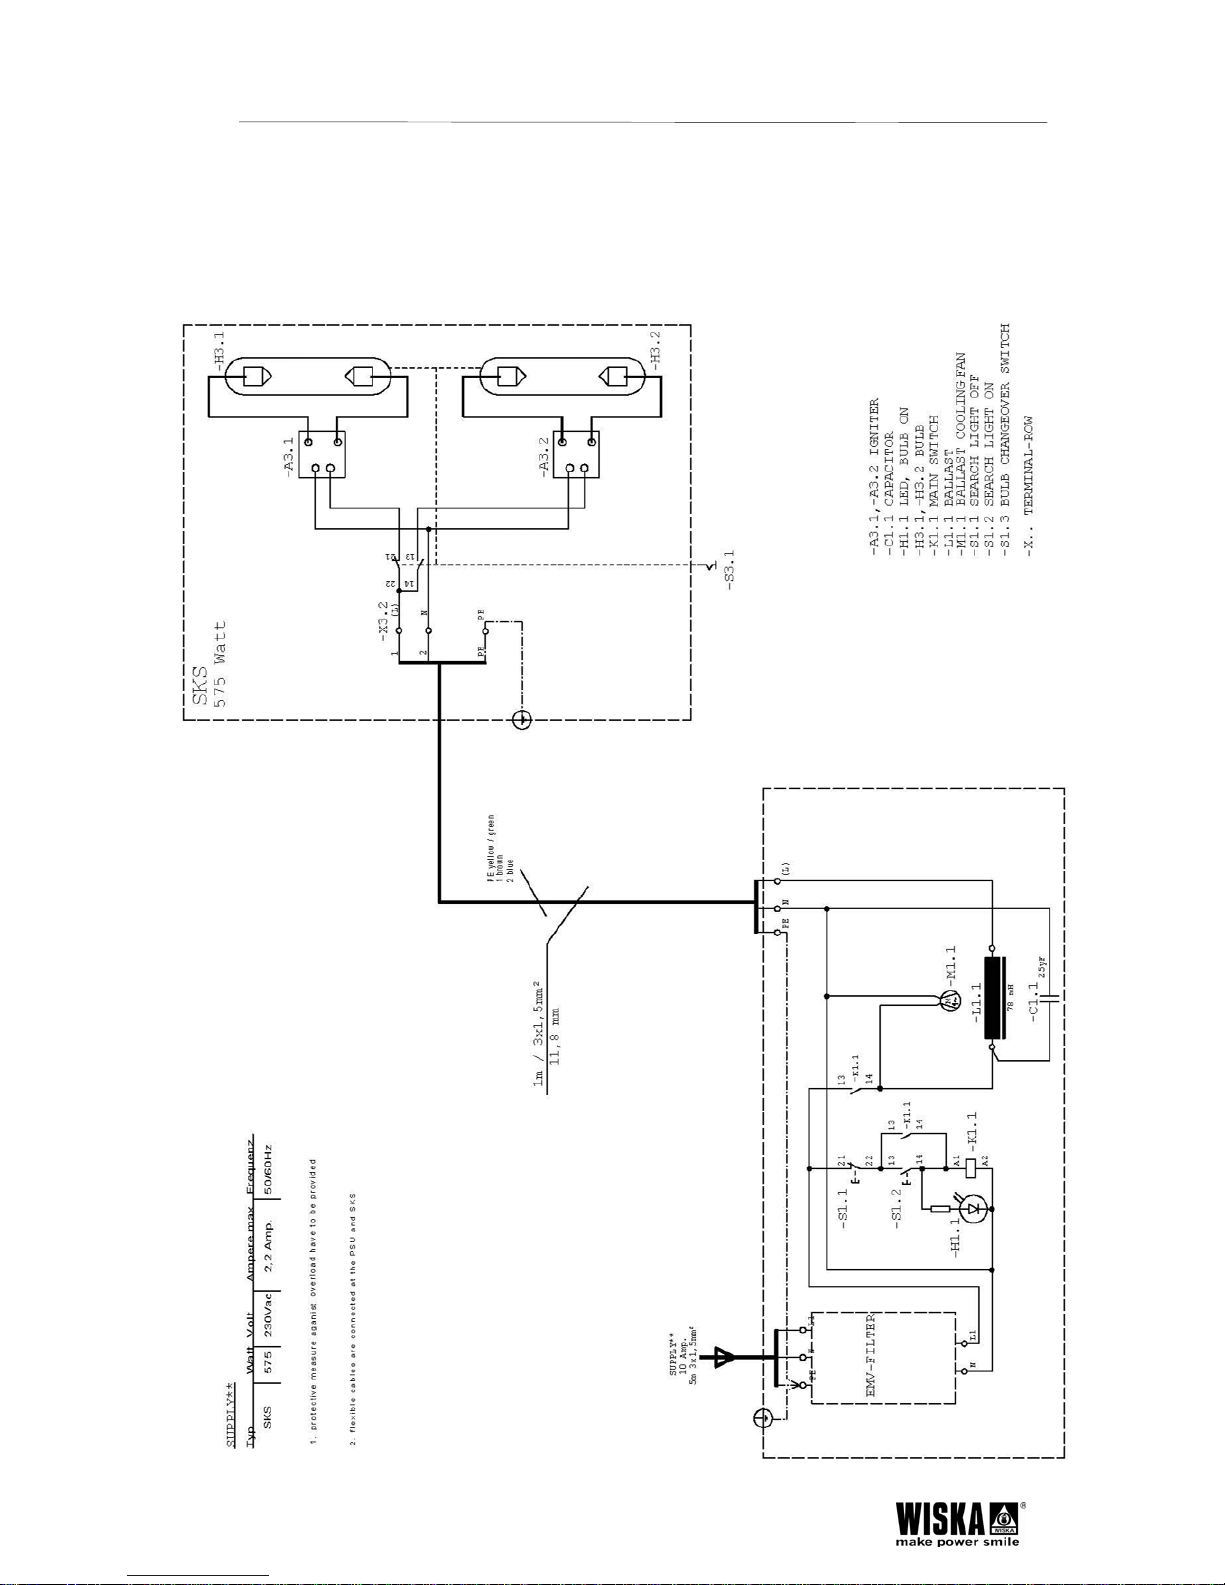
3.4 Circuit diagram ............................................................................. 10
4. INSTALLATION ........................................................................... 12
4.1 Unpacking ..................................................................................... 12
4.2 Mounting ....................................................................................... 12
4.3 Electrical connections ................................................................... 13
5. OPERATION ................................................................................ 14
5.1 Ballast unit PSUH SKS 575 .......................................................... 14
5.2 Switching on ................................................................................. 14
5.3 Searchlight head SKS 575 ........................................................... 15
5.4 Adjustment of the reflector ............................................................ 15
5.5 Changing the lamp (without opening the casing) ..................... 16
5.6 Switching off ................................................................................. 16
6. MAINTENANCE ........................................................................... 16
6.1 Cleaning ........................................................................................ 16
7. REPLACEMENT OF DEFECTIVE PARTS .................................. 17
7.1 Before starting work ...................................................................... 17
7.2 Assembly overview ....................................................................... 17
7.3 Lamp replacement ........................................................................ 18
8. DISPOSAL ................................................................................... 19
9. SPARE PARTS ............................................................................ 20
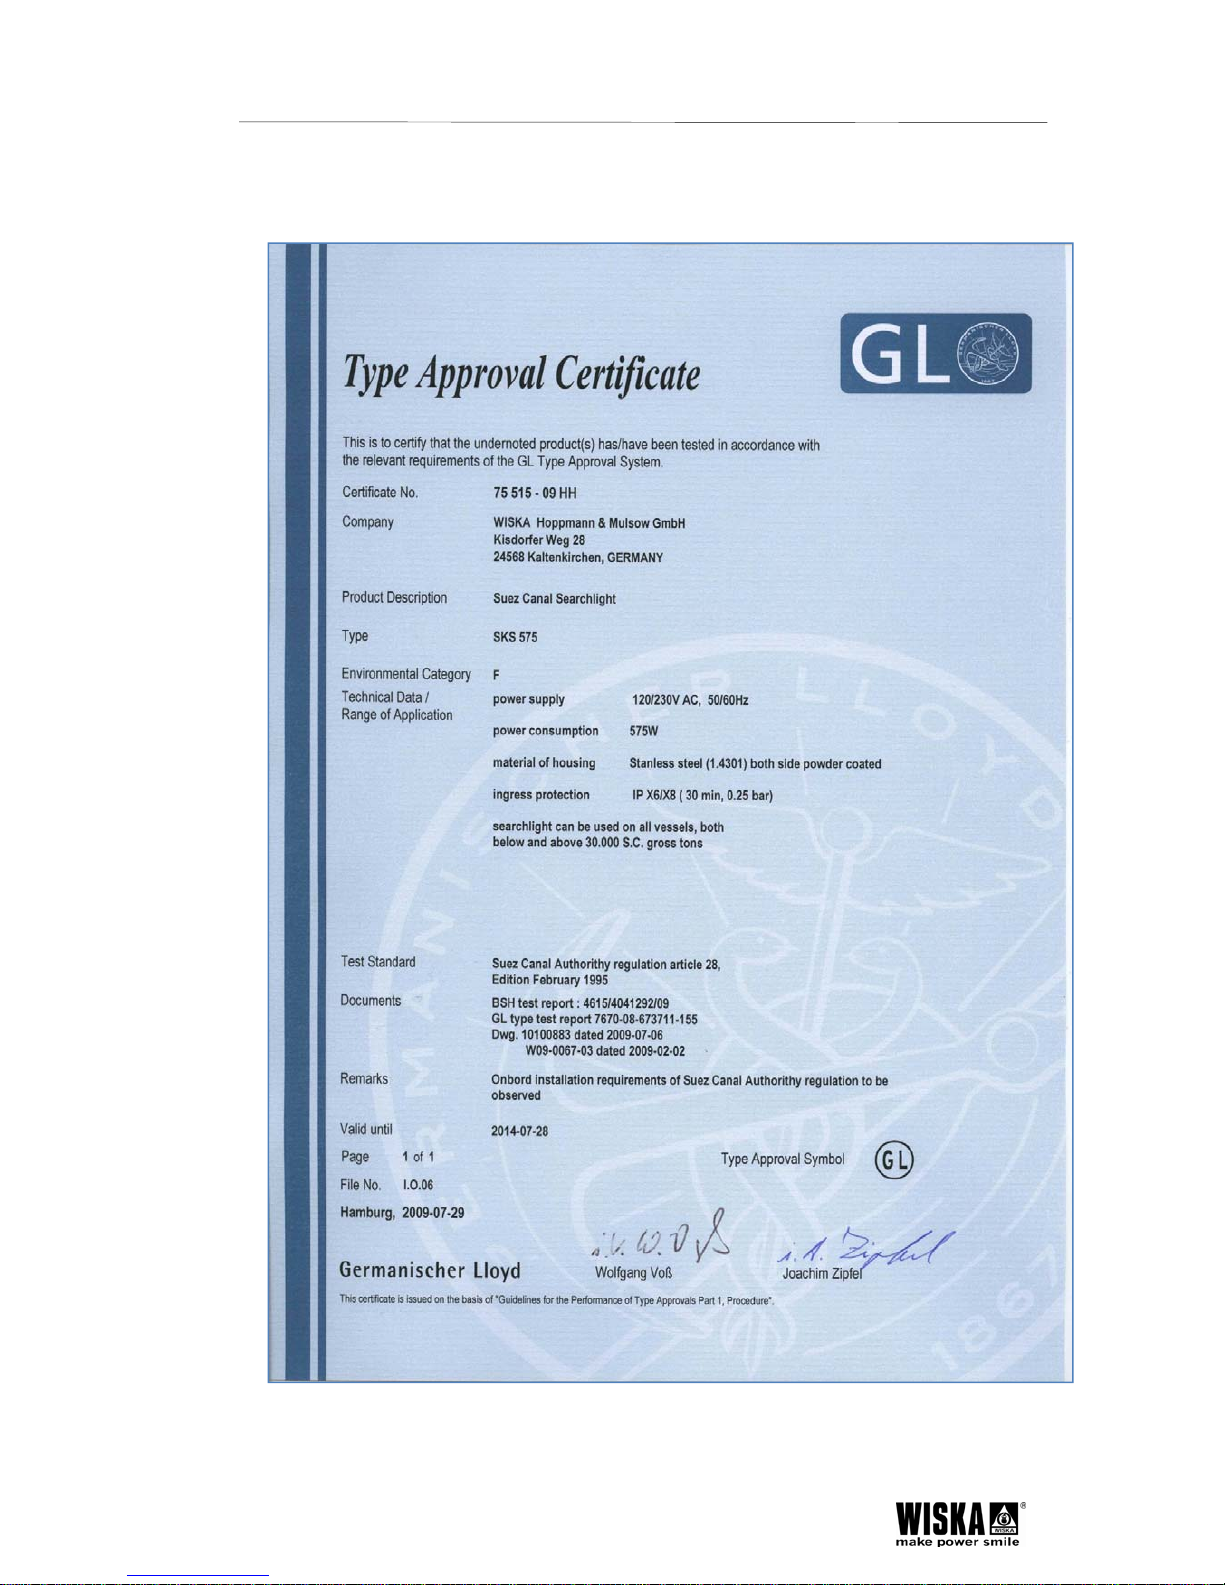
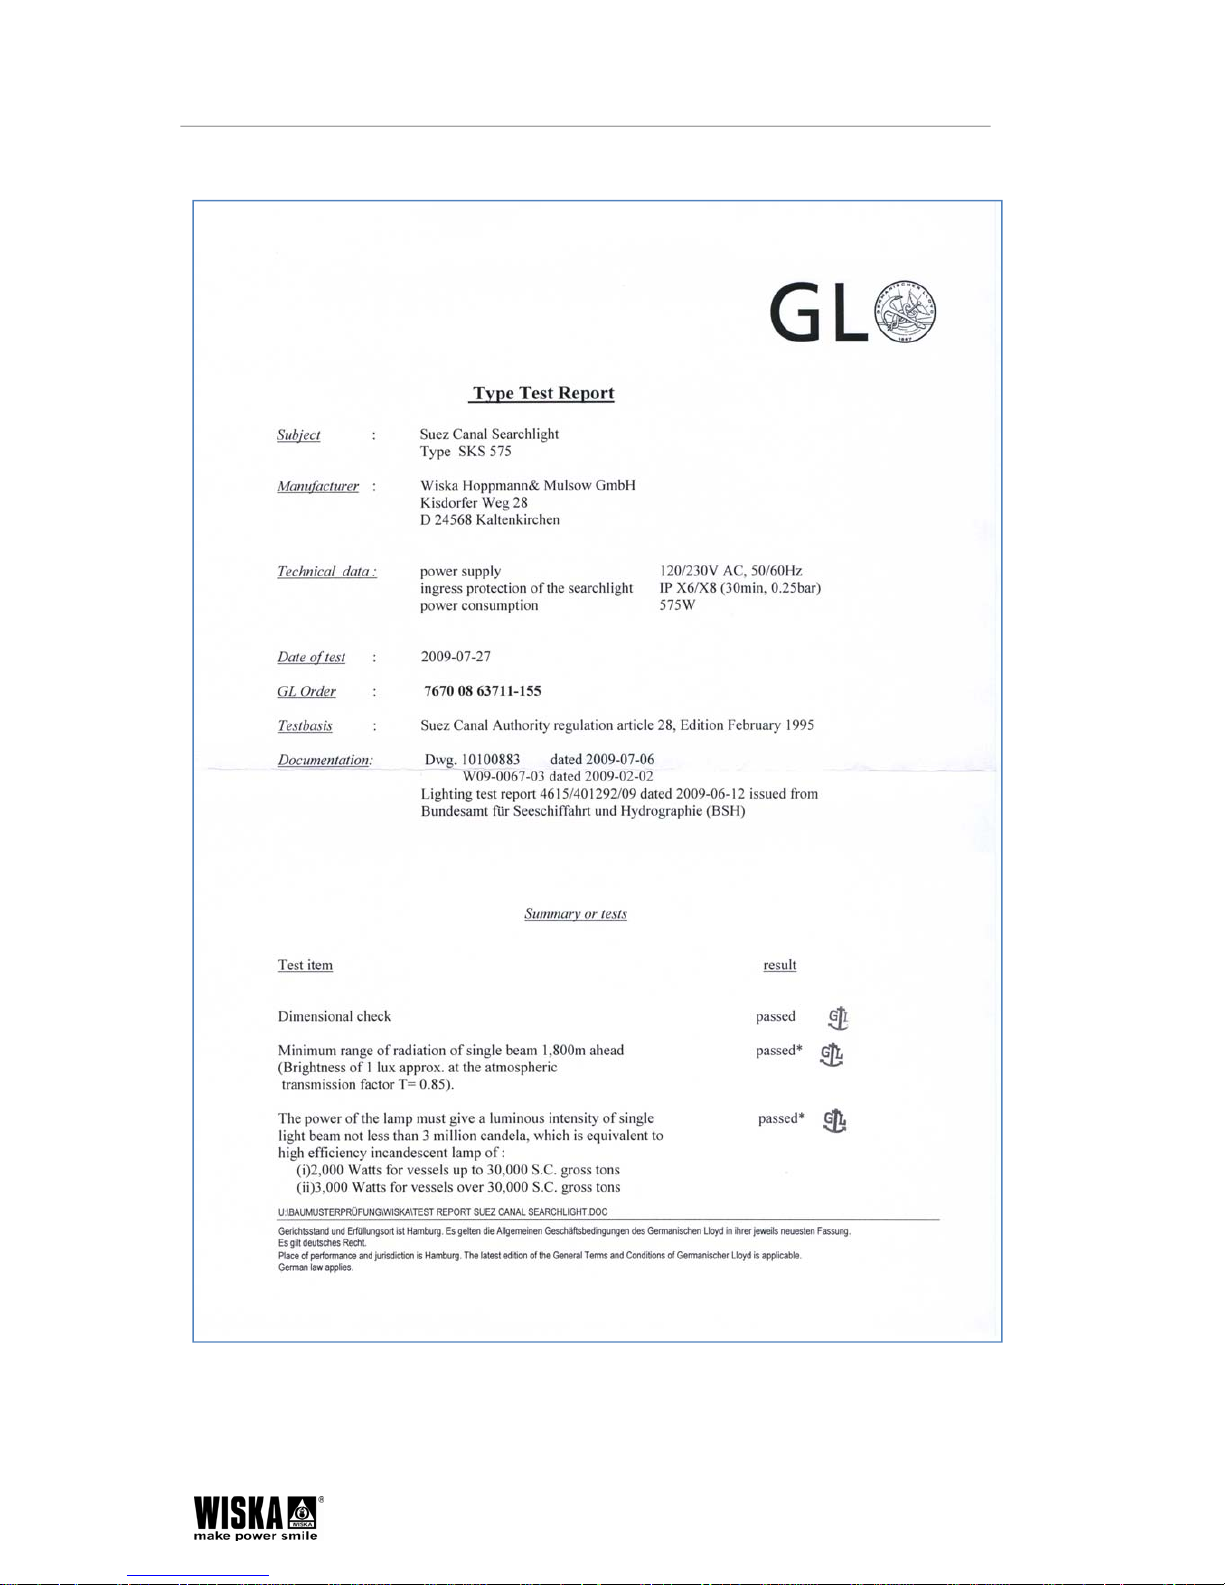
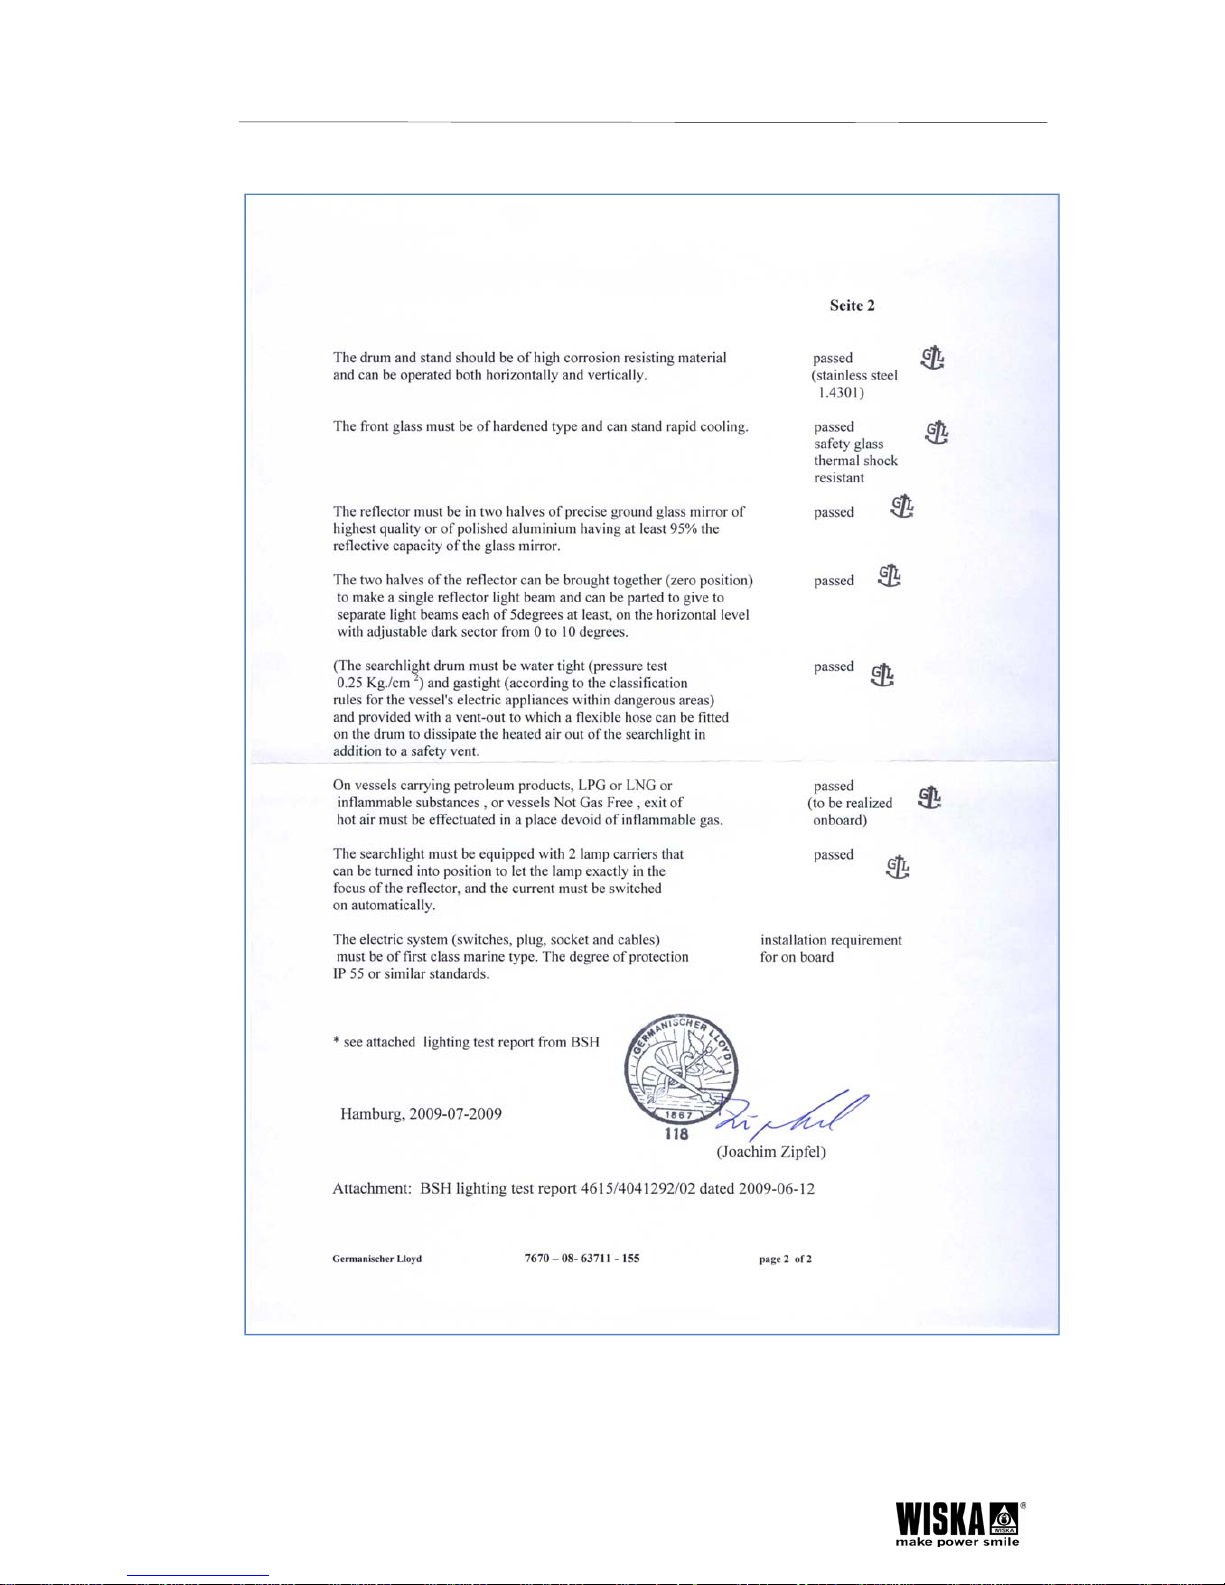
10. TYPE APPROVAL ....................................................................... 21
Page 3
50100935001_SKS-575(Ver2)Rev.02112012E
About these instructions
3
1. About these instructions
1.1 Symbols and guidance signs in these instructions
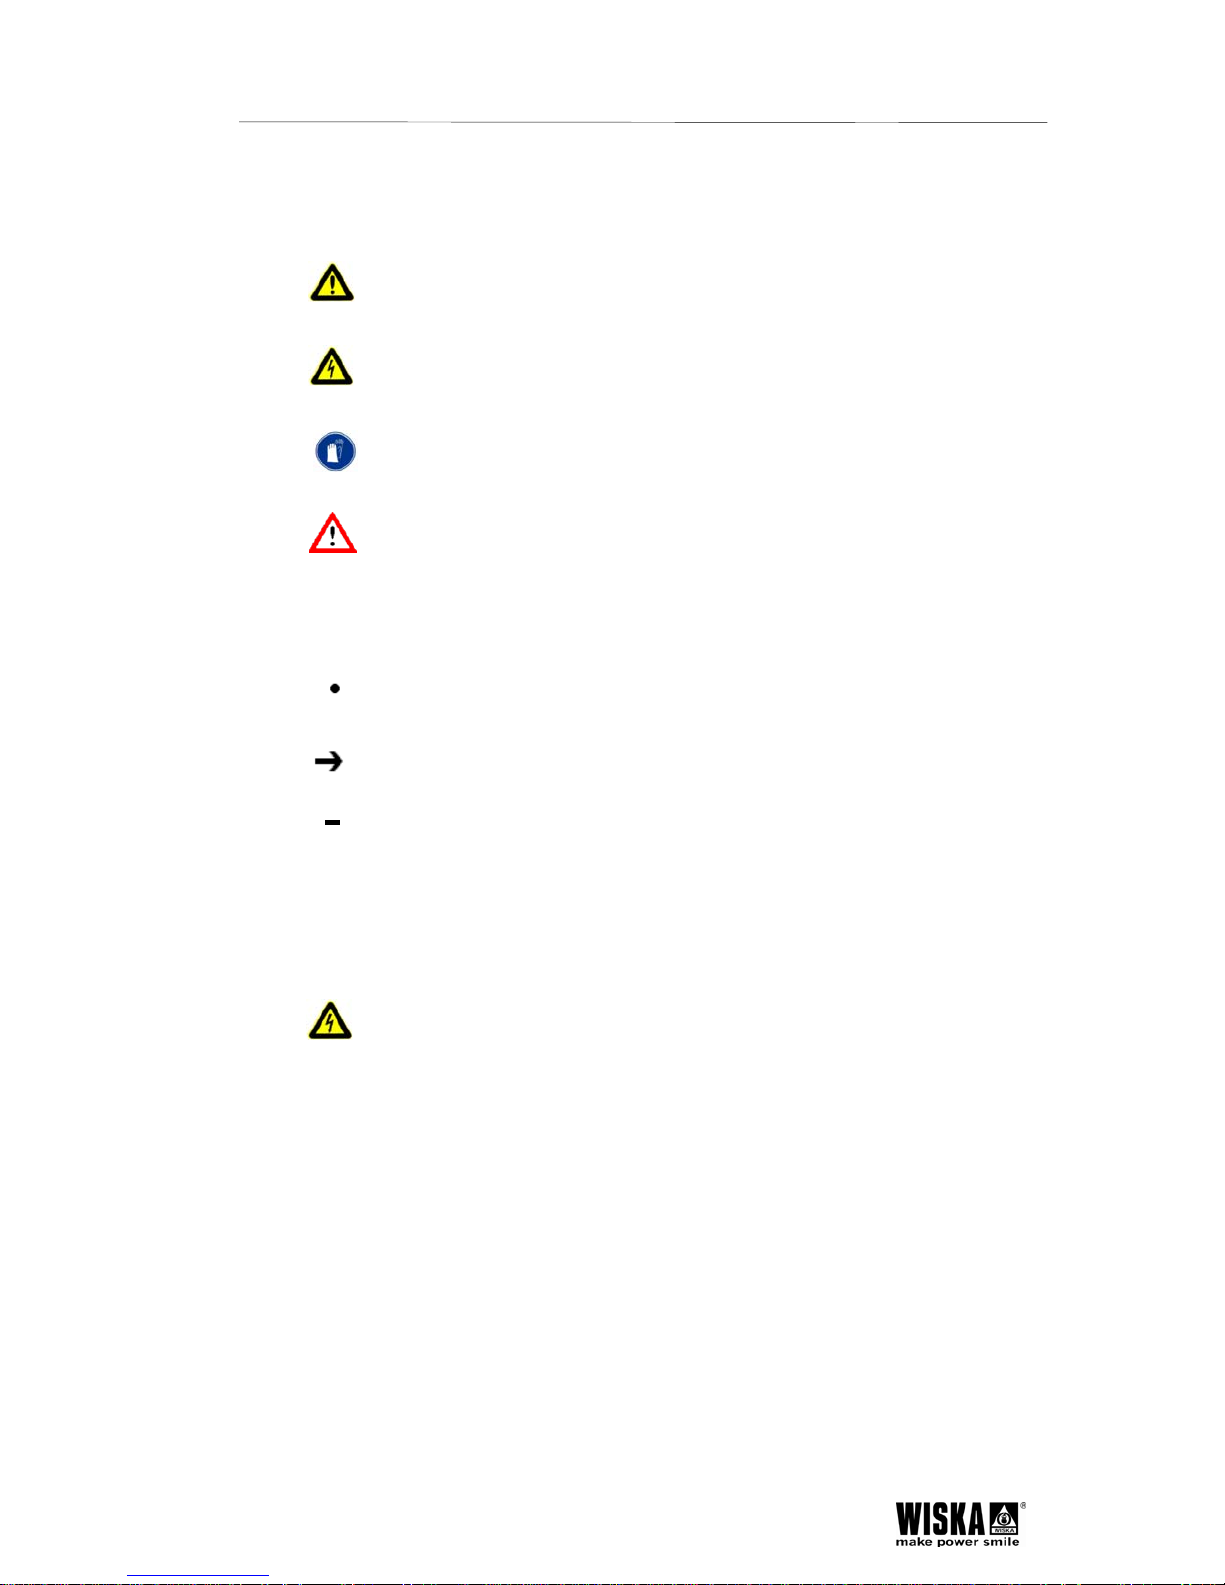
Danger! There is a risk to life and limb if the warning is not followed.
Risk of electric shock! There is a risk to life and limb from electricity if the
warning is not followed.
Use disposable gloves! Use disposable gloves for the following work to protect
the material or your health.
Attention! There is a risk to the environment and the device if the warning is not
followed.
Operating steps, that should take place in a certain order, are numbered
sequentially.
Operating steps, that only consist of one step or that don’t have to be followed
in a certain sequence, are marked with a point.
Feedback from executed actions begins with an arrow.
Enumerations begin with an enumeration line.
1.2 Who are these instructions for?
These instructions are intended for the personnel, that are assigned with the assembly,
operation and maintenance of the searchlight.
Risk of electric shock! All electrical installation and repair work may only be
carried out by a qualified electrician!
1, 2, 3, …
Page 4
50100935001_SKS-575(Ver2)Rev.02112012E Safety
4
2. Safety
The following safety instructions have to be strictly followed! Otherwise you put yourself
and others in danger.
2.1 General information
Intended use
The SKS 575 searchlight is designed for lighting large and far away objects. The range
of the searchlight is up to 3,460 m.
It is intended in particular for use on ships, especially for transfer through the Suez
Canal and complies with the Arab Republic of Egypt, Suez Canal Authority, Rules of
Navigation, Section II Preparation for Transit, Article 28 Searchlight.
It is suitable for ships over 30,000 SC.G.T.
Because of its intense light power the searchlight may not be used to illuminate persons
in the nearby surroundings.
It is not suitable for illuminating, spaces on the ship or in buildings.
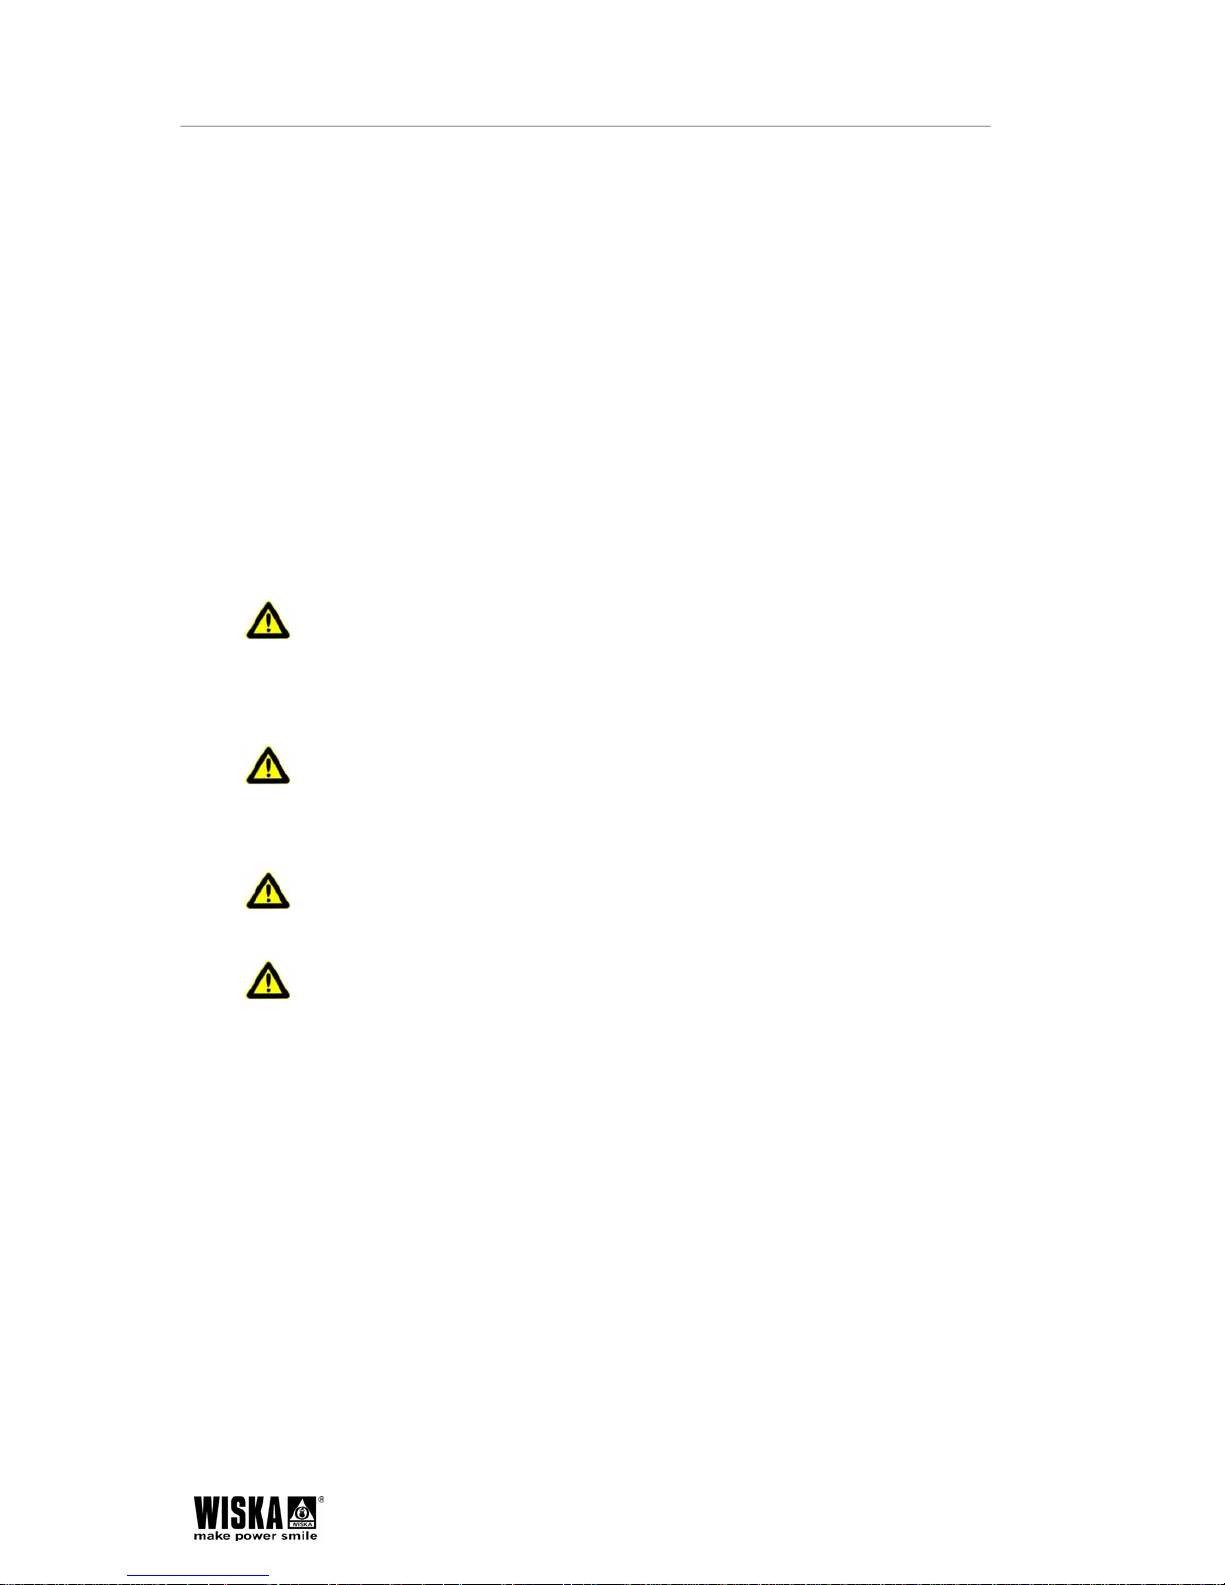
Danger! Unauthorised conversions and change s to the searchlight are not
allowed, since this can endanger persons and may damage the unit. If this is not
followed then the unit’s approval becomes null and void.
Only original spare parts may be used. If this is not followed then the guarantee
rights become null and void.
Risk of getting burned! Never touch the searchlight during operation without
protection. The casing can reach 120 °C. Always allow the searchlight to cool
down before maintenance and repair work. In case of burns cool the injured area
immediately and seek medical help.
Risk of glare! Never look into the light source during operation. This is
dangerous for the eyes. Never point the searchlight directly at anyone.
Risk of crushing! Risk of shearing! Before turning or tilting the searchlight:
Make sure that there is nobody right beside it. A persons limbs can get trapped
between the searchlight and the moving mechanism and sustain serious injured.
2.2 How to handle metal halide lamps
Strictly follow the safety instructions below when handling metal halide lamps:
Transport
Always store and transport metal halide lamps in such a way that the glass
bulb cannot break.
Following the removal of metal halide lamps store them immediately in a safe
place where they cannot be broken. If a lamp breaks proceed as described in
chapter 2.3 Protective measures in case of a broken lamp.
Page 5
50100935001_SKS-575(Ver2)Rev.02112012E Safety
5
Operation
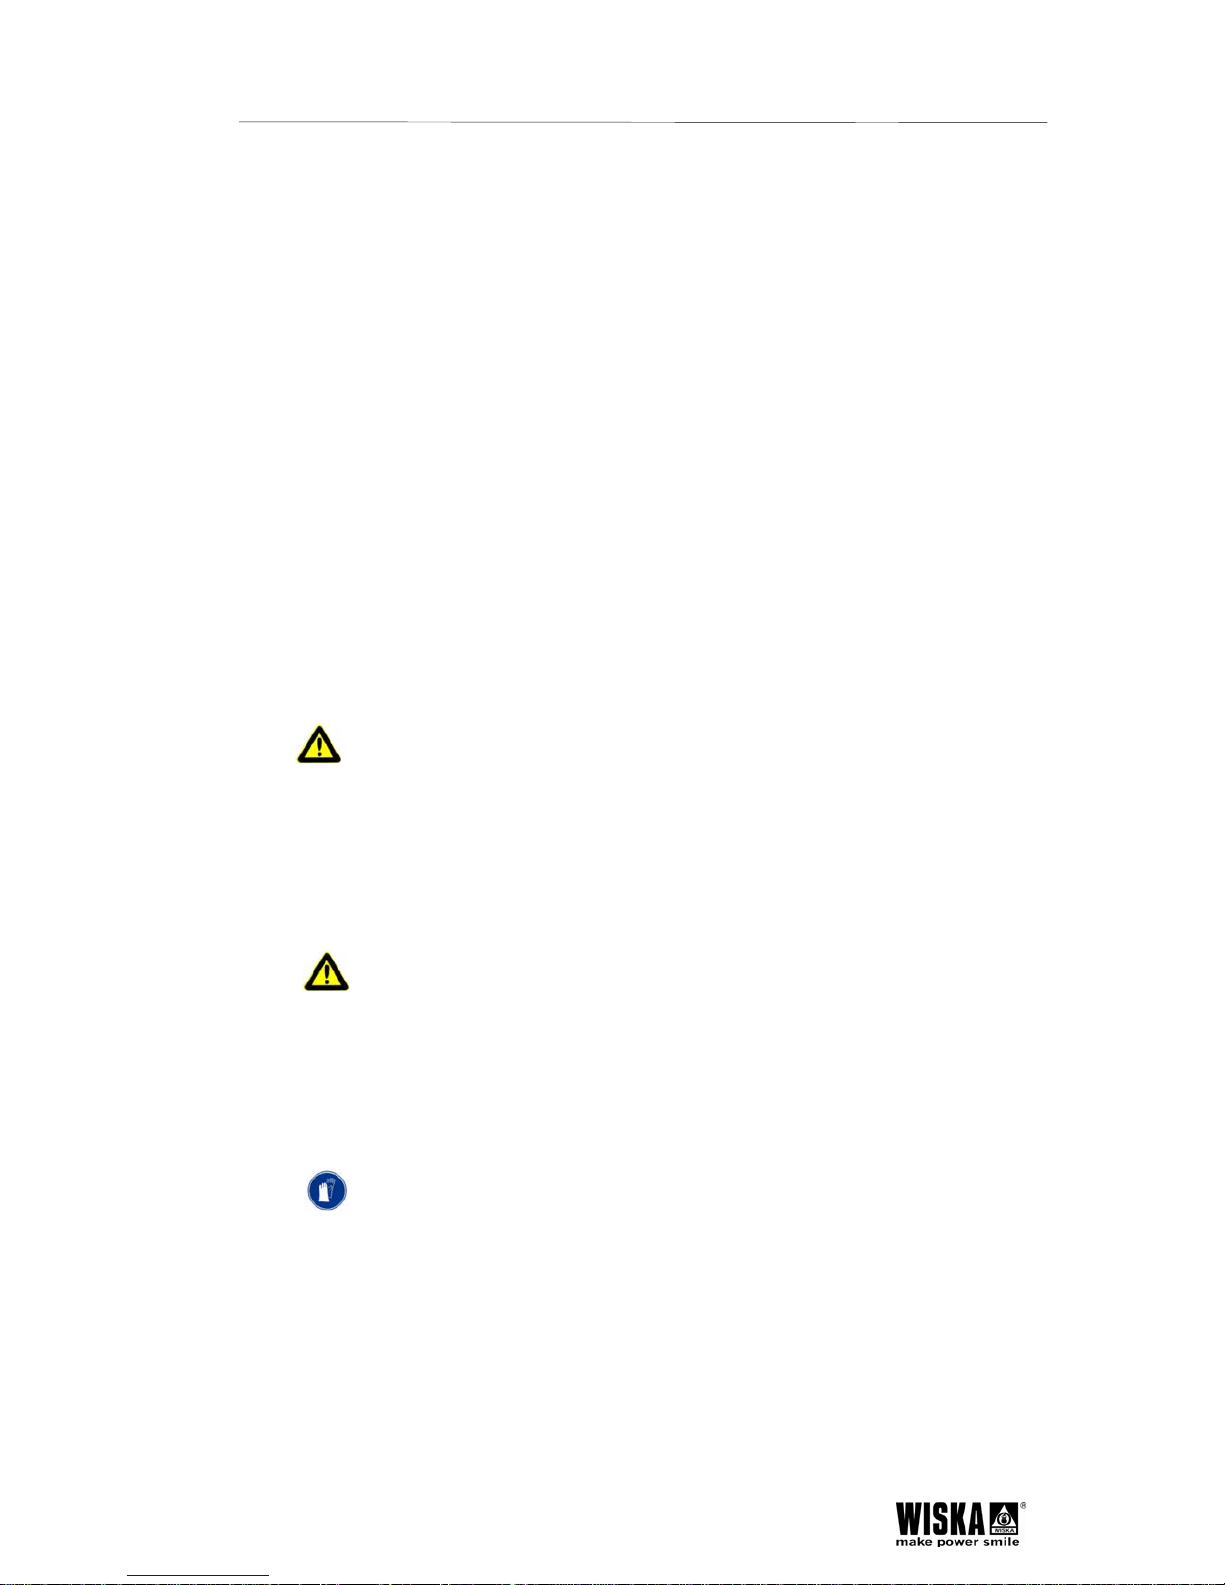
Never touch the naked lamp bulb with your bare hands. Remove fingerprints
on the lamp before installation with an alcohol solution and a soft lint-free
cloth. When handling it is recommended to use disposable gloves to avoid
fingerprints.
Check the lamp for scratches, cracks or other damage before installation.
Don’t continue using damaged lamps.
Lifetime
Metal halide lamps have an average lifetime of approx. 750 operating hours.
The actual lifetime can deviate in practice and depends on the ratio of switching
on frequency to switching on duration.
Disposal
Metal halide lamps contain environmentally hazardous substances (incl.
mercury), and hence in Europe have to be disposed of as special waste as per
the directive EWC-Code 2001 21* for “Fluorescent tubes and other mercury-
containing waste”. Hence metal halide lamps have to be brought to suitable
disposal sites. In other countries the relevant legislation has to be followed.
Metal halide lamps may not be destroyed under any circumstances during
disposal.
Health risks
Breathing in of mercury or mercury compounds in the form of vapour or dust can
damage your health. Apart from inhaling, mercury can also be absorbed by
penetrating the skin.
2.3 Protective measures in case of a broken lamp
We recommend proceeding as follows, in case of a lamp break or explosion, in
order to eliminate any health risks:
All persons in the close surroundings should evacuate the area immediately,
to avoid inhaling mercury vapour.
Ventilate the area adequately for 20 to 30 minutes.
After the lamp has cooled down and in any case before restarting any
residual mercury is to be thoroughly removed from inside the light using
mechanical means.
Disposable gloves are recommended to avoid skin contact. Liquid mercury can
also be absorbed using a standard absorption agent (based on active carbon).
Page 6

50100935001_SKS-575(Ver2)Rev.02112012E Safety
6
2.4 Safety devices
Radiation/escape of dangerous particles
Metal halide lamps radiate UV light which is harmful to the eyes. The
special searchlight casing prevents you from looking directly into the arc.
If the metal halide lamp explodes during operation, the casing remains
intact and contains any heated glass splinters, see chapter 2.3 Protective
measures in case of a broken lamp.
2.5 Operating conditions
Installation location of the searchlight
Under normal use conditions the casing surface temperatures can go up to 120 °C. Only
install the searchlight close to heat resistant material. To eliminate any dangers: Never
store any explosive or highly flammable materials right beside the searchlight. These
include petrol, paper and paint for example.
2.6 Maintenance / Cleaning
Before carrying out maintenance or cleaning work:
Set the main switch on the PSUH power supply unit to OFF.
Make sure that the complete electrical system is de-energised.
Wait until the searchlight has cooled down.
Page 7
50100935001_SKS-575(Ver2)Rev.02112012E An overview of the unit
7
3. An overview of the unit
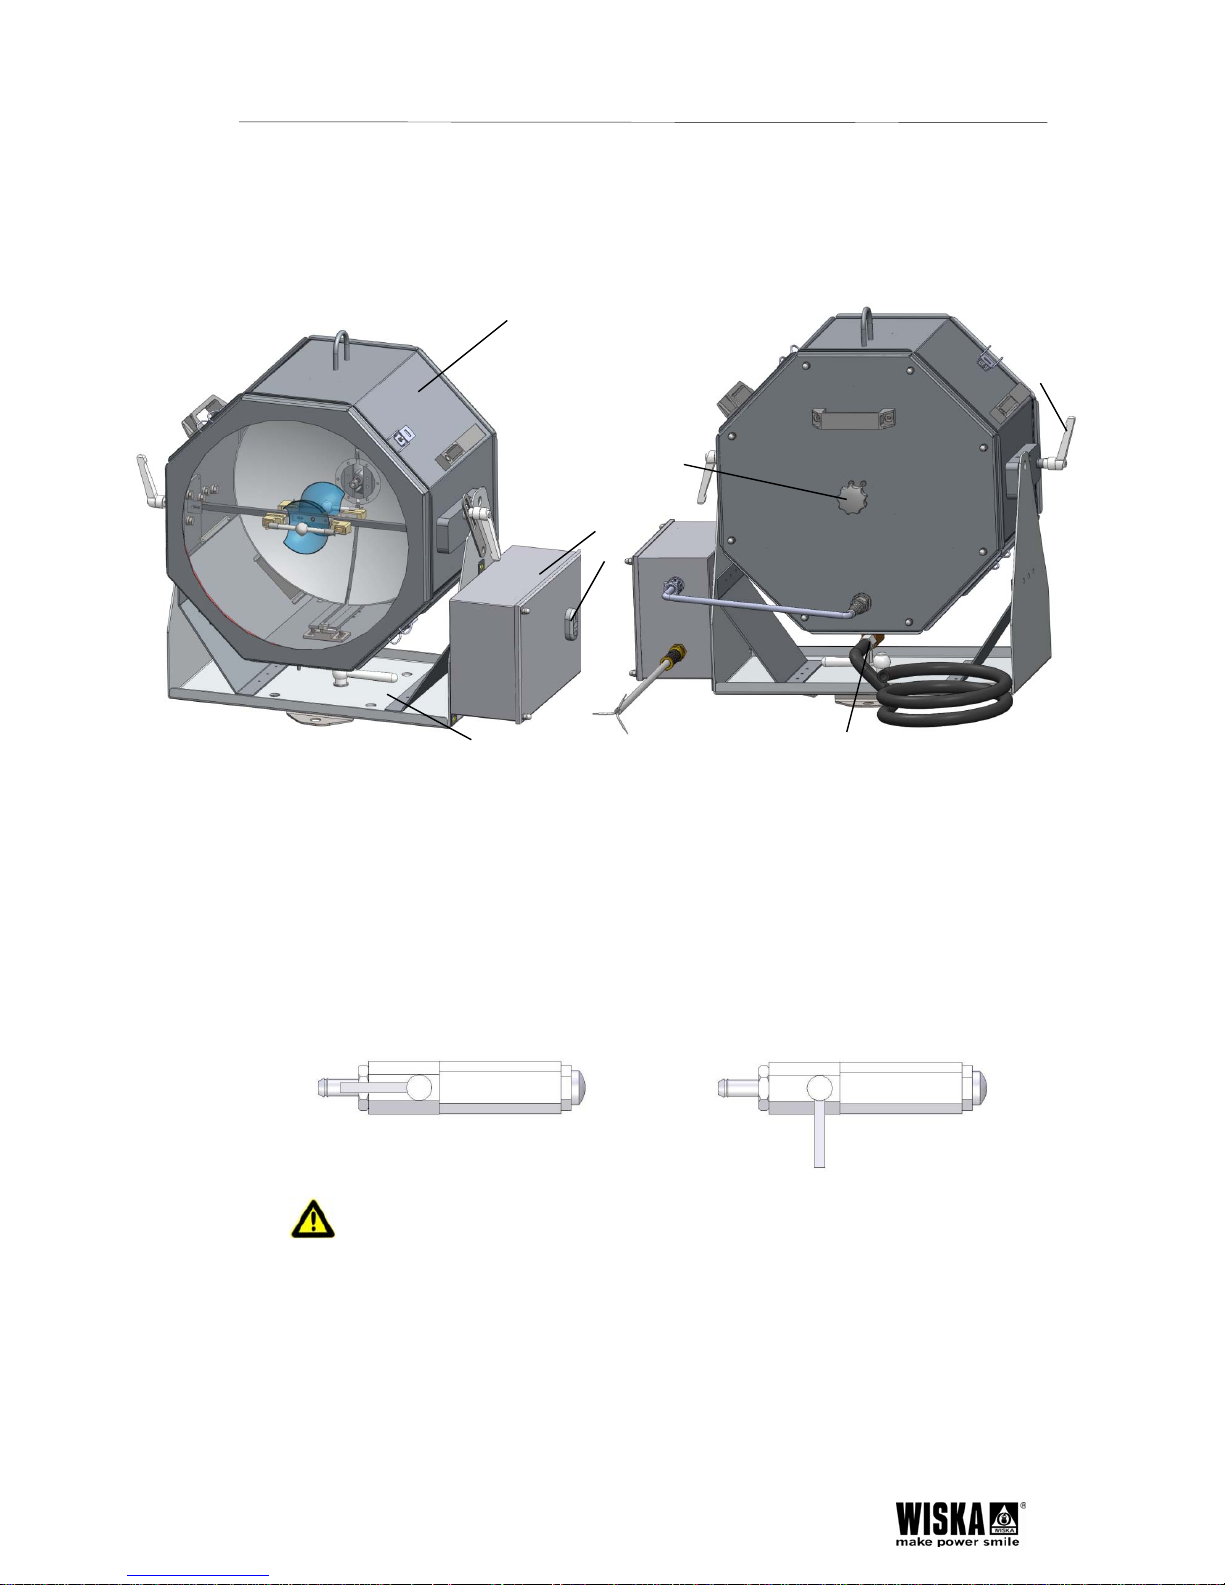
3.1 Layout drawing
Base configuration
1
6
7
2
3
4 5
1 Searchlight head SKS 575
2 Ballast unit PSUH SKS 575
3 ON/OFF switch and indicator lamp for searchlight
4 Searchlight baseplate + turning unit
5 Pressure connection for atmospheric pressure with flexible tube (5m)
6 Lamp change mechanism
7 Hand wheel for adjusting the reflector
Pressure connection open Pressure connection closed
Pressure connection! Make sure that the ball valve is in the open (flow)
position and that the pressure hose is routed properly, so that the casing cannot
build up any overpressure or vacuum.
Page 8
50100935001_SKS-575(Ver2)Rev.02112012E An overview of the unit
8
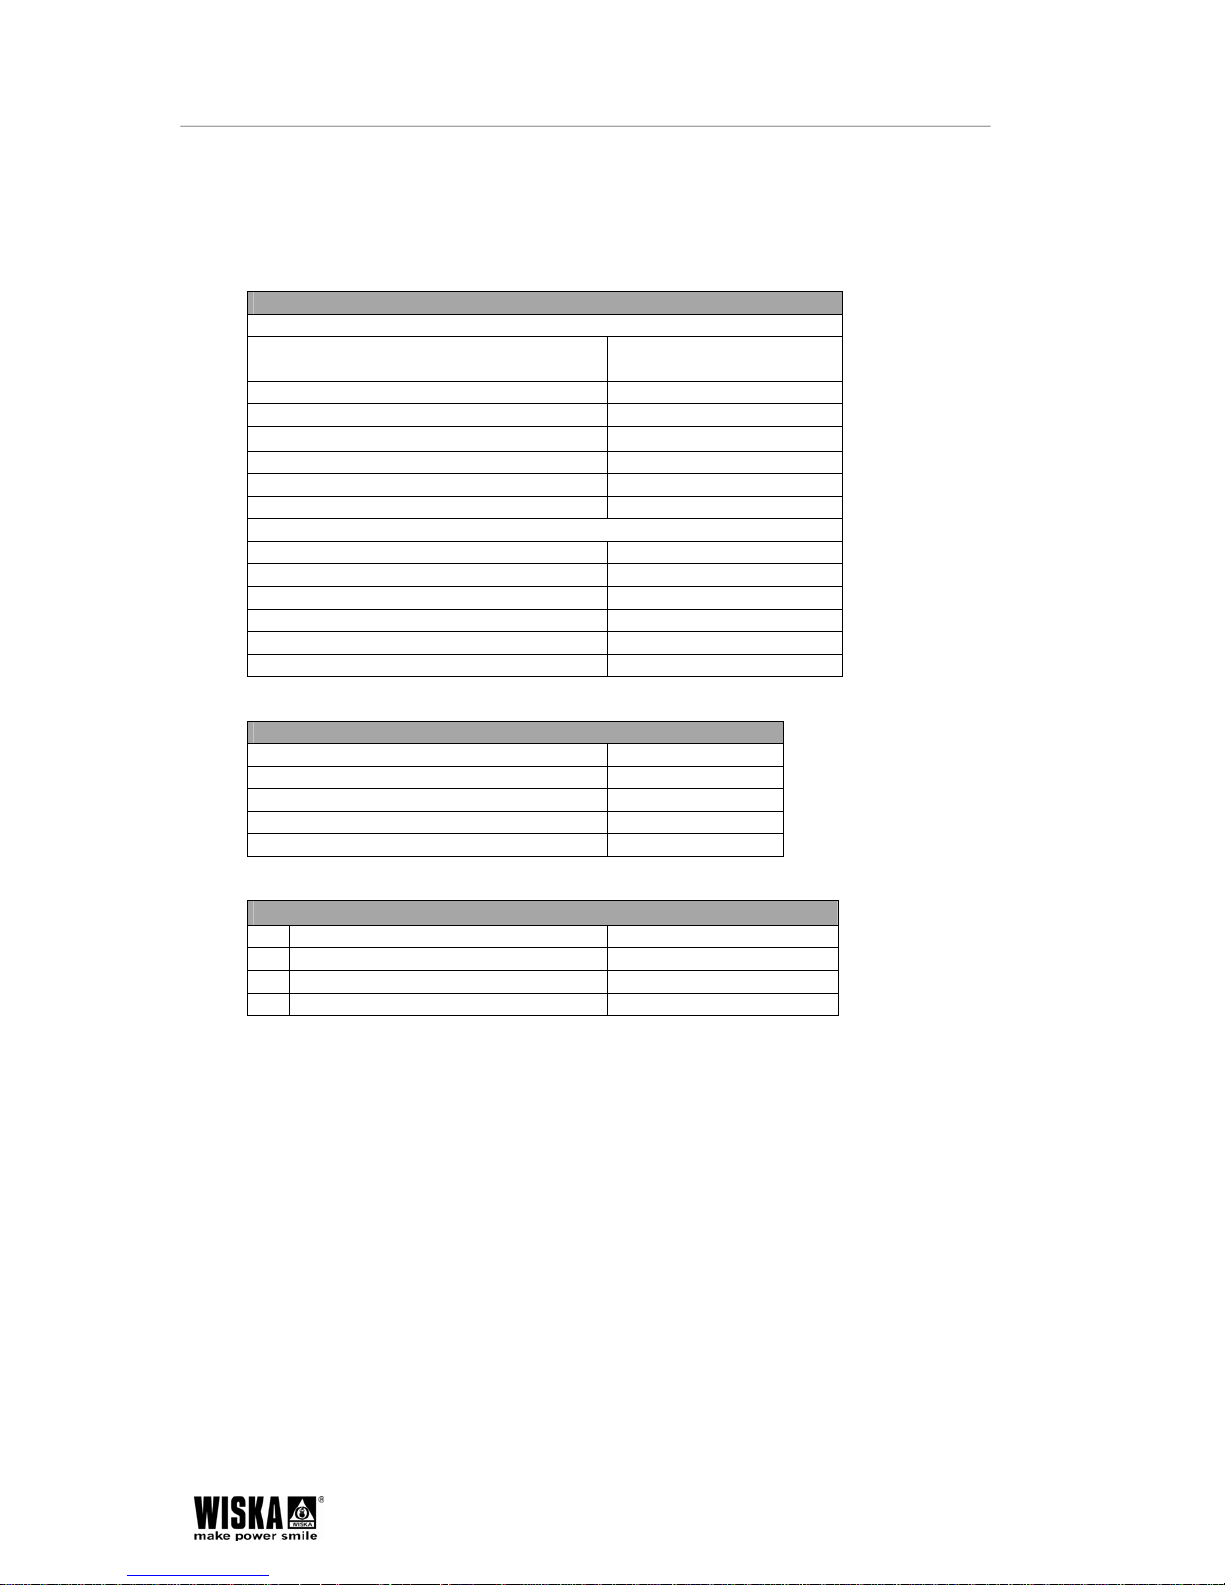
3.2 Technical data
Type SKS 575 230 V 50/60 Hz
Manufacturer WISKA Hoppmann & Mulsow GmbH
Searchlights
Lamp:
Illuminant Metal halide discharge
lamp
Luminous intensity 4 million cd
Range 3,200 m
Lamp power 575 W
Average lamp lifetime 750 h
Reflector 400 mm
Auxiliary mirror 100 mm
Casing:
Material Stainless steel 1.4301
Colour RAL 9016
Diameter 472 mm
Depth 400 mm
Weight 30 kg
Protection rating IP 68 (30 min. at 0.25 bar)
Ballast PSUH
Supply voltage 230 V 50/60 Hz
Fuse 16 A
Dimensions WxHxD 330 x 355 x 225
Weight 8 kg
Protection rating IP 66
Lamp ignition process
1. Generation of ignition voltage Instant of switching
2. Warm-up phase approx. 45 seconds
3. Current consumption limitation Operating condition
4. Re-ignition after switching off immediately
Page 9
50100935001_SKS-575(Ver2)Rev.02112012E An overview of the unit
9
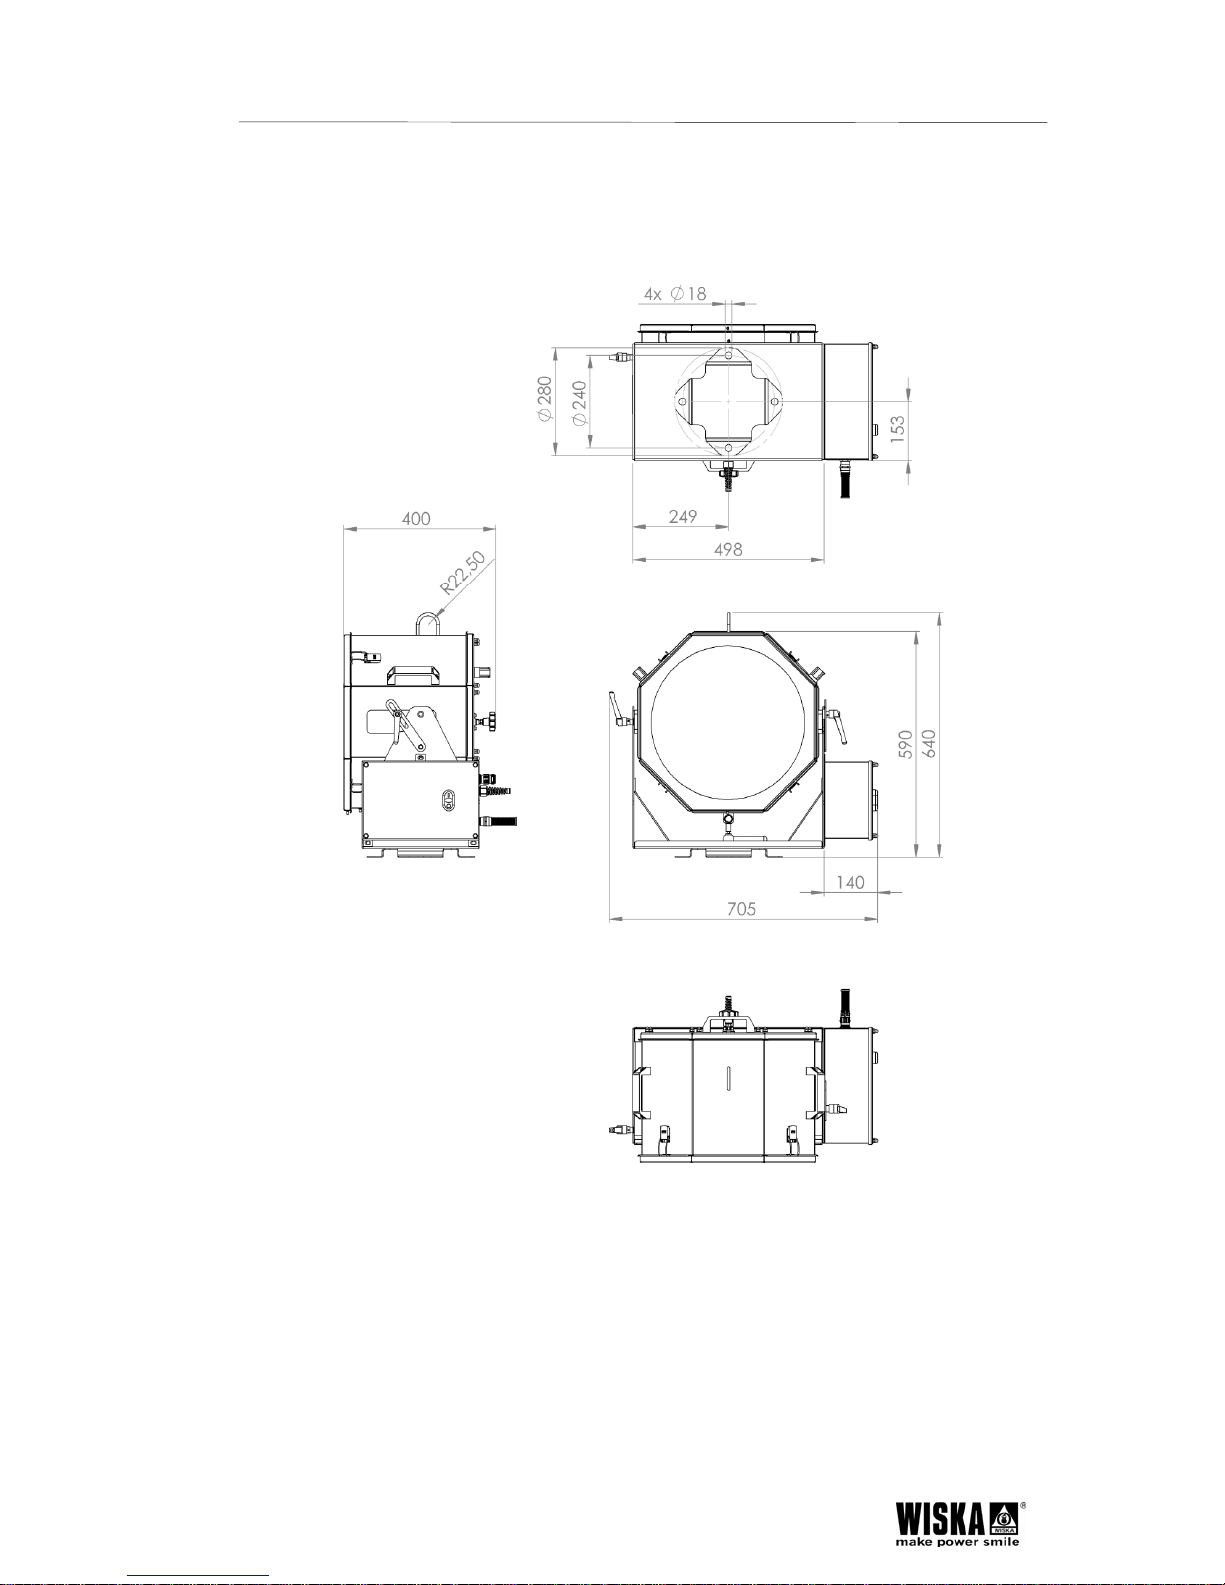
3.3 Dimensions
Searchlight head with deck and PSUH SKS 575
Page 10
50100935001_SKS-575(Ver2)Rev.02112012E An overview of the unit
10
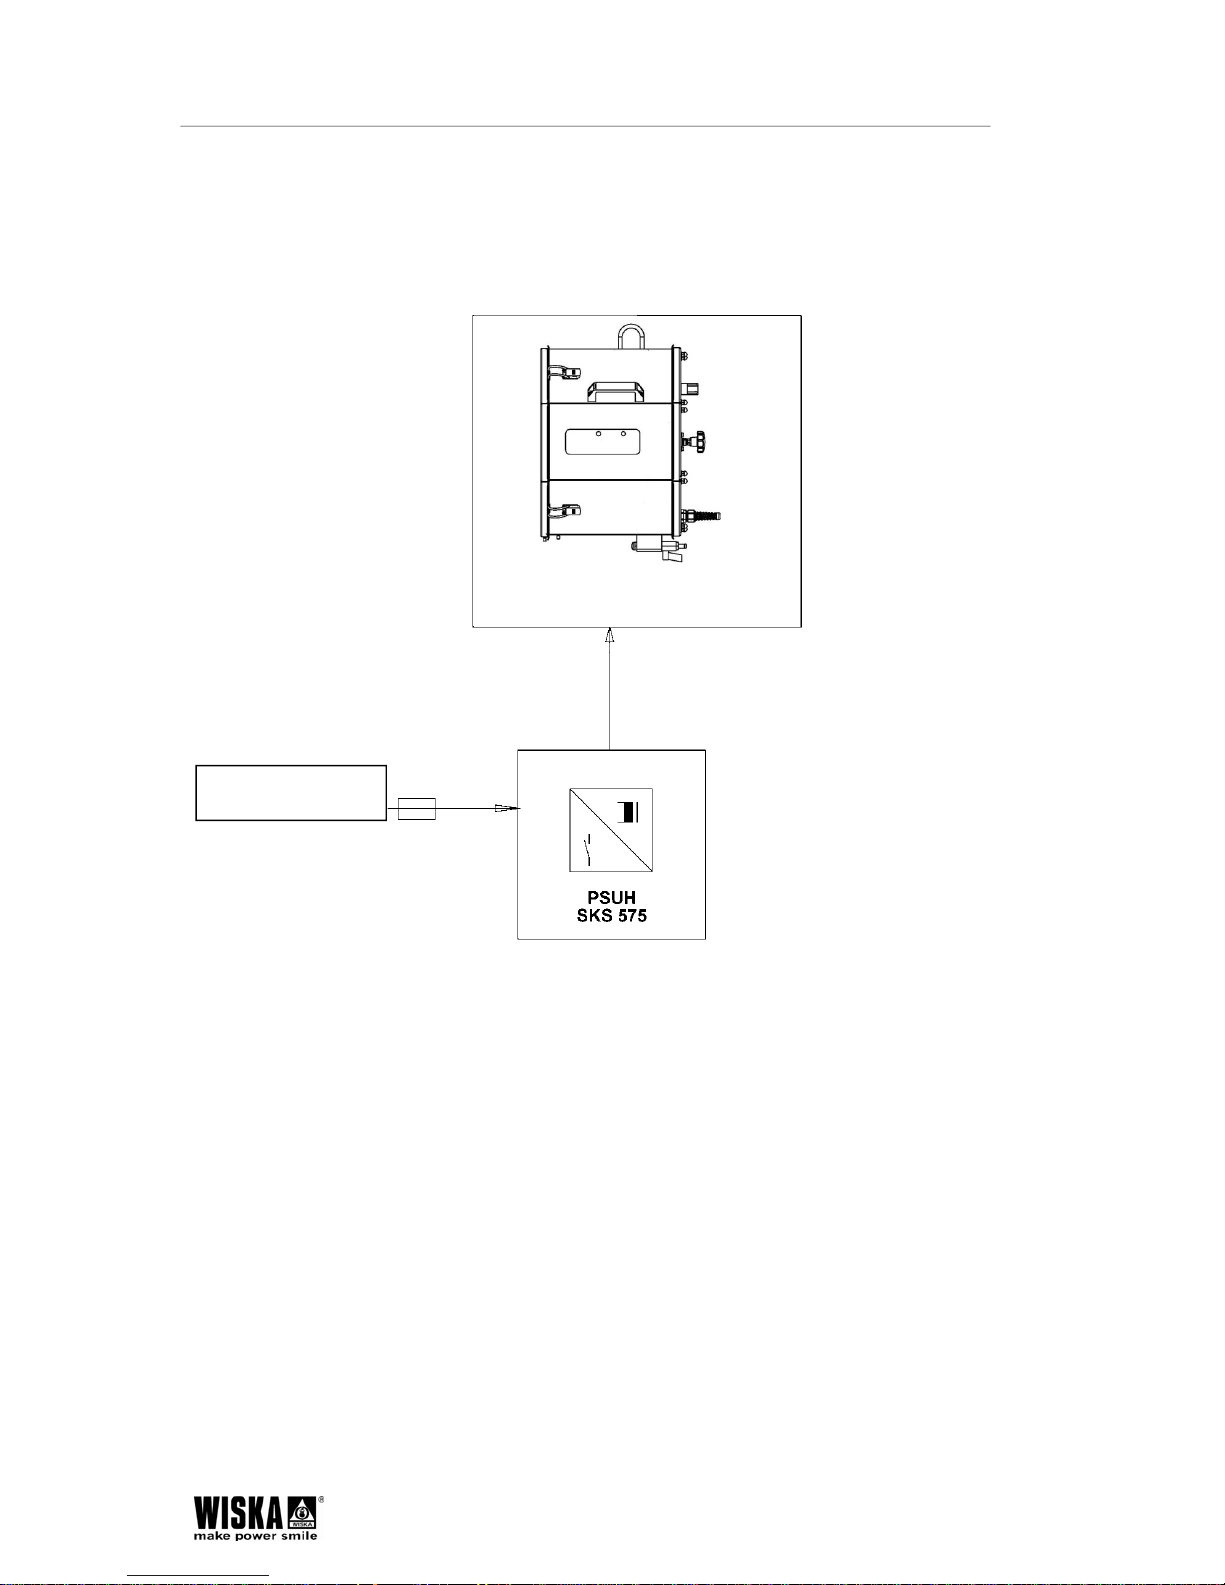
3.4 Circuit diagram
Block diagram
Supply connection
230 VAC 50/60Hz
SKS 575
Power Supply Unit for SKS 575
Page 11
50100935001_SKS-575(Ver2)Rev.02112012E An overview of the unit
11
Circuit diagram
Page 12
50100935001_SKS-575(Ver2)Rev.02112012E Installation
12
4. Installation
4.1 Unpacking
Check the delivery. Do not start the unit if there is transport damage or missing parts!
Contact WISKA or our sales partner in your country. The address can be found at the
back of these instructions or on the internet under www.wiska.de.
Think about the environment and send the packing for recycling!
4.2 Mounting
Mounting and installing the searchlight
.
1. Four fixing holes can also be drilled here on a circle of 240 mm in diameter: see
chapter 3.3 Dimensions. In order to ensure that the searchlight can still be
rotated, it can be fastened with the adjustable clamping levers (centric hole in
the baseplate see drawing on the right side).
2. Position the searchlight baseplate and bolt it down.
3. Connect the earth cable.
Installation of the SKS 575
Risk of electric shock! Electrical connections may only be carried by a
qualified electrician. Please ensure that the mains connection is off and that
nobody can accidentally energise the connections during installation!
The circuit diagram is also included separately or can be found in chapter 3.5
Circuit diagram.
Electrical connection values
Mains voltage: 230 VAC, 50/60Hz.
Device fuse: 1 x 16 A (included with delivery)
1. Bolt the searchlight down firmly through the holes.
2. Set the ball valve to the flow position and fasten the hose to the nozzle.
3. Connect the cable from the PSUH SKS to the voltage supply
Page 13

50100935001_SKS-575(Ver2)Rev.02112012E Installation
13
Mains connection
Observe the relevant national and international regulations! Make a correct
and fool proof connection!
Prior to commissioning:
Check for correct installation. Wrong connections can destroy the metal
halide lamps or the searchlight.
Check for correct connection of the earth / ground!
Reinsert the fuse.
4.3 Electrical connections
Risk of electric shock! Electrical connections may only be carried by a
qualified electrician. Please ensure that the mains connection is off and that
nobody can accidentally energise the connections during installation!
The circuit diagram is also included separately or can be found in chapter 3.5
Circuit diagram.
Electrical connection values
Mains voltage: 230 VAC, 50/60Hz.
Device fuse: 1 x 16 A (included with delivery)
Mains connection
Observe the relevant national and international regulations! Make a correct
and fool proof connection!
Prior to commissioning:
Check for correct installation. Wrong connections can destroy the metal
halide lamps or the searchlight.
Check for correct connection of the earth / ground!
Reinsert the fuse.
Page 14
50100935001_SKS-575(Ver2)Rev.02112012E
Operation
14
5. Operation
The operation of the searchlight and the associated PSUH SKS 575 ballast unit is described
below.
Particular attention is to be paid to the following points:
- Only use the control knobs provided for setting up the searchlight. Never
touch the searchlight casing during operation since there is a risk of
getting burned!
- Make sure that nobody is in front of the searchlight when switching on or
during operation, - Risk of glare!
- Now read on from item 5.2 Switching on.
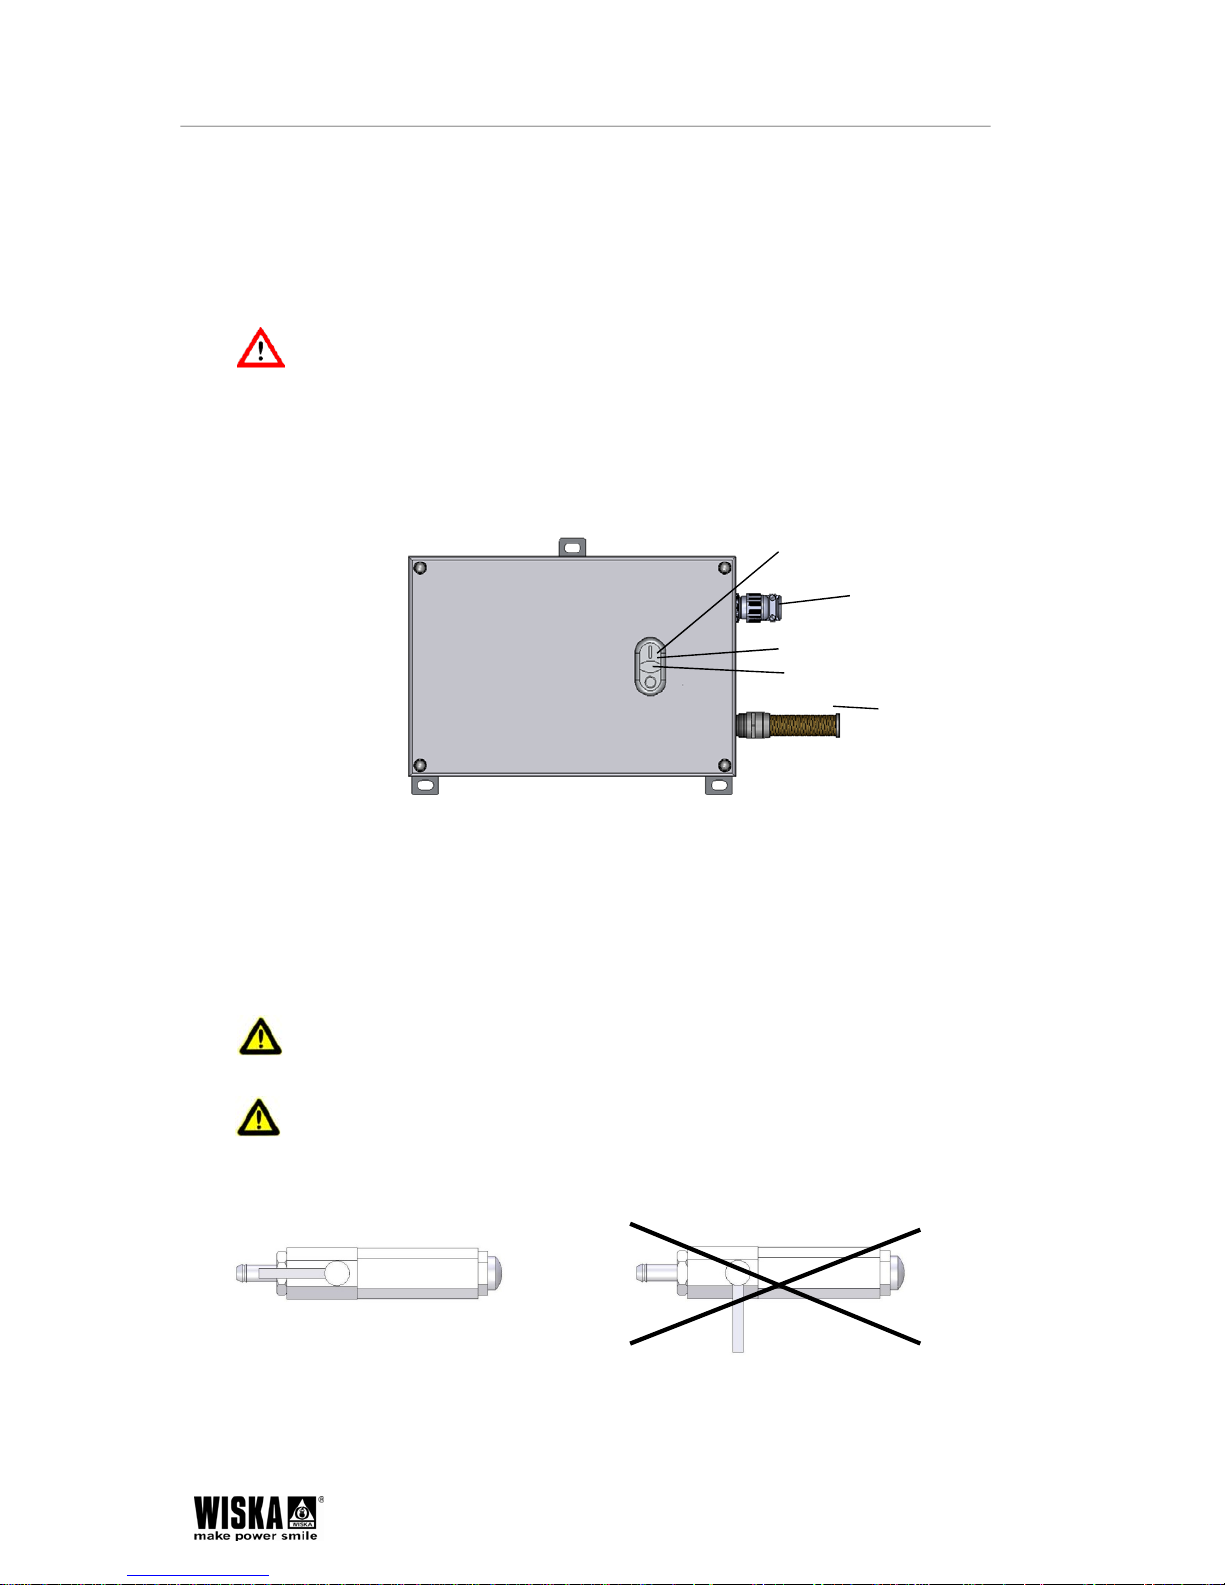
5.1 Ballast unit PSUH SKS 575
1 On switch (I)
2 Off switch (O)
3 Searchlight indicator lamp
4 Cable for voltage supply
5 Cable to the searchlight head
5.2 Switching on
Risk of getting burned! Never touch the searchlight during operation without
protection. The casing can reach 120 °C. In case of burns cool the injured area
immediately and seek medical help.
Risk of glare! Never look into the arc during operation. This is dangerous for the
eyes. Never point the searchlight directly at anyone. Before switching on make
sure that nobody is near the searchlight.
Pressure connection open Pressure co nnection closed
1
3
2
4
5
Page 15
50100935001_SKS-575(Ver2)Rev.02112012E Operation
15
Pressure connection! Make sure that the ball valve is in the open (flow)
position and that the pressure hose is routed properly, so that the casing cannot
build up any overpressure or vacuum.
Before switching on the searchlight: make sure that all work on the searchlight has been
completed and refer to chapter 4.2 Mounting.
1. Turn on the main switch (1) on the PSUH ballast unit. The indicator LED (3)
lights up and the lamp is ignited.
2. If the lamp does not ignite or only flashes a few times, either the operating
voltage is too low or the lamp is defective.
In order to exchange the lamp, refer to chapter 5.4 Changing the lamp (without
opening the casing) or chapter 7.3 Replacement of defective parts.
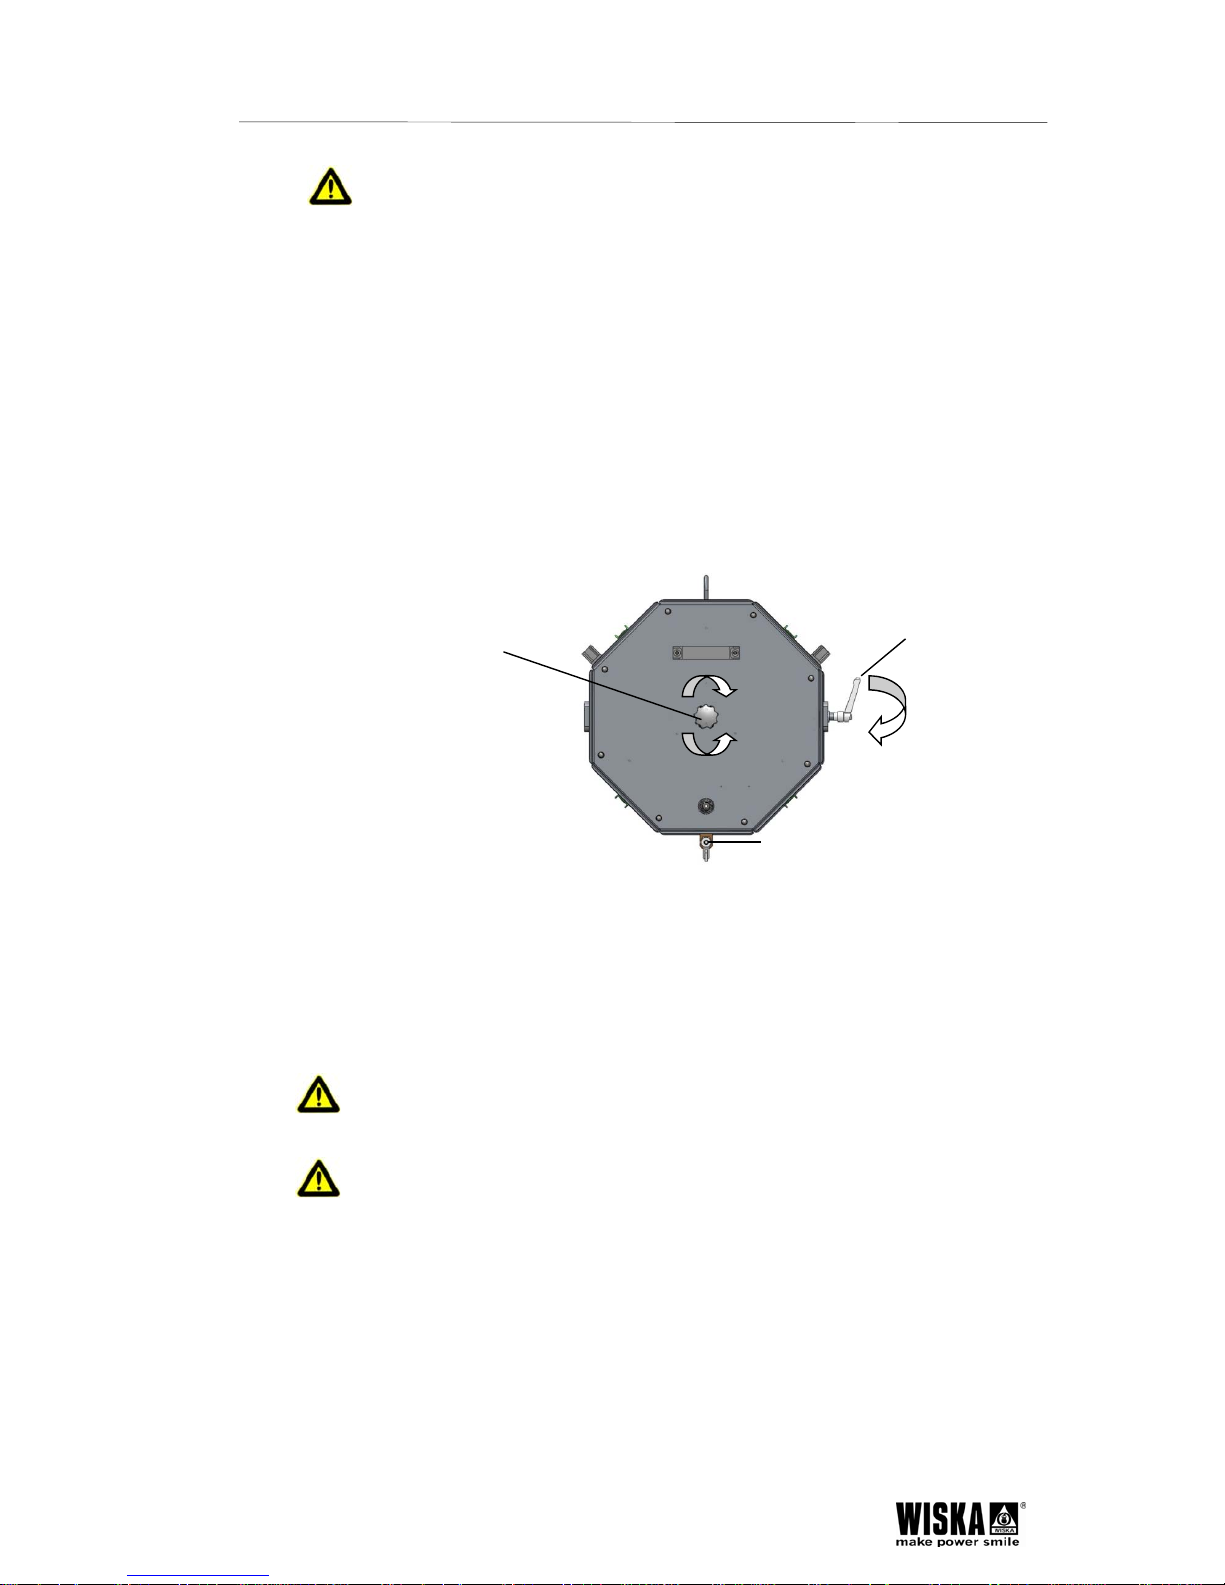
5.3 Searchlight head SKS 575
6
7
5
5 Pressure connection for atmospheric pressure
6 Lamp change mechanism
7 Hand wheel for adjusting the reflector
5.4 Adjustment of the reflector
Risk of getting burned! Never touch the searchlight during operation without
protection. The casing can reach 120 °C. In case of burns cool the injured area
immediately and seek medical help.
Risk of glare! Never look into the arc during operation. This is dangerous for the
eyes. Never point the searchlight directly at anyone. Before switching on make
sure that nobody is near the searchlight.
The reflector can be adjusted with the aid of the hand wheel (7) on the rear of the
searchlight head. To do this, turn the hand wheel (7) until the desired angle is achieved.
Page 16

50100935001_SKS-575(Ver2)Rev.02112012E
Maintenance
16
5.5 Changing the lamp
(without opening the casing)
Risk of getting burned! Never touch the searchlight during operation without
protection. The casing can reach 120 °C. In case of burns cool the injured area
immediately and seek medical help.
Risk of glare! Never look into the arc during operation. This is dangerous for the
eyes. Never point the searchlight directly at anyone. Before switching on make
sure that nobody is near the searchlight.
The lamp can be exchanged without opening the casing. To do this, switch off the
appliance via the button (O); the LED on the PSUH SKS 575 goes out. Switch over the
lamp using the lamp change mechanism (6) and then press the start button (I) on the
PSUH SKS 575 again. The changed lamp ramps up slowly to the full light intensity.
5.6 Switching off
Attention! Switch off the searchlight only via the button (O). In order to avoid a
vacuum in the casing, wait until the searchlight has cooled down before closing
the ball valve.
6. Maintenance
6.1 Cleaning
Clean the front glass on the outside as needed. When doing so check the function of the
fixing clamps and inspect them for rust. Cleaning the inside of the searchlight is not
necessary. A coloured film develops on the mirror surface over time. This is harmless
and does not affect the light power.
Risk of glare! Ensure that the searchlight cannot be switched on during
cleaning work.
Page 17
50100935001_SKS-575(Ver2)Rev.02112012E Replacement of defective parts
17
7. Replacement of defective parts
7.1 Before starting work
1. Make sure that the complete electrical system is de-energised and that it cannot
be switched on again accidentally.
2. Wait until the searchlight has cooled down.
3. Read chapter 2.2 How to handle metal halide lamps.
4. Make sure that the metal halide lamps do not get damaged during handling.
7.2 Assembly overview
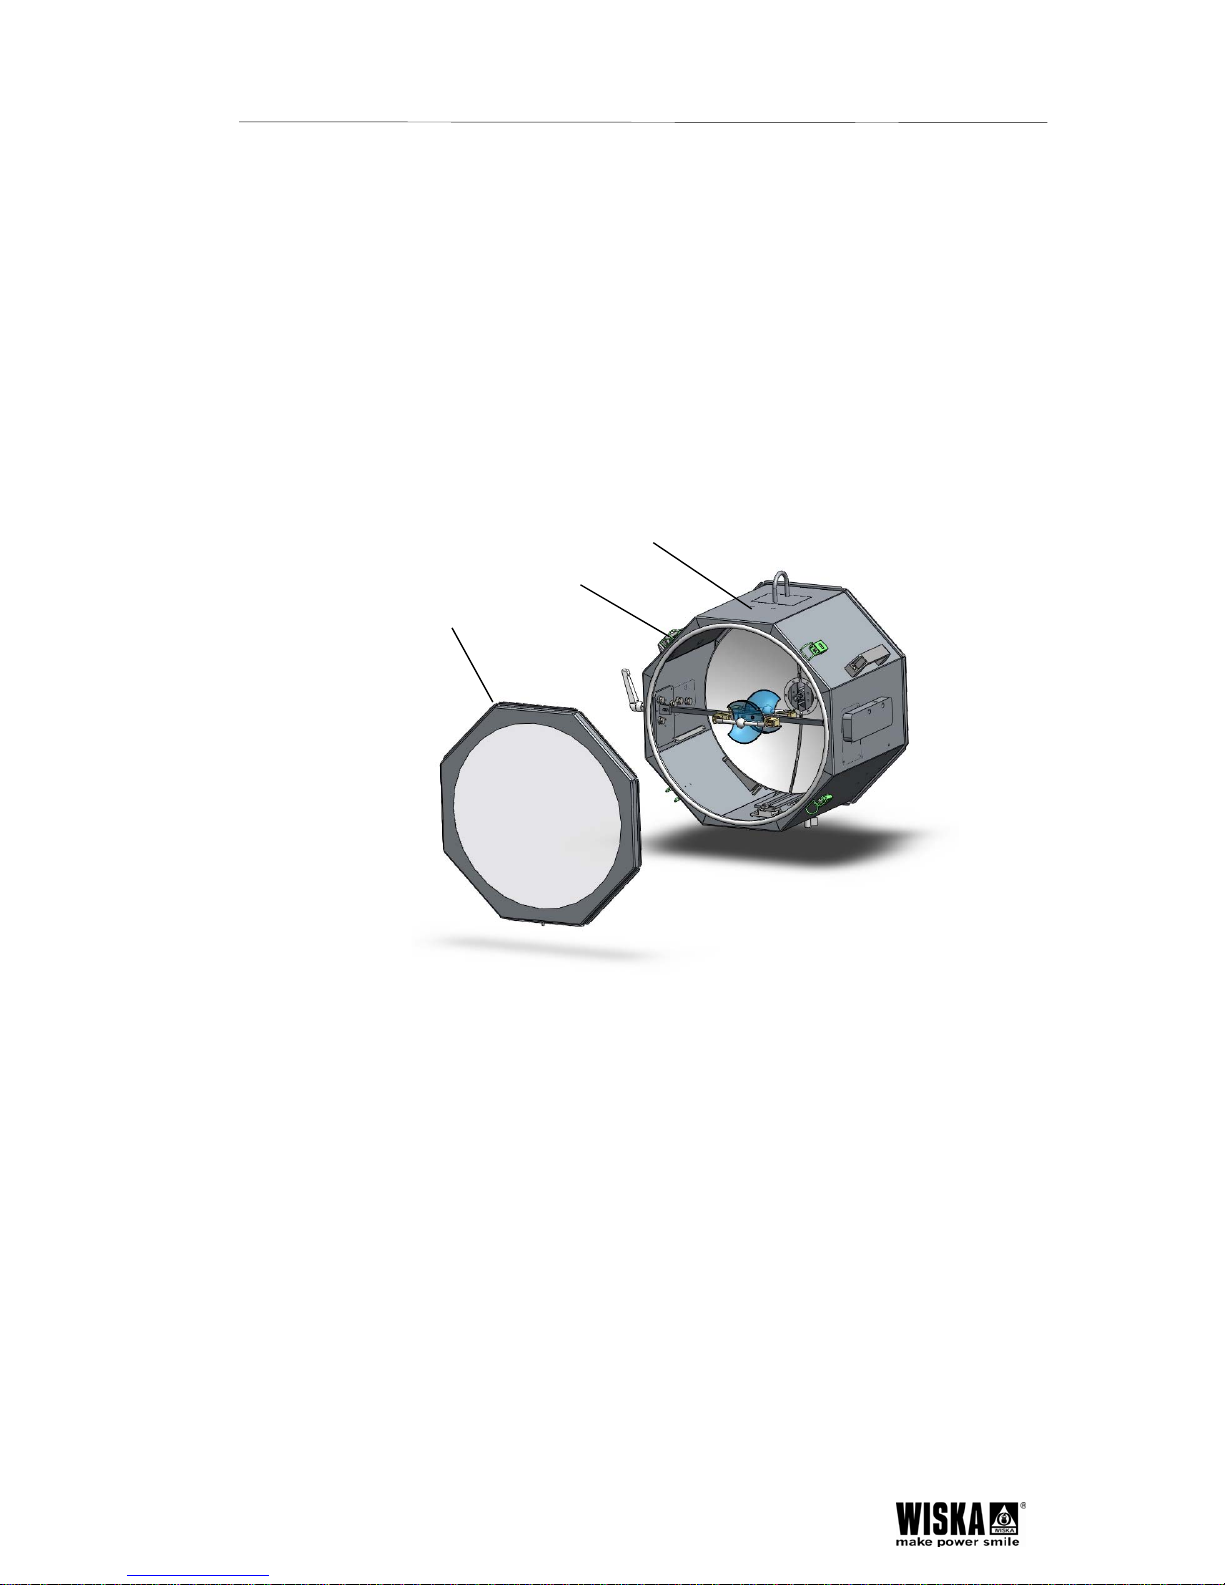
The following illustrations should help you to better understand the design of the
searchlight, before starting with the replacement work. Follow the instructions on the
following pages for carrying out the replacement work!
1
3
2
1 Casing
2 Front glass
3 Quick release clamp
Page 18
50100935001_SKS-575(Ver2)Rev.02112012E Replacement of defective parts
18
7.3 Lamp replacement
The lamp is defective, if
it only flashes a few times, but does not light,
the lamp electrodes are burned out,
the glass bulb is black.
Replace the lamp also if it has reached its average lifetime of 750 hours.
Danger! Persons who have to carry out these repairs, have to be instructed by
a trained professional and also made aware of the dangers and necessary
protective measures to be taken!
Be sure to read chapter 7.1 Before starting work!
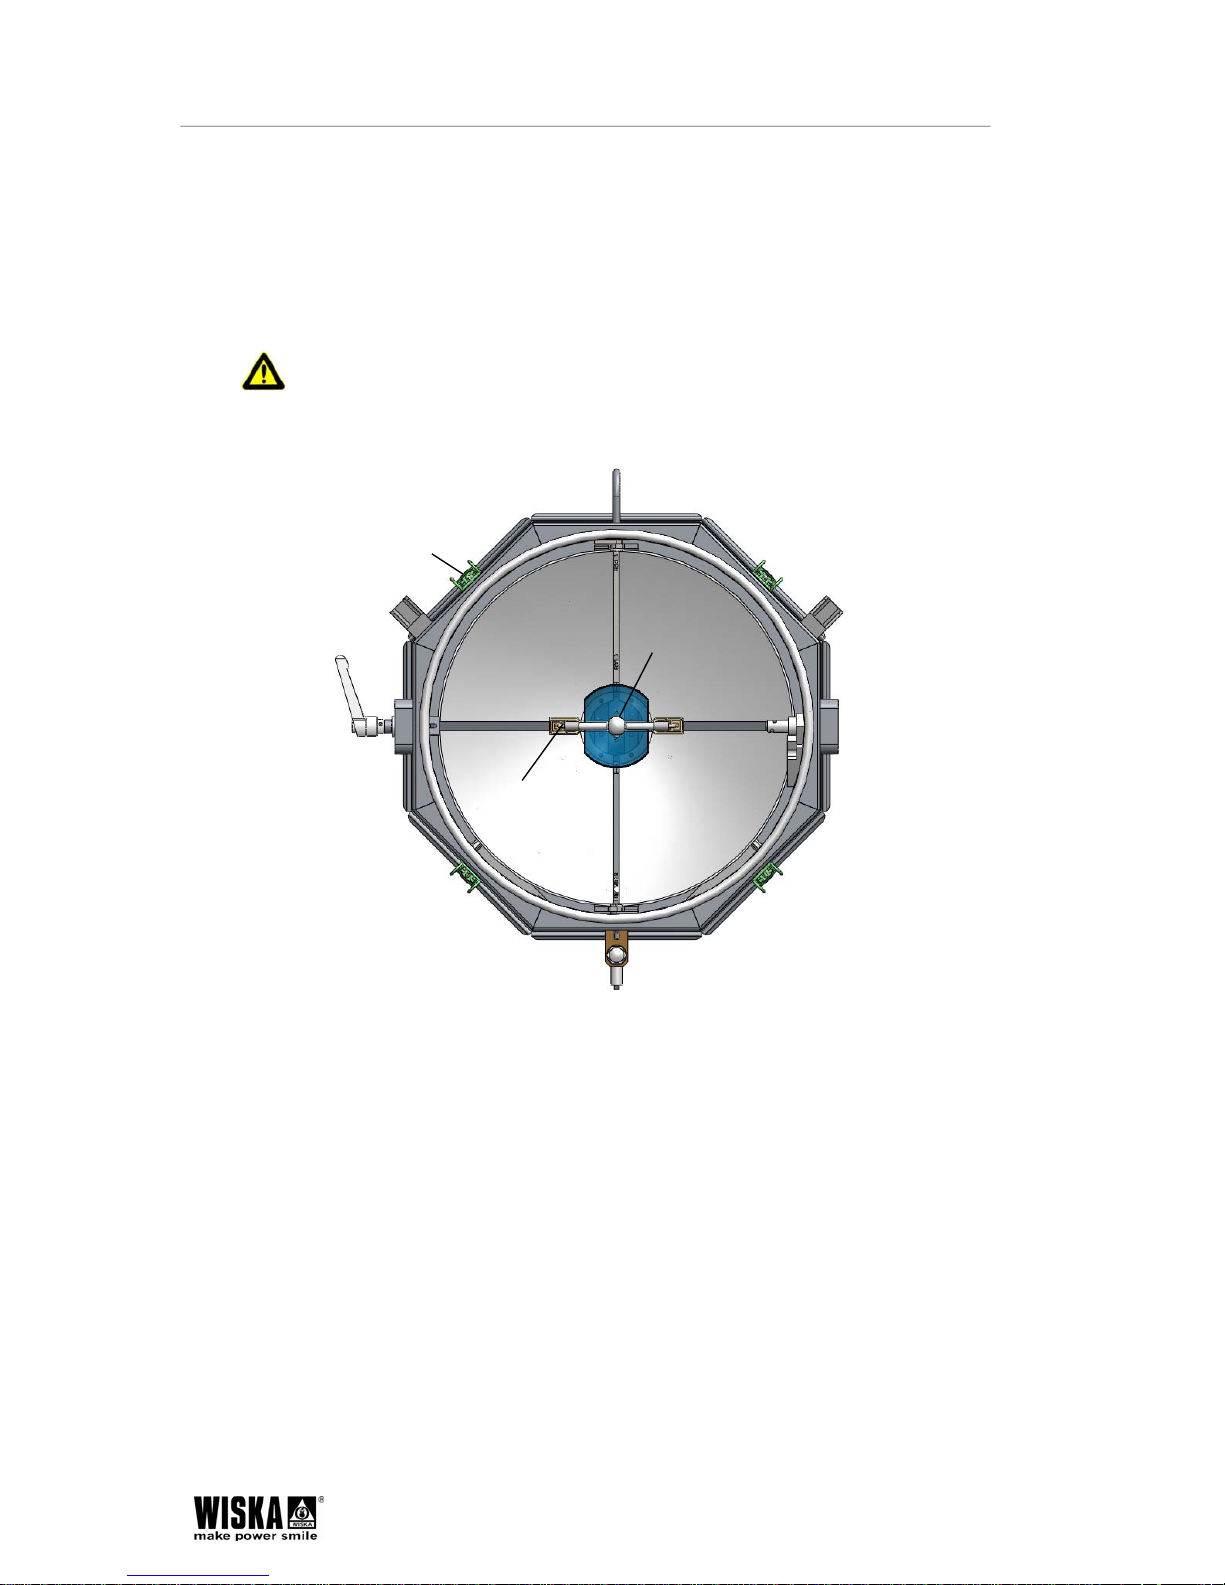
3
4
5
Removal
1. Disengage the quick releases 3 on the front side and put the front glass carefully
aside.
Note: The glass rod of the lamp bulb 4 is held horizontally in the lamp support 5.
The correct handling is to be observed during removal and installation.
2. Loosen the defective lamp until it can be removed without force in an upward
direction out of the holder 5.
3. Put the defective lamp down so that the glass bulb does not get damaged.
Page 19
50100935001_SKS-575(Ver2)Rev.02112012E
Disposal
19
Attention: If for any reason the glass bulb of the lamp should be broken, then
you have to proceed as described in 2.3 Protective measures in case of a
broken lamp, to protect your health and the environment.
Installation
Attention! Check the new lamp before installation for fingerprints or damage
such as scratches or cracks. Do not start the lamp if there is visible damage.
Remove any fingerprints with an alcohol solution and a soft lint-free cloth.
1. Open the protective packing of the new lamp. Make sure not to touch the glass
bulb with your fingers during installation. Use disposable gloves when handling
the lamp to avoid leaving fingerprints.
2. Insert the lamp into the slot in the lamp holder 5 until it reaches the stop.
3. Fix the lamp in this position.
4. Put the front part of the searchlight back in place and fix it with the quick
releases.
5. Dispose of the defective lamp properly as described in 2.2 How to handle metal
halide lamps.
8. Disposal
Electrical components contain substances which are hazardous for the environ ment.
Ensure proper disposal or send the defect parts to WISKA. The address is on the back
page of these instructions.
Pay particular attention to properly dispose of the lamps. To do so also read chapter 2.2
How to handle metal halide lamps.
Health risk
Under no circumstances may metal halide lamps be destroyed during disposal.
For this see also 2.3 Protective measures in case of a broken lamp.
Page 20
50100935001_SKS-575(Ver2)Rev.02112012E Spare parts
20
9. Spare parts
Searchlight head SKS 575
Designation Art. no.
Front frame + front glass 22000038
Reflector unit (two-part) 22000105
Auxiliary mirror 22000106
Metal halide discharge lamp 575 W 22000107
Lamp holder 22000109
Ignitor type IG575KVG 22000108
Ballast PSUH
Designation Art. no.
Series impedance for 575 W lamp 22000110
Accessories
Designation Art. no.
Cover S 400 22000473
Mounting device (Turning Unit) 22000474
All other parts can be obtained by contacting WISKA sales.
Page 21
50100935001_SKS-575(Ver2)Rev.02112012E Type Approval
21
10. Type Approval
Page 22
50100935001_SKS-575(Ver2)Rev.02112012E Type Approval
22
Page 23
50100935001_SKS-575(Ver2)Rev.02112012E Type Approval
23
Page 24

WISKA Hoppmann & Mulsow GmbH
Kisdorfer Weg 28
24568 Kaltenkirchen
Germany
+49 (0) 4191/508-100
+49 (0) 4191/508-209
[email protected]
www.wiska.de
 Loading...