

Page 1
User Guide
Model Number: W17-Y
I. Product Overview
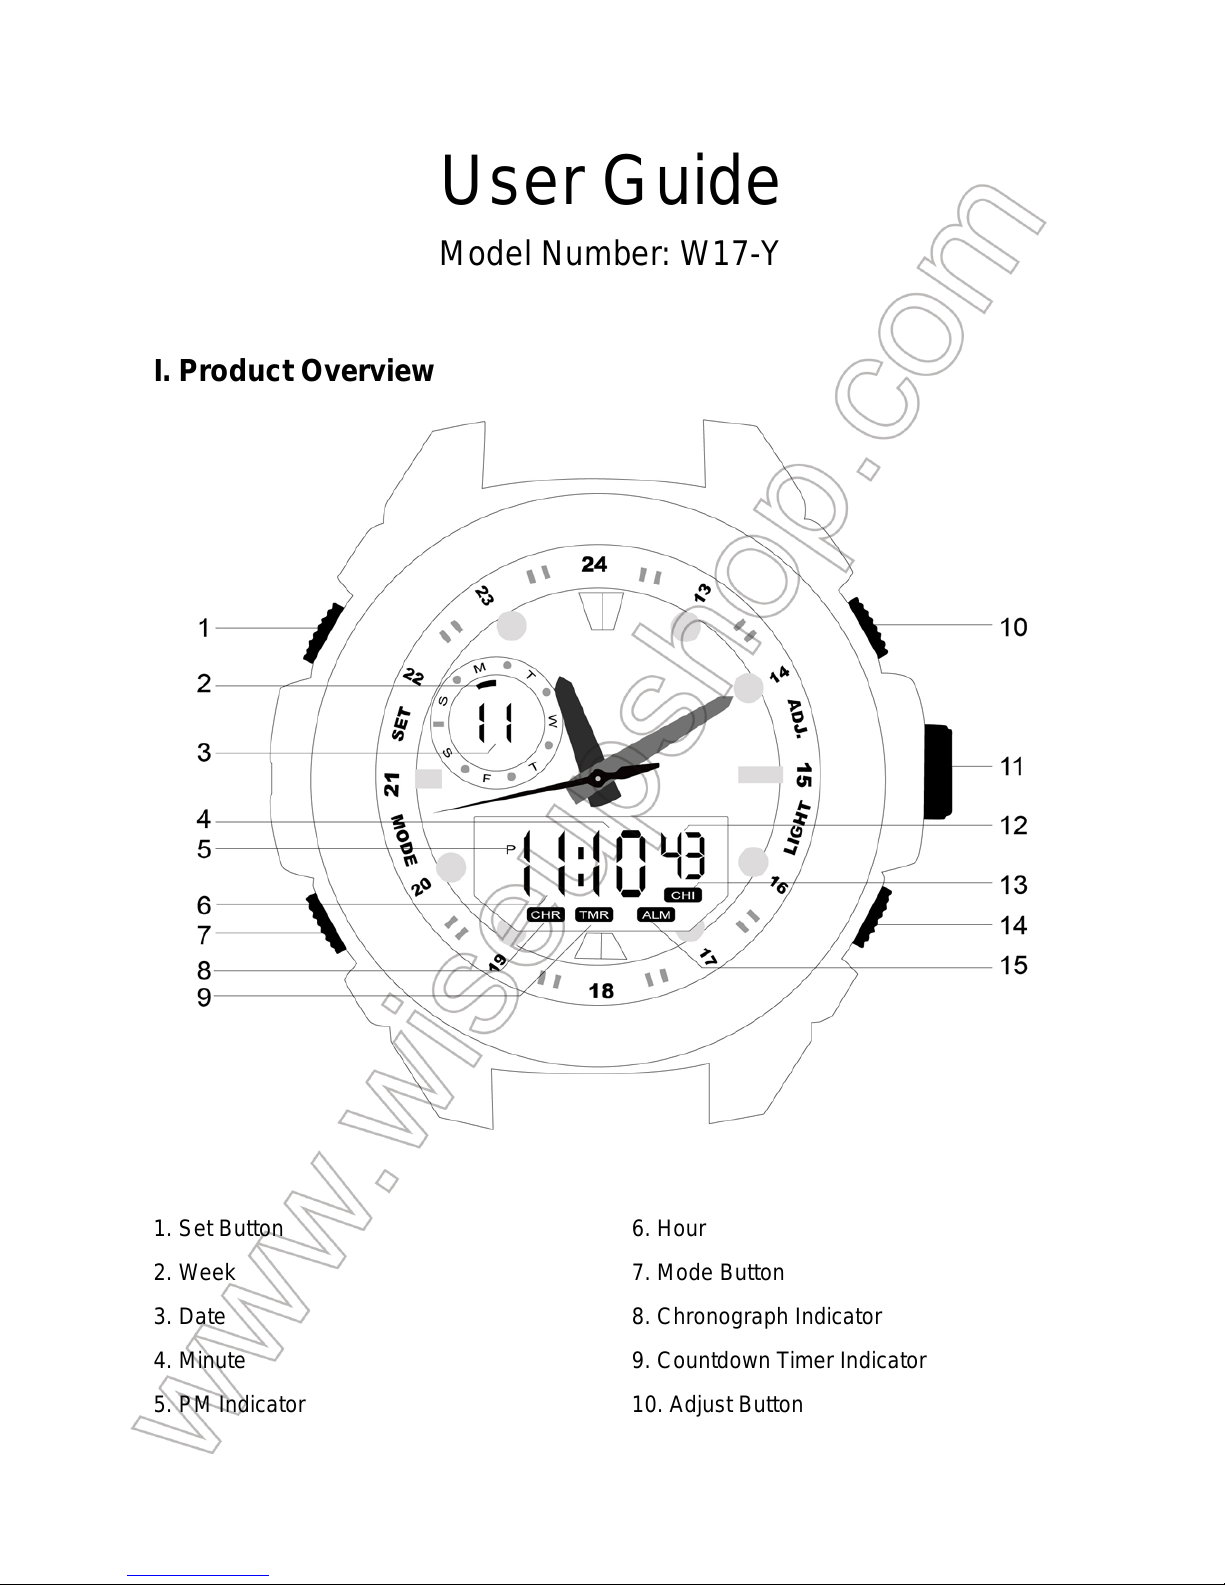
1. Set Button
2. Week
3. Date
4. Minute
5. PM Indicator
6. Hour
7. Mode Button
8. Chronograph Indicator
9. Countdown Timer Indicator
10. Adjust Button
Page 2
11. Time Adjustment Knob
12. Seconds
13. Hourly Chime Indicator
14. Light Button
15. Alarm Indicator
II. Current Time Setting
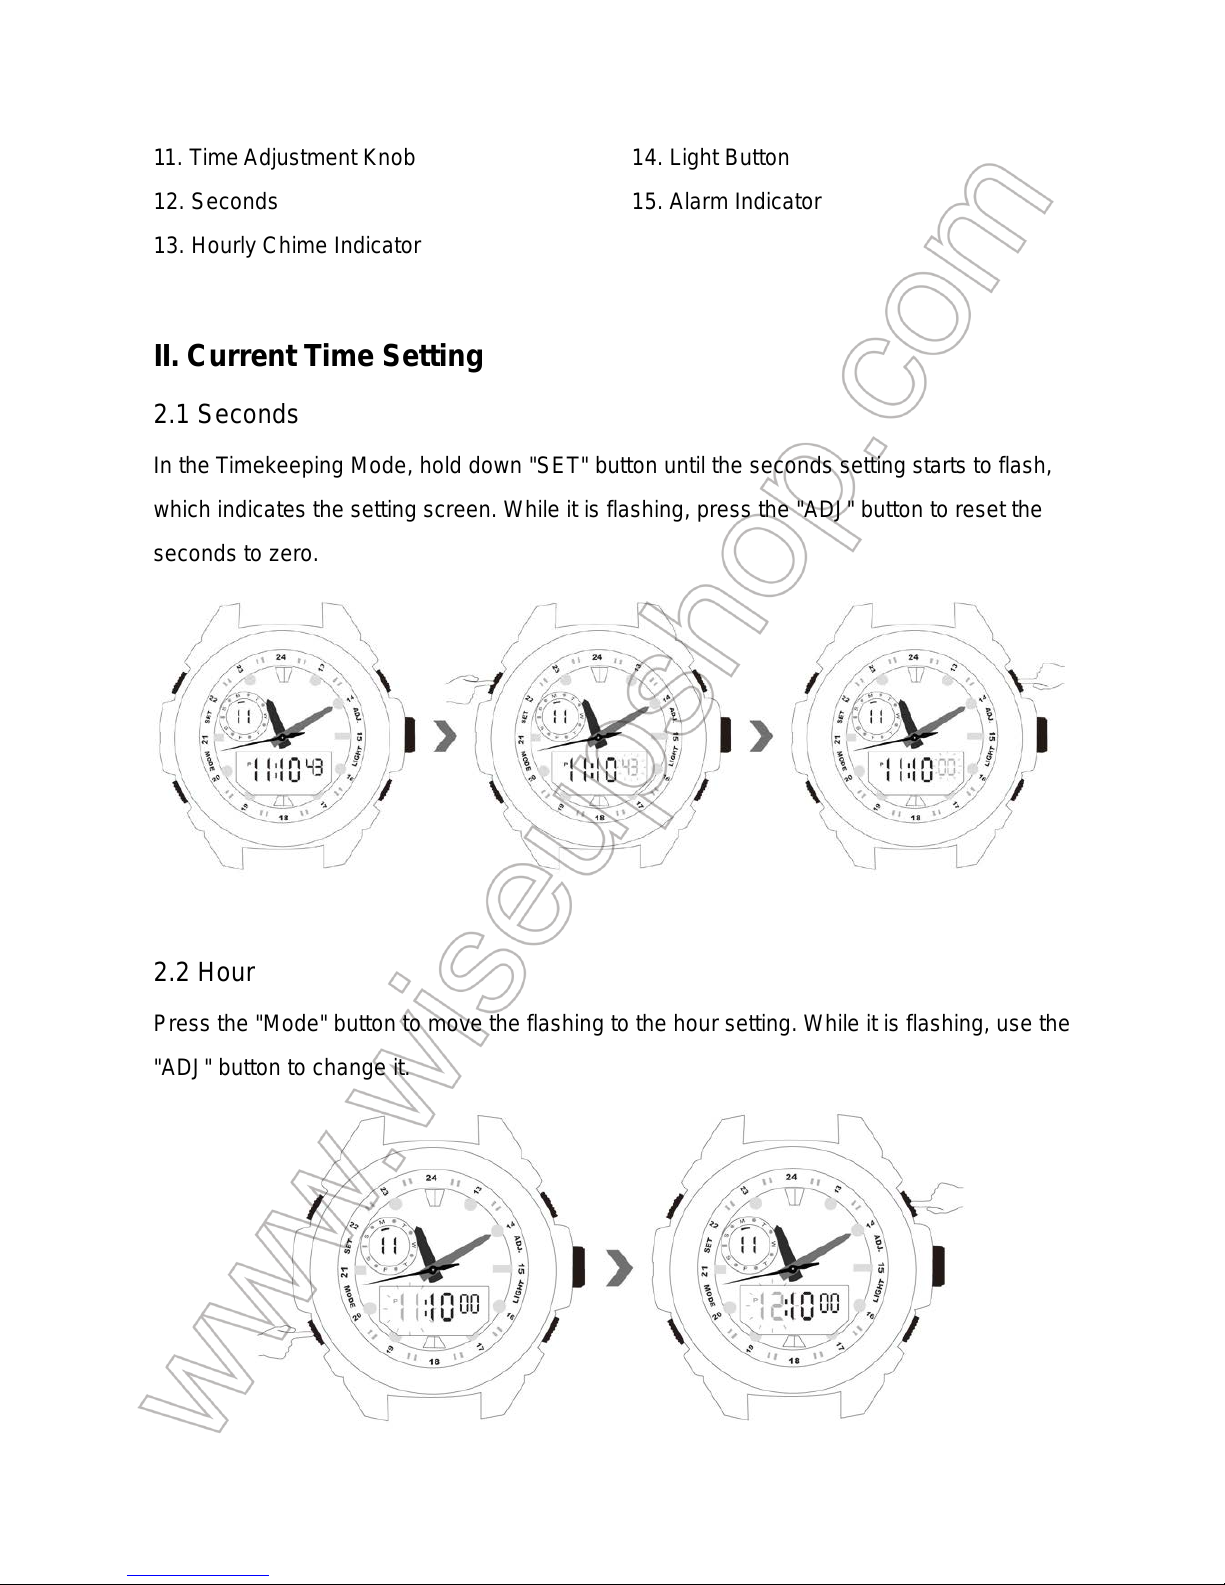
2.1 Seconds
In the Timekeeping Mode, hold down "SET" button until the seconds setting starts to flash,
which indicates the setting screen. While it is flashing, press the "ADJ" button to reset the
seconds to zero.
2.2 Hour
Press the "Mode" button to move the flashing to the hour setting. While it is flashing, use the
"ADJ" button to change it.
Page 3
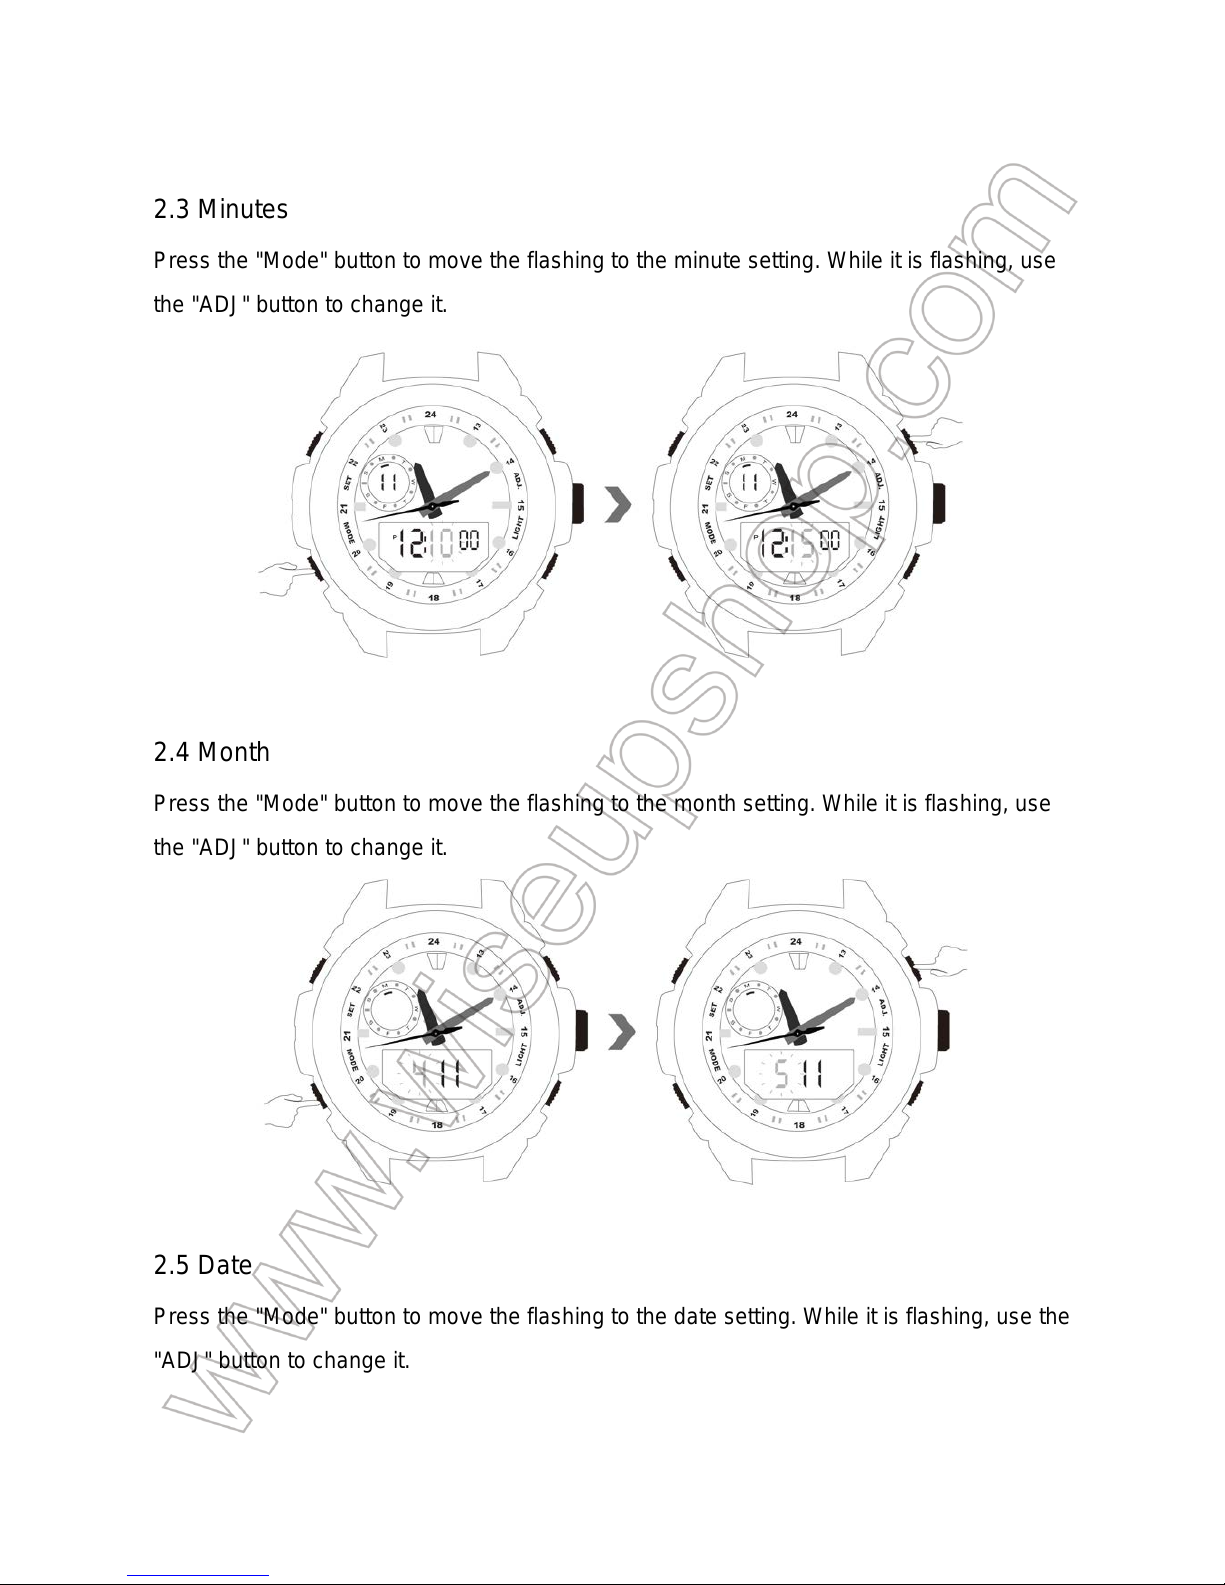
2.3 Minutes
Press the "Mode" button to move the flashing to the minute setting. While it is flashing, use
the "ADJ" button to change it.
2.4 Month
Press the "Mode" button to move the flashing to the month setting. While it is flashing, use
the "ADJ" button to change it.
2.5 Date
Press the "Mode" button to move the flashing to the date setting. While it is flashing, use the
"ADJ" button to change it.
Page 4
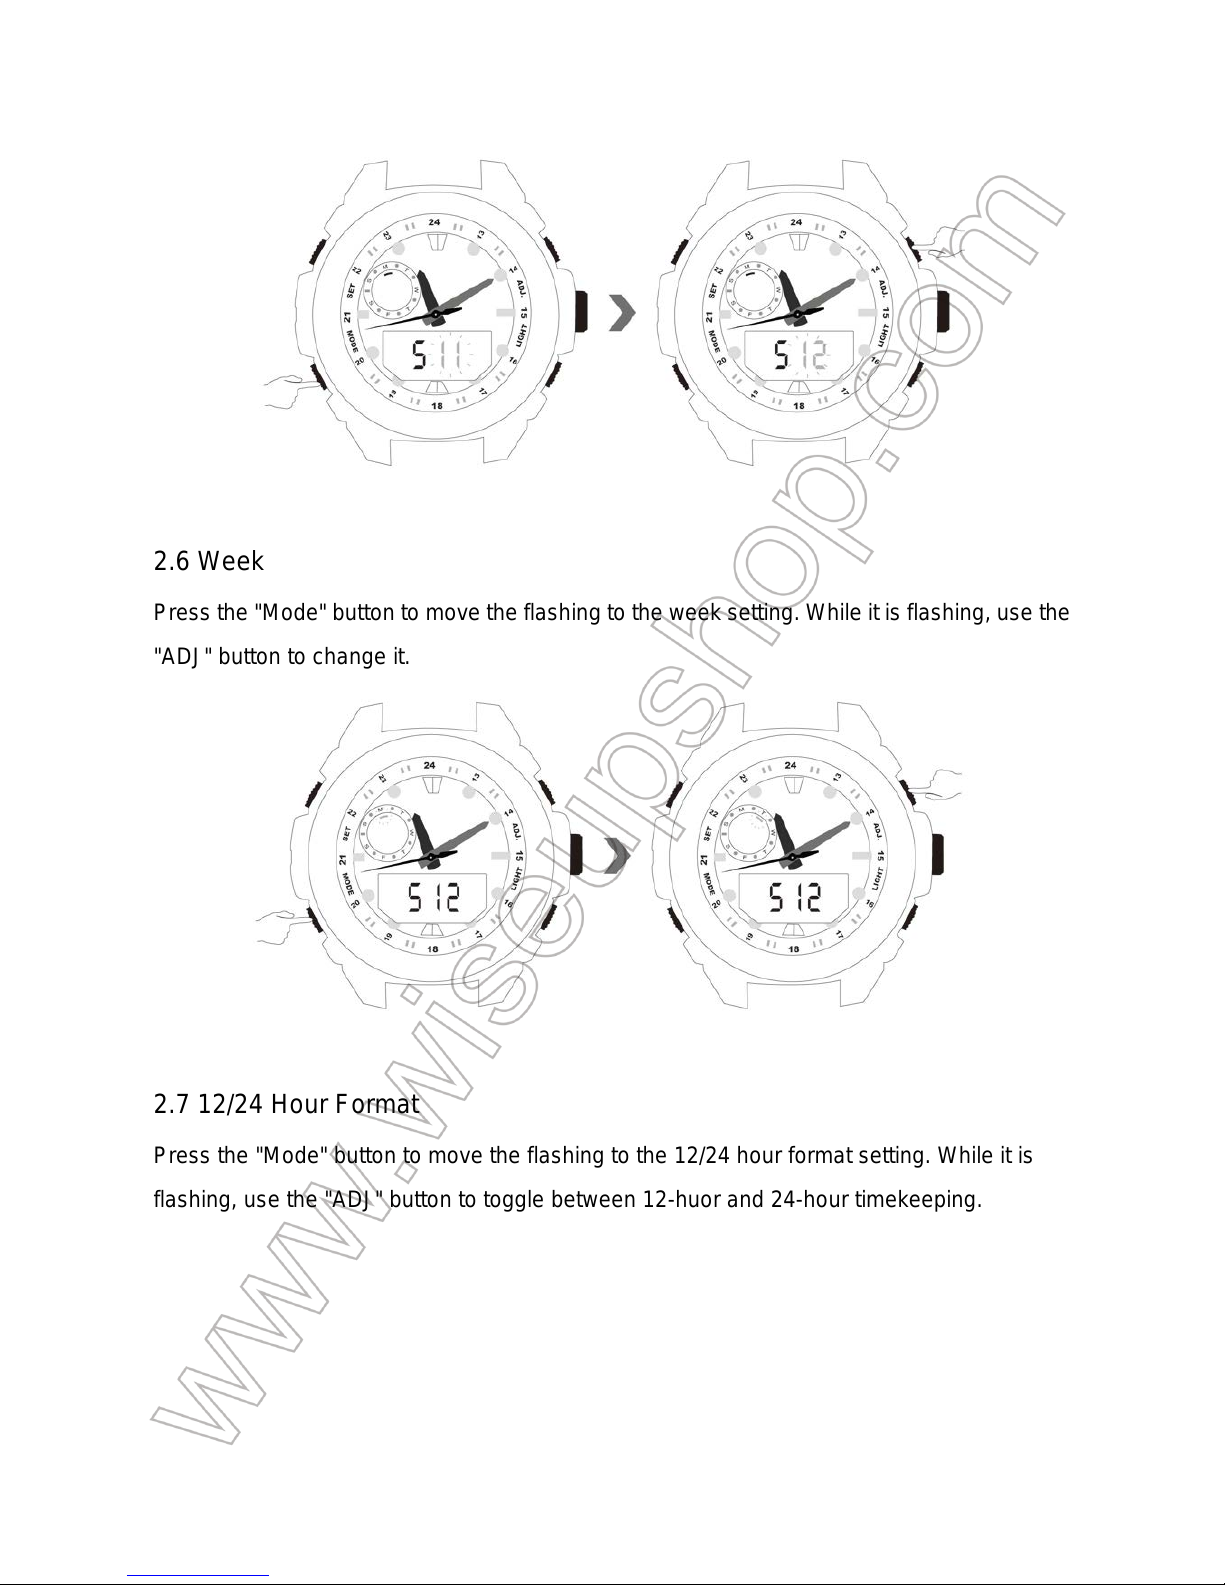
2.6 Week
Press the "Mode" button to move the flashing to the week setting. While it is flashing, use the
"ADJ" button to change it.
2.7 12/24 Hour Format
Press the "Mode" button to move the flashing to the 12/24 hour format setting. While it is
flashing, use the "ADJ" button to toggle between 12-huor and 24-hour timekeeping.
Page 5
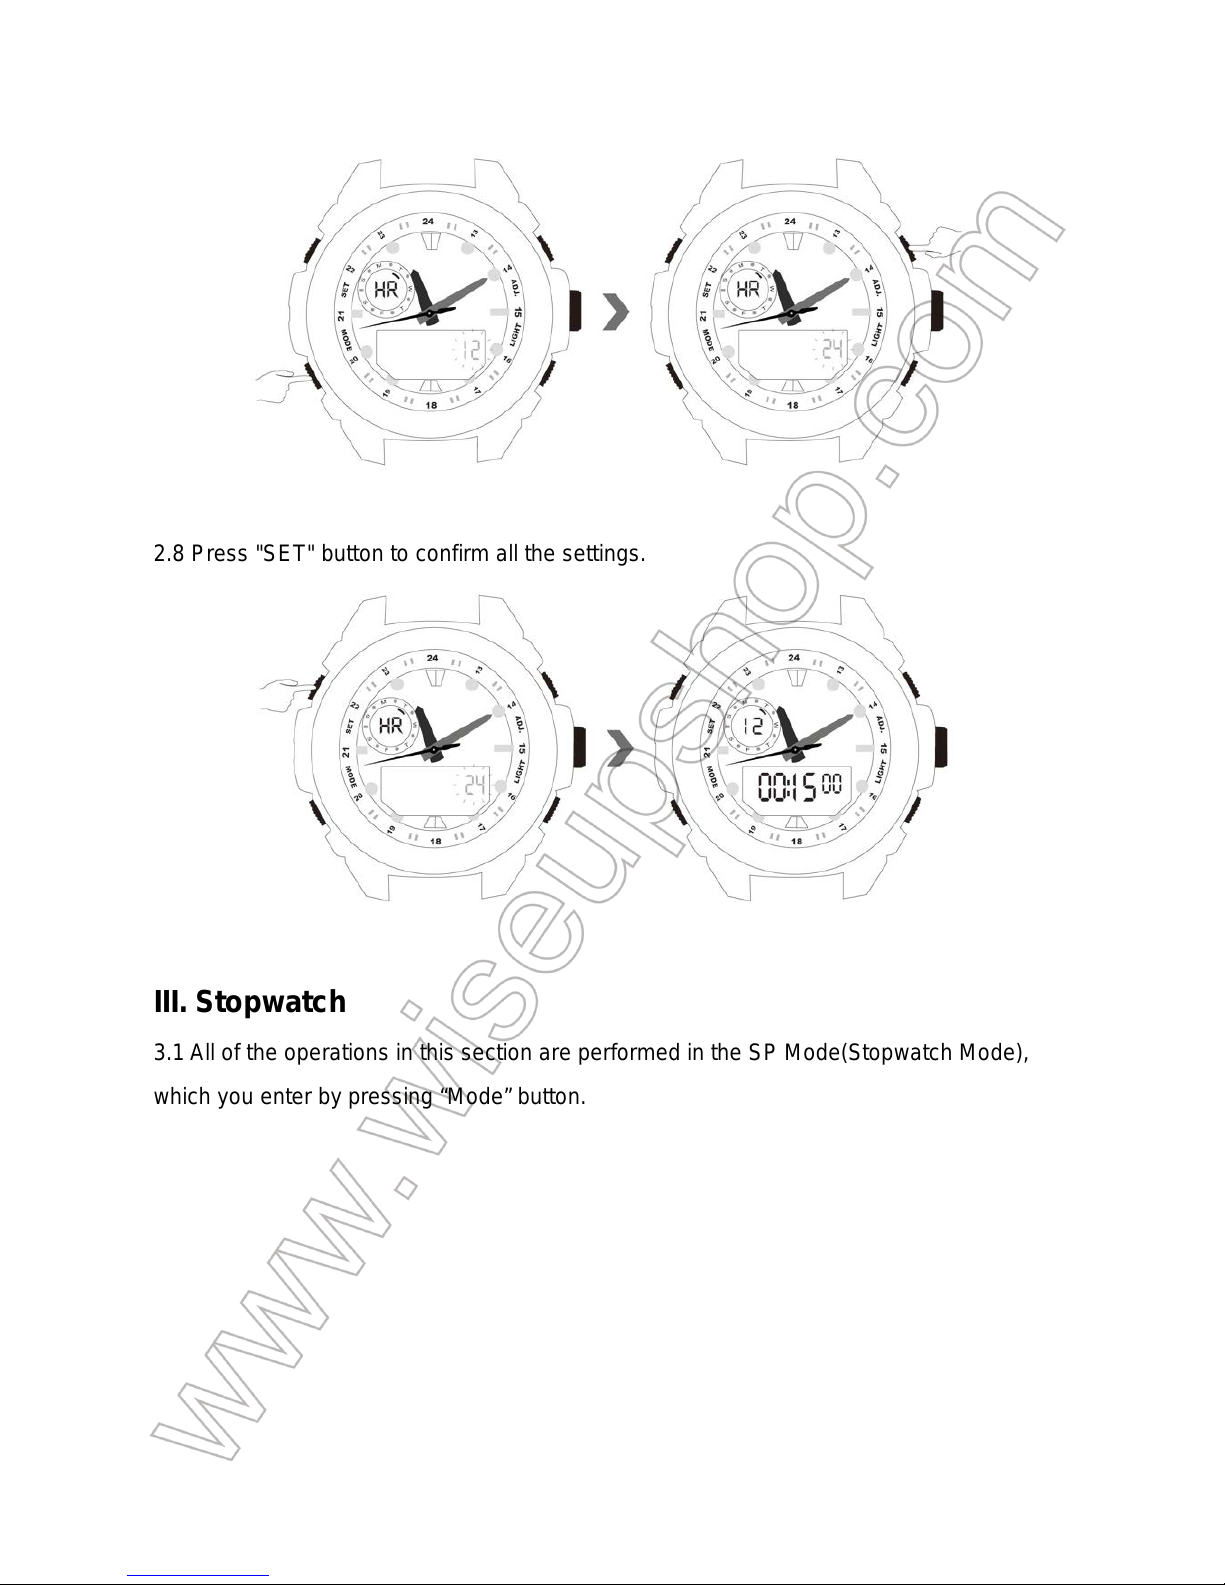
2.8 Press "SET" button to confirm all the settings.
III. Stopwatch
3.1 All of the operations in this section are performed in the SP Mode(Stopwatch Mode),
which you enter by pressing “Mode” button.
Page 6
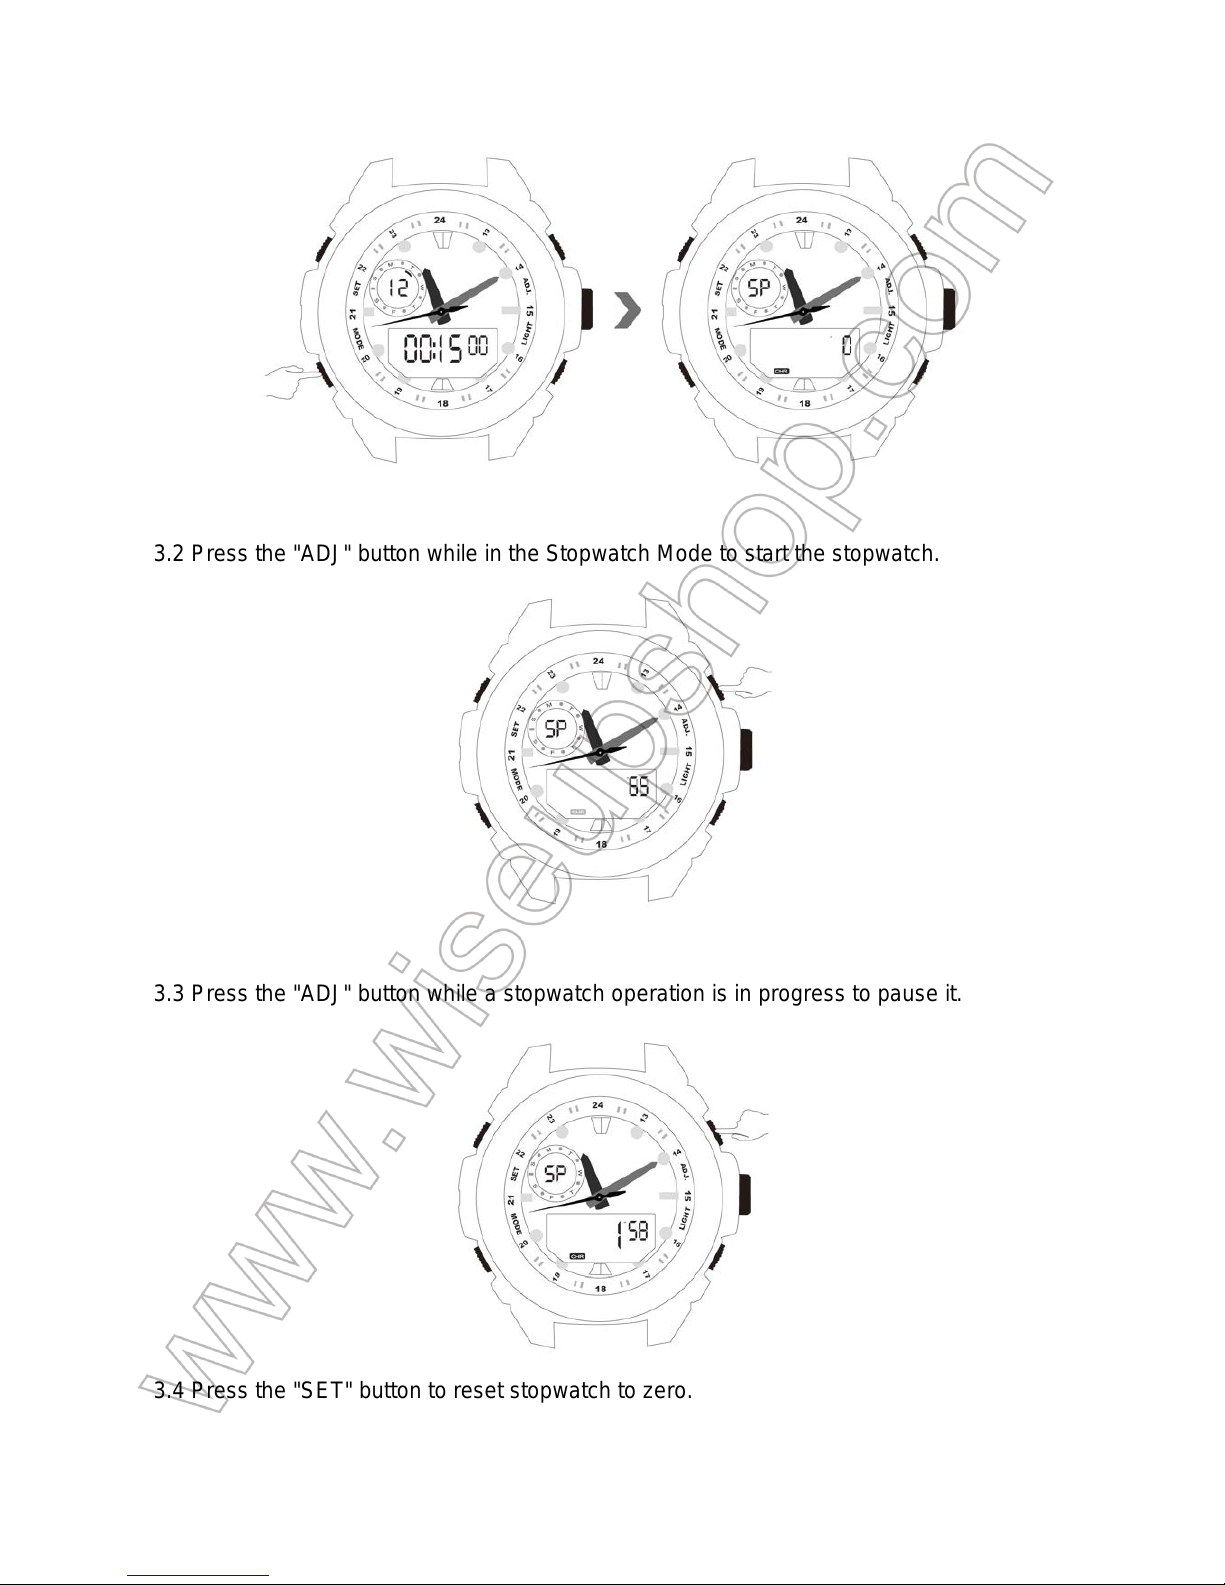
3.2 Press the "ADJ" button while in the Stopwatch Mode to start the stopwatch.
3.3 Press the "ADJ" button while a stopwatch operation is in progress to pause it.
3.4 Press the "SET" button to reset stopwatch to zero.
Page 7
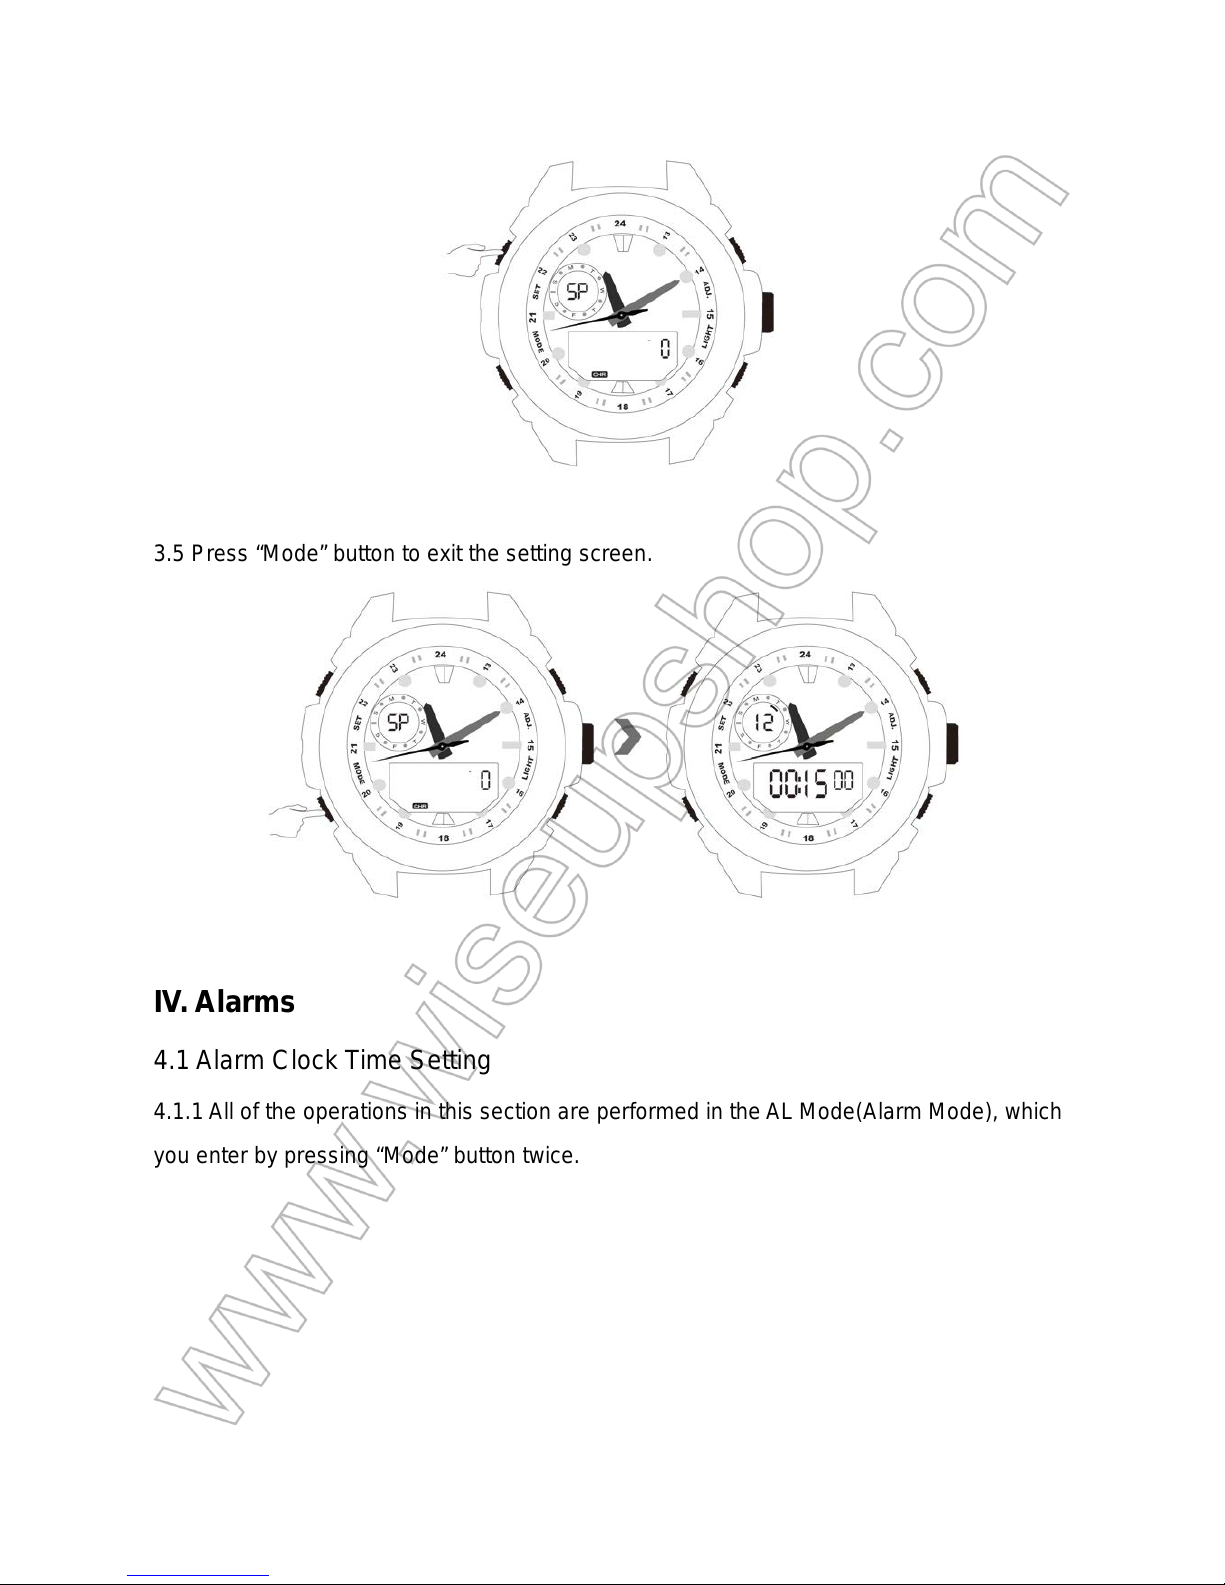
3.5 Press “Mode” button to exit the setting screen.
IV. Alarms
4.1 Alarm Clock Time Setting
4.1.1 All of the operations in this section are performed in the AL Mode(Alarm Mode), which
you enter by pressing “Mode” button twice.
Page 8
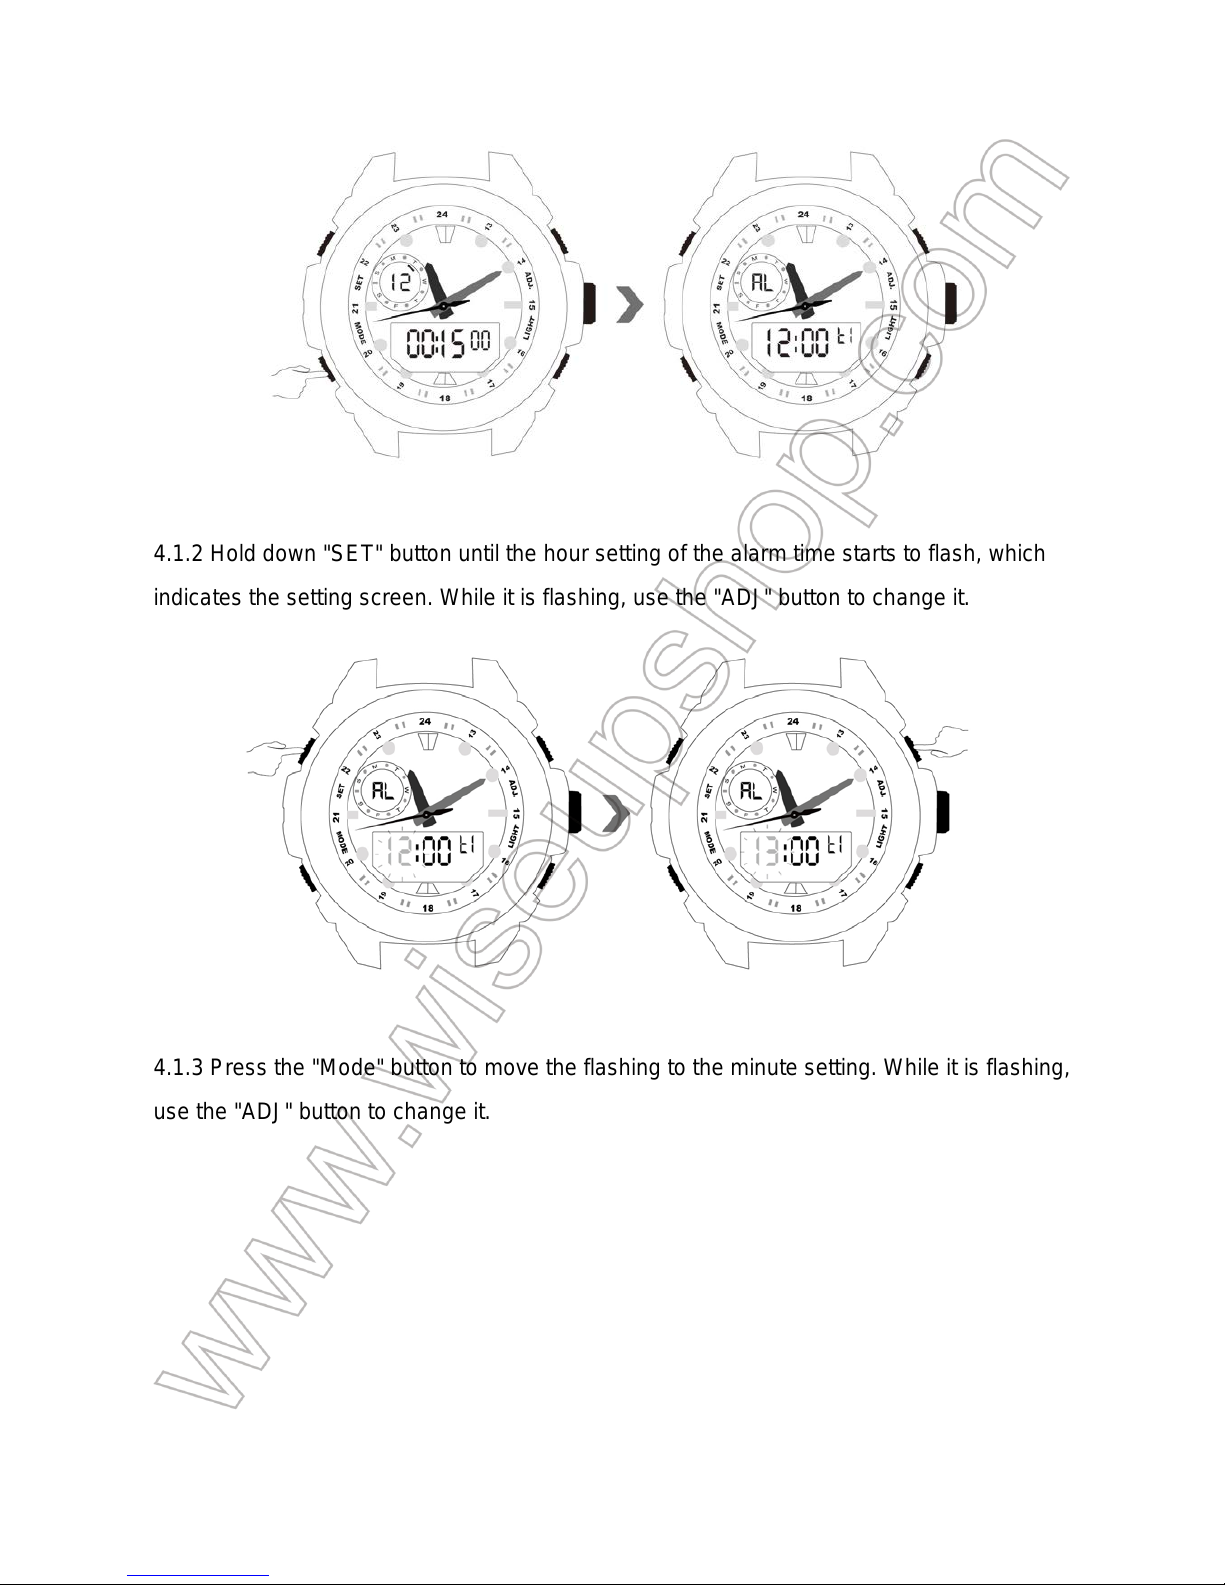
4.1.2 Hold down "SET" button until the hour setting of the alarm time starts to flash, which
indicates the setting screen. While it is flashing, use the "ADJ" button to change it.
4.1.3 Press the "Mode" button to move the flashing to the minute setting. While it is flashing,
use the "ADJ" button to change it.
Page 9
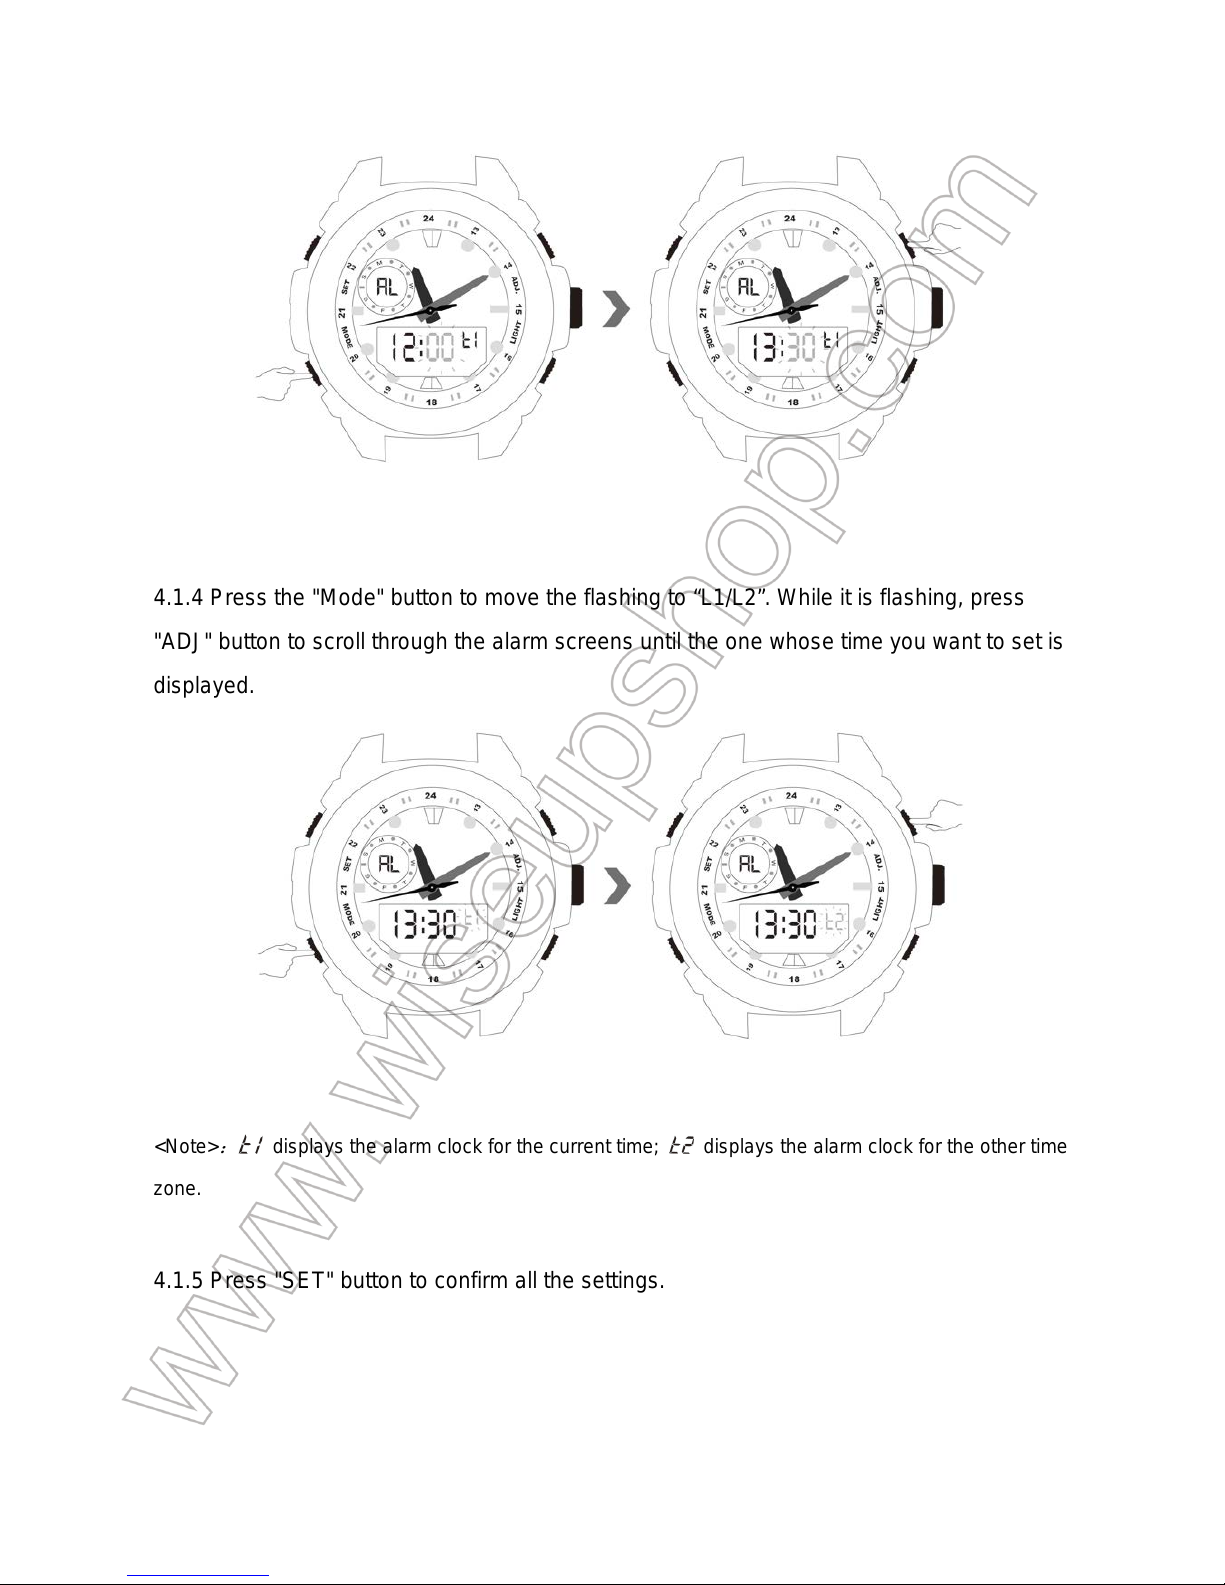
4.1.4 Press the "Mode" button to move the flashing to “L1/L2”. While it is flashing, press
"ADJ" button to scroll through the alarm screens until the one whose time you want to set is
displayed.
<Note>
:
displays the alarm clock for the current time; displays the alarm clock for the other time
zone.
4.1.5 Press "SET" button to confirm all the settings.
Page 10
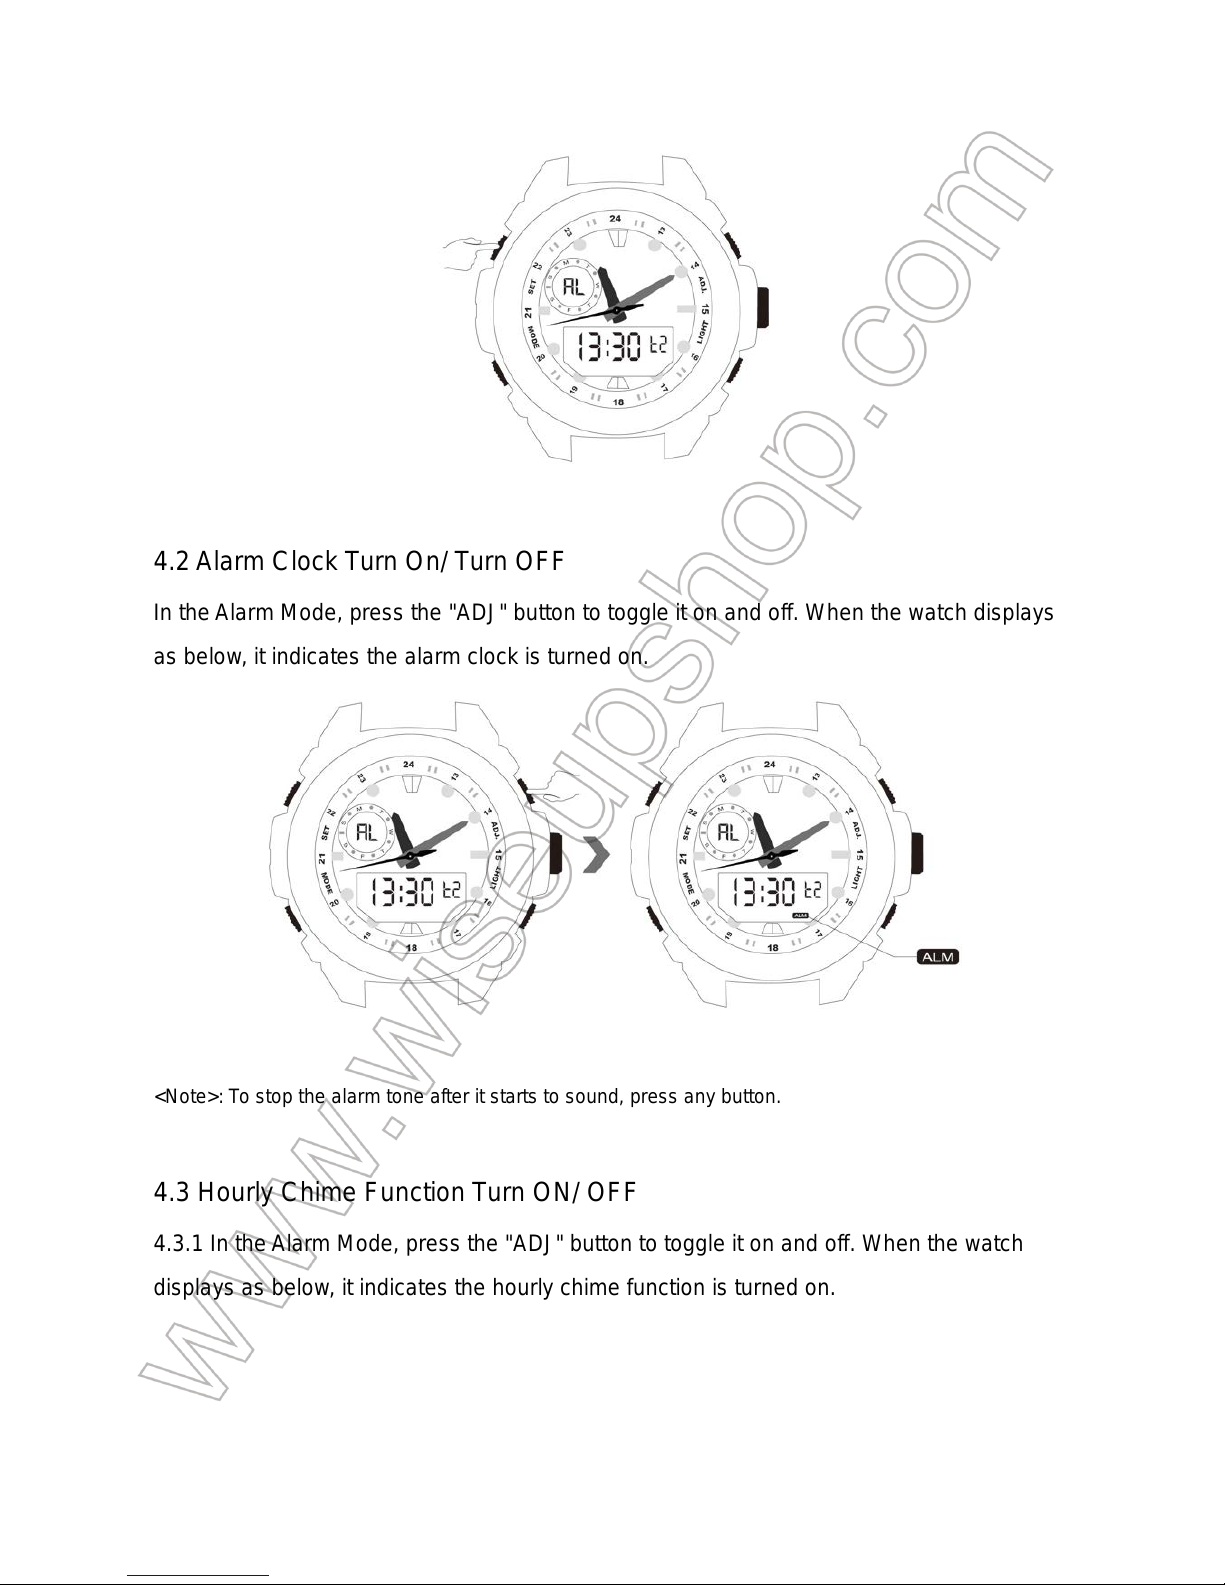
4.2 Alarm Clock Turn On/ Turn OFF
In the Alarm Mode, press the "ADJ" button to toggle it on and off. When the watch displays
as below, it indicates the alarm clock is turned on.
<Note>: To stop the alarm tone after it starts to sound, press any button.
4.3 Hourly Chime Function Turn ON/ OFF
4.3.1 In the Alarm Mode, press the "ADJ" button to toggle it on and off. When the watch
displays as below, it indicates the hourly chime function is turned on.
Page 11
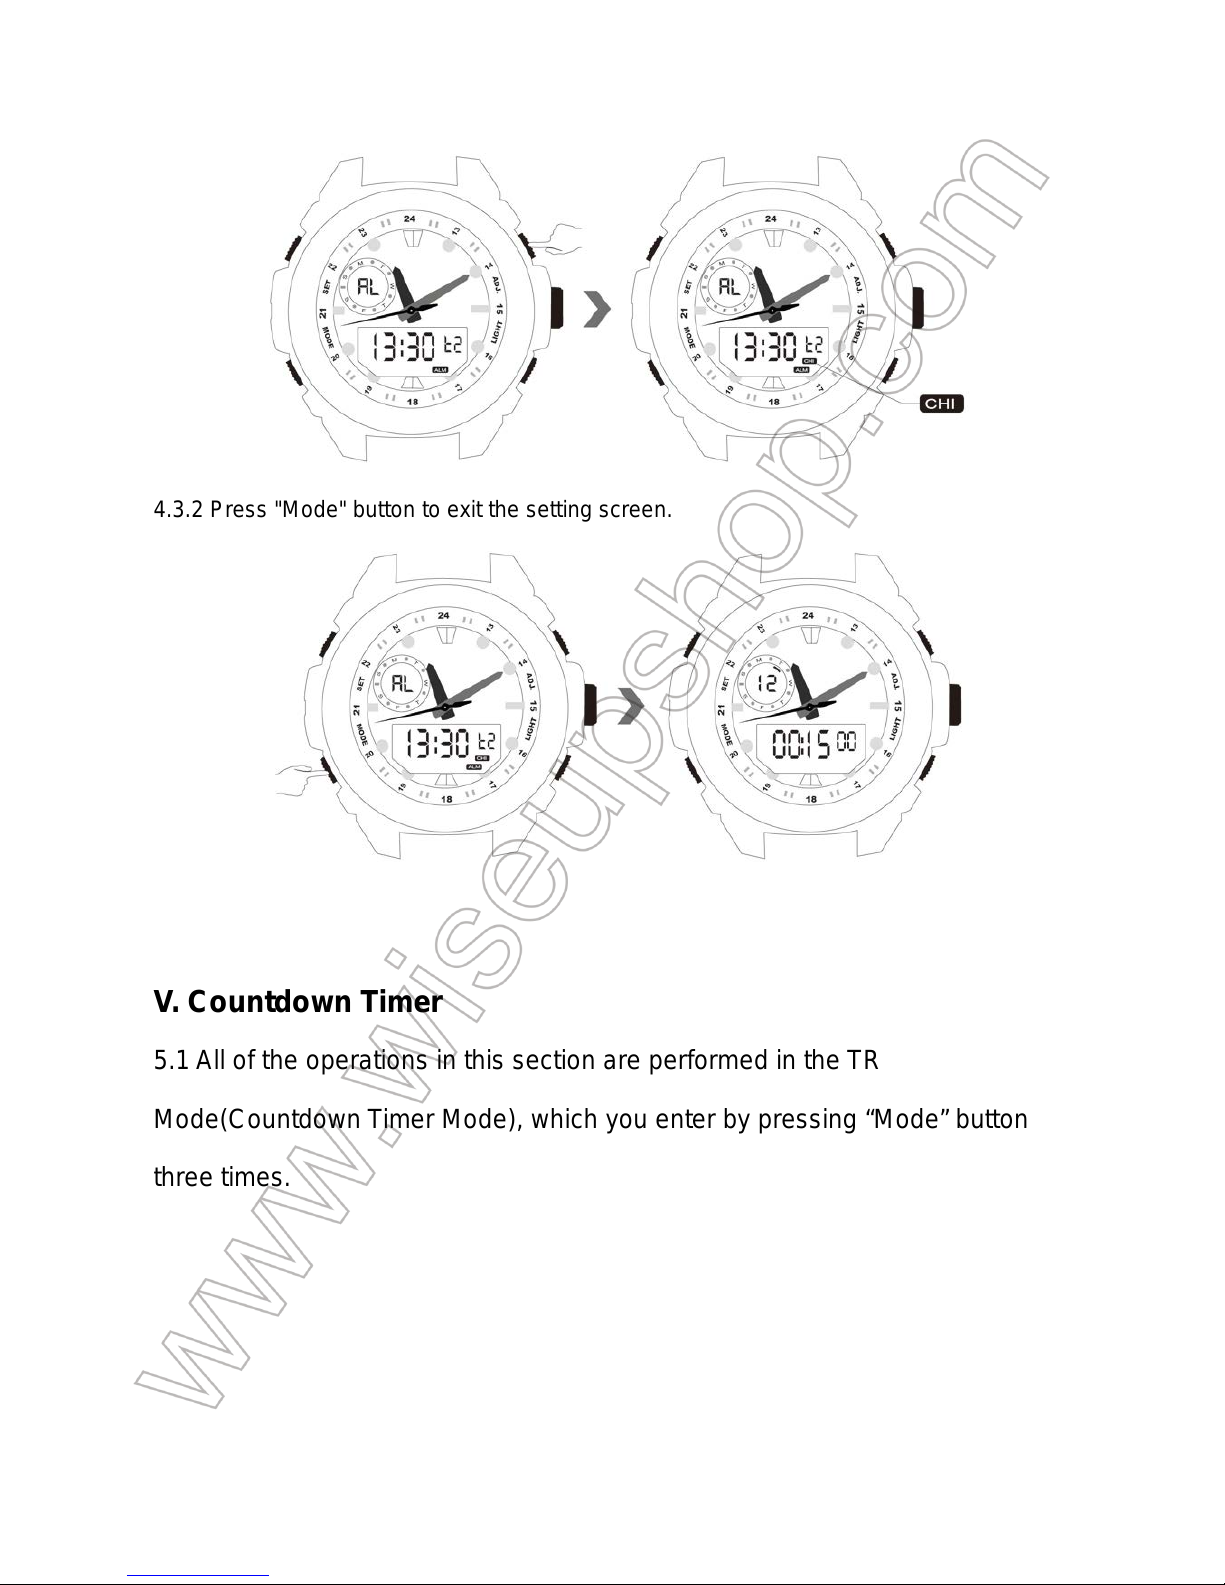
4.3.2 Press "Mode" button to exit the setting screen.
V. Countdown Timer
5.1 All of the operations in this section are performed in the TR
Mode(Countdown Timer Mode), which you enter by pressing “Mode” button
three times.
Page 12
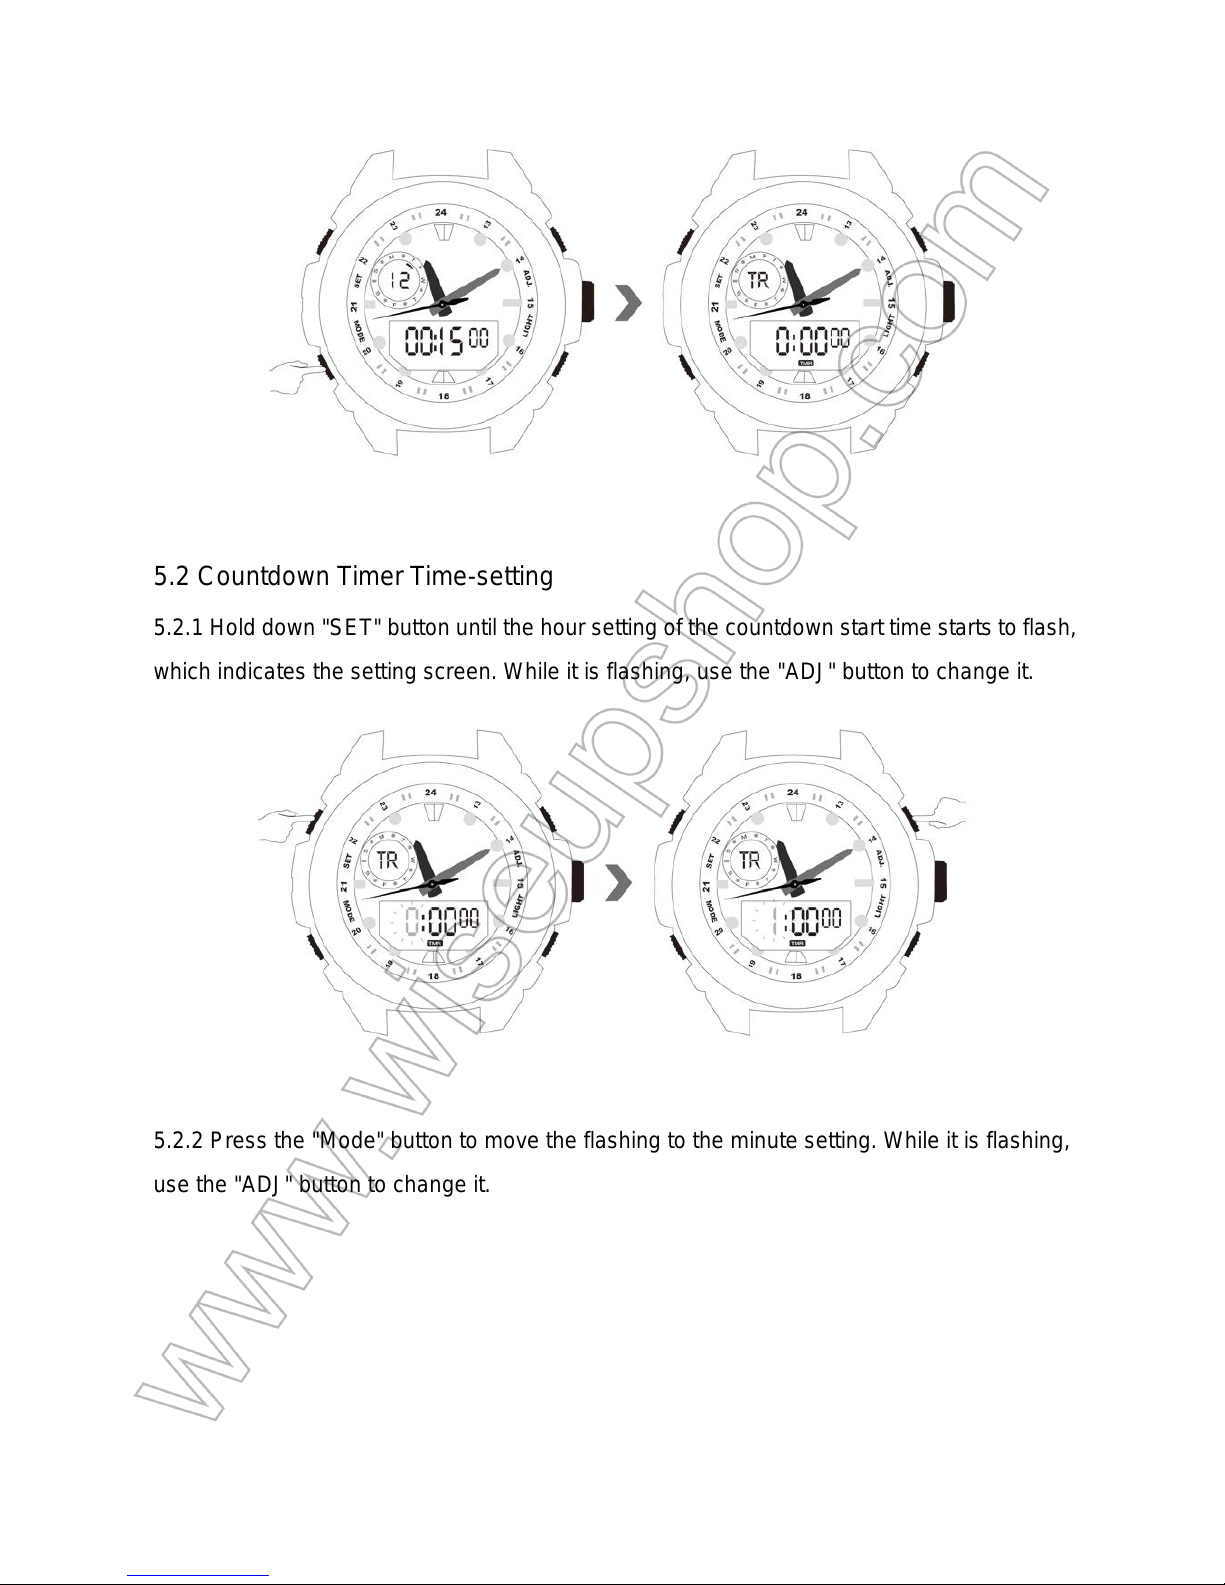
5.2 Countdown Timer Time-setting
5.2.1 Hold down "SET" button until the hour setting of the countdown start time starts to flash,
which indicates the setting screen. While it is flashing, use the "ADJ" button to change it.
5.2.2 Press the "Mode" button to move the flashing to the minute setting. While it is flashing,
use the "ADJ" button to change it.
Page 13
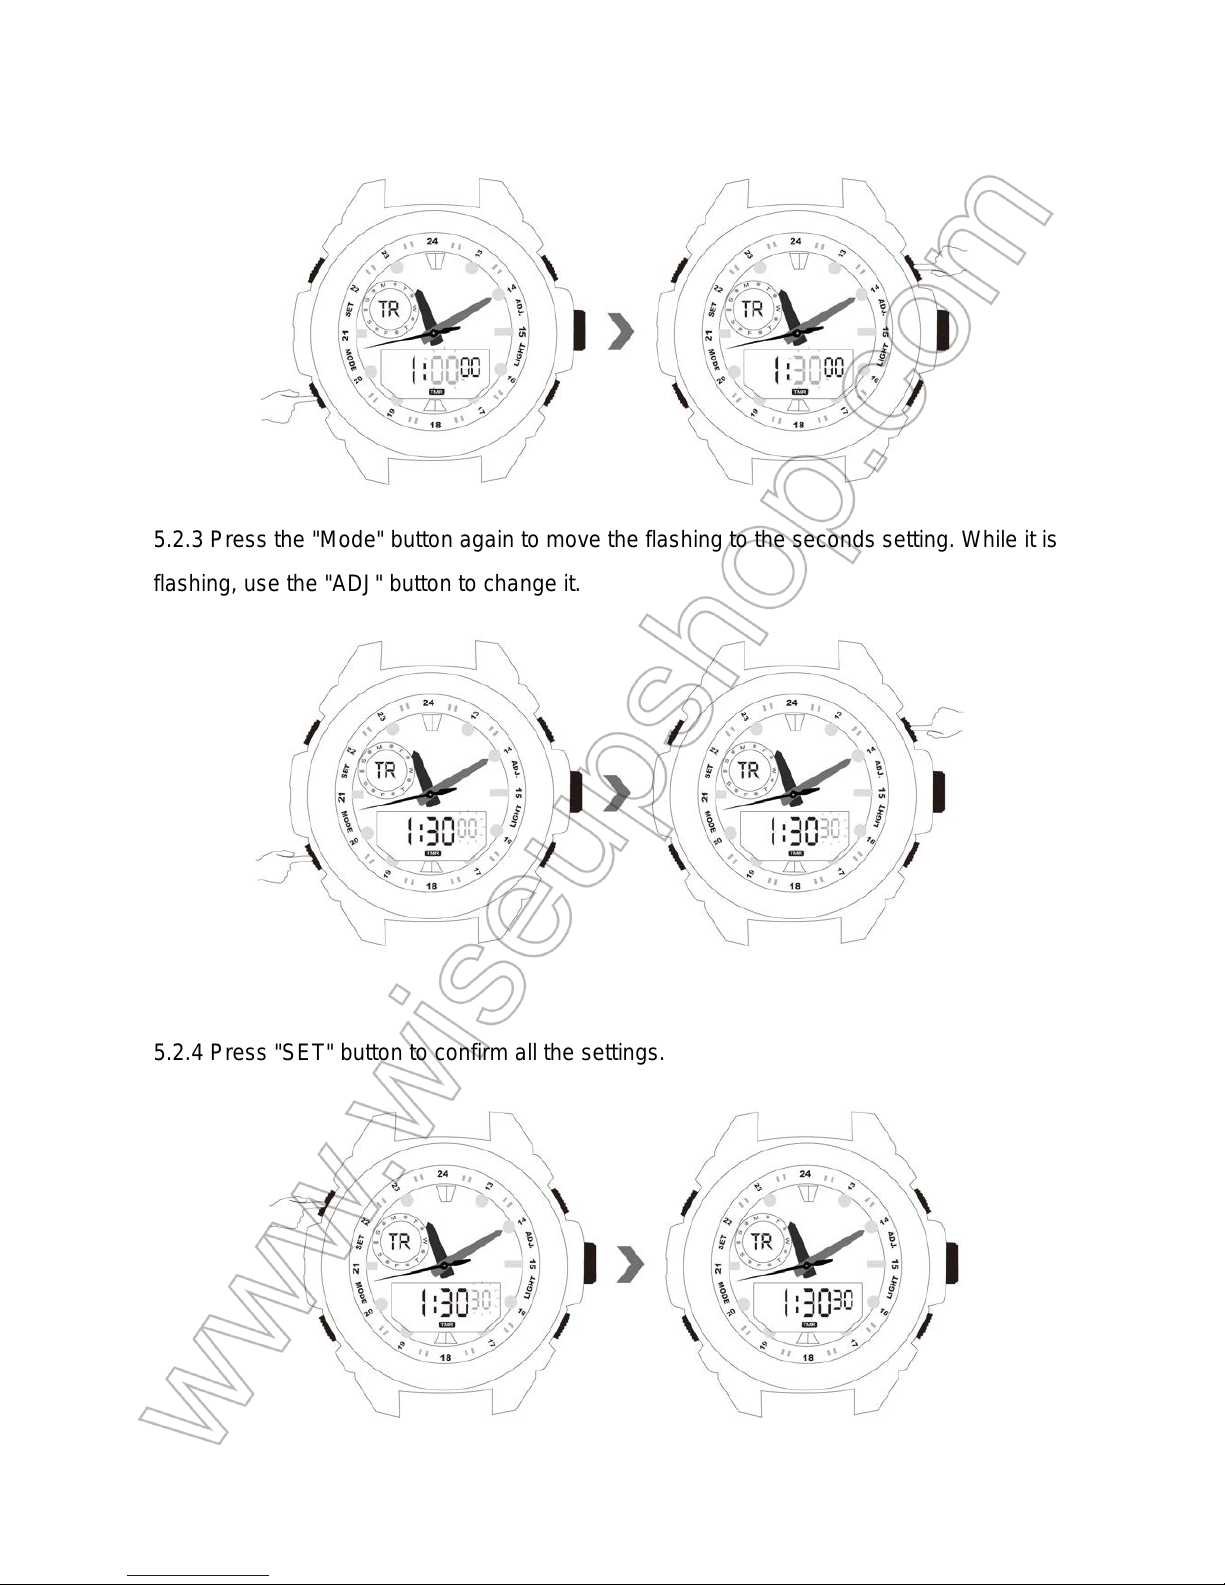
5.2.3 Press the "Mode" button again to move the flashing to the seconds setting. While it is
flashing, use the "ADJ" button to change it.
5.2.4 Press "SET" button to confirm all the settings.
Page 14
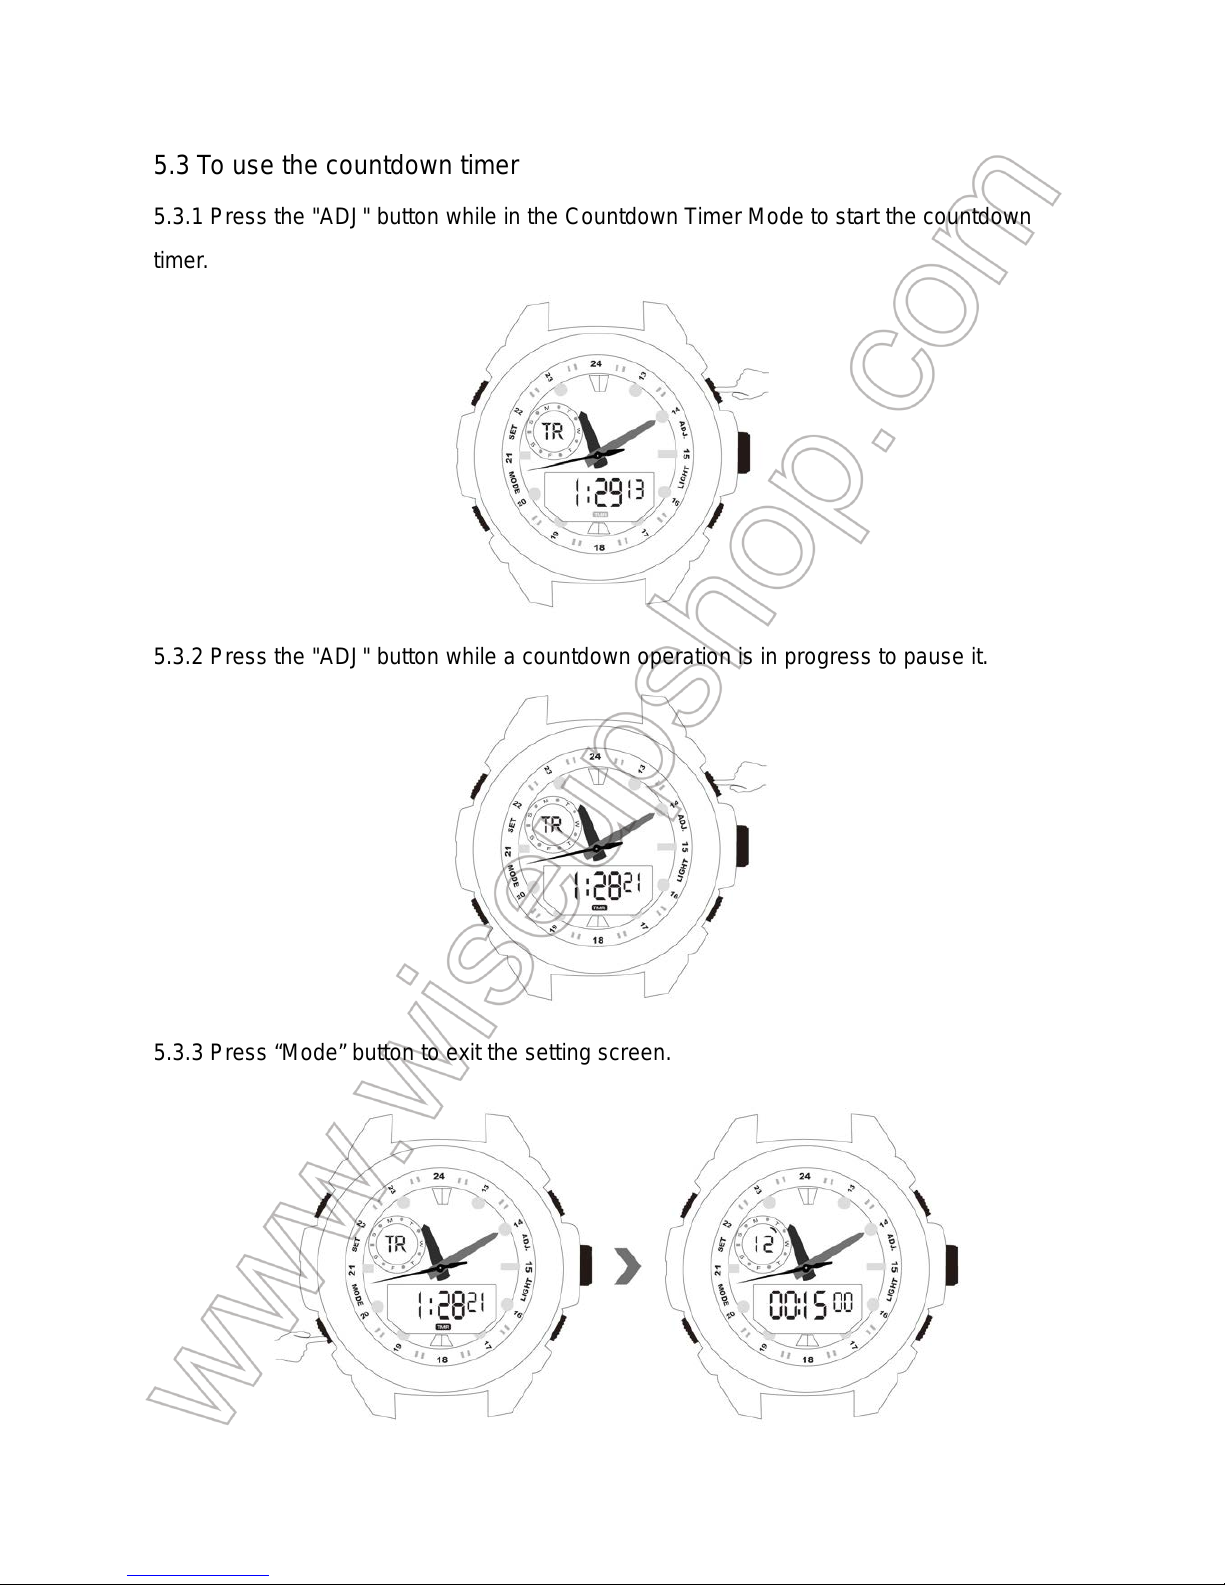
5.3 To use the countdown timer
5.3.1 Press the "ADJ" button while in the Countdown Timer Mode to start the countdown
timer.
5.3.2 Press the "ADJ" button while a countdown operation is in progress to pause it.
5.3.3 Press “Mode” button to exit the setting screen.
Page 15
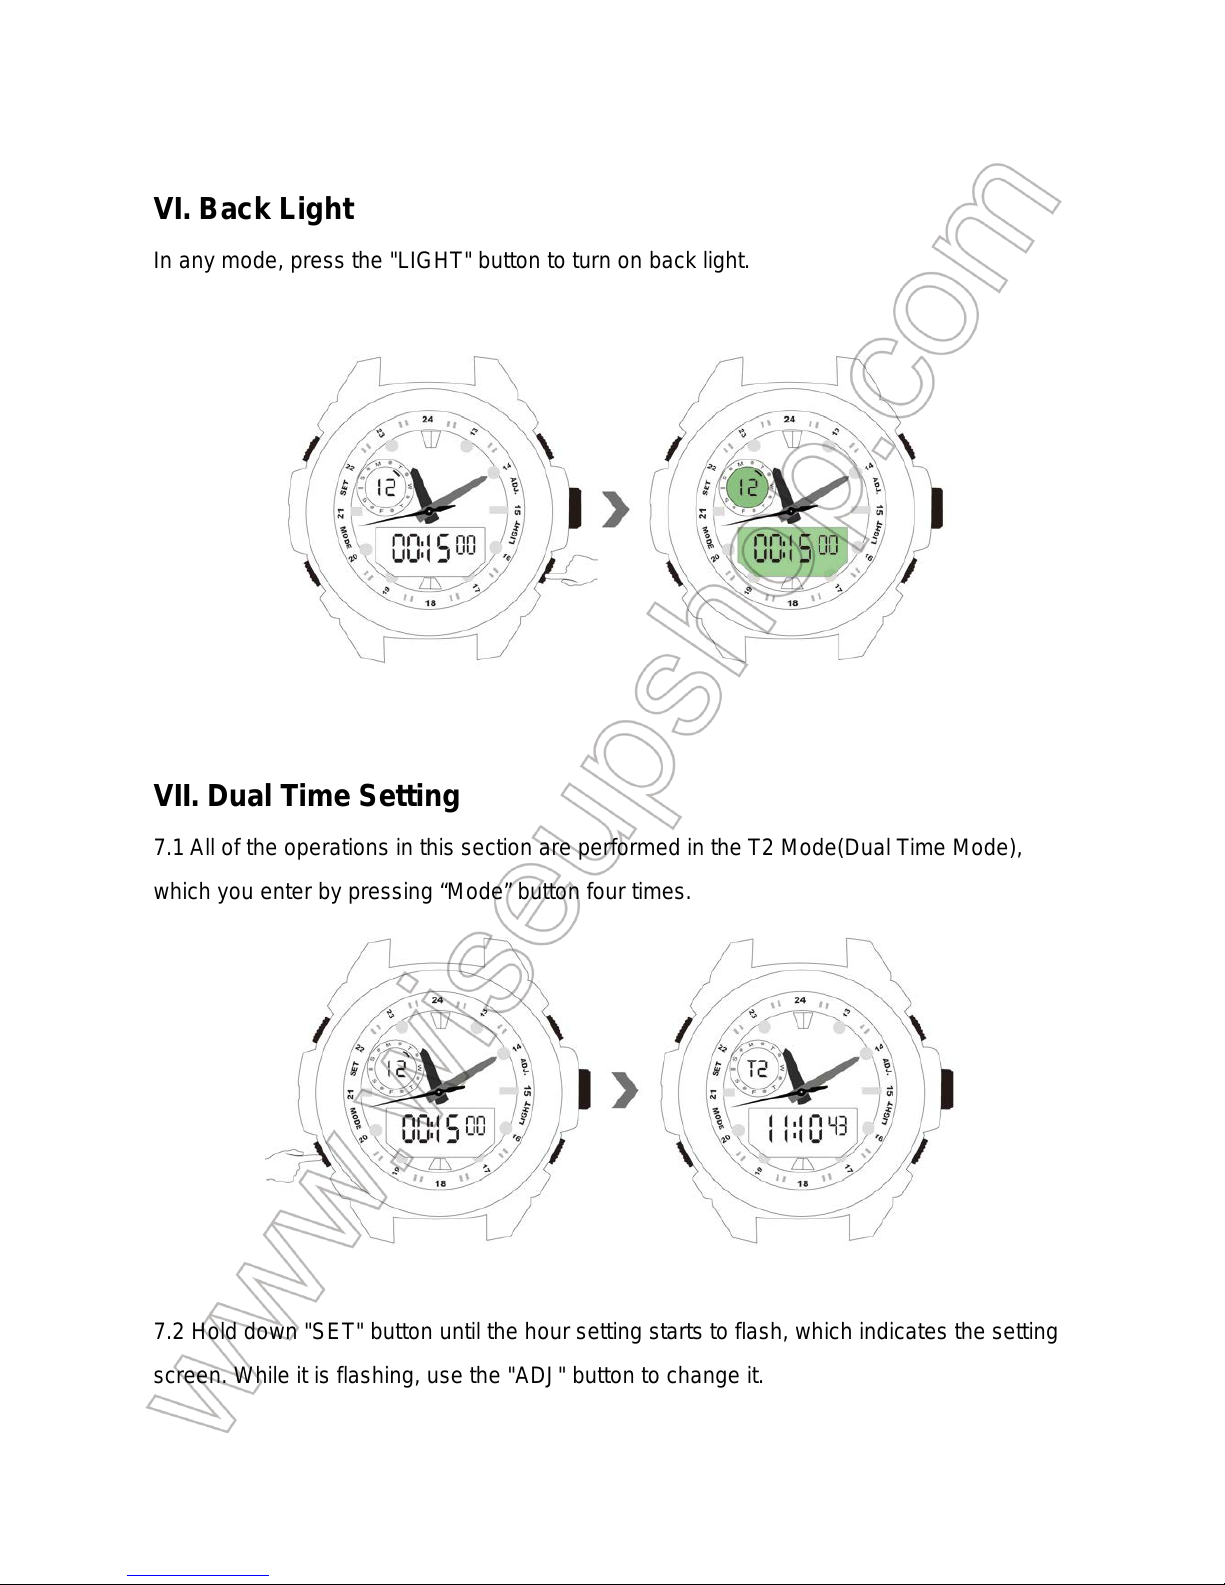
VI. Back Light
In any mode, press the "LIGHT" button to turn on back light.
VII. Dual Time Setting
7.1 All of the operations in this section are performed in the T2 Mode(Dual Time Mode),
which you enter by pressing “Mode” button four times.
7.2 Hold down "SET" button until the hour setting starts to flash, which indicates the setting
screen. While it is flashing, use the "ADJ" button to change it.
Page 16
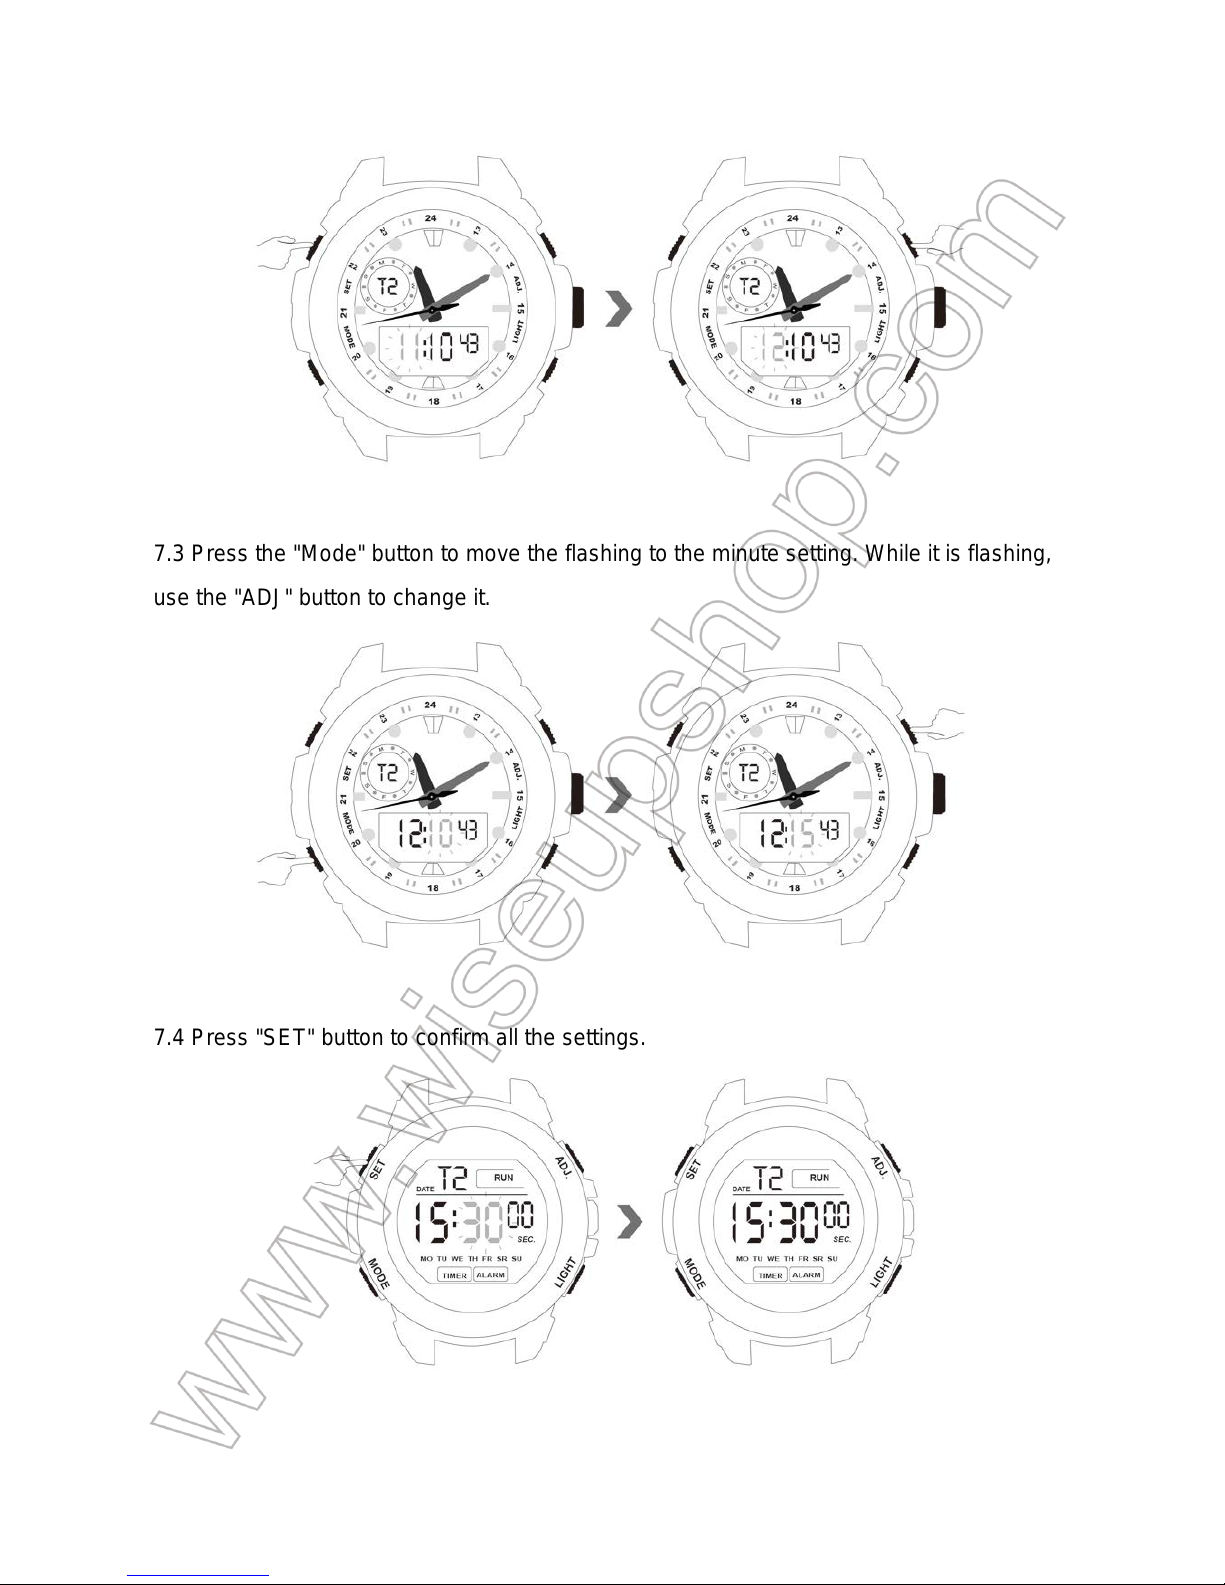
7.3 Press the "Mode" button to move the flashing to the minute setting. While it is flashing,
use the "ADJ" button to change it.
7.4 Press "SET" button to confirm all the settings.
Page 17
<Note>: Only Hour and Minute can be adjusted in Dual Time Mode.
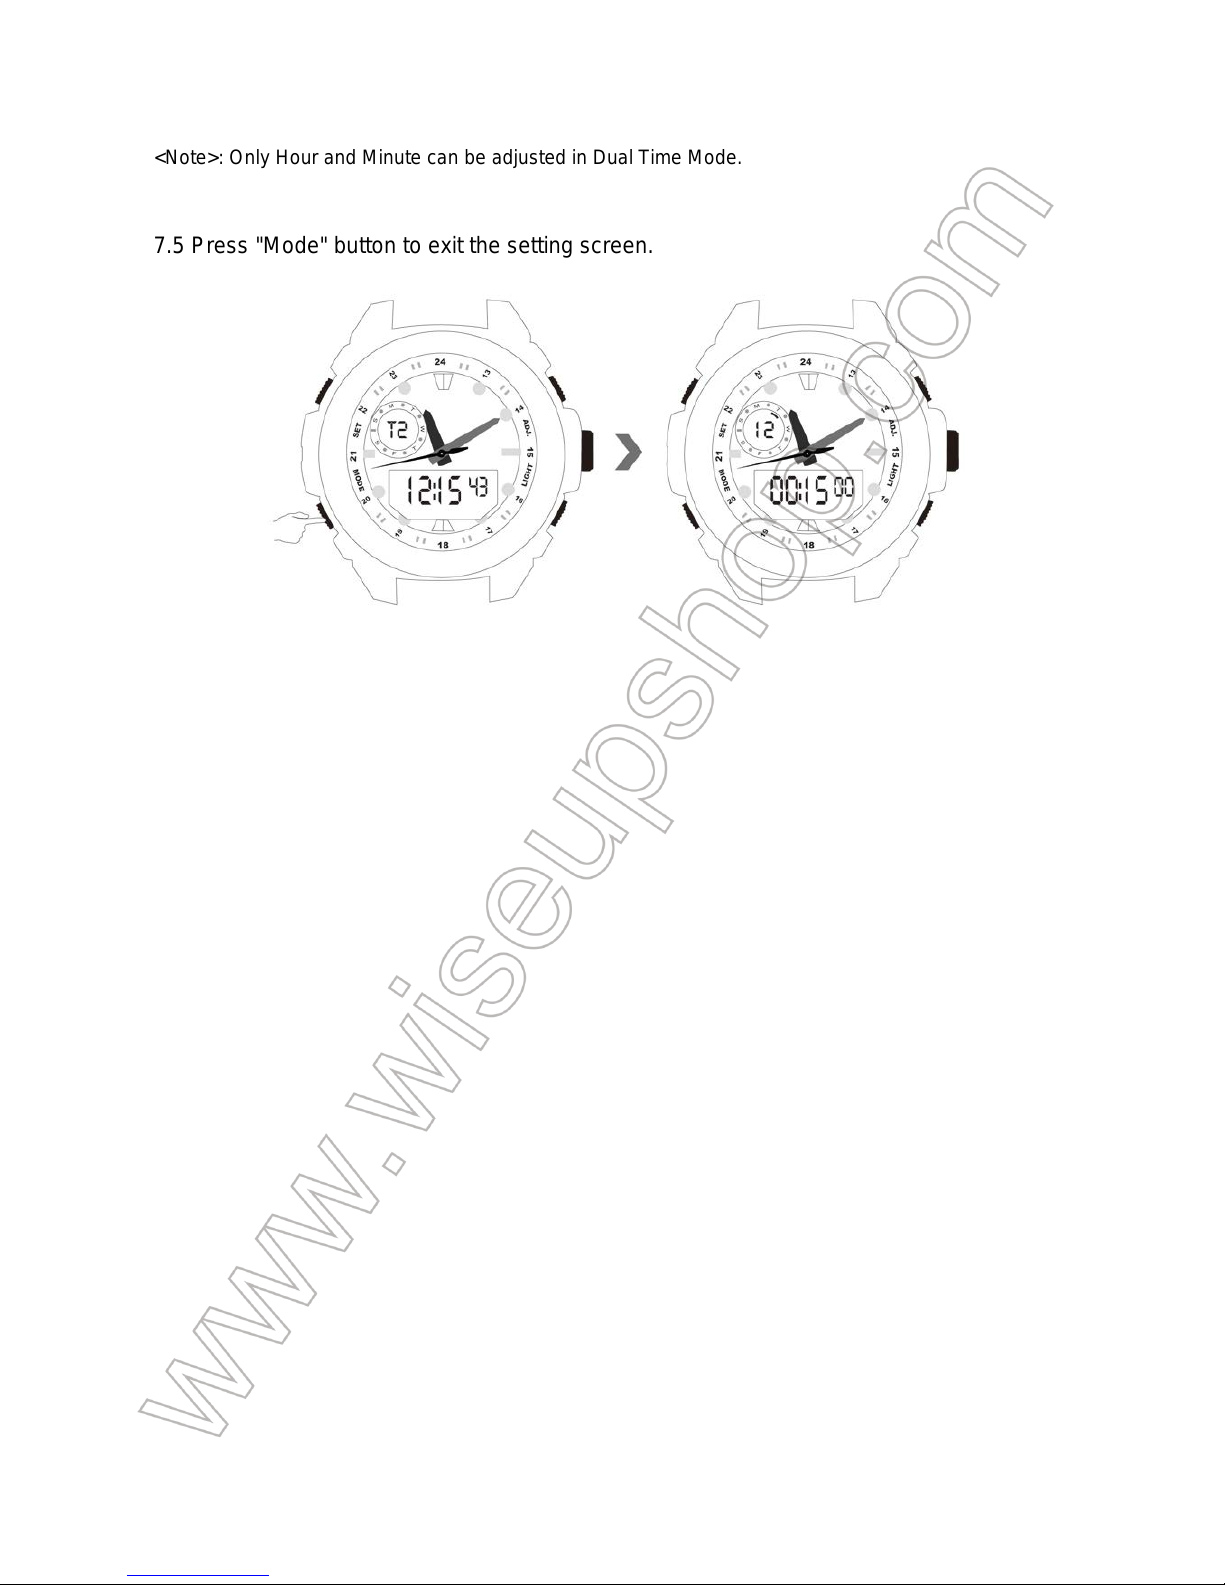
7.5 Press "Mode" button to exit the setting screen.
 Loading...