

Page 1
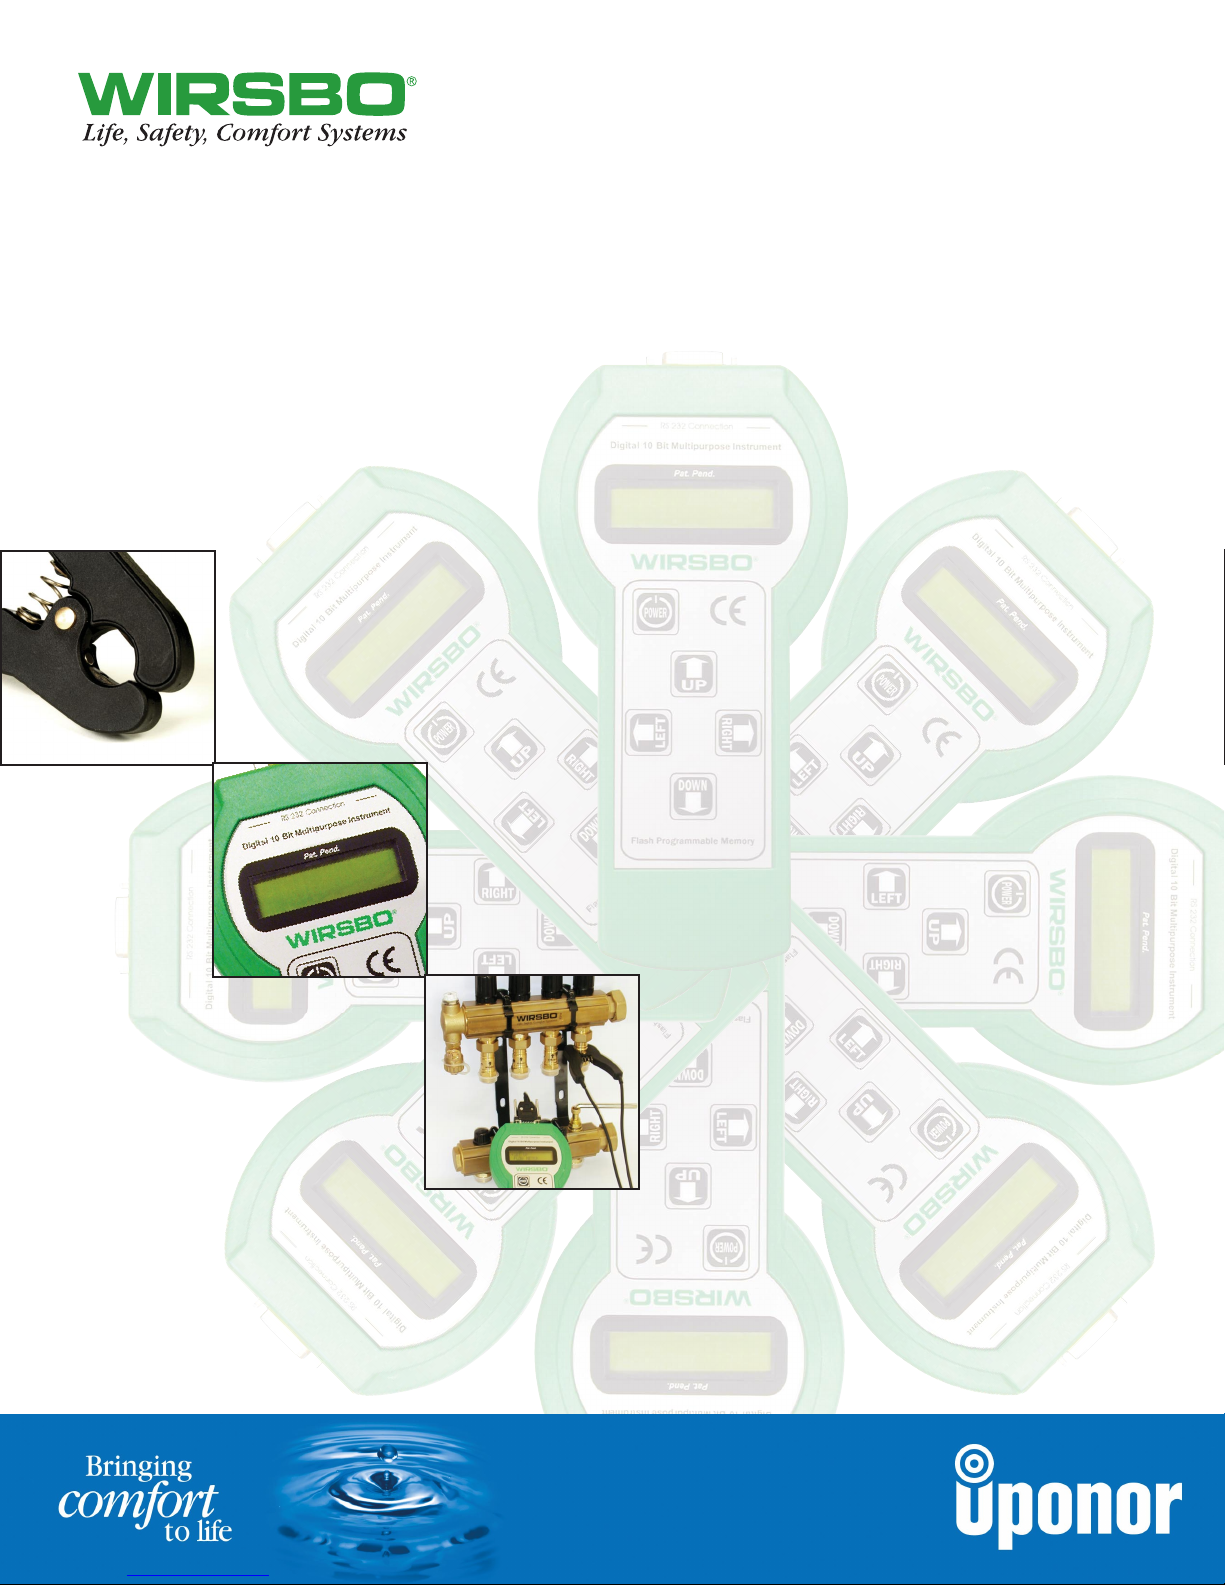
Wirsbo FlowMaster™User Manual
Page 2

Wirsbo FlowMaster™ User Manual
is published by Uponor Wirsbo
5925 148th Street West
Apple Valley, MN 55124
(952) 891-2000
© 2003 Uponor Wirsbo
All rights reserved
First Edition
First printing, March 2003
Printed in the United States of America
Page 3
Table of Contents
1
1
Wirsbo FlowMaster User Manual
Table of Contents
Section 1 Overview ....................................................................................................................3
Section 2 Key Functions ............................................................................................................4
Section 3 Setup Menu ............................................................................................................5-7
Section 4 Flow Meter Menu ......................................................................................................8
Section 5 Flow and Temperature Measurement ..................................................................9
Section 6 Reading Memory ....................................................................................................10
Section 7 Deleting Memory ....................................................................................................11
Section 8 Connecting to a Computer ....................................................................................12
Section 9 Charging the Battery ..............................................................................................13
Page 4
2
Wirsbo FlowMaster User Manual
Page 5
Section 1 — Overview
1
3
Wirsbo FlowMaster User Manual
Section 1 — Overview
The Wirsbo FlowMaster™ uses superior technology to measure flow and temperature in radiant floor
heating systems. Using infrared light, the hand-held electronic instrument reads the flow and
temperature for each loop — resulting in accurate and quick balancing or troubleshooting.
Even in highly contaminated water, the FlowMaster remains efficient by recalibrating the measures
according to the water transparency.
The companion electronic flow meter nipple easily measures
the flow by guiding the FlowMaster tool into the correct
measuring position — ensuring flawless data readings.
The FlowMaster comes with a
Microsoft Windows-compatible
software package, allowing the
ability to download data for
record keeping. Software
upgrades are available on
the Wirsbo website.
FlowMaster offers
superior accuracy
and efficient
measuring and data
collection at an
affordable price.
Page 6
4
Wirsbo FlowMaster User Manual
Section 2 — Key Functions
2
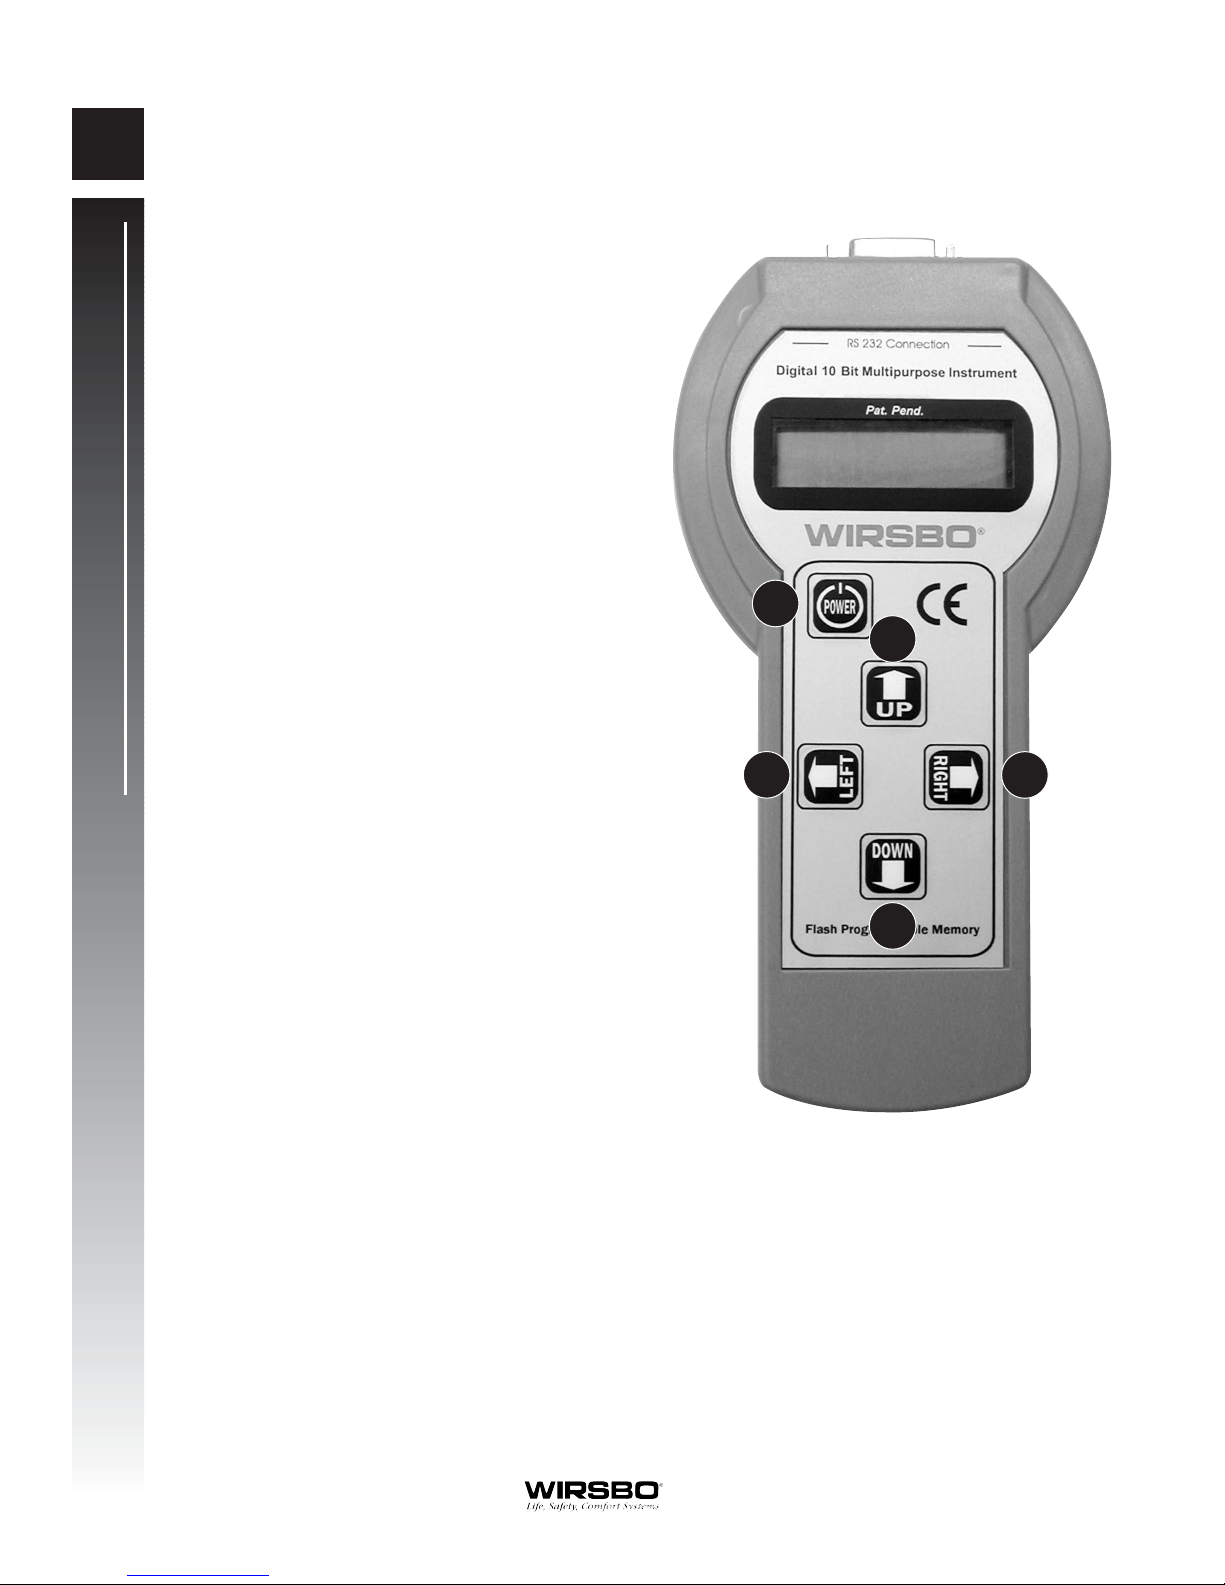
The FlowMaster features five key functions.
1. Power on/off key [ON/OFF]
2. Left key allows user to quit a function. [LEFT]
3. Right key allows user to select function or
confirm choice. [RIGHT]
4. Up key allows user to move up in pop-up
menus. [UP]
5. Down key allows users to move down in
pop-up menus. [DOWN]
1
5
2
4
3
Figure 2-1 Wirsbo FlowMaster
Section 2 — Key Functions
FlowMaster Package Contents.
• FlowMaster instrument
• Temperature/flow probe
• Charger
• PC download cable
• Software CD
Page 7
5
Wirsbo FlowMaster User Manual
Section 3 — Setup Menu
3
WIRSBO
➜ SETUP
FLOW METER
➜ TEMP. ADJUST
FLOW ADJUST
To turn on the FlowMaster, press [ON/OFF] for a minimum
of two seconds.
When the start menu appears, press [UP] or [DOWN] to
select SETUP. Press [RIGHT] to confirm this choice and to
enter SETUP mode.
The display shows the measured temperature at the
sensor. If the temperature reading is not correct, the
temperature displayed can be adjusted. Adjust the
temperature by pressing the [UP] or [DOWN] key.
Save the selected value by pressing the [RIGHT] key.
To delete the adjustment, press the [LEFT] key.
Each instrument is factory calibrated. If the temperature
needs to be recalibrated, Wirsbo recommends doing so
only with the use of a certified instrument.
Press the [UP] or [DOWN] key to cycle through the
following functions.
•Temperature adjustment • Backlight
•Flow adjustment • Auto off
•Measuring units • Version
• LCD contrast
Select the appropriate function by pressing [RIGHT].
TEMP 70.0ºF
CANC OK➜
➜
Temperature Adjustment
Turning on Power
The following appears in the display.
In SETUP mode, the following appears in the display.
Section 3 — Setup Menu
Note: Before using the FlowMaster for the first time, charge the battery for a minimum of
14 hours.
Page 8
6
Wirsbo FlowMaster User Manual
BACKLIGHT 5.0S
CANC OK➜
➜
Section 3 — Setup Menu
3
➜1/m HARDWARE:
GPM ALL VALVE
LCD CONTRAST 5
CANC OK➜
➜
The flow-adjustment operation may be necessary in older
radiant floor systems when the water or the sensing ports
of the electronic flow meter nipple darkens due to dirty
water in the system.
The self-calibration requires the electronic flow meter
nipple to remain in a 100% open position (maximum flow)
to obtain an accurate reference point.
On the manifold system, close all valves except the one used for the calibration process.
Attach the probe securely to the electronic flow meter nipple and press [RIGHT] to start the
calibration. The display will return to the previous menu when the calibration is completed.
Press [LEFT] to cancel flow adjustment step.
When the instrument powers off, the FlowMaster returns to the default calibration typically
used in new installations.
To select the appropriate MEASURING UNIT, press the
[UP] or [DOWN] button. Save and quit by pressing
[RIGHT]. To quit without saving, press [LEFT].
This setting remains in memory even if the FlowMaster
powers off, but can be changed any time through the
SETUP menu.
To select the LCD CONTRAST value, press the [UP] or
[DOWN] button. The value range is 1 to 9. Confirm the
setting by pressing [RIGHT], or cancel the value by
pressing [LEFT].
Use the [UP] or [DOWN] button to adjust the BACKLIGHT
duration (idle time). The duration range is 1 to 12.5
seconds. Save the value by pressing [RIGHT], or exit
without saving by pressing [LEFT].
FLOW ADJUST
EXIT START➜
➜
Flow Adjustment
Measuring Units
LCD Contrast
Backlight
Page 9
7
Wirsbo FlowMaster User Manual
Section 3 — Setup Menu
3
AUTO OFF
CANC OK➜
➜
BATTERY LEVEL
■■■■■■■■
FIRMWARW: 1.21EN
HARDWARE: D005_2
To set the AUTO OFF time, press the [UP] or [DOWN]
button. The auto-off time range is 15 to 90 minutes.
Save the auto-off time range by pressing [RIGHT], or exit
without saving by pressing [LEFT].
The battery level is indicated in the display. Exit this menu
by pressing [LEFT].
The VERSION menu displays the firmware and hardware
versions.
For the most recent information, download updates from
the Wirsbo website (www.wirsbo.com).
Exit the VERSION menu by pressing [LEFT].
Auto Off
Version
Battery Level
Page 10
8
Wirsbo FlowMaster User Manual
Section 4 — Flow Meter Menu
4
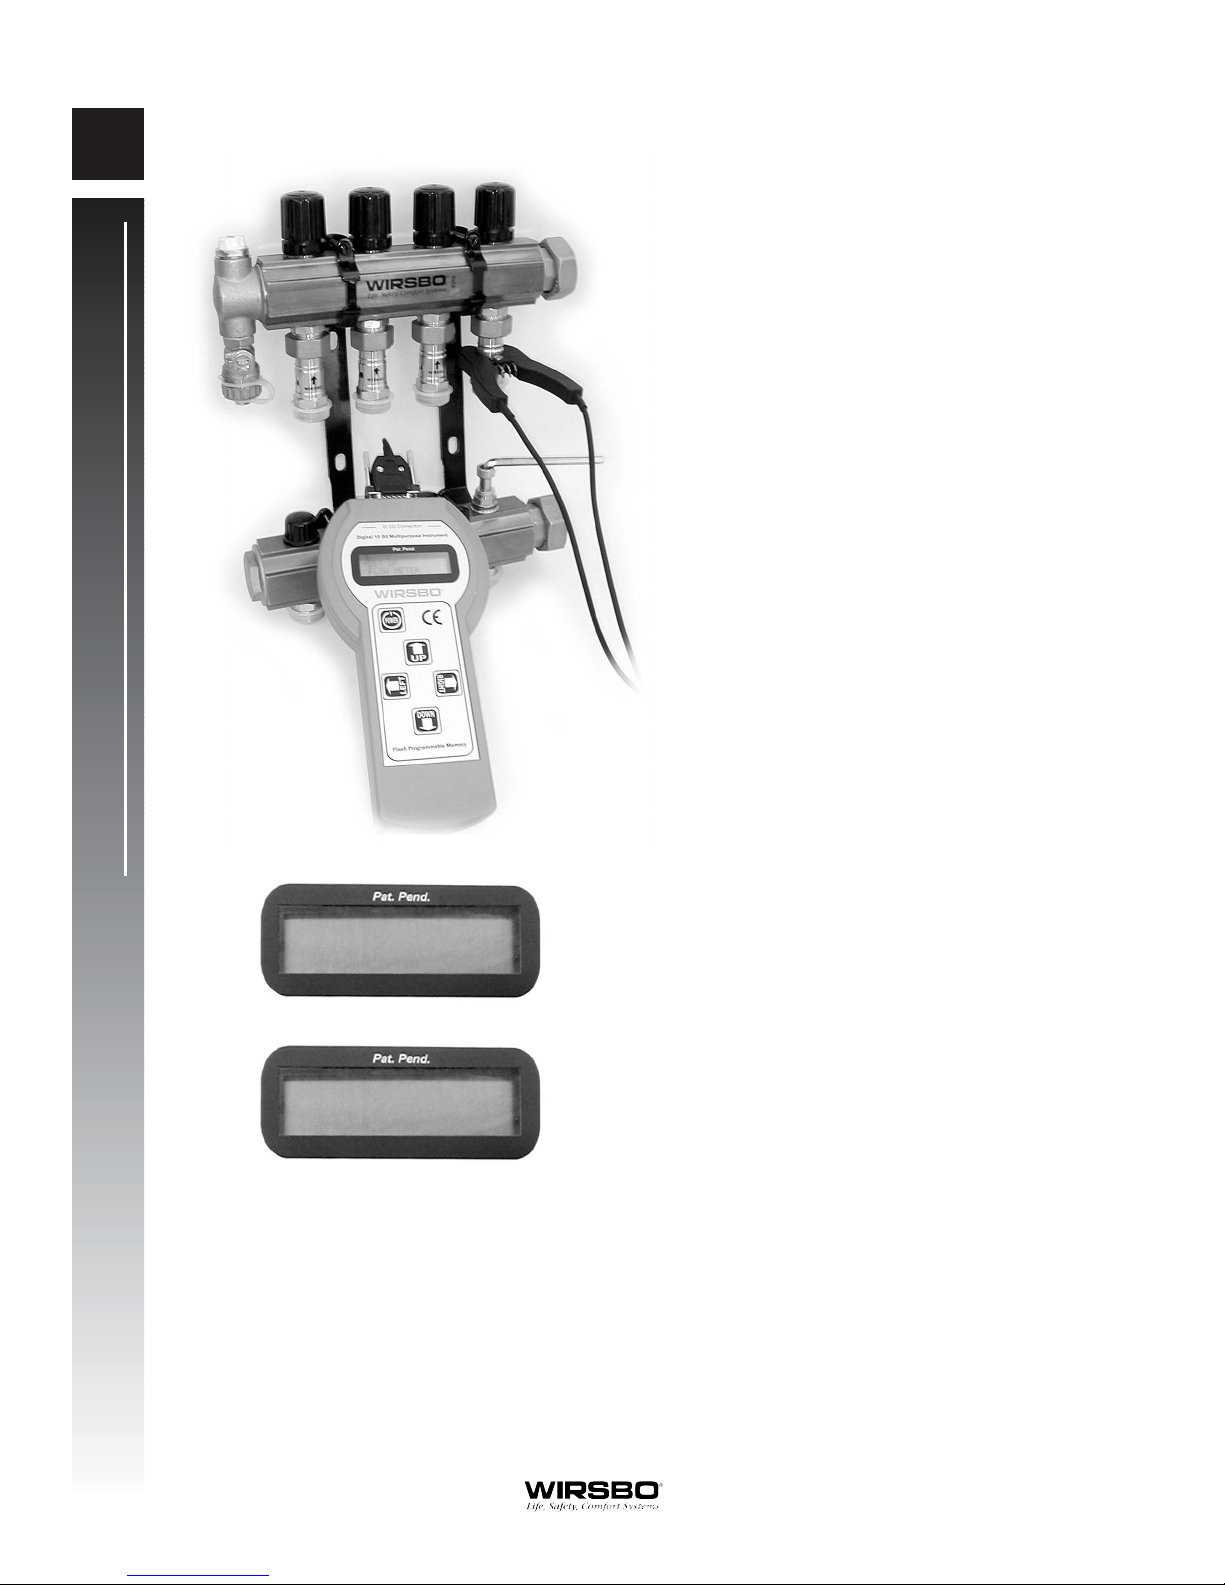
Figure 4-1 Connecting the Probe
SET UP
➜FLOW METER
Tu rn the power on (see page 5), and select Flow Meter
from the menu by pressing [UP] or [DOWN]. Confirm the
choice by pressing [RIGHT].
Starting to Measure
➜FLOW/TEMP.
PRESSURE
The FLOW & TEMPERATURE PRESSURE menu appears.
Section 4— Flow Meter Menu
Before turning the FlowMaster on, connect the
flow/temperature probe. Only connect the probe
while the FlowMaster is turned off. Make sure
that the probe is aligned correctly and the nut
tightened. See Figure 4-1.
Move the pointer through the following menu functions using the [UP] or [DOWN] key.
• Flow & Temp. (Flow and temperature measuring)
• Pressure (Differential pressure measuring)
• Read memory (Accessing stored measurements)
• Delete (Erasing stored measurements)
•Transf. mem➞PC (Transferring stored data to a computer)
Select a function by pressing [RIGHT].
Page 11
Section 5 — Flow and Temperature Measurement
5
Section 5 — Flow and Temperature Measurement
To secure a correct reading of the flow and temperature, position the probe in the slots located on each
side of the electronic flow meter nipple.
9
Wirsbo FlowMaster User Manual
FLOW 0.51/gpm
TEMP 71.1ºF
The FlowMaster measures flows between 0.25 gallons per
minute (gpm) and 1.32 gpm and temperatures between
32°F and 212°F.
Press [UP] or [DOWN] to activate the backlight.
Press [LEFT] to quit and return to the Flow Meter menu.
Correct Reading
MANIFOLD 1/1
0.51/gpm 72.0ºF
The storage positions are named “MANIFOLD <Manifold
No.> / <Loop No.> “(e.g. “MANIFOLD 1/1” for the first loop
on the first manifold). The number of manifolds and loops
that can be stored in the FlowMaster is up to 12 manifolds
with up to 12 loops per manifold.
From the reading menu, to enter the storage positions,
press the [RIGHT] button.
Select the desired manifold/loop by pressing the [UP] or
[DOWN] buttons to scroll through the selection. Once at
the correct manifold/loop, press [RIGHT] again and read
the flow/temp for the desired loop. To store this data,
simply press the [RIGHT] button again to confirm.
To store the next loop, scroll [UP] or [DOWN] to locate the
next manifold/loop. ]
Note: The FlowMaster goes back to MANIFOLD 1/1 after
each entry. You have to scroll [UP] or [DOWN] from first
position each time.
From the “READ” menu, press the [RIGHT] button to enter data storage menu. The following
appears in the display.
Storage Position (store the flow/temp data)
Page 12
Section 6 — Reading Memory
10
Wirsbo FlowMaster User Manual
Section 6 — Reading Memory
6
PRESSURE
➜ READ MEMORY
To access the stored data in the FlowMaster, select READ
MEMORY from the FlowMeter menu by using the [UP] or
[DOWN] key. Press [RIGHT] to confirm the selection.
Read Memory
➜FLOW & TEMP
PRESSURE
From the submenu, choose stored data from
flow/temperature measuring.
MANIFOLD 1/1
0.51/gpm 72.0ºF
Select FLOW & TEMP from the menu, and press [RIGHT]
to access the stored data.
Use the [UP] or [DOWN] key to cycle through the data.
Return to the previous menu by pressing [LEFT] or
[RIGHT].
The following appears in the display.
Reading Flow and
Temperature Measures
Page 13
Section 7 — Deleting Memory
7
11
Wirsbo FlowMaster User Manual
READ MEMORY
➜DELETE MEMORY
Deleting Stored Memory
To delete stored data from the FlowMaster, select DELETE
MEMORY from the Flow Meter menu by using the [UP] or
[DOWN] key. Press [RIGHT] to confirm the selection.
The DELETE submenu appears, allowing access to the
following functions.
• Flow/Temp (Delete a single flow or
temperature measure.)
• Pressure (Delete a single differential
pressure measure.)
• Del. Flow/Temp (Delete all flow and temperature
measures.)
• Del. Valve Memory (Delete all differential pressure
measures.)
MANIFOLD 1/1
0.51/gpm 72.0ºF
Deleting a Single Flow and
Temperature Measure
Select FLOW/TEMP from the Flow Meter menu by using
the [UP] or [DOWN] key. Press [RIGHT] to confirm the
selection.
Press the [UP] or [DOWN] key to select the storage
position to delete. Press [RIGHT] to delete the measure, or
press [LEFT] to return to the previous menu without
deleting the measure.
The following appears in the display.
PRESSURE
➜ALL FLOW & TEMP
Deleting all Flow/Temperature
Measures
Select DEL. FLOW/TEMP from the Flow Meter menu by
using the [UP] or [DOWN] key.
Press [RIGHT] to delete the stored data.
DELETE MEMORY
MANIFOLD
To exit without erasing the data and return to the previous
menu, press [LEFT].
Section 7 — Deleting Memory
!
Caution: Deleted data cannot be retrieved.
Caution: This operation cannot be reversed.
The following message will appear while the stored data is erased.
Page 14
Section 8 — Connecting to a Computer
Before exporting data to a computer, connect the FlowMaster to the computer and install the software.
To install the FlowMaster software, insert the supplied CD into the computer. The install program will
launch automatically. Follow the prompts.
Connect the instrument to a free COM-port on the computer using the DB-9 cable supplied with the
FlowMaster. Or, connect the DB-9 cable to a USB port using a USB-RS232 adapter (not supplied with
the FlowMaster).
After connecting the FlowMaster and installing the software, select TRANSF. MEM‡PC from the Flow
Meter menu using the [UP] or [DOWN] key. Press [RIGHT] to confirm the selection.
The following appears in the display.
After starting the transfer, the following appears in the display.
12
Wirsbo FlowMaster User Manual
Section 8 — Connecting to a Computer
8
TRANSF. MEM ➜PC
EXIT START➜
➜
Press [RIGHT] to start the transfer of data. Press [LEFT] to
abort and return to the previous menu.
Once ready to transfer the data to the PC, press [RIGHT] to
start the transfer of data on the FlowMaster and select
DOWNLOAD from the FlowMaster software menu.
CONNECTING...
When the connection is established and the transmission begins, the following appears in the display.
For additional information, refer to the software user guide.
TRANSMISSION IN
PROGRESS
Page 15
Charging the Battery
9
13
Wirsbo FlowMaster User Manual
Section 9 — Charging the Battery
Ensure the FlowMaster is turned off during the charging operation and remains off until the
charging is complete.
First, connect the plug to the FlowMaster. Then, connect the charger to a wall outlet.
The display shows the following when the battery is charging.
The display indicates when the battery is completely charged.
Note: Before using the FlowMaster for the first time, charge the batteries for at least 14 hours.
Keeping the Batteries in Good Shape
To keep the batteries in perfect shape, do not recharge the FlowMaster unless the battery level is low.
For information about checking the battery level, see Section 3, page 7.
CHARGING BATTERY
■■■■■■■■
CHARGING
COMPLETE
Page 16
14
Wirsbo FlowMaster User Manual
Notes
N
Page 17
Notes
N
15
Wirsbo FlowMaster User Manual
Page 18
16
Wirsbo FlowMaster User Manual
Notes
N
Page 19

Wirsbo FlowMaster Installation Manual
Page 20

4
Uponor Wirsbo
5925 148th STREET WEST
APPLE VALLEY, MN 55124
TEL: (800) 321-4739
FAX: (952) 891-1409
www.wirsbo.com
Copyright © 2003 Uponor Wirsbo, Printed in the United States
FM_MAN6/03
 Loading...