

FIBER
WP-TOOLKIT-FIBER-BAS Quick Start Guide
Thank you for purchasing the Wirepath SSF™ Basic Termination Tool Kit. This set includes everything needed to terminate
Wirepath SSF and also many other brands of ber optic connectors. See the instructions included with your connectors for
more information.
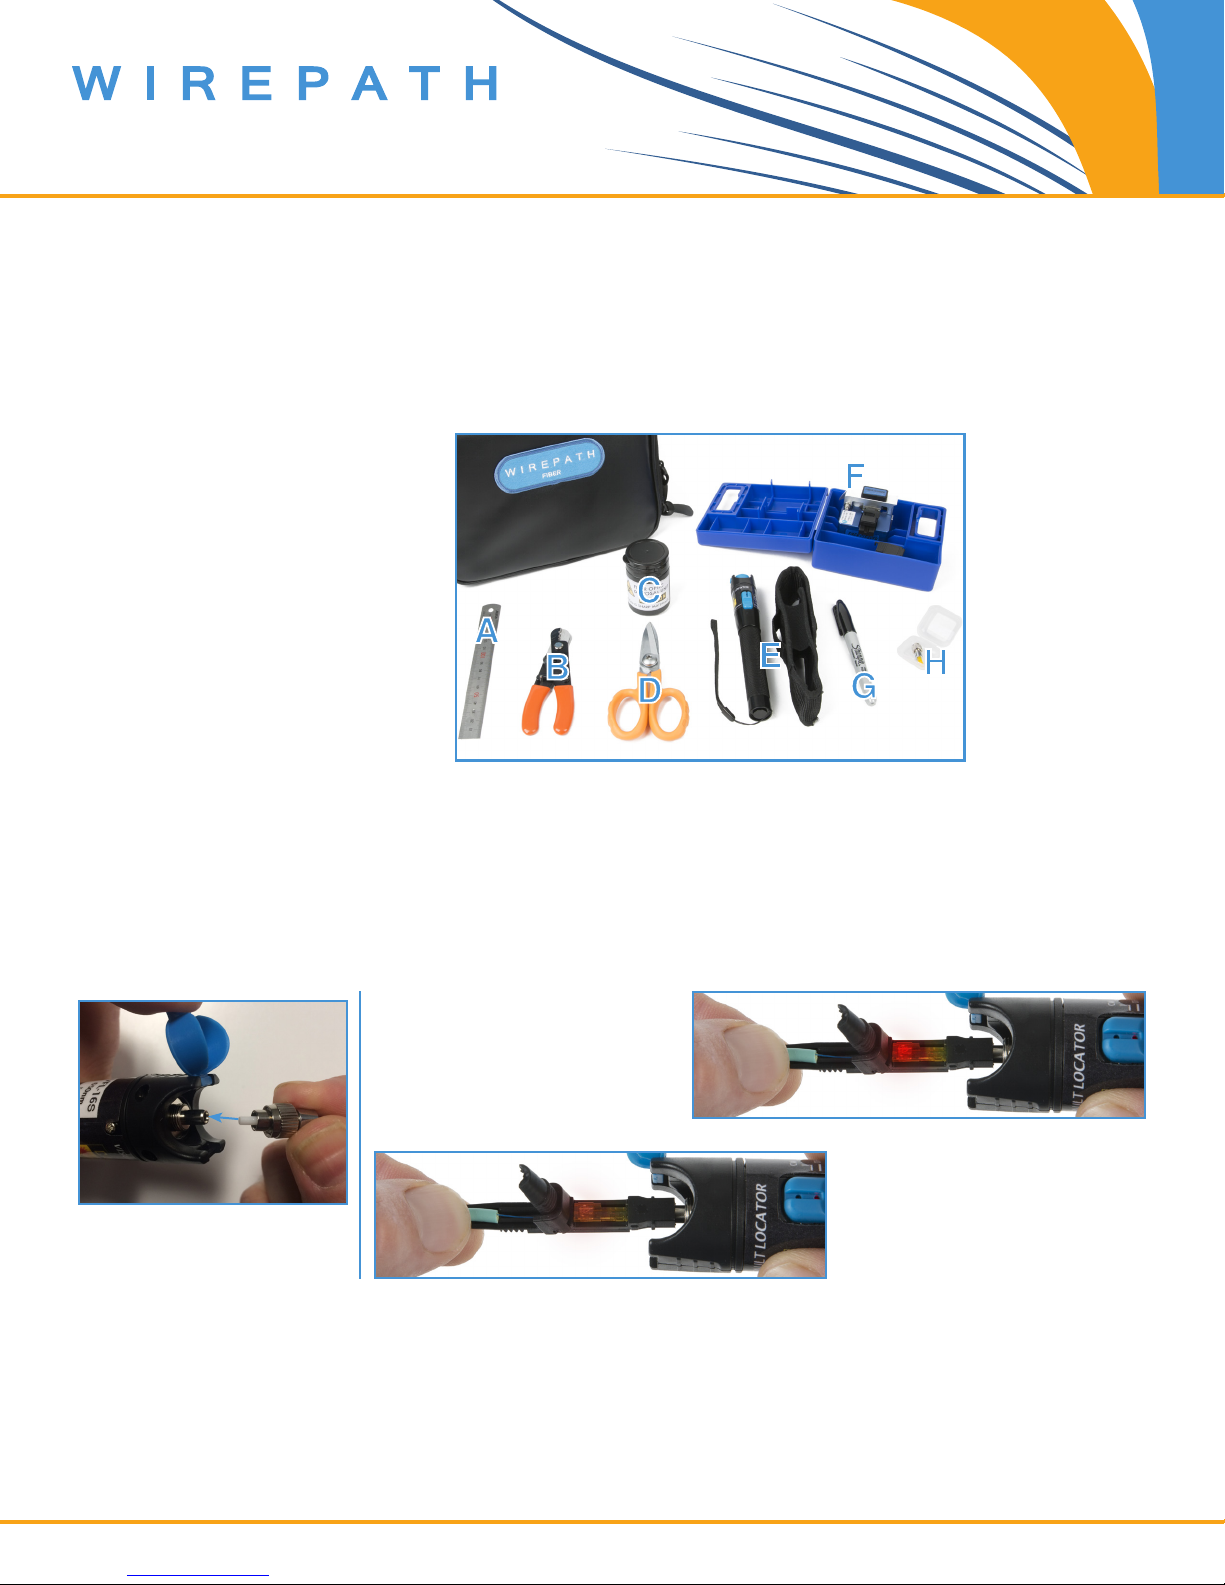
What’s Included
A. Measuring Tool
B. Cable Strippers
C. Disposal Unit
D. Cable Scissors
E. VFL Tool
F. Fiber Cleaver
G. Permanent Marker
H. VFL LC Adaptor
Using the Visual Fault Locator Tool
When terminating Wirepath SSF connectors, use the VFL tool to verify that the ber end is correctly seated inside the
connector, as shown below.
Slide SC type connectors directly into the opening. Use the VFL LC Adaptor to connector LC connectors (item H in the
package contents, above). Do not lose the adaptor!
Bright light in the activator slide tab
indicates ber is not present or not
correctly aligned in the connector.
Light dims in the activator slide tab
once the ber is correctly aligned
LC Adaptor slides into
VFL opening
The tool may also be used to spot check cables and terminations for damage. On a good run, the laser will shine through
the connector at the opposite end of the attached cable.
inside the connector. The opposite
end of the cable should illuminate
bright red.
Bad terminations are easily veried by a bright light in the slide indicator as shown below. Breaks in the cable will cause the
jacket to illuminate red in low light at the location of the break.
© 2017 Wirepath™

FIBER
Using the Cleaver with Wirepath SSF™ Fiber Cable
Q: How do I prep the fiber?
A: Always begin a termination with about 2 inches of coated ber exposed at
the end of the cable to ensure the best possible cleave. A certain amount
of soft peel coating must be left between the cable jacket and the end of
the ber. See connector instructions for dimensions.
Use your ngernails to remove the coating, then run your ngers on all
sides of the glass to ensure complete removal. Or, if desired, use a ber
wipe (not necessary because the optical glass is coated/protected).
Never attempt to cleave the ber with the soft peel coating still on the
glass because it will dirty the cleaving wheel. If this occurs, clean the
wheel using a cotton swab soaked in alcohol.
Q: The tool will not cleave the fiber correctly – what is the solution?
A: After positioning the ber, close the ip-down holder ( ), then close
the cleaver lid. Then, use your thumb to quickly push the cleaver slide
lever ( ). Sometimes pushing too slowly will cause the ber to not
cleave. You are not trying to “snap it”, just a steady push. With just a bit
of practice the ber should successfully cleave.
NO STRIPPERS
Note: Positioning the ber perpendicular (90°) to the cleaver wheel is
very important for obtaining quality cleaves/end faces. Use the ip-down
holder ( ) to ensure the ber is held in place during cleaving.
Also, make sure you are closing the “lid/handle” of the cleaver completely
so that the magnet holds it shut. The ber also needs to extend out the
right side over the trash collector so that once cleaved, the waste glass
can be caught in the collector.
If you continue having issues, see the cleaver wheel adjustment instructions, also included with the kit.
Technical Support: p. 866.838.5052 170127-1212
 Loading...