

Page 1
1
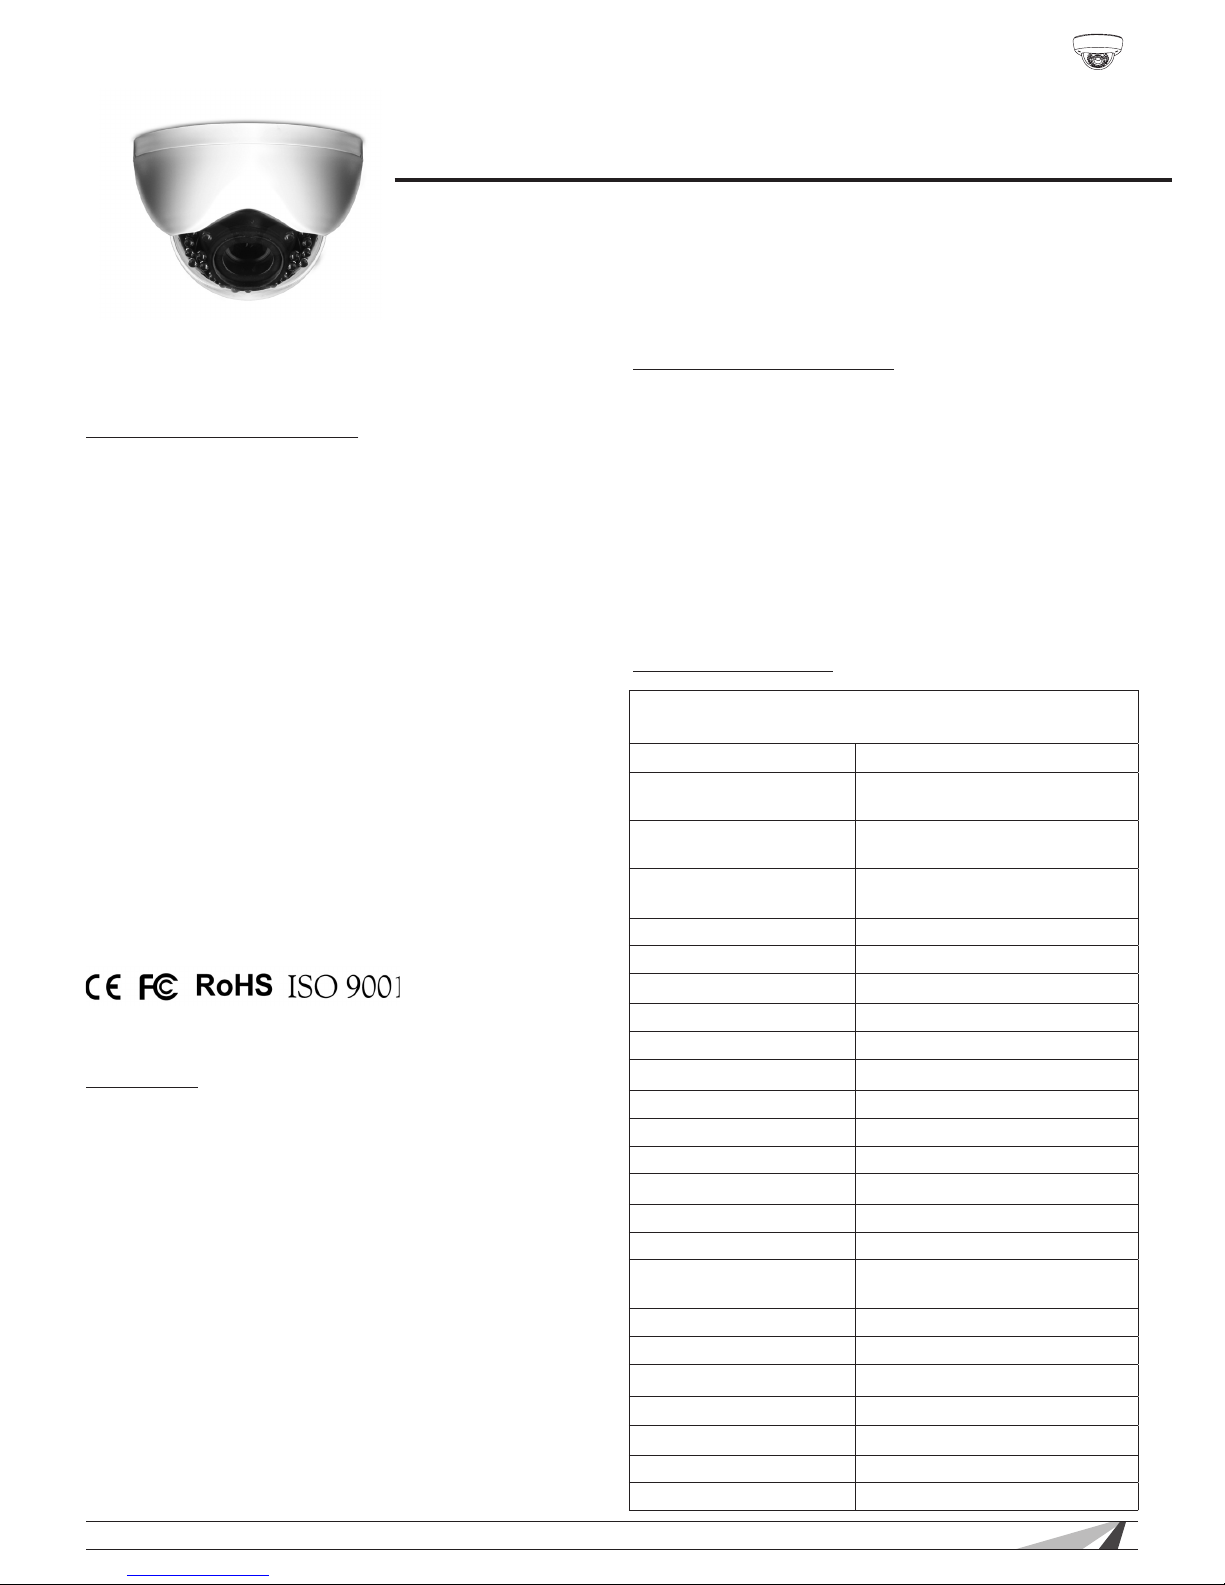
WPS-300-DOM-A Installation Manual
© 2012 Wirepath Surveillance
PACKAGE CONTENTS
(1) Camera
(1) DC Plug
(3) Screws
(3) Wall fasteners
Manual
NOTE: A POWER SUPPLY IS NOT INCLUDED WITH THIS CAMERA.
The PS-12DC-1A is recommended.
SPECIFICATIONS
WPS-300-DOM-A Wirepath™ Surveillance IR Indoor Varifocal
Dome Camera (550 TVL)
Image Sensor 1/3" Color Sony Super HAD II
Number of Pixels
NTSC:768(H)x494(V) PAL:752(H)
x582(V)
Lens
4~9mm Fixed Iris Vari-Focal Lens,
Horizonal FOV 60˚(W)~30˚(T)
Shutter Control
<NTSC>1/60~1/100,000 sec;
<PAL>1/50~1/100,000 sec
Auto Electronic Shutter ON
Auto Gain Control ON
Back Light Compensation ON
Auto White Balance ON
Sync. Mode Internal Sync
Scanning System 2:1 Interlace
Resolution 550 TV Lines
S/N Ratio >48dB
Gamma 0.45
Minimum illumination 0.01 Lux color, 0 Lux IR on
IR Range 50ft
Smart IR Yes
Horizontal Sync.
Frequency
NTSC: 15.734KHz; PAL: 15.625KHz
Video Output 1.0Vp-p,75ohm
Power Source 12 VDC (500 mA) – Not included
Power Consumption 3.6W - 300mA
Operating Temperature 14F-140F
Certications CE, FCC, ROHS
Dimensions 3.07(H) x 4.65" (W)
Net Weight .57 lb
SAFETY INSTRUCTIONS
This information is provided to ensure your safety and to
prevent physical or nancial loss. Please read this document
carefully before installing and operating the camera.
1. Handle with care.
This camera is not designed to resist heavy impact. Use
caution when handling to avoid damage to sensitive internal
components.
2. Do not install the camera under extreme temperatures.
This camera only operates under temperature conditions
between 14˚F ~ 140˚F.
3. Do not mount the camera directly facing bright light
sources.
Exposing the camera to strong light over long periods of time
will damage the camera’s sensor.
4. Do not supply voltage other than 12VDC.
This camera regulates power within this range. Higher
voltages will damage the camera’s electronic components.
5. Do not install the camera in environments with extreme
humidity.
Installing camera in environments with extreme humidity may
cause moisture to condense on the surface of the lens or
dome cover, which can affect picture quality.
FEATURES
• 1/3” Sony Super HAD II CCD
The Sony Super Had II CCD is ideal for low lux illumination
resulting in a clear and crisp image.
•Varifocal Lens
This camera features a varifocal lens with a focal length of
4-9mm to offer exibility during installation.
• Built-In Infrared with Smart IR
IR LEDs provide the ability to capture images during night
and low light conditions. Smart IR prevents IR over-exposure
when an object is close to the camera
• Backlight Compensation
Backlight compensation will adjust the exposure of a
subject standing in front of a bright light source.
• 3-Axis Gimbal
A 3-axis gimbal design provides for a wide range of camera
positioning angles through mechanical adjustment for both
wall and ceiling mount applications.
WPS-300-DOM-A-BL
WPS-300-DOM-A-WH
CAMERA
DOME
INSTALLATION MANUAL
Review manual thoroughly
before installation.
Retain for future reference.
*Specications are subject to change without notice
Page 2
2
WPS-300-DOM-A Installation Manual
© 2012 Wirepath Surveillance
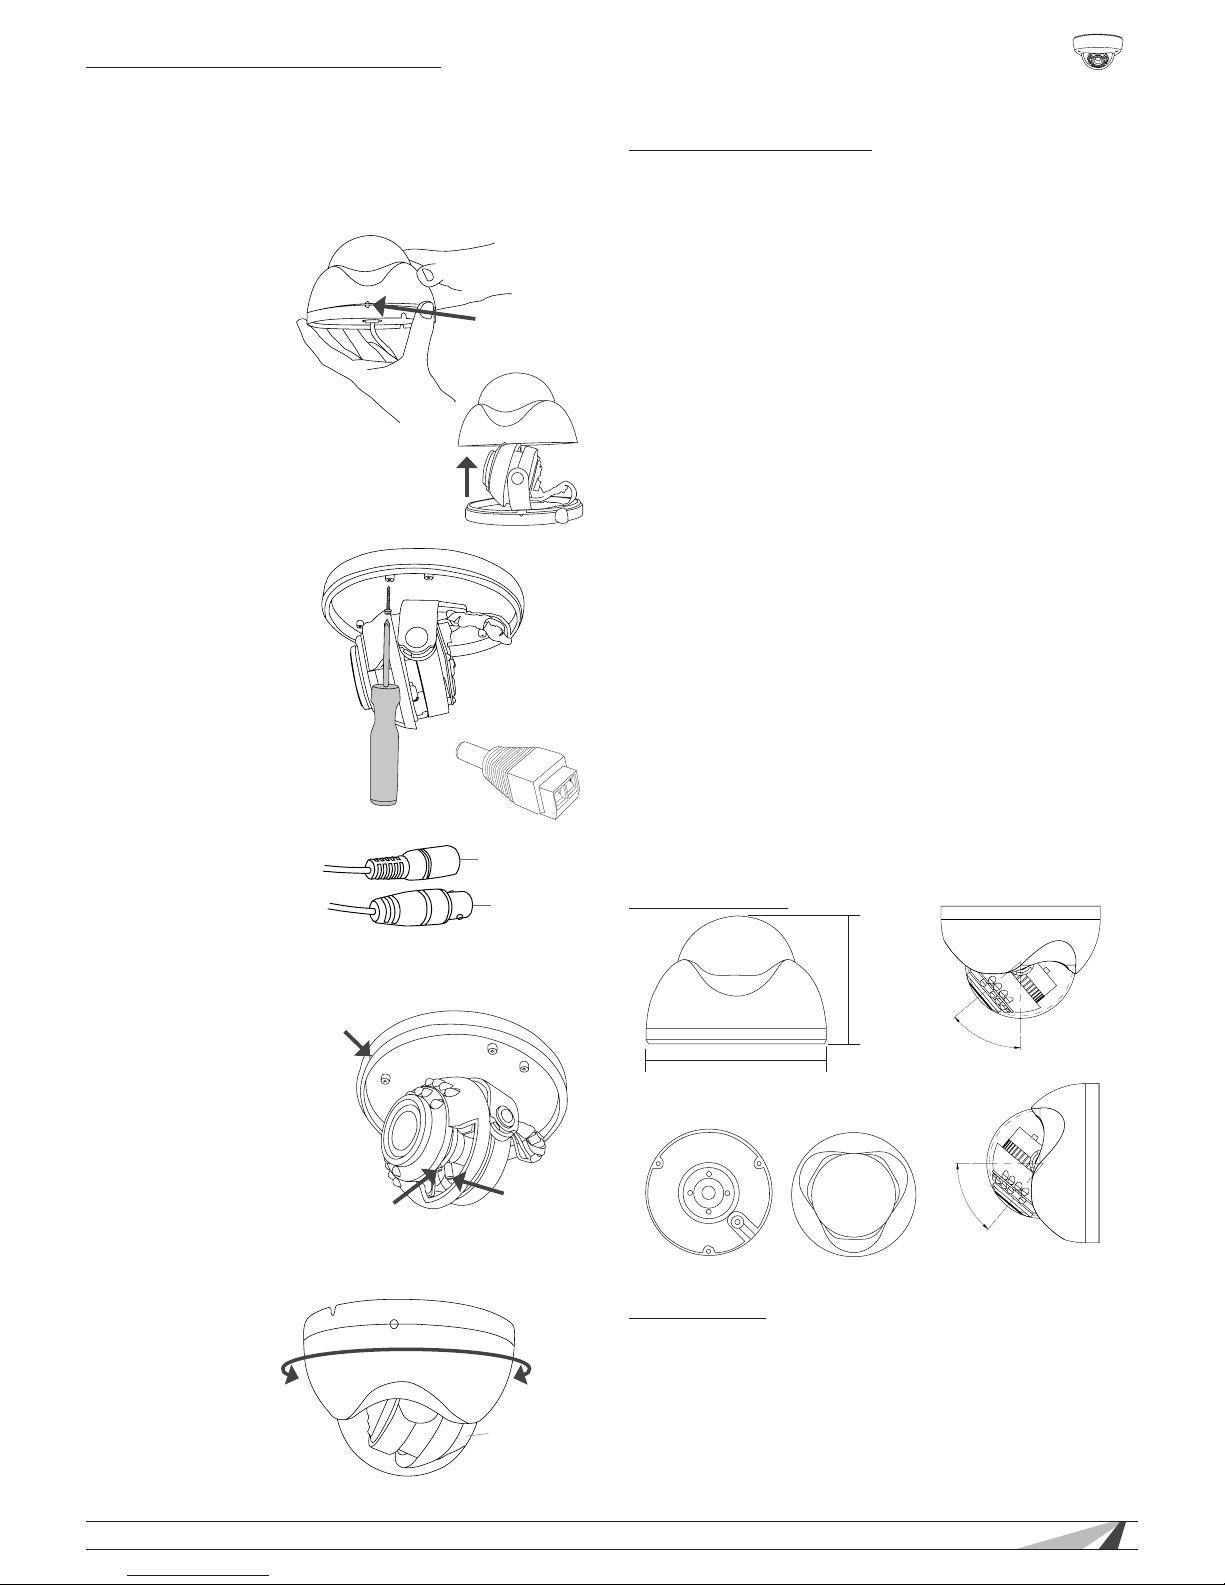
INSTALLATION INSTRUCTIONS
This camera is intended for indoor use only. Recommended
cabling includes solid copper RG59 or RG6 for video and 18
AWG two-conductor for power.
12VDC Power
DC Plug
BNC Video
Output
TROUBLESHOOTING
If you have trouble operating the camera, rst refer to the
following guidelines. If the problem persists, contact Technical
Support at 866.838.5052.
Nothing appears on the display
• Check if the power for camera and monitor is ON.
• Check if the VIDEO cable is connected to the camera
BNC video output jack.
• Check if the VIDEO cable is connected to the monitor
VIDEO input jack.
Image appears dim on the display
• Check the monitor contrast setting.
• Check the monitor brightness setting.
• Check the lens. If necessary, clean with a soft,
clean cloth.
• Check if the camera is facing towards a bright light.
If so, change the camera position.
• If a device exists between the camera and screen,
conrm the signal accepted by the screen is strong
enough – 75 Ohm.
Image appears blurry on the display
• Check the focus of the lens.
• Check the lens. If necessary, clean with a soft,
clean cloth.
The camera is not working properly and the camera
housing is hot
• Check if camera is connected to the correct power
source.
DIMENSIONS
WARRANTY
5-Year Limited Warranty
This camera has a 5-Year Limited Warranty. The warranty includes
parts and labor repairs on all components found to be defective
in material or workmanship under normal conditions of use. This
warranty shall not apply to products which have been abused,
modied, disassembled or improperly installed. Products to be
repaired under this warranty must be returned to Wirepath™
Surveillance or a designated service center with prior notication
and an assigned return authorization number (RA).
4.65”
3.07”
SIDE VIEW
TOP VIEWBOTTOM VIEW
1. Open the camera
by aligning the two
tic marks and gently
removing the dome
from the base.
2. Using the supplied
DC plug, connect
the power supply
jack to 12 VDC and
the BNC Video
Output to the desired
video line.
3. Position the camera’s
base in the desired
location. Point the
tic mark on the base
in the direction that
the camera will
ultimately face. Use
the provided screws
to attach the
camera base to the
wall or ceiling.
4. To adjust the zoom
and focus, use a
small screwdriver to
loosen (but not
remove) the set
screws. Using the
set screws, rotate the
lens until you achieve
the desired setting.
5. Once the camera is
installed, check the
angle. The lens angle
should not exceed
50˚ off of the center
axis. After vertical
and leveling
adjustments have
been made, it is
recommended to
rotate the camera
120 degrees in either
direction away from
its nal position.
6. Replace the dome
by aligning the two
tic marks. The t will
be tight to properly
seal the dome to the
rubber gasket
surrounding the lens
used to prevent any
IR LEDs from reect-
ing back into the
lens. Rotate the
dome back 120
degrees so the
camera is now
facing the correct
direction and the
dome is locked
to the base.
Remove
Dome
Align
tic marks
FOCUS
(Near-Far)
Point tic-mark
towards desired
focus area
ZOOM
(Tele-Wide)
Point lens 120°
from desired
focus area
before replacing
the dome
Maximum Lens Angle
50˚
50˚
120111
 Loading...