

Page 1
DVDR-X30
USER’S MANUAL
Page 2
Safety Symbols
Safety Precautions
SAFETY INSTRUCTIONS
This symbol indicates there is a dangerous voltage within the DVD Recorder, which
may have sufficient magnitude to constitute a risk of electric shock if not handled
correctly. To avoid the risk of electric shock, do not open the housing at any time.
This symbol identifies important operating and maintenance (servicing)
instructions. Be sure to follow instructions identified with this symbol to avoid
potential damage to your unit.
WARNING: TO REDUCE THE RISK OF FIRE OR ELECTRIC SHOCK, DO NOT
EXPOSE THIS APPLIANCE TO RAIN OR MOISTURE. DANGEROUS HIGH
VOLTAGES ARE PRESENT INSIDE THE ENCLOSURE. DO NOT OPEN THE
CABINET. REFER SERVICING TO QUALIFIED PERSONNEL ONLY.
DO NOT STARE INTO BEAM OR BLINDNESS MAY RESULT.
This DVD Recorder employs a laser system. To prevent direct exposure to laser beam, do not try to open the
enclosure or defeat the interlocks. Use of controls, adjustments or the performance of procedures other than
those specified may result herein hazardous radiation exposure. To prevent direct exposure to laser beam, do
not try to open the enclosure. Visible laser radiation when open and interlocks defeated.
Other Precautions
Do not put any objects in the tray other than approved video and audio discs.
Do not open the unit, touch the inner parts or insert any foreign objects into the unit.
Place the unit on a level, open surface. Do not locate the unit under direct sunshine, near heating devices or in
very dusty or dirty places. Otherwise, the unit may be damaged.
Hold the plug tight when connecting or disconnecting the AC power supply. Do not put any weight on AC
cord or attempt to service the AC cord if it becomes damaged.
Keep unit away from open windows or near anyplace where water may get into the unit and damage it.
Do not stack heavy objects on the unit.
Condensation may form in the unit when moving it from very cold to very warm or humid locations. In such
cases, wait for the unit to come to room temperature and the condensation to evaporate before using the unit.
Do not place the unit near radio receiver or other video or audio devices. Should a nearby
radio receiver experience interference while the unit is running, turn the DVD Recorder off.
1
Page 3
SAFETY INSTRUCTIONS
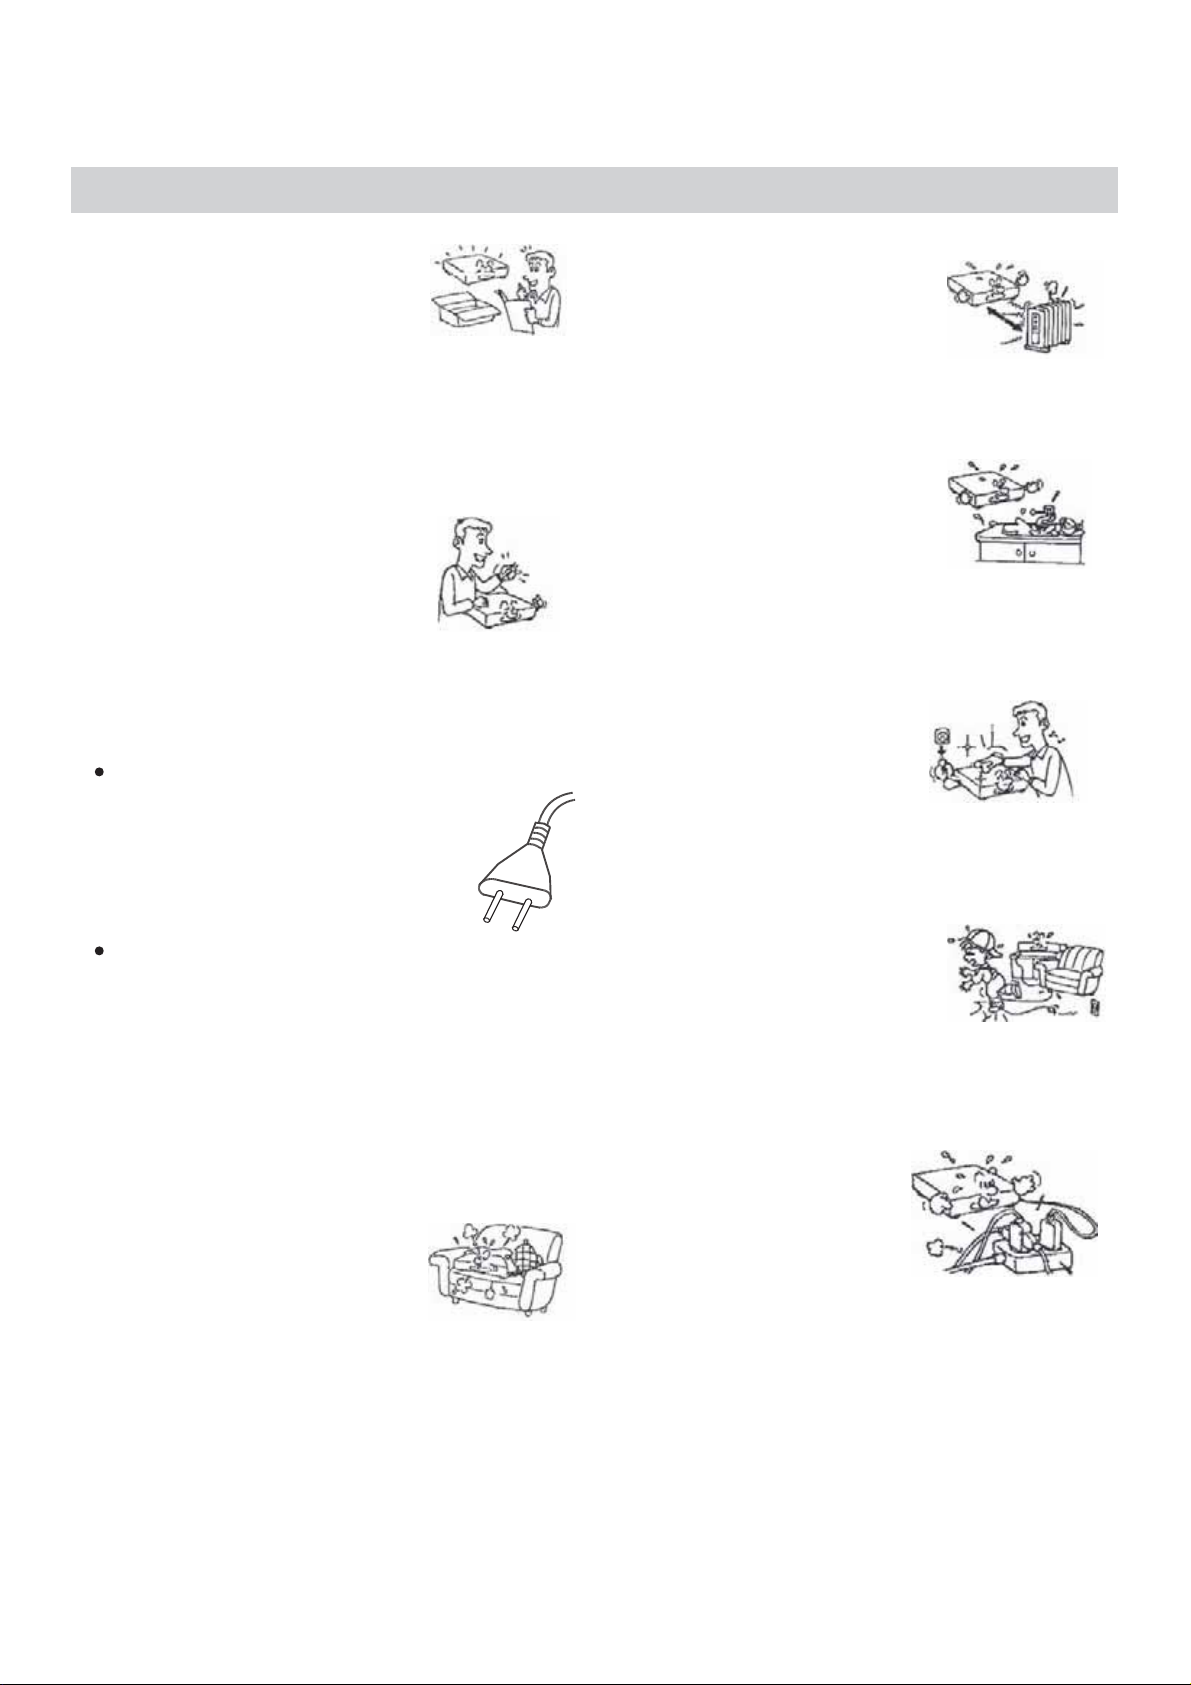
1.Read this Manual
After unpacking this product read
the manual carefully and follow
all the operating instructions.
2.Power Sources
This product should be operated
only from the type of power source
indicated on the unit. If you are not
sure of the type of power supply to
your home, consult your product
dealer or local power company.
3.Grounding or Polarization
If this product is equipped with a polarized
alternating current line plug(a plug having
one blade wider than the other), it will fit into
The outlet only one way. This is a safety feature.
If you are unable to insert the plug fully into
the outlet, try reversing the plug. If the plug
should still fail to fit, contact your electrician
to replace your obsolete outlet. Do not defeat
the safety purpose of the polarized plug.
If this product is equipped with a three-wire
grounding type plug, it will only fit into a grounding
type power outlet. This is a safety feature. If you are
Unable to insert the plug into the outlet, contact your
electrician to replace your obsolete outlet. Do not
defeat the safety purpose of the grounding type plug.
5.Heat
Position the unit away from heat
sources such as radiators, heat
registers, stoves, or other products
(including amplifiers) that produce
heat.
6.Water and Moisture
Do not use this product near water
such as near a bathtub, wash bowl,
kitchen sink, or laundry tub, in a wet
basement, near a swimming pool or
the like.
7.Cleaning
Unplug this product from the A/C
outlet before cleaning. Use a damp
cloth to clean the unit. Do not use
liquid or aerosol cleaners.
8.Power Cord Protection
Power supply cords should be routed
so that they are not likely to be walked
on or pinched by items placed upon
or against them. Pay particular
attention to cords at plugs, convenience
receptacles, and the point where they
exit from the product.
4.Ventilation
Slots and openings in the cabinet
are provided for ventilation and to
ensure operation of the product and
to protect it from overheating. Do
not block or cover these openings.
9.Overloading
Do not overload wall outlets or
extension cords as this can result
in a risk of fire or electric shock.
2
Page 4
SAFETY INSTRUCTIONS
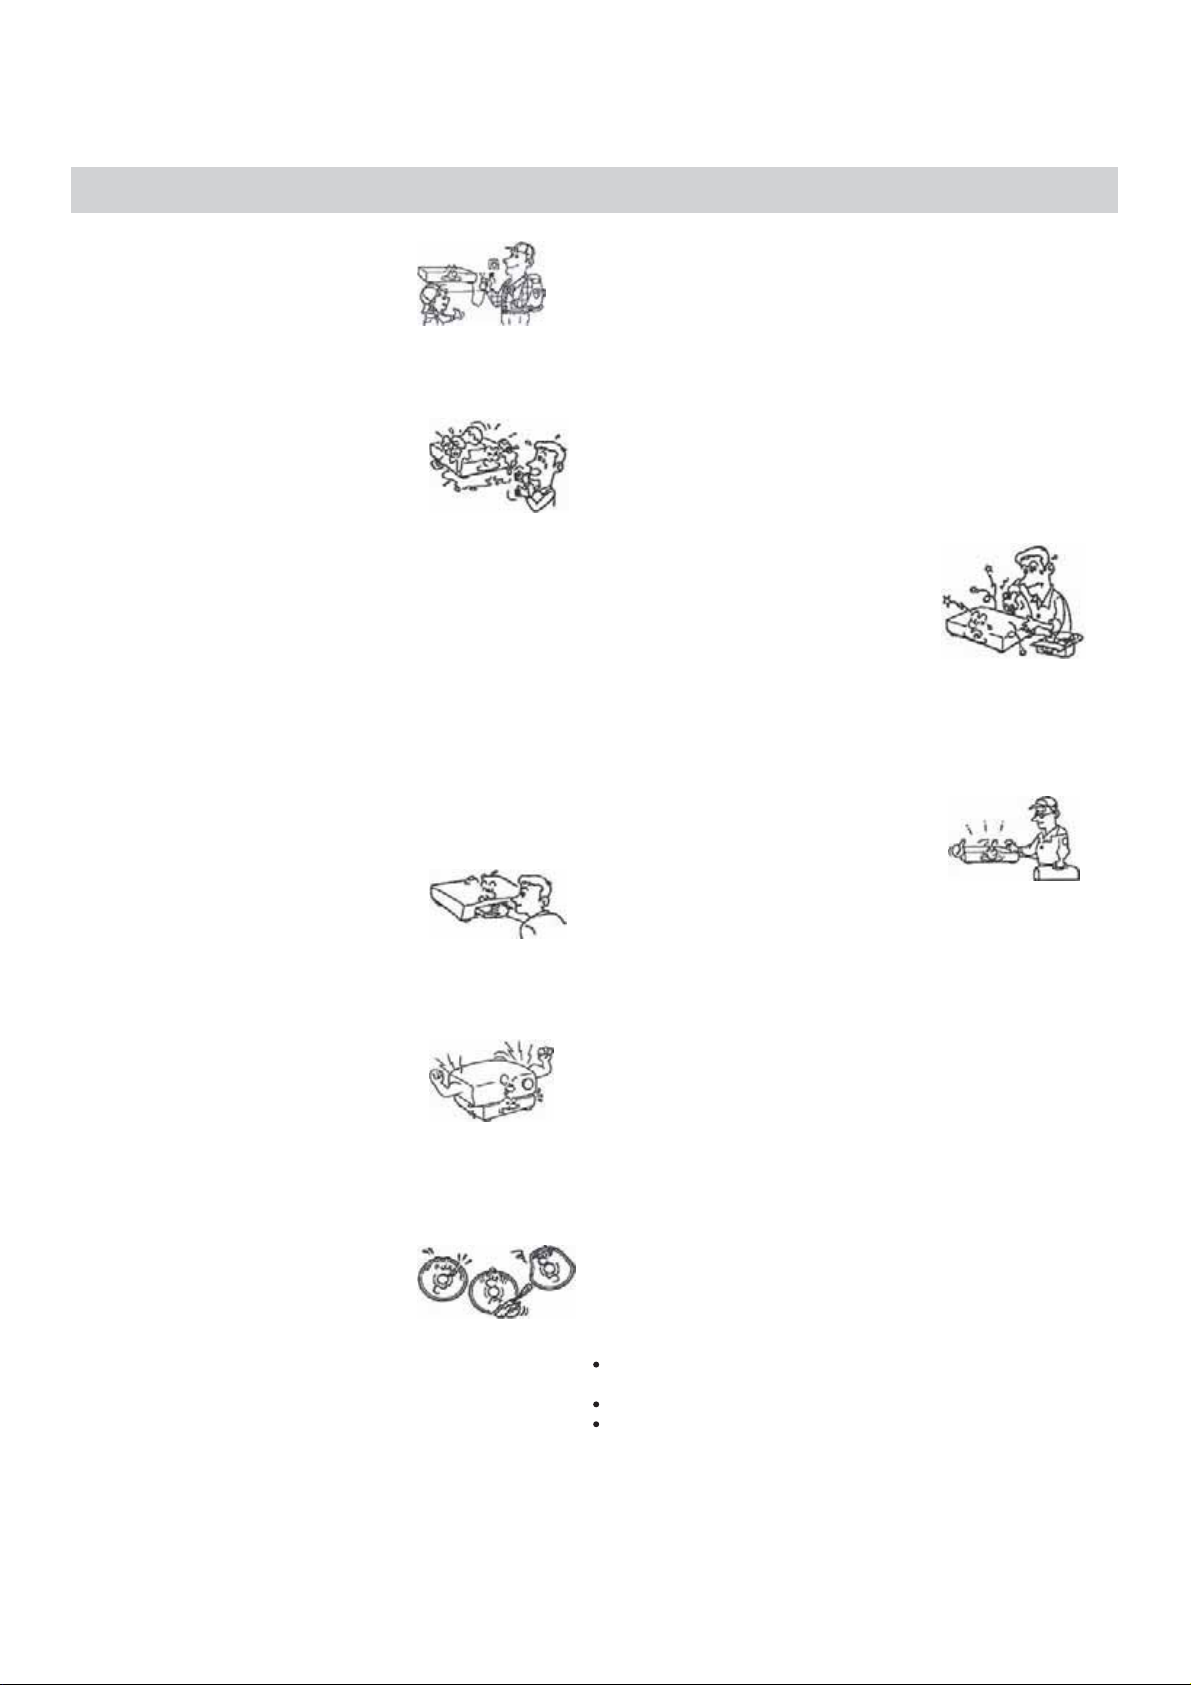
10.Lightning
Unplug the unit from the wall
outlet during storms to prevent
damage from lightning and
power surges.
11.Objects and Liquids
Never push objects into this
product as that could result in
a fire or electric shock. Never
spill liquids on the product.
12.Attachments
Do not use attachments not
recommended by the product
manufacturer as they may cause
hazards.
13.Accessories
Do not place this product on an
unstable platform. The product
may fall, causing serious injury
or serious damage to the product.
14.Disc Tray
Keep your fingers clear of the
disc tray as it is closing. Neglecting
to may cause serious personal injury.
15.Burden
Do not place heavy objects on
the product. The object may fall
causing serious personal injury
and serious damage to the product.
16.Discs
Do not use a cracked, deformed
or repaired disc. These discs are
easily broken and may cause
serious personal injury and product
malfunction.
17.Damage Requiring Service
Unplug the unit from the A/C outlet and refer servicing to
qualified service personnel under the following conditions:
a) When the power cord or plug is damaged.
b) If liquid has been spilled into or objects have fallen into
the product.
c) If the product has been exposed to rain or water.
d) If the product does not operate normally.
e) If the product has been dropped or damaged in any way.
f) When the product exhibits a distinct change in
performance.
18. Servicing
Do not attempt to service this
product yourself as this may
expose you to dangerous voltage
or other hazards. Refer all servicing
to qualified service personnel.
19. Replacement Parts
Be sure the service technician has
used authorized replacement parts.
Unauthorized substitutions may
result in fire, electric shock, or other
hazards.
20.Safety Check
Upon completion of any service or
repairs, ask the service technician
to perform safety checks to determine
that the product is in proper operating
condition.
21.Splashing
The apparatus shall not be exposed to dripping or
splashing and no objects filled with liquids,
such as vases, shall be placed on the apparatus.
22.Battery Usage
Battery leakage may result in bodily injury or damage to
the unit. In order to avoid battery problems, please follow
These instructions.
Install all batteries correctly, with+and -aligned as marked
on the unit.
Do not mix batteries(old/new,carbon/alkaline, etc.).
Remove batteries when the unit is not used for a long time.
3
Page 5

SAFETY INSTRUCTIONS
PRODUCTS WITH PROGRESSIVE SCAN OUTPUTS (525P/625P)
NOTICE REQUIREMENTS
(From the 525p/625p Addendum to the DVD License Agreement)
Licensee will incorporate the following wording, as appropriate, together with the applicable list
of Licensee's high definition television sets, in all product manuals or the like applicable to any
DVD Recorder with a YUV progressive scan output:
For DVD Recorders with 525p, but not 625p, progressive scan output:
CONSUMERS SHOULD NOTE THAT NOT ALL HIGH DEFINITION TELEVISION SETS ARE
FULLY COMPATIBLE WITH THIS PRODUCT AND MAY CAUSE ARTIFACTS TO BE
DISPLAYED IN THE PICTURE. IN CASE OF 525 PROGRESSIVE SCAN PICTURE
PROBLEMS, IT IS RECOMMENDED THAT THE USER SWITCH THE CONNECTION TO
THE STANDARD DEFINITION OUTPUT. IF THERE ARE QUESTIONS REGARDING OUR
TV SET COMPATIBILITY WITH THIS MODEL 525p DVD RECORDER, PLEASE CONTACT
OUR CUSTOMER SERVICE CENTER.
For DVD Recorders with 625p, but not 525p, progressive scan output:
CONSUMERS SHOULD NOTE THAT NOT ALL HIGH DEFINITION TELEVISION SETS ARE
FULLY COMPATIBLE WITH THIS PRODUCT AND MAY CAUSE ARTIFACTS TO BE
DISPLAYED IN THE PICTURE. IN CASE OF 625 PROGRESSIVE SCAN PICTURE
PROBLEMS, IT IS RECOMMENDED THAT THE USER SWITCH THE CONNECTION TO
THE STANDARD DEFINITION' OUTPUT. IF THERE ARE QUESTIONS REGARDING OUR
TV SET COMPATIBILITY WITH THIS MODEL 625p DVD RECORDER, PLEASE CONTACT
OUR CUSTOMER SERVICE CENTER.
For DVD Recorders with both 525p and 625p progressive scan outputs:
CONSUMERS SHOULD NOTE THAT NOT ALL HIGH DEFINITION TELEVISION SETS ARE
FULLY COMPATIBLE WITH THIS PRODUCT AND MAY CAUSE ARTIFACTS TO BE
DISPLAYED IN THE PICTURE.IN CASE OF 525 OR 625 PROGRESSIVE SCAN PICTURE
PROBLEMS, IT IS RECOMMENDED THAT THE USER SWITCH THE CONNECTION TO
THE 'STANDARD DEFINITION OUTPUT.IF THERE ARE QUESTIONS REGARDING OUR
TV SET COMPATIBILITY WITH THIS MODEL 525p AND 625p DVD RECORDER, PLEASE
CONTACT OUR CUSTOMER SERVICE CENTER.
4
Page 6

SAFETY INSTRUCTIONS
This product incorporates copyright protection technology that is protected by method claims of certain
U.S. patents and other intellectual property rights owned by Macrovision Corporation and other rights
owners. Use of this copyright protection technology must be authorized by Macrovision Corporation, and
is intended for home and other limited viewing uses only unless otherwise authorized by Macrovision
Corporation. Reverse engineering or disassembly is prohibited.
Manufactured under license from Dolby Laboratories. "Dolby", and the double-D symbol are
trademarks of Dolby Laboratories.
5
Page 7

CONTENTS
SAFETY INSTRUCTIONS . . . . .. . . . . . . . . . . . . . . . . . 1- 5
CONTENTS . . . . . . . . . .. . .. . . . . . . . . . . . . . . . . . . . . . . . . .6
INTRODUCTION
DVD R/RW Recorder and Progressive scan Player . . . . . . . 7
Opt ica l dis c com patibility . . . . . . . . . . . . . . . . ... . . . . . . . . . .8
Car ing f or optic al di scs . . . . . . . . . . . . . . . . . . . . . . . . . . . . . . . .8
Make sure the package contents are complete . . . . . . . . .. . . . .9
Installing batteries in the remote control . . . .. .. .. .. .. . . .. . . .9
Ope rat ing the re mote con tro l . . . . . . . . . . . . . . . . . . . . . . .. . . . .9
FUNCTIONAL OVERVIEW
Rem ote c ont rol . . . . . . . . . . . . . . . . . . . . . . . . . . . . . . . . . . . . . . 10
Fro nt pa nel . . . . . . . . . . . . . . .. . . . . . . . . . . . . . . . . . . . . . . . ... 1 1
Fro nt VF D displa y . . . . . . . . . . . . . . . . . . . . . . . . . . . . . . . . . . .12
Bac k pan el . . . . . . . . . . . . . . . .. .. ... . . . . . . . . . . . . . . . . . . . . . 13
CONNECTIONS
Composite video(Typical connection) . . . . . . . . . .. . . . .. . . . 14
Aud io ou tput con nec tio ns . . . . . . . . . . . . . . . . . . . . . . . . . . . . .1 5
Ant enn a & TV conne cti ons . . . . . . . . . . . . . . . . . . . . . . . . .. . .15
AV2 Inputs (VIDEO IN)DV input . ... . . . . . . . . . . . . . . . .. .. 16
DVD RECORDER OPERATION
Pow eri ng on the un it . . . . . . . . . . . . . . . . . . . . . . . . . . . . . . . . .1 7
Ini tia l Setup Pr oce dur e . . . . . . . . . . . . . . . . . . . . . . . . . . . . . . 17
Usi ng th e men us . . . . . . . . . . . . . . . . . . . . . . . . . . . . . . . . . . .. . 1 7
Ins ert ing a D isc . . . . . . . . . . . . . . . . . . . . . . . . . . . . . . . . . . . . . 18
Usi ng Di sc me nus . . . . . . . . . . . . . . . . . . . . . . . . . . . . . . . . . . . 18
Bas ic di sc pl ayb ack. . . . . . . . . . . . . . . . . . . . . . . . . . . . . . . . .. 19
Adv anc ed playb ack . . . . . . . . . . . . . . . . . . . . . . . . . . . . .. . . . 20
Slo w mot ion play bac k . . . . . . . . . . . . . . . . . . . .. . . . . . . . . . . . 20
Rep eat ing a segm ent you de fin e . . . . . . . . . . . . . . . . . . . . . . .20
Mul ti- ang le fu nction . . . . . . . . . . . . . . . . . . . . . . . . . . . . . . . . . 21
Cha ngi ng th e aud io track . . . . . . . . . . . . . . . . . . . . . . . . . . . . . 2 1
Sub tit les . . . . . . . . . . . . . . . . . . . . . . . . . . . . . . . . . . . . . . . . . . . 21
View ing J PEG file s . . . . . . . . . . . . . . . . . . . . . . . . . . . . . . . . . . 22
Pla yin g MP3 file s . . . . . . . . . . . . . . . . . . . .. . . . . . . . . . . . . . . 22
Rec ord . . . . . . . . . . . . . . . . . . . . . . . . . . . . . . . . . . . . . . 3 0-31
Lan gua ge . . . . . . . . . . . . . . . . . . . . . . . . . . . . . . . . . . . . . . . .31
Cha nne l scan . . . . . . . . . . . . . . . . . . . . . . . . . . . . . . . . . .32 -33
Clo ck . . . . . . . . . . . . . . . . . . . . . . .. . . . . . . . . . . . . . . . . . . . .33
EDIT
Edi t a tit le of D VD RW . . . . . . .. . . . . . . . . . . . . . . . . . . . . . . . . 34
Cha pte r edi t . . . . . . . . . . . . . . . . . . . . . . . . . . . . . . .. . . . . . . . . . . 34
Edi t a dis c on the DVD R . . . . . .. . . . . . . . . . . . . . . . . . . . . . 35
TROUBLE SHOOTING
Pla yba ck . . . . . . . . . . . . . . . . . . . . . . . . . . . . . . . . . . . . . . . . . . . . . 36
Recording
SPECIFICATIONS . . . . . . . . . . .. . . .. . . . . . . .. . . . . . . . . . . . . 37
ATTACHMENT
. . . . . . . . . . . . . .. . . . . . . . . .. . . . . . . . . . . . . . 36
. . . . . . . . . . . . . . . . . . . . . . .. . . . . . . . . . . 38
RECORDING
Int rod uction t o rec ord ing . . . . . . . . . . . . . . . . . . . . . . . . . . . 2 3
Set tin g record ing o pti ons . . . . . . . . . . . . . . . . . . . . . . . . . 2 4
Set tin g the auto c hapter o pti on . . . . . . . . . . . . . . . . . . . . . . . 24
Che cki ng the Time a nd Da te . . . . . . . . . . . .. . . . . . . . . . . . 2 4-2 5
The Ti tle s creen . . . . . . . . . . . . . . .. . . . . . . . . . . . . . . . . . . . . . . 2 5
Type s of Re cordin gs . . . . . . . . . . . . . . . . . . . . . . . . . . . . . . . 25
Mak ing a L ive Reco rdi ng . . . . . . . . . . . . . . . . . . . . . . . . 25 -26
Rec ord ing . . . . . . . . . . .. . . . . . . . . . . . . . . . . . . . . . . . . . . . . . 26
Tim er Re cordin g . . . . . . . . . . . . . . . . . . . . . . . . . . . . . . . . 26- 27
FINALIZATION . . . . . . . . . . . . . . . . . . . . .. . .. . . . . . . . . . . . 2 8
SYSTEM SETUP
Gen era l . . . . . . . . . . . . . . . . . . . . . . . . . . . . . . . . . . . . . . . . ..29
Pla yba ck . . . . . . . . . . . . . . . . . . . . . . . . . . . . ..29- 30
6
Page 8
INTRODUCTION
DVD R/RW Recorder and Progressive Scan Player
JPEG
PROGRESSIVE
SCAN
The recording provides you the ability to create your own DVD discs from your home movies, favorite TV
programs and more. Because of the outstanding compatibility of DVD R/RW discs, the discs you create will be
suitable for playback in most DVD Players. You can record from the unit's built-in TV tuner or an external video
source like a video camera. And when you're ready to watch your recordings or commercial DVD, you can enjoy
them in the highest quality with the unit's progressive scan video out and digital audio out.
DVD R/RW Recorder
Record from your TV, camcorder, VCR, DVD
Live, timer and scheduled recording functions
Multiple recording modes, HQ, SP, EP, SLP
Up to 6 hours recording on one DVD R/RW Disc
On-Screen disc title navigator gives you quick, easy
access to your recordings
Built-In TV tuner, side and rear A/V inputs
Editing features with Add/del, Hide Chapters
Your recordings are playable on most DVD players.
Progressive scan DVD R/RW
Progressive scan video with 3:2 pull down playback
DVD+R, DVD+RW, DVD-R, DVD-RW, DVD, CDR,CD-RW, SVCD,MP3, JPEG, HDCD Kodak picture
CD, MPEG4.
Component Video, S-Video and Composite Video
Outputs
96 kHz / 24 bit D/A converter
Stereo and 5.1CH Audio outputs, Optical and Coaxial
digital outputs.
Advanced playback functions: Slow playback, Repeat
playback, Parental control, Mp3 format, JPEG format,
Screen saver, Zoom In/Out, Track selection, On-
screen display and more.
7
Page 9

INTRODUCTION
Optical disc compatibility
This unit is compatible with a wide range of available
optical discs for recording and playback.
Discs suitable for Recording and Playback
You must use DVD R or DVD RW discs to record on this
unit.
DVD R: These discs can only be written to once. Existing
recordings can be hidden but not deleted. So, any disc space
already used by a recording cannot reclaim. DVD R discs
are required to be "Finalized" before they will be
compatible with standard DVD player. Once a disc is
finalized, no further recordings can be made.
DVD RW: DVD RW discs can be written to and erased
multiple times. Existing recordings can be deleted and disc
space regained. These discs do not require a finalization
procedure. As soon as a recording is made, the disc will be
compatible with standard DVD player.
CD-AUDIO: An on-screen navigator is provided to
select and play tracks when using CD-Audio discs.
CD-R/RW:This unit features an on-screen navigator for
easy access to playable files stored on CD-R/RW discs,
such as JPG images and MP3 music.
Caring for Optical Discs
Discs suitable for Playback
The unit are coded for Region 4, and are compatible with
discs marked accordingly.
4
DVD R/RW:These discs can be played back when
recorded in standard DVD video format.
TM TM
TM TM
1. Hold a disc by the rim or with an index finger in the
central hole. Never touch the signal surface.
2. Finger prints or stains on the surface of the disc may
cause signal loss.
3. Use a soft cloth and wipe in a radiating manner from
the center of the disc to the outer rims when cleaning
the disc surface.
4. Never add labels or adhesive tapes on the discs be
careful not to scratch or damage the disc surface.
5. To prevent discs from becoming bent or deformed,
they should be vertically kept in the disc storage case.
to prevent damage, avoid leaving discs in your car,
where they may be subject to direct sunlight and high
temperature.
6. Do not use any disc accessory to improve the audio
quality, disc protective solutions or lens cleaner.
these products may damage the disc surface.
Labels
Tapes
Labeling Side
Surface
8
Page 10
INTRODUCTION
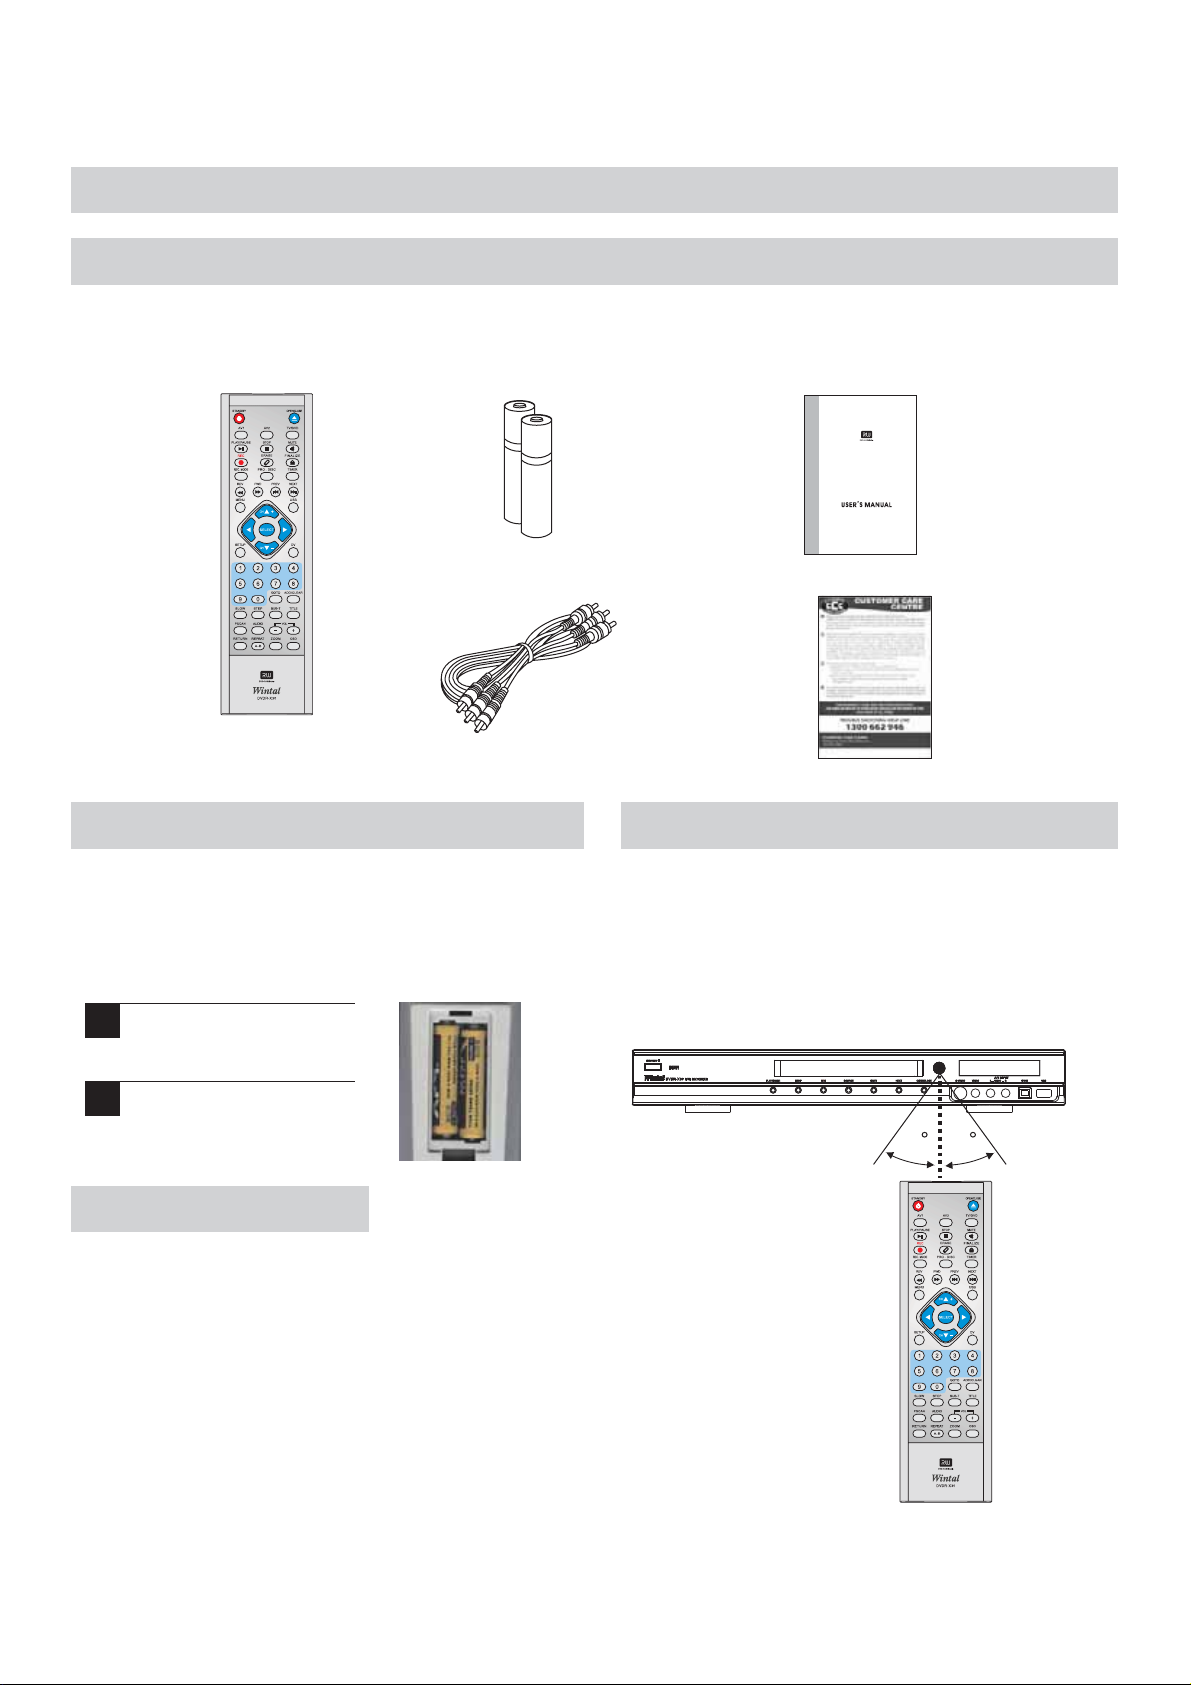
Make sure the package contents are complete
In addition to the DVD recorder, your package contains the following accessories.
Remote control
Batteries(AAA)
A/V cable (Composite
Video, Stereo Audio)
Installing batteries in the remote control
This unit comes completely with batteries for the remote
control. When installing batteries, be sure to take note of
the polarity markings on the inside of the battery
compartment and match them up with those on the
batteries.
Manual
Warranty
Operating the remote control
When using the remote control, be sure to stay within a
30degree angle of the sensor (More than 3 meter )on the
receiver. Keep in mind that any obstructions between
the remote control and the receiver will effect
performance.
1
Slide off the back cover
2
Install the batteries in
the compartment.
Notes on batteries
1. If the remote control functions better when it is closer
to the unit, the batteries may be running low.
2. In case of any leakage of batteries, dispose the
batteries right away and avoid touching the chemical
discharge. Make sure to clean the remote control's
battery compartment before installing new batteries.
3. Do not mix batteries of different types, or use old
batteries.
30 30
9
Page 11
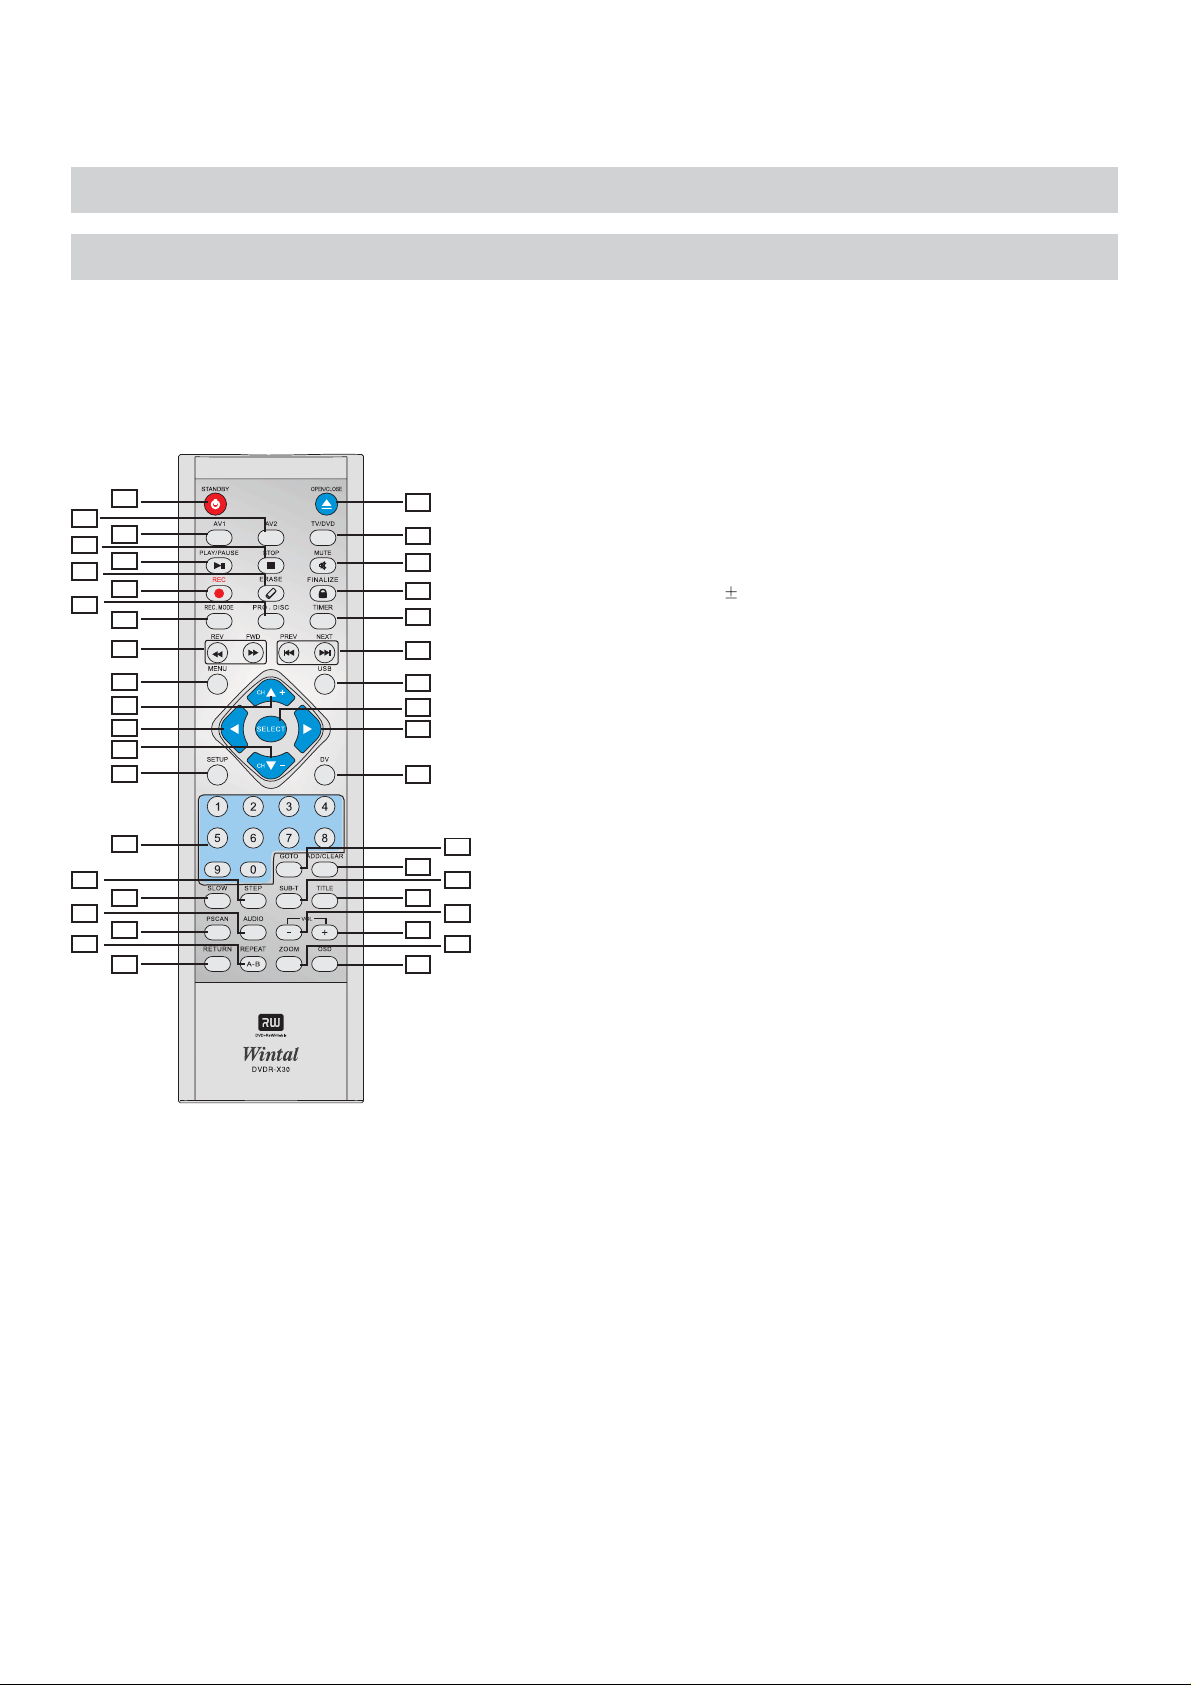
Remote Control
FUNCTIONAL OVERVIEW
17
19
21
1. STANDBY - Turn the unit on and set
the unit to Standby mode.
2.AV2-Select input sources to front
CVBS in, Front S-VIDEOO in.
3. AV1-Select input sources to Rear
CVBS in, Rear S-VIDEO.
4.STOP - Press once to stop
playback and hold the last position
in memory. Playback can be
resumed where it was left off by
1
2
3
4
5
6
7
8
9
10
11
12
13
14
15
16
18
20
22
23
24
25
26
27
28
29
30
31
32
34
36
38
40
pressing PLAY. Press twice to
clear the last playback position.
5.PLAY /PAUSE - Playback a disc,
chapter or track. Press again during
playback to pause. Playback or Pause
the disc.
6.EARSE-Press to earse the DVD RW
disc.
7.REC - Press to begin a live recording.
8.PRO.DISC-Press once to protect
DVD+RW disc that has been recorded.
Press twice to unprotect.
9. REC. MODE - Select the
recording quality mode: HQ, SP, EP,
SLP.
10.REV/FWD - Scan in fast reverse or
forward on DVD or other discs.
11. MENU - Access DVD or other disc's
menu, and can turn PBC funtion
ON/OFF when playing SVCD.
12/14. (CH+/-)/ UP/DOWN - In RF IN
33
mode, use to select a channel or to
highlight the item you desired.
35
37
39
RIGHT/LEFT To highlight the
13/31. -
item you desired.
15
. SETUP - Access the on-screen
Setup Menu for settings adjustment.
Use direction keys to highlight the
item you desired.
16.NUMBER KEYS - Enter
numeric values while setting options.
17.STEP-Step by step playback.
18.SLOW - Slow motion playback
mode in1/2,1/4 ,1/8or 1/16 speed.
Press PLAY to resume normal
playback.
19. AUDIO - Select an audio track
on DVD disc or other discs.
20.PSCAN - Select the video out format
for progressive scan mode or interlace
scan.
21.REPEAT- Select to repeat A-B,
Chapter, Title or Disc.
22.RETURN -Resume playback for
DVD discs or other discs.
23.OPEN / CLOSE - Open /Close the
disc tray.
24.TV/DVD-Press to TV mode and Press
to DVD playback mode.
25.MUTE - Temporarily cancel audio
playback.
26. FINALIZE-Press to finalize the
DVD+R disc.
27. TIMER -Access the timer
menu for scheduled recording
Setup.
28.PREV/NEXT- Advance to the next
track or play previous track on DVD or
other disc.
29.USB-Press to select playing the picture
or music in stored, if an USB is inserted.
30.Select - Select option in menus. Play a
disc, chapter or track with some discs.
For other discs, press PLAY key.
32.DV-Press to select DV IN as input
source.
33.GOTO -
chapter of the disc to play.
34.ADD/CLEAR-Use to delete characters
when entering words, further more, you
can use it to program your playback
order.
35. SUB-T -Select an available
Subtitle.
36.TITLE-Access the title screen on DVD
discs, displaying a graphical
representation of the recordings and
providing easy navigation.
37/38.VOL(-/+)-Use to increase or
decrease volume value.
39.ZOOM - Press to magnify the
screen with DVD or other discs and JPG
discs.
40.OSD - Bring up the on-screen display
showing information for the playback
section.
To Select your desired time,
10
Page 12
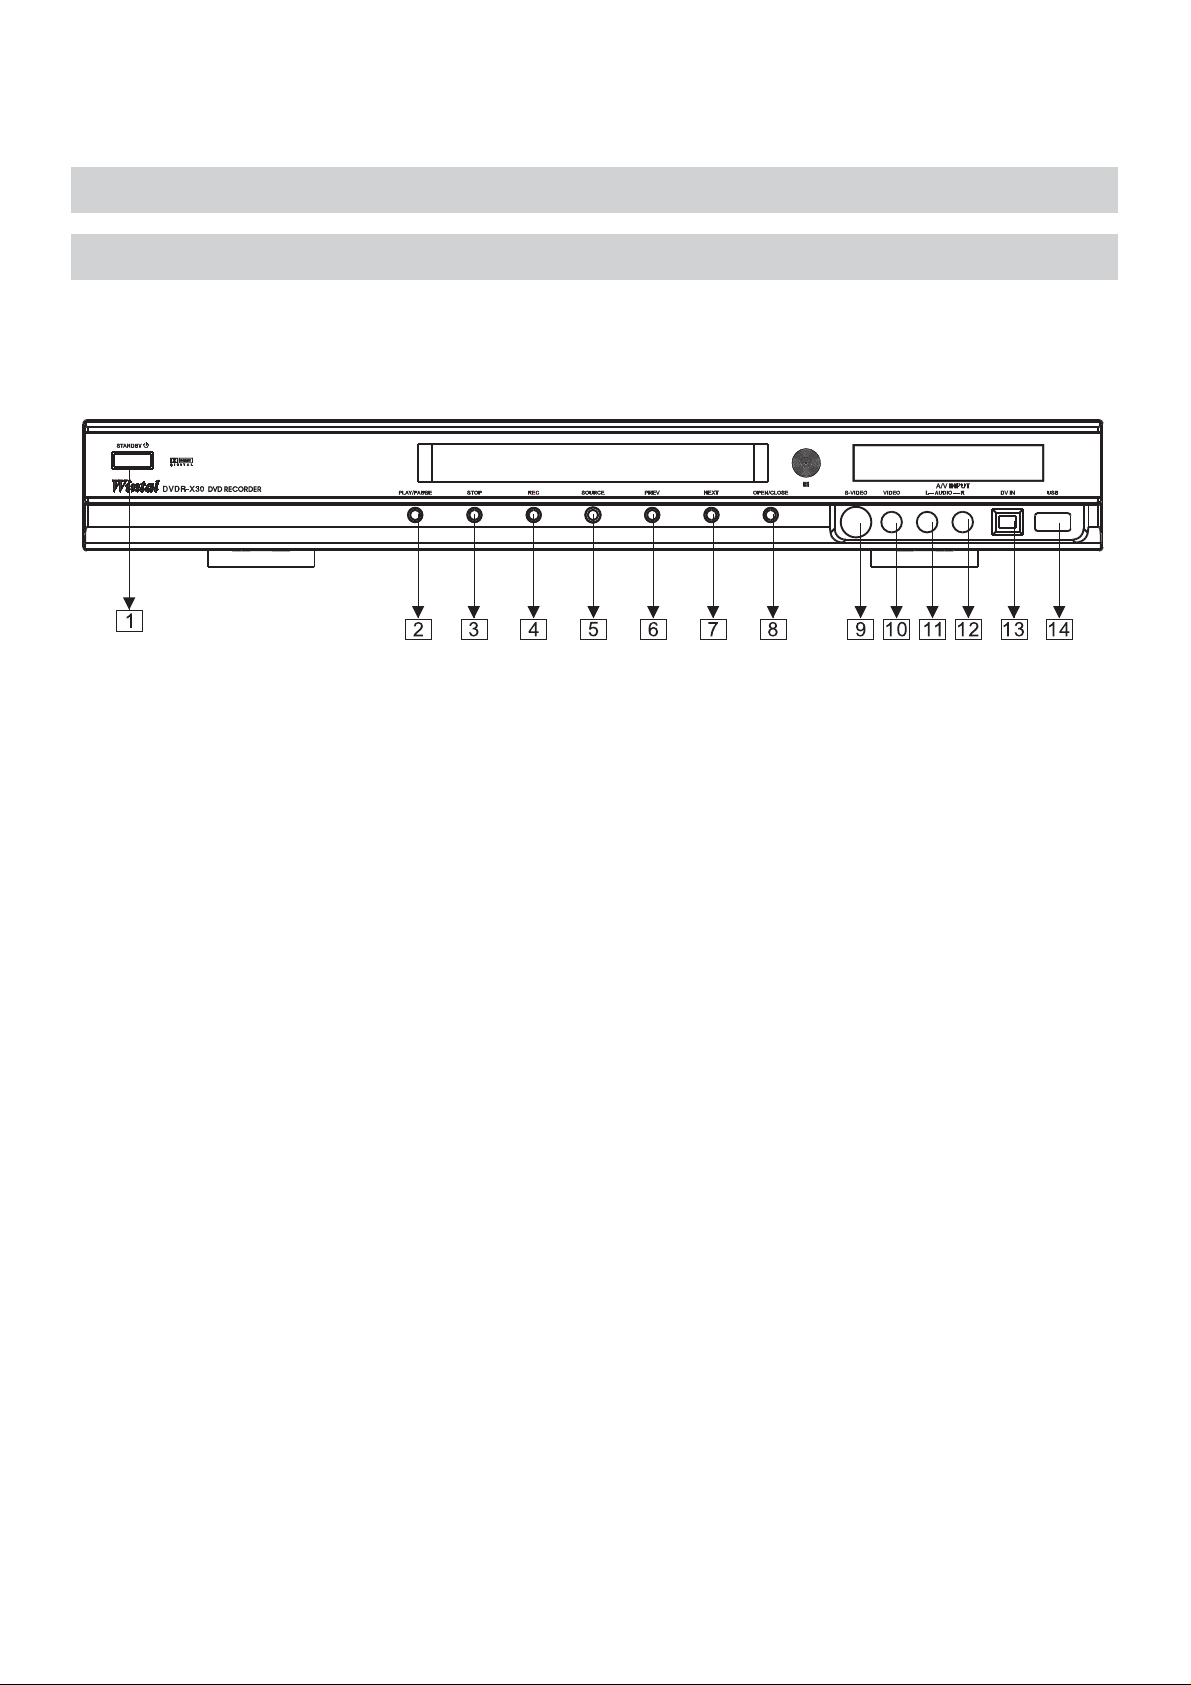
Front Panel
FUNCTIONAL OVERVIEW
1. STANDBY - Turn the unit on and sends the
unit to standby mode. In standby mode, the unit will
use a minute amount of power to enable power-on by
the remote control.
2. PLAY/PAUSE - Begin playback of a disc, chapter or
track. Press again during playback to pause, and again
to resume playback.
3. STOP - Press once to stop playback of a disc and
save the location of the stop point. The disc can be
played back from the stop point by pressing PLAY. To
erase the stop point and reset the play location to the
beginning of the disc, press STOP a second time.
4. REC- Begin a live recording.
5. SOURCE - Select input sources when the
recorder is in live record mode - TV Tuner, Front
CVBS, Rear CVBS, Rear S-Video, DV, And switch
DVD recorder mode to live recording mode.
6/7. PREV/NEXT- Advance to the next track or play
previous track on DVD or other disc.
8. OPEN/CLOSE - Press to open or close the
disc tray.
9. S-VIDEO INPUT - S-VIDEO input for recording.
To select this input, use the SOURCE button and
choose FRONT S-VIDEO.
VIDEO INPUT - Composite video input for
10.
recording. To select this input, use the SOURCE
button and choose FRONT CVBS.
11/12.
13.
14. -Press to select playing the picture or music in
STEREO AUDIO INPUTS-Use with Front
CVBS IN , or Front S-VIDEOIN for recording.
DV IN - The i-link DV input Jack. Connecting the
DV or digital camcorder for recording, To select this
input. Use the SOURCE button and source DV IN.
USB
stored, if an USB is inserted.
11
Page 13

Front VFD Display
FUNCTIONAL OVERVIEW
1. FUNCTION INDICATORS
Indicate the status of advanced disc playback
Functions:
REC Recording indicator.
PBC PBC (Playback Control) Function is enabled.
These indicators show the playback status of a
DVD, CD or other optical disc-Currently Playing,
Paused.
Indicate the timer recording
2. PROCESSOR INDICATORS
These indicators display the status of the surround
sound processors and type of sound track currently
active. CHANNEL the TV channel indicates
DOLBY the Dolby Digital processor is active.
TV. Indicate the TV channel.
3. DISC TYPE INDICATORS
Display the type of optical disc inserted - DVD,
SVCD,CDDA (Music CD), or Mp3.
4.TITLE /CHAPTER/TRACK INDICATOR
Display the number of the current Title, Chapter or
Track on DVD, Music CDs and other discs.
5.MULTI-FUNCTION DISPLAY
When playing a DVD or other optical disc, displays
the elapsed time of the playback session or track.
Also displays disc tray status, system messages and
more. When the unit is in Standby Mode, displays the
system clock.
12
Page 14

Back Panel
FUNCTIONAL OVERVIEW
3
1
1. RF IN / O UT - For antenna or cable TV connection. pass through connection to TV does not transfer the output
signal from the DVD recorder.
*Some units do not have a pass through connector. In this case, use a splitter (See page 16).
2.STEREO AUDIO INPUTS-Use with S-VIDEO IN or VIDEO IN for recording.
3.S-VIDEO INPUT- S-VIDEO input for recording. To select this input, use the SOURCE button and choose Rear S-
VIDEO.
4.COMPOSITE VIDEO OUTPUT-Standard video output is supported by most TVs
5. 5.1CH AUDIO OUTPUT - Connect to TV or other audio equipment supporting 5.1CH audio in.
6. COAXIAL DIGITAL AUDIO OUTPUT - Use a special coaxial digital audio connector to send the RAW code or
LPCM digital signal to devices supporting digital decoding.
7.COMPONENT/PROGRESSIVE SCAN VIDEO OUTPUT-Use this output with Tvs supporting component video
or progressive scan input for best video quality. Select this output in the DVD recorders SETUP MENU.
8.S-VIDEO UTPUT-Connect to TV with S-VIDEO in for better picture quality than standard composite video.
9.OPTICAL DIGITAL AUDIO OUTPUT-Use to connect to a receiver or other device with 5.1channel decoders.
This output is the coded digital signal.
2
4
5
6
7
8 9
13
Page 15

CONNECTIONS
Connecting the video output to your TV
In order to use the DVD recorder, you need to make a video connection to your TV. The capabilities of your TV and
the cables you have on hand will determine the connections you can use. There are 3 possible connection types:
- Composite Video - The most widely used connection. This unit includes an A/V cable for Composite Video.
- S-Video - A higher quality connection that requires a special S-Video cable and an S-Video capable TV.
- Component Video - The highest quality video connection. Supported on high-end TVs and requires a special
cable.
Composite Video (Typical connection)
This unit ships with a composite video (A/V) cable for connection to TV with a standard video input as shown below.
This is the most widely used type of connection. On most TV's, this connector is colored yellow, and is normally
accompanied by stereo audio inputs, colored red and white for stereo channels right and left respectively.
First, use the supplied A/V cable to connect to the
1 2
composite video input on your TV. This is normally a
yellow-colored connector that matches the video output
on the back of this unit. If you wish to hear sound
through the TV, connect the red and white stereo audio
connections as well.
Composite Video
Input Jack
Composite Video /
Stereo Audio Cable
STEREO AUDIO IN
R
L
3
Turn on the TV and DVD recorder and select the DVD
playback mode with the remote control.
On your TV , select the video input. This is normally done
by selecting
control. On some TV s, this is done by selecting a
particular channel.
TV with
Composite
Video Input
(Typical
Connection)
Video 1 or Video Input with the remote
,
14
Page 16

S
L
R
L
R
CONNECTIONS
S-Video Connection
This is a higher quality connection than standard composite video, and requires a special S-Video cable not included.
The S-Video connector is distinguishable by its 4 pins, as shown below. If your TV has an S-Video input jack, it's
recommended that you use this type of connection for better picture quality.
1
First, use a special S-Video cable. Connecting the SVideo output from the unit to the corresponding input
S-Video
Input Jack
S-Video Cable
on your TV.
Turn on the unit and select the DVD mode.
2
3
On your TV, select the S-Video input. This is
normally done by selecting Ycb/cr or Ypb/pr or
S-VIDEO with the remote control. On some TV S
this is done by selecting a particular channel.
TV with
S-Video Input
Component Video Connection
The highest quality video connection, component video requires separate cables for the Y, Cb/Pb, Cr/ Pr signals. To
use the progressive scan option on this unit, you need to use the component video output. Using the component video
output requires these steps:
First, use the supplied A/V cable to connect to the
1
component video input on your TV. Select this input.
Change the TV OUT MODE to the progressive scan
1
by press the PSCAN and SELECT key, select the
correct video input on your TV.
Component
Video Cable
Y
Component Video
TV with
Component
Video Input /
Progressive Scan
capabil ity
Y Pb
Pr
VIDEO
Resetting the video output
INPUT
If you inadvertently switch the OUTPUT FORMAT setting to
PROGRESSIVE while using a standard TV not capable of
PSCAN, you will lose video. If this happens, reset the
recorder to its default video settings by pressing PSCAN
and SELECT on the remote control.
Input Jacks
Cb/Pb
Cr/Pr
15
Page 17

CONNECTIONS
Audio Output Connections
This unit features a variety of audio outputs for connection to a receiver or other audio equipment.
- Use the included A/V cable to connect the stereo audio outputs for connection to a TV or stereo receiver.
- Optical and Coaxial digital audio outputs send an encoded digital bitstream, suitable for receivers with Dolby
decoding capability. These outputs require special cables not included.
STEREO AUDIO IN
TV or receiver
with stereo
audio in
L
R
OPTICAL DIGITAL AUDIO IN
Receiver with Dig ital
Audio Input
COAXIAL DIGITAL AUDIO IN
Antenna & TV Connections
This unit is available with and without an antenna pass through connection. For units with an antenna input connector
and with pass through connector, as shown below to the left , use antenna or cable TV connection to connect RF input
and RF output connect to a TV.
Without Passthrough Connector
ANTENNA OR CABLE TV CONNECTION
OUT OUT
OR
With Passthrough Connector
ANTENNA OR CABLE TV CONNECTION
IN
Splitter
TV with
coaxial
antenna or
cable TV
connection
TV with
coaxial
antenna or
cable TV
connection
16
Page 18

CONNECTIONS
Connecting Audio/Video recording sources to the A/V Inputs
Audio/Video inputs are provided on the front side and back of the unit for connection of outside audio/video sources
such as VCRs, camcorders, DVD players, etc. External video sources must support S-Video, Composite Video and/or
Stereo Audio to be suitable for recording.
COMPOSITE VIDEO /
STEREO AUDIO OUTPUT
VIDEO IN
L RV
Audio/Video sources such as
DVD player or VCR with
Composite Video Out
Audio/Video source such as
camcorder supporting
S-VIDEO Out
AV2 Inputs (VIDEO IN) and DV INPUT
DIGITAL VIDEO IN
S-VIDEO IN
R
L
V
S
R
L
COMPOSITE VIDEO /
STEREO AUDIO OUTPUT
S-VIDEO / STEREO
AUDIO OUTPUT
Audio/Video source such as
camcorder supporting
S-VIDEO Out
Audio/V ideo source such as
DVD player or VCR with
Composite Video Out
17
Page 19

DVD RECORDER OPERATION
Powering on the unit
Only after all connections are complete, connect the
power cord and power on the unit.
1
Plug the standard jack end into a wall socket or
power strip.
Press STANDBY on the remote control or front panel
2
to bring the system out of standby mode. The system
is now ready to use.
Initial Setup Procedure
Using the Menus
When the unit is first powered on, you'll be prompted to
set the time and date as well as TV Tuner options. You
can always change any of the settings you chosen
during the initial setup later in the DVD recorder's
SETUP MENU.
1
Use the UP/DOWN keys to increase or decrease the
value of a selected field or move to a field above or
below. Use the LEFT/RIGHT keys to move to the
previous or next fields.
Press SELECT to select an option and continue.
2
Notes on Power states
¡°¡±
There are 3 power states for this unit:
1. OFF - not connect the power cord. The unit draws no
power and cannot be turned on by the remote control.
2. STANDBY - the unit has not been taken out of standby
by pressing either the standby key on the remote
control or the standby button on the front panel. The
unit draws a slight amount of power to enable the
remote control receiving circuit.
3. ON - the standby button on the remote control or the
standby button on the front panel has been pressed.
The unit is ready to use.
Time and Date
Setting the time and date correctly is important, as the timer
recording depends on an accurate setting. The time format
used is 24H. Use the UP/DOWN keys to increase or decrease
the time or date and the LEFT/RIGHT keys to move to a
different field. When you have done, press SELECT key.
SYSTEM SETUP
The initial setup is now complete. Remember, any settings
chosen during the initial setup can be changed at any time in
the DVD recorder's SETUP MENU. Press SETUP to exit the
initial setup and begin using your DVD recorder.
CLOCK
Date(mm/dd/yy)
Time(hh:mm:ss)
01/01/ 01
21:45: 23
SYSTEM SETUP
Press RETURN/EDIT to exit edit mode,
Press UP/DOWN or 0-9 to edit.
CLOCK
Date(mm/dd/yy)
Time(hh:mm:ss)
01/01/ 01
21:45: 23
18
Page 20

DVD RECORDER OPERATION
Inserting a Disc
2
1
Press the OPEN/CLOSE button on the remote control
or front panel to open the disc tray.
FRONT PANEL
OR
2
Insert a disc.
2
Labeling Side
Surface
2
Press ENTER to confirm your selection.
Accessing a menu after play has started
1
If you wish to re-enter the menu after disc play
has started, use the MENU key. MENU also exits
the menu at any time.
3
Close the disc tray by pressing OPEN / CLOSE on
3
the remote control or front panel.
Using Disc Menus
Playing a Disc from the Menu
Most DVD will automatically display a menu after
the disc is inserted. This first menu is the first of
possibly many layers, and is therefore known as the
menu.
1
Use the ARROW keys on the remote control
to navigate through the menu to the
appropriate selection to start the movie.
19
Page 21

DVD RECORDER OPERATION
Basic Disc Playback
Starting, Pausing and Stopping Disc Play
3
2
2
1
PLAY - To begin playback of a disc, press PLAY/PAUSE.
2
2
PAUSE - To freeze the video on a single frame, press
the PLAY/PAUSE key during playback. To resume
normal playback, press PLAY/PAUSE again.
3
STOP - To stop playback of a disc, press STOP. The first
time STOP is pressed the location where disc play was
halted is saved. You can begin playback where you left
off by pressing PLAY. If STOP is pressed twice, the
playback location is reset to the beginning of the disc.
Skipping to the Next or Previous Chapter /Track
You can advance or skip back through the chapters or
tracks on DVD discs, audio CDs and other discs with
the NEXT and PREV buttons on the remote control or
front panel.
1
SKIP PREVIOUS - Press the PREV button on the
remote control or front panel to skip back to the
previous track.
2
SKIP NEXT - To advance to the next chapter or
track,press the NEXT button on the remote control
or front panel.
Frame advance
Fast Forward and Fast Reverse
You can scan through DVD and other discs in forward
or reverse direction at speeds up to 32X(eight times
normal speed).Fast forward/reverse scanning will
only work during disc playback, not when the disc is
stopped.
1
To use the fast forward/reverse function with the
remote control, press the REV or FWD key repeatedly
to cycle through all speeds in the desired direction.
Available speeds are 2X, 4X, 16X, and 32X. To resume
normal playback, press the PLAY key.
1
Press PAUSE during normal playback.
2
One frame is advanced each time you press STEP.
3
Press PLAY to resume normal play.
20
Page 22

DVD RECORDER OPERATION
Advanced Playback
Slow Motion Playback
This unit supports slow motion playback to 1/16 normal
speed.
A_
A-B RPT
Repeat the A
Repeat the A-B RPT
1
Press the SLOW button repeatedly to step through all
options for slow playback. you can choose 1/2,1/4 ,
1/8or1/16 speed.
Repeating A-B,Title, Chapter, or Track
Press REPEAT button to choose between A_B, Chapter
,Title or Track. Press it once to set the A point for A_B
repeat. The second press sets the B point for A_B
repeat. The third press activates Chapter repeat. The
Fourth press activates Title repeat and the fifth it
returns normal playback.
Note:
Title and Chapter repeat are only available on DVD
discs
C-RPT
T-RPT
NORMAL
Repeat the same chapter
Repeat the title
Return normal playback
1
Press the REPEAT button during playback.Each time
you press repeat button the repeat mode will change.
21
Page 23

DVD RECORDER OPERATION
SUBTITLES
01/02CH
SUBTITLES
02/02EN
Muting the sound
1
Press the MUTE button on the remote control to
temporarily cancel the audio signal at any time.
Press MUTE again to resume normal audio.
Changing the audio track
Most discs are recorded with multiple audio tracks.
Off
1
During playback, press theAUDIO button to
change the audio track.
Subtitles
Most DVD discs include at least one subtitle track in
one language. Subtitles are useful to viewing movies in
a foreign language or for hearing-impaired viewers.
Press the SUB-T button during playback to choose
one of the subtitle available on the disc, or turn the
subtitle off.
22
Page 24

DVD RECORDER OPERATION
Viewing JPEG Files
Slide Shows
You can view JPEG picture files stored on CD-R/RW
discs individually or in slide show mode on your TV.
JPEG is the standard format for pictures stored in digital
cameras, the internet and many other applications.
When you insert a disc with JPEG files, a slide show will
automatically begin.
Rotating and Flipping JPEG Images
While a JPEG is displayed, you can rotate the image or
flip it horizontally or vertically.
1
To rotate an image in the clockwise direction,
press the RIGHT arrow key.
Playing MP3 Files
The MP3 Player
When you insert a disc containing MP3 files, the player
will launch the MP3 player ( an on-screen interface for
playing MP3 music files).
File play--PLAY 01:01:22-01:02:23
FILE&DIRECTORY
XXXX.MP3
XXXX.MP3
XXXX.MP3
XXXX.MP3
XXXX.MP3
XXXX.MP3
XXXX.MP3
XXXX.MP3
XXXX.MP3
XXXX.MP3
. TRACK LIST - A list of the tracks and folders on
the disc.
. CURRENT FILE - The current file will begin to
be played.
. PLAYBACK INFO - Displays the current track
number, total tracks on the disc and elapsed
playback time.
FAVORITE/PROGRAM
2
To flip the image horizontally, press the DOWN arrow
key.
JPG notes
1. JPEG files must be stored on discs with the extension
"JPEG" , such as "Picture. JPEG" , otherwise the files will
¡°
¡±
not be recognized.
2. You can have a maximum of 250 files or folders.
3. CD-R/RW discs containing JPEG files should be in
ISO/9660, mode 1, closed section format for best
compatibility.
¡°
¡±
1
Use the UP/DOWN arrow keys to select a file to play.
Alternatively, you can jump to a file directly by using
the NUMBER keys, select the file number, then
pressing SELECT.
MP3 notes
MP3 files must be stored on discs with the
extension Mp3 , such as song1.mp3 , otherwise
¡°
the files will not be recognized.
You can have a maximum of 250 files or folders.
CD-R/RW discs containing MP3 files should be in
ISO/9660, mode 1, closed section format for best
compatibility.
¡±
¡°
¡±
23
Page 25

RECORDING
Introduction to recording
You already know that DVD discs provide the highest quality
video playback available. Now, with DVD R/RW recording,
you can create your own DVDs from your home movies,
favorite TV shows or virtually any other video source.
Recording to DVD R/RW is easy. The process is similar in
many ways to your old VCR, but with many new
enhancements. You can record live by simply pressing one
button, or set the timer for scheduled recordings. And
DVD RW discs can be erased and used over and over again more than one thousand times and still look crystal clear. Try
that with VHS tapes!
There's lots of new editing features with DVD R/RW that
give your recordings a flexibility that you never had with VHS.
The title screen gives you quick access to your recordings
with thumbnail images you can change. You can quickly add or
delete titles or chapters.
Discs you can Record To
This unit will accept two disc types for recording:
DVD RW and DVD R.
Although DVD RW discs are more expensive than DVD
Rs,they can actually be more economical and convenient for
certain situations. For example, if you are recording TV
programs you may want to "recycle" discs - recording over
episodes you have already watched. In this situation,
DVD+RW discs are the best choice because a single disc can
be used over and over again - there's fewer discs to buy and
keep track of.
DVD+RW
DVD-RW
Think of DVD RW (DVD+ReWritable) discs as the digital
equivalent of your old VHS tapes. Like video tape, DVD
RWdiscs can be recorded to, erased and re-used. But unlike
videotape, DVD RW discs will retain their crystal-clear
digital quality even after being erased and re-recorded over
1000 times! This superior quality will not be degraded with
the passage of time like VHS tapes.
Also, unlike DVD+R discs, DVD+RW discs do not require a
"Finalization" process for compatibility with standard DVD
player. To understand why this is so, consider the following:
In order for your recordings to be compatible with standard
DVD player, a TOC (Table of Contents) must be written to
each disc. Since DVD RW discs are ReWritable, the TOC
can be constantly updated as new recordings are made. This
means that a DVD +RW disc can be played on a standard
DVD player directly after the first recording, and will remain
compatible as new material is added later.
DVD+R
DVD R discs are "Recordable" discs that
cannot be erased. Once a recording is made to a DVD R disc,
the disc space used by that recording can not be reclaimed,
although the recording itself can be "hidden" so it is not
viewable when the disc is played.
DVD R discs must be finalized before they can be played
back on standard DVD player. Once this process is
complete, no more recordings can be added. This is and
important difference between DVD R and DVD RW discs.
While the TOC (Table of Contents) can be written to and
updated many times on a DVD RW disc, the TOC on a
DVD R disc can only be written once. Therefore, you cannot
move a DVD R between the recorder and a DVD player as
you add recordings to the disc. Instead, you must complete the
disc before it is playable on a standard DVD player.
Although DVD R offers less recording flexibility than
DVD RW, the lower cost per disc and the fact that the material
cannot be erased or edited make it the best choice for large
distributions of recordings to friends or clients.
DVD-R
What you can Record From
You can record your own DVD from the following sources:
TV Tuner - This unit features a built-in TV Tuner that can be
connected to a cable TV hookup or standard antenna to record
your favorite TV shows. You can auto-scan for available
channels .
AV Inputs (Composite/S-Video) - Use the Audio/Video
inputs to record from consumer electronics devices such as
your camcorder and VCR. You can also connect external TV
tuners, DVD player, etc. to the A/V inputs - basically any
video device that has a S-Video or composite video output,
DV Input/1394
About Copy Protection
You cannot record from a video source that is encoded
with Macrovision copy-protection, such as most DVD
produced by major studios. As an example, if you have
a DVD recorder connected to an AV input and attempt
to record a DVD, an error message will occur, letting
you know that the disc is copy-protected. DVD not
encoded with Macrovision can be used as a recording
source.
24
Page 26

RECORDING
Setting Recording Options
There are several recording options and other settings that
should be understood and checked before you begin recording.
Setting the Record Quality
The record quality determines the quality of your recordings as
well as the maximum amount of video you can record on a disc.
The higher the quality, the less video recording time can be
recorded.
SYSTEM SET UP
1
Press SETUP to enter to System Setup and use
UP/DOWN to move to the record icon. Then move to
Default Quality .press SELECT to confirm.
SYSTEM SETUP
RECORD
Auto chapter marker
Default source
Default quality
RECORD
Auto chaptermarker
Default source
Defaul t quality
ON
Tuner
SP
ON
Tuner
SP
Setting the Auto Chapter Option
You can set the recorder to automatically add a"chapter
marker" every 5 minutes during your recordings.
During playback, this will allow you to skip forward or
back in 5minutes intervals by using the NEXT/PREV
keys on the remote control. These chapter markers are
compatible with most standard DVD player as well.
1
Press SETUP to access the setup menu. Move to
RECORD icon.
SYSTEM SETUP
Auto chapter marker
Default source
Default qual ity
2
Press RIGHT to highlight the icon and press
SELECT.And UP/DOWN to select the ON/OFF.
SYST EM SETUP
Auto chapter marker
Default source
Default quality
RECORD
RECORD
ON
Tuner
SP
ON
ON
OFF
OFF
SP
HQ: High quality. About 60 minutes
SP: Standard play quality. About 120minutes
EP: Extended play quality.About240minutes
SLP: Super long play. About 360minutes
NOTE:
2
Recording time is an approximately value.
You can set the record quality in the SETUPMENU.
RECORD
Auto chapter ma rker
Default source
Default quality
ON
Tuner
SP
HQ
SP
EP
SLP
Checking the Time and Date
Before youbegin recording, you should make sure the time
and date are both correct. The time and date are used not only
to schedule recordings, but also to label recordings that you
make live. Setting the time and date correctly is important, as
the timer recordings depend on an accurate setting. The time
format used is 24H.
1
Durin g stop sta t us , p res s SETU P to ac c ess t he
SETUP menu. Use arrow keys to hightlight the
clock icon, then move to the date and time.
SYSTEM SETUP
CLOCK
Date(mm/dd/yy)
Time(hh:mm:ss)
01/01/01
21:45:23
25
Page 27

RECORDING
2
3
¡°
When date (mm/dd/yy) is highlighted, press SELECT
and input the local date by NUMBER KEY, press
SELECT again to confirm it.
SYSTEM SETUP
Date(mm/dd/yy)
Time(hh:mm:ss)
When time (hh:mm:ss) is highlighted, press SELECT
¡°
and input the local time by NUMBER KEY press
SELECT again to confirm it .
SYSTEM SETUP
Date(mm/dd/yy)
Time(hh:mm:ss)
¡±
CLOCK
01/01/01
21:45:23
¡±
CLOCK
01/01/01
21:45:23
The Title Screen
When you insert a DVD RW or DVD R disc, the title
screen will appear. The title screen displays thumbnail
images and information for each title (recording) on the
disc.
3. NEXT INDICATOR - The ARROW SYMBOL appears
above or below the 3 titles, indicating that a previous page
of titles exists.
Types of Recordings
There are two recording methods you can use:
LIVE RECORDING - You can start a live recording
by simply pressing the REC button while viewing
video from an input source, such as the TV tuner or AV
inputs. A live recording will end automatically if the
disc is full.
TIMER RECORDING - You can also schedule a
recording to automatically begin at a particular date
and time by using the DVD Recorder's built-in TIMER
function. Recording can be scheduled to record once a
week or daily.
Making a Live Recording
Selecting the Input Source
1. THUMBNAIL IMAGE - An image taken from the first
frame of the recording, the thumbnail image provides a
visual cue to help you identify the titles on the disc.
1.TITLE
01/01/00
12:03:47
SP 00:00:20
.The name of the pre-recorded. The default is TITLE.
.The date of the record.
.The quality
.Length of the record.
.The time of the record.
2. TITLE INFORMATION - Displays information about
the recording, including the date and time that the recording
was made, the total length of the recording and the record
quality.
After a DVD RW or DVD R disc is inserted in the DVD
recorder, you must select the input source that will be
recorded. You may choose from the following input sources:
TUNER - The DVD recorder's built-in TV tuner allows you
to record your favorite TV programs.
REAR CVBS - The composite video input located at the
back of the unit. Used for any video device with composite
video output.
REAR S-VIDEO - Located on the back panel, S-VIDEO
provides a better picture than standard composite video. Use
this input for camcorders or other video devices when
possible
FRONT CVBS - Composite video input located on the right
side.
DV IN
- Digital video input.
1
2
26
Page 28

RECORDING
1
After selecting the input source for recording, press
the REC. MODE button to choose recording quality.
2
You can press REC key to start recording.
Recording
In live recording mode, you may record with no specific end
point, using the REC button
1
To begin recording, press the REC button. This will
begin recording without a specific end time.
Alternatively, the end time will be dependent on the
amount of disc space available, as well as the
record mode (quality) setting. An indicator will
appear on the screen letting you know that the
recording has begun. The DVD recorder's front
panel display will show "REC"indicator, followed by
the elapsed time of the recording.
.
DVD+R discs must be finalized
Remember, your recoding is not complete on a
DVD R disc until the disc is finalized, until a
DVD R disc is finalized, it can be recorded to,
played back and edited on the DVD recorder, but it
will not be compatible with any other DVD player,
Finalization makes the disc compatible for playback
on standard DVD players. Once a disc is finalized,
no more recordings can be added. For more on
finalization, see EDIT DISC(Page 35).
Title limit
A DVD R/RW disc may contain up to 48 titles.
Attempting to add additional title after reaching this
limit will result in an error.
Timer Recordings
You can use the timer function to schedule recording
to begin and end at specific time. Timer recordings
are designed for unattended operation, and the unit
can work in standby mode. During a timer recording,
the recorder may not be used for any other
operations.
1
First setup the clock of your system as CLOCK setup.
¡±
¡°
2
You may pause the DVD recorder during a live
recording. Simply press PAUSE and the recording
will stop temporarily. Press REC again to resume
recording.
To end recording, press STOP. Keep in mind that
3
the recording will end automatically if the disc
runs out of space. There will be a STOP while the
recorder updates the disc contents.
4
To return to the title screen, press TITLE. You will
see a thumbnail image representing your last
recording, with information on the details of the
recording, including the date and time the
recording was made, along with the length and
recording mode.
2
Press TIMER, the record schedule will pop up.
Record scheduler
Date
Quality
Source
1
2
3
4
5
6
Start
End
NOTE:
If you want to delete a schedule. Highlight the one
and press ADD/CLEAR.
3
Use UP/DOWN to select one schedule, and press
SELECT to access item editor as below in each
item you can also use direction keys to highlight
and press SELECT to choose your desired setting.
27
Page 29

RECORDING
SOURCE:
Select video source for timer recordings. It is
including: TUNER (you should search TV channels
first )FRONT CVBS.
QUALITY:
Select record quality for timer recoding.
START:
Press SELECT to edit start time.
END:
Press SELECT to edit end time.
MODE:
Select recording frequency for timer recording: Daily,
Weekly, or Once. Press SELECT to edit mode.
DATE:
Select date for timer recording, Press SELECT to
edit date.
4
Select CONFIRM to save your setting
5
In three minutes before it is ready to record the
scheduled, It will appear a record prompt dialog,
affirm press confirm, abolish press cancel and if
without operation for a moment, It will record the
scheduled automatically.
NOTE:
In standby mode, your recorder will wake up in 1
minutes before recording.
28
Page 30

FINALIZATION
PAL
My DVD
DISC FINALIZATION
When do discs need to be finalized?
DVD R/DVD-RW discs recorded with your DVD
recorder will play fine on your nuit, or on your computer
DVD-ROM with or without disc finalization. However,
If you want to view your DVD on a standard DVD player
then you will have to finalize the disc to make the disc
compatible.
Record your discs as per the manual(Pg.24)and when you
wish to finalize, follow the steps below.
Press the TITLE key on the remote control. With the
1
first thumbnail selected, hit the UP key on your remote
control. This will bring you to the DISC INFORMATION
SCREEN.
4
You will come across the FINALIZE DISC DIALOGUE
BOX which reminds you that no new content can be
recorded on the disc once finalized. Choose YES to
continue the finalization process.
PAL
DVD
EDIT
5
Wait for the finalization process to complete. Do
My DVD
DVD
Finalize disc
Warning:Thisoperation will finalize
the DVD+Rdisc in loader.If finalized
it cannot recordnew contentany
more.Are you sureto continue?
Yes
No
not power off the unit or remove the disc until the
process is complete.
PAL
DVD
EDIT
Notice the Yellow Arrow on the screen. Keying RIGHT
2
My DVD
01/01/2000
17:17:35
on your remote control will bring the disc finalization
screen.
PAL
DVD
EDIT
Using your remote control, choose FINALIZE DISC
3
Play
Rename disc
Record a new title
Finalize disc
with the arrow keys and hit the SELECT button.
DVD
DVD
Total process needs about 9 minutes.
EDIT
Do not power off. Working now.....
My DVD
Finalize disc
15%
Once the Finalization process is complete, you will
be able to play your DVD disc on almost any DVD
player. Some points to remember are:
1. You can not make any new recordings on a finalized disc.
2. The play Disc/Rename Disc/Finalize Disc/Record New
Title menu options will only appear on un-finalized discs.
3. It is not necessary to finalize the disc if you will be using the
disc with the DVD Recorder or your computer DVD-ROW.
4. You can not finalize DVD+RW discs.
PAL
DVD
EDIT
Play
Rename disc
Record a new title
Finalize disc
29
Page 31

SYSTEM SETUP
p
General
The General menu including Screen saver,
Progressive/Interlace,Video output format, Restore
factory settings. The realization of functions must be
under STOP condition.
SCREEN SAVER
Default setting :
You can enable the built-in SCREEN SAVER. When
enabled by choosing ON, the Screen Saver will start if
the unit remain paused for a period of about 5 minutes,
protecting your TV from possible screen burn that could
occur when a still image is displayed for too long.
SYSTEM SETUP
Screen Saver
Progr essive /Inter lace
Video ou tput for mat
Restore factory settings
PROGRESSIVE/INTERLACE
Default setting:
Progressive scan mode need TV support.
SYSTEM SETUP
Screen Saver
Progressive/I nterlace
Video output format
Resto re facto ry settin gs
Progre ssive scan mode n eed TV support !
VIDEO OUTPUT FORMAT
Default setting:
Your DVD Recorder will work with TVs based on the NTSC
and PAL standards, as well as TVs designed to function with
both standards, or Multi System models. NTSC is the standard
TV system used in the USA, Canada, Japan and many other
countries. The PAL TV system is used in Europe, Africa and the
Middle East, among other places. Refer to your TV's
documentation to make sure which model you have.
SYSTEM SETUP
Screen Saver
Progressive/Interlace
Video ou tput forma t
Restore factory settings
ON
GeneraL
ON
Interlace
PAL
OK
INTERLACE
GeneraL
ON
Interlac e
PAL
OK
PAL
GeneraL
ON
Interlace
PAL
OK
“
Ā
SYSTEM SETUP
Screen Saver
Progressive/Interlace
Video ou tput for mat
Resto re factor y setting s
Screen Save r
Progres sive/Interla ce
Video outp ut for mat
Restor e factory settings
SYSTEM SETUP
Screen Saver
Progressive/Interlace
Video output for mat
Restore factory settings
GeneraL
GeneraL
Gener aL
ā
”
ON
ON
Interlace
Interlace
OFF
PAL
OK
ON
Interlac e
Progressive
PAL
Interlace
OK
ON
Interlace
PAL
PAL
OK
NTSC
RESTORE FACTORY SETTINGS
Use this option to RESET the unit to FACTORY
DEFAULTS. All settings will be reset, including the
DATE and TIME. All stored CHANNELS will be lost.
GeneraL
Scre en Saver
Progressive/Interla ce
Video ou tput form at
Rest ore factor y settings
ON
Interlace
PAL
OK
Restore factory settings
!
System will reset all the setup
item to default value. OK to
confirm. Cancel to discard
OK
CANCEL
Playback
The playback including TV aspect ratio, rating level,
Digital audio output, Closed captions analog audio
output.
TV ASPECT RATIO
Default setting:
Please set according to your TV screen shape
Please set according to your TV screen
shape
You can s etup your DVD Recorde r to wor k with norma l and
wide screen televisions. If you are using a wide screen TV, set
this option to to match the aspect ratio of
your TV. When used with a normal TV (4:3 aspect ratio), the
4:3 NORMAL/PS
display, where a movie is clipped on the sides to fit into the
TV screen. The setting
will enable the Letterbox format, where the movie is
presented in wide screen format with black lines at the top
and bottom of the screen. The and
NORMAL/LB
very few movies support both options. DVDs are generally
recorded with either PS or LB and do not allow switching
between the two. So, viewing a wide screen DVD on a
standard TV will result in black bars on the top and bottom of
the screen.
PARENTAL LEVEL
Default setting
You must set up a to use the Parental Level
options. When you first attempt to use the Parental Control,
you are prompted to create a . Choose any
5 digit number for your password and press .
SELECT
assword is set up, use the menu option to
change your existing password. You will be prompted to
SELECT OLD NEW
to confirm. If you have forgotten your password, you may use
MASTER PASSWORD
the of in place of the old
password.
LETTER BOX
PLAYB ACK
PLAYB ACK
TV aspect ratio
Rating level
Digital audio output
Clos ed capti ons
Analog audio output
Lett er box
OFF
RAW
ON
2CH
Please set according to your TV screen
shape
PLAYBACK
TV aspect ratio
Rati ng leve l
Digital audio output
Closed ca ptions
Analog audio output
Letter box
16:9
OFF
Pan Scan
RAW
ON
2CH
16:9 WIDE TV
setting results in the typical Pan & Scan
Ā
“
ā
”
4:3 NORMAL/LB LETTER BOX
“”
settings usually will have no effect, since
:OFF
PASS W O R D
the password again to confirm. After your
the password, then the password twice
4:3 NORMAL/PS
NEW PASSWORD
SELECT
PASSWORD
3308
30
Page 32

SYSTEM SETUP
A
SYSTEM SETUP
DVD play level c ontrol
OFF
Ne w p a s sw o rd
PLAYBACK
PLAYBACK
TV aspect ratio
Rating level
Digit al audio ou tput
Closed captions
Analog audio output
Set Rati ng Level
Lett er box
OFF
RAW
ON
2CH
OK
NEW
ENTER PASSWOR D
OK CANCEL
OFF
OFF
8. Audio
Set Rating Level
OK
NEWNe w p as sword
New pass wor d
New pas sword
OK
Conf ir m
Cancel
NOTE ON PARENTAL SECURITY
Remember to keep in mind that since the MASTER
PASSWORD is listed above; your recorder may not be secure if
this manual is accessible by your children.
CHOOSE RATING
Default setting:
The rating level allows you to limit the use of your DVD
recorder to only those DVD discs that do not exceed the rating
you specify. Choices include
NC17, ADULT OFF
level is set, DVD discs that support parental control will play
only after entering correct password . Non-supporting discs,
however, will be immune to lockout.
OFF
Kid Safe, G, PG, PG13, PGR, R,
and (All discs play). When the parental
,
the
Ā
ā
“
”
SET PASSWORD
To change the password, SELECT 3308 , then SELECT
“
the new password.
Ā
ā
”
DIGITAL AUDIO OUTPUT
Default setting:
Select audio output format according to your amplifier.
RAW
CLOSED CAPTIONS
Default setting:
SYSTEM SETUP
PLAYBACK
PLAYBACK
TV aspect ratio
Rating level
Digital audio output
Closed captions
Analog audioou tput
OFF
Lett er box
OFF
RAW
OFF
2CH
PLAYBACK
TV aspect ratio
Rating level
Digital audio output
Closed captions
Analog audio output
Letter box
OFF
RAW
OFF
ON
OFF
ANALOG AUDIO OUTPUT
Default setting:
SYSTEM SETUP
PLAYBACK
PLAYBACK
TV aspect ratio
Rating level
Digital au dio output
Closed capti ons
Analog audio o utput
2CH
Lett er box
OFF
RAW
OFF
2CH
PLAYBACK
TV aspect ratio
Rating level
Digital au dio output
Closed capti ons
Analog audio output
Letter box
OFF
RAW
OFF
2CH
2CH
5.1CH
RECORD
The record menu includs ,
Default source Default quality
,.
AUTO CHAPTER MARKER
Default setting:
You can set the recorder to automatically add a
"chapter marker" every 5 minutes during your
recordings. During playback, this will allow you to
skip forward or back in 5 minutes intervals by using the
NEXT/PREV
chapter markers are compatible with most standard
DVD player as well.
1
Press SETUP to access the setup menu. Move to
RECORD icon.
ON
keys on the remote control. These
SYSTEM SETUP
Auto chapter marker
RECORD
uto chapter mark er
Default source
Default qu ality
ON
Tuner
SP
SYSTEM SETUP
Select audio output format according to
your amplifier.
PLAYBACK
TV aspect r atio
Rating l evel
Digital audio output
Closed c aptions
Analog audio output
Let te r box
OFF
RAW
ON
2CH
SYSTEM SETUP
Select audio output format according to
your amplifier.
PLAYBACK
TV aspect rati o
Rating level
Digital audiooutput
Closed captions
Analog audi o output
Letter box
OFF
RAW
RAW
LPCM
2CH
2
Press RIGHT to highlight the icon then press
SELECT. And use UP/DOWN to select the
ON/OFF.
31
Page 33

SYSTEM SETUP
SYSTEM SETUP
RECORD
Auto chapte r marker
Default sour ce
Default quality
ON
Tun er
SP
SYSTEM SETUP
Auto chapter marker
Default source
Default qualit y
RECORD
ON
ON
OFF
OFF
SP
DEFAULT SOURCE
Default setting
RECORD
Auto ctapter marker
Default source
Default qu ality
:
TUNER
ON
Tuner
EP
Auto ctapter marker
Default source
Default quality
RECORD
ON
Tuner
Rear CVBS
EP
DV
Tuner
DEFAULT QUALITY
Default setting
The Record quality determines the quality of your recordings as
well as the maximum amount of video you can record on a disc.
The higher the quality is the less video recording time can be
recorded.
1
Press SETUP to access the setup menu. Press
UP/DOWN to select the RECORD icon.
2
Press RIGHT to highlight the icon ,then press
SELECT and UP/DOWN to select the record
quality.
HQ: High quality. about 60 minutes
SP: Standard play quality. about 120minutes
EP: Extended play quality. about240minutes
SLP: Super long play. About 360minutes
3
After your selection, press SELECT to confirm it.
:
SP
Auto chapter marker
Default source
Default quality
Auto chapter marker
Default source
Default quality
RECORD
RECORD
ON
Tuner
SP
ON
Tuner
SP
HQ
SP
EP
SLP
Language
The language menu includs ,
Menu language Subtitle language and Audio
language
,
.
OSD LANGUAGE
Default setting:
OSD Language
Menu Language
Subtitle Language
Audio Language
When playing a DVD, or Music CD, you can display
the current title, chapter/track and elapsed playback
time on-screen with the OSD.
LANGUAGE
ENGLISH
ENGLISH
ENGLI SH
OFF
ENGLISH
MENU LANGUAGE
Default setting:
The realization of function must be under STOP
condition.
OSD Language
Menu Language
Subtitle Language
Audio Language
LANGUAGE
ENGLISH
ENGLISH
ENGLI SH
OFF
ENGLISH
SUBTITLE LANGUAGE
Default setting:
The realization of function must be under STOP
condition.
SYSTEM SETUP
OSD Languag e
Menu Languag e
Subtitle Language
Audio Langu age
LANGUAGE
OFF
ENGLISH
ENGLISH
OFF
ENGLISH
AUDIO LANGUAGE
Default setting:
The realization of function must be under STOP
condition.
SYSTEM SETUP
OSD Lang uage
Menu Language
Subtitle Language
Audio Lang uage
LANGUAGE
ENGLISH
ENGLISH
ENGLISH
OFF
ENGLISH
OSD language
OSD Language
Menu Language
Subtitle Language
Audio Language
LANGUAGE
OSD Language
Menu Language
Subtitle Language
Audio Language
LANGUAGE
OSD Languag e
Menu Language
Subtitle Language
Audio Langu age
OSD Language
Menu Language
Subti tle Langua ge
Audio Lang uage
LANGUAGE
LANGUAGE
SYSTEM SETUP
SYSTEM SETUP
SYSTEM SETUP
SYSTEM SETUP
ENGLISH
ENGLISH
ENGLISH
OFF
ENGLISH
ENGLISH
ENGLISH
ENGLISH
CHINESE
OFF
DANISH
ENGLISH
ENGLISH
ENGLISH
OFF
ENGLISH
OFF
ENGLISH
CHINESE
ENGLISH
ENGLISH
OFF
ENGLISH
ENGLISH
CHINESE
DANISH
32
Page 34

Channel scan
SYSTEM SETUP
1
Press number keys or Ch-/Ch+ to change channel.
The channel scan includs ,
channel Modify channel information Sort
channel order
,and
.
Default TV system Scan
The realization of function must be under STOP
condition.
DEFAULT TV SYSTEM
Default setting
:
PAL B/G
SYSTEM SETUP
Select default TV system
CHANNEL SCAN
Default TV system
Scan channels
modify channel information
Sort channel order
PAL B/ G
SCAN
EDIT
SORT
SCAN CHANNELS
To record TV programs you should search TV
channels first.
SYSTEM SETUP
CHANNEL SCAN
Default TV system
Scan channels
modify channel information
Sort channel order
175.25MHZ
PAL B /G
SCAN
EDIT
SORT
2
Use UP/DOWN to change item. LEFT/RIGHT to
manual scan. Press Stop to stop manual.
UP/DOWN to chan ge item, LEFT/R IGHT
to manual scan, STOP to stop manual scan.
3
UP/DOWN to change item, select to edit. Choose
right TV system.
Total found 0 channel, Press STOP to stop
scanning.
MODIFY CHANNEL INFORMATION
NOTICE:
had scaned TV channels.
This function is only used, when you
SYSTEM SETUP
Modify channel inrfor matio
CHANNEL SCAN
Default TVsys tem
Scan channels
modify channel information
Sort channel order
PAL B /G
SCAN
EDIT
SORT
33
UP/DOWN to change item, SELECT to edit.
4
UP/DOWN to change item. SELECT to skip/unskip
UP/DOWN to change sound mo de,
SELECT to confirm .
channel.
UP/DOW N to change item, Press SELE CT to
skip/uns kip channel.
UP/DOWN to hide/unhide channel.
SELECT to confirm
Page 35

SYSTEM SETUP
5
Use UP/DOWN to change item. LEFT/RIGHT to
fine tune.
UP/DOWN to cha nge item, LEFT/RIGHT
to fine tune.
6
Exit channel information edit.
Press SELECT to save your change of
channel information.
SORT CHANNEL ORDER
CHANNEL SORT
P000 Ch000 Skip
P000 Ch001 Skip
P000 Ch002 Skip
P000 Ch003 Skip
P000 Ch004 Skip
P000 Ch005 Skip
P000 Ch006 Skip
P000 Ch007 Skip
P000 Ch008 Skip
UP/DOWN Key to select insert position ,
SELECT /LEFT key to insert channel.
P000 Ch000 Skip
Clock
Befor e you begin recording, you shou ld m ake sure the tim e
and date are both correct. The time and date are used not only
to schedule recordings, but also to label recordings that you
make live. Setting the time and date correctly is important, as
the timer recordings depend on an accurate setting. The time
format used is 24H .
1
During stop status, press SETUP to access the
setup
menu.
2
Use RIGHT/LEFT to highlight the clock icon .
SYSTEM SETUP
Resort channelorder
1
Use UP/DOWN keys to change channel, SELECT
CHANNEL SCAN
Defaul t TV syst em
Scan channe ls
modify chan nel informa tion
Sort channe l order
PAL B /G
SCAN
EDIT
SORT
keys to select channel.
CHANNEL SORT
P000 Ch000 Ski p
P000 Ch001 Ski p
P000 Ch002 Ski p
P000 Ch003 Ski p
P000 Ch004 Ski p
P000 Ch005 Ski p
P000 Ch006 Ski p
P000 Ch007 Ski p
P000 Ch008 Ski p
UP/DOWN Key to change channel, Right
key to select channel,return toc onfirm.
2
Use UP/DOWN keys to move the channel to the
position which you want, SELECT key to complete
the sort.
3
Use up/down to highlight the Date and Time.
4
Āā
“
With date (mm/dd/yy) is highlighted, press
”
RETURN/EDIT to exit edit mode. Press UP/DOWN
or 0-9 edit.
SYSTEMSETUP
Pres s RET URN/EDIT to exi t edit mode,
Press UP/DOWN or 0~9 to edit.
5
Āā
“
With time (hh:mm:ss) is highlighted, press
RETURN/EDIT to exit mode. Press UP/DOWN
CLOCK
Date(mm/dd/yy)
Time(hh:mm:ss)
01/01/01
21:45:23
”
edit
or 0-9 edit.
SYSTEM SETUP
Press SELEC T to edit time.
CLOCK
Date(mm/dd/yy)
Time(hh:mm:s s)
01/01/01
21:45:23
34
Page 36

EDIT
Edit a title of DVD RW
1
Insert a recorded DVD RW disc on the disc tray.
Press EDIT button ,the index picture screen will
pop up.
e
2
Use the direction keys to highlight the title, which you
want to edit. Press the RIGHT key. The menu will
display on the screen, and press the UP/DOWN keys
to select a sub-item.
3
Press EDIT, the title edit bar appears on the
screen while playing back.Press UP/DOWN to
highlight one icon and enter it. Press UP/DOWN
to select a sub-item.
HIDE CHAPTER:
Mark current chapter invisible in
play mode
INDEX PICTURE:
Snap current screen as title index
picture
SPLIT TITLE:
Divide current title to 2 titles at
current point
T-ELAPSED:
Display the elapsed time
4
Press EDIT to quit the menu
TITLE:
You can select title that want to
edit here
CHAPTER:
Go to a chapter here
PLAY:
Play process control
CHAPTER MARKER:
Edit chapter marker here
Chapter edit
Get into the EDIT MODE menu and highlight the
fourth icon by UP/DOWN and select it.
When selecting insert maker, a new chapter marker
will be add to the current point.
When selecting delete marker, the marker of the
current chapter will be deleted.
When selecting delete all markers, all of chapter
markers in the current title will be deleted.
Note
From the second icon in the control bar the above
operation can be viewed.
35
Page 37

Rename title
RENAME TITLE
You can rename the current title. Select the RENAME
TITLE with TITLE-NAME displayed. On the screen,
there appears a keyboard.
Titl e name
TITLE
ABCDEFGHI JK0 12
L MN OPQR ST UV 3 4 5
WXY Z
Space Caps BkSp Delete Clear Exit OK
()
_
:?. 6789
EDIT
3
Press SELECT to run the operation.
Play
Rename disc
Erase disc
Record a new title
Overwrite disc
Lock disc
PLAY
This item is selected to play the disc
RENAME DISC
Press SELECT to rename the disc
Press the direction keys (UP/DOWN/RIGHT/LEFT) to
highlight the character which you want to input, and
press SELECT to confirm it.
The control bars of the last line in the keyboard is for
edit command. Select OK to save the title name.
Note:
The maximum length of the title name is up to 9
characters.
EDIT title on the DVD RW
1.Insert a recorded DVD RW on the disc tray
2.Use UP/DOWN key to select a title which you want to
edit
1. TITLE
03/15/2004
11:19:01
HQ 00:01:00
2. TITLE
03/15/2004
11:19:01
HQ 00:01:00
3. TITLE
03/15/2004
11:19:01
HQ 00:01:00
3.Press the RIGHT key, the edit bar appears on the
screen, Press UP/DOWN to hightlight one icon and
SELECT it to edit the title.
4.Press the LEFT key to quit the operation.
1. TITLE
Play title
03/15/2004
11:19:01
HQ 00:01:00
Edit title
Rename title
2. TITLE
Erase title
03/15/2004
11:19:01
Overwrite title
HQ 00:01:00
Overwrite disc
3. TITLE
03/15/2004
11:19:01
HQ 00:01:00
ERASE DISC
Erase DVD RW Disc only
RECORD A NEW TITLE
Record new title.
OVERWRITE DISC
LOCK DISC
Lock DVD RW disc only
When the icon display LOCK, it shows you can lock
your current disc. if you have locked your disc, you can
not make any more except play it back, but you can
unlock it by UNLOCK.
EDIT A DISC ON THE DVD R
Play
Rename disc
Record a new title
Finailize disc
PLAY
This item is selected to play the disc.
RENAME DISC
Press SELECT to rename the disc.
RECORD A NEW TITLE
Record new title.
EDIT A DISC ON THE DVD RW
1
Insert a DVD RW on the disc tray.
2
Press DISC OPER to access the editing menu.
FINAILIZE DISC DVD+R/DVD-RW)
Remember, your recoding is not complete on a
DVD R/DVD-RW disc until the disc is finalized, until a
DVD R/DVD-RW disc is finalized, it can be recorded
to, played back and edited on the DVD recorder, but it
will not be compatible with any other DVD player,
finalization makes the disc compatible for playback on
standard DVD players. Once a disc is finalized, no more
recordings can be added.
36
Page 38

TROUBLE SHOOTING
Common Problems & Solutions
Playback
The DVD Recorder Does Not Power On
The AC power cord may be loose or not plugged in.
Make sure the power cord is secure in the AC socket
and the connector on the back of the recorder.
The unit may be in Standby Mode. Turn the recorder
on with the remote control Standby button, wait for a
few seconds, then turn the unit back on.
There must be a pause between powering the unit
down and back on of a few seconds.
A Specific Disc Does Not Play
The disc may be dirty. Try cleaning the disc.
Make sure the disc is not in upside-down
The REGION CODE of the disc may not match that
of the recorder. In this case, the disc cannot be used.
The Remote Control Does Not Function
Make sure you're aiming the remote control directly
at the recorder remote control sensor, located on the
front panel.
Make sure there are no obstacles between the remote
control and the recorder.
The batteries may be drained. Try changing the
batteries in the remote control.
You could be using the remote control too far away.
Try within 4 meters from the recorder.
There is No Picture on the TV Screen
Make sure the connections from the recorder to the
TV are secure.
Verify that the TV's channel is set to match the video
input you are using. Refer to the TV's documentation.
On most TVs the "AUX In" , "Video In"or "A/V In"
channel should match the video input connector.
If you're using the S-Video connector, your TV may
have a separate input channel for this type.
¡° ¡° ¡°¡± ¡±¡±
Distorted Picture when Connected to a
VCR
This DVD recorder is built with Macrovision
copy- protection. This will distort the signal when
it is used with VCRs. Connect the recorder
directly to the TV.
Recording
Recording Will Not Start
The video input source may be protected with
Macrovision Copy or CGMS Protection.
The disc may already contain recordings of a
different TV System type - PAL or NTSC. If the
disc already contains a PAL recording, you cannot
record from an NTSC source, and vice versa.
The maximum number of titles - 48 - may have
been reached.
If the disc is a DVD R/DVD-RW, it may already
be FINALIZED
The disc is not a DVD R/RW disc
The Disc Cannot be Erased
The disc is not a DVD RW disc.
The disc may be dirty. Try cleaning the disc.
Recordings Do Not Play on Other DVD
Player
If the disc is a DVD R/DVD-RW, make sure it has
been FINALIZED.
The DVD player may not support DVD R/RW
discs.
Timer Recording Does Not Start.
The time/date is invalid or conflicts with another
schedule.
The time/date settings of the recorder are incorrect.
Set the time/date in SETUP menu.
The specified video input source is unavailable.
The disc is out of space.
The Picture Appears Stretched or Squeezed
The video aspect ratio may be set wrong for your
television type.
Enter the SETUP MENU and select the VIDEO setup
MENU. Try changing the TV display setting to
normal/PS (4:3 Pan & Scan) if you are using a
standard TV, or Wide TV(16:9 Wide) if your TV is a
Wide-Screen type.
The Disc Doesn't Eject
If the recorder is in Standby Mode with the glowing
red LED to the left of the disc tray, the disc will not
eject. Turn the recorder on with the remote control
and then eject the disc.
NOTE:
1.Please be sure on the condition of STANDBY prior
to power off.
2.To prevent improper condition, restarting within
five minutes since power off shall not be advised.
3.The playing effect shall not be assured if user
operates the products with bad quality DVD RW
discs.
4.If this DVD RW has been stay under 0
temperature for more than 30minutes, Please
keep it in an warmer environment (over
15temperature) before you plug in.
37
Page 39

SPECIFICATIONS
SPECIFICATIONS
DISC TYPES SUPPORTED
DVD RW . . . . . . . . . . . . . . . . . . . . . . . . . . . . . . . Pla yba ck
DVD R . . . . . . . . . . . . . . . . . . . . . . . . . . . . . . . . . Pla yba ck
DVD -Vid eo . . . . . . . . . . . . . . . . . . . . . . . . . . . . . . Playb ack
SVC D . . . . . . . . . . . . . . . . . . . . . . . . . . . . . Pla yba ck
CD- Aud io . . . . . . . . . . . . . . . . . . . . . . . . . . . . . . . Playb ack
CD- R/RW . . . . . . . . . . . . . . . . . . . . . . . . . . . . . . . P lay bac k
MP3 . . . . . . . . . . . . . . . . . . . . . . . . . . . . . . . . . . . . . .. Pl ayb ack
JPE G. . . . . . . . . . . .. . . . . . . . . . . . . . . . . . . . . . . . . . P laybac k
Kod ak Pi cture CD . . . . . . . . . . . . . . . . . . . . . . . . . . P lay bac k
MPE G4 . . . . . . . . . . . . . . . . . . . . . . . . . . Pl ayb ack
RECORDING
Med ia . . . . . . . . . . . . . . . . . . . . . . . . . DV D R, DV D RW
Dia met er . . . . . . . . . . . . . . . . . . . . . . . . . . . . . . . . . . . 12cm
Cap aci ty . . . . . . . . . . . . . . . . . . . . . . . . . . . . . . . . . . 4. 7GB
Recording Time . . . . . Approximately 6 Hours (SLP Mode)
TV Sy ste ms . . . . . . . . . . . . . . . . . . . . . . . . . . . . NT SC/ PAL
Dig ita l Compre ssi on . . . . . . . . . . . . . . . MPEG 2, M PEG 1
Rec ord ing Types . . . . . . . . . . . . . . . . . . . . . . . . L ive , Time r
Max Simultaneous Timer Recordings . . . . . . . . . . . . . . . . 8
Rec ord ing F eat ure s . . . . . . . . . . . . . . . . . . . . . . . . . . . . . . .
Pause Record, Auto-Insert Chapter, Index Screen
Navigator, Multi Record Modes
Edi tin g Featur es . . . . . . . . . . . . . . . . . . . . . . . . . . . . . . . . . .
Erase Disc, Show Chapter, Edit Title Name
PLAYBACK
MP3 & JPG Navigator
Fast Forward / Reverse to 32X
Slow Motion Playback
Repeat Playback (Chapter/Disc & A-B)
Commercial Skip Function
Zoom in or out to 12%,25%,50%,100%,200%,400%when
viewing JPG images. And to 150%,200%when playing
movie.
OUTPUT CONNECTIONS
Com pon ent Vi deo O ut . . . . . . . . . . . . . . . . . . . . . . . . . . . .
Y . . . . . . . . . . ..1.0 0.2Vp-p (75 Ohm), Negative Sync
Pb/ Pr . . . . . . . . . . . . . . . . . . . . . . . 0. 7 0.1 4Vp -p (7 5 Ohm )
S-Vi deo O ut . . . . .. . .. . .. . .. . . . . .. . .. . .. . Min i DIN 4 -Pin
(Y= 1.0 0.2 Vp-p C=0.3 Vp-p 75 Ohm)
Composite Video Out . .. . .. .. . .. .. . .. .. . ... One Pin Jack,
1.0 0.2Vp-p (75 Ohm)
Coaxial Digital Out . . . .. . .. . .. . .. . .. . .. . .. .One Pin Jack,
0.5+0.1/0.5-0.2Vp-p (75 Ohm)
Optical Digital Out . . . . . . . . Standard Optical Connector
Analog Audio Out . . . . 2.0+0.2/2.0-1.0 VRMS (470 Ohm)
INPUT CONNECTIONS
S-Video In (Rear) . . . . . . . . . . . Mini DIN 4-Pin (75 Ohm)
Composite Video In (Front/Rear). .. . ......... . .. .. ...Cinch,
1Vp-p (75 Ohm)
Stereo Audio In (Front/Rear) . . .. .. .. 1.6VRMS (47 Ohm)
PHYSICAL
Ope rat ing C ond itions . . . . . . . . . . . . . . . . . . . . . . .0 to 4 0
Power Supply . . . . . . . . . . . .. . . . AC 110-240V, 50/60Hz
Pow er Co nsumpt ion . . . . . . . . . . . . . . . . . . . . . . . . . . . 3 0W
Dimensions . . . . . .. 55mm 430mm 250mm(H W L)
Weig ht . . . . . . . . . . . . . . . . . . . . . . . . . . . . . . . . . . . 7. 7 LBS
¡æ
VIDEO PERFORMANCE
Resolution . . . 720x480 NTSC, 720x576 PAL in HQ Mode
DA Con ver ter . . . . . . . . . . . . . . . . . . . . . . . . . . . . . . . 8 -bi t
AD Co nve rter . . . . . . . . . . . . . . . . . . . . . . . . . . . . . . . . 9-b it
Video Outputs . . . . . . . . .Composite, S-Video, Component
Scanning . . . . . . . . . . . . . . . . . Progressive Scan, Interlaced
Las er . . . . . . . . . . . . . . . . . . . . . . . . . . . . . . . . . . . . . 65 0nm
AUDIO PERFORMANCE
DA Con ver ter. . . . . . . . . . . . . . . . . . . . . . . . . . . . . . . 24 bi t
AD Co nve rter . . . . . . . . . . . . . . . . . . . . . . . . . . . . . . . 24 bi t
DVD Linear Sound
48 kH z Sam pling . . . . . . . . . . . . . . . . . . . . . 4H z to 22 k Hz
96 kH z Sam pling . . . . . . . . . . . . . . . . . . . . . 4H z to 44 k Hz
Aud io CD . . . . . . . . . . . . . . . . . . . . . . . . . . 4 Hz to 2 0kH z
Sig nal t o Noise Ra tio . . . . . . . . . . . . . . . . . . . . . . . . > 90dB
Aud io Dy namic Ra nge . . . . . . . . . . . . . . . . . . . . . . . > 80dB
Harmonic Distortion . . . . . . . . . . . . . < 0.001% (W.PEAK)
38
Page 40

Support Media (DVD R)
ATTACHMENTATTACHMENT
Recommend
Max
write
speed
:8
NO
Recommend
Max
write
speed
:8
Support Media (DVD RW)
DVD-R
DVD+R
DVD-R
DVD+R
Media
MITSUBISHI
MITSUBISHI
TDK
RICOH
Media
PRINCO
FUSION
OPTO
FUJIFILM
Speed
4
8
8
4
Speed
4
8
4
8
Manufacture ID
MCC
MCC 02RG20
003
R01
Manufacture ID
PRINCO
YUDEN000
Op1
R01
Recommend
Max
write
speed
:4
DVD-R
DVD+R
NO
Recommend
Max
write
speed
:4
DVD+R
DVD-R
Media
TDK
MITSUBISHI
TDK
RICOH
Media
SKC
RISHENG
IMATION
RISHENG
39
Speed
2
4
4
4
Speed
2.4
4
2
4
Manufacture ID
TDK502SAKUM3
MCC 01RW4
W11
W11
Manufacture ID
OPTODISC
OPTODISC
OPTODISCW002
OPTODISC
 Loading...