

Page 1
Dolby Digital 7.1 Home Theater Wall Plate Instruction Manual
Accessories supplied: Mounting bolts (4), Short screws (4)
Installation
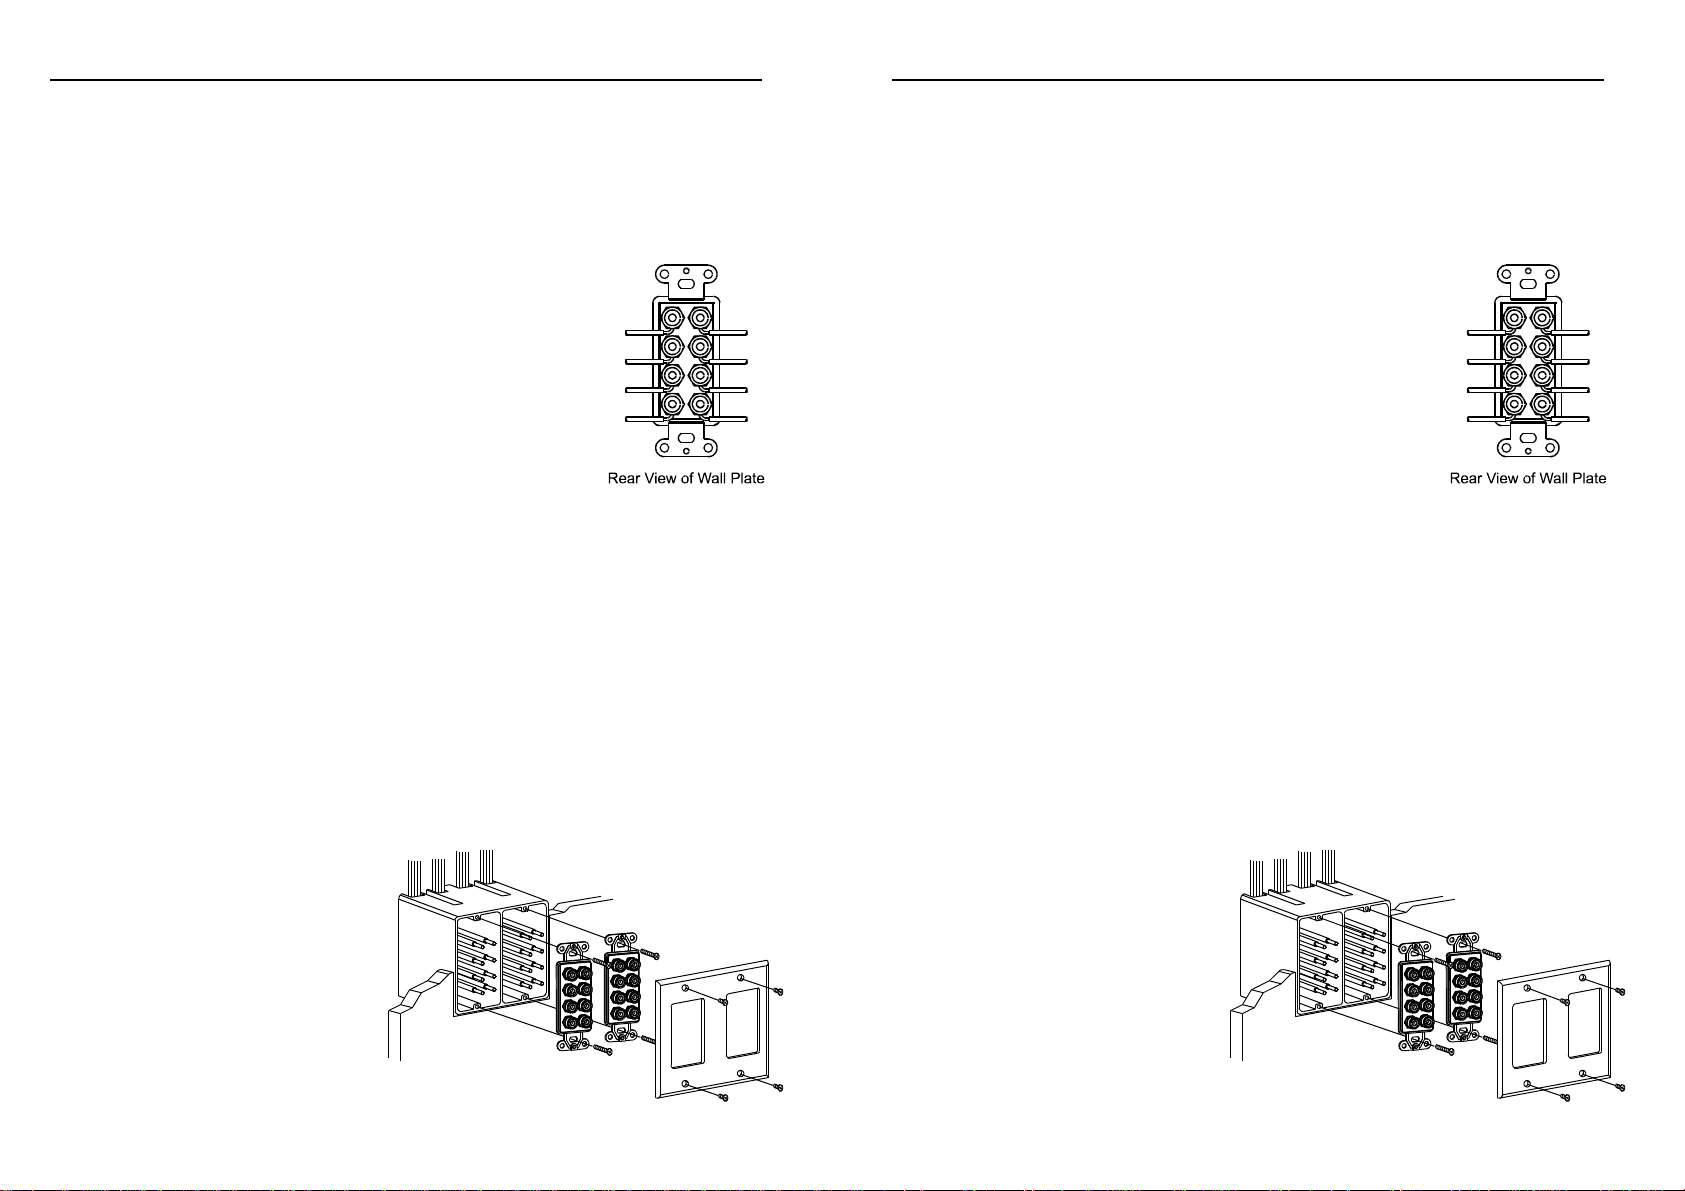
Choose a mounting location that has existing wiring or where you can easily run wire
through the wall. You must use a standard double gang electrical box. A single box
cannot be used with this wall plate.
1. Run cables from the desired audio source through the wall into the electrical box.
2. Based on the number of connections you use, expose the
same number of terminal holes on the back of your wall plate
by screwing the terminal sleeves counterclockwise.
3. Insert the source device's positive (+) speaker cables into the
matching terminals with the red stripe. Tighten the terminal
sleeves to secure the cables.
4. Insert the source device's negative (-) speaker cables into the
matching terminals with the black stripe. Tighten the terminal
sleeves to secure the cables.
5. Repeat step 3. and 4. for each speaker you connect.
6. Put the wall plate on the electrical box, insert the supplied mounting bolts into the top and
bottom large holes on the mounting bracket, then tighten them.
7. Place the decora plate over the wall plate and secure it with the four supplied short
screws.
Connect Your Speakers
The wall plate terminals can accommodate up to 12-gauge speaker cable.
1. Based on the number of connections you use, expose the same number of terminal holes
on the front of your wall plate.
2. Insert the speaker's positive (+) speaker cables into the terminals holes with the red stripe
on the front of the wall plate. Tighten the terminal sleeves to secure the cables.
3. Insert the speaker's negative (-) speaker cables into the terminals holes with the black
stripe. Tighten the terminal sleeves to secure the cables.
Note: Be sure to connect right and left
cables to the same speaker location.
You also may connect your speakers
using banana plugs (not supplied).
Insert the positive (+) and negative (-)
plugs into the corresponding + or - jacks
on the front of the wall plate. To avoid
possible damage to speaker systems
when connecting speaker cables to the
+ and - terminal holes, be sure not to let
any cable strands touch each other.
Dolby Digital 7.1 Home Theater Wall Plate Instruction Manual
Accessories supplied: Mounting bolts (4), Short screws (4)
Installation
Choose a mounting location that has existing wiring or where you can easily run wire
through the wall. You must use a standard double gang electrical box. A single box
cannot be used with this wall plate.
1. Run cables from the desired audio source through the wall into the electrical box.
2. Based on the number of connections you use, expose the
same number of terminal holes on the back of your wall plate
by screwing the terminal sleeves counterclockwise.
3. Insert the source device's positive (+) speaker cables into the
matching terminals with the red stripe. Tighten the terminal
sleeves to secure the cables.
4. Insert the source device's negative (-) speaker cables into the
matching terminals with the black stripe. Tighten the terminal
sleeves to secure the cables.
5. Repeat step 3. and 4. for each speaker you connect.
6. Put the wall plate on the electrical box, insert the supplied mounting bolts into the top and
bottom large holes on the mounting bracket, then tighten them.
7. Place the decora plate over the wall plate and secure it with the four supplied short
screws.
Connect Your Speakers
The wall plate terminals can accommodate up to 12-gauge speaker cable.
1. Based on the number of connections you use, expose the same number of terminal holes
on the front of your wall plate.
2. Insert the speaker's positive (+) speaker cables into the terminals holes with the red stripe
on the front of the wall plate. Tighten the terminal sleeves to secure the cables.
3. Insert the speaker's negative (-) speaker cables into the terminals holes with the black
stripe. Tighten the terminal sleeves to secure the cables.
Note: Be sure to connect right and left
cables to the same speaker location.
You also may connect your speakers
using banana plugs (not supplied).
Insert the positive (+) and negative (-)
plugs into the corresponding + or - jacks
on the front of the wall plate. To avoid
possible damage to speaker systems
when connecting speaker cables to the
+ and - terminal holes, be sure not to let
any cable strands touch each other.
 Loading...