

Winston foodservice Collectrmatic ANNUAL SAFETY INSPECTION CHECKLIST
ANNUAL SAFETY INSPECTION CHECKLIST
This Annual Safety Inspection Checklist ( “Inspection” ) applies to all Collectramatic® Fryers.
The inspection performs an important safety function. It provides for an annual inspection
of each fryer. Each inspected fryer will be designated as either:
A) Pass
B) Fail & Decommission
C) Fail & Remove Fryer from Use until Repaired
D) Fail & Repair Promptly
The inspection does not replace any other recommended inspections, maintenance or repairs
of Collectramatic Fryers. See Owner's Manual for details.
Instructions
Step 1- Inspect for 25 Year Useful Life
The dened useful life of a Collectramatic Pressure Fryer is 25 years from date of manufacture. Any
Collectramatic Pressure Fryer that has reached its useful life is to be decommissioned immediately,
either through physical destruction or transformation of the pressure fryer into an open fryer through
the use of the dened process. If any of the following criteria apply to the Collectramatic Pressure
Fryer during inspection, the fryer will be designated as Fail & Decommission:
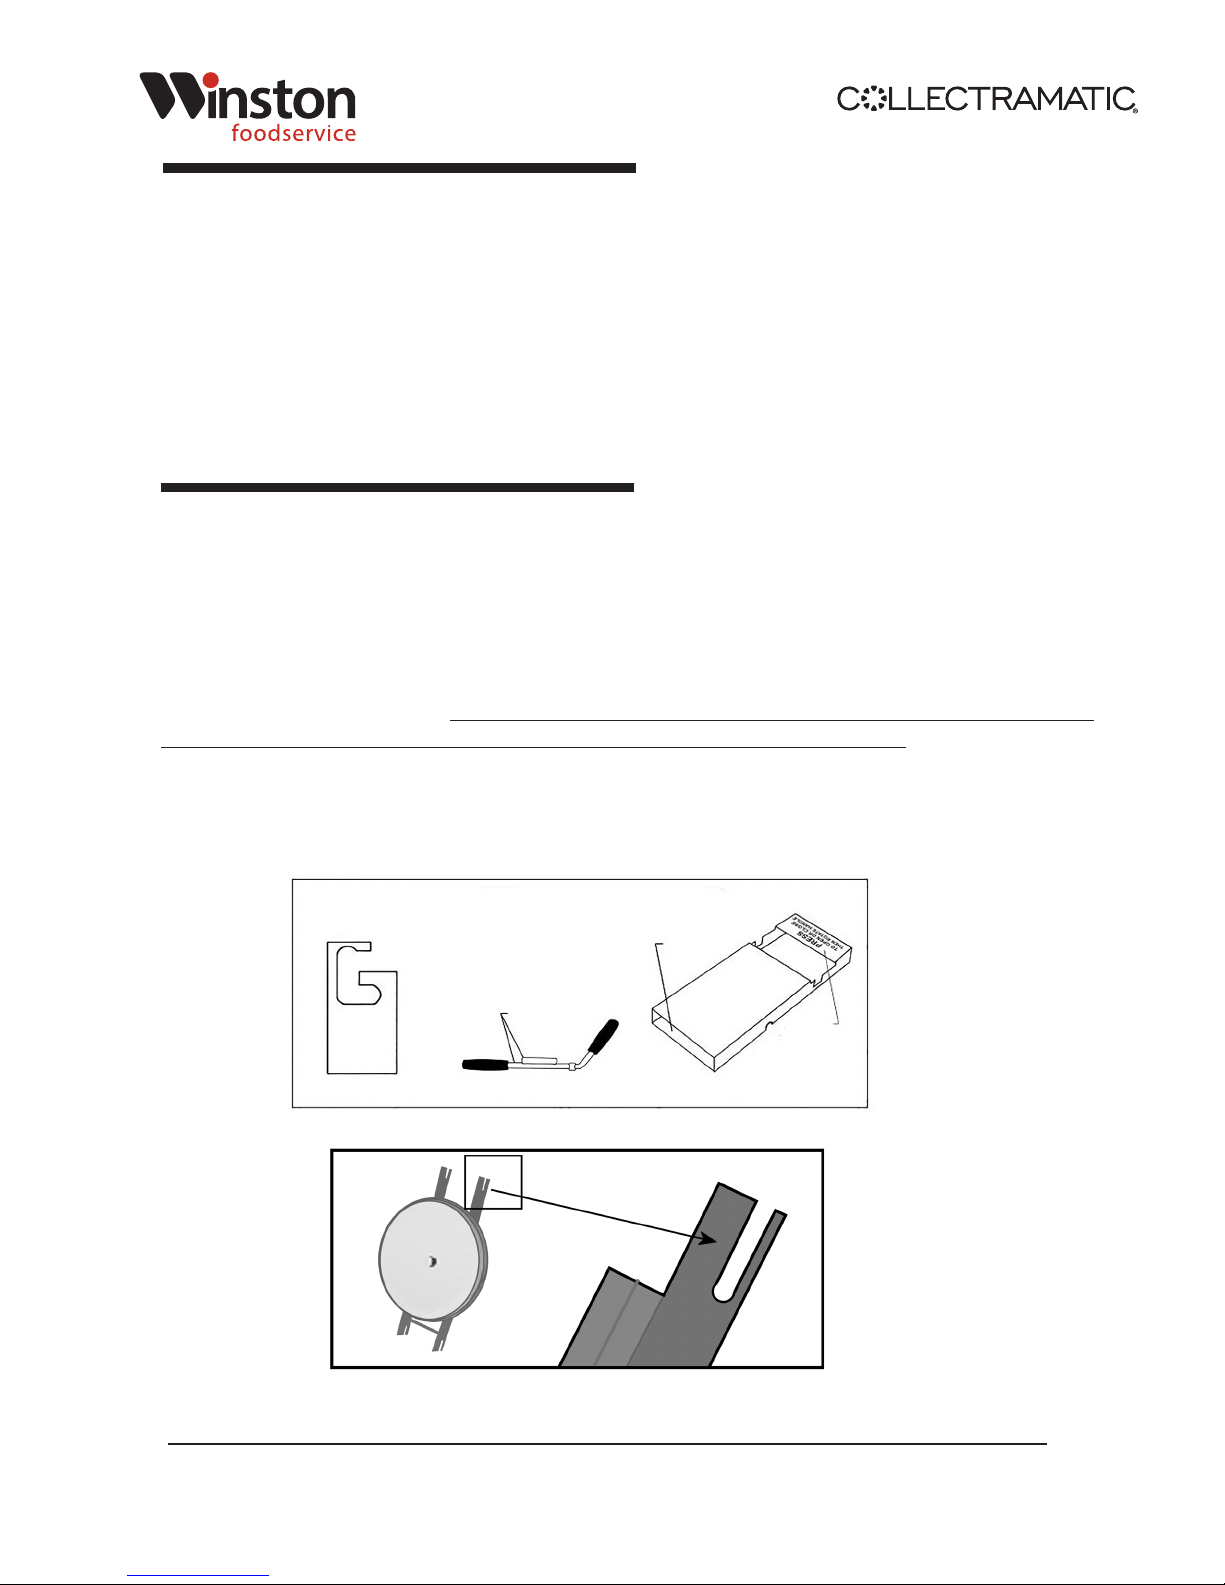
1. Fryer Lid or Front Block include any Cam Lock components (Fig. A and Fig. B)
2. Fryer Lid includes Pressure Lock components (Fig. B)
3. Fryer Serial Number to show an age of 25 years or more (Fig. C)
4. No identication of valid Serial Number found on fryer
CAM LOCK LID PARTS ( >25 YEARS)
No Metal Tab
Sticking Out
Round Bar
PRESS
To Open or Close
Then Rotate Handle
1. Front Block 2. Handle Bar 3. Lid Lock
Fig. A - Cam Lock Lid Components
NO CUT OUT
Fig. B - Cam Lock or Pressure Lock Lid
Winston Foodservice | 2345 Carton Drive | Louisville, Kentucky 40299
800.234.5286 | +1.502.495.5400 | www.kfcfryers.com
Page 1 of 8 4272y185rev13_01-20-17_instructions_fryer_maintenance_kfc
Serial Number Range ( original ) Max Year of Useful Life for PF Models
37701-40187 2017
40188-40187 2018
41488-42605 2019
42606-42464 2020
>43465 or 12 digit SN w/ rst 6 digits of
063098 and ending in 96
12 digit SN with digits 5 and 6 as 97 2022
12 digit SN with digits 5 and 6 as 98 2023
12 digit SN with digits 5 and 6 as 99 2024
12 digit SN with digits 5 and 6 as 00 2025
12 digit SN with digits 5 and 6 as 01 or
11 digit SN with 2001 as rst four digits
11 digit SN with 2002 as rst four digits 2027
Fig. C - Serial Number Key for Useful Life
Serial numbers may be listed on the ID tag of the front panel of the fryer. If no ID tag is present or
the ID tag was replaced with an upgrade control kit, the original serial number is etched onto the front
right side of the fryer pot rim. A serial tag from an upgrade control kit can NOT be used to determine
useful life.
2021
2026
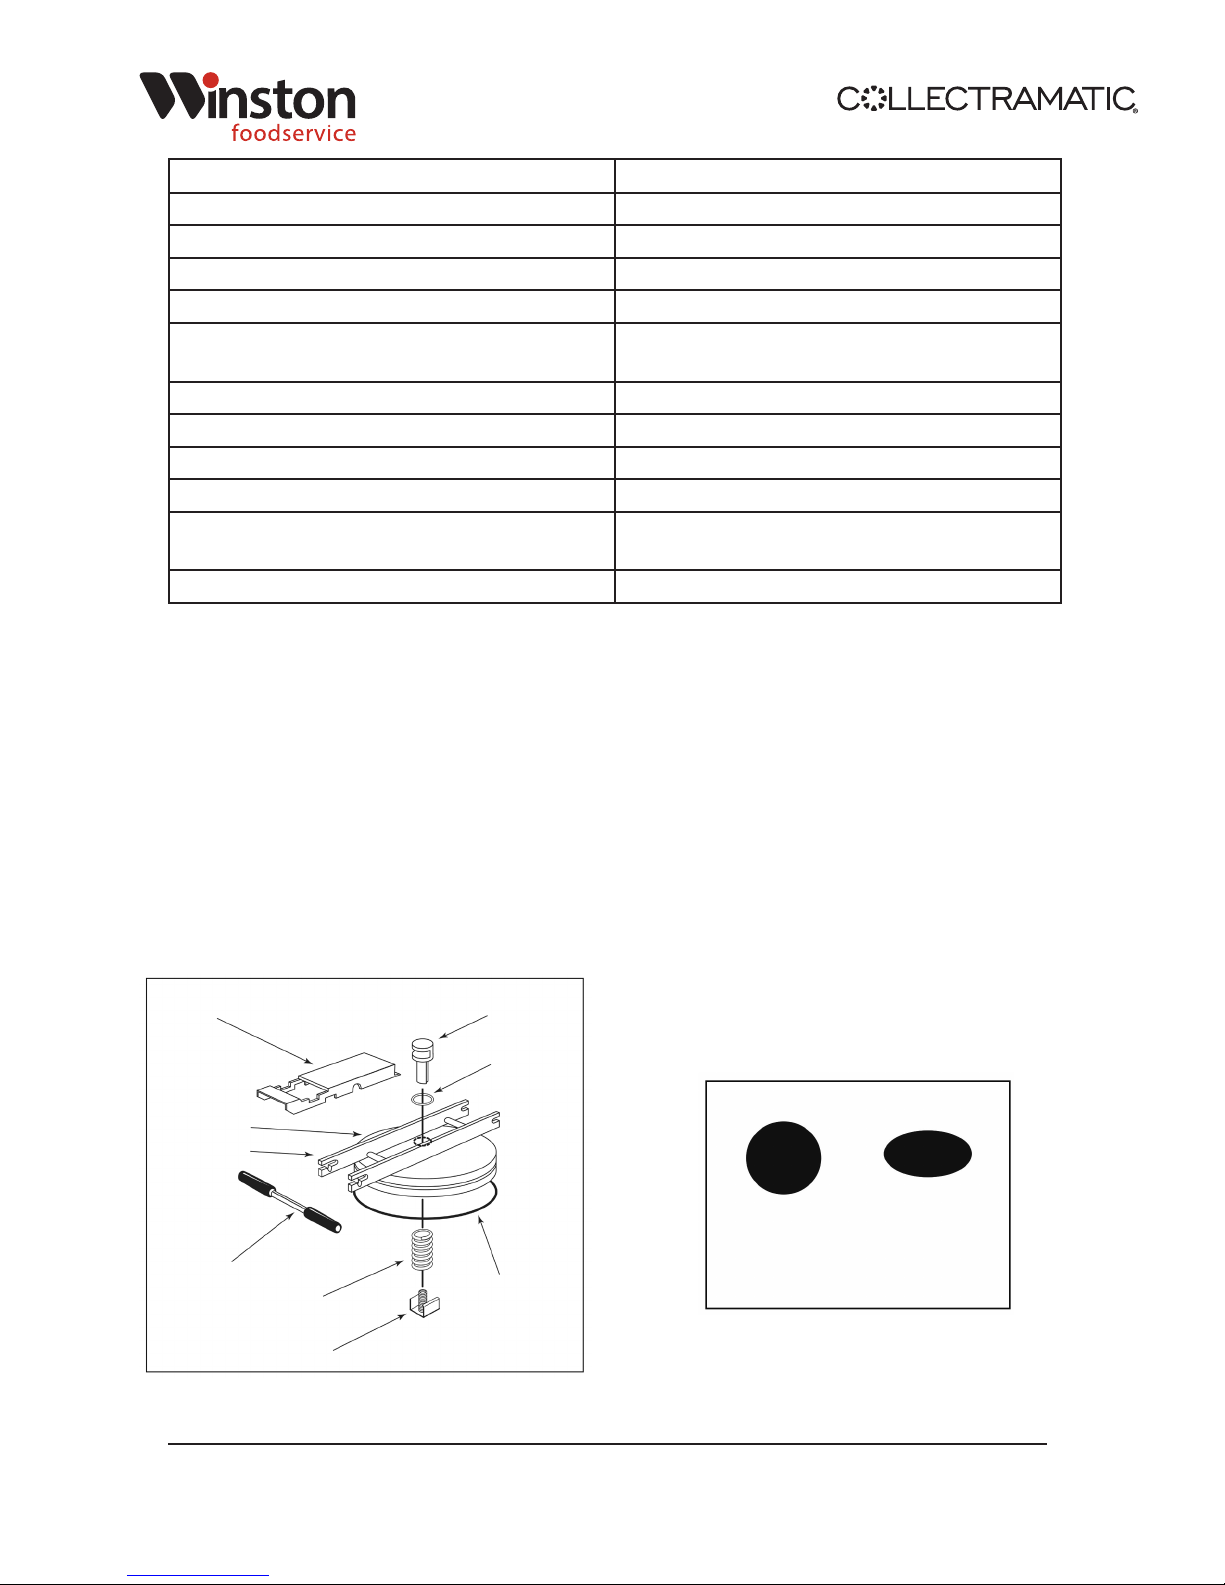
Step 2 - Inspect Pressure Components
Fryer should be emptied of oil and cooled to room temperature prior to inspection.
1. Lid Inspection - Examine all lid components for damage such as bends, cracks, or broken
welds (Fig. D). Open and Close lid with gasket installed to ensure proper function.
Remove lid valve (Fig. D #8) to verify O-Ring (Fig. D #9) is not attened,
frayed, or torn. Inspect Lid Gasket (Fig. E) to verify it is not attened, frayed, or torn.
1. LID LOCK
2. LID
3. LID SUPPORT BAR
4. HANDLEBAR
6. SPRING
8. LID VALVE
9. O-RING
5. LID GASKET
ROUND
OK
FLATTENED
DO NOT USE
GASKET CROSS SECTION
Fig. E - Lid Gasket
7. RETAINER
Fig. D - Lid Components
Winston Foodservice | 2345 Carton Drive | Louisville, Kentucky 40299
800.234.5286 | +1.502.495.5400 | www.kfcfryers.com
Page 2 of 8 4272y185rev13_01-20-17_instructions_fryer_maintenance_kfc
All components acceptable = Pass Lid Inspection
All components acceptable except at lid or lid valve gasket = Fail and Repair Promptly
Any components damaged = Fail and Remove Fryer from Use Until Repaired
Lid or lid valve gasket are frayed or torn = Fail and Remove Fryer from Use until Repaired
Lid does not open and/or close properly = Fail and Remove Fryer from use until Repaired
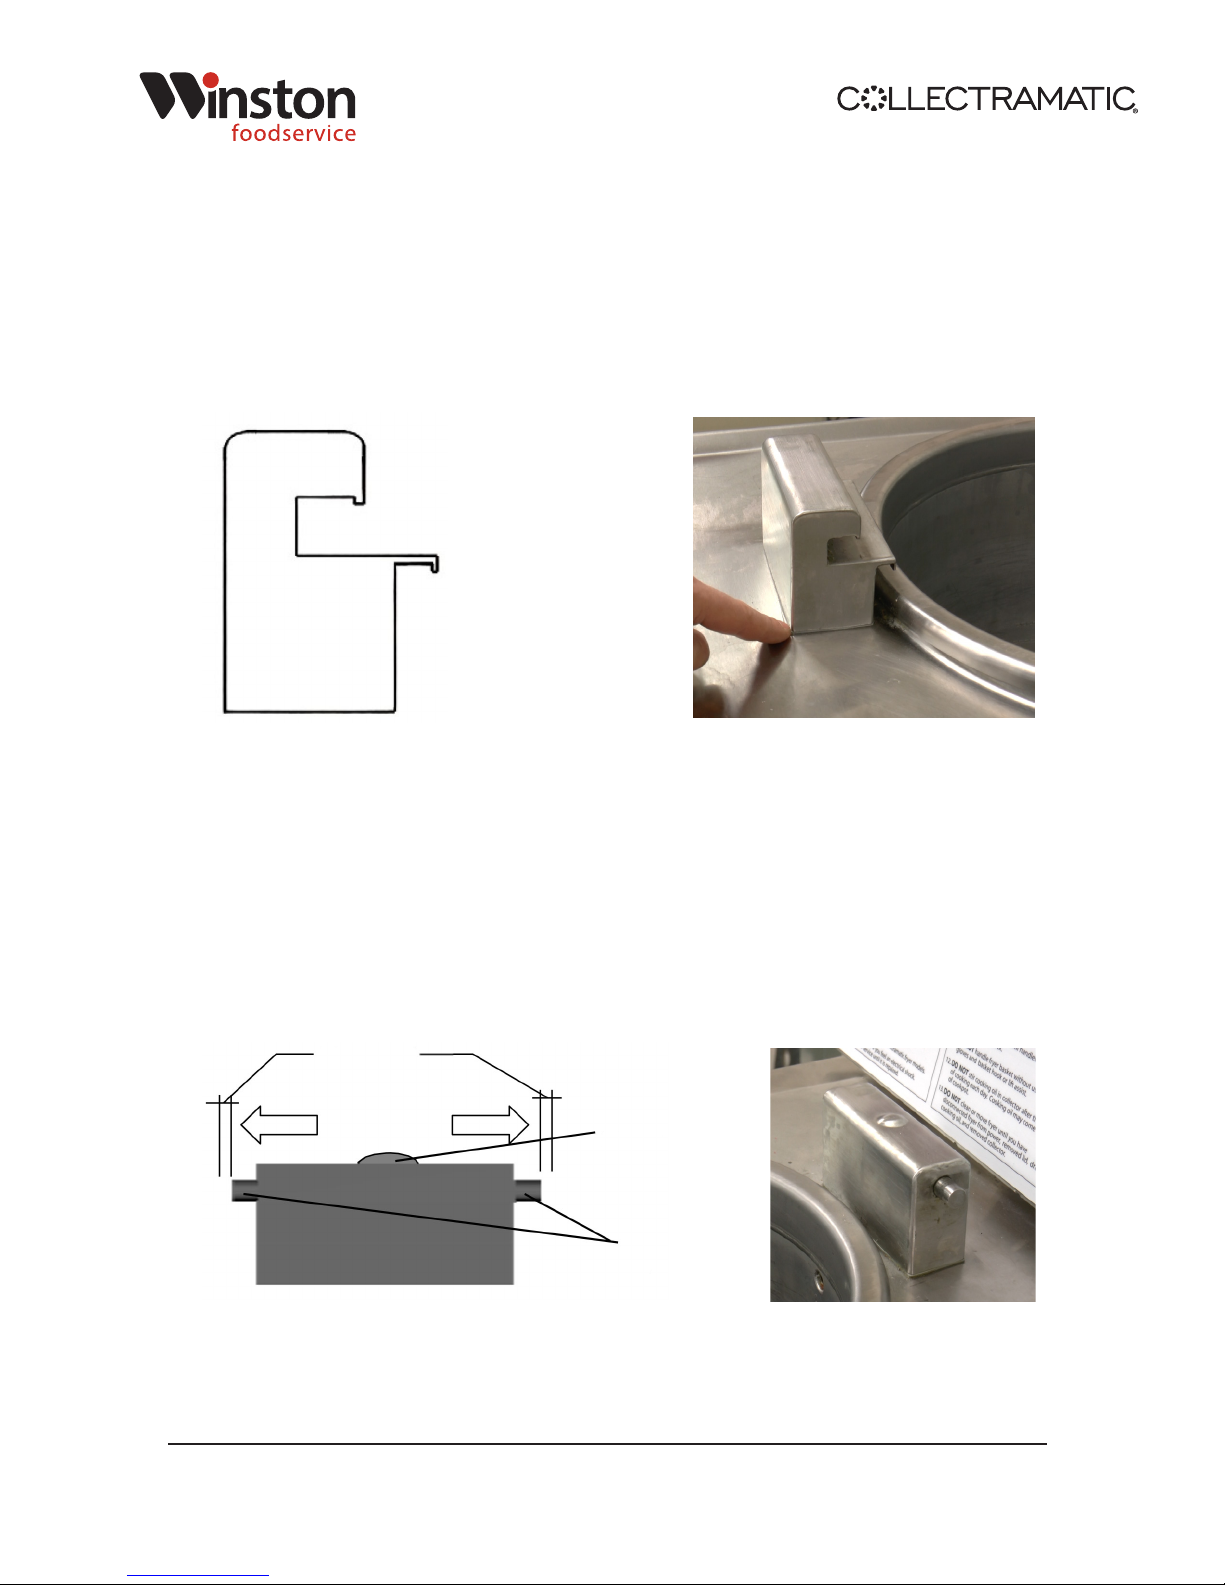
2. Front Latch Block Inspection - Inspect Front Latch Block (Fig. F) to ensure that there are no cracks or
broken welds. Ensure that there is a gasket or food-grade silicone caulk between the fryer top and
Fig. F - Front Latch Block Fig. G - Front Block Gasket
Front Latch acceptable = Pass Front Latch Inspection
Silicone/Gasket missing = Fail and Repair Promptly
Front Latch not acceptable = Fail and Remove Fryer from Use until Repaired
3. Rear Block Inspection - Inspect Rear Block (Fig. H & I) to ensure that the block has a bump on the top.
Inspect to ensure that there are no cracks or broken welds. Inspect pins to ensure they are not bent or
loose. While pins may spin or slide side to side, they may not move more than 1/16th of an inch. Ensure
that there is a gasket or food-grade silicone between the fryer top and the base of the block.
1/16" MAX
BUMP
PINS
Fig. I - Rear Hinge Block
Fig. H - Rear Hinge Block
Winston Foodservice | 2345 Carton Drive | Louisville, Kentucky 40299
800.234.5286 | +1.502.495.5400 | www.kfcfryers.com
Page 3 of 8 4272y185rev13_01-20-17_instructions_fryer_maintenance_kfc
 Loading...