

Page 1
Please read these instructions carefully before using this product, and save this manual for future use.
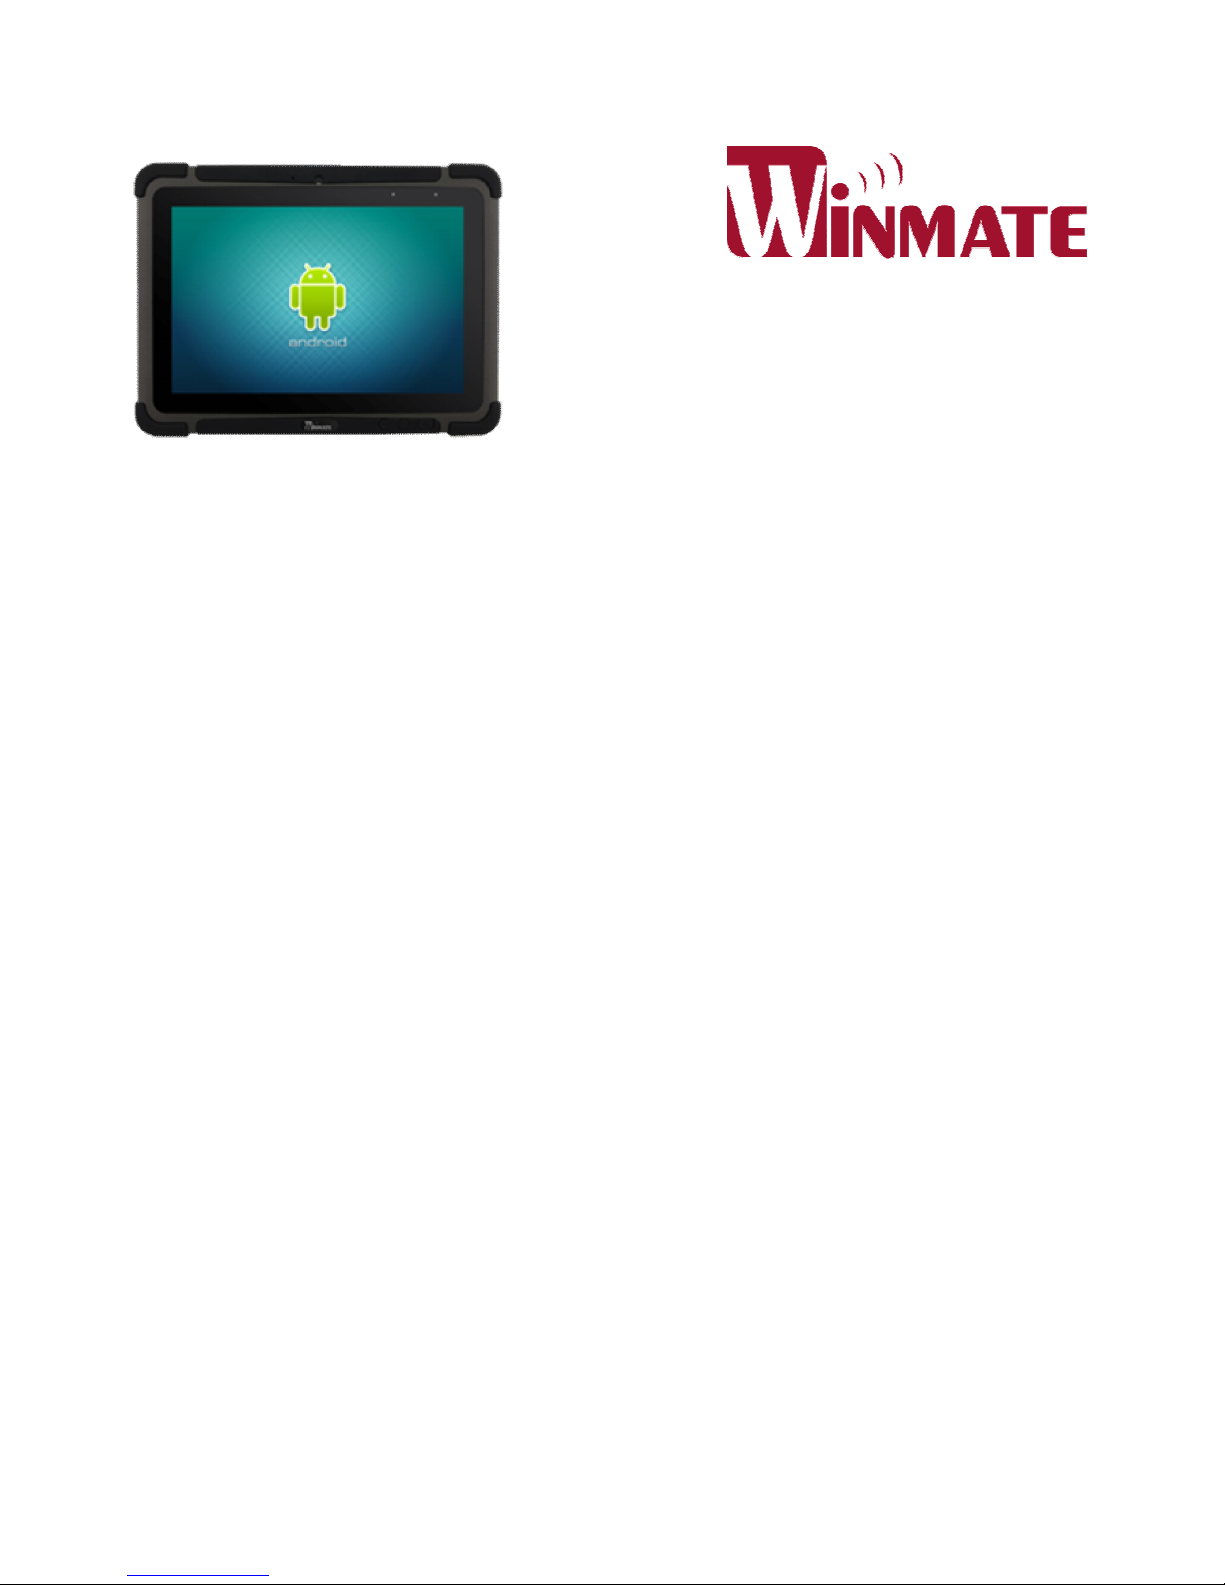
M101M4 Tablet PC
Quick Start Guide V1.0
Page 2
M101M4 Quick Start Guide 1
Getting Started
Congratulations on purchasing this rugged Tablet Computer. The rugged design allows you to
use it in harsh outdoor environments.
This quick start guide tells you step by step how to get the Tablet Computer up and running. You
will find instructions for the following procedures:
• Unpacking
• Description of Parts
• First Time Operations
• Turning On/Off
Unpacking
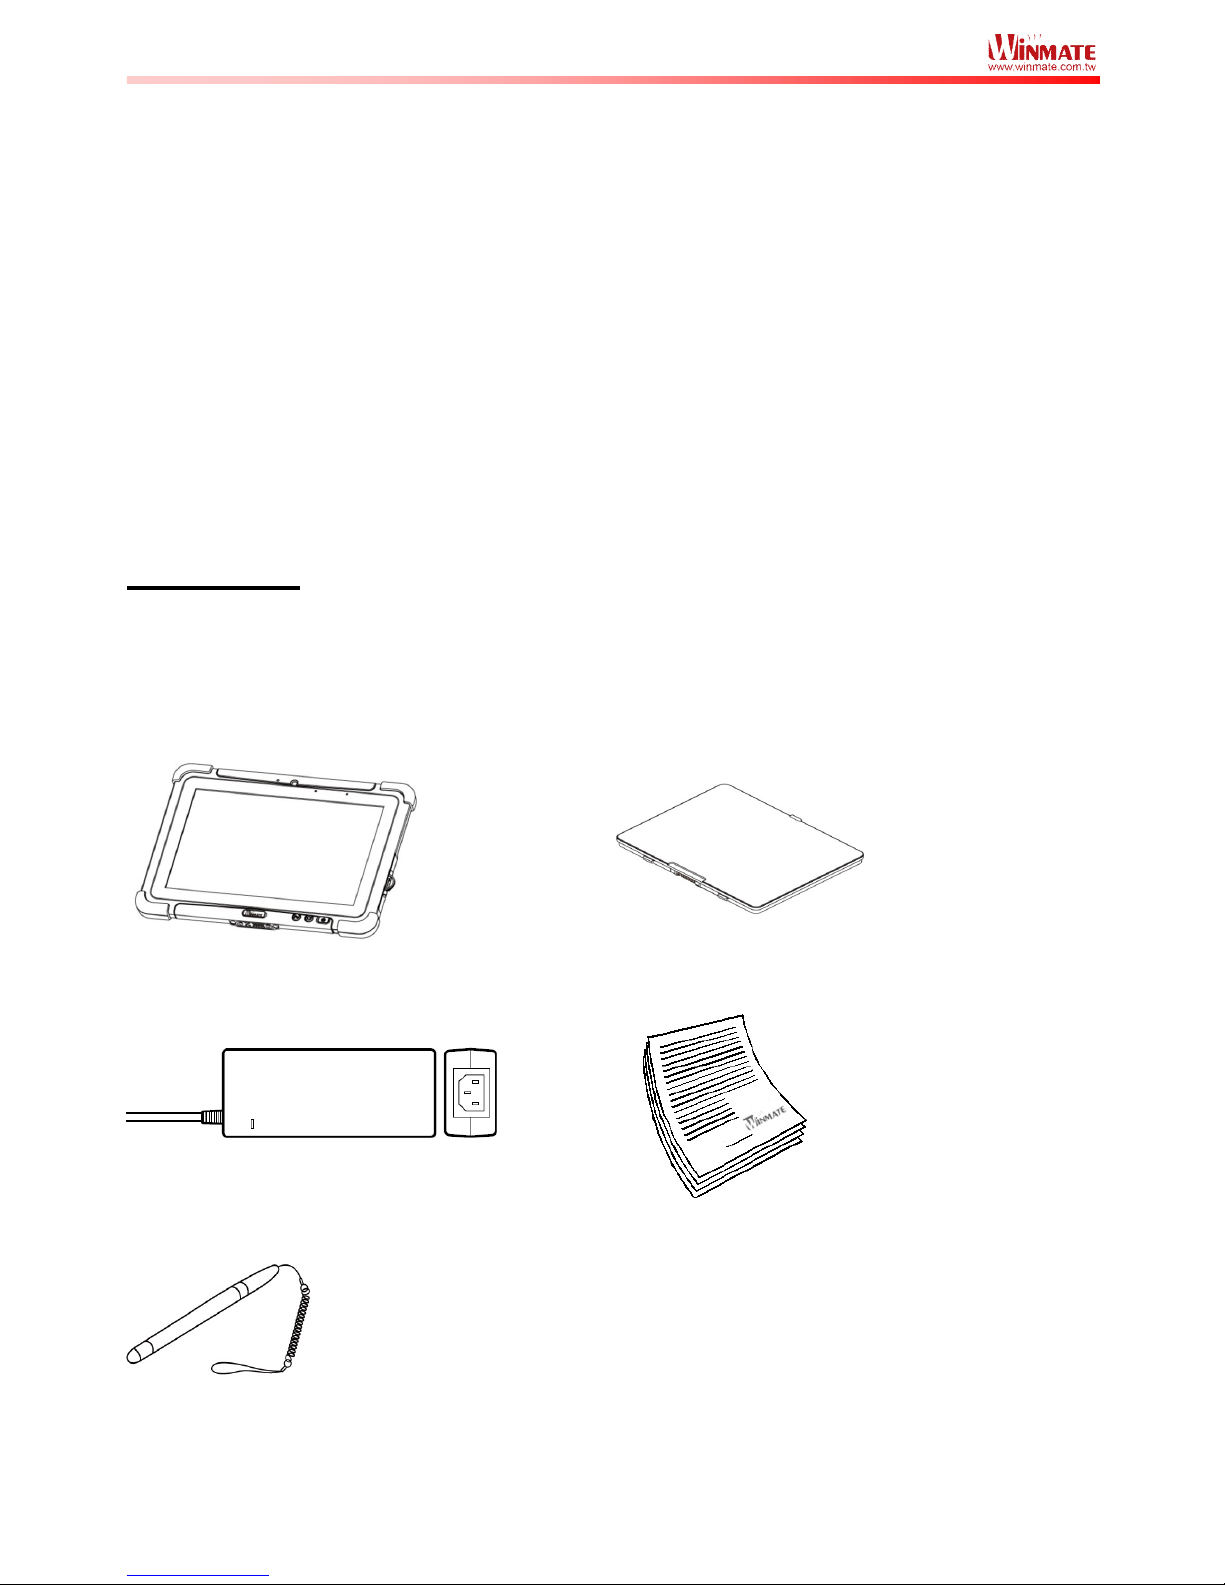
Check and identify the supplied accessories:
• Tablet Computer
• Standard Battery
• 12V Power Adapter with Power Cord
• Quick Start Guide
• Capacitive Touch Stylus
Page 3
M101M4 Quick Start Guide 2
Description Of Parts
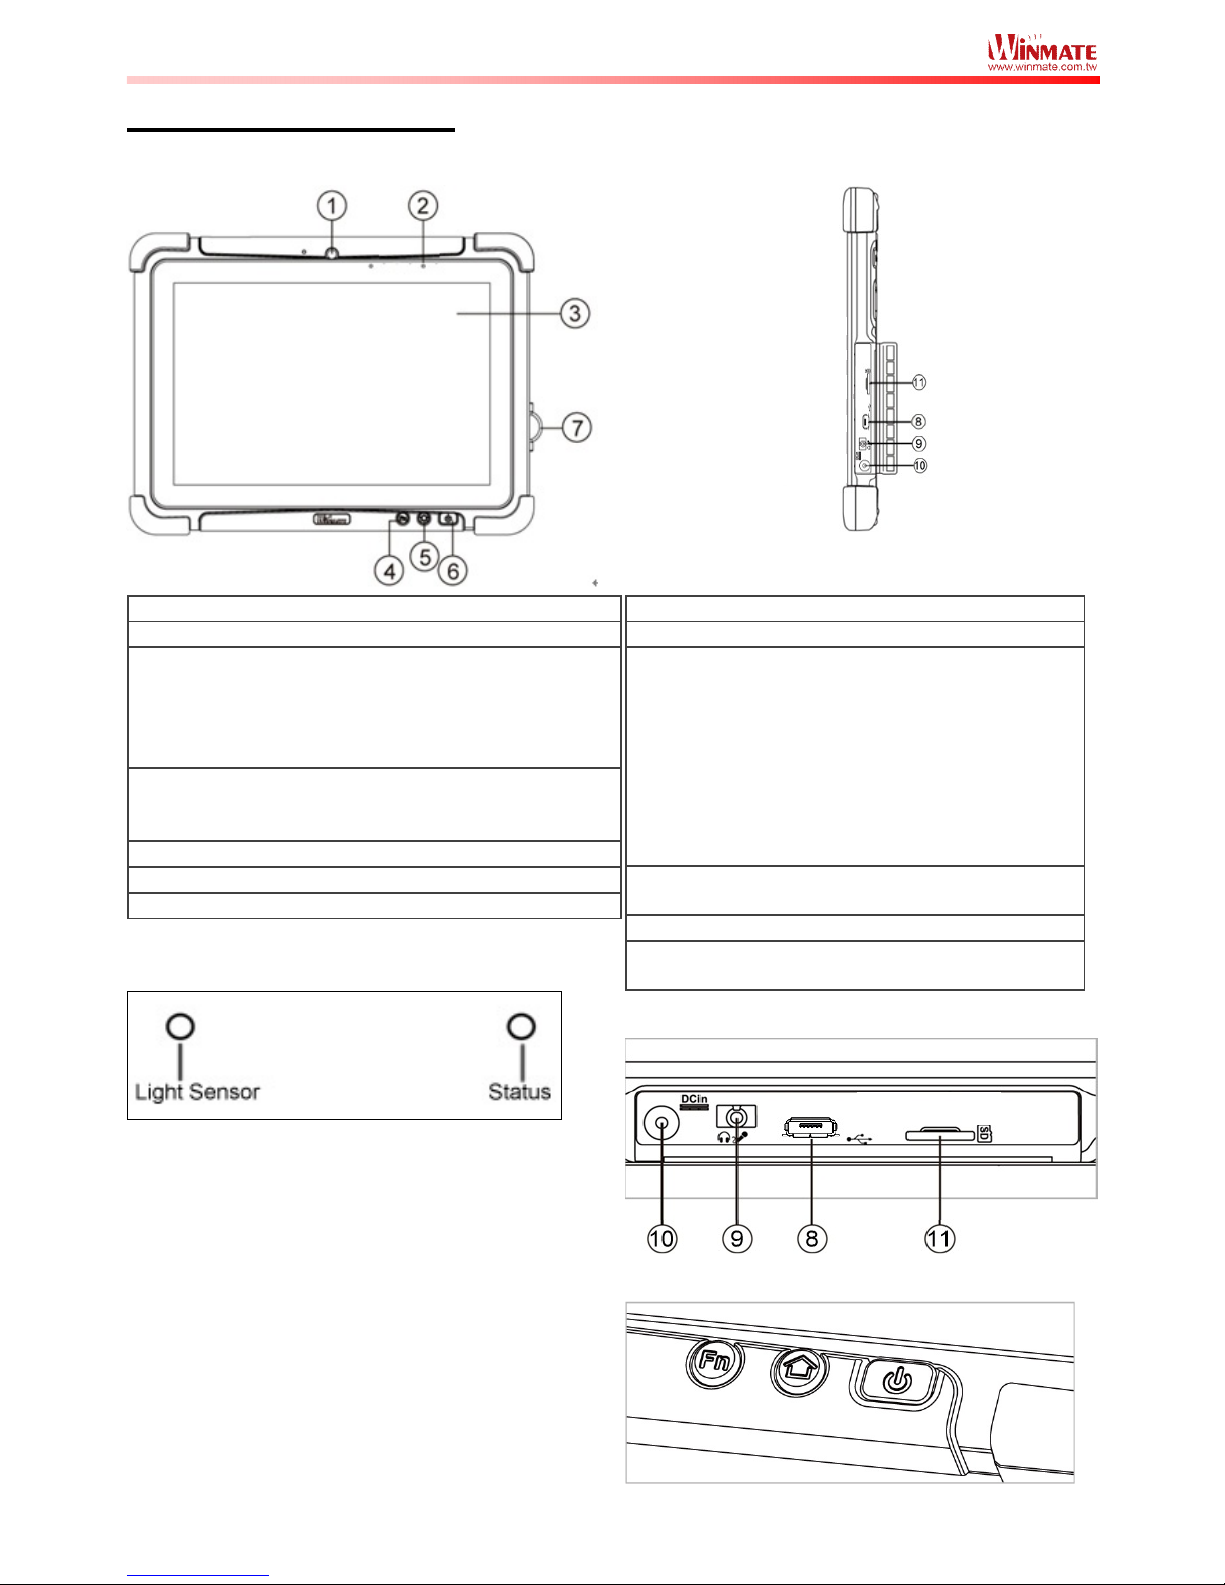
Front:
Right:
No Item Description
1
Front Camera 2 Mega pixel Webcam
2
LED Indicators: Show the current status of
the Tablet Computer
Orange: Charging
Green: Full Charge
Blue: Data Receiving
3
Touch Screen Displays and act as one of
the inputs for the Tablet
Computer
4
Back Button Back to previous page
5
Home Button Back to Desktop
6
Power Button Turns on/off tablet
Front LED Indicators Detail:
No Item Description
7
I/O Cover Protects I/O ports
8
Micro USB
OTG
High speed USB port
connects to PC or USB
devices such as mouse,
keyboard, etc.
※ Note:
This USB port won’t work
when the tablet is
connected to the optional
docking. Please use the
USB ports on the docking.
9
Mic In/Line Out Headset or headphone
can be connected
10
Power Jack DC-IN power input jack
11
Micro SD Card
Reader
Memory card reader
port for Micro SD Card
Side I/O Details:
Front Buttons Details:
Page 4
M101M4 Quick Start Guide 3
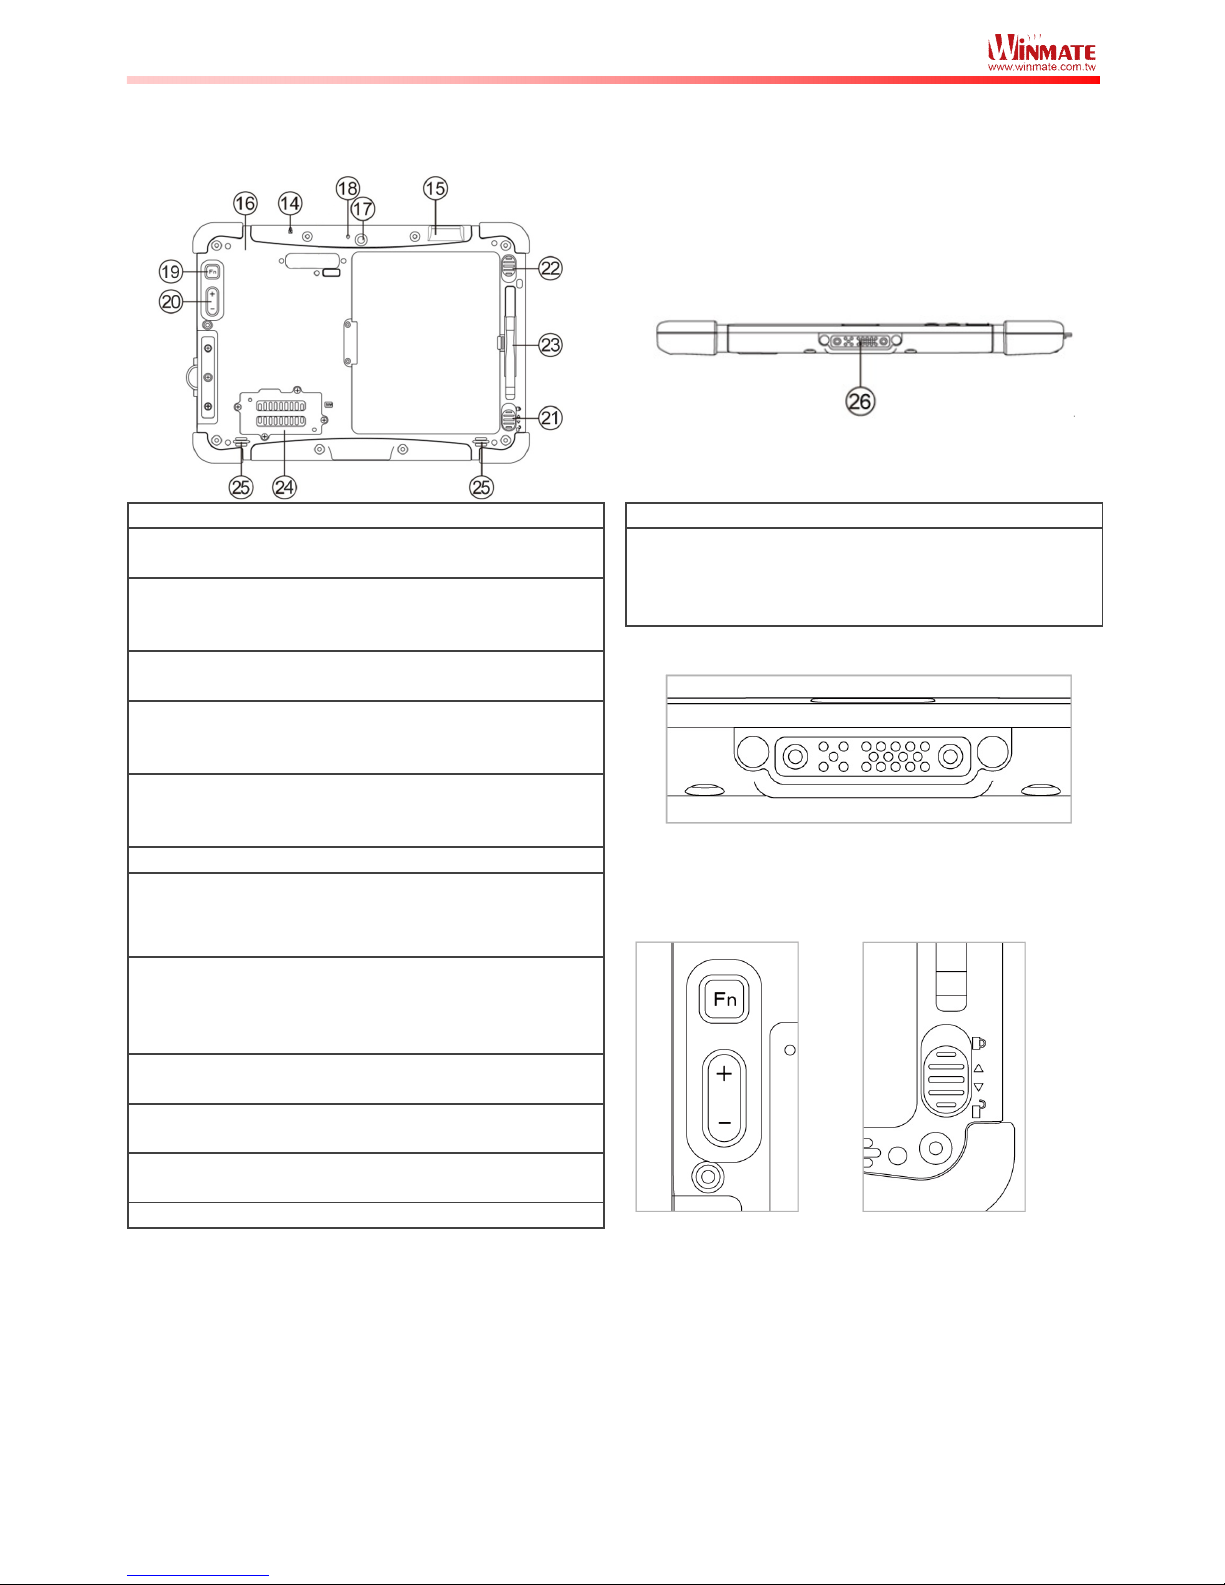
Rear:
Bottom:
No Item Description
14
Kensington
Lock
Provides lock access for
Kensington Lock.
15
Optional
Barcode
Barcode Scanner for
reading of 1D/2D
barcode.
16
Optional RFID RFID reader for reading
of RFID tags.
17
Rear Camera 8MP Autofocus Camera.
Captures photos and
videos.
18
Camera Flash LED camera flash to
provide flash lighting
when use with camera.
19
Menu Button Open the Menu
20
Volume Buttons
(Optional Barcode
Reader / RFID
Trigger Button)
Volume Control.
(+) Raises volume,
(-) Lowers volume.
21
Battery Lock
Latch
Latch to lock the battery
in place once battery is
inserted. Not springloaded.
22
Battery Release
Slider
Spring-loaded slider that
latches the battery in.
23
Touch Pen Slot Pen holder slot to store
touch pen
24
SIM card slot Service window to insert
Micro SIM card.
25
Speakers Emits sounds.
No Item Description
26
Docking
Connector
Port to docking solutions
such as vehicle docking
to provide power and
extension IO ports
Docking Connector Detail:
Rear Buttons
Detail:
Battery Lock Latch
Detail:
Page 5
M101M4 Quick Start Guide 4
First-time Operation
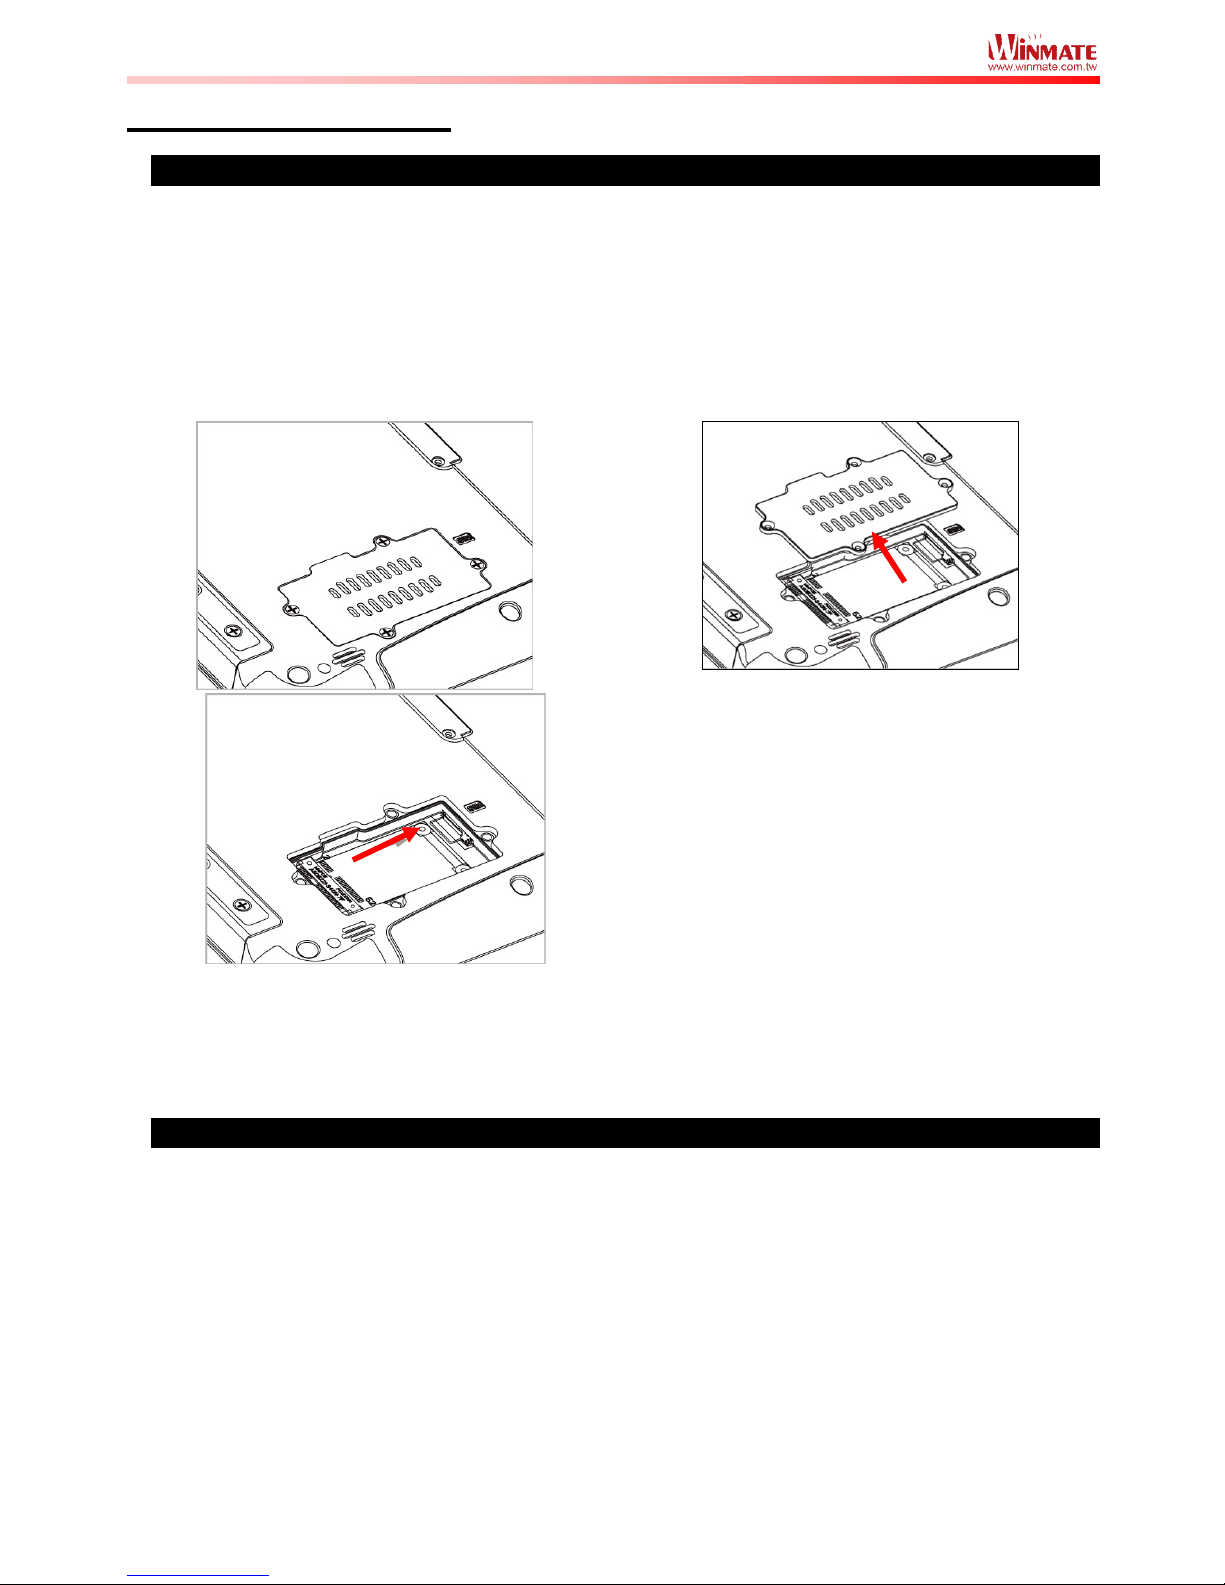
Insert SIM card (For 3G)
The Tablet Computer supports data connection using 3G SIM card sand fits a Micro-SIM card.
Perform the following to install the SIM card into your Tablet Computer:
1. Remove the service window in the rear by unscrewing the four screws.
2. Insert the 3G SIM card into the slot located near the right side of the service window.
3. Reposition the removed service window screw to secure the service window.
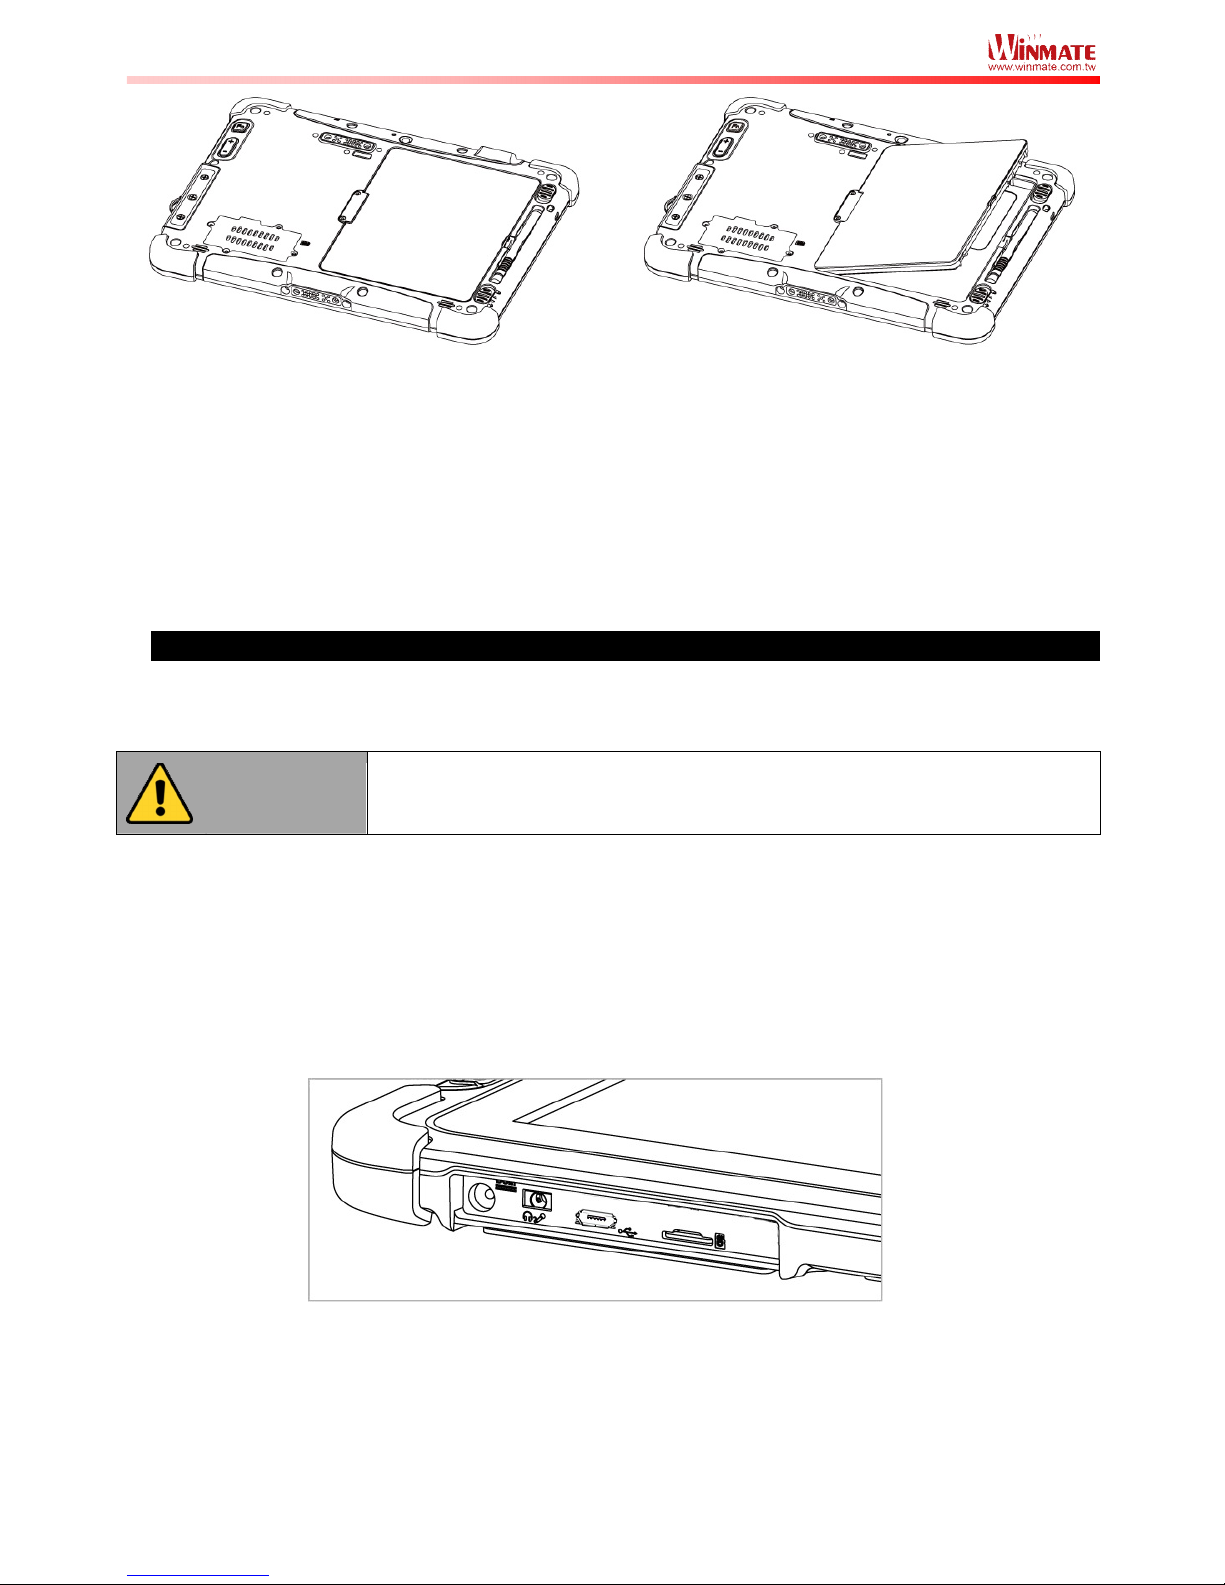
Inserting Battery Pack
To insert the included standard battery pack into the Tablet Computer:
1. Disconnect any cords connected to the tablet computer.
2. Turn the tablet computer over, back facing up.
3. Locate the Battery Lock Latch and push it to the “Unlocked” position.
4. Locate the Battery Release Slider that is spring-loaded. Pull back and hold.
5. Insert the battery with the connector-pins side first, and then lower the battery into the
battery compartment. Continue to hold the Battery Release Slider until the battery is fully
inserted.
6. Make sure the battery is completely lowered into the compartment before letting go of the
Battery Release Slider. Battery will be flat against the housing once fully inserted
Page 6
M101M4 Quick Start Guide 5
Removing the Battery Pack
1. Shut down the tablet computer (or put it to sleep). Disconnect any cords connected to the
computer.
2. Turn the tablet computer over, back facing up.
3. Locate the Battery Lock Latch and push it to the “Unlocked” position.
4. Locate the Battery Release Slider that is spring-loaded. Pull back and hold.
5. Lift the battery out using the opening on side of battery compartment.
Connecting to Power Supply
The Tablet Computer operates either on external AC power or internal battery power. It is
recommended to use AC power when you start up the Tablet Computer for the first time.
Caution
Use only the AC adapter included with your Tablet Computer. Using
other AC adapters may damage the Tablet Computer and the Battery.
Perform the following to connect the Tablet computer to AC Power:
1. On the side of the Tablet computer, lift the I/O protective cover by pulling on the latch
2. Plug the DC cord of the AC adapter into the Power Jack of the tablet computer.
3. Plug the AC power cord into the AC adapter.
4. Finally, Plug the AC power cord into the electrical outlet.
Page 7

M101M4 Quick Start Guide 6
When the AC Adapter is connected, the battery pack starts charging. The battery LED indicator
on the tablet computer will show different states. Please refer to description of the LED indicator
in the Description of Parts.
Turning On / Off
Turning On
Press and hold the power switch for 3 seconds to turn on the tablet.
Note:
• Press the power switch again to put the tablet to sleep
Turning Off
Perform the following procedure to shutdown the Tablet Computer:
1. Press and hold the power switch for 3 seconds until the pop-up menu shows
2. Tap on Shut Down.
3. Wait for the Tablet Computer to power off.
Page 8
M101M4 Quick Start Guide 7
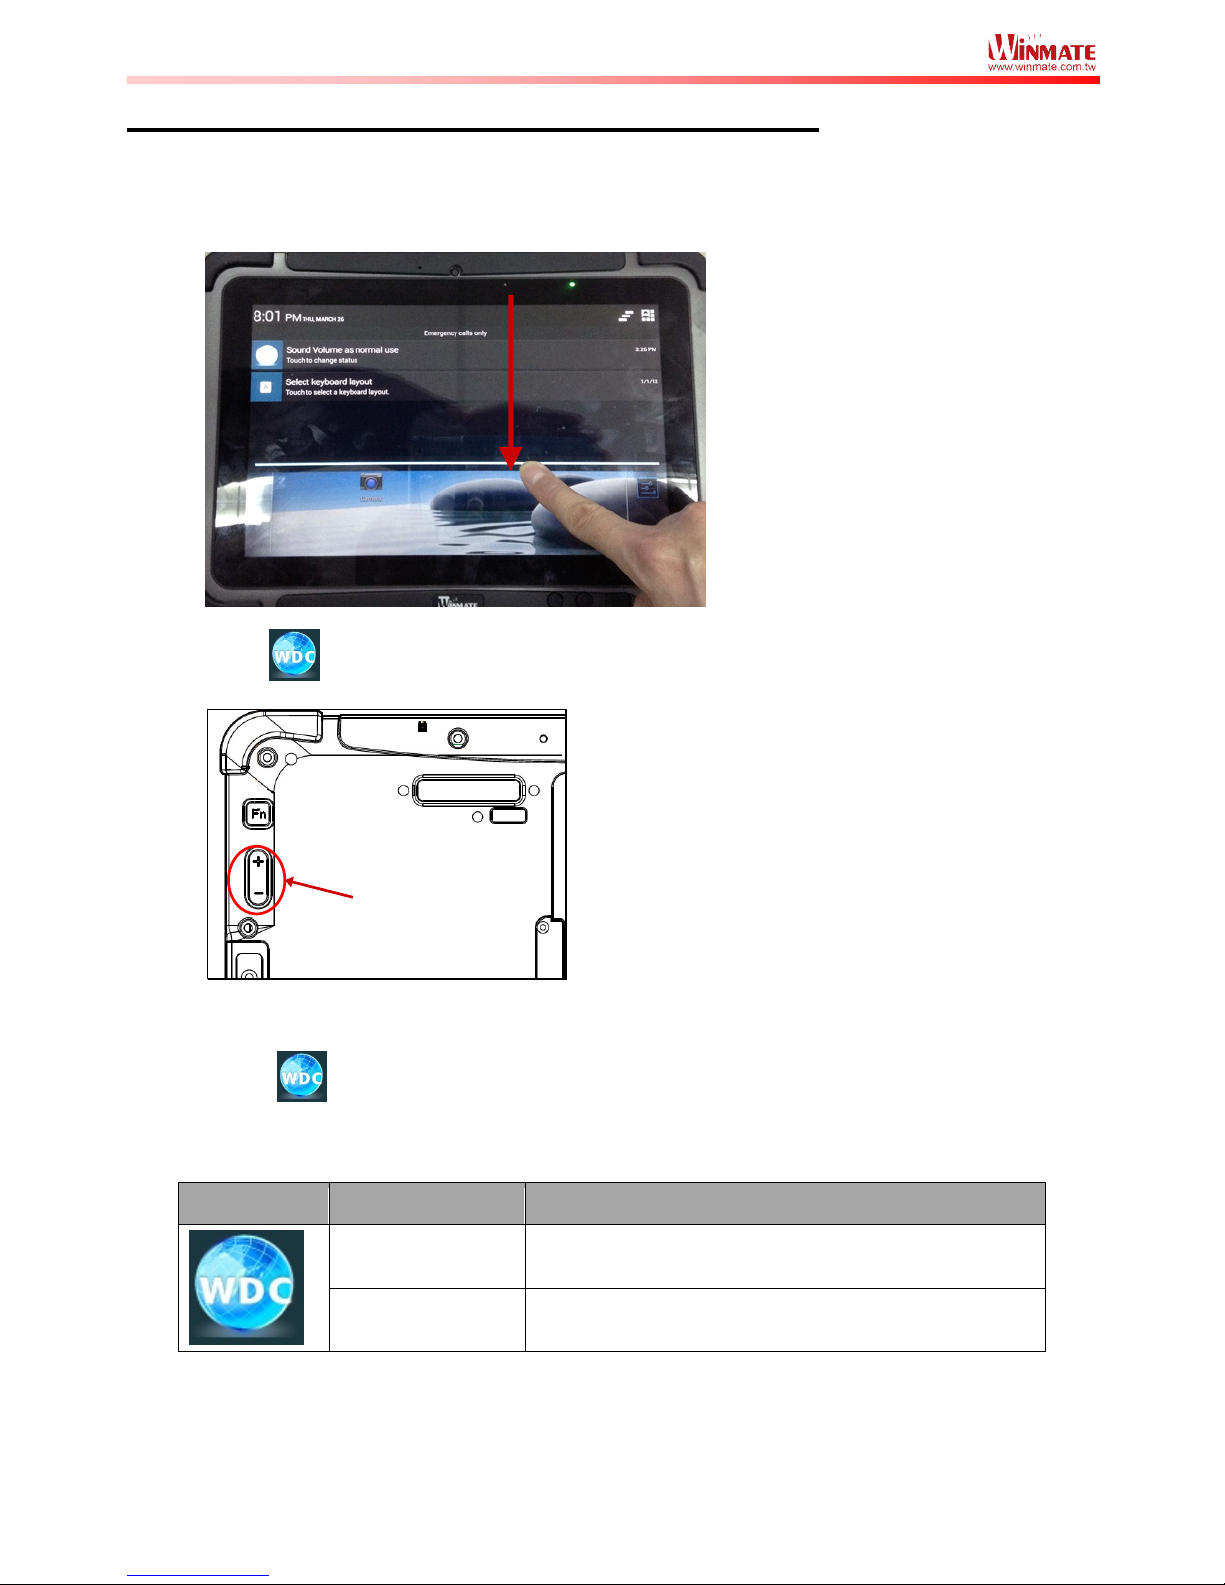
Using the Optional Barcode Reader feature
To enable the Barcode Reader feature, perform the following procedure:
1. Pull down from the top of the screen to get the notifications area.
2. Tip the icon to change the “physical volume buttons” function
3. Make sure the wording beside the icon shows “Sound Volume as scan button”
(Tip the icon again to change back to “normal use” to disable Barcode Reader)
4. Open the application where barcode reader will be displaying the scanned barcode.
5. Press the volume buttons to trigger the Barcode Scanner
Item Status Description
volume button as
normal use
Barcode Reader is disabled.
volume button as
scan button
Barcode Reader is enabled. Reading will need to
be triggered manually thru Volume buttons.
Volume
buttons
Page 9
M101M4 Quick Start Guide 8
Using the Optional RFID Reader feature
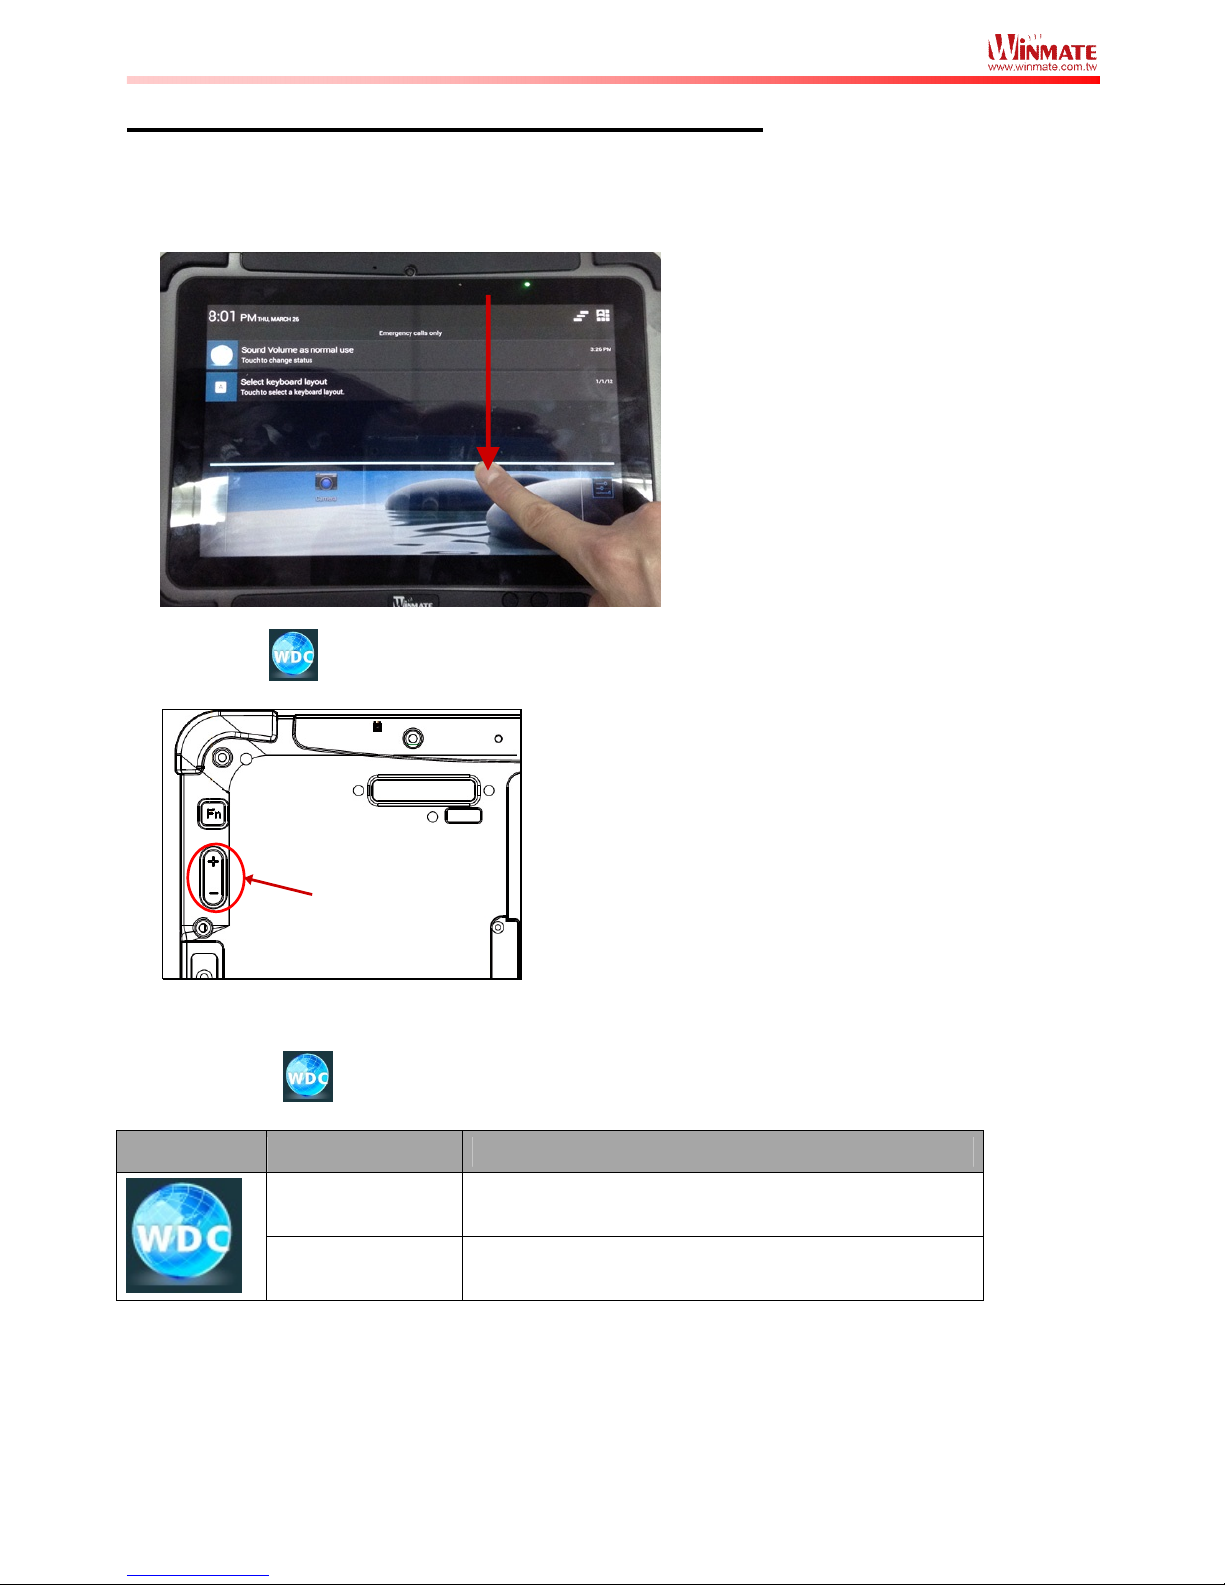
To enable the RFID Reader feature, perform the following procedure:
1. Pull down from the top of the screen to get the notifications area.
2. Tip the icon to change the function of “physical volume buttons”
3. Make sure the wording beside the icon shows “Sound Volume as scan button”
(Tip the icon again to change back to “normal use” to disable Barcode Reader)
Item Status Description
volume button as
normal use
Barcode Reader is disabled.
volume button as
scan button
Barcode Reader is enabled. Reading will need to
be triggered manually thru Volume buttons.
4. Open the application where RFID reader will be displaying the scanned RFID tag.
5. Press the volume buttons to trigger the RFID Reader
Page 10

M101M4 Quick Start Guide 9
WinmateCommunicationINC.
9F,No.111-6,Shing-DeRd.,SanChungDistrict,NewTaipeiCity241,Taiwan,R.O.C
WebSite:http://www.winmate.com.tw
 Loading...