

Page 1
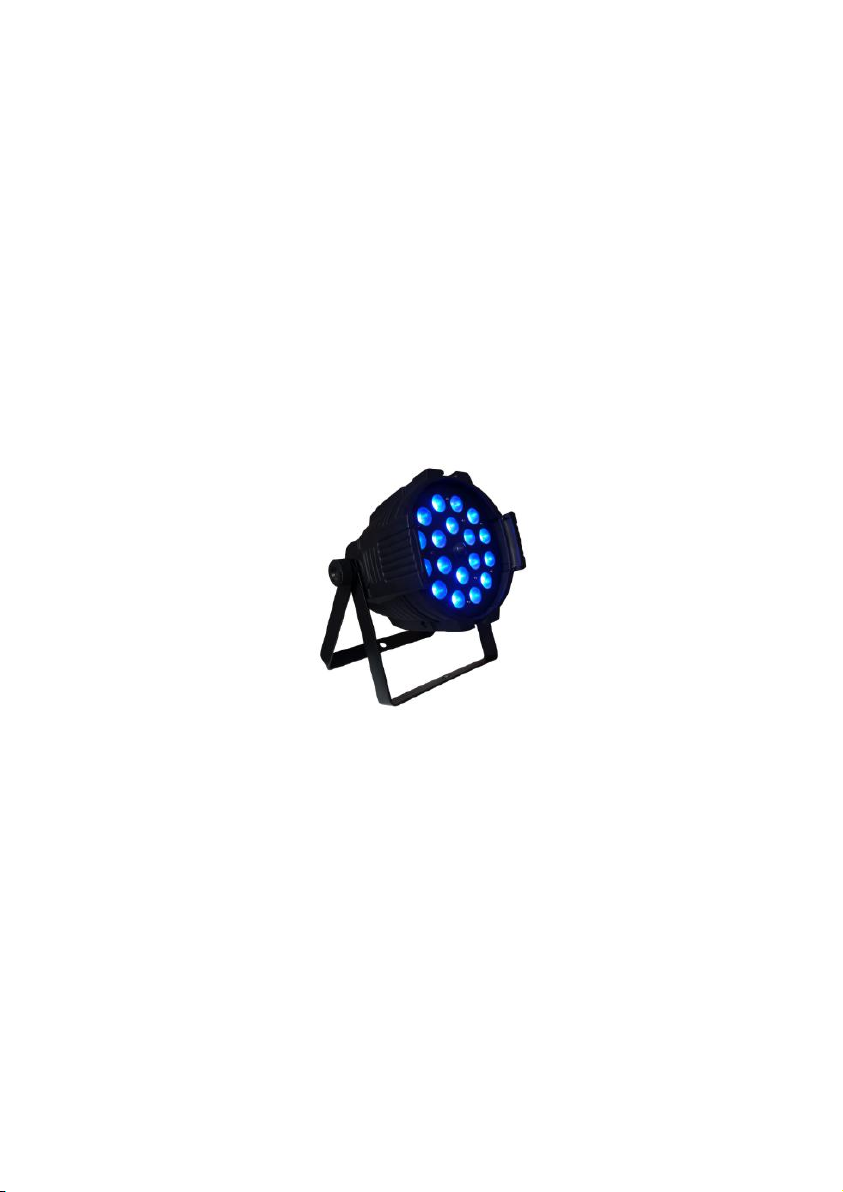
LED PAR ZOOM
Thank you very much for choosing our product. For safety purpose, please read this
manual carefully before your operation. This manual included installation and using
information. Please install and operate it according to this manual.
18X15W 6 in 1 LED
USER MANUAL
Page 2
1
Part 1 PRDUCT
1.1 Product introduction
This product is designed for indoor/outdoor use. Suitable applications include wash
or effect lighting for architectural, stage or nightclub applications. This product can
also be installed for use in signage and advertising using the dynamic functions
available with DMX512 control. Direct input of DMX512 signal allows the units to be
controlled from any DMX512 controller. This product can be operated as a single unit
or in multiple units for large applications.
1.2 Technical Specifications
Voltage: AC100-240V, 50/60Hz
Power: 300W
Light Source: 18PCS *15W ( RGBWA+UV 6in1 LED)
IP Rating: IP20
Lifespan: around 100,000 hours
Housing: Die-casting aluminum, powder-coated finish
Control: DMX 512, 7 modes (3/4/5/7/8/9/14CH)
Control Mode: DMX, Auto, Master/Slave, Sound active
Dimmer: 0-100%
Strobe: 0-20Hz
Beam angle: 8º -45º
Net Weight:3.5Kg
Size: 266*274*321mm
IMPORTANT:
ALWAYS READ THE USER MANUAL BEFORE OPERATION. PLEASE CONFIRM THAT
THE POWER SUPPLY STATED ON THE PRODUCT IS THE SAME AS THE MAINS
POWER SUPPLY IN YOUR AREA.
● This product must be installed by a qualified professional.
● Always operate the equipment as described in the user manual.
● A minimum distance of 0.5m must be maintained between the equipment and
combustible surface.
● The product must always be placed in a well ventilated area.
● Always make sure that the equipment is installed securely.
● DO NOT stand close to the equipment and stare directly into the LED light source.
● Always disconnect the power supply before attempting and maintenance.
● Always make sure that the supporting structure is solid and can support the
combined weight of the products.
1.3 Safety Warning
Page 3

2
● The earth wire must always be connected to the ground.
● Do not touch the power cables if your hands are wet.
ATTENTION:
● This product left the place of manufacture in perfect condition. In order to
maintain this condition and for safe operation, the user must always follow the
instructions and safety warnings described in this user manual.
● Avoid shaking or strong impacts to any part of the equipment.
● Make sure that all parts of the equipment are kept clean and free of dust.
● Always make sure that the power connections are connected correct and secure.
● If there is any malfunction of the equipment, contact your distributor immediately.
● When transferring the product, it is advisable to use the original packaging in
which the product left the factory.
● Shields, lenses or ultraviolet screens shall be changed if they have become
damaged to such an extent that their effectiveness is impaired.
● The lamp (LED) shall be changed if it has become damaged or thermally deformed.
Page 4
3
PART 2 INSTALLATION
2.1 Mounting:
2.1-1 Hanging
The product can be mounted in a hanging position using the supporting bracket. The
bracket should be secured to the mounting truss or structure using a standard
mounting clamp. Please note that when hanging the unit a safety cable should also
be used
.
2.1-2 Upright
The product can be mounted in an upright or sitting position using the supporting
brackets.
NOTE:
The product can be mounted at any angle and in any position. It is possible to further
adjust the angle of the product using the two adjustment knobs located on the side
of the fixture.
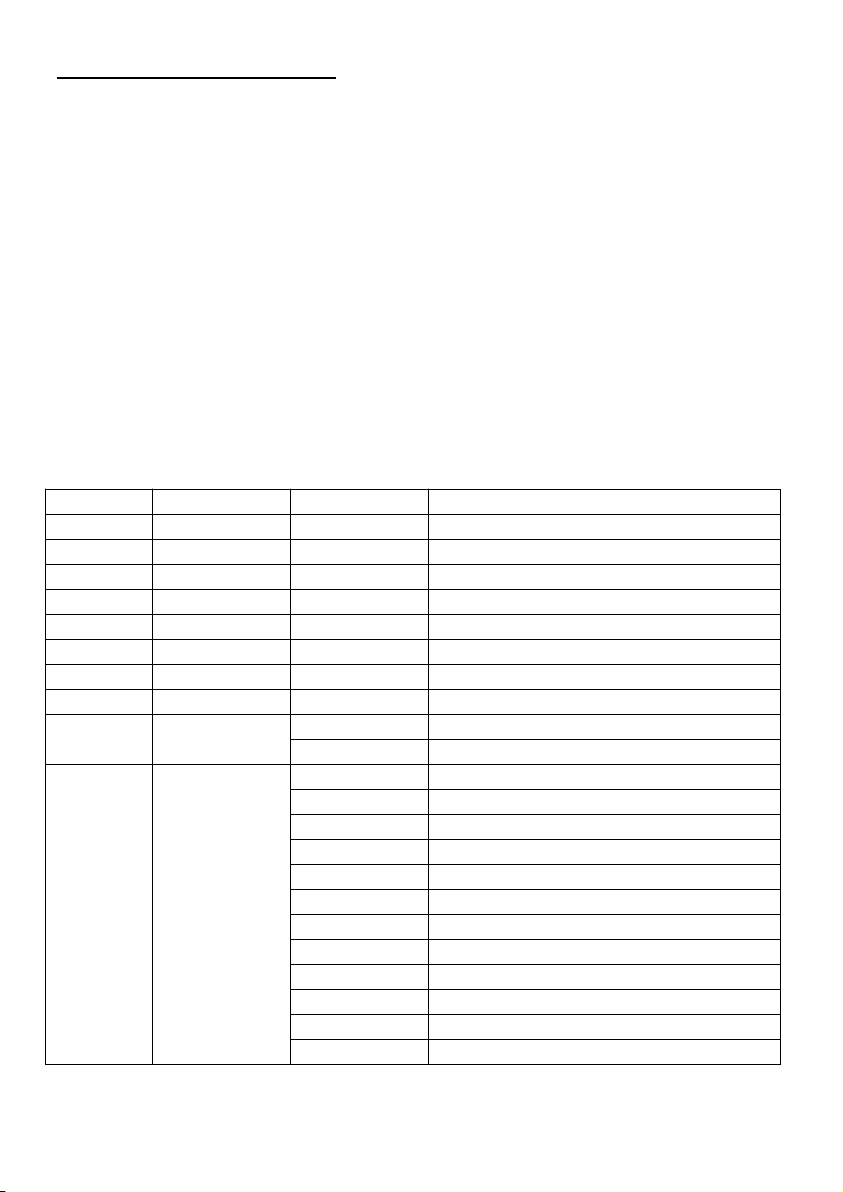
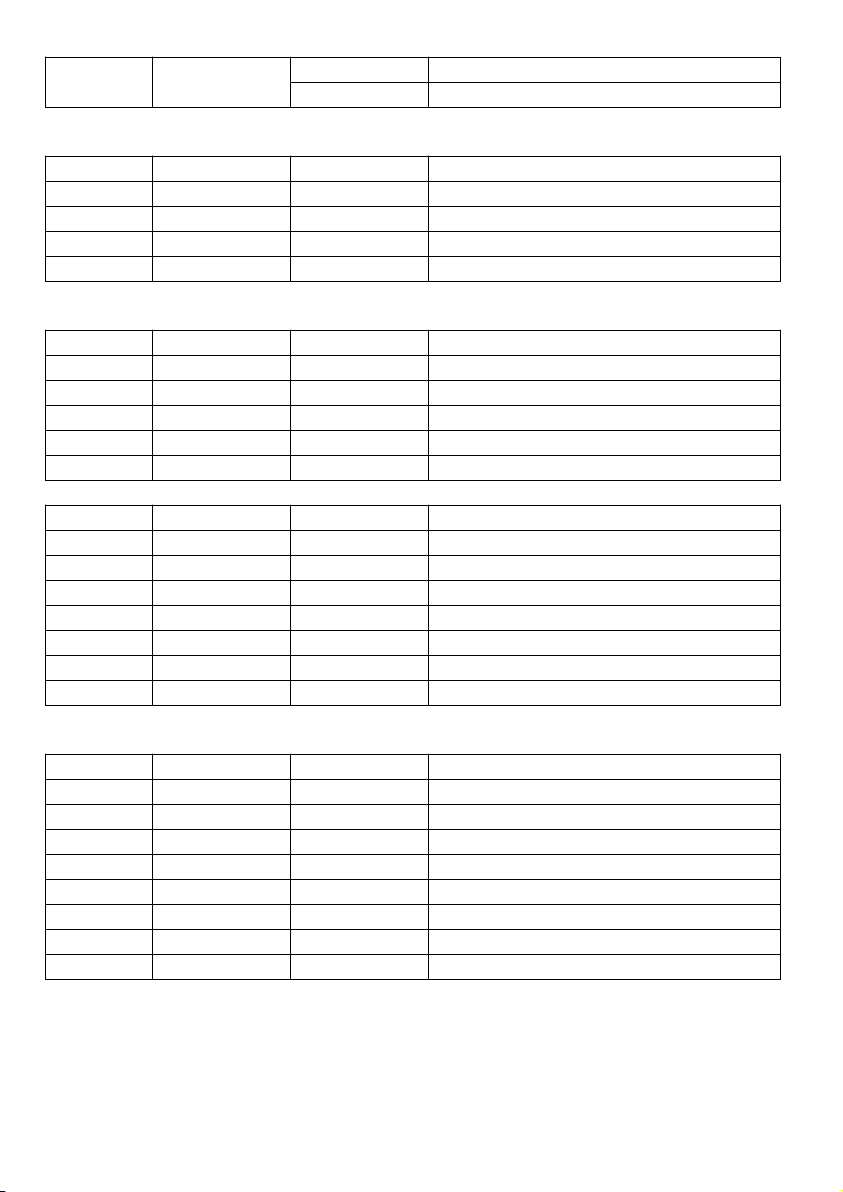
2.2 DMX Channel instruction
STAG MODE
14CH
Function
DMX Value
Instruction
1
Dimmer
0-255
0-255
2
Red
0-255
0-255
3
Green
0-255
0-255
4
Blue
0-255
0-255
5
White
0-255
0-255
6
Amber
0-255
0-255
7UV0-255
0-255
8
Zoom
0-255
0-255
9
Strobe
0-10
Strobe OFF
11-255
Strobe speed from slow to fast
10
Color Macro
0-30
No function
31-50
Red 100%/ Green UP/ Blue 0%
51-70
Red DOWN/ Green 100%/ Blue 0%
71-90
Red 0%/ Green100%/ Blue UP
91-110
Red 0%/ Green DOWN/ Blue 100%
111-130
Red UP/ Green 0%/ Blue10 0%
131-150
Red 100%/ Green 0%/ Blue DOWN
151-170
Red 100%/ Green UP/ Blue UP
171-190
Red DOWN/ Green DOWN/ Blue 100%
191-200
Red 100%/ Green 100%/ Blue 100%
201-205
WHITE1:3200K
206-210
WHITE2:3400K
Page 5
4
211-215
WHITE3:4200K
216-220
WHITE4:4900K
221-225
WHITE5:5600K
226-230
WHITE6:5900K
231-235
WHITE7:6500K
236-240
WHITE8:7200K
241-245
WHITE9:8000K
246-250
WHITE10:8500K
251-255
WHITE11:10000K
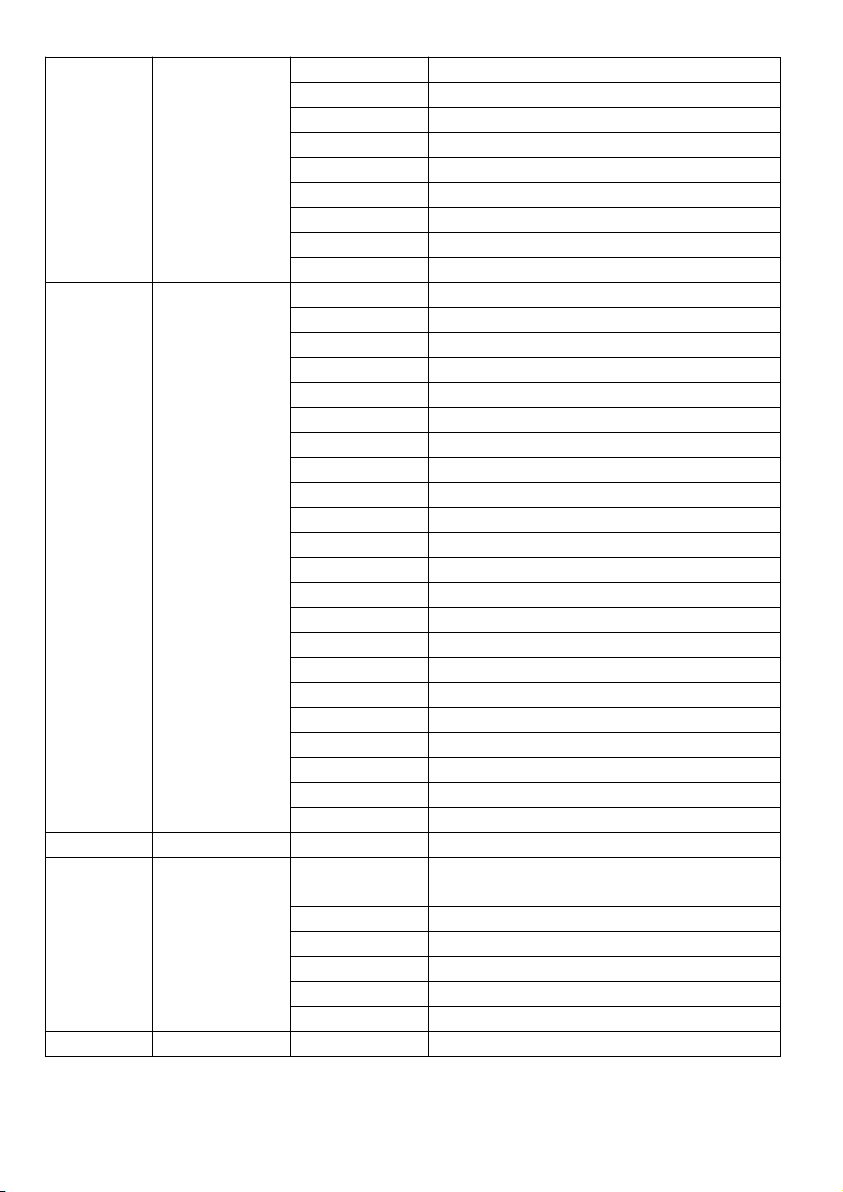
11
Auto mode and
Custom Mode
0-20
Auto OFF
21-30
AUTO1
31-40
AUTO2
41-50
AUTO3
51-60
AUTO4
61-70
AUTO5
71-80
AUTO6
81-90
AUTO7
91-100
AUTO8
101-110
AUTO9
111-120
AUTO10
121-130
CUSTOM1
131-140
CUSTOM2
141-150
CUSTOM3
161-170
CUSTOM4
171-180
CUSTOM5
181-190
CUSTOM6
191-200
CUSTOM7
201-210
CUSTOM8
211-220
CUSTOM9
221-230
CUSTOM10
231-255
Sound
12
Auto speed
0-255
Auto speed adjustment
13
Dimmer speed
0-9
Dimmer Speed
Preset Dimmer speed from display menu
10-29
Linear Dimmer
30-69
Non Linear dimmer(Fastest)
70-109
Non Linear dimmer 2
110-169
Non Linear dimmer 3
170-255
Non Linear dimmer 4(Slowest)
14
ID address
0-9
Select all ID Address
Page 6
5
10-209
ID1-20, each 10 value corresponding a ID
210-255
ID21-66, each value corresponding a ID
ARC.1 MODE
4CH
Function
DMX Value
Instruction
1
Red
0-255
0-255
2
Green
0-255
0-255
3
Blue
0-255
0-255
4
ZOOM
0-255
0-255
AR1.D MODE
5CH
Function
DMX Value
Instruction
1
Dimmer
0-255
0-255
2
Red
0-255
0-255
3
Green
0-255
0-255
4
Blue
0-255
0-255
5
ZOOM
0-255
0-255
ARC.2 MODE
7CH
Function
DMX Value
Instruction
1
Red
0-255
0-255
2
Green
0-255
0-255
3
Blue
0-255
0-255
4
White
0-255
0-255
5
Amber
0-255
0-255
6UV0-255
0-255
7
Zoom
0-255
0-255
AR2.d MODE
8CH
Function
DMX Value
Instruction
1
Dimmer
0-255
0-255
2
Red
0-255
0-255
3
Green
0-255
0-255
4
Blue
0-255
0-255
5
White
0-255
0-255
6
Amber
0-255
0-255
7UV0-255
0-255
8
Zoom
0-255
0-255
Page 7
6
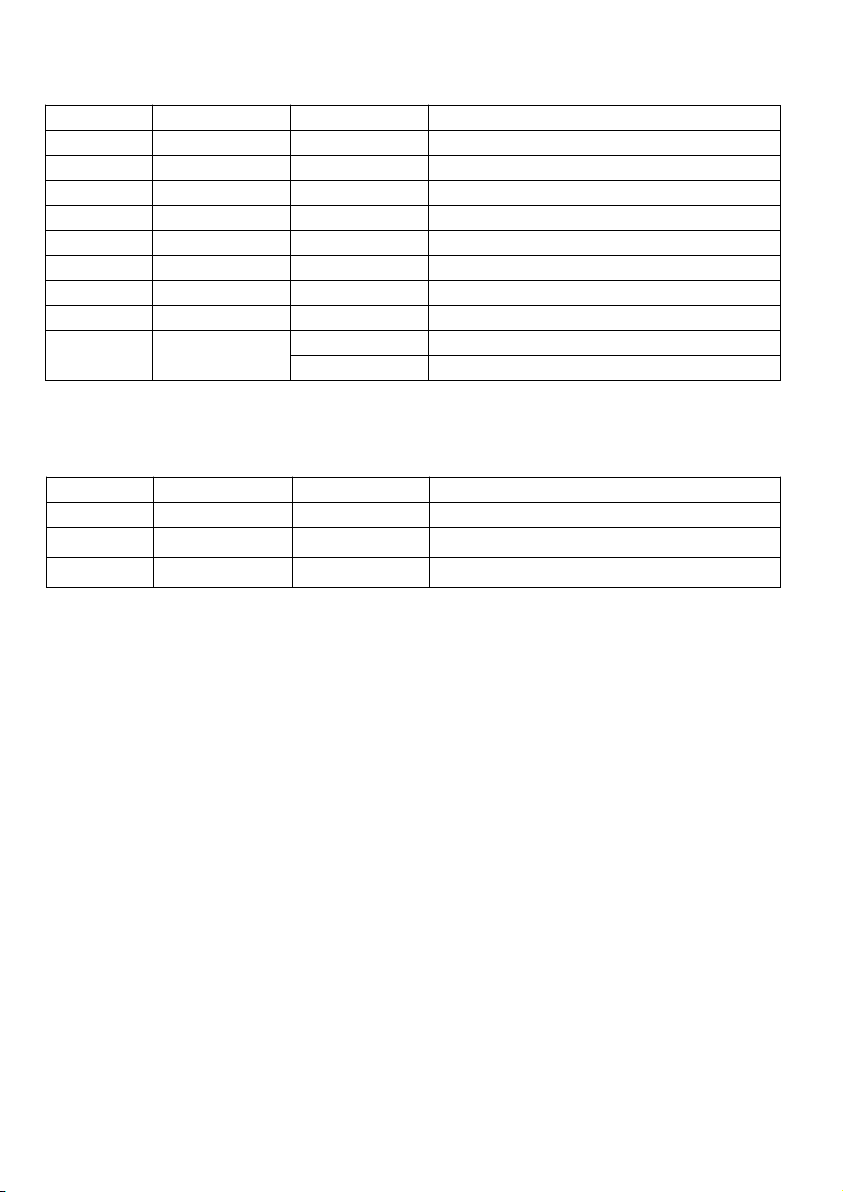
AR2.S MODE
9CH
Function
DMX Value
Instruction
1
Dimmer
0-255
0-255
2
Red
0-255
0-255
3
Green
0-255
0-255
4
Blue
0-255
0-255
5
White
0-255
0-255
6
Amber
0-255
0-255
7UV0-255
0-255
8
Zoom
0-255
0-255
9
Strobe
0-10
Strobe OFF
11-255
Strobe speed from slow to fast
HSV MODE
3CH
Function
DMX Value
Instruction
1
HUE
0-255
HUE(0-100%)
2
SATURATION
0-255
SATURATION(0-100%)
3
VALUE
0-255
VALUE(0-100%)
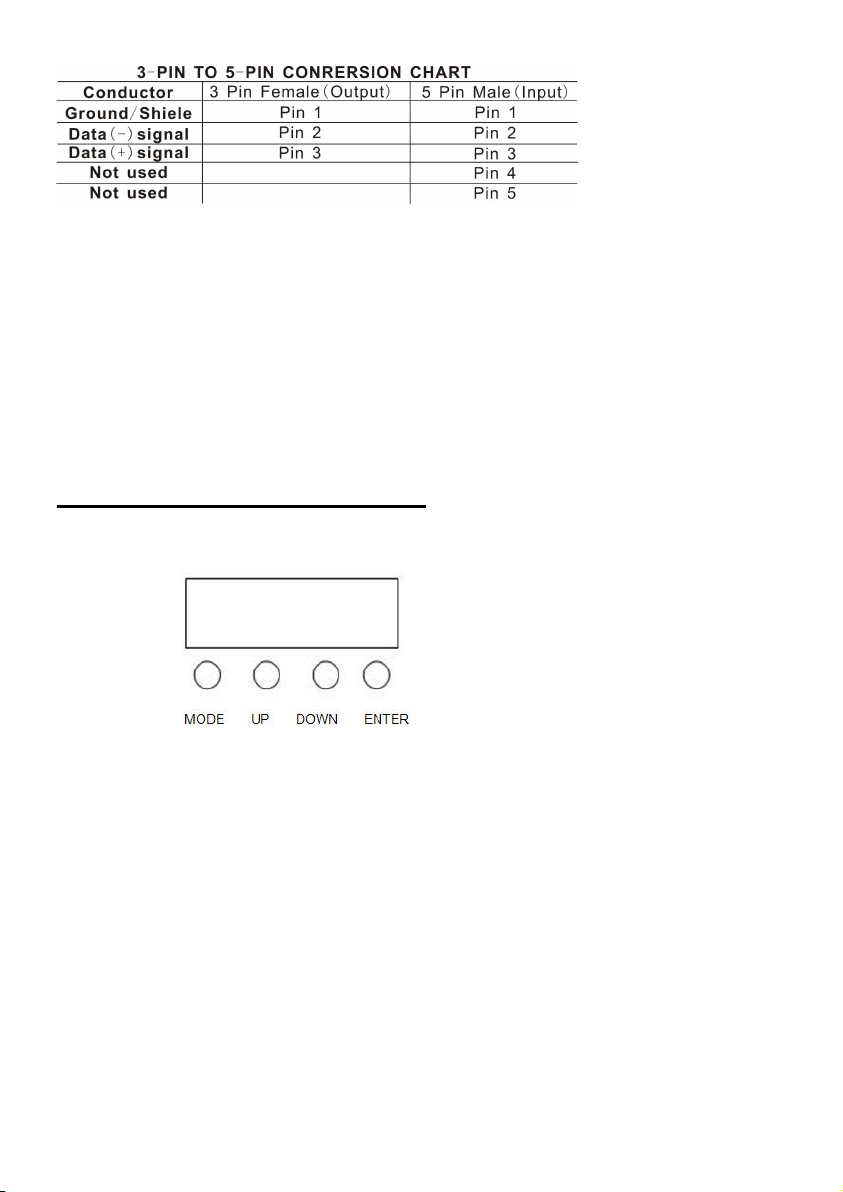
2.3 Special construction for DMX connection
☆ At last fixture, the DMX cable has to be terminated with a terminator to reduce
signal errors. Solder a 120-ohm 1/4W resistor between pin 2(DMX-) and pin
3(DMX+) into a 3-pin XLR-plug and plug it in the DMX-output of the last fixture.
☆ If the controller is 5-pin output, it’s necessary to use an adaptor to transfer signal
from 5-pin output to 3-pin XLR-plug or you can connect cables as following:
Page 8
7
PART 3 Display Panel Operation
[MODE] menu selection or return to previous menu.
[UP] press [UP] through the menu list to increase/change the value of the current
function.
[DOWN] press [DOWN] through the menu list to decrease/change the value of the
current function.
[ENTER] confirm & quit out current function setting.
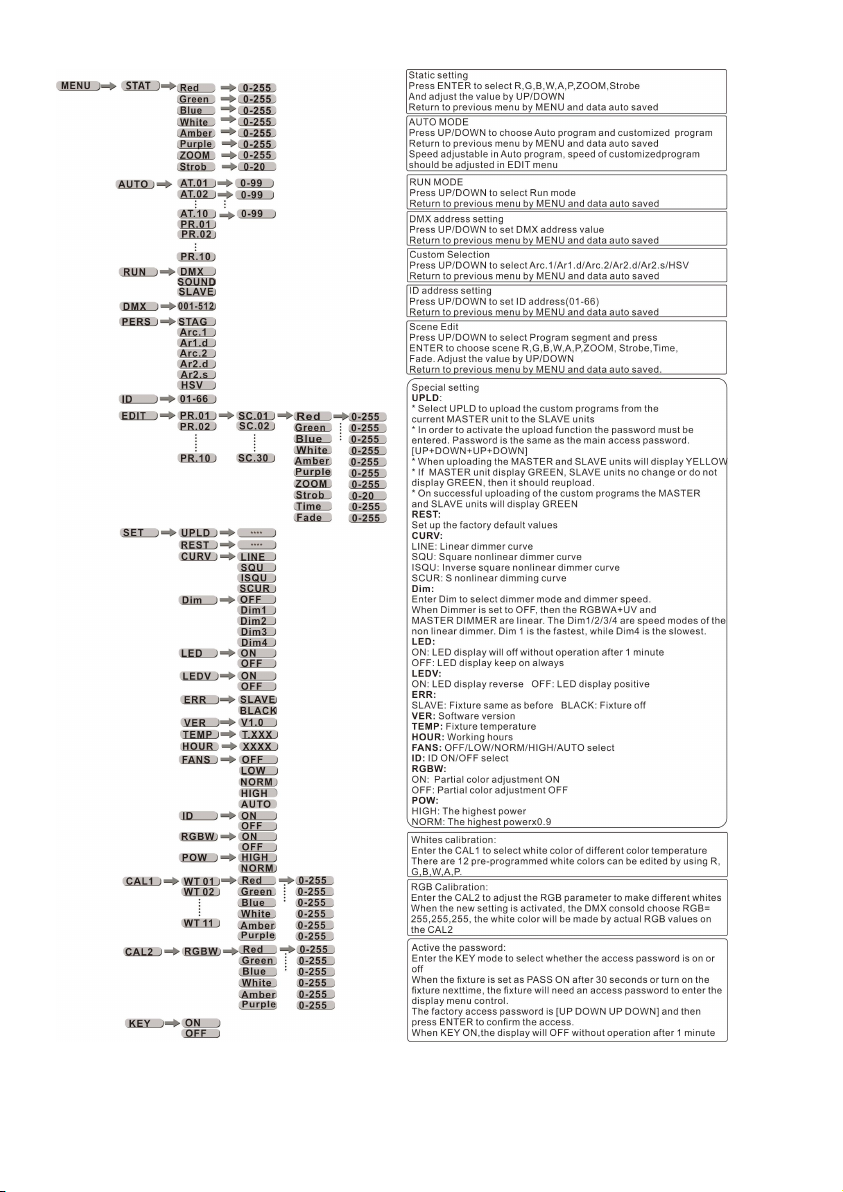
3.2 Di s pla y Me nu ins tru c tio n (g ene r al)
3.1 Di spl ay pa n el men u in st ruc tio n
Page 9
8
Page 10

9
Part 4 Maintenance
The cleaning of internal must be carried out periodically to optimize light output.
Cleaning frequency depends on the environment in which the fixture operates:
damp, smoky or particularly dirty surrounding can cause greater accumulation of dirt
on the fixture’s optics.
● Clean with soft cloth using normal glass cleaning fluid.
● Always dry the parts carefully.
● Clean the external optics at least every 20 days.
● Clean the internal optics at least every 30/60 days – Up to vary products.
Please ask professional technical to clean waterproof products and make sure the
fixture will be reassembled well for waterproof.
 Loading...