

Setting Up TV
Stations
32
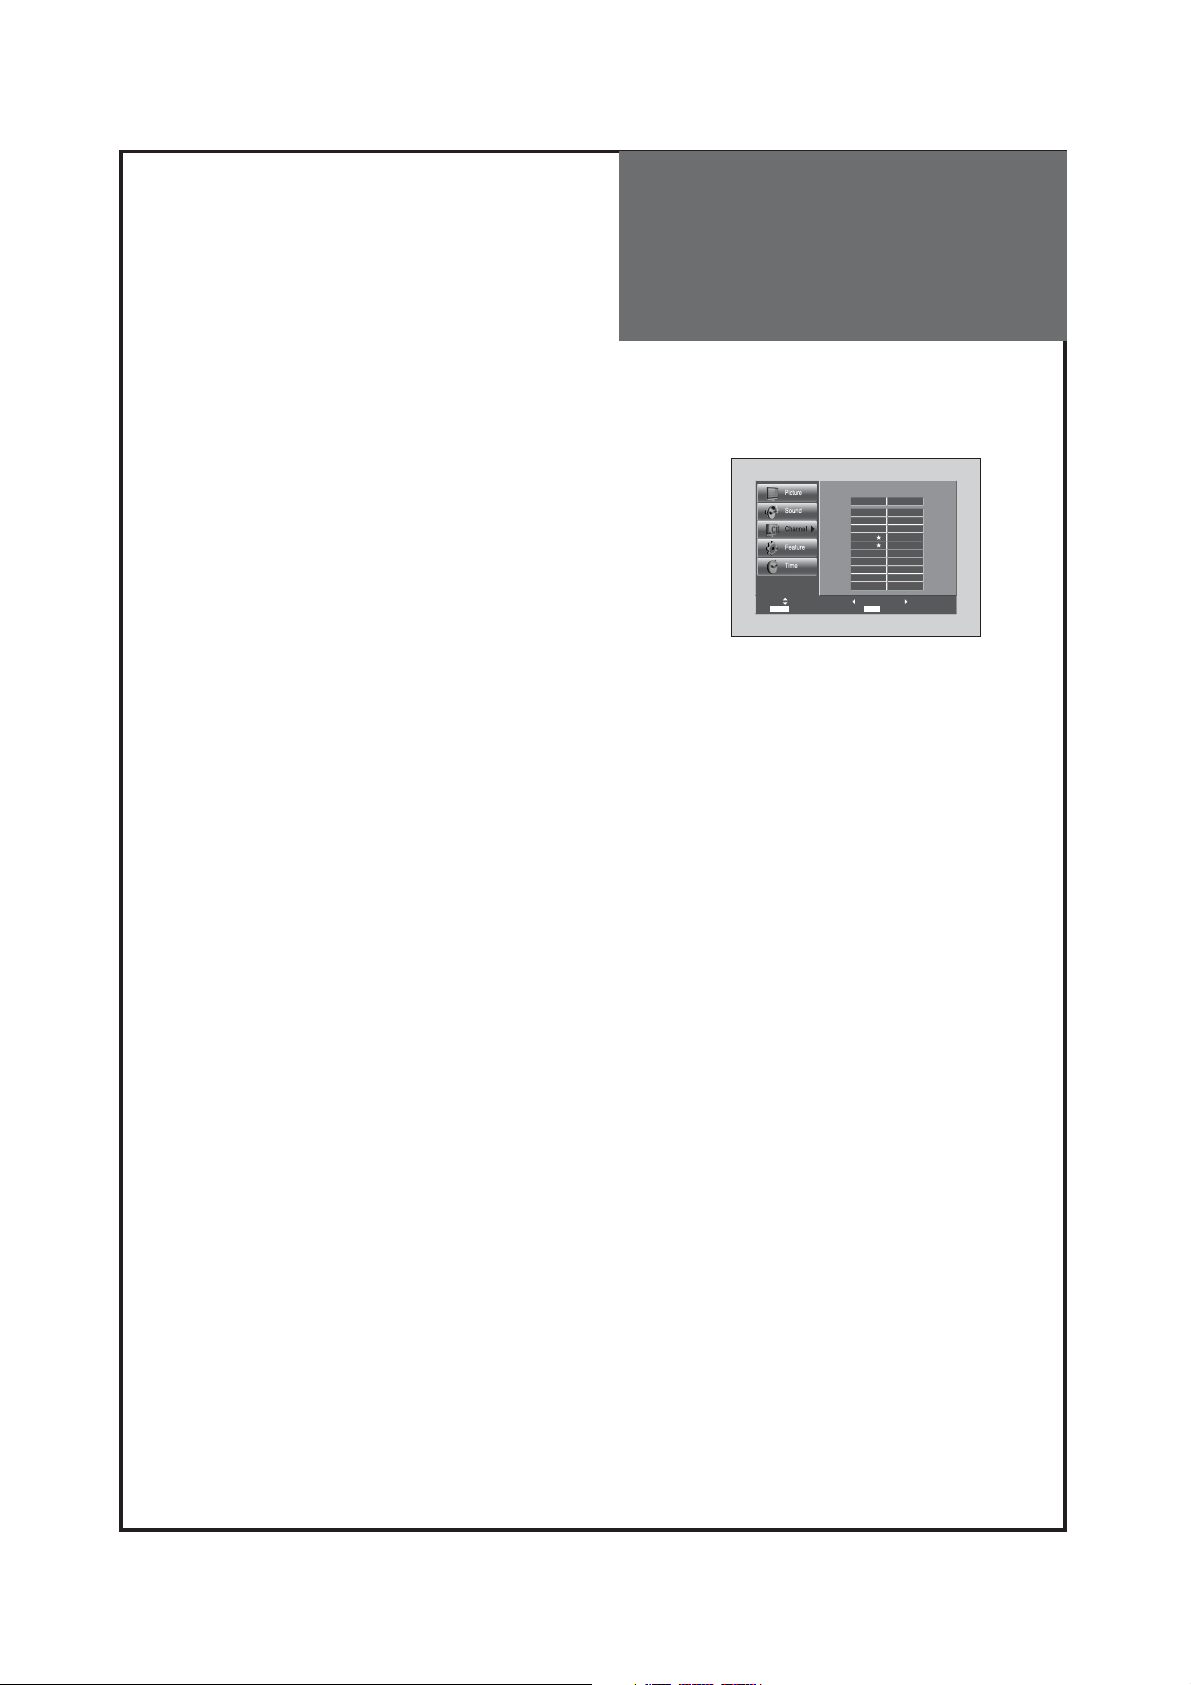
• After "Auto Search" mode, received channels are in the
position of "Add" and scrambled channels are in the position
of "Del".
• Scrambled channels are displayed in (S), and deleted
channels are presented normal.
ex) Scrambled Channel : 11-1(S) Deleted Channel : 11-1
• Scrambled scrambled channels are fixed, they cannot be
moved to "Add" side.
• If you want to watch scrambled channels, you have to contact
cable TV service.
Channel Select Add
FAV.CH Favorite Channel Add/Del
E
d
it C
A
d
d
1
5
1
3
1
5
4
0
4
5
MENU Return
h
a
n
n
e
l
D
e
l
11
-1
(s
)
Del
Setting Up TV
Stations
33
- Reveals how strong your DTV signal is and whether you need to adjust your antenna.
- The higher the signal strength, the less likely you are to experience picture degradation.
- Digital TV Signals; May not be available in all areas, nor broadcast all channels.
1. Locate the selection bar on the strength.
• Move to strength in the Channel menu.
• Display the strength status of digital signal.
Signal Strength(Digital TV mode only)
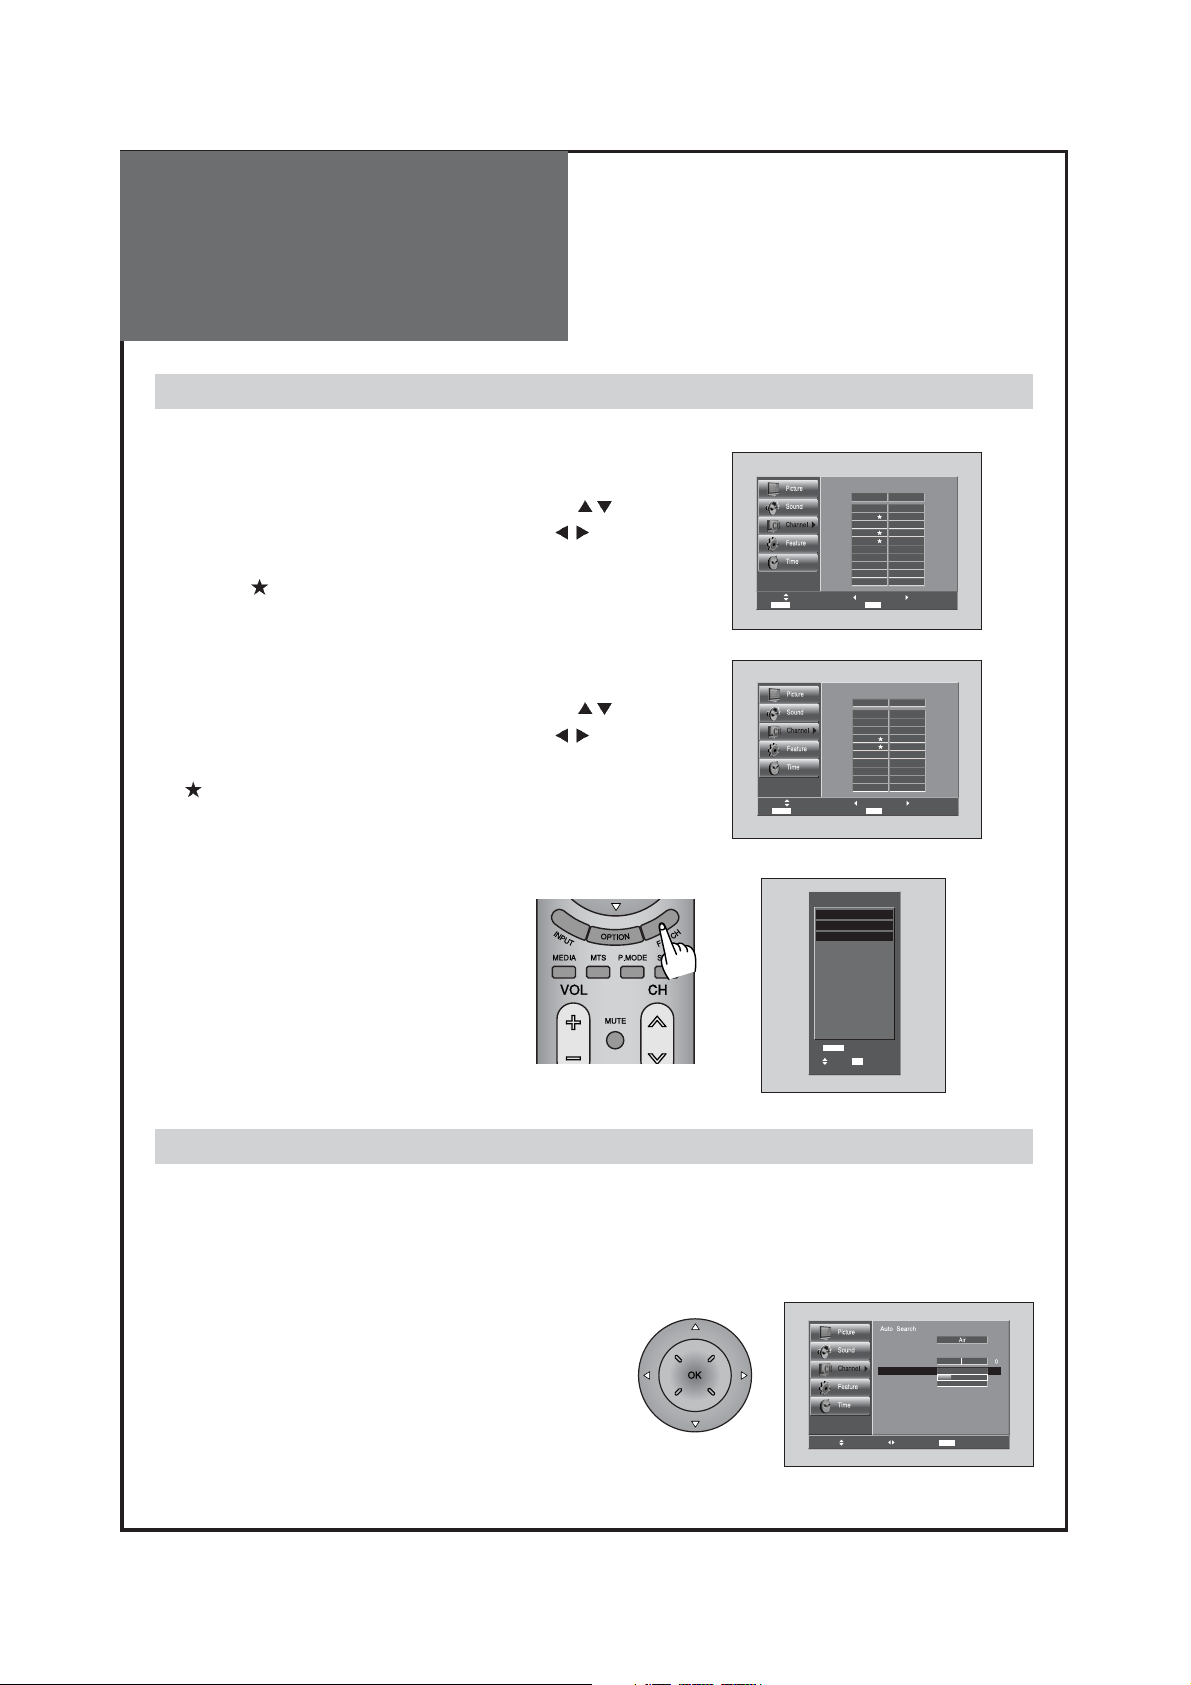
1. Programing Favorite Channel.
• Press MENU button. Select Channel by pressing "
" button.
• Select Edit Channel selection bar by pressing "
" button.
• Press "FAV CH" button, on the Edit Channel mode. then you
can see "
".
2. Deleting Favorite Channel.
• Press MENU button. Select Channel by pressing "
" button.
• Select Edit Channel selection bar by pressing "
" button.
• Press "FAV CH" button again, on the Edit Channel mode. then
"
" disappeared.
3. Viewing the Favorite CH
• Whenever pressing "FAV CH" button,
the Channel changes as the selected
Channel order.
FAV CH
- You can set channel you watch frequently as favorites.
Channel Select Add
FAV.CH Favorite Channel Add/Del
Channel Select Add
FAV.CH Favorite Channel Add/Del
E
d
it C
A
d
d
1
5
1
3
1
5
4
0
4
5
MENU Return
E
d
it C
A
d
d
1
5
1
3
1
5
4
0
4
5
MENU Return
h
a
n
n
e
l
D
e
l
Del
h
a
n
n
e
l
D
e
l
Del
FAV
O
FAV.C
Select OK Move
R
IT
E
C
H
A
N
N
E
L
5
1
5
4
0
H
C
hange
A
n
te
n
n
a
E
d
it C
h
a
n
n
e
l
F
in
e
Tu
n
e
S
ig
n
a
l S
tre
n
g
th
Move Change MENU Return
1
4
-
1
(1
6
)
Wea
k
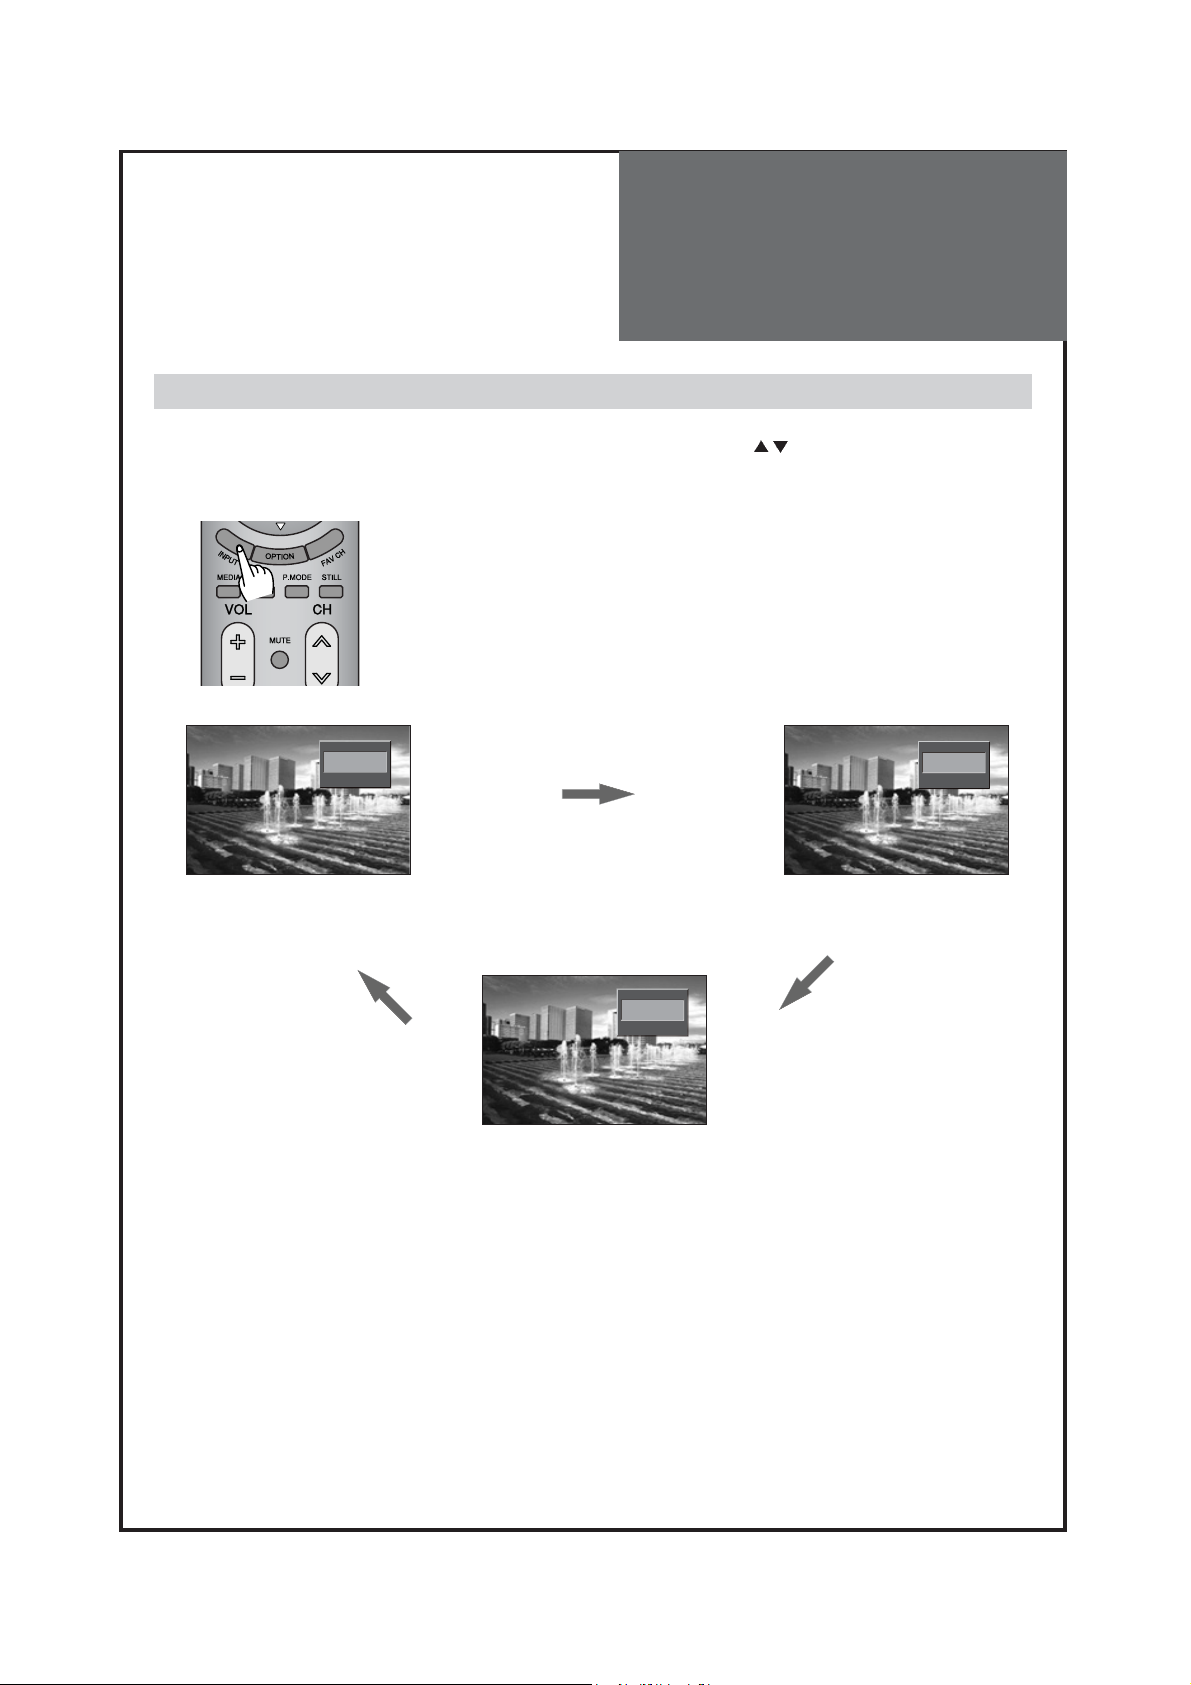
Selection of TV/VIDEO
Input Signal
34
- When you presses INPUT Button, You can select as follows by pressing ” ” and “OK” buttons.
AIR/CABLE => AV1 => AV2 => Component1 => Component2 => HDMI1 => HDMI2 => PC
Note:
• If S-video and RCA jack are connected at the same time, the TV set will only detect the S-Video mode.
• If sound signal is mono mode, connect it to the L-terminal of the sound input terminal.
When watching video, Camcorder, DVD, Cable TV with External Input
AirAnalog
26
INPUT
AV2
INPUT
AV1
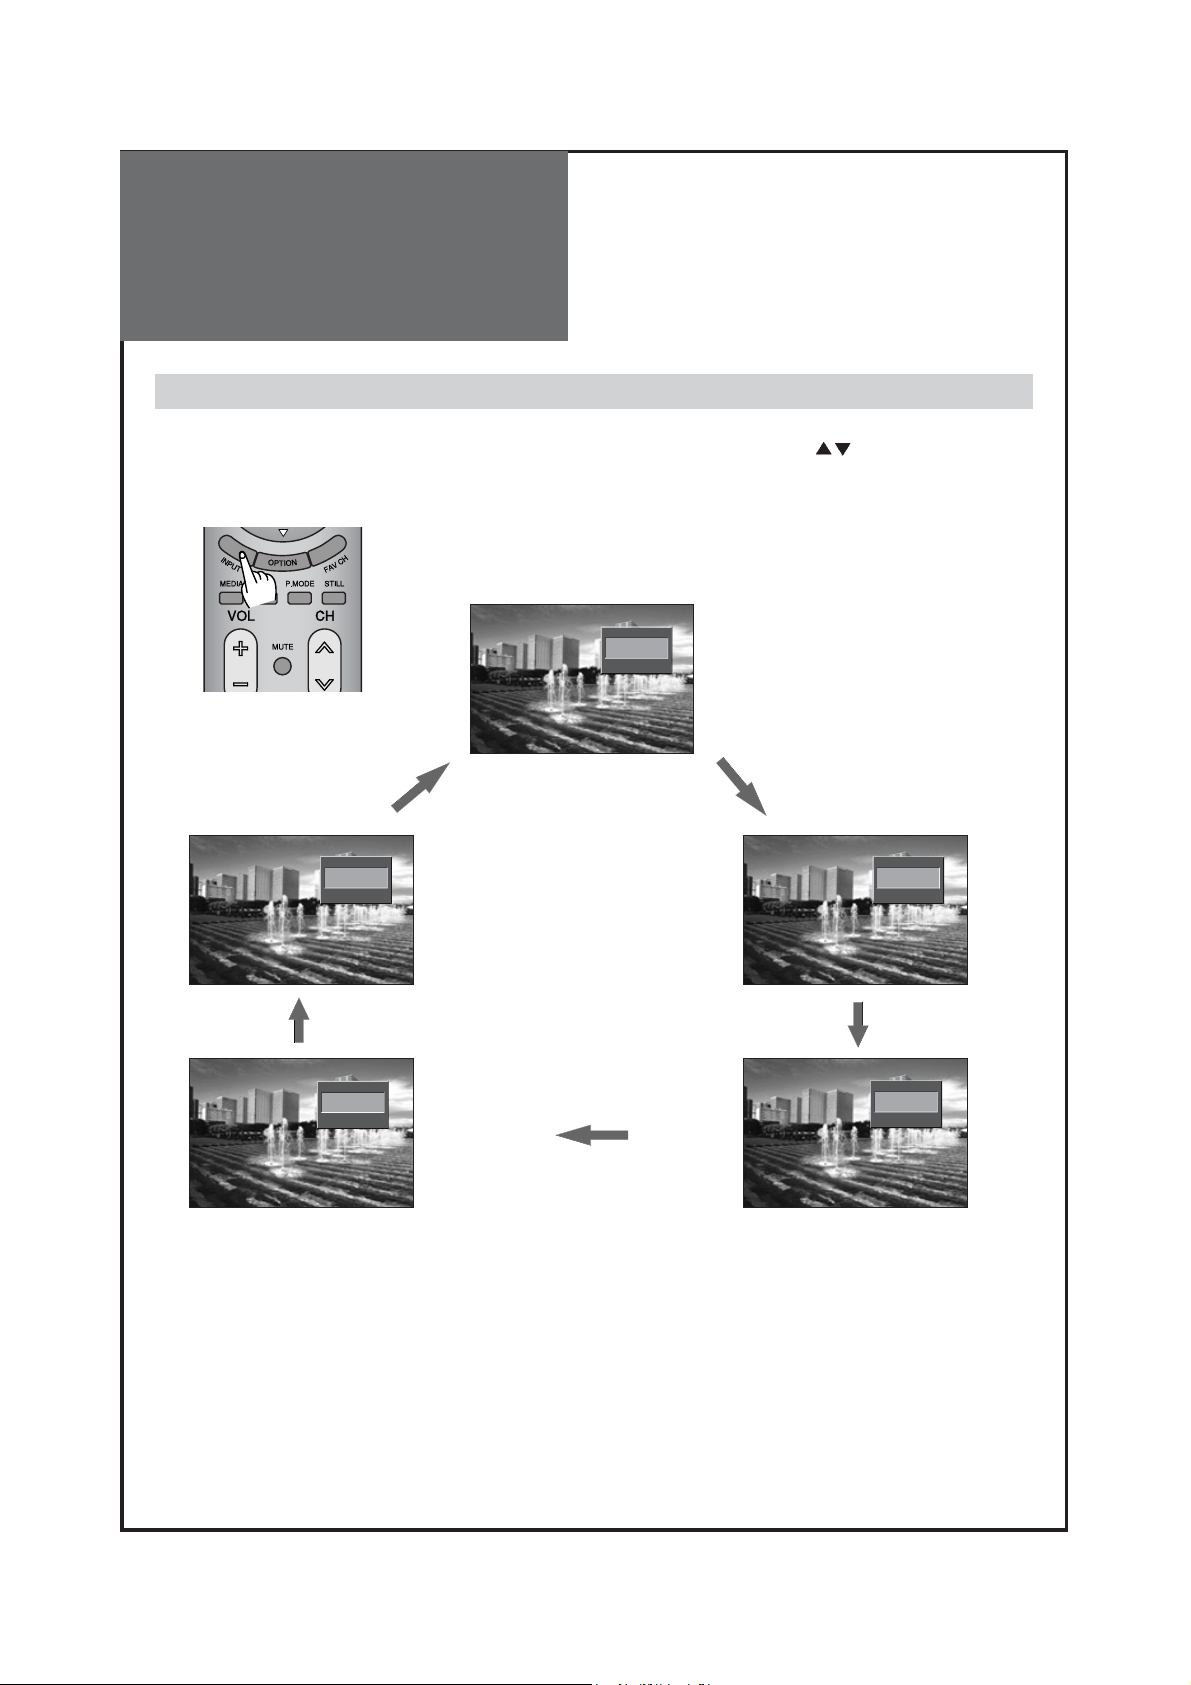
Selection of Multimedia
Input Signal
35
When connecting PC, STB, DVD with Multimedia
1. When you presses INPUT Button, You can select as follows by pressing the ” ” buttons.
AIR/CABLE => AV1 => AV2 => Component1 => Component2 => HDMI1 => HDMI2 => PC
Note:
• If sound signal is mono mode, connect it to the L-terminal of the sound input terminal.
INPUT
PC VGA
INPUT
HDMI 2
INPUT
HDMI 1
INPUT
Component 1
INPUT
Component 2

Selection of Multimedia
Input Signal
36
1. If the message ‘No signal’ appears on the screen, adjust the PC output to a format listed in the Multimedia
Input table.
Multimedia Input Format
HDMI & PC & Component mode
Note :
1. When you connect with component, PC (D-Sub), and HDMI, you must check the input resolution of
external devices.
2. So if this mode is used at PC mode, the screen can be enlarged.
3. 1600x1200 & 1920x1080P modes are supported only Full HD model.
Resolution V-freq HDMI PC(D-Sub) Component Standard
640 X 480 60Hz O O X VESA Standard
800 X 600 60Hz O O X VESA Standard
1024 X 768 60Hz O O X VESA Standard
1280 X 768 60Hz O O X
1280 X 1024 60Hz O O X VESA Standard
1360 X 768 60Hz O O X
1600 X 1200 60Hz O O X
720 X 480i 60Hz X X O
720 X 480p 60Hz O O O
1280 X 720p 60Hz O O O
1920 X 1080i 60Hz O O O
1920 X 1080p 60Hz O O O
Selection of Media(USB)
Input Signal
37
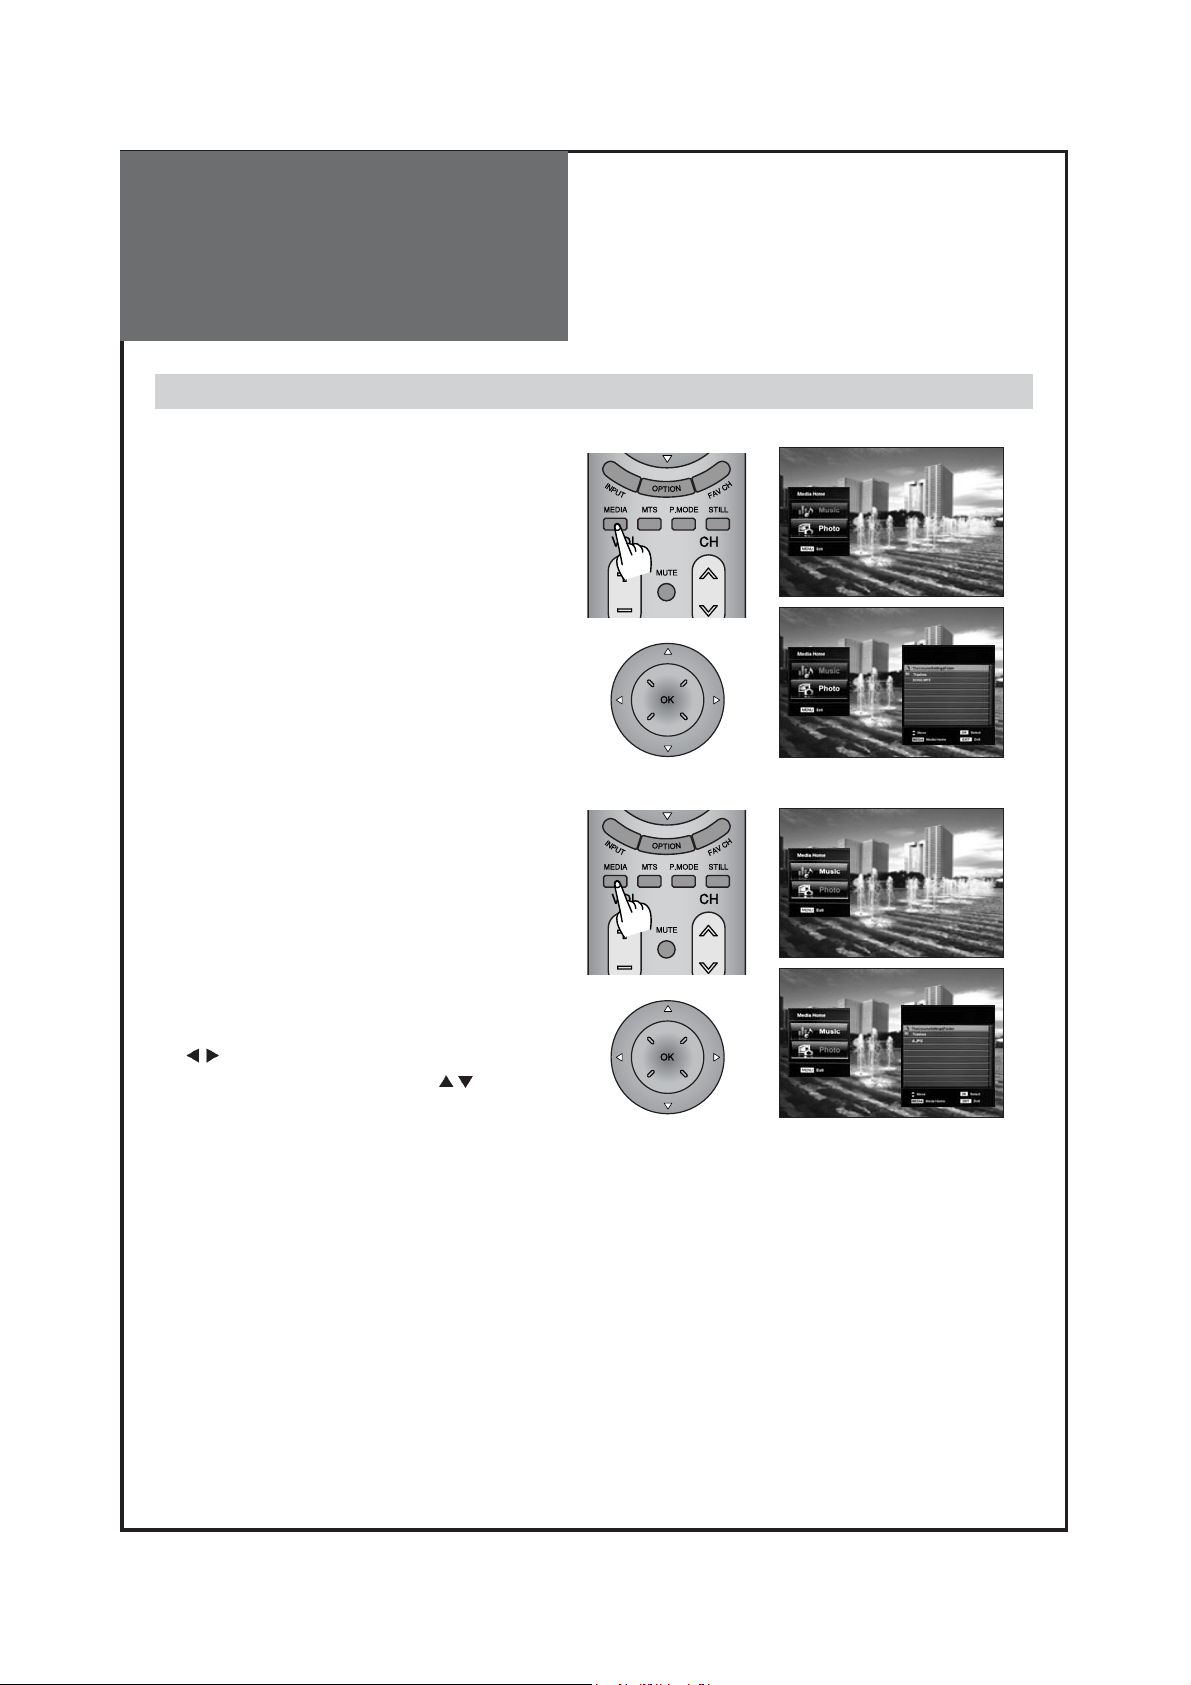
Function of USB
1. Playing Music
This menu shows MP3 files from the files saved on a
USB memory device.
• Press MEDIA button. The Media screen appears
as follows.
• Select the "MUSIC" then press the "OK" button.
• Then Sub-folders are displayed.
• Press "OK"button again, You can see files and
folders in the USB are displayed.
• Select the mp3 files then press "OK" button.
• If you don’t choose the MP3 file but Folder, press
“OK” button. And then sub-folder will be opened.
2. Viewing Photo
This menu shows JPG files from the files saved on a
USB memory device.
• Press MEDIA button. The Media screen appears
as follows.
• Select the "Photo" then press the "OK" button.
• Then files and folders in the USB are displayed.
• Select the jpg files then press "OK" button.
• You can see previous/next photo using the
"
" buttons.
You can rotate photo using the "
" buttons.
If you want to enjoy Slide show, press “OK” button.
Note : 1) It only works with a USB connected to TV.
2) It supports mp3, jpg files only.
3) Photo resolution supports up to 3264X2448.
4) Supported sampling frequency on the mp3 files.(11 ~ 48KHz)
5)
Supports unicode. Does not support the following languages : Korean, Japanese and Chinese.

Picture Adjustment
38
Note :
• 16:9 : 16:9 will display a true 16:9 (anamorphic) picture with no aspect
distortions.
• 4:3 : General TV screen currently broadcasted.
• ZOOM 1 : Enlarge vertical size of the 16:9 picture.
• ZOOM 2 : Move the ZOOM 1 picture to the upper direction.
• ZOOM 1 and ZOOM 2 screen are not available in PC and HDMI mode.
Adjustment of Aspect ratio in TV/Video/Component mode
1. Press the "MENU -> Picture -> Aspect Ratio" button.
• The screen changes as below whenever by pressing the "
" button.
16:9 => 4:3 =>ZOOM 1 => ZOOM 2 => 16:9
42
81
58
RG
4
Off
10
ZOOM 1
42
81
58
RG
4
Off
10
ZOOM 2
RG
Noise Reduction
Color temp.
Dimming
Aspect Ratio
PC Screen Mode
Move Change MENU Return
RG
Noise Reduction
Color temp.
Dimming
Aspect Ratio
PC Screen Mode
Move Change MENU Return
42
81
58
4
Off
10
16 : 9
42
81
58
4
Off
10
4 : 3
Noise Reduction
Color temp.
Dimming
Aspect Ratio
PC Screen Mode
Move Change MENU Return
Noise Reduction
Color temp.
Dimming
Aspect Ratio
PC Screen Mode
Move Change MENU Return
Picture Adjustment
39
Note.
• You can adjust the PC menu only in the PC mode.
• During the Auto Adjust, you must not alter a screen on the monitor.
• During a moving picture, Auto Adjust is liable to incorrectly work. So you must execute
Auto Adjust on a still image.
• When Auto Adjust is not working correctly, you can adjust with Auto adjust, Phase,
Clock, H. Position, V. Position.
Adjustment of the screen in the PC mode
1. Select Picture by pressing the "Menu" button.
• The menu screen appears as follows.
2. Select PC Screen Mode
• Move to PC Screen Mode in the Picture menu by
pressing the ”
” buttons.
• Press the ”
” button.
3. Select and adjust each items.
• Move to item what you want by pressing the ”
”
button.
• Adjust each items by pressing the ”
” button.
RG
Noise Reduction
Color temp.
Dimming
Aspect Ratio
PC Screen Mode
Move Change MENU Return
PC Screen Mode
Auto Adjust
Phase
Clock
H. Position
V. Position
Move Change MENU Return
42
81
58
4
Off
10
16 : 9
9
1688
-355
-41
Picture Adjustment
40
- The user may select various screens designed for a good picture without adjusting the brightness, contrast
or color individually.
Note.
• Normal : For a highly defined image in a normally bright room
• User : Allows the user to customize settings as desired
• Dynamic : For a clear-cut image emphasizing high contrast for sports viewing
• Cinema : Ideal for movies
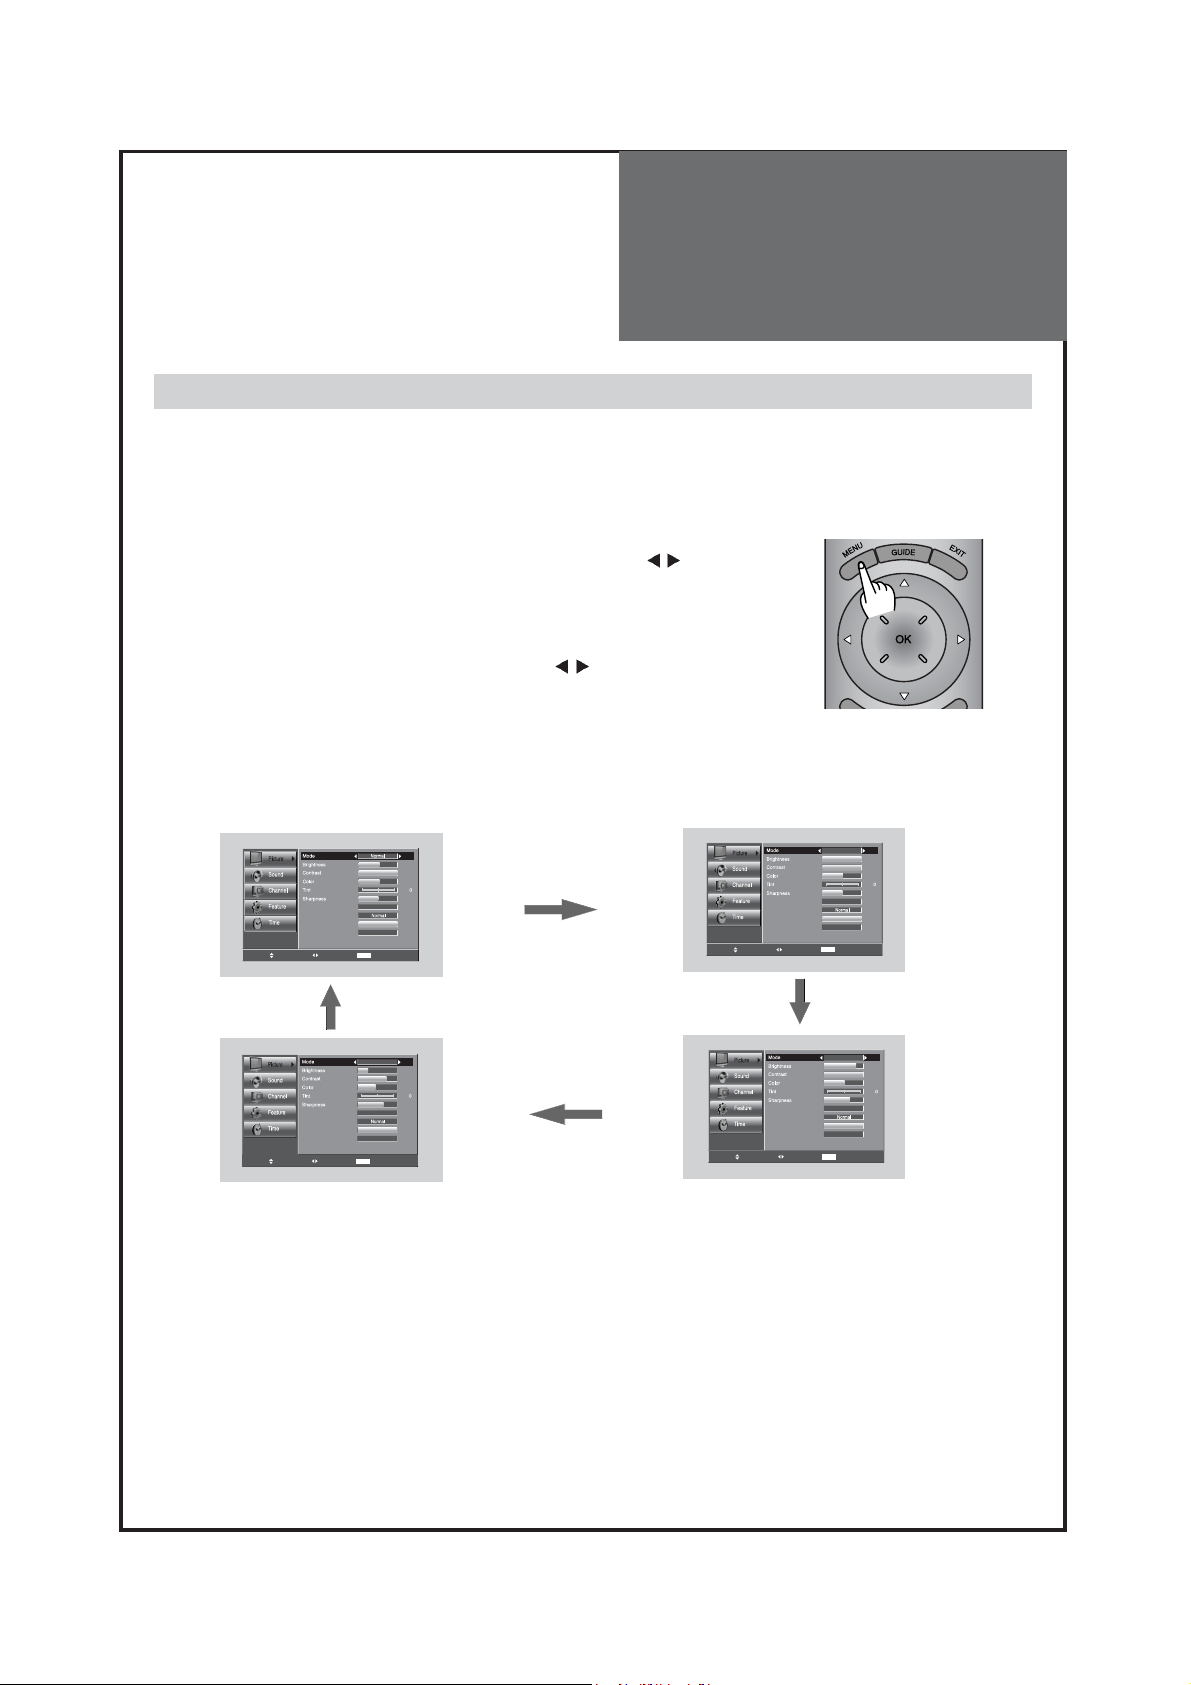
When setting up various screen modes
1. Picture Mode selects what you want.
• Press MENU button and Select Picture mode by pressing ”
” buttons.
• The screen status changes as followed:
Normal => User => Dynamic => Cinema
• The screen adjustment status changes as the following screens are
displayed sequentially whenever pressing the ”
”(on picture mode)
button.
• The screen returns to the mode prior to turning power off when then
turning power on again.
50
100
50
RG
Noise Reduction
Color temp.
Dimming
Aspect Ratio
PC Screen Mode
Move Change MENU Return
55
Off
10
16 : 9
RG
Noise Reduction
Color temp.
Dimming
Aspect Ratio
PC Screen Mode
Move Change MENU Return
User
100
100
50
55
Off
10
16 : 9
Cinema
30
70
40
RG
Noise Reduction
Color temp.
Dimming
Aspect Ratio
PC Screen Mode
Move Change MENU Return
65
O
ff
10
16 : 9
Noise Reduction
Color temp.
Dimming
Aspect Ratio
PC Screen Mode
Move Change MENU Return
Dynamic
80
100
50
RG
65
O
ff
10
16 : 9
Picture Adjustment
41
- You can enjoy various screens by adjusting Brightness, Contrast, Color, Tint, Sharpness, Noise Reduction,
Color Temp., Dimming, Aspect Ratio, PC Screen Mode(Only in PC Mode), etc to the user’s taste.
- Through color temperature control, you can change the tone of color
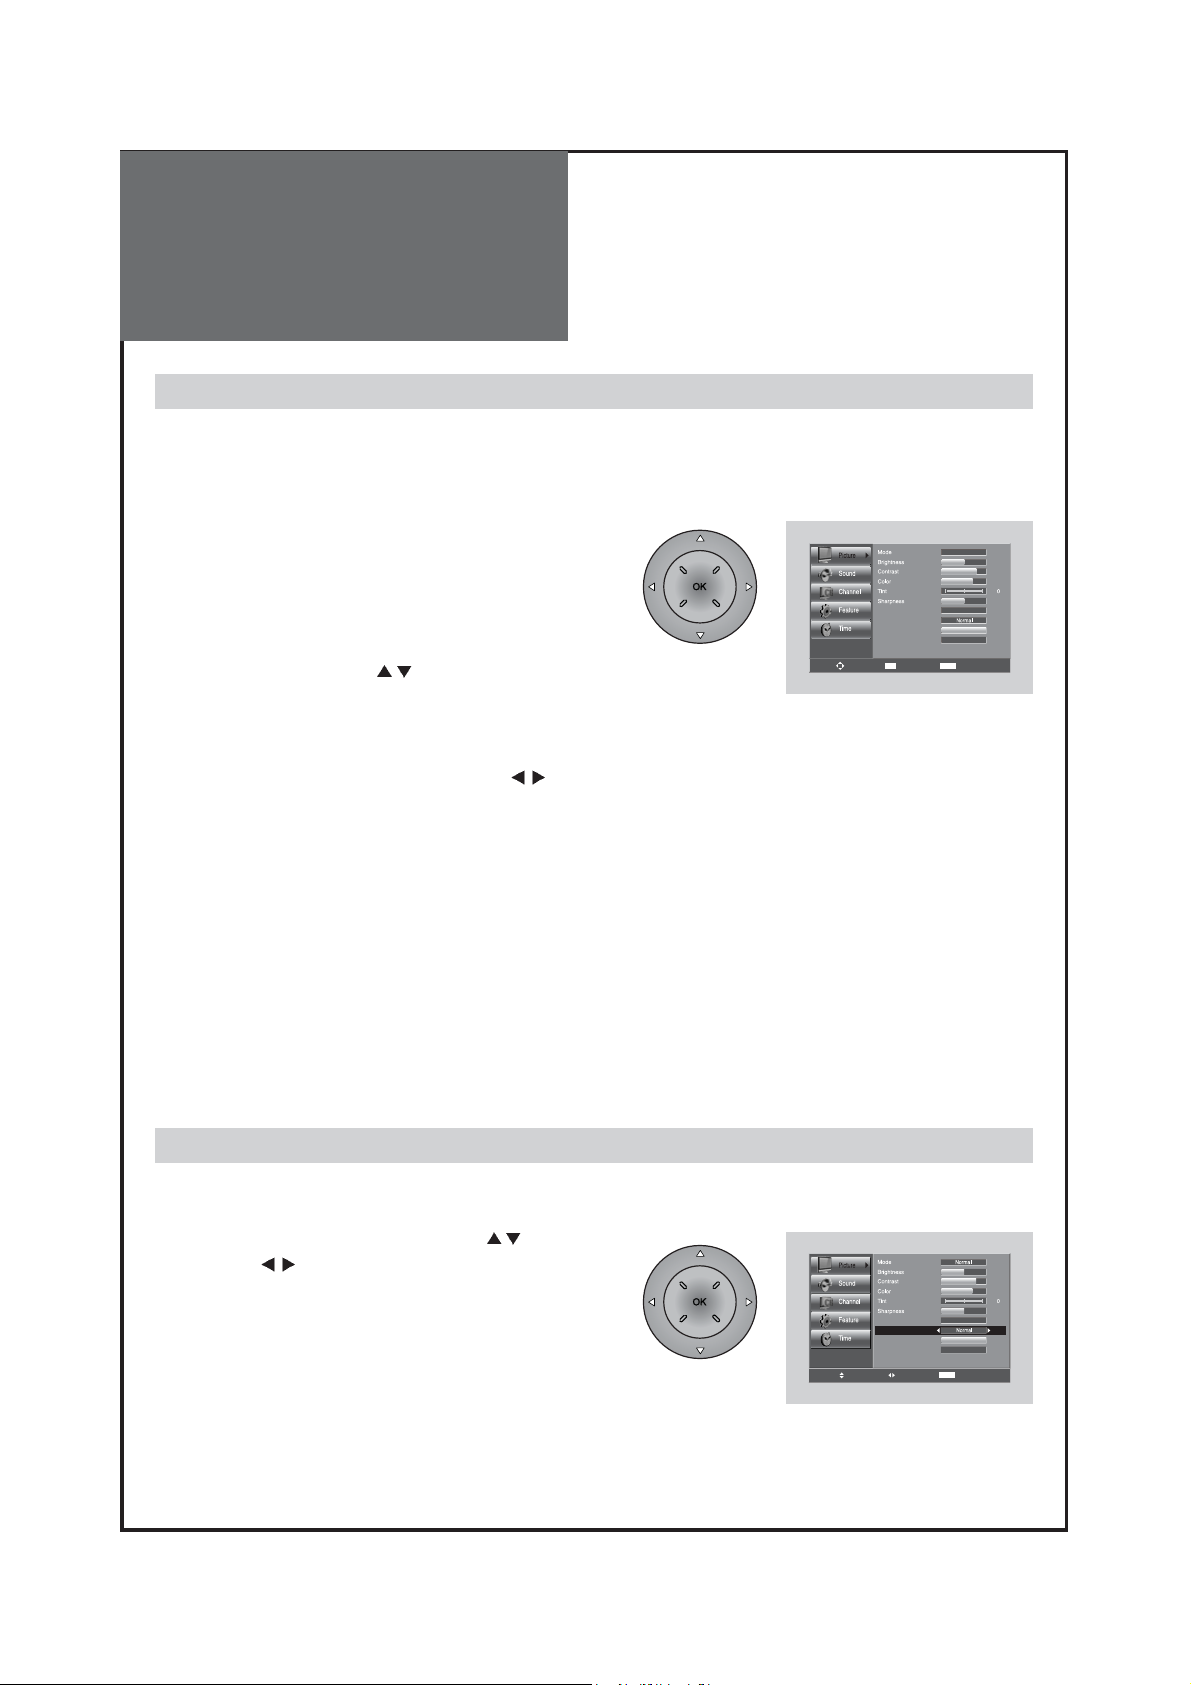
When adjusting the screen to taste
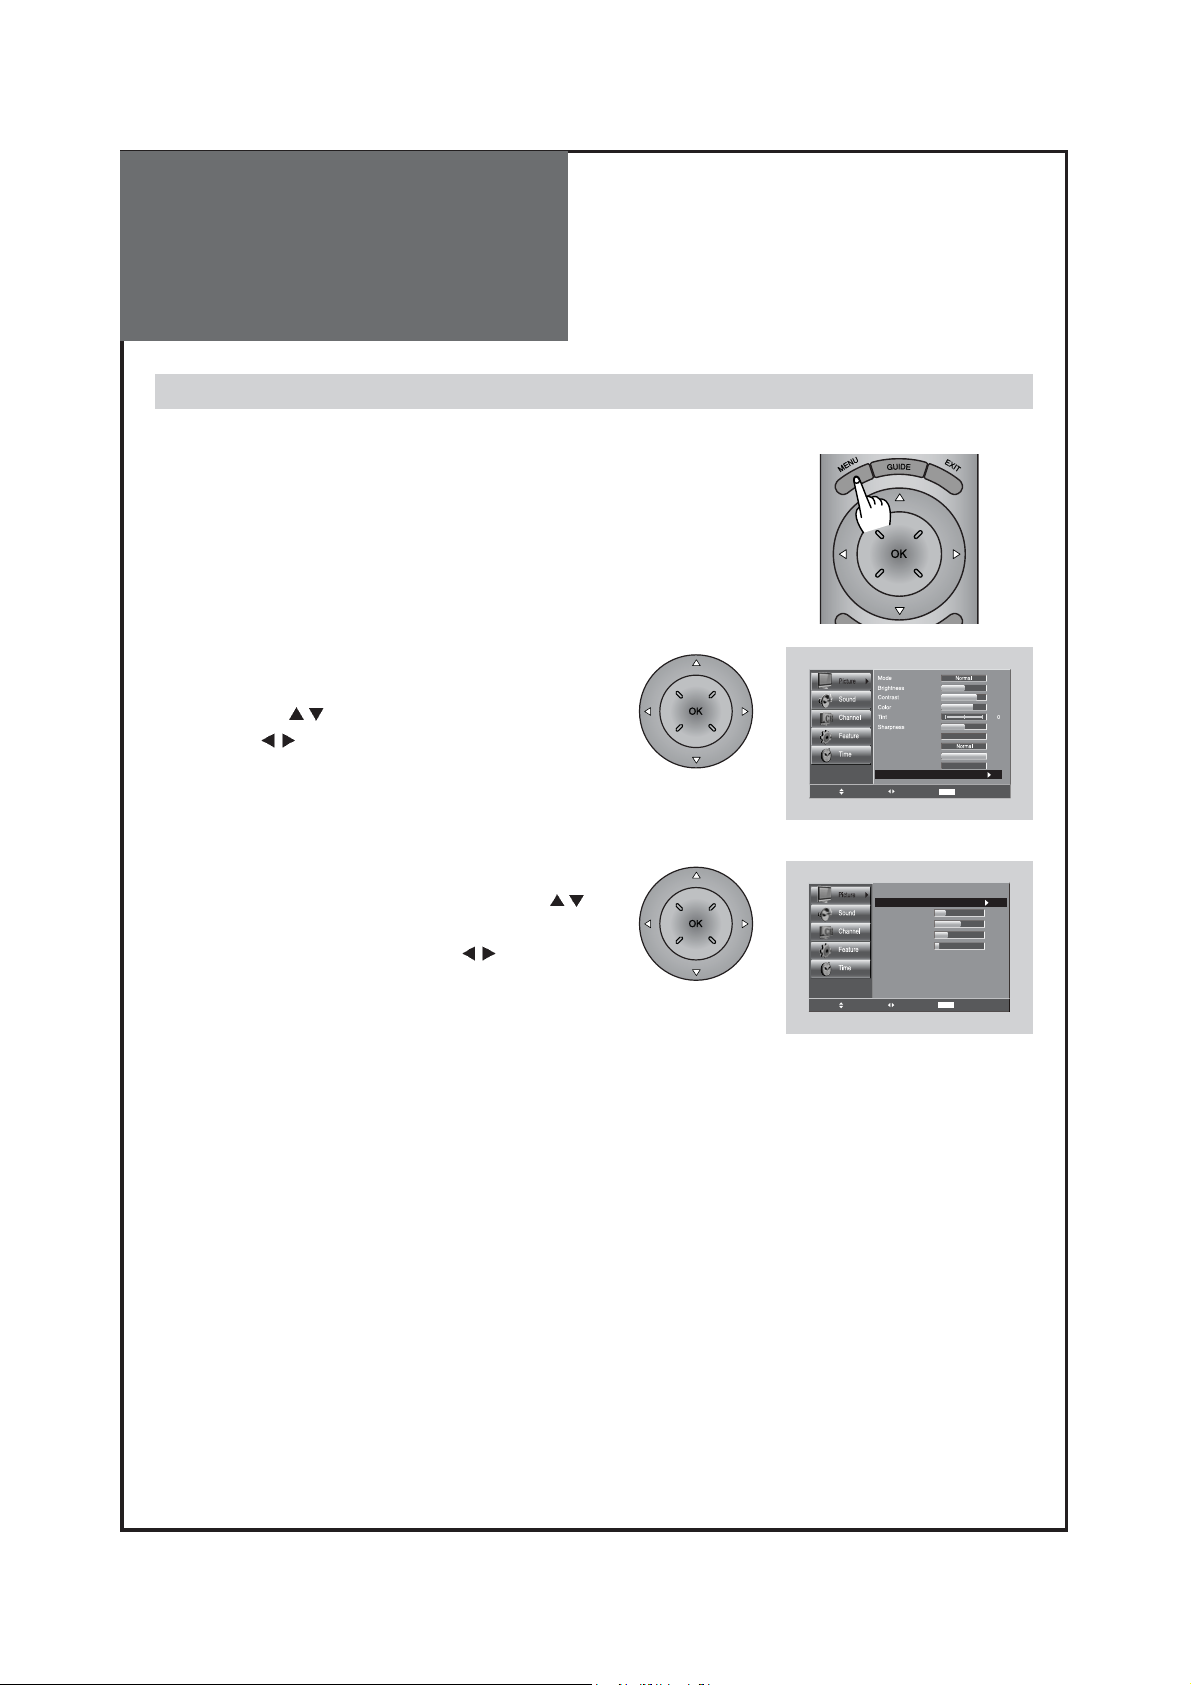
1. Select Picture by pressing the “Menu” button.
• The menu screen appears as follows.
2. Select and adjust each items.
• Move to the PICTURE menu.
• Whenever pressing the ”
” button, you can select in
order of Brightness, Contrast, Color, Tint, Sharpness,
Noise Reduction, Color Temp., Dimming, Aspect Ratio,
PC Screen Mode(Only in PC Mode).
• You can adjust all items by pressing the ”
” buttons
Note:
• Brightness : Adjust the whole of screen brighter or darker.
• Contrast : Adjust difference between brightness and darkness between objects and background on the screen.
• Color : Adjust color thinly or thickly.
• Tint : Adjust the natural tint of the image.
• Sharpness : Adjust outline of the screen smoothly or sharply.
• N . R : Reduce the noise in the picture due to poor reception or poor picture quality (Only IN TV (Analog
mode) and AV1/2 mode).
Note:
• Tint actives when receiving a NTSC signal.
• The adjusted levels are stored automatically in User mode.
1. Move to the Color Temp menu with ”
” buttons.
• Press the ”
” buttons, select the desired Color
Temperature.
Note:
• Normal : Normal White
• Warm : Reddish white
• Cool : Bluish white
Adjustment of Color Temperature in TV
Noise Reduction
Color temp.
Dimming
Move
Aspect Ratio
PC Screen Mode
OK Select MENU Exit
User
RG
Off
16 : 9
42
81
58
50
10
RG
Noise Reduction
Color temp.
Dimming
Aspect Ratio
PC Screen Mode
Move Change MENU Return
42
81
58
4
Off
10
16 : 9

Sound Adjustment
42
When adjusting sound to taste
1. Adjust the Balance
• Move to Balance in the Sound menu.
• Adjust the balance level by pressing the ”
”
buttons.
When selecting various sound Effects
1. Sound mode selects what you want.
• Move to Effect in the Sound menu.
• Select desirable Sound mode by pressing the ”
” buttons. (under the effect mode is off)
• The Screen status changes as followed : Dynamic Bass => ST Voice => off => Dynamic Bass
Note.
• ST Voice : Allows human voice to be heard more clearly.
• Dynamic Bass : Suitable for the bass effect.
2. Select AVC (Auto Volume Control)
• Move to AVC in the Sound menu.
• Select either AVC On/Off by pressing the ”
”
buttons.
- The user can enjoy various sounds by adjusting Effect, Mode, Equalizer, Balance, Auto Volume Control,
Digital Volume and Speaker.
Off
Equalizer
Auto Volume Control
Digital Volume
Speaker
Move Change MENU Return
Normal
Off
16
On
ST Voice
Equalizer
Auto Volume Control
Digital Volume
Speaker
Move Change MENU Return
Normal
Off
16
On
Move Change MENU Return
Equalizer
Auto Volume Control
Digital Volume
Speaker
Dynamic Bass
Normal
Off
On
16
Off
Equalizer
Auto Volume Control
Digital Volume
Speaker
Move Change MENU Return
Equalizer
Auto Volume Control
Digital Volume
Speaker
Move Change MENU Return
Normal
Normal
Off
On
Off
Off
On
16
16

Sound Adjustment
43
When adjusting sound to taste
3. Sound mode selects what you want.
• Move to Mode in the Sound menu.
• Select desirable Sound mode by pressing the ”
” buttons.
(under the effect mode is off)
• The Sound status changes as followed : User => Normal => Movie => Music => News => User
Note :
• "Mode" function is available when the Effect is Off.
Equalizer
Auto Volume Control
Digital Volume
Speaker
Off
Normal
Off
On
16
Move Change MENU Return
Off
Equalizer
Auto Volume Control
Digital Volume
Speaker
Move Change MENU Return
Equalizer
Auto Volume Control
Digital Volume
Speaker
Move Change MENU Return
User
Off
16
On
Off
News
Off
16
On
Equalizer
Auto Volume Control
Digital Volume
Speaker
Move Change MENU Return
Equalizer
Auto Volume Control
Digital Volume
Speaker
Move Change MENU Return
Movie
Music
Off
Off
16
On
Off
Off
16
On

Sound Adjustment
44
When adjusting sound to taste
4. Adjust the audio Equalizer
• Move to Mode in the Sound menu.
• Select User mode by pressing the ”
” buttons.
• Select and use the relevant frequency by pressing the
” ”
buttons.
• You can adjust the degree of the frequency
by pressing
the
” ”
buttons.
5. Adjust the Digital Volume (Digital TV mode only)
• Move to Digital volume in the Sound menu.
• Adjust the Digital volume level by pressing the
”
” buttons.
Note:
• Equalizer adjustment is available in User mode.
• Equalizer: High quality sound range adjustment method used
for audio product.
10 kHZ: High sound range
1/3.3 kHz: Middle sound range
100/330 Hz: Low sound range
Note:
• Digital volume is available in DTV mode.
Off
Equalizer Setting
User
Normal
Off
Off
Off
Equalizer
Auto Volume Control
Digital Volume
Speaker
Move Change MENU Return
10 KHz
3.3 KHz
1 KHz
330 Hz
100 Hz
Move Change MENU Return
Equalizer
Auto Volume Control
Digital Volume
Speaker
Move Change MENU Return
16
On
16
On

Sound Adjustment
45
Note: The availability of these additional audio tracks depends on the program.
• In DTV broadcasting, you can select audio tracks
(simultaneous translations of the program into foreign
languages) by pressing the “MTS” button.
Choosing a Multi-Channel Sound (MTS) in analog and digital
1. Mono Sound Selection (Mono/Stereo/AutoSAP) – Analog TV Mode
• If the Stereo reception is weak, you can switch to MONO by pressing
the “MTS” button. Then the OSD character will be change to “Mono”.
In Mono reception the depth of sound is improved.
• To switch back to stereo, press the “MTS” button again.
Note: The availability of these additional audio tracks depends on the program.
2. Audio track Selection – Digital TV Mode
MTS:
Mono
MTS:
Stereo
MTS:
Auto SAP

Features Closed Caption
46
Note.
• The Closed Caption feature doesn’t work in Component, HDMI and PC modes
• Closed Caption: The availability of captions depends on the program being broadcast
CC1 : The Primary Synchronous Caption Service. These are captions in the primary language that
must be in sync with the sound, preferably matched to a specific frame.
CC2 : The Special Non-Synchronous Use Captions.
This channel carries data that is intended to augment information carried in the program.
CC3 : Secondary Synchronous Caption Service.
Alternate program-related caption data, typically second language captions.
CC4 : Special Non-Synchronous Use Captions. Similar to CC2.
• The Closed Caption feature doesn’t work in PIP/POP mode.
Viewing Closed Caption (On-Screen Text Messages) - Analog
1. Caption mode selects what you want.
• Move to Caption in the Features menu.
• Select Caption by pressing the ”
” buttons.
• Select desirable Analog CC by pressing
the ”
” buttons.
• The Analog CC changes as followed:
CC1 => CC2 => CC3 => CC4 => TEXT1 => TEXT2 =>
TEXT3 => TEXT4 => SERVICE1 => SERVICE2 =>
SERVICE3 => SERVICE4 => SERVICE5 => SERVICE6
Move Change MENU Return
Move Change MENU Return
Parental Control
Language
Caption
Menu Opacity
MGDI Demonstration
Initialize
Caption
Closed Caption CC1
Caption Style
CC on Mute
English
11
OOnff

Features -
Closed Caption
47
1. Caption mode selects what you want.
• Move to Caption in the Features menu.
• Select Caption by pressing the ”
” buttons.
• Select desirable Closed Caption by pressing the
”
” buttons.
• The Digital CC changes as followed:
CC1~4 => Text1~4 => Service1~6
2. Caption Style selects what you want. (In Digital TV
mode Only)
• Move to Caption Style in the Features menu.
• Select Caption Style by pressing the ”
” buttons.
• Press the ”
” buttons to select the desired submenu options (see options below), and then presses
the ”
” buttons.
Note:
• Service 1~6 in digital caption mode may not be
available depending on the broadcast.
Note:
• The digital caption feature is available only in Digital TV mode.
• The availability of captions depends on the program being broadcast.
• Default means to follow the standard set by the broadcaster.
• Text Size: This option consists of Default, Small, Standard, and Large. The default is Standard.
• Text Font: This option consists of Default, Font1~7. You can change the font you want. The default is Style 0.
• Text Color: This option consists of Default, Black, White, Red, Green, Blue, Yellow, Magenta, and Cyan. You can
change the color of the letter. The default is White.
• BG Color: This option consists of Default, Black, White, Red, Green, Blue, Yellow, Magenta, and Cyan. You can
change the background color of the caption. The default is Black.
• BG Opacity: This option consists of Default, Light, and Transparent. You can change the Background opacity of the
caption.
Viewing Closed Caption (On-Screen Text Messages) - Digital
Parental Control
Language
Caption
Menu Opacity
MGDI Demonstration
Initialize
Move Change MENU Return
Caption
Closed Caption CC1
Caption Style
CC on Mute
Move Change MENU Return
English
OOnff
11
Caption
Closed Caption CC1
Caption Style
CC on Mute
OOnff
Move Change MENU Return
Text Size
Text Font
Text Color
BG Color
Text Opacity
BG Opacity
Edge Style
Edge Color
Move Change MENU Return

Features Parental Control
48
1. Change password
• Move to Parental control in the Features menu.
• The message “Enter password” will appear. Enter
your 4 digit password
Note:
• The default password of a new TV set is “0-0-0-0”.
• Move to Change Password in the Parental Control
• Press the ”
” buttons to change the password.
• The Change password screen will appear. Choose
any 4 digits for new password and enter them.
Note:
• If you forget the password, you must call the Service Center.
Adjustment of Parental Control
- The Parental control feature automatically looks out programs that are deemed inappropriate for children.
-
-
Parental Control
Language
Caption
Menu Opacity
MGDI Demonstration
Initialize
Move Change MENU Return
Parental Control
Language
Caption
Menu Opacity
MGDI Demonstration
Initialize
Move Change MENU Return
English
Enter Password
English
0~9 Enter
- - - -
11
MENU Return
11
Rating Status
MPAA
TV-Rating
Can.English Rating
Can.French Rating
Change Password
Move Change MENU Return
Parental Control
Enter Password
Language
Caption
Menu Opacity
MGDI Demonstration
Initialize
Move Select MENU Return
English
New Password
Confirm
0~9 Enter OK OK
Off
11
Cancel OK
MENU Return
- - - -
- - - -

Features -
Parental Control
49
2. Rating Status
• Move to Rating Status in the Parental Control
• Select either On or Off by pressing the ”
”
buttons.
Adjustment of Parental Control
3. MPAA
• Move to MPAA in the Parental Control and press the
”
” buttons.
• The MPAA screen will appear.
Press the ”
” buttons to select the MPAA categories:
G: General audience
PG: Parental guidance
PG-13: Viewers 14 and over
R: Mature audience
NC17: No children under age 17
X: Adults only
NR: Not rated
• Press the “OK” button. Depending on your existing
setup, the “ “ symbol will be selected.
(blank = unblocked “ “ = Blocked)
Note:
• The Parental Control will automatically block any categories that are “more restrictive”.
For example, if you block PG-13 category, then R, NC and X will automatically be blocked also.
Rating Status
MPAA
TV-Rating
Can.English Rating
Can.French Rating
Change Password
Move Change MENU Return
Rating Status
MPAA
TV-Rating
Can.English Rating
Can.French Rating
Change Password
Move Change MENU Return
G Suitable for All Ages
PG
PG13
R
NC17
X
NR
Move MENU ReturnOK OK
On
MPAA
Parental Guidance Suggested
Parents Strongly Cautioned
Rested. under 17 must be accompanied by adult
No One 17 and Under Admitted
No One 17 and Under Admitted
Not Rated by MPAA
Off

Features Parental Control
50
4. TV Rating
• Move to Block and select Block to On.
• Move to TV Rating in the Parental Control and press the
”
” buttons.
• The TV Rating screen will appear.
Press the ”
” buttons to select one of the six aged
based categories:
Y: Young children
14: Viewers 14 and over
Y7: Children 7 and over
MA: Mature audience
G: General audience
PG: Parental guidance
• Press the “OK” button. Depending on your existing
setup, the “ “ symbol will be selected.
(blank = Unblocked “ “ = Blocked)
Note:
• The Y, Y7, G, PG, 14 and MA have additional options.
FV: Fantasy violence / D: Sexually Suggestive Dialog / L: Adult Language / S: Sexual situation / V: Violence
•
The Parental Control will automatically block certain categories that are “more restrictive”. For example, if you block “Y”
category, then Y7 will automatically be blocked. Similarly, if you block the G category, then all the categories in the “young
adult” group will be blocked (G, PG, 14, and MA). The Sub-ratings (D, L, S, and V) work together similarly.
• Select on of these TV-Ratings(Y, Y7, G, PG, 14 and MA)
and press the ”
” buttons.
• Press the “OK” button to select the sub-rating.
Note:
• The Parental Control will automatically block certain categories that are “more restrictive”. For example,
if you block “L” sub-rating in PG, then the L sub-rating in 14 and MA will automatically be blocked
Adjustment of Parental Control
Rating Status
MPAA
TV-Rating
Can.English Rating
Can.French Rating
Change Password
Move Change MENU Return
On
TV Rating
Children
Y
Y7
FV
General
G
PG
DLSV
14
D L S V
MA
L
S
Allow All
Move OK OK MENU Return
V
TV Rating
Move OK OK MENU Return
Y
Y7
FV
General
G
PG
DLSV
14
D L S V
MA
Allow All
Children
L
S
V

Features -
Parental Control
51
Adjustment of Parental Control
5. Can. English Rating :
• Move to Can. English Rating in the Parental Control
and press the “
“ buttons.
• The Can. English Rating screen will appear.
Press the “VOL” buttons to select the Can. English
Rating categories: Press the EXIT button to exit.
C: Programming intended for children under age 8.
C8+: Programming generally considered
acceptable for children 8 years and over to
watch on their own.
G: General programming, suitable for all
audiences.
PG: Parental Guidance.
14+: Programming contains themes or content
which may not be suitable for viewers under
the age of 14.
18+: Adult programming.
• Press the “OK” button. Depending on your existing
setup, the “ “ symbol will be selected.
(blank = unblocked “ “ = Blocked)
Note:
The Parental Control will automatically block any
category that are “more restrictive” For example, if
you block G category, then PG, 14+ and 18+ will
automatically be blocked also.
Rating Status
MPAA
TV-Rating
Can.English Rating
Can.French Rating
Change Password
Move Change MENU Return
E Exempt
C
C8+
G
PG
14+
18+
Move MENU ReturnOK OK
Can.English Rating
Children under ages 8
Children ages 8 and over
General
Parental Guidance Suggested
Ages 14 and over
Ages 18 and over
Allow All
On

Features Parental Control
52
6. Can. French Rating :
• Can. French Rating in the Parental Control and press the
“
“ buttons.
• The Can. French Rating screen will appear.
Press the “
“ buttons to select the Can. French Rating
categories: Press the EXIT button to exit.
G: General
8 ans+ : Programming generally considered acceptable
for children 8 years and over to watch on their
own.
13 ans+: Programming may not be suitable for children
under the age of 13.
16 ans+: Programming is not suitable for children under
the age of 16.
18 ans+: Programming restricted to adults.
• Press the “OK” button. Depending on your existing
setup, the “ “ symbol will be selected.
(blank = unblocked “ “ = Blocked)
Note:
The Parental Control will automatically block any
category that are “more restrictive” For example, if you
block 8 ans+ category, then 13 ans+, 16 ans+ and 18
ans+ will automatically be blocked also.
7. Downloadable RRT :
Allow all: Press to unlock all TV ratings.
Block all: Press to lock all TV ratings.
Parental restriction levels differ depending on the
broadcasting station.The default menu name and
Downloadable US rating changes depending on the
downloaded information. Even if you set the On-screen
display to your desired language, the “Downloadable
U.S. Rating” menu will appear in English only.
The rating will automatically block certain categories that
are more restrictive.
The rating titles (For example: Humor Level..etc) and TV
ratings (For example: DH, MH, H..etc) may differ
depending on the broadcasting station.
Rating Status
MPAA
TV-Rating
Can.English Rating
Can.French Rating
Change Password
Move Change MENU Return
On
E Exempt
C
8ans+
13ans+
16ans+
18ans+
Move MENU ReturnOK OK
Can.French Rating
For all
Children ages 8 and up
Teenagers 13 and up
Teenagers 16 and up
Adults 18 and up
Allow All

53
1. Setup of MGDi Demonstration
• Move to MGDi Demonstration in the Features menu.
• Press the ”
” buttons. In this demo version of
MGDi you can only see the functional difference of
ON/OFF, not the difference of quality of picture.
1. Setup of Menu Opacity
• Move to Menu Opacity in the Features menu.
• Adjust the translucent level of OSD background
by pressing the ”
” buttons.
Note:
• New technology, MGDi Demonstration, brings viewers more detailed,
clearer and more natural image with picture compensation algorithm.
• MGDi Demonstration is not available in PC and HDMI mode.
When viewing how MGDi improves the picture.
Selection of Language
1. Select Language
• Move to Language in the Features menu.
• Select your desired language by pressing the
”
” buttons. Then it will be setting automatically.
• The language change as the followed:
English => Español => Français => English
When adjusting the transparency of the menu screen
Features - ETC
Parental Control
Language
Caption
Menu Opacity
MGDI Demonstration
Initialize
Move Change MENU Return
English
11
Parental Control
Language
Caption
Menu Opacity
MGDI Demonstration
Initialize
Move Change MENU Return
Parental Control
Language
Caption
Menu Opacity
MGDI Demonstration
Initialize
Move Change MENU Return
English
English
11
11

Time Setting
54
1. Clock Menu
• Move to Clock mode in the Time menu.
• It can change ‘MANUAL’ , ‘AUTO’ by pressing
“
“ buttons.
2. Current Time Set
• Move to Current Time Set in the Time menu.
• To go to the Current Time Set, press the “
“
buttons.
• Place the cursor to AM / PM / Hour / Min. /
Month / Day /Year. with “
“ buttons.
• Set the AM / PM / Hour / Min. / Month / Day
/Year.with the “
“ buttons and then presses
the “MENU” button to complete.
Note :
1. Information of Auto Clock is required to DTV signal.
2.Current Time Set is available in MANUAL mode.
3. Time Zone
• Move to Time zone in the Time menu.
• Select the Time zone to desirable Time zone by
pressing the “
“ button.
• The Time zone change as the followed:
Central => Eastern => Atlantic => Hawaii =>
Alaska => Pacific => Mountain
Adjustment of Time
Clock Mode Auto
Current Time Set AM 12:00
Time Zone
DST
Sleep Timer
On Timer
Off Timer
Move Change MENU Return
Clock Mode Auto
Current Time Set AM 12:00
Time Zone
DST
Sleep Timer
On Timer
Off Timer
Move Change MENU Return
Eastern
Auto
Eastern
Auto
Off
Off
Clock Mode Auto
Current Time Set AM 12:00
Time Zone
DST
Sleep Timer
On Timer
Off Timer
Move Change MENU Return
Eastern
Auto
Off

4. Setting the On Timer / On Time / On CH / On
Volume
• Move to Wake Timer in the Time menu.
• Select the Wake Timer to "On" by pressing the
” ”
button.
• Move to Wake Time with the ”
” buttons.
• To go to Wake Time, press the
”
”
buttons.
• Place the cursor to AM/PM / Hour / Min. with
” ”
buttons.
• Set the AM/PM / Hour / Min. with the ”
” buttons
and then press the “OK” and then press “MENU”
buttons.
• Move to Wake CH. in the Time menu.
• Select the Wake CH. to desirable Channelby pressing
the ”
” buttons.
• Move to Wake Vol. in the Time menu.
• Select the Wake Vol. to desirable Volume by pressing
the ”
” buttons.
Note:
• Confirm the Current Time is set. The Wake Timer is only available when the Current Time is set.
• The set will be turned on at selected time.
•
If adjusted once, the Wake Time continues to operate everyday unless canceling setup or turn the AC power off.
Adjustment of On Timer
Time Setting
55
Clock Mode Auto
Current Time Set AM 12:00
Time Zone
DST
Sleep Timer
On Timer
Off Timer
Move Change MENU Return
On Timer On
On Time Set
Time Input
On Timer Channel
On Timer Volume
Move Change MENU Return
On Timer
Eastern
Auto
Off
Cable
1
20
On Timer On
On Time Set
Time Input
On Timer Channel
On Timer Volume
Move Change MENU Return
On Timer On
On Time Set
Time Input
On Timer Channel
On Timer Volume
Move Change MENU Return
On Timer
On Timer
Cable
Cable
1
20
1
20

Time Setting
56
5. Setting DST
• Move to DST in the Time menu. and select On, Off with
” ”
buttons.
Note: Timezone and DST is available in Auto Clock mode
6. Setting the Sleep mode.
• By pressing the
” ”
button on the remote control
repeatedly, you can select one of the following settings:
Sleep Timer:
Off => 5 => 10 => 15 => 30 => 45 => 60 =>
90 => 120 => Off
• The set will turn off after the time you select.
Note:
• If an active signal is not present for about 30 minutes,
the set will automatically turn to Stand-by mode.
Adjustment of Off Time
Clock Mode Auto
Current Time Set AM 12:00
Time Zone
DST
Sleep Timer
On Timer
Off Timer
Eastern
Auto
Off
Move Change MENU Return
Clock Mode Auto
Current Time Set AM 12:00
Time Zone
DST
Sleep Timer
On Timer
Off Timer
Move Change MENU Return
Eastern
Auto
Off

Channel Banner
57
1. General Information
Channel Mode: Display the current channel mode (Air/Cable/DTV).
Channel Number: Displays the current channel number.
Channel Name: Displays the current channel name. (Digital TV mode only)
Program Name: Displays the current program name. (Digital TV mode only)
Program information: Displays the current program information. (Digital TV mode only)
Program time: Display the current / next program time (start ~ end). (Digital TV mode only)
Icon: Displays the service items (Channel State, Screen Size, Audio Service, Dolby Digital, Favorite
Channel, and ETC) in the current program.
Note: Owing to our policy of continuous improvement, the availability of icon which depends upon
the program may change.
Current time: Displays the current time.
Channel Banner
- The channel banner displays information about a channel number, name,
broadcasting time, audio service and more. You can see this banner by pressing
“OK” button on the Remote Control.
6
DIGITAL
9
-1
ABC D-1
Strong
4
ABC News
5
Next Program : ABC Monie : Omega Man
4:00 PM 12:00 PM
7
ENGLISH16:91080i
DOLBY DIGITAL
2007
Web. Dec 25
4:45 PM
8

Channel Banner
58
Electronic Program Guide (EPG) (Digital TV mode only)
- The DTV Electronic Program Guide (EPG) displays program information
about each channel, up to seven days ahead.
- You can edit your own profiles, and record programs.
- By pressing the “GUIDE” button to access EPG directly, you can see all
channels broadcasting now.
Note:
• The EPG channel is only available when watching DTV channels.
1. Select a desired channel
• Select a channel with the ”
” buttons.
• Press the “GUIDE” button and move a program with the ”
”
buttons.
• If you need detail information, press the
”
” button.
Program Guide 12/06/2008 05:21 PM
Channels
5-1 WNYW DT
5-2 WNYW DT
Move OK Watch Channel CH +/- Page Move MENU Exit
05:00 PM The Tyra Banks Show
06:00 PM Girlfriends
06:30 PM The Bernie Mac Show
07:00 PM The King of Queens
07:30 PM The King of Queens
08:00 PM IFL Battleground
10:00 PM My 9 News
11:00 PM The Bernie Mac Show
11:30 PM One on One
12:00 PM Malcolm in the Middle
Schedule

Troubleshooting
59
Please check the following items before asking for repair service.
Symptoms and Solutions
Symptom Check items
Neither picture - Check the contact of sockets is all right.
nor sound - Check the TV main power is on.
Picture is OK - Check the Volume control is set to minimum or mute.
but no sound
Sound is OK, but - Check the color control and adjust it properly.
no color. - Check the program is in color and not in black & white.
The picture has - Check the antenna is installed correctly and if not, adjust the overlapped
image. antenna toward the broadcasting station.
Picture has “snow - Check the antenna or its connection is correct and if not, correct the
noise”. antenna fault or connection cable fault.
- Check if car traffic or neon sign disturbs the sound effect.
Stripes on - Check the susceptible interference by other electronic devices such
picture. as radio and television and keep magnetic or electronic devices
away from the TV.
Bad stereo or Dual - Long distance from the station or other radio waves can generate
sound. bad sound reception. If so, change the mode to Mono.
Remote control - Check if the batteries in the Remote control are dead.
does not - Check if any object between IR sensor of the TV and the Remote
work. control does not obstruct.
R
E
W
O
P
E
T
U
M
123
456
9
78
H
C
.
V
E
R
P
0
0
0
1

Troubleshooting
60
In Digital TV mode
• AFTER SALES SERVICE
Do not hesitate to contact your retailer or service agent if a change in the performance of your product
indicates that a faulty condition may be present.
Some Problems will only occur when viewing DTV channels.
Due to the different techniques involved in digital reception, DTV signal quality can be poor even if you
appear to have a strong signal when viewing analog programs.
The DTV system requires a good quality signal to provide the best picture. When viewing analog pictures,
interference such as signal reflection from nearby buildings or mountains causes ‘ghosting’, but still
provides a viewable picture. For the DTV system, Interference such as this can disrupt the flow of data
causing the picture to appear to be made up of large blocks, or to freeze intermittently. If the picture
disappears completely, this could mean that signal quality is very poor. If this happens often, you may need
to improve your aerial system to provide a better signal. This TV contains a complex microprocessor which
enables you to view enhanced digital services. Occasionally this device may need to be reset. This can be
done by pressing the stand-by button on your remote control or the power switch on the front panel.
SYMPTOM CHECKS
Check that DTV transmissions are available from
the transmitter you are currently using. If not, try
directing the aerial at another local transmitter.
No DTV Channels listed in the TV Guide after Auto Setup
Check analog transmissions. If picture quality is
poor, you will need to improve or change your
aerial system to receive DTV channels. Consult a
local installer.
Blocky interference. Blocky interference indicates that the signal
quality is poor.
Picture freezes intermittently. You should consider improving your aerial
system.
To check the quality of your signal use the Signal
strength (See page 29)
SYMPTOM CHECKS
- Check the resolution and frequency of your PC.
Then, adjust them to optimum condition for LCD TV.
“NO SIGNAL” appears on the screen. - Refer to the table of PC mode input format. (If
registered resolution and Frequency on the table no
listed then no picture will be displayed.)
“Not available” appears on the screen. - Ensure that the signal cable is firmly connected to PC
and TV.
Image is not clear. - Adjust the PHASE control.
Image is not centered. - Run the Auto setup.
In PC mode

61
Standard of
Product
Owing to our policy of continuous improvement, specifications may change.
Screen Size 32” 37” 42” 42”(Full HD)
LCD Panel
Aspect Ratio 16:9 16:9
Resolution 1366 x 768 (WXGA) 1920 x1080 (FHD)
Pixel Pitch
170.25 x 510.75 x RGB 0.200 x 0.600 mm x RGB 0.227 x 0.681 mm x RGB 0.4845 x 0.4845 mm x RGB
Dimension(W x H x D) Set Dimension 806 x 626.5 x 230mm 940 x 720 x 328.5mm 1060 x 823 x 328mm 1060 x 823 x 328mm
Power Consumption
Marked on the back of the product
TV System NTSC, ATSC
Power Source 110 ~ 220V, 60Hz

“GOLDEN WARRANTY”
Crosley Corporation warrants this product to be free from defects in material and workmanship and
agrees to repair or replace this product to remedy such defects.
This warranty covers TWO YEAR LABOR and TWO YEAR PARTS from the date of the original
purchase.
This warranty applies only to product purchased from an authorized Crosley dealer and used within
the boundaries of the U.S.A. and Canada.
This warranty does not apply to product that has been improperly installed, subjected to usage for
which the product was not designed, misused or abused, damaged during transportation, or which has
been altered or repaired in any way that affects the reliability or detracts from its performance.
How you get warranty service
Warranty service can only be provided by an authorized Crosley service center. For the closest
authorized service center to you, please contact your Dealer. In order to receive warranty service you
must provide the authorized service center with a copy of proof of purchase, signifying the date of
purchase and the name of the Dealer from whom you purchased the product.
Statutory warranties
The purchaser may have rights under existing provincial or federal laws, and where any terms of this
warranty are prohibited by such laws, they are deemed null and void, but the remainder of the
warranty shall remain in effect.
If you require further assistance, please contact the Crosley dealer or go to:
www
.crosley.com to locate your nearest Crosley Distributor.
Crosley Corporation
111 Cloverleaf Drive, Suite 200
Winston-Salem, NC 27103
Service Call Toll Free Number: 1-877-393-7823
 Loading...