

Page 1
Use & Care Guide
Kenmore
Manual de Uso y Cuidado
1.5 Cu. Ft., 1000 Watts
1.5 Pies.Cúbicos, 1000 Vatios
Models/Modelos:
111.71519810 - Black /
111.71513810 - Stainless Steel /
Negro
®
Acero Inoxidable
Customer Assistance/Asistencia al Cliente
1-844-553-6667 press 2/presione 2
Sears Brands Management Corporation
Hoffman Estates, IL 60179 U.S.A.
www.kenmore.com
www.sears.com
®
Page 2

IMPORTANT!
FAN OPERATION NOTICE
At the end of longer cooking cycles it is normal operation for
the fan to continue running to cool the oven electronic system.
After 5 minutes with no further cooking activity the fan will
automatically shut off. However, you can begin a new
cooking cycle even while the fan is running.
Page 3

PRECAUTIONS TO AVOID POSSIBLE
EXPOSURE TO EXCESSIVE MICROWAVE
ENERGY
(a) Do not attempt to operate this oven with the door open since this can result in harmful
exposure to microwave energy. It is important not to defeat or tamper with the safety
interlocks.
(b) Do not place any object between the oven front face and the door or allow soil or
cleaner residue to accumulate on sealing surfaces.
(c) Do not operate this oven if it is damaged. It is particularly important that the oven
door close properly and that there is no damage to the:
(1) DOOR (bent) or DOOR METAL SCREEN (cracks or breaks)
(2) HINGES AND LATCHES (broken or loosened)
(3) DOOR SEALS AND SEALING SURFACES
(d) The oven should not be adjusted or repaired by anyone except properly qualified
service personnel.
(e) WARNING :
any service or repair operation that involves the removal of a cover which gives
protection against exposure to microwave energy.
(f) WARNING :
they are liable to explode.
(g) WARNING :
instructions have been given so that the child is able to use the oven in a safe way and
understands the hazards of improper use.
(h) WARNING :
should only use the oven under adult supervision due to the temperature generated. (if
provided)
It is hazardous for anyone other than a competent person to carry out
Liquids and other foods must not be heated in sealed containers since
Only allow children to use the oven without supervision when adequate
When the appliance is operated in the combination mode, children
Specifications
Model: 111.71513810 / 111.71519810
Rated Voltage: 120V~ 60Hz
Rated Input Power(Microwave): 1650 W
Rated Output Power(Microwave): 1000 W
Grill: 1200 W
Convection: 1450 W
Combination: 1700 W
Oven Capacity: 1.5 cu.ft. / 42 L
Turntable Diameter: Ø 13.4 inch / 340 mm
External Dimensions: 22.9X22.0X14.9 inch (582X559X379 mm)
Net Weight: Approx. 48.9 Lbs (22.2 kg)
EN-1
Page 4

IMPORTANT SAFETY INSTRUCTIONS
WARNING
1. Read all instructions before using the
appliance.
2. Read and follow the specic: "PRECAUTIONS TO AVOID POSSIBLE EXPOSURE
TO EXCESSIVE MICROWAVE ENERGY"
found on page 1.
3. As with most cooking appliances, close
supervision is necessary to reduce the risk
of a re in the oven cavity.
4. To reduce the risk of re in the oven
cavity:
i) Do not overcook food. Carefully attend
the appliance when paper, plastic, or
other combustible materials are placed
inside the oven to facilitate cooking.
ii) Remove wire twist-ties and metal
handles from paper or plastic containers/
bags before placing them in the oven.
iii) If materials inside the oven ignite,
keep the oven door closed. Turn the
oven off, and unplug the appliance.
Disconnect the power cord, shut off
power at the fuse or circuit breaker panel.
iv) Do not use the oven cavity for storage
purposes. Do not leave paper products,
cooking utensils, or food in the cavity
when not in use.
v) Never operate an empty microwave
oven. Arcing or sparking in the oven
cavity may occur.
5. This oven must be grounded. Connect
only to properly grounded outlet. See
"GROUNDING INSTRUCTIONS" found on
page 3.
6. Install or locate this oven only in
accordance with the installation
instructions provided.
7. Some products such as whole eggs
and sealed containers-for example,
closed glass jars- are able to explode
and should not be heated in the oven.
To reduce the risk of burns, electric shock, re, injury to persons or
exposure to excessive microwave oven energy when using your
appliance, follow basic safety precautions, including the following:
8. Use this appliance only for its intended
uses as described in this manual. Do
not use corrosive chemicals or vapors
in this appliance. This oven is
specically designed to heat or cook
or dry food. It is not designed for
industrial or laboratory use.
9. As with any appliance, close
supervision is necessary when used
by children.
10. Do not operate this oven if it has a
damaged cord or plug, if it is not
working properly or if it has been
damaged or dropped.
11. This microwave should be serviced
only by qualifed service personnel.
12. Do not cover or block any openings on
the oven.
13. Do not store or use this appliance
outdoors.
14. Do not use this oven near water, for
example, near a kitchen sink, in a wet
basement, near a swimming pool, or
similar locations.
15. Do not immerse cord or plug in water.
16. Keep cord away from heated surfaces.
17. Do not let cord hang over edge of
table or counter.
18. When cleaning surfaces of door and
oven that come together on closing
the door, use only mild, nonabrasive
soaps or detergents applied with a
sponge or soft cloth.
19.
Do not consume foods immediately after
the oven nishes cooking. Heated foods,
especially pizza, may burn your mouth.
Allow foods to cool to a safe eating
temperature.
20. This appliance is for private household
use only.
EN-2
Page 5

21. Liquids, such as water, coffee, or tea
are able to be overheated beyond
the boiling point without appearing to
be boiling. Visible bubbling or boiling
when the container is
removed from the microwave oven is not
always present. THIS COULD RESULT IN
VERY HOT LIQUIDS SUDDENLY BOILING
OVER WHEN THE CONTAINER IS
DISTURBED OR A SPOON OR OTHER
UTENSIL IS INSERTED INTO THE LIQUID.
i) Do not overheat the liquid.
ii) Stir the liquid both before and
halfway through heating it.
iii) Do not use straight-sided containers
with narrow necks.
iv) After heating, allow the container
to stand in the microwave oven for
a short time before removing the
container.
v) Use extreme care when inserting
a spoon or other utensil into the
container.
SAVE THESE INSTRUCTIONS
22. Oversized foods or oversized metal
utensils should not be inserted in a
thicrowave oven as they may create a
re or risk of electric shock.
23. Do not clean with metal scouring pads.
Pieces can bum off the pad and touch
electrical parts involving a risk of
electric shock.
24. Do not store any materials, other
than manufacturer's recommended
accessories, in this oven when not in use.
25. Do not cover racks or any other part of
the oven with metal foil. This will cause
overtheating of the oven.
26. Do not operate the oven without the
glass tray in place.
Be sure it is properly sitting on the
rotating base.
EN-3
Page 6
GROUNDING INSTRUCTIONS
DANGER
Electric Shock Hazard
Touching some of the internal
components can cause serious
personal injury or death. Do not
disassemble this appliance.
DANGER
Electric Shock Hazard
An improperly grounded appliance
can result in electric shock. Do
not plug into an outlet until
appliance is properly installed
and grounded.
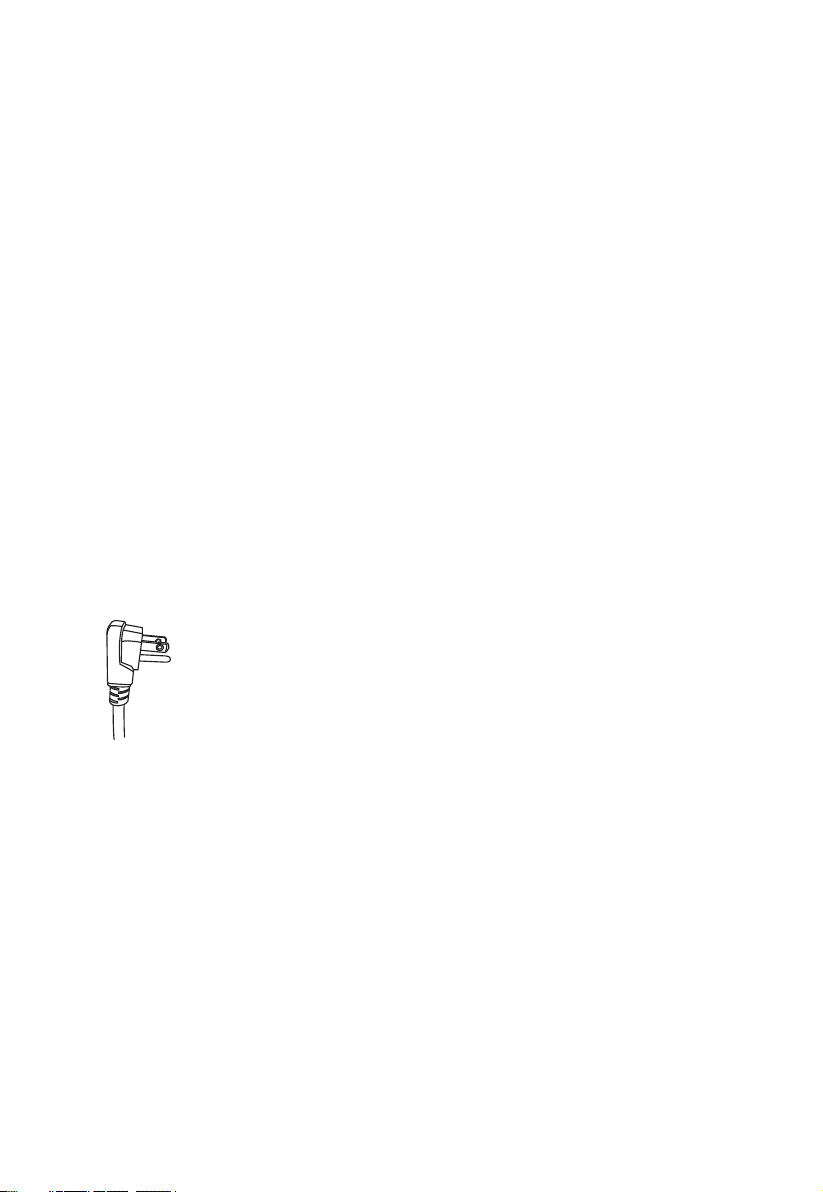
Three-pronged
(grounding) plug
This appliance must be grounded. In the event of
an electrical short circuit, grounding reduces the risk
of electric shock by providing an escape wire for the
electric current. To protect against electrical shock,
this appliance is equipped with a cord having a 3prong grounding-type plug for insertion into a proper
grounding-type receptacle. DO NOT alter the plug
for use in a 2-prong receptacle. DO NOT use a
3-prong adapter to enable the microwave to be
plugged into a 2-prong receptacle. If the plug will
not t into a receptacle, have the proper receptacle
installed by a qualied electrician.
Consult a qualied electrician or serviceman if the
grounding instructions are not completely understood
or if doubt exists as to whether the appliance is
properly grounded. If it is necessary to use an
extension cord, use only a 3-wire extension cord that
h as a 3-pronged grounding plug, and a 3-slot
receptacle that will accept the plug on the appliance.
The marked rating of the extension cord shall be
equal to or greater than the electrical rating of the
appliance.
1. A short power-supply cord is provided to reduce the risks resulting from becoming entangled in
or tripping over a longer cord.
2. Longer cord sets or extension cords are available and may be used if care is exercised in
their use.
3. If a long cord sets or extension cord is used:
i) The marked electrical rating of the cord set or extension marked electrical rating of
the cord set or extension cord should be at least as great as the electrical rating of the
appliance.
ii) The extension cord must be a grounding-type 3-wire cord.
iii) The longer cord should be arranged so that it will not drape over the countertop or
tabletop where it can be pulled on by children or tripped over unintentionally.
EN-4
Page 7

RADIO FREQUENCY INTERFERENCE
STATEMENT FEDERAL COMMUNICATIONS
COMMISSION (U.S.A ONLY)
WARNING:
This equipment generates and uses ISM frequency energy and if not installed and used
properly, that is in strict accordance with the manufacturer's instructions, may cause interference
to radio and television reception.
It has been type-tested and found to comply with limits for an ISM equipment pursuant to part
18 of FCC rules, which are designed to provide reasonable protection against such interference
in a residential installation.
However, there is no guarantee that interference will not occur in a particular installation.
If this equipment does cause interference to radio or television reception, which can be
determined by turning the equipment off and on, the user is encouraged to try correct the
interference by one or more of the followings.
• Reorient the receiving antenna of radio or television.
• Relocate the microwave oven with respect to the receiver.
• Move the microwave oven away from the receiver.
• Plug the microwave oven into a different outlet so that microwave oven and receiver are on
different branch circuits.
THE MANUFACTURER is not responsible for any radio or TV interference caused by
UNAUTHORIZED MODIFICATION to this microwave oven. It is the reponsibility of the user to
correct such interfercnce.
CAUTION UTENSILS
Personal injury Hazard
Tightly-closed utensils
could explode. Closed
containers should be opened
and plastic pouches should be
pierced before cooking.
See the instructions on "Materials you can use in
microwave oven or to be avoided in microwave oven."
There may be certain non-metallic utensils that are not
safe to use for microwaving. If in doubt, you can test the
utensil in question following the procedure below.
Utensils Test:
1. Fill a microwave-safe container with 1 cup of cold
water (250ml) along with the utensil in question.
2. Cook on maximum power for 1 minute.
3. Carefully feel the utensil. If the empty utensil is
warm, do not use it for microwave cooking.
4. Do not exceed 1 minute cooking time.
EN-5
Page 8

SAFE AND UNSAFE MATERIALS
Materials you can use in microwave oven
Utensils Remarks
Aluminum foil Shielding only. Small smooth pieces can be used to cover thin parts of
meat or poultry to prevent overcooking. Arcing can occur if foil is too
close to oven walls. The foil should be at least 1 inch (2.5cm) away from
oven walls.
Browning dish Follow manufacturer’s instructions. The bottom of browning dish must be
at least 3/16 inch (5 mm) above the turntable. Incorrect usage may cause
the turntable to break.
Dinnerware Microwave-safe only. Follow manufacturer's instructions. Do not use
cracked or chipped dishes.
Glass jars Always remove lid. Use only to heat food until just warm. Most glass jars
are not heat resistant and may break.
Glassware Heat-resistant oven glassware only. Make sure there is no metallic trim.
Do not use cracked or chipped dishes.
Oven cooking
bags
Paper plates
and cups
Paper towels Use to cover food for reheating and absorbing fat. Use with supervision
Parchment
paper
Plastic Microwave-safe only. Follow the manufacturer’s instructions. Should be
Plastic wrap Microwave-safe only. Use to cover food during cooking to retain
Thermometers Microwave-safe only ( meat and candy thermometers).
Wax paper Use as a cover to prevent splattering and retain moisture.
Follow manufacturer’s instructions. Do not close with metal tie. Make
slits to allow steam to escape.
Use for short–term cooking/warming only. Do not leave oven unattended
while cooking.
for a short-term cooking only.
Use as a cover to prevent splattering or a wrap for steaming.
labeled "Microwave Safe". Some plastic containers soften as the food
inside gets hot. "Boiling bags" and tightly closed plastic bags should be
slit, pierced or vented as directed by instructions on package.
moisture. Do not allow plastic wrap to touch food.
Materials to be avoided in microwave oven
Utensils Remarks
Aluminum tray May cause arcing. Transfer food into microwave-safe dish.
Food carton with
metal handle
Metal or metaltrimmed utensils
Metal twist ties May cause arcing and could cause a re in the oven.
Paper May cause a re in the oven.
Plastic foam Plastic foam may melt or contaminate the liquid inside when exposed
Wood Wood will dry out when used in the microwave oven and may split
May cause arcing. Transfer food into microwave-safe dish.
Metal shields the food from microwave energy. Metal trim may cause
arcing.
to high temperature.
or crack.
EN-6
Page 9

SETTING UP YOUR OVEN
Names of oven Parts and Accessories
Remove the oven and all materials from the carton and oven cavity.
Your oven comes with the following accessories:
Glass tray 1
Turntable ring 1
Use & Care Guide 1
Low Rack 1
High Rack 1
F
E
D
G
A) Control panel
B) Turntable shaft
C) Turntable ring
D) Glass tray
E) Observation window
F) Oven Door
G) Safety interlock system
H) Rack (*Optional)
A
B
C
H
Turntable Installation
Rack (*Optional)
Hub (underside)
Glass tray
Turntable shaft
Turntable ring
a. Never place the glass tray upside down. The glass
tray should never be restricted.
b. Both glass tray and turntable ring must always be
used during cooking.
c. All food and containers of f ood are always to be
placed on the glass tray for cooking.
d. If glass tray or turntable ring cracks or breaks, contact
the following customer assistance number:
1-800-657-6119
EN-7
Page 10

Countertop Installation
Remove all packing material and accessories.
Examine the oven for any damage such as
dents or broken door. Do not install if oven is
damaged.
Installation
Select a level surface that provide
1.
enough open space for the intake
and/or outlet vents.
3.0 inches (7.5cm)
3.0 inches (7.5cm)
12 inches (30cm)
OPEN
Cabinet:
Remove any protective lm found
on the microwave oven cabinet surface.
Do not remove the off-white Mica cover
that is attached to the oven cavity to
protect the magnetron.
(3) Blocking the intake or outlet vent openings
can damage the oven.
(4) Place the oven as far away from
radios and TV as possible.
Operation of microwave oven may
cause interference to your radio or TV
reception.
Plug your oven into a standard household
2.
outlet. Be sure the voltage and the
frequency is the same as the voltage
and the frequency on the rating label.
A minimum clearance of 3.0 inches
(7.5cm) is required between the oven and
any adjacent walls. One side must be open.
(1) Leave a minimum clearance of 12
inches (30cm) above the oven.
(2) Do not remove the legs from the
bottom of the oven.
WARNING:
Do not install oven over a
range cooktop or other heat-producing
appliance. If installed near or over a heat
source, the oven could be damaged and the
warranty would be void.
EN-8
Page 11

OPERATION
Control Panel and Features
(13)
(3)
(2)
(7)
(11)
(5)
(4)
(6)
(1)
(8)
(1)
(10)
(9)
(12)
(1) Auto Menu (Auto Reheat, Auto Cook, Auto Bake, Auto Roast, Popcorn, Beverage)
Auto Menu items allow you to easily program cooking time based on food
quantity.
(2) Defrost : Defrost time calculated by entered weight and category of item.
(3) Micro - Press for Microwave only cooking
(4) Grill - Press for Grill only cooking
(5) Conv - Press for Convection only cooking
(6) Micro + Conv - Press for combined Microwave + Convection cooking
(7) Power Level
(8) Timer / Clock
(9) Number Pads
(10) ONE TOUCH START Pads (1-6)
(11) START / ADD 30 SEC
(12) STOP / Hold 3sec : Before cooking starts, press to clear all previous settings.
During cooking, press once to stop oven; press twice to stop oven and clear all
settings.
Press pad for 3 seconds to lock or unlock display
(13) Display Window
EN-9
Page 12

OPERATION
CLOCK SETTING
When the microwave oven is plugged into an outlet, " : 0" will display.
(1) Press
(2) Press the number pads and enter the current clock time. For example, if the time is now 8:30,
(3) Press
Note: (1) If you make a number entry mistake while in the process of setting clock, press
Timer/Clock
press "8, 3, 0" in order. The numbers will ash in the display.
Timer/Clock
time in the display.
to start over.
(2) This is a 12 hour clock. If the numbers entered are not within the range between 1:00
to 12:59, the setting will not be accepted until valid numbers are entered.
TIMER
(1) Press
(2) Press the number pads to enter the time amount. The maximum amount of time that can be
(3) Press to conrm setting.
(4) When the time amount elapses, the control panel will beep 3 times.
Note: The Timer setting is different from the Clock setting; it is simply a timer.
Timer/Clock
enter is 99 minutes 99 seconds.
once, "12H" will appear in the display.
to nish clock setting, ":" will ash and the numbers will appear as a clock
twice, " : 0" and TIMER indicator "v" will appear in the display window.
MICROWAVE COOK
(1) Press Micro, " : 0" and MICRO (Microwave) indicator "v" will appear in the display window.
(2) Press number pads to enter the cooking time; the maximum cooking time is 99 minutes and
99 seconds.
(3) Press Power Level ; PL10 will display. This is the default power level of 100%. Press number
pads 0 through 9 to select a different power level if desired. See the Power Level table
below.
(4) Press to start cooking.
Example: To cook the food with 50% microwave power for 15 minutes.
a. Press the Time Cook, " : 0" and M/W (Microwave) indicator "v" will appear in the
display window.
b. Press "1, 5, 0, 0" in order for 15:00 to appear in the display.
c. Press Power Level, then press "5" to select 50% microwave power.
d. Press to start cooking.
Note: In the process of setting, if the pad is pressed, the display will return to standby
mode.
EN-10
Page 13

FAN OPERATION NOTICE
At the end of Grill / Convection / Combi cooking cycles it is normal operation for the fan to
continue running to cool the oven electronic system. After 5 minutes with no further cooking
activity the fan will automatically shut off. However, you can begin a new cooking cycle even
while the fan is running.
STANDING TIME
"Standing time" means that after the timed cooking period ends, food should be allowed to
stand either inside or outside the oven to completely nish cooking. Outside oven standing time
will allow the oven to be available for other use.
POWER LEVEL
Ten power levels are available.
Power level 0 is also available if you want to program a timed in-oven standing time.
After entering Time Cook digits and prior to starting operation, press
will display. Adjust the power by pressing a number pad as indicated in the table below.
Level 10 9 8 7 6 5 4 3 2 1 0
Power 100% 90% 80% 70% 60% 50% 40% 30% 20% 10% 0%
Display PL10 PL-9 PL-8 PL-7 PL-6 PL-5 PL-4 PL-3 PL-2 PL- 1 PL-0
Power Level
and "PL10"
ONE TOUCH START
(1) Instant cooking at 100% power level and 1 to 6 minutes cooking time can be started by
pressing number pads 1 to 6.
(2) Instant cooking at 100% power level and 30 seconds cooking time can be started by
pressing . Each repeated press will increase cooking time by 30 seconds.
The maximum cooking time is 99 minutes, 99 seconds.
Note: Time can also be added in 30 second increments by pressing during Microwave
Cooking.
EN-11
Page 14

WEIGHT DEFROST FUNCTION
(1) Press
Press the same pad repeatedly, "dEF1", "dEF2", "dEF3" will display in order.
(2) Press number pads to enter the weight to be defrosted.
Input the weight range between 0.2 to 6.0 lbs.
The lb indicator "'v" will ash in the display window.
If the weight input is not between 0.2 to 6.0 lbs, the input will be invalid. The oven will not
(3) Press to start defrosting and the cooking time remaining will be displayed.
Note: During the Defrost cycle, the oven will beep to remind you to turn over the food. Turn over
Weight Defrost
LED display dEF1 dEF2 dEF3
Food
operate until valid numbers are entered.
food, close door and press to resume defrost cycle.
, "dEF1" and DEF. indicator "v" will appear in the display window.
Meat Poultry
Fish
EN-12
Page 15

AUTO COOK FUNCTION
(1) Press Auto Cook, "Ac-1" will display.
(2) Press Auto Cook repeatedly to choose the menu. See Auto Cook table below.
(3) Press number pad to enter weight or portions.
(4) Press to start cooking.
Auto Cook Menu:
Food Display Weight / Portion
Potato Ac-1
Fresh Vegetable Ac-2 4 oz / 8 oz / 12 oz / 16 oz
Frozen Vegetable Ac-3 4 oz / 8 oz / 10 oz / 12 oz / 16 oz
Ground Meat Ac-4 8 oz / 12 oz / 16 oz / 24 oz
Fish/Seafood Ac-5 8 oz / 12 oz / 16 oz / 24 oz
AUTO COOK TABLE
Food Serving Amount and Recommendations
Serving size is 1 to 4 medium sized potatoes, about 8 to 10 oz. (225 to 280
1
Potato
Fresh
2
Vegetable
Frozen
3
Vegetable
Ground
4
Meat
Fish/
5
Seafood
*Fold back one corner of the plastic wrap to vent excess steam.
g) each.
Pierce each potato several times with a fork and place around the edge of
the oven tray, at least 1 in.(2.5cm) apart.
Serving size is 1 to 4 cups (250 ml to 1L).
Place moist vegetables in a microwavable container.
Add 2 to 4 tablespoons (30 to 60 ml) water.
Cover with plastic wrap and vent*.
Most vegetables need stirring and 2 to 3 minutes standing time after
cooking.
Serving size is t to 4 cups (250 ml to 1L).
Remove from package and place vegetables in a microwavable container.
Add 2 to 4 tablespoons (30 to 60 ml) water.
Cover with plastic wrap and vent*.
Most vegetables need stirring and 2 to 3 minutes standing time after
cooking.
Serving size is 8 to 24oz. (1/2 to 1.5lbs.)
Crumble meat into a microwave-safe container.
Season and cover with plastic wrap.
Vent cover for well-done meat.
Cover dish for medium cooked meat (such as meat to be used in another dish
and cooked further).
Serving size is 8 to 24oz. (1/2 to 1.5lbs.)
Place the food around the sides of a microwave-safe container. Season and
add 1/4 to 1/2cup (60 to 125 ml) liquid (wine, water, salsa, etc.) if desired.
Cover with plastic wrap and vent*.
8 oz / 16 oz / 24 oz / 32 oz
(1 ea / 2 ea / 3 ea / 4 ea)
EN-13
Page 16

AUTO REHEAT FUNCTION
(1) Press Auto Reheat, "rH-1" will display.
(2) Press Auto Reheat repeatedly to choose the menu. See Auto Reheat table below.
(3) Press number pad to enter weight or portions.
(4) Press to start cooking.
Auto Reheat Menu:
Food Display Weight / Portion
Dinner Plate rH-1 10 oz / 12 oz / 16 oz
Soup/Sauce rH-2 1 cup / 2 cups / 3 cups / 4 cups
Casserole rH-3 1 cup / 2 cups / 3 cups / 4 cups
AUTO REHEAT TABLE
Food Serving Amount and Recommendations
Serving size is about 10 to 16 oz (280 to 450 g).
1
Dinner Plate
2
Soup/Sauce
3
Casserole
*Fold back one corner of the plastic wrap to vent excess steam.
Place food to be heated on a dinner plate or similar dish.
Cover with plastic wrap and vent*.
Serving size is 1 to 4 cups (250 ml to 1L).
Place food to be heated in a casserole dish.
Cover with plastic wrap and vent*.
Serving size is 1 to 4 cups (250 ml to 1L).
Place food to be heated in a casserole dish.
Cover with plastic wrap and vent*.
EN-14
Page 17

AUTO BAKE FUNCTION
(1) Press Auto Bake, "Ab-1" will display.
(2) Press Auto Bake repeatedly to choose the menu. See Auto Bake table below.
(3) Press number pad to enter weight or portions. For Ab-4, press number pad 1 through 3 to
choose weight. For Ab-1, Ab-2, Ab-3, You do not need to press number pad to choose a
weight or portion.
(4) Press to start cooking.
Auto Bake Menu:
Food Display Weight / Portion
Frozen Pizza Ab-1 10~12inch thin crust frozen pizza
Mufns Ab-2 6cup mufn (With preheat function)
Biscuit/Dinner Roll
/Bread Stick
Frozen French Fries Ab-4 8 oz / 12 oz / 16 oz
CAUTION:
AUTO BAKE TABLE
Do not consume foods immediately after oven nishes cooking. Heated foods,
especially pizza, may burn your mouth. Allow foods to cool to a safe eating
temperature.
When using the convection function, only place the grill pan on the glass tray.
Food Serving Amount and Recommendations
1
Frozen Pizza
2
3
4
Mufns
Biscuit/Dinner
Roll
/Bread Stick
Frozen French
Fries
Ab-3 1 pan (With preheat function)
For best results, a pizza pan is not required. Use a 10~12-inch thin-
crust frozen pizza. If baking a rising-crust pizza, add an additional
10 to 20 minutes' baking time on convection cook at 450°F(230°C).
Place the frozen pizza directly on the high rack.
Use 1 package of a mufn mix. Place the low rack on the turntable.
After PREHEAT, use 6-cup mufn pan; place pan on rack.
For best results, bake one pan of biscuits, dinner rolls, or breadsticks
at a time.
After PREHEAT, place the biscuits 1-2 in. (2.5-5 cm) apart on a
greased pizza pan or cookie sheet on the low rack.
Cool on the rack for 10 minutes after cooking.
Use frozen, prepared French fries. Do not overlap or layer potatoes.
For crispier potatoes, use MORE to add additional cooking time.
Spread the french fries on a pizza pan or cookie sheet. Place the
pan on the high rack.
Weight range: 8 to16 oz. (225 to 450 g).
EN-15
Page 18

AUTO ROAST FUNCTION
(1) Press Auto Roast, "Ar-1" will display.
(2) Press Auto Roast repeatedly to choose the menu. See Auto Roast table below.
(3) Press number pad to enter weight.
(4) Press to start cooking.
Food Display Weight / Portion
Roast Beef Ar-1 2 lb ~ 4 lb
Roast Chicken Ar-2 2.4 lb ~ 6 lb
Roast Pork Chop Ar-3 1 lb ~ 4 lb
Roast Potato Ar-4 1 lb ~ 2 lb
CAUTION:
AUTO ROAST TABLE
When using the convection function, only place the grill pan on the glass tray.
Food Serving Amount and Recommendations
Weigh roast and pat dry with paper towels. Place a microwavesafe/heatproof plate on turntable to catch drippings. Place roast on
1
2
Roast Chicken
3
4
Roast Potato
Roast Beef
Roast Pork
Chop
low rack.
After cooking, loosely tent roast beef with aluminum foil and let stand
for 5 to 10 minutes.
Weight range: 2 to 4 lbs. (1 to 2 kg)
Weigh whole chicken. Remove giblets and neck and discard.
Thoroughly wash inside and outside of chicken with cold water. Pat
chicken dry with paper towels. Secure the legs with kitchen twine.
Brush outside of chicken with melted butter or margarine. Place a
microwavesafe/heatproof plate on turntable to catch drippings.
Place chicken breast side up on low rack. After cooking, loosely tent
roast chicken with aluminum foil and let stand for 10minutes.
Weight range: 2.4 to 6lbs. (1 to 3 kg)
Weigh roast and pat dry with paper towels. Place a microwavesafe/heatproof plate on turntable to catch drippings. Place roast on
low rack.
After cooking, loosely tent roast with aluminum foil and let stand for
5 to 10minutes.
Weight range: 1 to 4lbs. (450g to 2 kg)
Wash and dry the potatoes thoroughly. Cut potatoes into even sized
pieces and season. Place potatoes in microwave-safe/heatproof
plate. Place on high rack.
Weight range: 1 to 2lbs. (450g to 1 kg)
EN-16
Page 19

COMBINATION FUNCTION (Microwave + Convection)
(1) Press Micro + Conv, " : 0" and MICRO and CONV indicator "v" will appear in the display
window.
(2) Press number pads 0 through 9 to choose cooking temperature. Temperature selections (°F):
0 = 425, 1=100, 2 = 200, 3 = 250, 4 = 275, 5 = 300, 6 = 325, 7 = 350
8 = 375, 9 = 400. MICRO and CONV Indicator "v", "F" and the corresponding temperature
will display.
(3) Press number pads to enter the cooking time. The maximum cooking time is 99 minutes, 99
seconds.
(4) Press to start cooking. The remaining cook time will display. You can check the selected
temperature by pressing MICRO + CONV during cooking.
Note: When using the convection function, you should place grill pan on the glass tray.
GRILL FUNCTION (Grill)
(1) Press Grill, " : 0" and GRILL indicator "v" will appear in the display window.
(2) Press number pads to enter the cooking time; the maximum cooking time is 99 minutes and
99 seconds.
(3) Press to start cooking.
CONVECTION COOK
(1) Press Conv., " : 0" and CONV indicator "v" will appear in the display window.
(2) Press number pads 0 through 9 to select cooking temperature if desired. Temperature
selections (°F):
0 = 425, 1=100, 2 = 200, 3 = 250, 4 = 275, 5 = 300, 6 = 325, 7 = 350
8 = 375, 9 = 400. "Conv", "F" and the corresponding temperature will display.
(3) Press to start preheating. Selected temperature, "F" and "PrEH" are alternately
displayed. CONV indicator "v" will display, and PREH indicator "v" will ash. When the oven
preheats to the selected cooking temperature, PREH indicator "v" stops ashing and the oven
will beep to remind you, and selected temperature, "F" will ash in the display to remind
you to place food in oven and set the cook time. If no cook time is entered within 15 minutes,
the oven will return to display " : 0" or the clock time.
Note: Grill Pan - Only for use with Convection cooking. Only place grill pan on glass tray.
will return to display the clock time.
(4) Press number pads to enter the cooking time. The maximum cooking time is 99 minutes, 99
seconds.
(5) Press to start cooking. The remaining cook time will display. "Conv" will display and
you can check selected temperature by pressing CONV during cooking.
Note: 1) If no preheat is needed, follow step 1 and 2 above and then skip to step 4.
2) If preheating, do not place food into oven until cooking temperature is reached.
3) If Convection Cooking without preheating, place food into oven at the start of cooking.
4) When using the convection function, only place grill pan on the glass tray.
EN-17
Page 20

ONE TOUCH COOK
POPCORN
(1) Press
"1.75" will appear in the display in order.
Press Once: Popcorn 3.2 oz
Press Twice: Popcorn 3.0 oz
Press 3 Times: Popcorn 1.75 oz
(2) Press to start cooking. Cook time for size chosen appears in the display. Oven beeps 3
times when cooking is nished.
BEVERAGE
(1) Press Beverage repeatedly until the number you wish appears in the display, "1", "2", "3"
cup will display in order.
(2) Press to start cooking. Cook time for number chosen appears in the display. Oven
beeps 3 times when cooking is nished.
Food Amount Comments
Popcorn
Beverage
(200ml/1cup)
repeatedly until the number you wish appears in the display, "3.2", "3.0" ,
Popcorn
1.75oz.
3.0oz.
3.2oz.
1cup
2cups
3cups
Use only with prepackaged microwave popcorn weighing 1.75,
3.0,3.2 ounces.
Do not use this feature twice in succession on the same food
portion –it may result in severely overcooked or burnt food.
Do not cover.
Drinks heated with the Beverage feature may be very hot.
Remove the container with care.
Do not use this feature twice in succession on the same food
portion –it may result in severely overcooked or burnt food.
EN-18
Page 21

MULTI-STAGE COOKING
At most 2 stages can be set for cooking.
Note:
ONE TOUCH COOK, ONE TOUCH START and SENSOR COOK
stage cooking.
Example: 80% Power Level for 5 minutes followed by 60% Power Level for 10 minutes;
a. Press
Time Cook
b. Press
Power Level
c. Press
Time Cook
d. Press
Power Level
e. Press to immediately start multi-stage cooking.
once, then press "5", "0" and "0" to set rst stage cook time.
once, then press "8" to choose 80% rst stage cooking power.
again, then press "1", "0", "0" and "0" to set second stage cook time.
again, then press "6" to choose 60% second stage cooking power.
cannot be used in multi-
LOCK FUNCTION
To lock the microwave so that it cannot be operated by children or other unintended users,
press pad for 3 seconds. You will hear a long beep and "Loc" and LOCK indicator "v" will
appear in the display window.
To Unlock, press for 3 seconds, You will hear a long beep and the LOCK indicator "v" will
disappear in the display window.
COOKING END REMINDER FUNCTION
The oven will beep 3 times to alert the user that cooking time has ended. "End" will display.
The time of day will display by opening the door or pressing pad.
WARNING - If you see arcing, press STOP/CLEAR pad and correct the problem.
Arcing is the microwave term for sparks in the oven. Arcing is caused by :
a) Metal or foil touching the side of the oven.
b) Foil not molded to food (upturned edges act like antennas).
c) Metal such as twist-ties, poultry pins, or gold rimmed dishes in the microwave.
d) Recycled paper towels containing small metal pieces being used in the microwave.
EN-19
Page 22

Maintenance
Troubleshooting
Check your problem by using the chart below and try the solutions for each problem. If the
microwave oven still does not work properly, contact the following number for customer
assistance: 1-800-657-6119.
TROUBLE POSSIBLE CAUSE POSSIBLE REMEDY
Oven will not start
Arcing or sparking
Unevenly cooked
foods
Overcooked foods
Undercooked foods
Improper defrosting
Sensor cooked foods
not properly cooked
a. Electrical cord for oven is
not plugged in.
b. Door is open.
c. Wrong operation is set.
a. Materials to be avoided in
microwave oven were used.
b. The oven is operated when
empty.
c. Spilled food remains in the
cavity.
a. Materials to be avoided in
microwave oven were used.
b. Food is not defrosted
completely.
c. Cooking time, power level
is not suitable.
d. Food is not turned or stirred.
Cooking time, power level is not
suitable.
a. Materials to be avoided in
microwave oven were used.
b. Food is not defrosted
completely.
c. Oven vents are blocked or
restricted.
d. Cooking time, power level is
not suitable.
a. Materials to be avoided in
microwave oven were used.
b. Cooking time, power level is
not suitable.
c. Food is not turned or stirred.
a. Cover or lid on food not
vented.
b. Door opened before
sensordetected cooking time
appears in display.
a. Plug into the outlet.
b. Close the door and try again.
c. Check instructions.
a. Use microwave-safe cookware
only.
b. Do not operate with oven
empty.
c. Clean cavity with wet towel.
a. Use microwave-safe cookware
only.
b. Completely defrost food.
c. Use correct cooking time,
power level.
d. Turn or stir food.
Use correct cooking time, power
level.
a. Use microwave-safe cookware
only.
b. Completely defrost food.
c. Check to see that oven venti-
lation ports are not restricted.
d. Use correct cooking time,
power level.
a. Use microwave-safe cookware
only.
b. Use correct cooking time,
power level.
c. Turn or stir food.
a. Cover or lid over food must
contain vent hole for escaping
steam.
b. Do not open door to stir or turn
food before sensordetected
cooking time appears in
display.
EN-20
Page 23

KENMORE LIMITED WARRANTY
FOR ONE YEAR from the date of sale this appliance is warranted against
defects in material or workmanship when it is correctly installed,
operated and maintained according to all supplied instructions.
WITH PROOF OF SALE a defective appliance will be replaced free of
charge. For warranty coverage details to obtain free replacement,
visit the web page: www.kenmore.com/warranty
This warranty does not cover the oven cavity light bulb, which is an
expendable part that can wear out from normal use within the
warranty period.
This warranty is void if this appliance is ever used for other than private
household purposes.
This warranty gives you specific legal rights, and you may also have
other rights which vary from state to state.
Sears Brands Management Corporation, Hoffman Estates, IL 60179
GARANTÍA LIMITADA DE KENMORE
DURANTE UN AÑO a partir de la fecha de venta, este
electrodoméstico, posee garantía contra defectos en los materiales
o en la mano de obra cuando se instale, opere y mantenga
correctamente de acuerdo con todas las instrucciones provistas.
CON EL COMPROBANTE DE VENTA, un electrodoméstico
defectuoso será reemplazado gratuitamente.
Para ver los detalles de cobertura de la garantía a fin de obtener
un reemplazo gratis, visite la página web:
www.kenmore.com/warranty
Esta garantía no cubre la bombilla dentro del horno, que es una
pieza consumible que se puede desgastar con el uso normal dentro
del periodo de garantía.
Esta garantía se anula si este electrodoméstico se usa para
cualquier propósito que no sea el uso doméstico privado.
Esta garantía le otorga derechos legales específicos, y es posible
que tenga también otros derechos, los cuales varían de un estado
a otro.
Sears Brands Management Corporation, Hoffman Estates, IL 60179
®
Page 24

ABOUT THIS MANUAL
(주) 신광씨링
광주광역시 서구 하남대로
502번길 14
담당 김지수 님
브랜드 Kenmore 언 어 영어
F.MODEL Kenmore KOC15 모델 사용자 매뉴얼
B.MODEL
BUYER
COUNTRY
MEMO 총 23p (140 x 210)
18.07.17-1p (7p _ 일러스트 그림 하 작업 2 cut )
18.07.24-총 23p (1~23p _ ① 신규 작업, ② 일러스트 호환 작업 1 cut)
18.07.26-7p (4p, 5p, 9p, 12p, 17p, 18p, 19p)
18.08.06-4p (1p, 7p, 9p, 16p)
18.08.08-1p (1p)
111.71519810 - Black / Negro
111.71513810 - Stainless Steel / Acero Inoxidable
NO NEED PRINT
 Loading...