

WingScapes WCB-00119 User Manual
wingscapes.com | 888.811.WING
© 2015 Ebsco Industries, Inc. All Rights Reserved. Made in China
This product is covered by one or more of the following US Patents: 6735387, 6768868, 6834162. Other patents pending.
WARNING! This product may contain lead, a chemical known to the state of California to cause cancer,
birth defects and other reproductive harm.
BirdCam Pro®
User’s Guide
For Models:
WCB-00119 BirdCam Pro
11/23/15
Page 19
BirdCam Pro User Guide
Page 2
BirdCam Pro User Guide
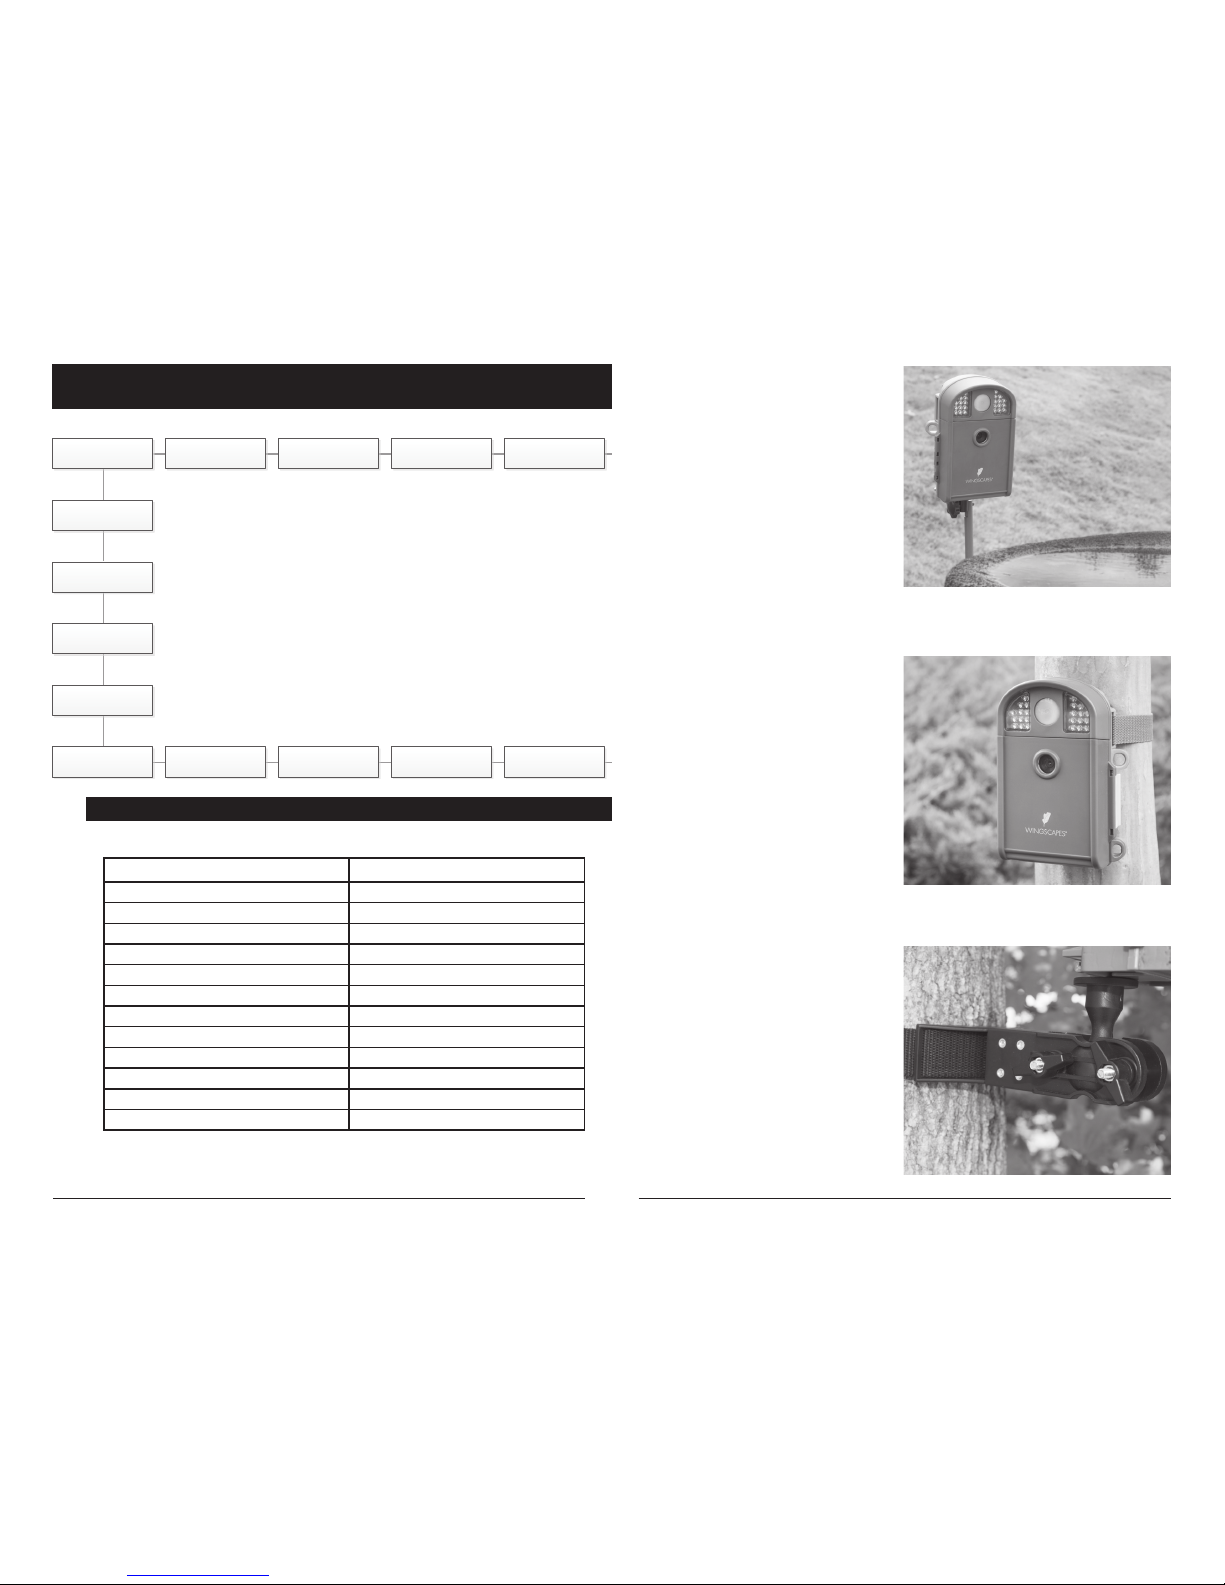
Tripods
For very precise placement and aiming,
no mounting method will beat a camera
tripod. A standard threaded tripod mount
(¼”-20) is embedded into the bottom of
the BirdCam Pro. This allows users to attach
the BirdCam Pro to any tripod or any of
thousands of 3rd-party camera mounting
accessories – providing users with a world
of creative opportunities through angle
and height adjustment.
Wingscapes makes an optional mounting
accessory for the BirdCam Pro:
Universal Camera Stake
(MCA-13051)
Mounting Strap
The BirdCam Pro comes with a
Mounting Strap to facilitate mounting.
You will nd slots in the rear of the
BirdCam Pro through which a strap
can be threaded. Many users will
tighten the BirdCam Pro to a tree,
then wedge a stick or piece of bark
between the BirdCam Pro and the
tree to facilitate aiming.
Mounting Arm Accessories
This accessory will allow you to easily
mount the BirdCam Pro to a common
bird feeder pole, a post, a stake, a wall,
or a tree. Numerous angle settings and
360° rotation make this mounting arm
one of the most versatile setup options.
Your Wingscapes BirdCam Pro oers
nearly limitless mounting opportunities,
allowing you to capture images of wildlife
in practically any situation.
To read more about attracting wildlife to
your backyard and BirdCam Pro, visit our
website at www.wingscapes.com.
Wingscapes BirdCam Pro
DEFAULT SETTINGS
General
DATE/TIME: 01/01/2016 11:11pm
PHOTO RESOLUTION: HIGH (10 MP)
VIDEO RESOLUTION: FHD (1920 x 1080)
VIDEO LENGTH: 10 SECONDS
CAMERA NAME: BIRDCAM PRO
INFOSTRIP ACTIVE: YES
TEMPERATURE: FAHRENHEIT
AC CONNECTED?: NO
PROGRAM SECURITY CODE: 00000
MANAGED MEMORY: DO NOT OVERWRITE
ERASE ALL IMAGES: NO
RESET TO FACTORY DEFAULTS: NO
SETUP MODE
< OPTIONS >
RESET TO
FACTORY DEFAULTS
MULTI-SHOT
DETECTION
DELAY
TIME LAPSE
INTERVAL
T.L. PROGRAM #2
STOP TIME
DATE & TIME
T.L. PROGRAM #2
START
CAMERA NAME
UPGRADE
FIRMWARE
PROGRAM
SECURITY CODE
MANAGED
MEMORY
ERASE ALL IMAGES
(FORMAT CARD)
WI-FI SD CARD?
IMPRINT INFO
TEMPERATURE
UNIT
AC CONNECTED?
PHOTO
QUALITY
PIR
SENSITIVITY
VIDEO
QUALITY
VIDEO
LENGTH
VIDEO
SOUND
PHOTO OR
VIDEO
CAPTURE MODE
T.L. PROGRAMS
PER DAY
T.L. PROGRAM #1
STOP
T.L. PROGRAM #1
START
Page 18
BirdCam Pro User Guide
Page 3
BirdCam Pro User Guide
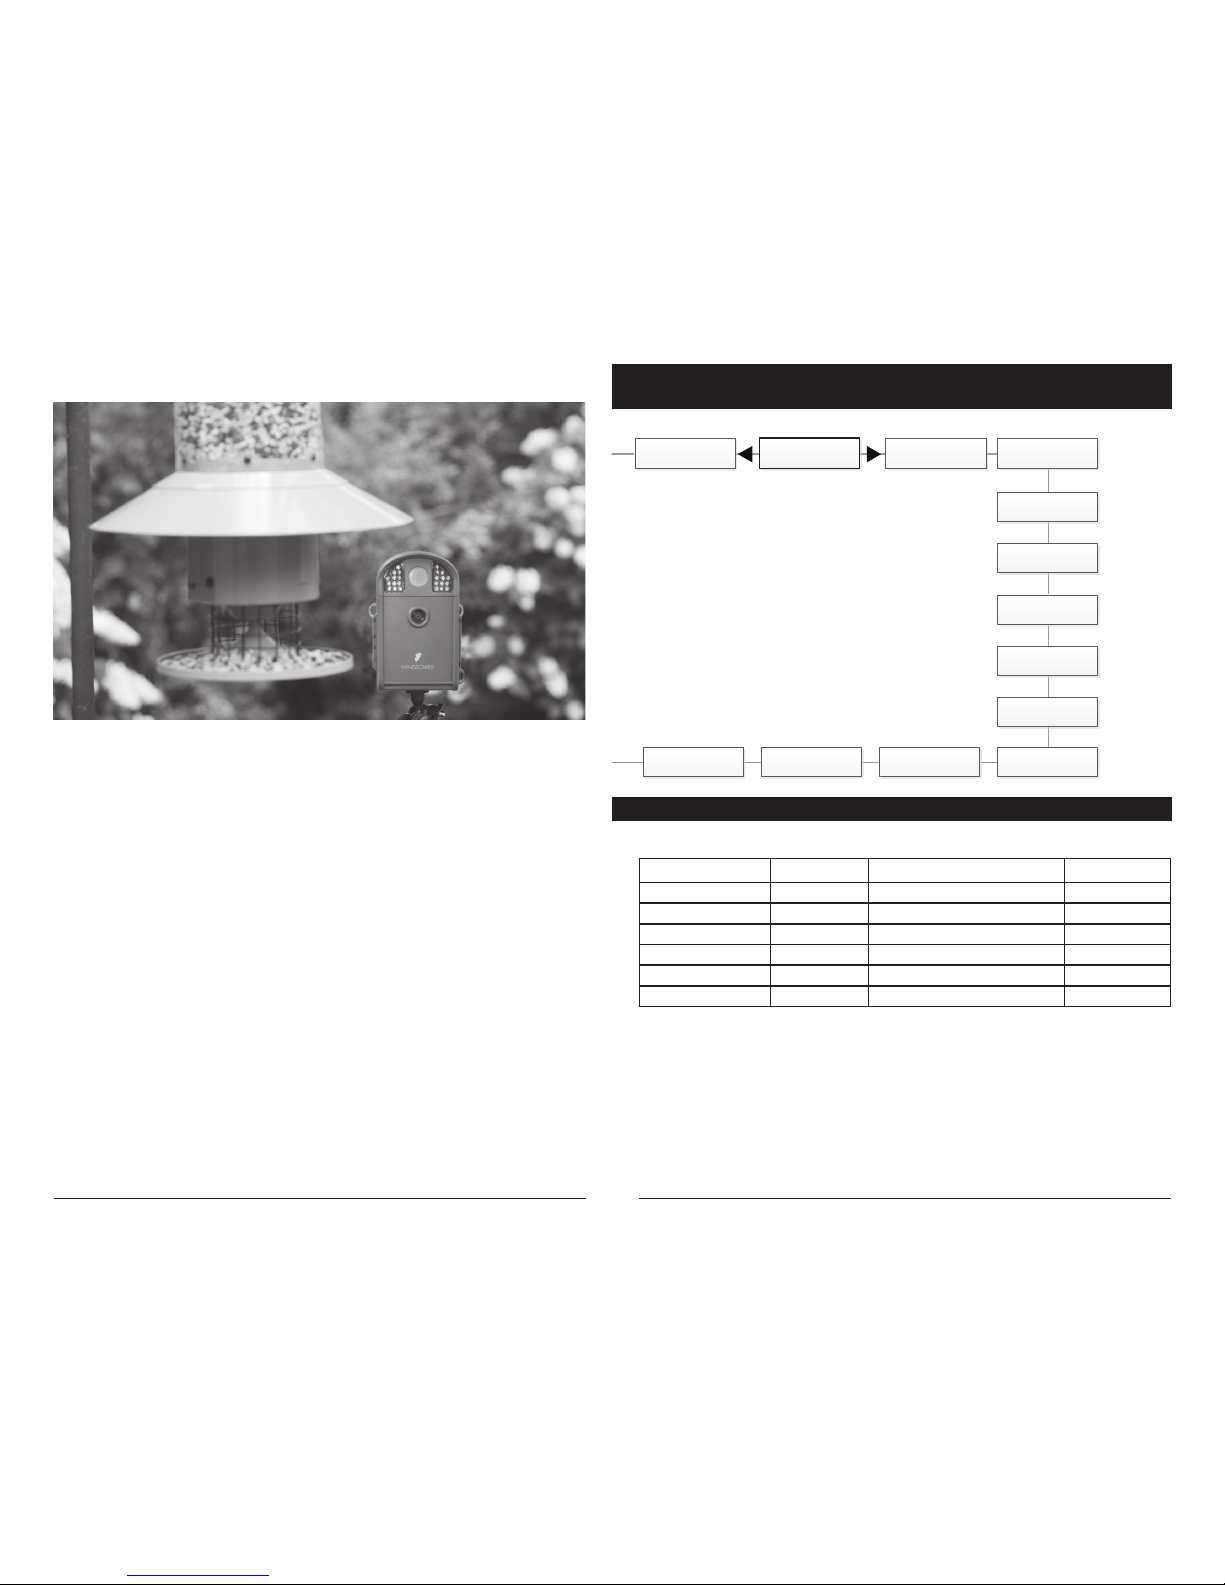
The key to taking great photos and videos
is proper mounting and placement of the
BirdCam Pro. We designed the BirdCam Pro so
that it can be mounted many dierent ways.
Take a moment to learn more about mounting
your BirdCam Pro properly, and you will
quickly see improvement in your images.
Basic Principles
1. Stability - Mount the BirdCam Pro securely
so that it does not move. It should never be
hung from above or mounted to an object
that moves in the wind. If the BirdCam Pro is
moving, it will cause the motion sensor to
trigger incorrectly.
2. Focus - Note that the BirdCam Pro lens can
be focused manually. This is a snap. Use the
included measuring tape to measure the
distance between the BirdCam Pro and its
target. Set the lens accordingly.
3. Lighting - As with all cameras, it is best to
avoid aiming the BirdCam Pro at the source
of light (for instance, the sun). Ideally during
daytime, position the BirdCam Pro so it is
facing its target, e.g. a bird feeder, but facing
away from the sun.
On the Ground
Set up is simple, even on the ground.
Just position your BirdCam Pro directly
on the ground. If you’re concerned about
it falling over, use the included Camera Strap
to secure the BirdCam Pro to the base of a
tree, a post, or other solid feature (a brick
works great).
Mounting your BirdCam Pro
Menu Map
Motion Detect Time Lapse
RESET OPTIONS?: DO NOT RESET TIME LAPSE INTERVAL: 10 SECONDS
DETECTION DELAY: 10 SECONDS TIME LAPSE PROGAMS/DAY: 2 PROGRAM
PIR SENSITIVITY: HIGH T.L. PROGRAM #1 START TIME: 6 AM
MULTI-SHOT: 1 (OFF) T.L. PROGRAM #1 STOP TIME: 9 AM
PHOTO OR VIDEO: PHOTO T.L. PROGRAM #2 START TIME: 4 PM
T.L. PROGRAM #2 STOP TIME: 7 PM
SETUP MODE
< OPTIONS >
RESET TO
FACTORY DEFAULTS
MULTI-SHOT
DETECTION
DELAY
TIME LAPSE
INTERVAL
DATE & TIME
PHOTO
QUALITY
PIR
SENSITIVITY
VIDEO
QUALITY
VIDEO
LENGTH
VIDEO
SOUND
PHOTO OR
VIDEO
CAPTURE MODE
 Loading...