

Wingman Models WMF 72003, RCAF Lockheed C-130J-30 Hercules Conversion Set Instructions Manual
Resin parts
Assembly Instructions
The conversion is set to convert the short C-130 of Italeri to the stretch C-130J-30
version.
Basically the assembly of the kit is as given in Italeri’s kit instructions, except
changes that are shown here and need to be done in the right building steps.
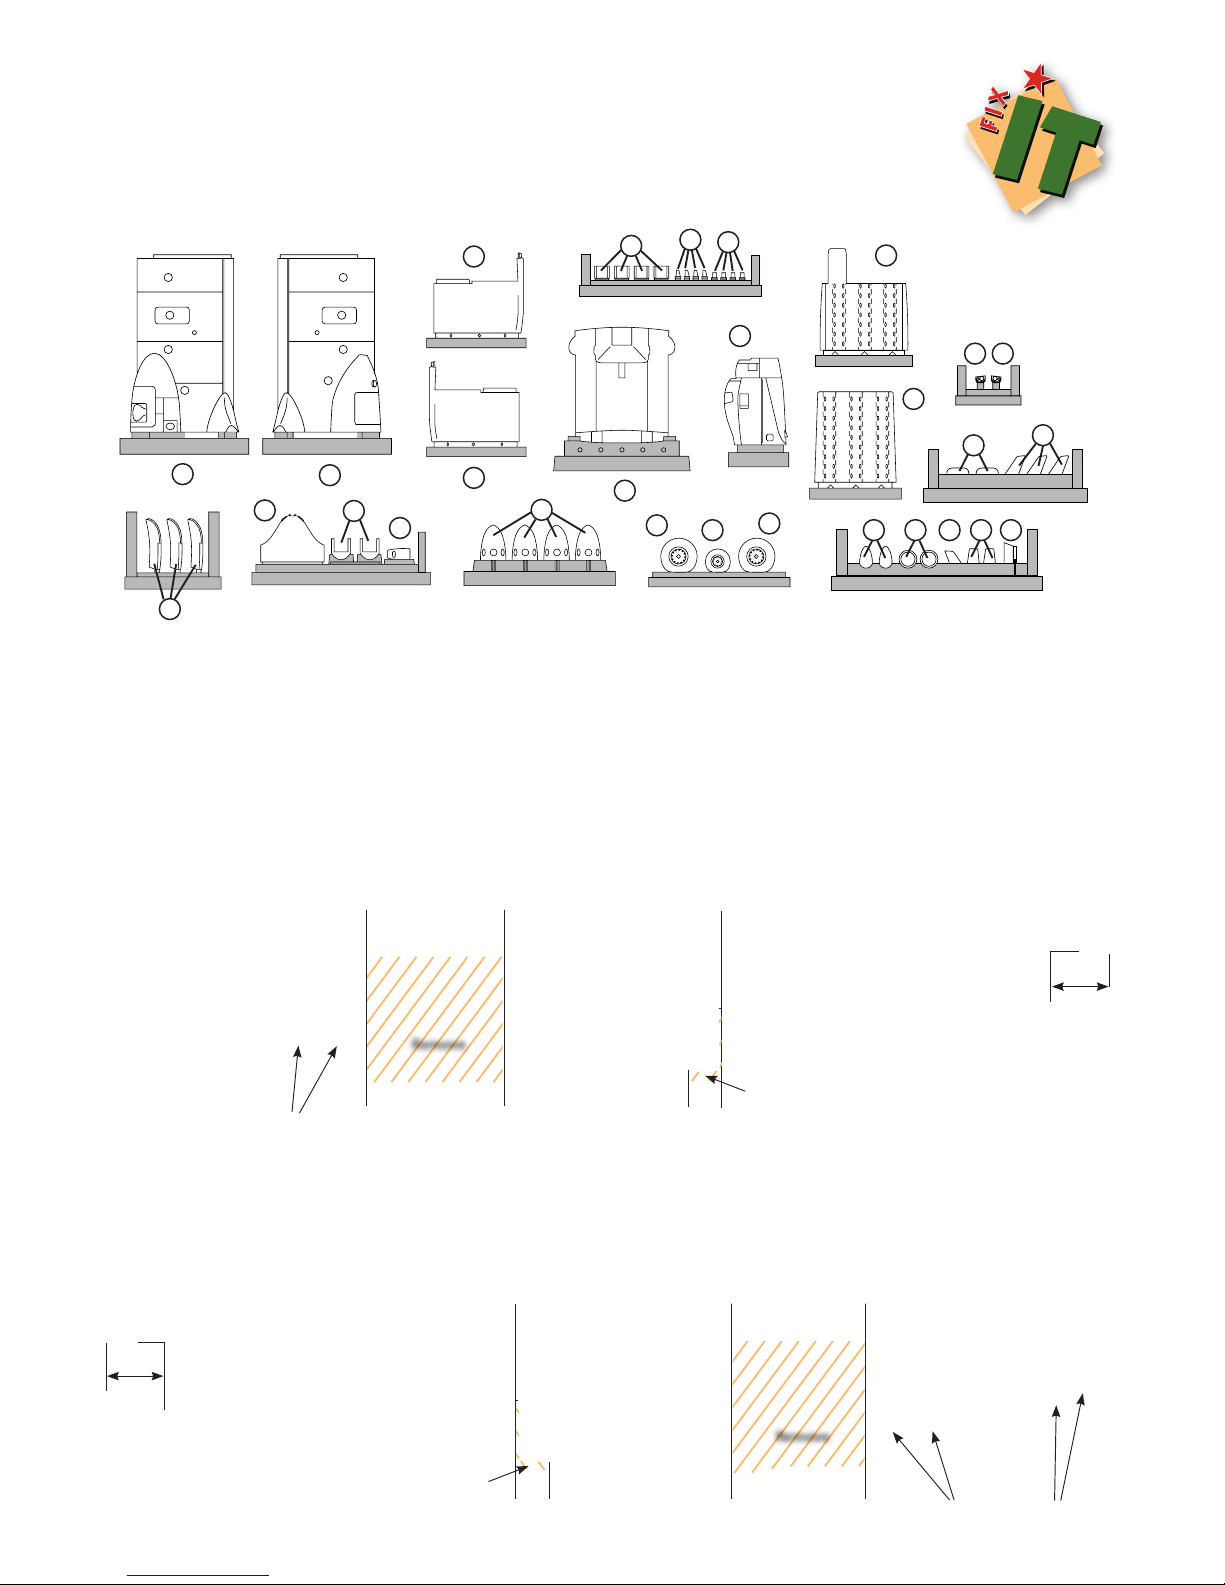
1. Assemble kit parts as seen in step one of the kit instructions.
2. Before step 2, cut the following parts exactly as shown here.
Cut
Seal
Seal
Seal
Cut
Cut
Cut
Cut Cut
Cut
Cut
30 mm
30 mm
CutCut
Cut
Cut
Cut
Cut
Cut
Cut
1
2
3
4
5
6
7
10
11
9
8
22 23
24
25
26 27 28 29 30
12
13
x 8
x 2
x 2
x 2
x 4
14
15
16
17
18
17
Remove
Remove
Remove
Remove
RCAF Lockheed C-130J-30 Hercules Conversion Set
(for Italeri C-130 kits)
WMF 72003 1/72 Scale
Decals
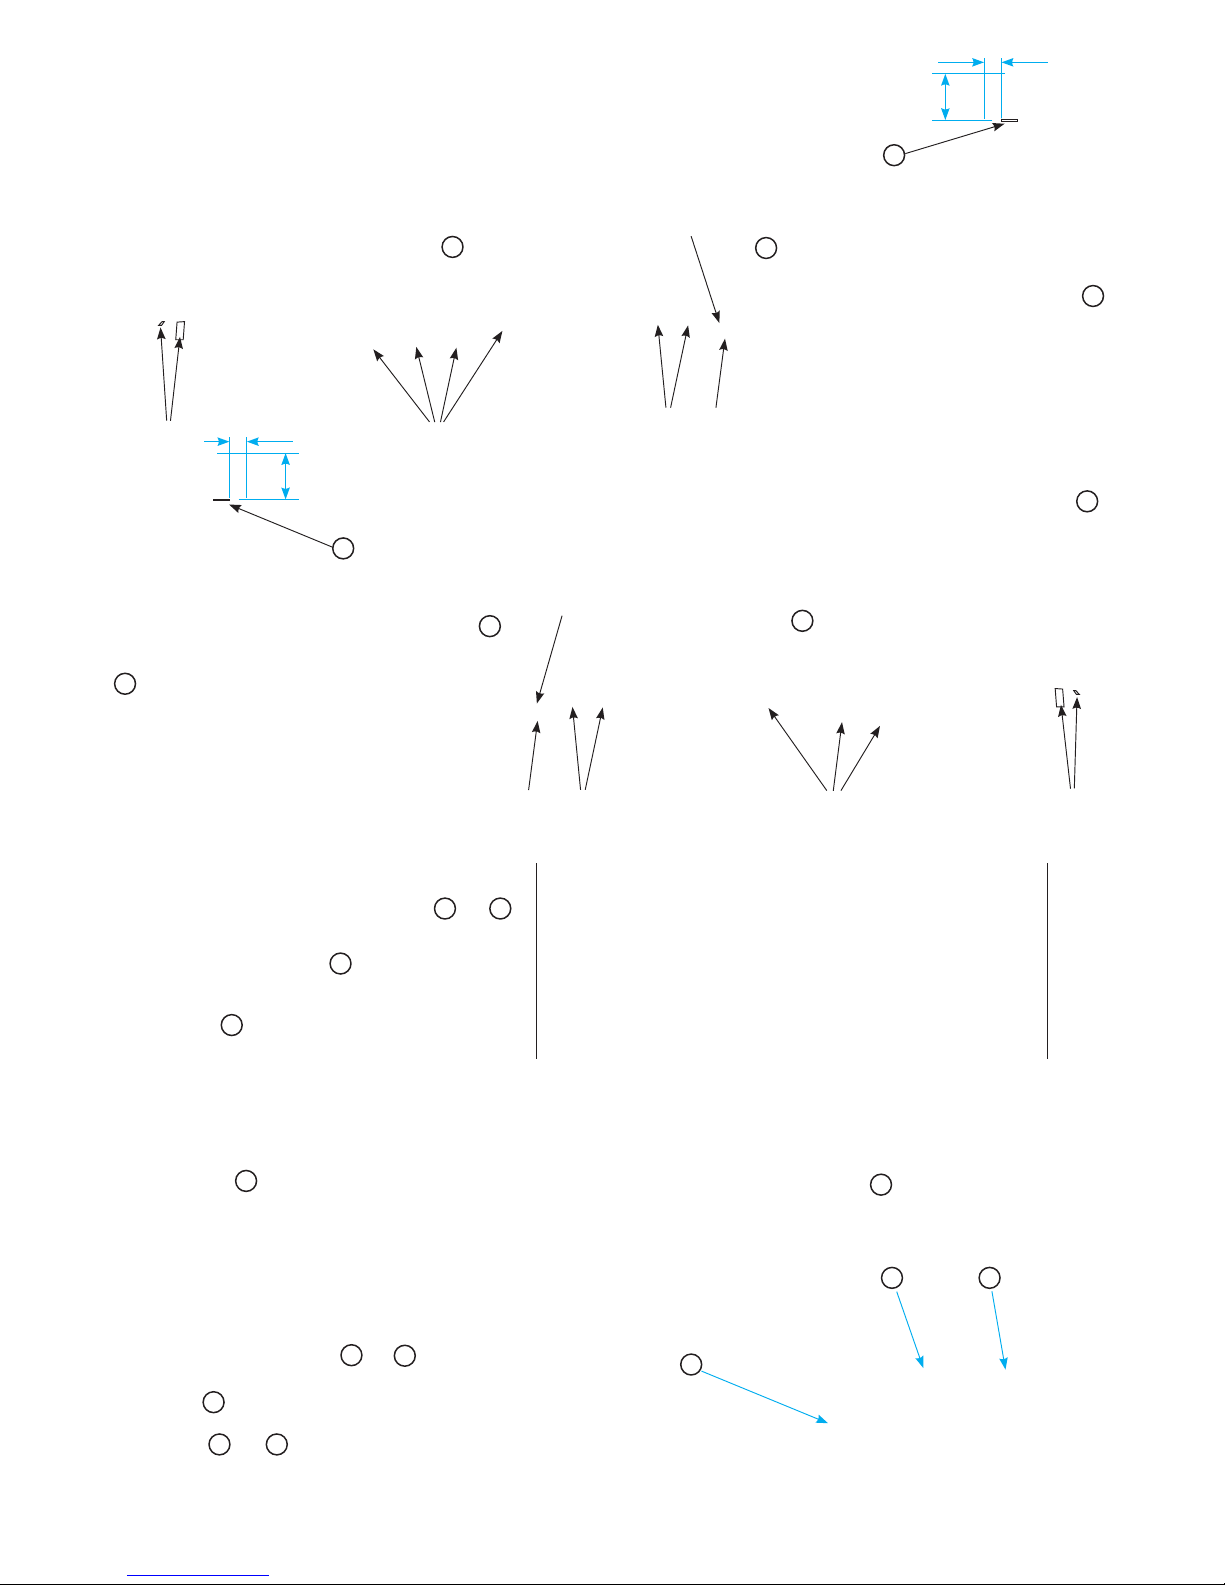
Install the fuselage plugs. Install the rear side entrance doors for
better fit of the rear plugs.
Glue windows 23E in their new location as well as 2E windows.
Locate windows 26E, 27E, 44E and 45E. Seal the relevant windows
with filler.
26 mm
26 mm
9 mm
9 mm
2F
Seal 23E
23E
23E
23E
2E
2E
3F
1
2
3
13
24
13
4
14
Seal
CutCut
CutCut
11
10
15
23 22
24
Steps 2-3: Install landing gear bays.
Step 4: If you wish to install the inner cargo floor, cut part
35A as seen on the right and left and attach parts and
as shown below.
For the lower ramp door use part instead of part
47C.
Step 5: Use part instead of 7F, 8F, 20F, 19F and 25F.
1110
8
13
Step 6: Use the our resin wheels ( and ) and
replace the parts provided by Italeri.
Install part instead of part 14F.
Install parts and .
15
22 23
1817
Step 7: Replace kit engines and props with our resin
parts. Assemble the rest as shown in the pictures below.
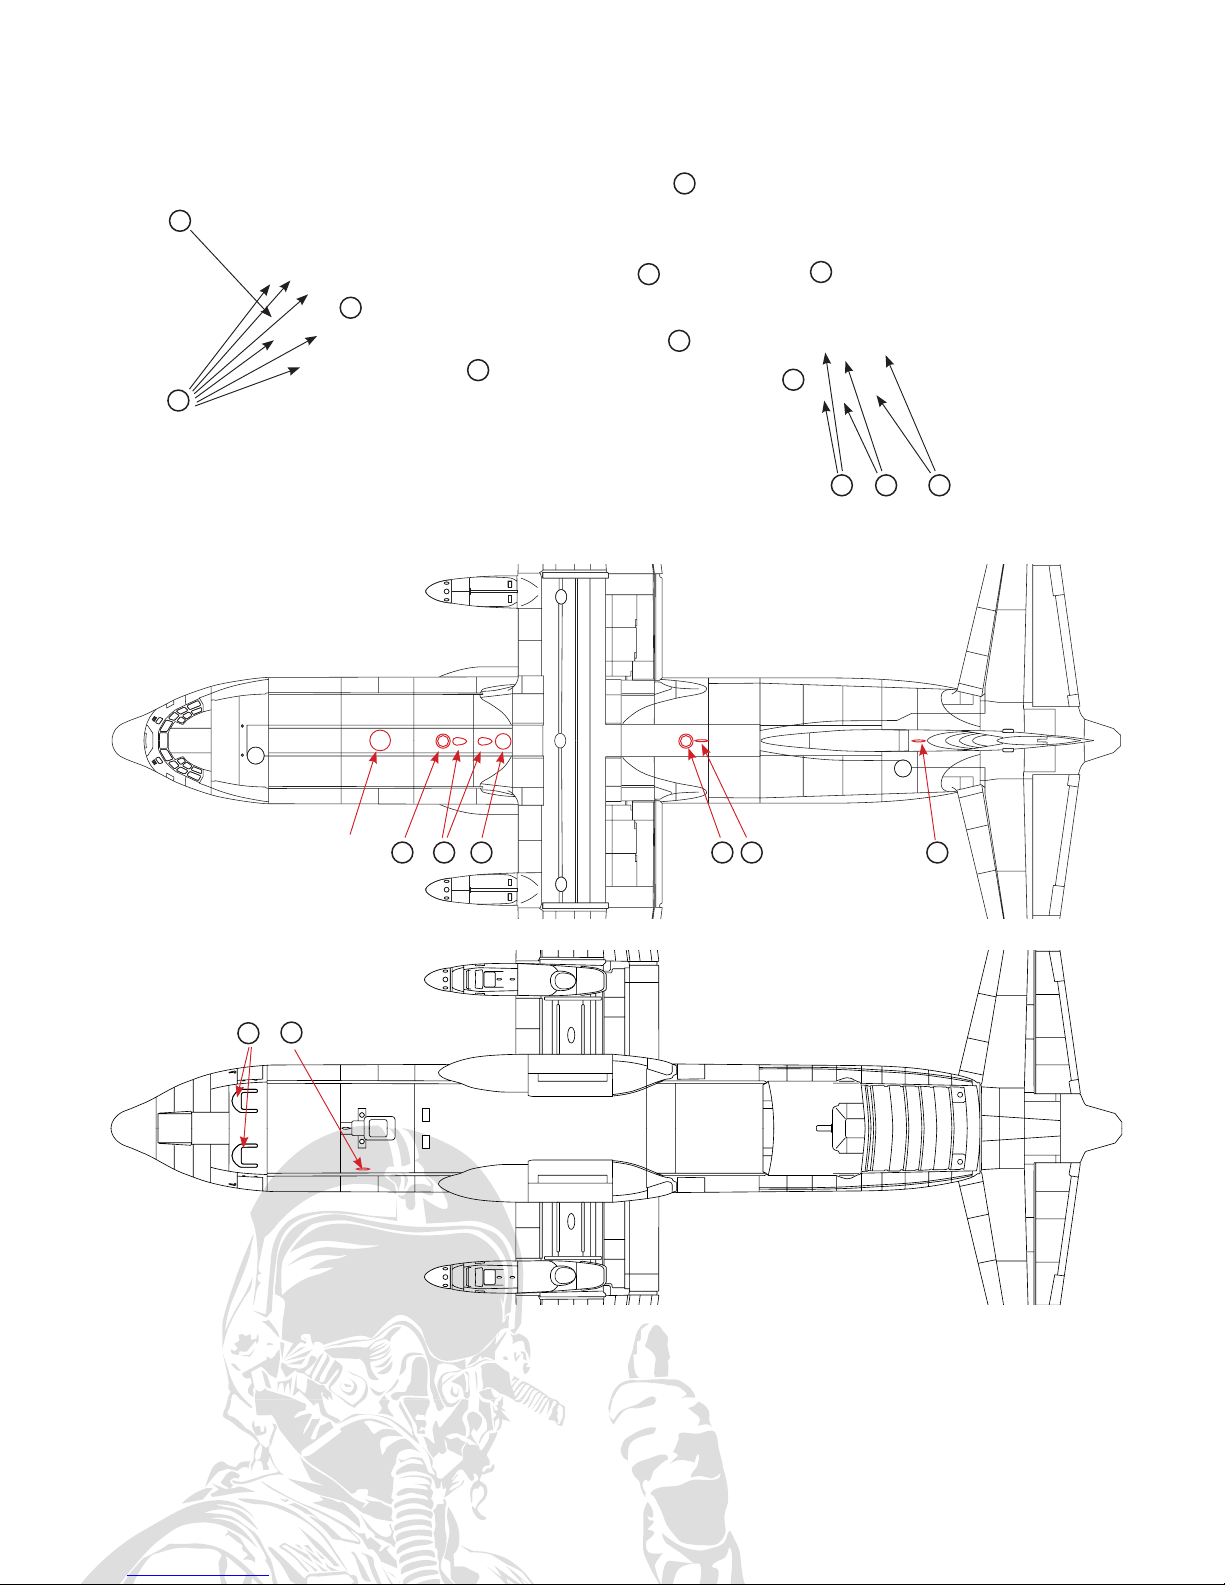
RCAF C-130J-30 aerials & antenna location
6F from
Italeri kit.
675
9
9
9
12
12
12
16
9
16
14
26 3027 27 2829
29
 Loading...