

Wing Bikes Freedom, Freedom S, Freedom Fatty Owner's Manual

1
Wing Bikes Owner’s Manual
Freedom/Freedom S/Freedom Fatty
WWW.WINGBIKES.COM
We are here to help! Please contact us at hello@wingbikes.com if you have questions.
Welcome
Thanks you for purchasing from Wing BikesTM. We take pride in bringing you a quality product and experience that we know
you’ll enjoy.
Thanks for choosing the Freedom of Wing!
Using This Manual
This manual contains details of the product, its equipment, and information on its operation and maintenance. Read it carefully
and familiarize yourself with your Wing Bike before using it in order to ensure a safe use and prevent tragic accidents. Be sure
to retain this manual as your convenient Wing Bikes information source.
This manual contains many Warnings and Cautions concerning the safe operation and consequences if safe setup, operation
and maintenance are not performed. All information in this manual should be carefully reviewed and if you have any
questions you should contact Wing Bikes immediately. The notes, warnings and cautions contained within the manual and
marked by this triangular Caution Symbol should also be given special care. Users should also pay special attention to
information marked in this manual beginning with NOTICE.
Because it is impossible to anticipate every situation or condition which can occur while riding, this manual makes no
representations about the safe use of bicycles under all conditions. There are risks associated with the use of any bicycle which
cannot be predicted or avoided, and which are the sole responsibility of the rider. You should save this manual, along with any
other documents that were included with your bicycle, for future reference, however all content in this manual is subject to
change or withdrawal without notice. Visit www.wingbikes.com to download the latest version. Wing Bikes makes every effort
to ensure accuracy of its documentation and assumes no responsibility of liability if any errors or inaccuracies appear within.
Assembly and first adjustment of your Wing Bike requires special tools and skills and it is recommended that this should be
done by a trained bicycle mechanic to ensure best results.

2
Table of Contents
Welcome....................................................................................................................................................... 1
Using This Manual ........................................................................................................................................ 1
Assembly Instructions .................................................................................................................................. 2
Battery Charging Tips ................................................................................................................................... 5
Operation ..................................................................................................................................................... 8
Maintenance .............................................................................................................................................. 11
Troubleshooting ......................................................................................................................................... 13
Warnings and Safety .................................................................................................................................. 15
Limited Warranty ....................................................................................................................................... 19
Assembly Instructions
NOTICE: The following assembly steps are only a general guide to assist in the assembly of your Wing Bike and is not a complete
or comprehensive manual of all aspects of assembly, maintenance and repair. We recommend you consult a bicycle repair
specialist to assist in the assembly, repair and maintenance of your bicycle.
Step 1:
material protecting the bicycle frame and components. Ensure the following pieces are included in the
package. If there are any missing parts please contact Wing Bikes for help replacing missing pieces.
Step 2:
remove the clamp.
Remove bike from carton and carefully set out all contents of the box. Remove packaging
1. Wing Bike
2. Front wheel with fender and front wheel axle bolts
3. Box with Pedals, Stem Extender (Freedom Only)
4. Assembly tools (2 hex wrenches, 2 spanner wrenches).
5. Charger and Battery
6. Keys for battery pack with button pad for alarm
7. Seat and seat post
Install your handlebar using your 4 mm hex wrench. Loosen the 4 handlebar clamp bolts to
Install the handlebar and re install the clamp to fit the handlebar in place.
3
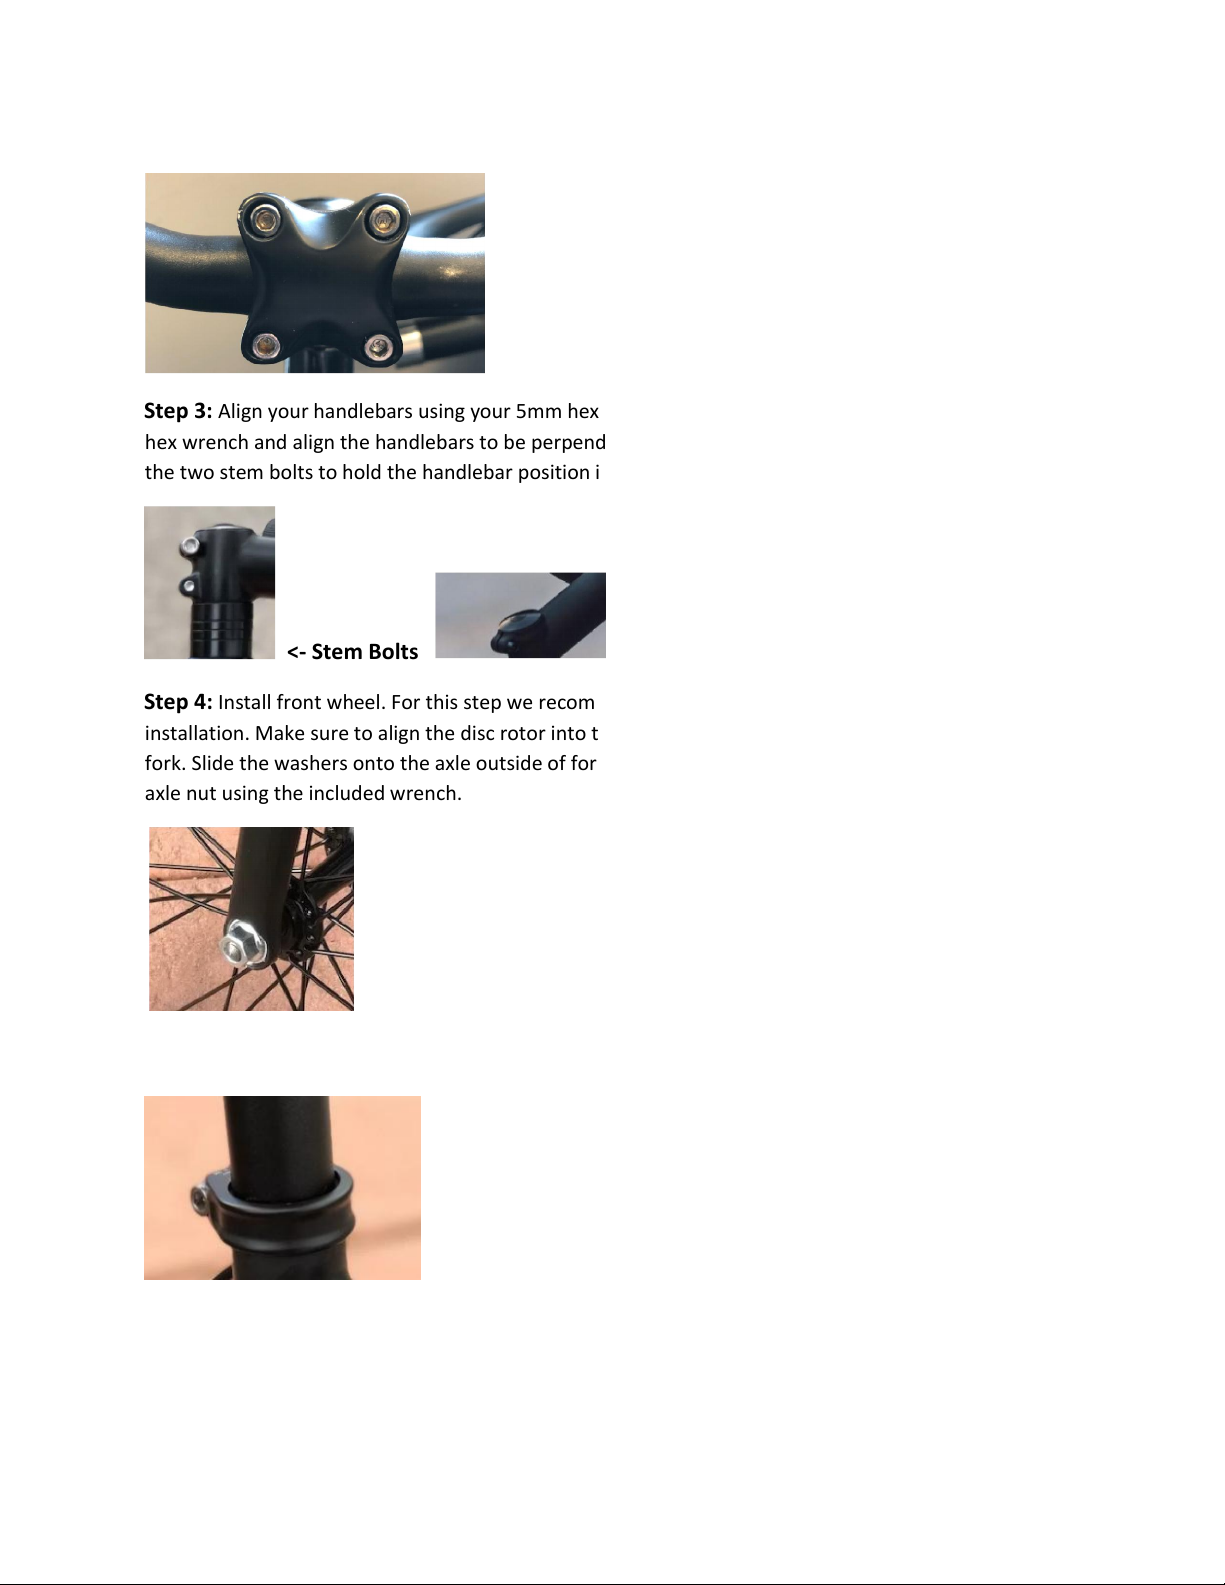
Step 3:
hex wrench and align the handlebars to be perpendicular to the bike frame. Tighten top bolt first, then
the two stem bolts to hold the handlebar position in place.
Step 4:
installation. Make sure to align the disc rotor into the brake caliper when installing the wheel onto the
fork. Slide the washers onto the axle outside of fork, and installed before the axle nut, then tighten the
axle nut using the included wrench.
Align your handlebars using your 5mm hex wrench. Loosen the two stem bolts using your 5mm
<- Stem Bolts <- Top Cap
Install front wheel. For this step we recommend turning the bike upside down for ease of
Step 5:
seatpost passed the minimum insert markings.
Step 6:
the right pedal marked with an “R” on the right side (side with drivetrain gears).
Install seat post. Secure tightly with the hex wrench at the desired height. Do not install
Install the pedals using the 15mm wrench. Use the pedal marked with an “L” on the left side and
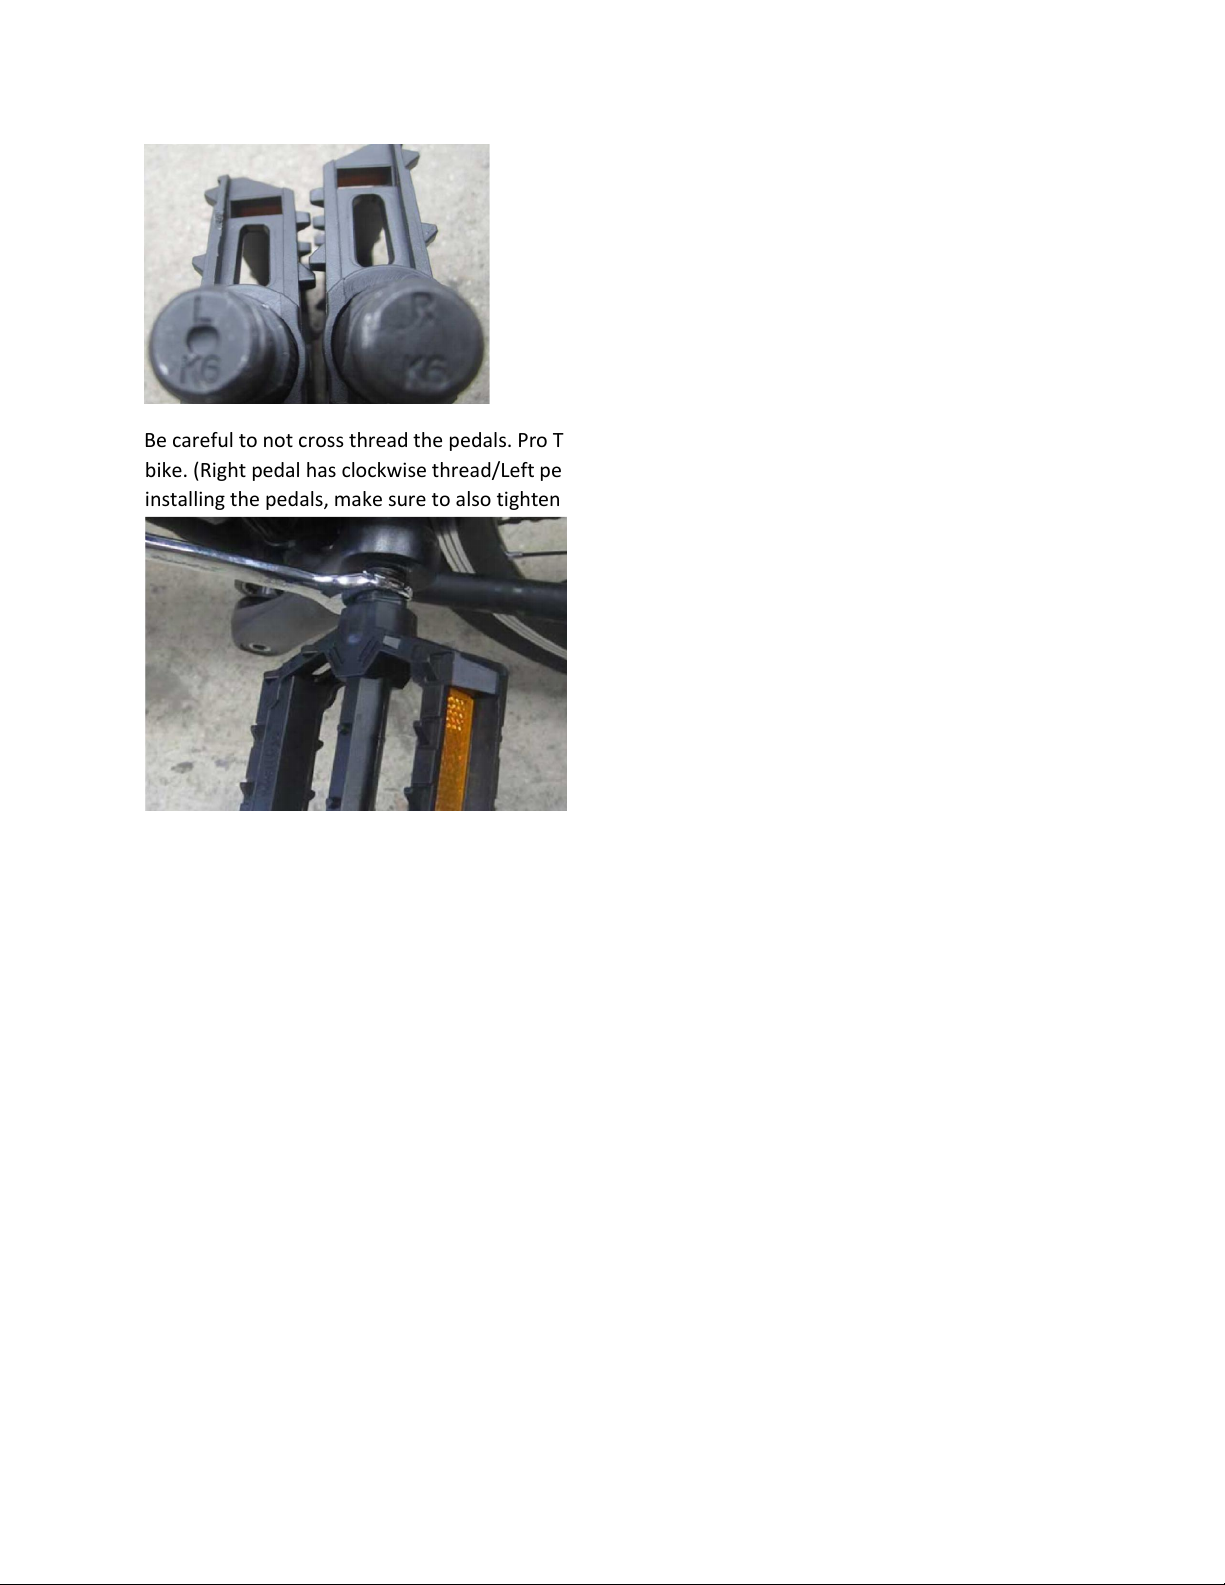
Be careful to not cross thread the pedals. Pro Tip: Pedal threads always tighten towards the front of the
bike. (Right pedal has clockwise thread/Left pedal has counter clockwise thread). PLEASE NOTE: After
installing the pedals, make sure to also tighten the crank arm bolts with an 8mm hex wrench.
4
Step 7:
Inflate tires to desired PSI. Recommended pressure 65 PSI for Freedom and Freedom S, 25 PSI
for Freedom Fatty. Do not overinflate or underinflate tires. We recommend checking your tire pressure
once a week. The fender mounts with two small bolts that attach the metal rods to the fork (near the
front wheel axle). The metal tab on the fender itself should sit behind the top of the fork. Insert the
longer bolt through the fork and the metal tab, then add a washer and tighten the nut to secure it.
Step 8:
Hold down the power button on the display on the handlebars to start the bike. Press and hold
the Up Arrow button on the handlebar display to turn the lights on and ensure both lights are activating.
Grab your key fob to test the alarm system. Press the lock button to arm the bike, then move the bike
around to activate the alarm. Once the alarm siren sounds, press the unlock button to disarm, you
should hear 2 beeps when disarming. The middle button on the button pad does not have a function.
Step 9:
Lift rear wheel off the ground and press and hold the down button to ensure the walk assist
spins the motor wheel. WARNING: Do not perform this step unless the rear wheel is off the ground, the
bike will take off if this step is done with the wheel touching the ground.
NOTICE: Ensure all hardware is tightened properly and all safety checks in the following sections are performed before first use.
Contact Wing Bikes if you have any questions regarding the assembly of your bike. If you are not able to ensure all the assembly
steps are performed properly please consult a certified local bicycle service provider for assistance in addition to contacting
Wing Bikes for help.

Hardware Location
Torque Required (Nm)
Handlebar
18-20
Stem 18-20
Saddle
18-20
Seat 18-20
Front Wheel (For Bikes With Bolt On Front Wheel)
16-25
Rear Wheel
30-35
Bottom Bracket Parts
35-55
Pedals
35
Disk mounting Bolts
6
Disk Caliber Mount
10
Crank Bolts
40
Rear Derailleur Cable Pinch
6
Front Derailleur Clamp
7
Seat Post Clamp
7
Do not extend any components including the stem, rear rack, or seat post beyond the insertion
marking etched into the components. Ensure that all hardware is properly tightened and secured
before moving on to next step otherwise serious injury or death could occur.
Recommended Torque Values
5
Adjusting Seat Height
Use the included hex wrench to loosen the clamp and free the seat post and pull upwards or push
downwards to reach desired height.
Notice:
Ensure seat post and seat are properly adjusted before riding. Do not raise the seat post beyond
the insertion marking etched into the seat post tube. If your seat post projects from the frame beyond
these markings, the seat post or frame may break, which could cause you to lose control and fall. Prior
to first use, be sure to tighten the seat clamp properly. A lose seat clamp or seat post binding bolt can
cause damage to the bicycle or can cause you to lose control or fall. Periodically check to make sure
these the seat clamp is properly tightened.
Rider Comfort
To obtain maximum comfort, the rider should not overextend his or her arms reach when riding. In
order to obtain the most comfortable riding position and offer the best possible pedaling efficiency, the
seat height should be set correctly in relation to the rider’s leg length. The correct saddle height should
not allow leg strain from over extension, and the hips should not rock from side to side when pedaling.
While sitting on the bicycle with one pedal at its lowest point, place the ball of your foot on that pedal.
The correct saddle height will allow the knee to be slightly bent in this position.
Battery Charging Tips
The battery should be recharged after each use. There is no memory effect so you can charge
the battery after short rides without damage.
The battery can be recharged on or off the bike.
Remove the battery by turning the key and then pulling the battery towards the direction of the
battery handle until the battery lifts off of the mounting receptacle.

6
The charger will automatically stop when the battery pack is full so you can charge overnight.
Always charge in dry locations and indoors away from direct sunlight, dirt or debris.
Do not cover up the charger when plugged in or charging, it air cools and needs to be left in a
clear space. Do not charge with the charger in the inverted position which can inhibit cooling
and reduce the chargers life.
Check the charger cables, charger and battery for damage before beginning each charge.
The light on the charger will turn green when charge is complete and stay red while the battery
charges.
Charging normally takes 3-5 hours, however it can take longer when you first receive the bike
since the battery pack is balancing.
Charge in a clear area away from potential to trip on the charging cords, or damage to occur to
the bike, battery or charging equipment while parked.
Charging Procedure
Follow these steps for charging your Wing Bike:
1. Remove the rubber cover on the charging socket.
2. With the battery on or off the bike, place the charger in a flat, secure place, and connect the DC
output plug from the charger (round barrel connector) to the charging port on the end of the
battery pack.
3. Then connect the input plug to the power outlet, charging should initiate and will be indicated
by the LED charge status light on the charger turning red.
4. After charging, unplug the charger from the wall outlet first and proceed to remove the charger
DC plug from the bike battery socket.
Always charge your battery in temperatures between 50 and 80 degree Fahrenheit and ensure the
battery and charger are not damaged before initiating charge. If you notice anything unusual while
charging please discontinue charging and use of the bike and contact Wing Bikes for help.
When the Battery Is Removed
Do not touch the “+” and “-“terminal contacts on the top of the battery when the battery is
removed from the bike.
Be careful not to drop or damage the battery pack when
loose from the bike.
Ensure the bike is turned off whenever you are removing
the battery from the bike.
When Installing the Battery onto the Bike
Do not force the battery onto the receptacle, slowly align and push battery into
the receptacle.
Ensure the battery is in the locked position before riding,
there should be an audible click when installed properly.
To best check that the battery has been properly

Distance Traveled
Charge Time to Fully Recharge
5 miles
1 hour
10 miles
1-2 hours
15 miles
2-3 hours
20 miles
3-4 hours
25 miles
4-5 hours
35+ miles
5-6 hours
secured to the bike, gently pull the handle on the battery
sideways and test the security of the pack.
Charging Time
When the input and output terminal are connected properly, and the battery is not fully charged, the
red charging indicator light should illuminate, showing that the battery is charging. The time that the
battery takes to fully charge the battery is dependent on various factors including distance traveled,
riding characteristics, terrain, payload, and battery age. The following table provides an estimate of
charge time based on most common distances traveled in regular operation:
7
Notice:
battery ages you might also experience increased charging times but this is only expected after 3-5 years of regular
use. If your battery does not seem to be charging normally, and taking longer to charge then expected, please
discontinue charging and contact Wing Bikes immediately.
Charger Safety Information
The battery pack can take longer to charge when fully depleted and when the battery is new. As your
Keep charger in a safe
place away from children.
Fully charge the battery before each use to extend the life of the battery and help to reduce the
chance of over-discharging the battery pack.
Do not charge the battery with any other chargers then what was originally supplied with your
Wing Bike or a charger purchased directly from Wing Bikes for use with your specific bike serial
number, as approved by Wing Bikes.
The charger works on 110/220 V 50/60 Hz standard home AC power outlets, do not open the
charger, the charger automatically detects and accounts for incoming voltage.
Avoid charger contact with liquids, dirt/debris or metal objects.
Store the charger in a location where it cannot suffer damage from falls/impact.
The charger should only be used indoors in a dry ventilated space.
If you notice a strange smell or the charger or battery are overheating, please stop charging and
contact Wing Bikes.
Do not yank or pull on the cables of the charger. When unplugging carefully remove both the AC
and DC cables by way of pulling on the plastic plugs, not pulling on the cables.
Please take special care in charging of your Wing Bike in accordance with the above procedures and
safety information. Failure to follow proper charging procedures can result in damage to your Wing
Bike, charger, personal property and/or serious injury or death.
 Loading...