

WinFast CarePhone Quick Installation Manual

WinFast CarePhone
Quick Installation Guide
WinFast CarePhone Hardware Installation
Before installing WinFast CarePhone, please make sure the outgoing
network is correctly configured as instructed by your ISP.
We recommend you to use Windows XP SP2 operating system with
Internet Explorer 6.0 or newer version of browser.
This installation guide is only intended for connecting WinFast
CarePhone. For other advanced functions or information related to the
product, please read the complete user manual on the CD. Or you can
visit our website for the detailed product
information.
Thank you for buying WinFast CarePhone. Please read this guide
carefully as the following chapters will take you through the installation
and network configuration of WinFast CarePhone. Please contact our
technical staff if you encounter other problems concerning the
installation.
http://www.leadtek.com.tw

Hardware Connection
Type I
Directly connect WinFast CarePhone and the
computer with a Cross-Over cable. (Fig. 1-1)
Type II (Recmmended)
Connect the Ethernet cables from both the
computer and WinFast CarePhone to the
same subnet.
1. Connect the Ethernet cable from the
computer to the switch or hub.
2. Connect the Ethernet cable from WinFast
CarePhone to the same network device. (Fig.
1-2)
Procedure
Fig. 1-1
Fig. 1-2
Step 1
Connect the included DC 5V power adapter to
the power connector of WinFast CarePhone.
Plug the other end of the power cord into the
wall outlet. (110V-240V) (Fig. 1-3)
Step 2
When the WinFast CarePhone is connected
for power, the yellow indicator on the white
button will light up. 10-20 seconds later, a
blue indicator on WinFast CarePhone will
light, which means the network connection is
working. (Fig. 1-4)
Fig. 1-3
Fig. 1-4
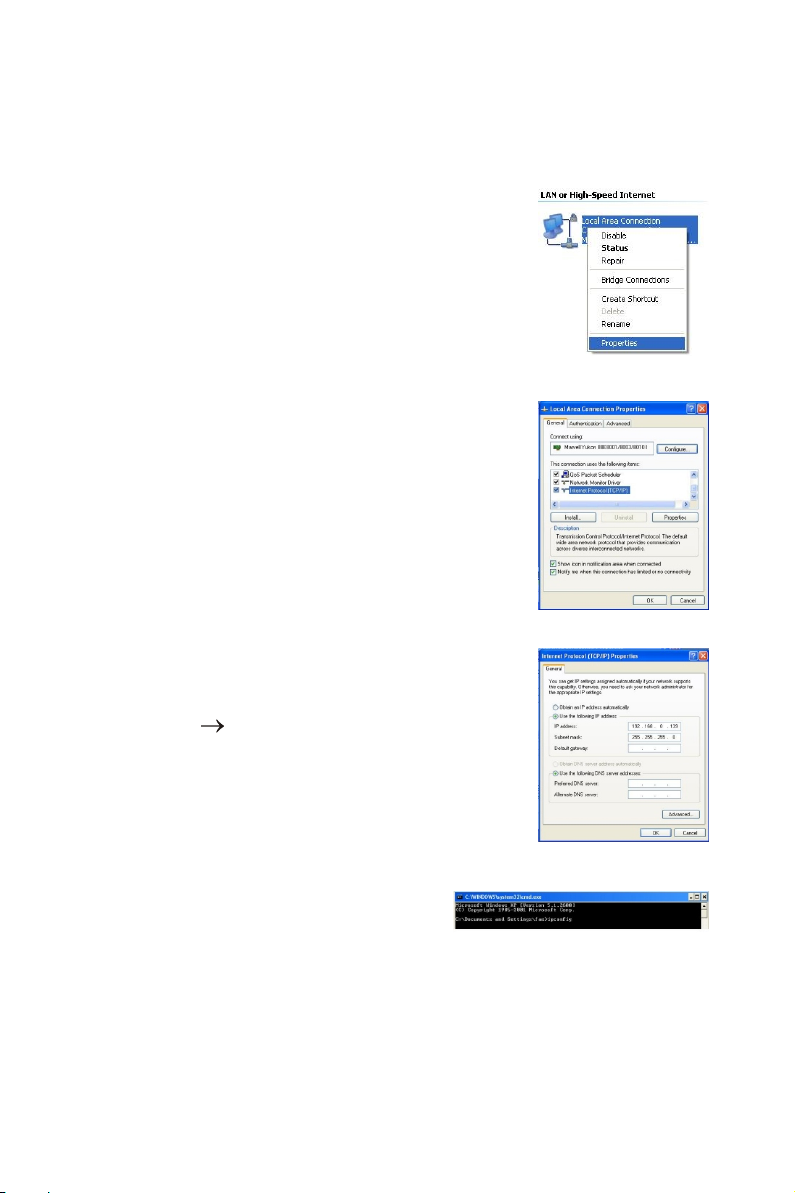
Step 3
Right-click the "My Neighborhood" icon on
desktop and choose "Properties". Right-click on
"Local Area Connection" icon, and choose
"Properties". (Fig. 1-5)
Choose "Internet Protocol (TCP/IP)" and click
"Properties". (Fig. 1-6)
Choose "Use the following IP address", and type
192.168.0.139 as the IP address. The Subnet
mask is 255.255.255.0. Click "OK". (Fig 1-7)
If the DNS server addresses are filled, please
clear them.
Return to the previous screen and click "OK" to
complete the TCP/IP configuration.
Step 4
Click "Start" "Run" and type "cmd". Click
"OK" to make sure if the computer has the
correct IP address. (Fig. 1-8)
In the MS-DOS window, type "ipconfig" and press
"ENTER". The command will display the IP
address, Subnet mask and gateway.
Fig. 1-5
Fig. 1-6
FIg. 1-7
Fig. 1-8
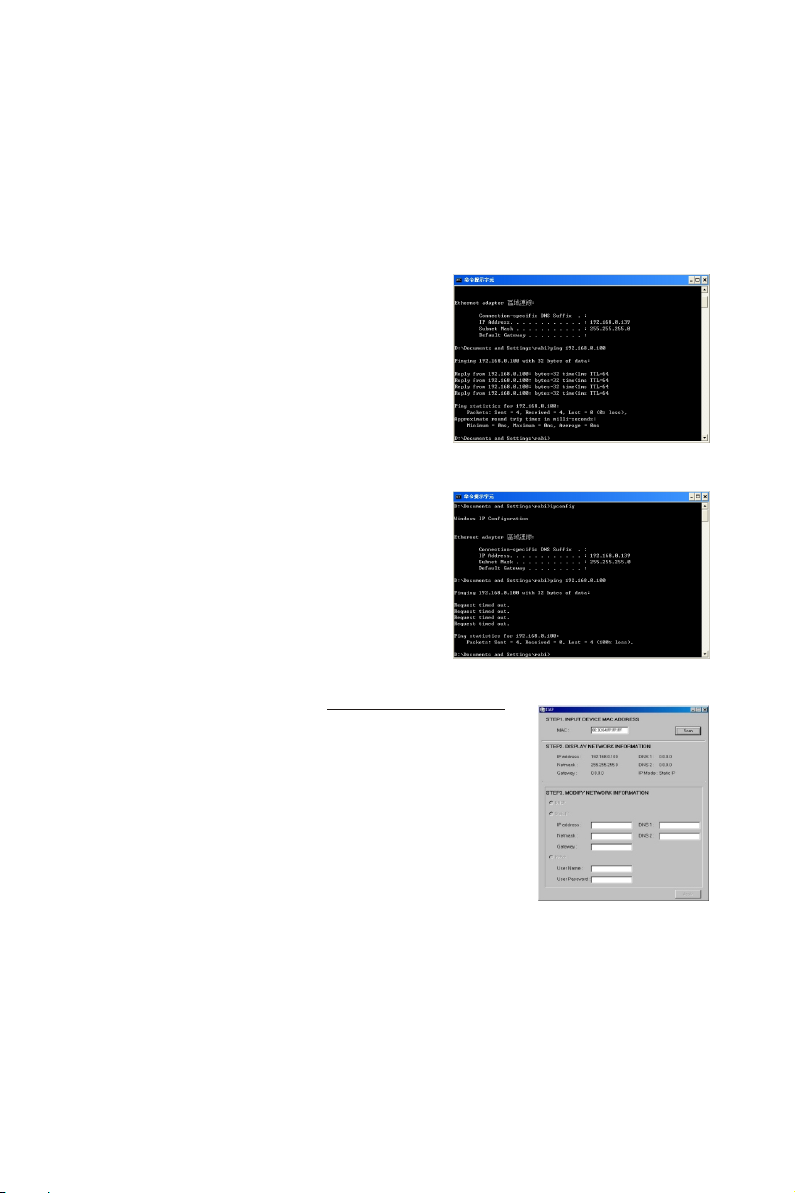
The default IP address of WinFast CarePhone is 192.168.0.100, so
you have to type "Ping 192.168.0.100" and press "ENTER". The
"PING" command is used to make sure if the computer and WinFast
CarePhone are correctly connected.
If the computer and WinFast
CarePhone are correctly connected, the
MS-DOS window will look like Fig. 1-8.
If the connection between the computer
and WinFast CarePhone fails, the MS-
Fig. 1-8
DOS window will look like Fig. 1-9.
Step 5 (This program can also be used
if you install the product in a DHCP
environment)
In the same local area network, using
the IIAP program can locate the default
IP address of WinFast CarePhone,
Fig. 1-9
which is a fixed IP address http://192.168.0.100.
The rest of the network information will be
displayed in the IIAP window.
Note: IIAP can only be used to locate WinFast
products. Follow the steps below if you want to
modify the network information of the device.
(Fig. 1-10)
1. Input the MAC address of the device and click "Scan".
2. Modify the network information if necessary.
3. Click "Apply" when done.
Fig. 1-10
Note: To prevent IP conflicts between the product and other devices in
the local area network, we recommend you to use an independent
network connection to connect the computer and WinFast CarePhone
through Switch/Hub.
Step 6
Click "Internet Explorer".
Click the "stop" icon , click "tools", and choose "Internet
Properties".
Click the "Connection" tab, and click "LAN settings".
Make sure no items are checked in the "LAN settings" window. Click
"OK" and click "OK again.
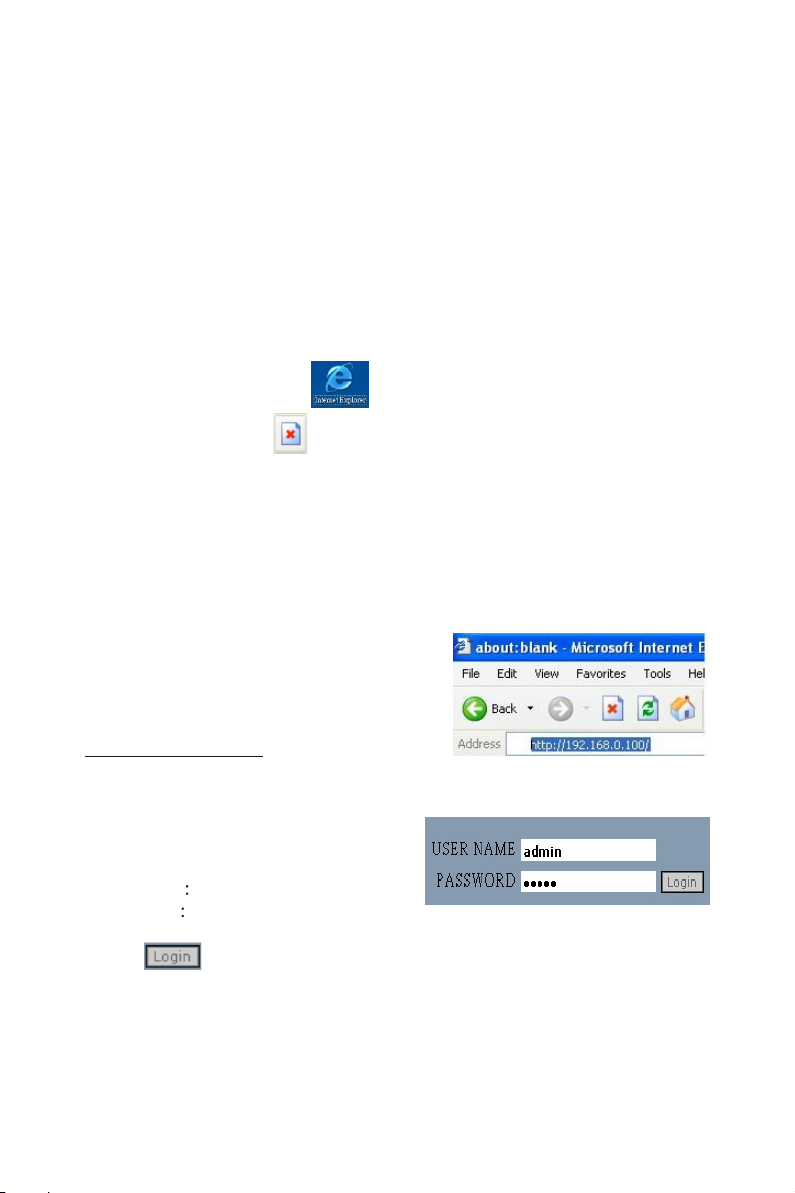
Login to WinFast CarePhone
configuration screen and start setting
up network connection.
Launch Internet Explorer, type
http://192.168.0.100 in the address bar
and press "ENTER". (Fig. 1-11)
Fig. 1-11
Input Username and Password as
follows.
Username admin
Password admin (Fig. 1-12)
Click to enter the configuration window.
Fig. 1-12

IE will ask you to download ActiveX control. Please notice the status
bar (Fig. 1-13) and the message below the address bar. Click the
message below the address bar and choose "Install ActiveX Control".
(Fig. 1-14)
Fig. 1-13
Fig. 1-14
Note: If the firewall in your computer is
enabled, you will see a security alert.
Please choose "Unblock". (Fig. 1-15)
Fig. 1-15
Click "Install" to begin downloading.
(Fig. 1-16)
Fig. 1-16
Downloading ActiveX will take 30 seconds to 1 minute. Do not close
the window when downloading.
the image will be displayed in the browser.
Step 7
We recommend you to choose "User Management" to modify the
Username and Password after you login for the first time and after you
download ActiveX Control.
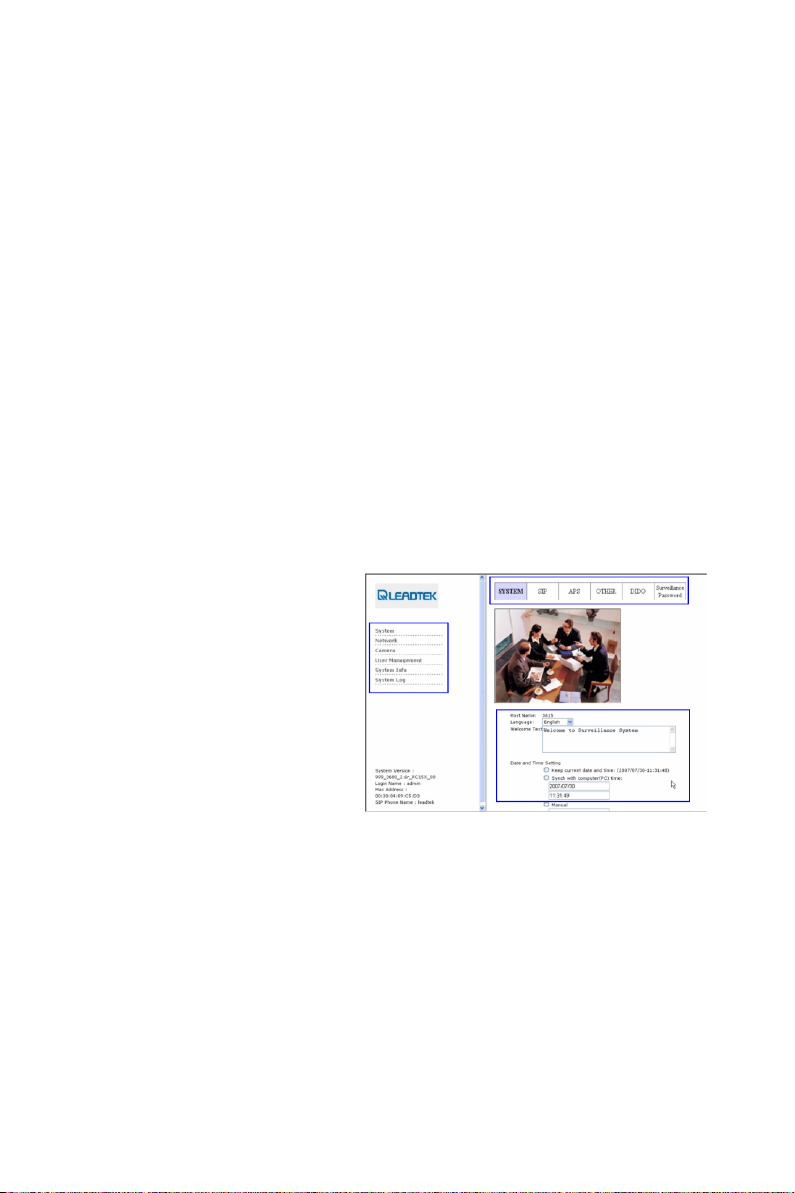
Step 8
A. Main Menu
System
Network
Camera
User Management
System Info
System Log
When the installation is completed,
(Fig. 1-17)
B
A
B. Submenu
Choose the related functions
of the items in the main
menu.
C. Settings
Modify the configurations of the functions.
C
Fig. 1-17

Other references
To set up the information of the persons to call to, please refer to:
Leadtek_WinFast_CarePhone_PC_UserManual_B5
For the detailed descriptions of all the parameters and functions of the
product, please refer to:
Leadtek_WinFast_CarePhone_PC_UserManual_B5
For troubleshooting (including the problems during installation), please
refer to:
Leadtek_WinFast_CarePhone_PC_UserManual_B5
 Loading...